English outdoor gear repair & care guide mcnett
•
2 recomendaciones•420 vistas

This document provides guidance on repairing and caring for various outdoor gear including tents, backpacks, outerwear, footwear, and camping equipment. It discusses how to seal tent seams, repair holes and tears, waterproof fabrics and leather, and eliminate odors. Proper lifting and packing of backpacks is covered as well as tips for building fires, setting tent stakes, and minimizing condensation in tents. Overall maintenance and repairs are focused on keeping gear in good condition for outdoor activities like camping, hiking, and backpacking.

Recomendados
Más contenido relacionado
Más de FerreHogar
Más de FerreHogar (20)
Último
Último (16)
English outdoor gear repair & care guide mcnett
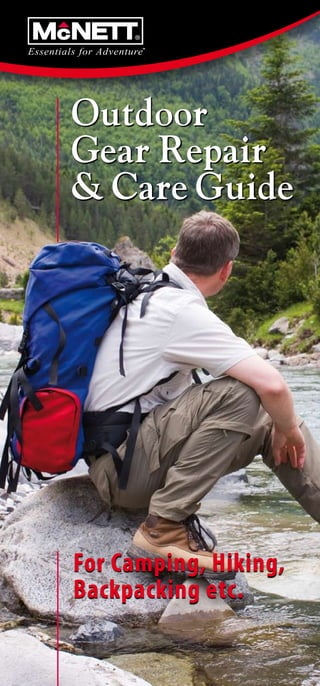
- 1. Outdoor Gear Repair & Care Guide For Camping, Hiking, Backpacking etc.
- 2. TENTS SeaM SealiNG tear & hole repair Apply Seam Grip® to the inside of the Seam Grip® permanently repairs common perimeter floor seam; this seam is not pinholes and tears in the tent floor. Apply taped at the factory. Draw seam sealer just enough Seam Grip to cover the hole and across threads and under folds. Mix spread 6mm beyond. Allow to dry level over- Seam Grip with Cotol-240™ before night. For 2 hour cure time, mix Seam Grip applying for 2 hour cure time. Allow with Cotol-240™ before applying. tent to dry overnight before using or storing. To use the tent immediately, cover uncured Seam Grip with a McNett Tenacious™ Patch. Use patch as a Use Seam Grip to seal areas that backing before applying Seam Grip regularly leak, such as stake-out to larger holes and tears. Remove points at corners. patch in a few days when the Seam Grip has cured. The Field Repair Kit includes both adhesive and patches. After years of service, seam tape on tents and outerwear can peel or pucker and the seam will begin to leak. If a small section has peeled use Seam Grip to reattach it. If the Keep the bugs out! Tenacious Patches tape seems to be failing ever- or Tenacious Tape provide a quick, where, remove and discard it, then in-field repair to torn mos- clean the seams and re-seal with quito netting until a more Seam Grip or Seam Sure™. permanent repair can be made. Seam Sure™ Water Based Seam Sealer is the easiest formula to use on large family or ‘cabin’ style tents. Apply Seam Sure as you would Seam Grip. Once dry, Seam Tent Tip Sure is nearly invisible. Minimize condensation in tents by keeping upper tent vents open, To seal the seams on your flysheet, set it up and lower vents clear inside-out for easier application. Attach the of sleeping bags, rainfly to the tent so all seams are taut. Before pads and other re-packing the tent and to prevent tacking, bulky items. sprinkle talcum powder onto all cured Seamgrip treated seams or repairs etc. 2 McNett Gear Repair & Care Guide McNett Gear Repair & Care Guide 3
- 3. TENTS tear & hole repairS re-Coat teNt FloorS SILICONE COATED FABRICS Re-coat worn areas on your tent floor If you have a tent made from silicone coated fabric, seal seams with Tent Sure™ Tent Floor Sealant. Apply and repair holes with SilNet™. SilNet is the only sealer that will to the coated side of the fabric (the bond to silicone treated fabric. inside) using a large foam paintbrush. For best results apply Tent Sure in a thin film, using even, sweeping motions to avoid puddles. A single thin coat works best. Tent Tips • Reduce tent fly wind damage by installing simple custom shock-cord loops on your guy lines. This design keeps the original guy line as a failsafe backup. • The Trucker’s Hitch is one of the easiest methods to tension guy lines. Set up as illustrated above. Create the loop by using an ‘overhand on a bight’ or a slip knot. Tie off with a looped half hitch which is easy to untie and adjust. Loop n Tighte Pull to Tie Off Tent Tip • On snow or rocky ground set the stake “deadman” style. Tie into the center of the stake then bury it horizontally in snow or under rocks. The line and stake together should make a “T”. Be sure to bury the stake 60cm to 90cm When it’s windy, mosqui- deep or the stakes will melt out! When using rocks, be sure to use enough toes will congregate on to handle the strongest winds you expect to encounter. the lee side of objects to Snow avoid being blown away. So pitch your tent door into the wind. You’ll be able to 60-90 cm enter without bringing the Rocks swarm in with you. 4 McNett Gear Repair & Care Guide McNett Gear Repair & Care Guide 5
- 4. CAMPING & B ACKPACKING Back Pack Tips iNFlatable MattreSS repairS Steps to Lifting a Backpack Home Repair: Clean and dry area to be repaired. Apply Seam Grip® to cover the hole and spread 6mm beyond. Allow to dry level overnight. 1. Lift to bent knee. 2. Slide onto one shoulder while swinging slowly around and slide other arm in opposite strap. Field Repair: To speed the cure time, mix a 3. Fasten hip belt, then adjust other straps and off you go...! few drops of water into Seam Grip before applying to the hole. Seam Grip cures faster when it’s wet (use patch backing for mixing). Apply mixture and allow to cure Proper Backpack level for 30 minutes (It will probably be Weight Distribution: fully cured in 2 hours). Note: Mixing Seam Grip with water will make repair cloudy. A. Small, “Quick Access” Items For a clear repair, mix with Cotol-240™. i.e.: sun block, head lamp, etc. B. Heavy Weight Items i.e.: food, water, fuel, etc. C. Light Weight Items i.e.: rain wear, clothing, etc. D. Medium Weight Items To use the repaired mattress at once, i.e.: tent, ground sheet, etc. center Tenacious™ Patch and apply over E. Sleeping Bag. uncured Seam Grip. The patch must extend at least 6mm beyond the Seam Grip. Press patch firmly onto mattress. Going Lighter – The “Big 3” Gear Items Your inflatable mattress is ready for use! • To dramatically reduce the weight of your Allow the patch to remain for 3 to 4 days, fully loaded backpack get the weight of then remove. The Seam Grip will have your “Big 3” gear items down. The “Big permanently sealed the hole underneath. 3” are your tent, sleeping bag and backpack (empty) combined. • For a “light” weekend pack (total weight under 15 kg) get your “Big 3” weight under 5 kg. 5 kg. Seam Grip seals small holes and leaks in the nozzle area. Seal with • For an “ultralight” weekend pack (total weight Seam Grip and stand upright under 10 kg) get your “Big 3” weight under 3 kg. overnight. Tip: to achieve the 3 kg “Big-3” weight consider a single-wall and/ or non-freestanding tent or a silnylon tarp. 6 McNett Gear Repair & Care Guide McNett Gear Repair & Care Guide 7
- 5. CAMPING & B ACKPACKING Camping Tips eliMiNatiNG odourS • One of the easiest campfires to build and maintain, the “lean-to” fire is a simple pyramid-shaped lean-to built against the side of a large To remove strong odours piece of firewood. Build up the lean-to using pencil-sized wood first from boots and shoes, spray followed by progressively larger wood. with ReviveX® Footwear Leave a gap to insert tinder into the Oudour Control. Thoroughly interior. Cover the gap with small spray all surfaces – inside and wood once the out, including the tongue tinder is alight. Large Piece where odour causing bacteria of Firewood likes to hide. To eliminate odours, mold and mildew from tents and other gear without damaging the waterproof coatings or fabrics, use McNett MiraZyme. • Commonly available fire lighters include: clothes dryer lint (extremely lightweight), alcohol hand sanitizing gel, a small piece of candle, some • Fill a tub with just enough cool water to submerge item. insect repellents and even greasy potato chips. For tents and packs add 30-60 ml of Mirazyme (depending on odour strength). Stir to mix. • Unzip all zips, open flaps, etc. Submerge item in solution saturating inside and out. Soak for 10 minutes then remove. • To sharpen a knife, slide • Do not rinse, the enzymes do much of their work while the item dries. the knife across the sharp- Hang to air dry in the shade. Do not machine dry. ening stone as though Slicing Stroke you are trying to cut a thin slice off the stone. Hold the blade at roughly a 20 degree angle and draw it steadily. Be sure to count the number of strokes and do the same number of strokes on the opposite side. • If your butane stove is struggling in cold weather, set it in a pot lid and add 20mm • Eliminate strong sandal odours by of cool water. The stove will roar to full scrubbing the footbed in a sink or buck- power (the fuel is now at least et of MiraZyme treated water. Allow to 0˚ C). Do not use hot water dry (the MiraZyme microbes work as in the lid. the sandal dries) then put them in the freezer overnight to eliminate any last traces of “funk”. 8 McNett Gear Repair & Care Guide McNett Gear Repair & Care Guide 9
- 6. OUTER WEAR how reviveX® Works raiNWear & SoFtShellS All rainwear is Don’t wash your high tech jacket in household detergents designed for your factory treated jeans! Household detergents leave residues that damage water repellent on the outside finishes (DWR). Wash all outerwear at least once per season with with a special ReviveX® Synthetic Fabric Cleaner Concentrate. water repellent spray called DWR (for “Durable Water Repellent”). Over time that Step 1: Prior to washing, apply cleaner treatment wears off causing outer fabrics directly to heavily soiled areas. Close all zips to “wet out.” Though rain isn’t leaking all the way through the and Velcro® tabs. garment, it may feel and look like it is. This is because “wet out” reduces breathability and creates excess interior condensation making you damp and cold. ReviveX® water repellents are unique Step 2: Add ReviveX Synthetic because they bond to both the fabric and any remaining factory DWR Fabric Cleaner to washer. creating the most durable water repellent finish available. Wash garments using the delicate cycle and warm water. Whenever possible use a front loading WHICH WATER REPELLENT IS BEST FOR YOU? washing machine, instead of a top loading washing machine. oriGiNal Alternate Step 2: If desired, hand wash garments in a sink or bath. Fill with just enough SpraY-oN ForMula water to cover the garments and add cleaner. ReviveX® Spray-On Water Repellent is a Gently knead all areas to remove dirt and stains. “universal” application for hard shell Rinse thoroughly until water runs clear. outerwear as it only treats the outside of the garment, leaving interior (possibly wicking) liners untreated. The spray-on version is also ideal for treating down and synthetic Step 3: Now is a good time to apply insulated garments and sleeping bags. a fresh water repellent treatment. One benefit of the spray is that you can Place wet garment on a hanger. concentrate heaviest on areas where water Spray ReviveX Spray-On Water repellent finishes (DWR) tend to wear first, such as the shoulders of a jacket Repellent on the garment or the seat of a pair of pants. exterior. Concentrate spray heaviest on high wear areas such as the shoulders, zip flaps and cuffs. Use ReviveX Wash-In Water Repellent to treat hard-shells and hard-to-treat items such as fleece jackets and hats in one load. Ideal for 2.5 and 3 layer hard-shells Step 4: Dry using heat setting (rainwear without a wicking liner). recommended by garment care label For skiwear and other “wicking liner” (medium heat if possible). To restore garments use ReviveX Spray-On formulas. rainwear and softshells to their original water repellency, dry garments for at least 60 minutes. 10 McNett Gear Repair & Care Guide McNett Gear Repair & Care Guide 11
- 7. FOOT WEAR Water repelleNCY Water repelleNCY For NubuCK, Suede & FabriC For leather To prepare footwear for the wettest, most abrasive situations such as step kicking in snow, ice climbing or mixed climbing, use a First remove dirt and trail hardened heavy duty gel waterproofing formula grime with ReviveX® Boot Cleaner such as ReviveX® Leather Gel. and air dry. Apply gel to a clean cloth, then buff into the leather. Newspaper Gel water repellent treatments will darken leather, giving footwear a rich, traditional Stuffing shoes with newspaper outdoor look. Do not use on nubuck will absorb moisture and help or suede footwear, unless you like footwear to dry faster. the darker colour. Boot Waterproofing Tips Apply water repellent to clean dry Heavy duty mountain boots are obsolete for backpacking.. But while the footwear. Liberally treat the tops ultralight backpacking crowd (carrying 10 kg packs) get by on trails using and sides of the toe area, especially trail running shoes or even good sport sandals, most people carrying heavier where the boot bends. loads should have some ankle support. Well-made light hikers with a 3/4 or full-height ankle collar are usually enough for moderate loads on most trails. • Lightweight hiking boots are made with nubuck, suede, nylon or Gore-Tex® fabric. Weatherproofing: Use ReviveX Boot Tip Nubuck, Suede & Fabric Spray—it won’t darken or smooth footwear and is ideal for Gore-Tex® fabric Sitting at the campfire with your and other waterproof breathable footwear. feet towards the fire may make you comfortably warm, but your • Mid-weight hiking & backpacking boots, are made with full- boot soles could be close to melting. grain leather for added support and durability. Many feature This can easily cause failure of the Gore-Tex® fabric for added comfort. Weatherproofing: Use sole’s glue bond. If your boot soles ReviveX Leather Spray—it’s formulated for extreme are peeling use Freesole® Urethane conditions, and won’t alter the appearance of full- Adhesive for a permanent fix. grain leather. • Extended backpacking & mountaineering boots are made with the roughest terrain and wettest conditions in mind. These boots are made with full-grain leather and often include Gore-Tex® fabric for maximum dryness and breathabil- ity. Weatherproofing: Use ReviveX Leather Gel— originally developed for mountain climbers, the most durable boot waterproofing available. 12 McNett Gear Repair & Care Guide McNett Gear Repair & Care Guide 13
- 8. FOOT WEAR re-boNdiNG SoleS MaKiNG a toe Cap Use Freesole® to permanently re-bond a peeling boot sole. First Climbers and hikers create tough toe caps remove loose dirt and debris and then clean the area with rub- with Freesole to protect boots from sharp bing alcohol (isopropyl alcohol) and a stiff brush. Apply Freesole to rocks and crampons. the sole evenly. Tape, clamp or weight sole firmly in place and dry overnight. Step 1: Start with a clean, dry boot. Stuff newspaper tightly inside the boot toe area. Apply tape tightly across toe to create straight edge. Lightly sand the toe area with sandpa- per, then buff aggressively with a rag dipped in rubbing alcohol. Allow to dry and buff a second time with rubbing alcohol. Step 2: Paint the surface with Freesole. Be sure rebuildiNG heelS to cover all areas between the sole and the tape. Freesole will self level and become smooth. • Freesole rebuilds heels. Sand worn area then buff with rubbing alcohol (isopropyl alcohol) soaked Step 3: Wait 45 minutes, then peel off tape. rag. Make plastic tape “dam” as shown. Set sole Do not leave tape on longer! Allow your new level and apply Freesole. Cures in 12-24 hrs. toe cap to cure completely overnight. re-boNdiNG boot raNdS • Use Freesole to permanently re-bond a peeling boot rand. First remove dirt, then clean the bonding area with Cotol-240™ (best) or rubbing alcohol (isopropyl alcohol) and a stiff brush. Apply Freesole in the gap. Tape or clamp firmly in place and dry overnight. When taping, insert a pen to apply pressure directly on the rand. repairiNG torN paNelS More Boot Tips Repair torn leather and fabric panels with Freesole. Carefully apply Freesole to both sides of torn area with brush. Press to close and hold in place with clear packing tape overnight. • Relieve pressure and give your boots a custom fit with these lacing tricks. 1. Use “Skip Lacing” to take pressure off sensitive areas 2. Use the “Double Wrap” to have different levels of tightness on upper and lower sections of the boot. 14 McNett Gear Repair & Care Guide McNett Gear Repair & Care Guide 15
- 9. TRAVEL ESSENTIALS Tick BiTes insecT repellenTs Tick bites are a major problem in Europe as they can Biting and stinging insects such as mosquitoes, midge, transmit over 50 different diseases and viruses. The gnats, ticks and horse flies can ruin any leisure activity. Most dangerous being meningitis (FSME) and Lymes disease (borreliosis). The FSME virus is transferred shortly They irritate, cause itchiness and can also transfer a after the bite therefore before visiting FSME infected areas, it is number of serious infectious diseases advisable to obtain vaccination against the FSME virus. including malaria, yellow fever and dengue. Borreliosis is usually transferred within 8 to 24 hours after a bite. Should troublesome symptoms appear i/e itching or red skin Reduce the risk of mosquito bites around the bite, or if in doubt, seek medical advice immediately. by wearing light coloured, finely-woven clothing. Where possible, cover exposed skin with long sleeves, long trousers and socks etc. Long sleeves plus long trousers and closed footwear offer some protection but McNett tick deterrent spray is also recom- Mosquito nets are an essential and inexpensive mended prior to outdoor activity. When returning indoors accessory, which helps to ensure you get a good from green areas (even the garden) carefully check all cloth- nights rest. They are also lightweight and compact ing and body for ticks. Remove ticks from the body in one making them ideal for your travel kit. piece and in one swift movement to reduce stress and dam- age to the tick. In stress, the tick will transfer large amounts Apply a strong insect repellent such as of the borrelia bacteria. The McNett tick card is designed to McNett Anti-Bite Deet 50% to exposed skin areas remove ticks quickly and in one piece from the skin. The card especially at night. For young children, pregnant also features a magnifier for checking the bite area. women or people with sensitive skin use a natural insect repellent such as McNett Bio Formula Anti Bite. creDiT cArD siZe Tick cArD Jellyfish sTings Contact with jellyfish can be most unpleasant. Their stings can induce loss of consciousness, requiring artificial respiration and CPR, and in some cases it can be fatal. In severe cases medical emergency assistance is required. The McNett Jellycard fits inside a wallet or purse and has been specially developed for relieving pain after contact with jellyfish tentacles. Simple and effective and also suitable for insect stings. The sliced corner of the cards sharpened edge, will also remove the actual sting itself. 16 McNett Gear Repair & Care Guide McNett Gear Repair & Care Guide 17
- 10. PADDLE SPORTS drY Suit Care & repair boat, CaNoe & KaYaK Care Wash paddling dry tops and dry suits in McNett® Wet Suit and Dry Suit Shampoo. To eliminate the toughest odours, dip suits in MiraZyme™ treated water To remove tough stains on kayaks, and air dry (see instructions on page 9). MiraZyme is a inflatable boats and other pad- powerful blend of odour fighting microbes & enzymes. dlesports gear use McNett Boat Cleaner. This environmentally friendly formula effectively removes tar, mold and other stubborn stains. To find pinhole leaks in GORE- TEX® fabric dry suits: 1) Turn the suit inside out. 2) Soak the tip of Every 30-45 days of sun exposure Treated a rag in rubbing alcohol (isopropyl treat surfaces of boats, PFD’s, spray alcohol) and dab over the suspect skirts, paddles, and dry suit gaskets area. 3) The hole will show up as a con- with UV Tech™ Surface Protectant & trasting colour. Allow area to dry and seal Rejuvenator to prevent brittleness, (on the inside surface) with Aquasure®. cracking and colour fading. Dry suit zips are tough to operate and Untreated expensive to replace. To ease opening and maximize zip life, remove dirt and grim with Zip Care™ liquid zip cleaner & lubricant. For heavy duty lubrication use Zip Tech™ stick lubricant. UV Tech protects colours on PFDs, paddles, spray skirts, dry bags etc! All benefit from UV Tech. Paddling Tips • Keep knots and kinks from jamming in your throw bag by stuffing it correctly! Step 1. Untangle and spread out your rope on a clean surface. Step 2. Turn your back to your rope, drape it over your shoulder and begin to coil it into your throw bag. Step 3. Ensure you’re stuffing the bag evenly and that kinks are untwisting behind you. 23 • Kayak cockpits are notorious 1 for cutting into spray skirts 4 and causing exterior crack- ing. Apply spot applications 5 of Aquasure to permanently 1) Outside Rim 2) Top Stretch Point repair and protect both the 3) Taped Seam 4) Inside Rim interior and exterior. 5) Outside Edge Damage from Paddle 18 McNett Gear Repair & Care Guide McNett Gear Repair & Care Guide 19
- 11. At McNett, we believe it’s important to renew, reuse and recycle outdoor gear and clothing, especially for the purpose of introducing new people to the outdoors. Young people in particular need mentors willing to show them there is a world beyond the ‘virtual’ one. Our products are ideal for breathing new life into old gear. These unique formulas will make water bead off old jackets and boots, restore loft to down sleeping bags and permanently seal leaky tents. We encourage you to look through your cuboards and find the ‘old friends’ who carried you through many adventures. These jackets, sleeping bags and tents have a presence all of their own and stories to tell new users. Restore these items, and share them with the next generation. – Your friends at McNett Distributed by: McNett Europe P.O. Box 11 44 • D-29684 Schwarmstedt • Germany www.mcnetteurope.com Gear Repair & Care Guide - Item Code 99960. Cover Photo © by M. Dreyling/digitalstock.de Copyright 2009 McNett Corporation. The contents of this brochure may not be used or reproduced in any way without the prior, written consent of McNett Corporation. All rights reserved. GORE-TEX® is a trademark of W.L. Gore & Associates, Inc. 20