2. Select New
Mainstack from
the File menu.
Just like in our “Hello World” App,
you start by selecting “New
Mainstack” in the Edit Menu.
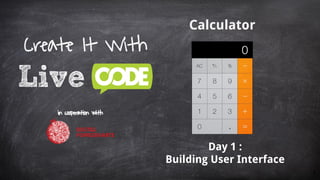
Calculator App
Starting our next
App: Calculator
2
3. We will go into details about screen sized
and the multi device market for the mobile
market today.
For now, we are going to standardize on
667 height and 375 width for our stack size
for all of the Apps we will create.
Calculator App
Setting the Stack Size
for Mobile Devices
667
375
Paint Code
They have a complete description of the
different iPhone sizes and an explanation.
Read More
3
4. Again, we start building our App
by adding controls to the card.
For the Calculator App we will
start with buttons.
But this time, as you can see, we
are going to need 19 of them.
We will also need to change the
“look & feel” of the buttons to
match the Calculator App
design.
Calculator App
Starting our next
App: Calculator
4
5. Let’s start by adding 4 buttons to our
card. Then use the mouse pointer to
select all 4 buttons.
When you select more than one object
you will see that the Align Object section
of the Property Inspector.
You can also hold down the SHIFT key
and click each button you want
included.
Calculator App
Start building the
User interface
5
6. To get the controls aligned together one
at a time, but LiveCode makes it quite
easy for you.
There is a quick way to align controls to
the left, right, top, bottom, center and
middle. You can make widths equal or
heights equal.
Please try out all the features to
thoroughly understand object
alignments.
Calculator App
Setting Control
Alignment
6
7. You will see there is full functionality to
make your user interface just as you
want it. Try it out! Trying it yourself is
important for the learning process.
We have measured the button sized and
the numbers that work best are 90
width and 110 height.
You can just type the numbers in the
Height and Width text box on the
property inspector.
Calculator App
Size & Position the
Controls
7
8. Just like the last lesson, we are selecting
a group of controls and using the copy
and paste method populate the UI with
controls.
Not only is it easier, but I don’t have to
set the size again.
Calculator App
Copy + Paste
Controls
8
9. Now let’s turn off Three D, Border and
Hilite border for all buttons. This will keep
the buttons to the simple new “flat” look.
You can see there are a lot of features to set
such as an icon for your button. These are
really very important and we will explore
them soon. Let’s just keep to the basics for
now.
Calculator App
Icons & Border of
Buttons
9
10. Setting the colors will be next, for now choose
the Orange and the dark orange colors.
1. Select the stack and set the Background
color to black.
2. Set the Fill color of the operator buttons
on the right side to match the calculator
app’s orange color.
3. Set the Text color of the buttons to white.
4. Set the Hilited color to dark orange.
Do the same with the other buttons, but
their color is gray.
Please try out all the features and make sure
you understand what they do.
Calculator App
Colors & Patterns
10
11. Now let’s change our button’s Text
Formatting
1. Select the button(s) you wish to set.
2. Choose Text Formatting on the
Property Inspector.
3. Set the Font to Helvetica Neue Thin
4. Size the text to 48
5. Set the Alignment to Center and the
Margins to 0.
Please do these steps for all the buttons.
Calculator App
3
Text Formatting
1
2
4
5
11
12. 1. Select the bottom left button.
2. Choose Basic Properties Set the Labels
of the number buttons.
3. Set Names & labels buttons as below:
1
2
3
4
Calculator App
Label Name
AC clear
± toggleSign
% percentage
÷ divide
X multiply
- minus
+ plus
= equals
12
13. As you can see, the background color of
the calculator is black. This can easily be
set in LiveCode.
Calculator App
Set the Background
to Black
1. Select Stack Inspector from the
Object menu.
2. Choose Colors & Patterns on the
Property Inspector.
3. Click the right box on the
Background line.
4. Select the black color in the color
picker.
1
2
3
13
14. Now we need a text field to display the
results of calculations. For the text field
we also set the Fill color to black and the
Text color to white. Set the font to
Helvetica and the size 52 and the margins
to 15.
You must turn on Lock text to stop text
input. Also turn off Focusable, Three
dimensional and Show border.
Calculator App
Display the Numbers
14
15. 1. Make sure the number display is
selected.
2. Select the Contents option.
3. Set the name to display.
4. Then simply set the content value
to 0 as the default.
Calculator App
1
2
3
4
Display Properties
15
16. Calculator App
Take for example when one of the
Operators is clicked, you will see the
border get dark because we set the
Hilited text color to darker Orange.
But also in the App you will see that
a black Border remains as an indicator to
remind them of which operator is
selected - giving a better the user
experience.
Q: How do we do that?
A: Code
User Interface is also
about User Interaction
16
17. Calculator App
If you edit script the “multiply” button and
add in the following code, you will see the
black border appear. Don’t forget to hit
Apply button.
Now add the same code to the other 4
operator buttons. Each one will show the
black border when clicked.
Let’s Set the BorderColor
Property on mouseUp
--Set the border color to Black
set the BorderColor of me to 0,0,0
set the showBorder of me to true
end mouseUp
**BTW - What is me?
Well in LiveCode controls are like people. When you just what to reference yourself, you just
say me. But, a control can ONLY reference itself me in it’s own space.
17
18. Calculator App
But the border never goes back to orange
when you click on another operator, so
we need to set the code to set the other
buttons to orange. But why would you
copy so much code to every on mouse
up? Answer: you should not
What you should do is “group” the code
into one command. We are going to call
this command “operatorPress” and pass
which button is pressed as a parameter.
Create Your own
Command
on operatorPressed pOperator
set the showBorder of button "/" to false
set the showBorder of button "x" to false
set the showBorder of button "-" to false
set the showBorder of button "+" to false
--Set the border color to Black
set the borderColor of button pOperator to black
set the showBorder of button pOperator to true
end operatorPressed
18
19. Calculator App
You will need to change the text in each of
the mouseUp script to just one line. The
line is calling our new command and
passing the name of the operator clicked.
Click Apply, switch in run mode...and click
the different buttons to see how the
black border effects the user interface
and experience.
One Line can now
do it all
on mouseUp
operatorPressed the short name of me
end mouseUp
on mouseUp
set the BorderColor of me to black
set the showBorder of me to true
end mouseUp
19
20. If you wish to learn more… Visit LiveCode
Congrats on completing:
The User Interface
Don’t forget to save your LiveCode Project!
Calculator App
20