How to modify a vector file with PowerPoint | Tutorials
•
2 recomendaciones•537 vistas

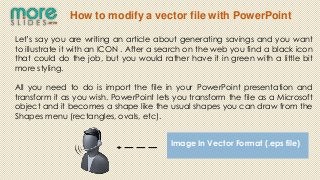
Let’s say you are writing an article about generating savings and you want to illustrate it with an ICON . After a search on the web you find a black icon that could do the job, but you would rather have it in green with a little bit more styling. All you need to do is import the file in your PowerPoint presentation and transform it as you wish. PowerPoint lets you transform the file as a Microsoft object and it becomes a shape like the usual shapes you can draw from the Shapes menu (rectangles, ovals, etc).

Recomendados
Recomendados
Más contenido relacionado
Último
Último (20)
Destacado
Destacado (20)
How to modify a vector file with PowerPoint | Tutorials
- 1. How to modify a vector file with PowerPoint Let’s say you are writing an article about generating savings and you want to illustrate it with an ICON . After a search on the web you find a black icon that could do the job, but you would rather have it in green with a little bit more styling. All you need to do is import the file in your PowerPoint presentation and transform it as you wish. PowerPoint lets you transform the file as a Microsoft object and it becomes a shape like the usual shapes you can draw from the Shapes menu (rectangles, ovals, etc). Image In Vector Format (.eps file)
- 2. Here is how to do it. Step 1: import your vector file, here the gray or other icon. It has to be an .eps file. Step 2: right click on the file and select ungroup. You are then prompted with the message “This is an imported picture, not a group. Do you want to convert it to a Microsoft Drawing Objects”. Click yes. Click Ok To Conform
- 3. Step 3: Ungroup the object a few more times to make sure you separate all the shapes making the drawing. You are now able to change the color of the shapes as you wish, add drop shadows or other effects. Please note that there is usually a rectangle frame around the drawing that you will need to delete; just experiment with the colors until you get the right result. Color After change Step 4:If you need to use the resulting image in another program, you can save it as a photo. Right click on the drawing and select Save as picture. You can save it as a .jpg or maybe a .png file if you need to preserve transparency.
- 4. If needed, you can also alter the shape of the object itself, which is really powerful. For example here is a rectangle that I wish to distort. • Select object. • Under the Format tab, click Change Shape.
- 5. click Edit Shape again, and this time select Edit points. You can now move the points of the figure, like dragging the corners of the rectangle, or making straight lines into curves. Edit Points Note: It seems like this feature is not available on PowerPoint for Mac, it just works on PCs. It might be that Keynote offers a similar took but I don’t use this software so I do not know.
- 6. Thank you Find More Tutorials Here