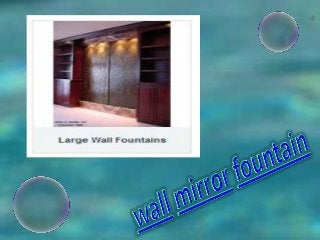
Indoor water features come in floor, wall and tabletop varieties, in a multitude of styles, sizes, themes, materials and trims. They are the perfect way to provide your home with beauty, moisture and a soothing environment with minimal effort. More Info At : http://www.waterfountainpros.com/wall-fountains
Animated floating bubbles(Intermediate)To reproduce the bubble shape effects on this slide, do the following:On the Home tab, in the Slides group, click Layout, and then click Blank.On the Home tab, in the Drawing group, click Shapes, and then under Basic Shapes select Oval (second option from the left). Press and hold SHIFT, and then click and drag to draw a circle shape.Select the circle (oval shape). On the Home tab, in the Drawing group, click the Format Shape dialog box launcher. In the Format Shape dialog box in the left pane, click Fill. In the Fill pane, click Gradient fill, and then do the following:Click the button next to Preset Colors and select Calm Water (second row, third option from the left).In the Type box, select Radial. Click the button next to Direction and select From Bottom Right Corner (first option from the left).Also in the Format Shape pane, in the left pane, click Line Color. In the Line Color pane, click Gradient Line, and then do the following:Click the button next to Preset Colors and select Calm Water (second row, third option from the left).In the Type box select Linear. In the Angle box, enter 90.Also in the Format Shape pane, in the left pane, click 3-D Format and then in the 3-D Format pane, do the following:Under Bevel, click the button next to Top and select Circle (first option from the left). Next to Top, in the Width box, enter 50 pt, and in the Height box, enter 50 pt.Under Surface, click the button next to Material, and then under Translucent, select Clear. Click the button next to Lighting, and then under Special, select Glow (third option from the left). In the Angle box, enter 110°.To reproduce the animation effects on this slide, do the following:On the slide select the oval. On the Animations tab, in the AdvancedAnimation group, click AddAnimation, and then under Entrance click Appear.On the Animations tab, in the Timing group, in the Start list, select WithPrevious.On the Animations tab, in the AdvancedAnimation group, click AddAnimation, and then click More Motion Paths. In the Add Motion Path dialog box, under Lines & Curves, click S Curve 1, and then click OK.On the Animations tab, in the Timing group, in the Start list, select WithPrevious.On the Animations tab, in the Timing group, in the Duration box, enter 8. On the slide, select the animation path. Click and drag the green rotation handle to the right to rotate the path until the right side of the path faces the bottom right corner of the slide. Click and drag the right side handle to lengthen the path until it extends about one inch off the bottom right edge of the slide. Click and drag the left side handle to lengthen the path until it extends about one inch off the top left edge of the slide.On the Animations tab, in the Animation group, click EffectOptions, and then click Reverse Path Direction.On the Animations tab, in the Animation group, click EffectOptions, and then click Edit Points. Click and drag the edit points and curve handles to make the path a smooth S-shaped curve from the bottom right to top left.On the slide select the oval. On the Animations tab, in the AdvancedAnimation group, click AddAnimation, and then under Emphasis click Grow/Shrink.On the Animations tab, in the Timing group, in the Start list, select WithPrevious.On the Animations tab, in the Timing group, in the Duration box, enter 0.1. On the Animations tab, in the Timing group, in the Delay box, enter 6. On the Animations tab, in the Animation group, click EffectOptions, and then click Larger.On the slide select the oval. On the Animations tab, in the AdvancedAnimation group, click AddAnimation, and then under Exit click Fade.On the Animations tab, in the Timing group, in the Start list, select WithPrevious.On the Animations tab, in the Timing group, in the Duration box, enter 0.1. On the Animations tab, in the Timing group, in the Delay box, enter 6. To create the second bubble on this slide, do the following:Select the bubble. On the Home tab, in the Clipboard group, click the arrow to the right of Copy, and then click Duplicate.Select the new bubble. Press and hold SHIFT, and then drag the sizing handle to resize the shape.Drag the bubble to a different part of the slide.On the Animation tab, in the Advanced Animation group, click Animation Pane.In the Animation Pane, select the Appear effect for the second oval. On the Animations tab, in the Timing group, in the Delay box, enter 1.4. In the Animation Pane, select the S Curve 1 effect for the second oval. On the Animations tab, in the Timing group, in the Delay box, enter 1.4.On the Animations tab, in the Animation group, click EffectOptions, and then click Edit Points. Click and drag the edit points and curve handles to make the path of the second oval different from the first one.In the Animation Pane, select the Grow/Shrink effect for the second oval. On the Animations tab, in the Timing group, in the Delay box, enter 7.In the Animation Pane, select the Fade effect for the second oval. On the Animations tab, in the Timing group, in the Delay box, enter 7.To reproduce the background on this slide, do one of the following:Note: You can save the background of this slide template as a picture and use it in your own slides. To use the same background as this slide, do the following:Right-click the water background on the original template, and then click Save Background.Save the file as a JPEG (.jpg) file format.On the Design tab, in the Background group, click Background Styles, and then click Format Background. In the Format Background dialog box, click Fill in the left pane, select Picturefill in the Fill pane, and then under Insert from click File. In the Insert Picture dialog box, select a picture, and then click Insert.
Animated floating bubbles(Intermediate)To reproduce the bubble shape effects on this slide, do the following:On the Home tab, in the Slides group, click Layout, and then click Blank.On the Home tab, in the Drawing group, click Shapes, and then under Basic Shapes select Oval (second option from the left). Press and hold SHIFT, and then click and drag to draw a circle shape.Select the circle (oval shape). On the Home tab, in the Drawing group, click the Format Shape dialog box launcher. In the Format Shape dialog box in the left pane, click Fill. In the Fill pane, click Gradient fill, and then do the following:Click the button next to Preset Colors and select Calm Water (second row, third option from the left).In the Type box, select Radial. Click the button next to Direction and select From Bottom Right Corner (first option from the left).Also in the Format Shape pane, in the left pane, click Line Color. In the Line Color pane, click Gradient Line, and then do the following:Click the button next to Preset Colors and select Calm Water (second row, third option from the left).In the Type box select Linear. In the Angle box, enter 90.Also in the Format Shape pane, in the left pane, click 3-D Format and then in the 3-D Format pane, do the following:Under Bevel, click the button next to Top and select Circle (first option from the left). Next to Top, in the Width box, enter 50 pt, and in the Height box, enter 50 pt.Under Surface, click the button next to Material, and then under Translucent, select Clear. Click the button next to Lighting, and then under Special, select Glow (third option from the left). In the Angle box, enter 110°.To reproduce the animation effects on this slide, do the following:On the slide select the oval. On the Animations tab, in the AdvancedAnimation group, click AddAnimation, and then under Entrance click Appear.On the Animations tab, in the Timing group, in the Start list, select WithPrevious.On the Animations tab, in the AdvancedAnimation group, click AddAnimation, and then click More Motion Paths. In the Add Motion Path dialog box, under Lines & Curves, click S Curve 1, and then click OK.On the Animations tab, in the Timing group, in the Start list, select WithPrevious.On the Animations tab, in the Timing group, in the Duration box, enter 8. On the slide, select the animation path. Click and drag the green rotation handle to the right to rotate the path until the right side of the path faces the bottom right corner of the slide. Click and drag the right side handle to lengthen the path until it extends about one inch off the bottom right edge of the slide. Click and drag the left side handle to lengthen the path until it extends about one inch off the top left edge of the slide.On the Animations tab, in the Animation group, click EffectOptions, and then click Reverse Path Direction.On the Animations tab, in the Animation group, click EffectOptions, and then click Edit Points. Click and drag the edit points and curve handles to make the path a smooth S-shaped curve from the bottom right to top left.On the slide select the oval. On the Animations tab, in the AdvancedAnimation group, click AddAnimation, and then under Emphasis click Grow/Shrink.On the Animations tab, in the Timing group, in the Start list, select WithPrevious.On the Animations tab, in the Timing group, in the Duration box, enter 0.1. On the Animations tab, in the Timing group, in the Delay box, enter 6. On the Animations tab, in the Animation group, click EffectOptions, and then click Larger.On the slide select the oval. On the Animations tab, in the AdvancedAnimation group, click AddAnimation, and then under Exit click Fade.On the Animations tab, in the Timing group, in the Start list, select WithPrevious.On the Animations tab, in the Timing group, in the Duration box, enter 0.1. On the Animations tab, in the Timing group, in the Delay box, enter 6. To create the second bubble on this slide, do the following:Select the bubble. On the Home tab, in the Clipboard group, click the arrow to the right of Copy, and then click Duplicate.Select the new bubble. Press and hold SHIFT, and then drag the sizing handle to resize the shape.Drag the bubble to a different part of the slide.On the Animation tab, in the Advanced Animation group, click Animation Pane.In the Animation Pane, select the Appear effect for the second oval. On the Animations tab, in the Timing group, in the Delay box, enter 1.4. In the Animation Pane, select the S Curve 1 effect for the second oval. On the Animations tab, in the Timing group, in the Delay box, enter 1.4.On the Animations tab, in the Animation group, click EffectOptions, and then click Edit Points. Click and drag the edit points and curve handles to make the path of the second oval different from the first one.In the Animation Pane, select the Grow/Shrink effect for the second oval. On the Animations tab, in the Timing group, in the Delay box, enter 7.In the Animation Pane, select the Fade effect for the second oval. On the Animations tab, in the Timing group, in the Delay box, enter 7.To reproduce the background on this slide, do one of the following:Note: You can save the background of this slide template as a picture and use it in your own slides. To use the same background as this slide, do the following:Right-click the water background on the original template, and then click Save Background.Save the file as a JPEG (.jpg) file format.On the Design tab, in the Background group, click Background Styles, and then click Format Background. In the Format Background dialog box, click Fill in the left pane, select Picturefill in the Fill pane, and then under Insert from click File. In the Insert Picture dialog box, select a picture, and then click Insert.
Animated floating bubbles(Intermediate)To reproduce the bubble shape effects on this slide, do the following:On the Home tab, in the Slides group, click Layout, and then click Blank.On the Home tab, in the Drawing group, click Shapes, and then under Basic Shapes select Oval (second option from the left). Press and hold SHIFT, and then click and drag to draw a circle shape.Select the circle (oval shape). On the Home tab, in the Drawing group, click the Format Shape dialog box launcher. In the Format Shape dialog box in the left pane, click Fill. In the Fill pane, click Gradient fill, and then do the following:Click the button next to Preset Colors and select Calm Water (second row, third option from the left).In the Type box, select Radial. Click the button next to Direction and select From Bottom Right Corner (first option from the left).Also in the Format Shape pane, in the left pane, click Line Color. In the Line Color pane, click Gradient Line, and then do the following:Click the button next to Preset Colors and select Calm Water (second row, third option from the left).In the Type box select Linear. In the Angle box, enter 90.Also in the Format Shape pane, in the left pane, click 3-D Format and then in the 3-D Format pane, do the following:Under Bevel, click the button next to Top and select Circle (first option from the left). Next to Top, in the Width box, enter 50 pt, and in the Height box, enter 50 pt.Under Surface, click the button next to Material, and then under Translucent, select Clear. Click the button next to Lighting, and then under Special, select Glow (third option from the left). In the Angle box, enter 110°.To reproduce the animation effects on this slide, do the following:On the slide select the oval. On the Animations tab, in the AdvancedAnimation group, click AddAnimation, and then under Entrance click Appear.On the Animations tab, in the Timing group, in the Start list, select WithPrevious.On the Animations tab, in the AdvancedAnimation group, click AddAnimation, and then click More Motion Paths. In the Add Motion Path dialog box, under Lines & Curves, click S Curve 1, and then click OK.On the Animations tab, in the Timing group, in the Start list, select WithPrevious.On the Animations tab, in the Timing group, in the Duration box, enter 8. On the slide, select the animation path. Click and drag the green rotation handle to the right to rotate the path until the right side of the path faces the bottom right corner of the slide. Click and drag the right side handle to lengthen the path until it extends about one inch off the bottom right edge of the slide. Click and drag the left side handle to lengthen the path until it extends about one inch off the top left edge of the slide.On the Animations tab, in the Animation group, click EffectOptions, and then click Reverse Path Direction.On the Animations tab, in the Animation group, click EffectOptions, and then click Edit Points. Click and drag the edit points and curve handles to make the path a smooth S-shaped curve from the bottom right to top left.On the slide select the oval. On the Animations tab, in the AdvancedAnimation group, click AddAnimation, and then under Emphasis click Grow/Shrink.On the Animations tab, in the Timing group, in the Start list, select WithPrevious.On the Animations tab, in the Timing group, in the Duration box, enter 0.1. On the Animations tab, in the Timing group, in the Delay box, enter 6. On the Animations tab, in the Animation group, click EffectOptions, and then click Larger.On the slide select the oval. On the Animations tab, in the AdvancedAnimation group, click AddAnimation, and then under Exit click Fade.On the Animations tab, in the Timing group, in the Start list, select WithPrevious.On the Animations tab, in the Timing group, in the Duration box, enter 0.1. On the Animations tab, in the Timing group, in the Delay box, enter 6. To create the second bubble on this slide, do the following:Select the bubble. On the Home tab, in the Clipboard group, click the arrow to the right of Copy, and then click Duplicate.Select the new bubble. Press and hold SHIFT, and then drag the sizing handle to resize the shape.Drag the bubble to a different part of the slide.On the Animation tab, in the Advanced Animation group, click Animation Pane.In the Animation Pane, select the Appear effect for the second oval. On the Animations tab, in the Timing group, in the Delay box, enter 1.4. In the Animation Pane, select the S Curve 1 effect for the second oval. On the Animations tab, in the Timing group, in the Delay box, enter 1.4.On the Animations tab, in the Animation group, click EffectOptions, and then click Edit Points. Click and drag the edit points and curve handles to make the path of the second oval different from the first one.In the Animation Pane, select the Grow/Shrink effect for the second oval. On the Animations tab, in the Timing group, in the Delay box, enter 7.In the Animation Pane, select the Fade effect for the second oval. On the Animations tab, in the Timing group, in the Delay box, enter 7.To reproduce the background on this slide, do one of the following:Note: You can save the background of this slide template as a picture and use it in your own slides. To use the same background as this slide, do the following:Right-click the water background on the original template, and then click Save Background.Save the file as a JPEG (.jpg) file format.On the Design tab, in the Background group, click Background Styles, and then click Format Background. In the Format Background dialog box, click Fill in the left pane, select Picturefill in the Fill pane, and then under Insert from click File. In the Insert Picture dialog box, select a picture, and then click Insert.
Animated floating bubbles(Intermediate)To reproduce the bubble shape effects on this slide, do the following:On the Home tab, in the Slides group, click Layout, and then click Blank.On the Home tab, in the Drawing group, click Shapes, and then under Basic Shapes select Oval (second option from the left). Press and hold SHIFT, and then click and drag to draw a circle shape.Select the circle (oval shape). On the Home tab, in the Drawing group, click the Format Shape dialog box launcher. In the Format Shape dialog box in the left pane, click Fill. In the Fill pane, click Gradient fill, and then do the following:Click the button next to Preset Colors and select Calm Water (second row, third option from the left).In the Type box, select Radial. Click the button next to Direction and select From Bottom Right Corner (first option from the left).Also in the Format Shape pane, in the left pane, click Line Color. In the Line Color pane, click Gradient Line, and then do the following:Click the button next to Preset Colors and select Calm Water (second row, third option from the left).In the Type box select Linear. In the Angle box, enter 90.Also in the Format Shape pane, in the left pane, click 3-D Format and then in the 3-D Format pane, do the following:Under Bevel, click the button next to Top and select Circle (first option from the left). Next to Top, in the Width box, enter 50 pt, and in the Height box, enter 50 pt.Under Surface, click the button next to Material, and then under Translucent, select Clear. Click the button next to Lighting, and then under Special, select Glow (third option from the left). In the Angle box, enter 110°.To reproduce the animation effects on this slide, do the following:On the slide select the oval. On the Animations tab, in the AdvancedAnimation group, click AddAnimation, and then under Entrance click Appear.On the Animations tab, in the Timing group, in the Start list, select WithPrevious.On the Animations tab, in the AdvancedAnimation group, click AddAnimation, and then click More Motion Paths. In the Add Motion Path dialog box, under Lines & Curves, click S Curve 1, and then click OK.On the Animations tab, in the Timing group, in the Start list, select WithPrevious.On the Animations tab, in the Timing group, in the Duration box, enter 8. On the slide, select the animation path. Click and drag the green rotation handle to the right to rotate the path until the right side of the path faces the bottom right corner of the slide. Click and drag the right side handle to lengthen the path until it extends about one inch off the bottom right edge of the slide. Click and drag the left side handle to lengthen the path until it extends about one inch off the top left edge of the slide.On the Animations tab, in the Animation group, click EffectOptions, and then click Reverse Path Direction.On the Animations tab, in the Animation group, click EffectOptions, and then click Edit Points. Click and drag the edit points and curve handles to make the path a smooth S-shaped curve from the bottom right to top left.On the slide select the oval. On the Animations tab, in the AdvancedAnimation group, click AddAnimation, and then under Emphasis click Grow/Shrink.On the Animations tab, in the Timing group, in the Start list, select WithPrevious.On the Animations tab, in the Timing group, in the Duration box, enter 0.1. On the Animations tab, in the Timing group, in the Delay box, enter 6. On the Animations tab, in the Animation group, click EffectOptions, and then click Larger.On the slide select the oval. On the Animations tab, in the AdvancedAnimation group, click AddAnimation, and then under Exit click Fade.On the Animations tab, in the Timing group, in the Start list, select WithPrevious.On the Animations tab, in the Timing group, in the Duration box, enter 0.1. On the Animations tab, in the Timing group, in the Delay box, enter 6. To create the second bubble on this slide, do the following:Select the bubble. On the Home tab, in the Clipboard group, click the arrow to the right of Copy, and then click Duplicate.Select the new bubble. Press and hold SHIFT, and then drag the sizing handle to resize the shape.Drag the bubble to a different part of the slide.On the Animation tab, in the Advanced Animation group, click Animation Pane.In the Animation Pane, select the Appear effect for the second oval. On the Animations tab, in the Timing group, in the Delay box, enter 1.4. In the Animation Pane, select the S Curve 1 effect for the second oval. On the Animations tab, in the Timing group, in the Delay box, enter 1.4.On the Animations tab, in the Animation group, click EffectOptions, and then click Edit Points. Click and drag the edit points and curve handles to make the path of the second oval different from the first one.In the Animation Pane, select the Grow/Shrink effect for the second oval. On the Animations tab, in the Timing group, in the Delay box, enter 7.In the Animation Pane, select the Fade effect for the second oval. On the Animations tab, in the Timing group, in the Delay box, enter 7.To reproduce the background on this slide, do one of the following:Note: You can save the background of this slide template as a picture and use it in your own slides. To use the same background as this slide, do the following:Right-click the water background on the original template, and then click Save Background.Save the file as a JPEG (.jpg) file format.On the Design tab, in the Background group, click Background Styles, and then click Format Background. In the Format Background dialog box, click Fill in the left pane, select Picturefill in the Fill pane, and then under Insert from click File. In the Insert Picture dialog box, select a picture, and then click Insert.
Animated floating bubbles(Intermediate)To reproduce the bubble shape effects on this slide, do the following:On the Home tab, in the Slides group, click Layout, and then click Blank.On the Home tab, in the Drawing group, click Shapes, and then under Basic Shapes select Oval (second option from the left). Press and hold SHIFT, and then click and drag to draw a circle shape.Select the circle (oval shape). On the Home tab, in the Drawing group, click the Format Shape dialog box launcher. In the Format Shape dialog box in the left pane, click Fill. In the Fill pane, click Gradient fill, and then do the following:Click the button next to Preset Colors and select Calm Water (second row, third option from the left).In the Type box, select Radial. Click the button next to Direction and select From Bottom Right Corner (first option from the left).Also in the Format Shape pane, in the left pane, click Line Color. In the Line Color pane, click Gradient Line, and then do the following:Click the button next to Preset Colors and select Calm Water (second row, third option from the left).In the Type box select Linear. In the Angle box, enter 90.Also in the Format Shape pane, in the left pane, click 3-D Format and then in the 3-D Format pane, do the following:Under Bevel, click the button next to Top and select Circle (first option from the left). Next to Top, in the Width box, enter 50 pt, and in the Height box, enter 50 pt.Under Surface, click the button next to Material, and then under Translucent, select Clear. Click the button next to Lighting, and then under Special, select Glow (third option from the left). In the Angle box, enter 110°.To reproduce the animation effects on this slide, do the following:On the slide select the oval. On the Animations tab, in the AdvancedAnimation group, click AddAnimation, and then under Entrance click Appear.On the Animations tab, in the Timing group, in the Start list, select WithPrevious.On the Animations tab, in the AdvancedAnimation group, click AddAnimation, and then click More Motion Paths. In the Add Motion Path dialog box, under Lines & Curves, click S Curve 1, and then click OK.On the Animations tab, in the Timing group, in the Start list, select WithPrevious.On the Animations tab, in the Timing group, in the Duration box, enter 8. On the slide, select the animation path. Click and drag the green rotation handle to the right to rotate the path until the right side of the path faces the bottom right corner of the slide. Click and drag the right side handle to lengthen the path until it extends about one inch off the bottom right edge of the slide. Click and drag the left side handle to lengthen the path until it extends about one inch off the top left edge of the slide.On the Animations tab, in the Animation group, click EffectOptions, and then click Reverse Path Direction.On the Animations tab, in the Animation group, click EffectOptions, and then click Edit Points. Click and drag the edit points and curve handles to make the path a smooth S-shaped curve from the bottom right to top left.On the slide select the oval. On the Animations tab, in the AdvancedAnimation group, click AddAnimation, and then under Emphasis click Grow/Shrink.On the Animations tab, in the Timing group, in the Start list, select WithPrevious.On the Animations tab, in the Timing group, in the Duration box, enter 0.1. On the Animations tab, in the Timing group, in the Delay box, enter 6. On the Animations tab, in the Animation group, click EffectOptions, and then click Larger.On the slide select the oval. On the Animations tab, in the AdvancedAnimation group, click AddAnimation, and then under Exit click Fade.On the Animations tab, in the Timing group, in the Start list, select WithPrevious.On the Animations tab, in the Timing group, in the Duration box, enter 0.1. On the Animations tab, in the Timing group, in the Delay box, enter 6. To create the second bubble on this slide, do the following:Select the bubble. On the Home tab, in the Clipboard group, click the arrow to the right of Copy, and then click Duplicate.Select the new bubble. Press and hold SHIFT, and then drag the sizing handle to resize the shape.Drag the bubble to a different part of the slide.On the Animation tab, in the Advanced Animation group, click Animation Pane.In the Animation Pane, select the Appear effect for the second oval. On the Animations tab, in the Timing group, in the Delay box, enter 1.4. In the Animation Pane, select the S Curve 1 effect for the second oval. On the Animations tab, in the Timing group, in the Delay box, enter 1.4.On the Animations tab, in the Animation group, click EffectOptions, and then click Edit Points. Click and drag the edit points and curve handles to make the path of the second oval different from the first one.In the Animation Pane, select the Grow/Shrink effect for the second oval. On the Animations tab, in the Timing group, in the Delay box, enter 7.In the Animation Pane, select the Fade effect for the second oval. On the Animations tab, in the Timing group, in the Delay box, enter 7.To reproduce the background on this slide, do one of the following:Note: You can save the background of this slide template as a picture and use it in your own slides. To use the same background as this slide, do the following:Right-click the water background on the original template, and then click Save Background.Save the file as a JPEG (.jpg) file format.On the Design tab, in the Background group, click Background Styles, and then click Format Background. In the Format Background dialog box, click Fill in the left pane, select Picturefill in the Fill pane, and then under Insert from click File. In the Insert Picture dialog box, select a picture, and then click Insert.