SlideShare a Scribd company logo
1 of 31
Microsoft Office Word allows you to create and edit personal and business
documents, such as letters, reports, invoices, emails and books. By default,
documents saved in Word are saved with the .docx extension. Microsoft Word
can be used for the following purposes −
 To create business documents having various graphics including pictures, charts,
and diagrams.
 To store and reuse readymade content and formatted elements such as cover
pages and sidebars.
 To create letters and letterheads for personal and business purpose.
 To design different documents such as resumes or invitation cards etc.
 To create a range of correspondence from a simple office memo to legal copies
and reference documents.
following is the basic window which you get when you start the Word
application. Let us understand the various important parts of this window..
File Tab
The File tab replaces the Office button from Word 2007. You can click it to
check the Backstage view. This is where you come when you need to open
or save files, create new documents, print a document, and do other file-
related operations.
Quick Access Toolbar
This you will find just above the File tab. This is a convenient resting place
for the mostf requently used commands in Word. You can customize this
toolbar based on your comfort.
Ribbon
Ribbon contains commands organized in three components −
 Tabs − These appear across the top of the Ribbon and contain groups of related
commands. Home, Insert, Page Layout are examples of ribbon tabs.
 Groups − They organize related commands; each group name appears below the
group on the Ribbon. For example, group of commands related to fonts or group
of commands related to alignment, etc.
 Commands − Commands appear within each group as mentioned above.
Title bar
This lies in the middle and at the top of the window. Title bar shows the
program and document titles.
Rulers
Word has two rulers - a horizontal ruler and a vertical ruler. The horizontal
ruler appears just beneath the Ribbon and is used to set margins and tab
stops. The vertical ruler appears on the left edge of the Word window and is
used to gauge the vertical position of elements on the page.
View Buttons
The group of five buttons located to the left of the Zoom control, near the
bottom of the screen, lets you switch through the Word's various document
views.
 Print Layout view − This displays pages exactly as they will appear when
printed.
 Full Screen Reading view − This gives a full screen view of the document.
 Web Layout view − This shows how a document appears when viewed by a Web
browser, such as Internet Explorer.
 Outline view − This lets you work with outlines established using Word’s
standard heading styles.
 Draft view − This formats text as it appears on the printed page with a few
exceptions. For example, headers and footers aren't shown. Most people prefer
this mode.
Go To Command
Press the F5 key to use the Go To command. This will display a dialogue box
where you will have various options to reach to a particular page.
Normally, we use the page number, the line number or the section number
to go directly to a particular page and finally press the Go To button.
Selecting a text is one of the most important skills required while editing a
word document. You can perform various operations on a selected text; you
can delete the selected text, copy it, move it, apply formatting to it, change
its capitalization, etc.
The most common method of selecting a text is to click and drag the mouse
over the text you want to select. Following table lists down a few other simple
methods that will help you in selecting text in different scenarios −
S.No Component & Selection Method
1
Selecting text between two points
Click at the start of the block of text, hold down Shift, and click at the end
of the block.
2
Selecting a single word
Double-click anywhere on the word you want to select.
3
Selecting a paragraph
Triple-click anywhere on the paragraph you want to select.
4
Selecting a sentence
Hold down the Ctrl key and click anywhere in the sentence you want to
select.
5
Selecting a column of text
Hold down Alt, click and hold the mouse button, and drag over the column
you want to select.
Note that only one part of the document can be in the selected state. If you
have one portion of the document in selected state and as soon as you try to
select any other part of the document, previous part will automatically be de-
selected.
Using the Keyboard
Keyboard provides very good support when you want to select various
components of the document as described in the following table −
S.No Key & Selection Method Selecting Text
1
Ctrl + A
Press Ctrl + A keys to select the entire document.
2
Shift
Keep pressing the Shift key and use any of the arrow keys to select the
portion of text.
3
F8
Press F8 and then use any of the arrows keys to select the portion of text.
4
Ctrl + Shift + F8
Press Ctrl + Shift + F8 and then use any of the arrows keys to select
column of the text.
Copy & Paste Operation
The Copy operation will just copy the content from its original place and
create a duplicate copy of the content at the desired location without deleting
the text from it's the original location. Following is the procedure to copy the
content in word −
Step 1 − Select a portion of the text using any of the text selection methods.
Step 2 − You have various options available to copy the selected text in
clipboard. You can make use of any one of the options −
 Using Right-Click − When you right-click on the selected text, it will display
the copy option, click this option to copy the selected content in clipboard.
 Using Ribbon Copy Button − After selecting text, you can use the copy button
available at the ribbon to copy the selected content in clipboard.
 Using Ctrl + c Keys − After selecting a text, just press Ctrl + c keys to copy the
selected content in clipboard.
Step 3 − Finally click at the place where you want to copy the selected text
and use either of these two simple options −
 Using Ribbon Paste Button − Just click the Paste button available at the ribbon
to paste the copied content at the desired location.
 Using Ctrl + v Keys − This is simplest way of pasting the content. Just press Ctrl
+ v keys to paste the content at the new location.
Find and replace option
We assume you are an expert in searching a word or phrase in a word
document as explained above. This section will teach you how you can replace
an existing word in your document. Following are the simple steps −
Step 1 − Click the Replace option in the Editing group on the Home tab
or press Ctrl + H to launch the Find and Replace dialog box shown in Step
2
Type a word which you want to search. You can also replace the word using
the Find and Replace dialog box as in the following screenshot −
Type a word which you want to search. You can also replace the word using
the Find and Replace dialog box as in the following screenshot −
Step 3 − Click the Replace button available on the Find and Replace dialog
box and you will see the first occurrence of the searched word would be
replaced with the replace with word. Clicking again on Replace button would
replace next occurrence of the searched word. If you will click Replace
Allbutton then it would replace all the found words in one go. You can also
use Find Next button just to search the next occurence and later you can
use Replace button to replace the found word.
Check Spelling and Grammar using Review tab
Here is the simple procedure to find out the spelling mistakes and fix them −
Step 1 − Click the Review tab and then click the Spelling &
Grammarbutton.
A Spelling and Grammar dialog box will appear and will display the wrong
spellings or errors in grammar. You will also get suggestions to correct as
shown below −
Now you have following options to fix the spelling mistakes −
 Ignore − If you are willing to ignore a word, then click this button and Word
ignores the word throughout the document.
 Ignore All − Like Ignore, but this ignores all occurrences of the same misspelling,
not just once but throughout the document.
 Add to Dictionary − Choose Add to Dictionary to add the word to the Word
spelling dictionary.
 Change − This will change the wrong word using the suggested correct word.
 Change All − Like Change, but this changes all occurrences of the same
misspelling, not just once but throughout the document.
 AutoCorrect − If you select a suggestion, Word creates an AutoCorrect entry
that automatically corrects this spelling error from
Step 3 − Select one of the given suggestions you want to use and click
the Change option to fix the spelling or grammar mistake and repeat the
step to fix all the spelling or grammar mistake.
Step 4 − Word displays a dialog box when it finishes checking for spelling
and grammar mistakes, finally Click OK.
Shortcuts to use Undo & Repeat operations
Though you can access the Undo and Repeat commands from the Quick
Access toolbar, but because these commands are the most frequently used
commands, we recommend you memorize their keyboard shortcuts which are
as follows −
S.No Shortcuts & Operation
1
Ctrl + Z
Undoes the previous action.
2
Ctrl + Y
Repeats the previous action.
Clear Formatting Options
All of the setting can be reset to plain text, or the default formatting. To reset
text to default settings −
Step 1 − Select the portion of text that you want to reset.
Step 2 − Click the Clear Formatting button in the Home tab Font group,
or simply use Ctrl + SPACEBAR.
we will discuss how to change text cases in Word You can also capitalize a
character you are typing by pressing and holding the SHIFT key while you
type. You can also press the CAPS LOCK to have every letter that you type
capitalized, and then press the CAPS LOCK again to turn off capitalization.
Change Text to Sentence Case
A sentence case is the case where the first character of every sentence is
capitalized. It is very simple to change the selected portion of text into
sentence case by following two simple steps −
Step 1 − Select the portion of text that that needs to be put in sentence
case. You can use any of the text selection methods to select the portion of
text.
Step 2 − Click the Change Case button and then select the Sentence Case
option to capitalize the first character of every selected sentence.
Change Text to Lowercase
Changing text to lowercase is where every word of a sentence is in lowercase.
It is very simple to change a selected portion of text into lowercase by
following two simple steps −
Step 1 − Select the portion of text that needs to be put in lowercase. You
can use any of the text selection methods to select the portion of text.
Step 2 − Click the Change Case button and then select Lowercase option
to display all the selected words in lowercase.
Change Text to Uppercase
This is where every word of a sentence is in uppercase. It is very simple to
change selected text into uppercase by following two simple steps −
Step 1 − Select the portion of text that you want to change to a bold font.
You can use any of the text selection method to select the portion of text.
Step 2 − Click the Change Case button and then select UPPERCASE option
to display all selected words in all caps. All characters of every selected word
will be capitalized.
Toggle the Text
The Toggle operation will change the case of every character in reverse way.
A capital character will become a character in lower case and a character in
lower case will become a character in upper case. It is very simple to toggle
case of the text by following two simple steps −
Step 1 − Select the portion of text that you want to change to a bold font.
You can use any of the text selection method to select the portion of text.
Step 2 − Click the Change Case button and then select the tOGGLE
cASEoption to change all the words in lowercase into words in uppercase;
the words in uppercase words change to words in lowercase.
Highlight Text with Colors
You can highlight a selected portion of text using any color and it will look
like it was marked with a highlighter pen. Usually we highlight a text using
yellow color. It is very simple to highlight a portion of text with a color by
following two simple steps
Step 1 − Select the portion of text that needs to be highlighted with color.
You can use any of the text selection method to select the portion of text.
Step 2 − Click the Text Highlight Color button triangle to display a list of
colors. Try to move your mouse pointer over different colors and you will see
the text color changes automatically. You can select any of the colors
available by simply clicking over it.
If you click at the left portion of the Text Highlight Color button, then the
selected color gets applied to the portion of text automatically; you need to
click over the small triangle to display a list of colors.
we will discuss the how to indent paragraphs in Word. As you know the
margin settings determine the blank space that appears on each side of a
paragraph. You can indent paragraphs in your document from the left margin,
the right margin, or both the margins. This chapter will teach you how to
indent your paragraphs with or without the first line of the paragraphs.
Left Indentation
Left indentation means to move the left edge of the paragraph inward towards
the center of the paragraph. Let us use the following steps to create left
indentation.
Step 1 − Click anywhere on the paragraph you want to indent left and click
the Increase Indent button available on the Home tab or simply press
the Ctrl + M keys. You can click multiple times to create deeper indentation
Microsoft word provides bullets and numbers to put a list of items in a nice
order. This chapter will teach you simple steps to create either the bulleted
or the numbered lists in simple steps.
Create a List from Existing Text
This is very simple to convert a list of lines into a bulleted or numbered list.
Following are the simple steps to create either bulleted list or numbered list.
Step 1 − Select a list of text to which you want to assign bullets or numbers.
You can use any of the text selection method to select the portion of text.
Step 2 − Click the Bullet Button triangle to display a list of bullets you want
to assign to the list. You can select any of the bullet style available by simply
clicking over it.
we will discuss how to add header and footer in Word 2010. Headers and
footers are parts of a document that contain special information such as page
numbers and the total number of pages, the document title, company logo, any
photo, etc. The header appears at the top of every page, and the footer appears
at the bottom of every page.
Add Header and Footer
The following steps will help you understand how to add header and footer in
a Word document.
Step 1 − Click the Insert tab, and click either the Header button or
the Footer button that which needs to be added first. Assume you are going
to add Header; when you click the Header button it will display a list of
built-in Headers from where you can choose any of the headers by simply
clicking on
Create a Table
The following steps will help you understand how to create a table in a Word
document.
Step 1 − Click the Insert tab followed by the Table button. This will display
a simple grid as shown below. When you move your mouse over the grid
cells, it makes a table in the table that appears in the document. You can
make your table having the desired number of rows and columns.
Step 2 − Click the square representing the lower-right corner of your table,
which will create an actual table in your document and Word goes in the table
design mode. The table design mode has many options to work with as shown
below.
This is an optional step that can be worked out if you want to have a fancy
table. Click the Table Styles button to display a gallery of table styles.
When you move your mouse over any of the styles, it shows real time preview
of your actual table.
Step 4 − To select any of the styles, just click the built-in table style and you
will see that the selected style has been applied on your table.
Delete a Table
Following are the simple steps to delete an existing table from a word
document.
Step 1 − Click anywhere in the table you want to delete.
Step 2 − Click the Layout tab, and click the Delete Table option under
the Delete Table Button to delete the complete table from the document
along with its content.
Merging Cells
The following steps will help you merge table cells in a Word document.
Step 1 − Bring your mouse pointer position inside the first cell that you want
to merge. Now press the Shift key and click the cells around the cell which
you want to merge into the first cell. This will highlight the cells which you
click and they will be ready to be merged.
Step 2 − Now click the Layout tab and then click the Merge Cells button
which will merge all the selected cells.
Split a Cell
The following steps will help you split a cell into two sub-cells of a table
available in word document.
Step 1 − Bring your mouse pointer position inside the cell that has to be
divided into multiple cells.
Add a Formula
Following are the simple steps to add formula in a table cell available in Word
document.
Step 1 − Consider the following table with the total number of rows. Click in
a cell that should contain the sum of the rows.
Step 2 − Now click the Layout tab and then click the Formula button; this
will display a Formula Dialog Box which will suggest a default formula,
which is =SUM(LEFT) in our case. You can select a number format
using Number Format List Box to display the result or you can change the
formula using the Formula List Box.
Step 3 − Now click OK to apply the formula and you will see that the left
cells have been added and the sum has been put in the total cell where we
wanted to have it. You can repeat the procedure to have the sum of other
two rows as well.
Adding Picture in Document
The following steps will help you add an existing picture in your word
document. It is assumed that you already have a picture available on your
machine before you add this picture in your Word document.
Step 1 − Click on your document where you want to add a picture.
Step 2 − Click the Insert tab and then click the Picture option available in
illustrations group, which will display the Insert Picture dialog box.
Step 3 − You can select a required picture using the Insert Picture dialog
box. When you will click the Insert button, selected picture will be inserted
in your document. You can play with your inserted picture in different ways,
like you can apply quick styles to your picture, you can resize it, or you can
change its color too. To try it, just -lick your inserted image and Word will
give you numerous options available under the Format tab to format your
inserted graphics.
we will discuss how to create table of contents in Word 2010. A table of
contents (or TOC) is a list of headings in the order in which they appear in
the document. You can set a list of headings which should be a part of the
table of contents. Let us learn how to create a Table of Contents. A table of
content helps in navigating through a Word document by providing associated
page numbers and direct links to various headings available on those pages.
Create Table of Contents
The following will help you to create Table of Contents in your Microsoft Word
using various levels of headings.
Step 1 − Consider a document having different levels of headings.
Step 2 − You can insert a table of content anywhere in the document, but
the best place is always at the beginning of the document. So bring your
insertion point at the beginning of the document and then click
the References tabfollowed by the Table of Content button; this will
display a list of Table of Contents options.
Step 3 − Select any of the displayed options by simply clicking on it. A table
of content will be inserted at the selected location.
Step 4 − You can select number of levels of headings in your table of content.
If you click on the Insert Table of Content option available in the option
menu, then it will show you a dialog box where you can select the number of
levels you want to have in your table of content. You can turn ON or turn OFF
the Show Page Numbers option. Once done, click the OK button to apply
the options.
Delete Table of Contents
The following steps will help you delete an existing Table of Contents from
Microsoft Word.
Step 1 − Consider you already have a table of content as shown above. Click
the References tab and next Table of Contents button which will display
a list of Table of Contents options along with Remove Table of
Contentsoption available at the bottom.

More Related Content

What's hot

Ms word Presentation
Ms word PresentationMs word Presentation
Ms word PresentationMadhab Behera
 
All about shortcut keys
All about shortcut keysAll about shortcut keys
All about shortcut keysNilabh Verma
 
Microsoft Word
Microsoft WordMicrosoft Word
Microsoft WordJack Frost
 
Presentation of ms word
Presentation of ms wordPresentation of ms word
Presentation of ms wordVaishnavi8950
 
Formatting features in microsoft word
Formatting features in microsoft wordFormatting features in microsoft word
Formatting features in microsoft wordRayadJahoor
 
Ms excel ppt presentation
Ms excel ppt presentationMs excel ppt presentation
Ms excel ppt presentationvethics
 
Ms word 2010
Ms word 2010Ms word 2010
Ms word 201047ishu
 
Introduction to MS WORD
Introduction to MS WORDIntroduction to MS WORD
Introduction to MS WORDMuhammad Irfan
 
Teaching Excel
Teaching ExcelTeaching Excel
Teaching Excelsam ran
 
Text formatting in ms word ppt
Text formatting in ms word pptText formatting in ms word ppt
Text formatting in ms word pptJosephclarin15
 
Microsoft Power Point
Microsoft Power PointMicrosoft Power Point
Microsoft Power PointOwly Eyes
 
Intro to Microsoft Word 2010 for Kids
Intro to Microsoft Word 2010 for Kids Intro to Microsoft Word 2010 for Kids
Intro to Microsoft Word 2010 for Kids Queens Library
 
Microsoft word ppt presentation
 Microsoft word  ppt presentation Microsoft word  ppt presentation
Microsoft word ppt presentationvethics
 
Parts of m.s word
Parts of m.s wordParts of m.s word
Parts of m.s wordJohn Lloyd
 

What's hot (20)

Introduction to microsoft word 2007
Introduction to microsoft word 2007Introduction to microsoft word 2007
Introduction to microsoft word 2007
 
Ms word Presentation
Ms word PresentationMs word Presentation
Ms word Presentation
 
All about shortcut keys
All about shortcut keysAll about shortcut keys
All about shortcut keys
 
Microsoft Word
Microsoft WordMicrosoft Word
Microsoft Word
 
Presentation of ms word
Presentation of ms wordPresentation of ms word
Presentation of ms word
 
Formatting features in microsoft word
Formatting features in microsoft wordFormatting features in microsoft word
Formatting features in microsoft word
 
Ms excel ppt presentation
Ms excel ppt presentationMs excel ppt presentation
Ms excel ppt presentation
 
Microsoft word basics
Microsoft word basicsMicrosoft word basics
Microsoft word basics
 
Ms word 2010
Ms word 2010Ms word 2010
Ms word 2010
 
Introduction to MS WORD
Introduction to MS WORDIntroduction to MS WORD
Introduction to MS WORD
 
Ms word 2007
Ms word 2007Ms word 2007
Ms word 2007
 
MS Word 2007
MS Word 2007MS Word 2007
MS Word 2007
 
Excel Tutorial
Excel TutorialExcel Tutorial
Excel Tutorial
 
Teaching Excel
Teaching ExcelTeaching Excel
Teaching Excel
 
Ms powerpoint 2013
Ms powerpoint 2013Ms powerpoint 2013
Ms powerpoint 2013
 
Text formatting in ms word ppt
Text formatting in ms word pptText formatting in ms word ppt
Text formatting in ms word ppt
 
Microsoft Power Point
Microsoft Power PointMicrosoft Power Point
Microsoft Power Point
 
Intro to Microsoft Word 2010 for Kids
Intro to Microsoft Word 2010 for Kids Intro to Microsoft Word 2010 for Kids
Intro to Microsoft Word 2010 for Kids
 
Microsoft word ppt presentation
 Microsoft word  ppt presentation Microsoft word  ppt presentation
Microsoft word ppt presentation
 
Parts of m.s word
Parts of m.s wordParts of m.s word
Parts of m.s word
 

Similar to Microsoft Office Word Introduction Complete

ICT Skills CBSE XI AI Resources for students
ICT Skills CBSE XI AI Resources for studentsICT Skills CBSE XI AI Resources for students
ICT Skills CBSE XI AI Resources for studentsricha527021
 
Bnet free indispensable_word_tips
Bnet free indispensable_word_tipsBnet free indispensable_word_tips
Bnet free indispensable_word_tipsChinmay Bande
 
Introduction to word processing
Introduction to word processingIntroduction to word processing
Introduction to word processingIddrisu Issah
 
Microsoft word 2007 part 1
Microsoft word 2007 part 1Microsoft word 2007 part 1
Microsoft word 2007 part 1kenjaneredz
 
Microsoft word
Microsoft wordMicrosoft word
Microsoft wordsonnpb
 
Microsoft office word 2003
Microsoft office word 2003Microsoft office word 2003
Microsoft office word 2003sasika fernando
 
Quickword How To
Quickword How ToQuickword How To
Quickword How Toqoipaduia
 
Quickword How To
Quickword How ToQuickword How To
Quickword How Toqoipaduia
 
Quickword How To
Quickword How ToQuickword How To
Quickword How Toqoipaduia
 
Quickword How To
Quickword How ToQuickword How To
Quickword How Toqoipaduia
 
Quickword How To
Quickword How ToQuickword How To
Quickword How Toqoipaduia
 
Quickword How To
Quickword How ToQuickword How To
Quickword How Toqoipaduia
 
Quickword How To
Quickword How ToQuickword How To
Quickword How Toqoipaduia
 
Quickword How To
Quickword How ToQuickword How To
Quickword How Toqoipaduia
 
Quickword How To
Quickword How ToQuickword How To
Quickword How Toqoipaduia
 
Quickword How To
Quickword How ToQuickword How To
Quickword How Toqoipaduia
 
Quickword How To
Quickword How ToQuickword How To
Quickword How Toqoipaduia
 
Quickword How To
Quickword How ToQuickword How To
Quickword How Toqoipaduia
 
Quickword How To
Quickword How ToQuickword How To
Quickword How Toqoipaduia
 

Similar to Microsoft Office Word Introduction Complete (20)

ICT Skills CBSE XI AI Resources for students
ICT Skills CBSE XI AI Resources for studentsICT Skills CBSE XI AI Resources for students
ICT Skills CBSE XI AI Resources for students
 
Bnet free indispensable_word_tips
Bnet free indispensable_word_tipsBnet free indispensable_word_tips
Bnet free indispensable_word_tips
 
Microsoft Word Intermediate
Microsoft Word  IntermediateMicrosoft Word  Intermediate
Microsoft Word Intermediate
 
Introduction to word processing
Introduction to word processingIntroduction to word processing
Introduction to word processing
 
Microsoft word 2007 part 1
Microsoft word 2007 part 1Microsoft word 2007 part 1
Microsoft word 2007 part 1
 
Microsoft word
Microsoft wordMicrosoft word
Microsoft word
 
Microsoft office word 2003
Microsoft office word 2003Microsoft office word 2003
Microsoft office word 2003
 
Quickword How To
Quickword How ToQuickword How To
Quickword How To
 
Quickword How To
Quickword How ToQuickword How To
Quickword How To
 
Quickword How To
Quickword How ToQuickword How To
Quickword How To
 
Quickword How To
Quickword How ToQuickword How To
Quickword How To
 
Quickword How To
Quickword How ToQuickword How To
Quickword How To
 
Quickword How To
Quickword How ToQuickword How To
Quickword How To
 
Quickword How To
Quickword How ToQuickword How To
Quickword How To
 
Quickword How To
Quickword How ToQuickword How To
Quickword How To
 
Quickword How To
Quickword How ToQuickword How To
Quickword How To
 
Quickword How To
Quickword How ToQuickword How To
Quickword How To
 
Quickword How To
Quickword How ToQuickword How To
Quickword How To
 
Quickword How To
Quickword How ToQuickword How To
Quickword How To
 
Quickword How To
Quickword How ToQuickword How To
Quickword How To
 

More from Raj vardhan

Software Testing Life Cycle Unit-3
Software Testing Life Cycle Unit-3Software Testing Life Cycle Unit-3
Software Testing Life Cycle Unit-3Raj vardhan
 
Internet Basics Unit-7
Internet Basics  Unit-7Internet Basics  Unit-7
Internet Basics Unit-7Raj vardhan
 
Local Area Network – Wired LAN
Local Area Network – Wired LANLocal Area Network – Wired LAN
Local Area Network – Wired LANRaj vardhan
 
Network Connecting Devices UNIT 5
Network Connecting Devices UNIT 5Network Connecting Devices UNIT 5
Network Connecting Devices UNIT 5Raj vardhan
 
UNIT 4-HEADER FILES IN C
UNIT 4-HEADER FILES IN CUNIT 4-HEADER FILES IN C
UNIT 4-HEADER FILES IN CRaj vardhan
 
Wireless LANs(IEEE802.11) Architecture
Wireless LANs(IEEE802.11) Architecture Wireless LANs(IEEE802.11) Architecture
Wireless LANs(IEEE802.11) Architecture Raj vardhan
 
UNIT -03 Transmission Media and Connecting Devices
UNIT -03 Transmission Media and Connecting Devices UNIT -03 Transmission Media and Connecting Devices
UNIT -03 Transmission Media and Connecting Devices Raj vardhan
 
Unit 1: Introduction to DBMS Unit 1 Complete
Unit 1: Introduction to DBMS Unit 1 CompleteUnit 1: Introduction to DBMS Unit 1 Complete
Unit 1: Introduction to DBMS Unit 1 CompleteRaj vardhan
 
Introduction To Software Concepts Unit 1 & 2
Introduction To Software Concepts Unit 1 & 2Introduction To Software Concepts Unit 1 & 2
Introduction To Software Concepts Unit 1 & 2Raj vardhan
 
Swachh Bharat Abhiyan - Project Report
Swachh Bharat Abhiyan - Project ReportSwachh Bharat Abhiyan - Project Report
Swachh Bharat Abhiyan - Project ReportRaj vardhan
 
Network Topology
Network TopologyNetwork Topology
Network TopologyRaj vardhan
 
Digital money Revolution Introduction
Digital money Revolution IntroductionDigital money Revolution Introduction
Digital money Revolution IntroductionRaj vardhan
 
Definition of Business
Definition of BusinessDefinition of Business
Definition of BusinessRaj vardhan
 
Business Terms & Concepts
Business Terms & ConceptsBusiness Terms & Concepts
Business Terms & ConceptsRaj vardhan
 
Number System Conversion | BCA
Number System Conversion | BCANumber System Conversion | BCA
Number System Conversion | BCARaj vardhan
 
Interaction With Computers FIT
Interaction With Computers FITInteraction With Computers FIT
Interaction With Computers FITRaj vardhan
 
FIT-MS-WORD Lab | BCA
FIT-MS-WORD Lab | BCAFIT-MS-WORD Lab | BCA
FIT-MS-WORD Lab | BCARaj vardhan
 
Syllabus Front End Design Tool VB.NET | BCA-205
Syllabus Front End Design Tool VB.NET | BCA-205 Syllabus Front End Design Tool VB.NET | BCA-205
Syllabus Front End Design Tool VB.NET | BCA-205 Raj vardhan
 
UNIT-II VISUAL BASIC.NET | BCA
UNIT-II VISUAL BASIC.NET | BCAUNIT-II VISUAL BASIC.NET | BCA
UNIT-II VISUAL BASIC.NET | BCARaj vardhan
 

More from Raj vardhan (20)

Software Testing Life Cycle Unit-3
Software Testing Life Cycle Unit-3Software Testing Life Cycle Unit-3
Software Testing Life Cycle Unit-3
 
Internet Basics Unit-7
Internet Basics  Unit-7Internet Basics  Unit-7
Internet Basics Unit-7
 
Local Area Network – Wired LAN
Local Area Network – Wired LANLocal Area Network – Wired LAN
Local Area Network – Wired LAN
 
Network Connecting Devices UNIT 5
Network Connecting Devices UNIT 5Network Connecting Devices UNIT 5
Network Connecting Devices UNIT 5
 
UNIT 4-HEADER FILES IN C
UNIT 4-HEADER FILES IN CUNIT 4-HEADER FILES IN C
UNIT 4-HEADER FILES IN C
 
Wireless LANs(IEEE802.11) Architecture
Wireless LANs(IEEE802.11) Architecture Wireless LANs(IEEE802.11) Architecture
Wireless LANs(IEEE802.11) Architecture
 
UNIT -03 Transmission Media and Connecting Devices
UNIT -03 Transmission Media and Connecting Devices UNIT -03 Transmission Media and Connecting Devices
UNIT -03 Transmission Media and Connecting Devices
 
Unit 1: Introduction to DBMS Unit 1 Complete
Unit 1: Introduction to DBMS Unit 1 CompleteUnit 1: Introduction to DBMS Unit 1 Complete
Unit 1: Introduction to DBMS Unit 1 Complete
 
Introduction To Software Concepts Unit 1 & 2
Introduction To Software Concepts Unit 1 & 2Introduction To Software Concepts Unit 1 & 2
Introduction To Software Concepts Unit 1 & 2
 
Swachh Bharat Abhiyan - Project Report
Swachh Bharat Abhiyan - Project ReportSwachh Bharat Abhiyan - Project Report
Swachh Bharat Abhiyan - Project Report
 
Network Topology
Network TopologyNetwork Topology
Network Topology
 
Digital money Revolution Introduction
Digital money Revolution IntroductionDigital money Revolution Introduction
Digital money Revolution Introduction
 
C Programming
C ProgrammingC Programming
C Programming
 
Definition of Business
Definition of BusinessDefinition of Business
Definition of Business
 
Business Terms & Concepts
Business Terms & ConceptsBusiness Terms & Concepts
Business Terms & Concepts
 
Number System Conversion | BCA
Number System Conversion | BCANumber System Conversion | BCA
Number System Conversion | BCA
 
Interaction With Computers FIT
Interaction With Computers FITInteraction With Computers FIT
Interaction With Computers FIT
 
FIT-MS-WORD Lab | BCA
FIT-MS-WORD Lab | BCAFIT-MS-WORD Lab | BCA
FIT-MS-WORD Lab | BCA
 
Syllabus Front End Design Tool VB.NET | BCA-205
Syllabus Front End Design Tool VB.NET | BCA-205 Syllabus Front End Design Tool VB.NET | BCA-205
Syllabus Front End Design Tool VB.NET | BCA-205
 
UNIT-II VISUAL BASIC.NET | BCA
UNIT-II VISUAL BASIC.NET | BCAUNIT-II VISUAL BASIC.NET | BCA
UNIT-II VISUAL BASIC.NET | BCA
 

Recently uploaded

Grant Readiness 101 TechSoup and Remy Consulting
Grant Readiness 101 TechSoup and Remy ConsultingGrant Readiness 101 TechSoup and Remy Consulting
Grant Readiness 101 TechSoup and Remy ConsultingTechSoup
 
Basic Civil Engineering first year Notes- Chapter 4 Building.pptx
Basic Civil Engineering first year Notes- Chapter 4 Building.pptxBasic Civil Engineering first year Notes- Chapter 4 Building.pptx
Basic Civil Engineering first year Notes- Chapter 4 Building.pptxDenish Jangid
 
Explore beautiful and ugly buildings. Mathematics helps us create beautiful d...
Explore beautiful and ugly buildings. Mathematics helps us create beautiful d...Explore beautiful and ugly buildings. Mathematics helps us create beautiful d...
Explore beautiful and ugly buildings. Mathematics helps us create beautiful d...christianmathematics
 
PROCESS RECORDING FORMAT.docx
PROCESS      RECORDING        FORMAT.docxPROCESS      RECORDING        FORMAT.docx
PROCESS RECORDING FORMAT.docxPoojaSen20
 
Unit-IV- Pharma. Marketing Channels.pptx
Unit-IV- Pharma. Marketing Channels.pptxUnit-IV- Pharma. Marketing Channels.pptx
Unit-IV- Pharma. Marketing Channels.pptxVishalSingh1417
 
Class 11th Physics NEET formula sheet pdf
Class 11th Physics NEET formula sheet pdfClass 11th Physics NEET formula sheet pdf
Class 11th Physics NEET formula sheet pdfAyushMahapatra5
 
1029 - Danh muc Sach Giao Khoa 10 . pdf
1029 -  Danh muc Sach Giao Khoa 10 . pdf1029 -  Danh muc Sach Giao Khoa 10 . pdf
1029 - Danh muc Sach Giao Khoa 10 . pdfQucHHunhnh
 
SOCIAL AND HISTORICAL CONTEXT - LFTVD.pptx
SOCIAL AND HISTORICAL CONTEXT - LFTVD.pptxSOCIAL AND HISTORICAL CONTEXT - LFTVD.pptx
SOCIAL AND HISTORICAL CONTEXT - LFTVD.pptxiammrhaywood
 
This PowerPoint helps students to consider the concept of infinity.
This PowerPoint helps students to consider the concept of infinity.This PowerPoint helps students to consider the concept of infinity.
This PowerPoint helps students to consider the concept of infinity.christianmathematics
 
Key note speaker Neum_Admir Softic_ENG.pdf
Key note speaker Neum_Admir Softic_ENG.pdfKey note speaker Neum_Admir Softic_ENG.pdf
Key note speaker Neum_Admir Softic_ENG.pdfAdmir Softic
 
Ecological Succession. ( ECOSYSTEM, B. Pharmacy, 1st Year, Sem-II, Environmen...
Ecological Succession. ( ECOSYSTEM, B. Pharmacy, 1st Year, Sem-II, Environmen...Ecological Succession. ( ECOSYSTEM, B. Pharmacy, 1st Year, Sem-II, Environmen...
Ecological Succession. ( ECOSYSTEM, B. Pharmacy, 1st Year, Sem-II, Environmen...Shubhangi Sonawane
 
SECOND SEMESTER TOPIC COVERAGE SY 2023-2024 Trends, Networks, and Critical Th...
SECOND SEMESTER TOPIC COVERAGE SY 2023-2024 Trends, Networks, and Critical Th...SECOND SEMESTER TOPIC COVERAGE SY 2023-2024 Trends, Networks, and Critical Th...
SECOND SEMESTER TOPIC COVERAGE SY 2023-2024 Trends, Networks, and Critical Th...KokoStevan
 
Making and Justifying Mathematical Decisions.pdf
Making and Justifying Mathematical Decisions.pdfMaking and Justifying Mathematical Decisions.pdf
Making and Justifying Mathematical Decisions.pdfChris Hunter
 
Measures of Dispersion and Variability: Range, QD, AD and SD
Measures of Dispersion and Variability: Range, QD, AD and SDMeasures of Dispersion and Variability: Range, QD, AD and SD
Measures of Dispersion and Variability: Range, QD, AD and SDThiyagu K
 
Gardella_PRCampaignConclusion Pitch Letter
Gardella_PRCampaignConclusion Pitch LetterGardella_PRCampaignConclusion Pitch Letter
Gardella_PRCampaignConclusion Pitch LetterMateoGardella
 
The basics of sentences session 2pptx copy.pptx
The basics of sentences session 2pptx copy.pptxThe basics of sentences session 2pptx copy.pptx
The basics of sentences session 2pptx copy.pptxheathfieldcps1
 

Recently uploaded (20)

INDIA QUIZ 2024 RLAC DELHI UNIVERSITY.pptx
INDIA QUIZ 2024 RLAC DELHI UNIVERSITY.pptxINDIA QUIZ 2024 RLAC DELHI UNIVERSITY.pptx
INDIA QUIZ 2024 RLAC DELHI UNIVERSITY.pptx
 
Grant Readiness 101 TechSoup and Remy Consulting
Grant Readiness 101 TechSoup and Remy ConsultingGrant Readiness 101 TechSoup and Remy Consulting
Grant Readiness 101 TechSoup and Remy Consulting
 
Basic Civil Engineering first year Notes- Chapter 4 Building.pptx
Basic Civil Engineering first year Notes- Chapter 4 Building.pptxBasic Civil Engineering first year Notes- Chapter 4 Building.pptx
Basic Civil Engineering first year Notes- Chapter 4 Building.pptx
 
Explore beautiful and ugly buildings. Mathematics helps us create beautiful d...
Explore beautiful and ugly buildings. Mathematics helps us create beautiful d...Explore beautiful and ugly buildings. Mathematics helps us create beautiful d...
Explore beautiful and ugly buildings. Mathematics helps us create beautiful d...
 
PROCESS RECORDING FORMAT.docx
PROCESS      RECORDING        FORMAT.docxPROCESS      RECORDING        FORMAT.docx
PROCESS RECORDING FORMAT.docx
 
Unit-IV- Pharma. Marketing Channels.pptx
Unit-IV- Pharma. Marketing Channels.pptxUnit-IV- Pharma. Marketing Channels.pptx
Unit-IV- Pharma. Marketing Channels.pptx
 
Class 11th Physics NEET formula sheet pdf
Class 11th Physics NEET formula sheet pdfClass 11th Physics NEET formula sheet pdf
Class 11th Physics NEET formula sheet pdf
 
1029 - Danh muc Sach Giao Khoa 10 . pdf
1029 -  Danh muc Sach Giao Khoa 10 . pdf1029 -  Danh muc Sach Giao Khoa 10 . pdf
1029 - Danh muc Sach Giao Khoa 10 . pdf
 
SOCIAL AND HISTORICAL CONTEXT - LFTVD.pptx
SOCIAL AND HISTORICAL CONTEXT - LFTVD.pptxSOCIAL AND HISTORICAL CONTEXT - LFTVD.pptx
SOCIAL AND HISTORICAL CONTEXT - LFTVD.pptx
 
This PowerPoint helps students to consider the concept of infinity.
This PowerPoint helps students to consider the concept of infinity.This PowerPoint helps students to consider the concept of infinity.
This PowerPoint helps students to consider the concept of infinity.
 
Key note speaker Neum_Admir Softic_ENG.pdf
Key note speaker Neum_Admir Softic_ENG.pdfKey note speaker Neum_Admir Softic_ENG.pdf
Key note speaker Neum_Admir Softic_ENG.pdf
 
Ecological Succession. ( ECOSYSTEM, B. Pharmacy, 1st Year, Sem-II, Environmen...
Ecological Succession. ( ECOSYSTEM, B. Pharmacy, 1st Year, Sem-II, Environmen...Ecological Succession. ( ECOSYSTEM, B. Pharmacy, 1st Year, Sem-II, Environmen...
Ecological Succession. ( ECOSYSTEM, B. Pharmacy, 1st Year, Sem-II, Environmen...
 
SECOND SEMESTER TOPIC COVERAGE SY 2023-2024 Trends, Networks, and Critical Th...
SECOND SEMESTER TOPIC COVERAGE SY 2023-2024 Trends, Networks, and Critical Th...SECOND SEMESTER TOPIC COVERAGE SY 2023-2024 Trends, Networks, and Critical Th...
SECOND SEMESTER TOPIC COVERAGE SY 2023-2024 Trends, Networks, and Critical Th...
 
Making and Justifying Mathematical Decisions.pdf
Making and Justifying Mathematical Decisions.pdfMaking and Justifying Mathematical Decisions.pdf
Making and Justifying Mathematical Decisions.pdf
 
Measures of Dispersion and Variability: Range, QD, AD and SD
Measures of Dispersion and Variability: Range, QD, AD and SDMeasures of Dispersion and Variability: Range, QD, AD and SD
Measures of Dispersion and Variability: Range, QD, AD and SD
 
Advance Mobile Application Development class 07
Advance Mobile Application Development class 07Advance Mobile Application Development class 07
Advance Mobile Application Development class 07
 
Mattingly "AI & Prompt Design: The Basics of Prompt Design"
Mattingly "AI & Prompt Design: The Basics of Prompt Design"Mattingly "AI & Prompt Design: The Basics of Prompt Design"
Mattingly "AI & Prompt Design: The Basics of Prompt Design"
 
Gardella_PRCampaignConclusion Pitch Letter
Gardella_PRCampaignConclusion Pitch LetterGardella_PRCampaignConclusion Pitch Letter
Gardella_PRCampaignConclusion Pitch Letter
 
The basics of sentences session 2pptx copy.pptx
The basics of sentences session 2pptx copy.pptxThe basics of sentences session 2pptx copy.pptx
The basics of sentences session 2pptx copy.pptx
 
Mehran University Newsletter Vol-X, Issue-I, 2024
Mehran University Newsletter Vol-X, Issue-I, 2024Mehran University Newsletter Vol-X, Issue-I, 2024
Mehran University Newsletter Vol-X, Issue-I, 2024
 

Microsoft Office Word Introduction Complete

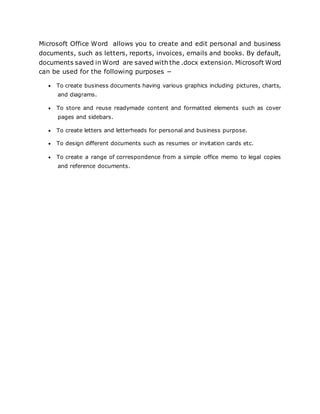
  • 1. Microsoft Office Word allows you to create and edit personal and business documents, such as letters, reports, invoices, emails and books. By default, documents saved in Word are saved with the .docx extension. Microsoft Word can be used for the following purposes −  To create business documents having various graphics including pictures, charts, and diagrams.  To store and reuse readymade content and formatted elements such as cover pages and sidebars.  To create letters and letterheads for personal and business purpose.  To design different documents such as resumes or invitation cards etc.  To create a range of correspondence from a simple office memo to legal copies and reference documents.
  • 2. following is the basic window which you get when you start the Word application. Let us understand the various important parts of this window..
  • 3. File Tab The File tab replaces the Office button from Word 2007. You can click it to check the Backstage view. This is where you come when you need to open or save files, create new documents, print a document, and do other file- related operations. Quick Access Toolbar This you will find just above the File tab. This is a convenient resting place for the mostf requently used commands in Word. You can customize this toolbar based on your comfort. Ribbon Ribbon contains commands organized in three components −  Tabs − These appear across the top of the Ribbon and contain groups of related commands. Home, Insert, Page Layout are examples of ribbon tabs.  Groups − They organize related commands; each group name appears below the group on the Ribbon. For example, group of commands related to fonts or group of commands related to alignment, etc.  Commands − Commands appear within each group as mentioned above. Title bar This lies in the middle and at the top of the window. Title bar shows the program and document titles. Rulers Word has two rulers - a horizontal ruler and a vertical ruler. The horizontal ruler appears just beneath the Ribbon and is used to set margins and tab stops. The vertical ruler appears on the left edge of the Word window and is used to gauge the vertical position of elements on the page.
  • 4. View Buttons The group of five buttons located to the left of the Zoom control, near the bottom of the screen, lets you switch through the Word's various document views.  Print Layout view − This displays pages exactly as they will appear when printed.  Full Screen Reading view − This gives a full screen view of the document.  Web Layout view − This shows how a document appears when viewed by a Web browser, such as Internet Explorer.  Outline view − This lets you work with outlines established using Word’s standard heading styles.  Draft view − This formats text as it appears on the printed page with a few exceptions. For example, headers and footers aren't shown. Most people prefer this mode. Go To Command Press the F5 key to use the Go To command. This will display a dialogue box where you will have various options to reach to a particular page. Normally, we use the page number, the line number or the section number to go directly to a particular page and finally press the Go To button.
  • 5. Selecting a text is one of the most important skills required while editing a word document. You can perform various operations on a selected text; you can delete the selected text, copy it, move it, apply formatting to it, change its capitalization, etc. The most common method of selecting a text is to click and drag the mouse over the text you want to select. Following table lists down a few other simple methods that will help you in selecting text in different scenarios − S.No Component & Selection Method 1 Selecting text between two points Click at the start of the block of text, hold down Shift, and click at the end of the block. 2 Selecting a single word Double-click anywhere on the word you want to select. 3 Selecting a paragraph Triple-click anywhere on the paragraph you want to select. 4 Selecting a sentence Hold down the Ctrl key and click anywhere in the sentence you want to select. 5 Selecting a column of text Hold down Alt, click and hold the mouse button, and drag over the column you want to select. Note that only one part of the document can be in the selected state. If you have one portion of the document in selected state and as soon as you try to select any other part of the document, previous part will automatically be de- selected.
  • 6. Using the Keyboard Keyboard provides very good support when you want to select various components of the document as described in the following table − S.No Key & Selection Method Selecting Text 1 Ctrl + A Press Ctrl + A keys to select the entire document. 2 Shift Keep pressing the Shift key and use any of the arrow keys to select the portion of text. 3 F8 Press F8 and then use any of the arrows keys to select the portion of text. 4 Ctrl + Shift + F8 Press Ctrl + Shift + F8 and then use any of the arrows keys to select column of the text.
  • 7. Copy & Paste Operation The Copy operation will just copy the content from its original place and create a duplicate copy of the content at the desired location without deleting the text from it's the original location. Following is the procedure to copy the content in word − Step 1 − Select a portion of the text using any of the text selection methods. Step 2 − You have various options available to copy the selected text in clipboard. You can make use of any one of the options −  Using Right-Click − When you right-click on the selected text, it will display the copy option, click this option to copy the selected content in clipboard.  Using Ribbon Copy Button − After selecting text, you can use the copy button available at the ribbon to copy the selected content in clipboard.  Using Ctrl + c Keys − After selecting a text, just press Ctrl + c keys to copy the selected content in clipboard.
  • 8. Step 3 − Finally click at the place where you want to copy the selected text and use either of these two simple options −  Using Ribbon Paste Button − Just click the Paste button available at the ribbon to paste the copied content at the desired location.  Using Ctrl + v Keys − This is simplest way of pasting the content. Just press Ctrl + v keys to paste the content at the new location. Find and replace option We assume you are an expert in searching a word or phrase in a word document as explained above. This section will teach you how you can replace an existing word in your document. Following are the simple steps − Step 1 − Click the Replace option in the Editing group on the Home tab or press Ctrl + H to launch the Find and Replace dialog box shown in Step 2
  • 9. Type a word which you want to search. You can also replace the word using the Find and Replace dialog box as in the following screenshot − Type a word which you want to search. You can also replace the word using the Find and Replace dialog box as in the following screenshot − Step 3 − Click the Replace button available on the Find and Replace dialog box and you will see the first occurrence of the searched word would be replaced with the replace with word. Clicking again on Replace button would replace next occurrence of the searched word. If you will click Replace Allbutton then it would replace all the found words in one go. You can also use Find Next button just to search the next occurence and later you can use Replace button to replace the found word.
  • 10. Check Spelling and Grammar using Review tab Here is the simple procedure to find out the spelling mistakes and fix them − Step 1 − Click the Review tab and then click the Spelling & Grammarbutton. A Spelling and Grammar dialog box will appear and will display the wrong spellings or errors in grammar. You will also get suggestions to correct as shown below −
  • 11. Now you have following options to fix the spelling mistakes −  Ignore − If you are willing to ignore a word, then click this button and Word ignores the word throughout the document.  Ignore All − Like Ignore, but this ignores all occurrences of the same misspelling, not just once but throughout the document.  Add to Dictionary − Choose Add to Dictionary to add the word to the Word spelling dictionary.  Change − This will change the wrong word using the suggested correct word.  Change All − Like Change, but this changes all occurrences of the same misspelling, not just once but throughout the document.  AutoCorrect − If you select a suggestion, Word creates an AutoCorrect entry that automatically corrects this spelling error from Step 3 − Select one of the given suggestions you want to use and click the Change option to fix the spelling or grammar mistake and repeat the step to fix all the spelling or grammar mistake. Step 4 − Word displays a dialog box when it finishes checking for spelling and grammar mistakes, finally Click OK.
  • 12. Shortcuts to use Undo & Repeat operations Though you can access the Undo and Repeat commands from the Quick Access toolbar, but because these commands are the most frequently used commands, we recommend you memorize their keyboard shortcuts which are as follows − S.No Shortcuts & Operation 1 Ctrl + Z Undoes the previous action. 2 Ctrl + Y Repeats the previous action. Clear Formatting Options All of the setting can be reset to plain text, or the default formatting. To reset text to default settings − Step 1 − Select the portion of text that you want to reset. Step 2 − Click the Clear Formatting button in the Home tab Font group, or simply use Ctrl + SPACEBAR.
  • 13. we will discuss how to change text cases in Word You can also capitalize a character you are typing by pressing and holding the SHIFT key while you type. You can also press the CAPS LOCK to have every letter that you type capitalized, and then press the CAPS LOCK again to turn off capitalization. Change Text to Sentence Case A sentence case is the case where the first character of every sentence is capitalized. It is very simple to change the selected portion of text into sentence case by following two simple steps − Step 1 − Select the portion of text that that needs to be put in sentence case. You can use any of the text selection methods to select the portion of text. Step 2 − Click the Change Case button and then select the Sentence Case option to capitalize the first character of every selected sentence. Change Text to Lowercase Changing text to lowercase is where every word of a sentence is in lowercase. It is very simple to change a selected portion of text into lowercase by following two simple steps − Step 1 − Select the portion of text that needs to be put in lowercase. You can use any of the text selection methods to select the portion of text. Step 2 − Click the Change Case button and then select Lowercase option to display all the selected words in lowercase.
  • 14. Change Text to Uppercase This is where every word of a sentence is in uppercase. It is very simple to change selected text into uppercase by following two simple steps − Step 1 − Select the portion of text that you want to change to a bold font. You can use any of the text selection method to select the portion of text. Step 2 − Click the Change Case button and then select UPPERCASE option to display all selected words in all caps. All characters of every selected word will be capitalized.
  • 15. Toggle the Text The Toggle operation will change the case of every character in reverse way. A capital character will become a character in lower case and a character in lower case will become a character in upper case. It is very simple to toggle case of the text by following two simple steps − Step 1 − Select the portion of text that you want to change to a bold font. You can use any of the text selection method to select the portion of text. Step 2 − Click the Change Case button and then select the tOGGLE cASEoption to change all the words in lowercase into words in uppercase; the words in uppercase words change to words in lowercase. Highlight Text with Colors You can highlight a selected portion of text using any color and it will look like it was marked with a highlighter pen. Usually we highlight a text using yellow color. It is very simple to highlight a portion of text with a color by following two simple steps Step 1 − Select the portion of text that needs to be highlighted with color. You can use any of the text selection method to select the portion of text. Step 2 − Click the Text Highlight Color button triangle to display a list of colors. Try to move your mouse pointer over different colors and you will see the text color changes automatically. You can select any of the colors available by simply clicking over it. If you click at the left portion of the Text Highlight Color button, then the selected color gets applied to the portion of text automatically; you need to click over the small triangle to display a list of colors. we will discuss the how to indent paragraphs in Word. As you know the margin settings determine the blank space that appears on each side of a paragraph. You can indent paragraphs in your document from the left margin, the right margin, or both the margins. This chapter will teach you how to indent your paragraphs with or without the first line of the paragraphs.
  • 16. Left Indentation Left indentation means to move the left edge of the paragraph inward towards the center of the paragraph. Let us use the following steps to create left indentation. Step 1 − Click anywhere on the paragraph you want to indent left and click the Increase Indent button available on the Home tab or simply press the Ctrl + M keys. You can click multiple times to create deeper indentation Microsoft word provides bullets and numbers to put a list of items in a nice order. This chapter will teach you simple steps to create either the bulleted or the numbered lists in simple steps. Create a List from Existing Text This is very simple to convert a list of lines into a bulleted or numbered list. Following are the simple steps to create either bulleted list or numbered list. Step 1 − Select a list of text to which you want to assign bullets or numbers. You can use any of the text selection method to select the portion of text. Step 2 − Click the Bullet Button triangle to display a list of bullets you want to assign to the list. You can select any of the bullet style available by simply clicking over it. we will discuss how to add header and footer in Word 2010. Headers and footers are parts of a document that contain special information such as page numbers and the total number of pages, the document title, company logo, any photo, etc. The header appears at the top of every page, and the footer appears at the bottom of every page. Add Header and Footer The following steps will help you understand how to add header and footer in a Word document.
  • 17. Step 1 − Click the Insert tab, and click either the Header button or the Footer button that which needs to be added first. Assume you are going to add Header; when you click the Header button it will display a list of built-in Headers from where you can choose any of the headers by simply clicking on Create a Table The following steps will help you understand how to create a table in a Word document. Step 1 − Click the Insert tab followed by the Table button. This will display a simple grid as shown below. When you move your mouse over the grid cells, it makes a table in the table that appears in the document. You can make your table having the desired number of rows and columns. Step 2 − Click the square representing the lower-right corner of your table, which will create an actual table in your document and Word goes in the table design mode. The table design mode has many options to work with as shown below.
  • 18. This is an optional step that can be worked out if you want to have a fancy table. Click the Table Styles button to display a gallery of table styles. When you move your mouse over any of the styles, it shows real time preview of your actual table.
  • 19. Step 4 − To select any of the styles, just click the built-in table style and you will see that the selected style has been applied on your table.
  • 20. Delete a Table Following are the simple steps to delete an existing table from a word document. Step 1 − Click anywhere in the table you want to delete. Step 2 − Click the Layout tab, and click the Delete Table option under the Delete Table Button to delete the complete table from the document along with its content.
  • 21. Merging Cells The following steps will help you merge table cells in a Word document. Step 1 − Bring your mouse pointer position inside the first cell that you want to merge. Now press the Shift key and click the cells around the cell which you want to merge into the first cell. This will highlight the cells which you click and they will be ready to be merged.
  • 22. Step 2 − Now click the Layout tab and then click the Merge Cells button which will merge all the selected cells. Split a Cell
  • 23. The following steps will help you split a cell into two sub-cells of a table available in word document. Step 1 − Bring your mouse pointer position inside the cell that has to be divided into multiple cells.
  • 24. Add a Formula Following are the simple steps to add formula in a table cell available in Word document. Step 1 − Consider the following table with the total number of rows. Click in a cell that should contain the sum of the rows. Step 2 − Now click the Layout tab and then click the Formula button; this will display a Formula Dialog Box which will suggest a default formula, which is =SUM(LEFT) in our case. You can select a number format using Number Format List Box to display the result or you can change the formula using the Formula List Box.
  • 25. Step 3 − Now click OK to apply the formula and you will see that the left cells have been added and the sum has been put in the total cell where we wanted to have it. You can repeat the procedure to have the sum of other two rows as well.
  • 26.
  • 27. Adding Picture in Document The following steps will help you add an existing picture in your word document. It is assumed that you already have a picture available on your machine before you add this picture in your Word document. Step 1 − Click on your document where you want to add a picture. Step 2 − Click the Insert tab and then click the Picture option available in illustrations group, which will display the Insert Picture dialog box.
  • 28. Step 3 − You can select a required picture using the Insert Picture dialog box. When you will click the Insert button, selected picture will be inserted in your document. You can play with your inserted picture in different ways, like you can apply quick styles to your picture, you can resize it, or you can change its color too. To try it, just -lick your inserted image and Word will give you numerous options available under the Format tab to format your inserted graphics.
  • 29. we will discuss how to create table of contents in Word 2010. A table of contents (or TOC) is a list of headings in the order in which they appear in the document. You can set a list of headings which should be a part of the table of contents. Let us learn how to create a Table of Contents. A table of content helps in navigating through a Word document by providing associated page numbers and direct links to various headings available on those pages. Create Table of Contents The following will help you to create Table of Contents in your Microsoft Word using various levels of headings. Step 1 − Consider a document having different levels of headings. Step 2 − You can insert a table of content anywhere in the document, but the best place is always at the beginning of the document. So bring your insertion point at the beginning of the document and then click the References tabfollowed by the Table of Content button; this will display a list of Table of Contents options.
  • 30. Step 3 − Select any of the displayed options by simply clicking on it. A table of content will be inserted at the selected location.
  • 31. Step 4 − You can select number of levels of headings in your table of content. If you click on the Insert Table of Content option available in the option menu, then it will show you a dialog box where you can select the number of levels you want to have in your table of content. You can turn ON or turn OFF the Show Page Numbers option. Once done, click the OK button to apply the options. Delete Table of Contents The following steps will help you delete an existing Table of Contents from Microsoft Word. Step 1 − Consider you already have a table of content as shown above. Click the References tab and next Table of Contents button which will display a list of Table of Contents options along with Remove Table of Contentsoption available at the bottom.