3. Introduction
•Chest radiography is the most common radiographic procedure
performed in medical imaging departments, and one of the most
often repeated exams. It is a projection radiograph of the chest
used to diagnose conditions affecting the chest, its contents, and
nearby structures. Chest radiography is performed to evaluate the
lungs, heart and thoracic viscera. Additionally, disease processes
such as pneumonia, heart failure, pleurisy and lung cancer, Hiatal
hernia, Bone fracture, Interstitial lung disease, etc.
3
5. Indications
•Pain
•Shortness of breathing
•Trauma pneumothorax, hemothorax
•Fractures of bone of thorax
•Infections TB, pneumonia
•Cardiac investigations, cardiomegaly, heart failure
•Pulmonary investigations Pulmonary embolus, emphysema,
COPD, pulmonary effusion, pulmonary edema
•Carcinomas primary, metastases, mesothelioma
•Inhalation of foreign body pneumoconiosis
5
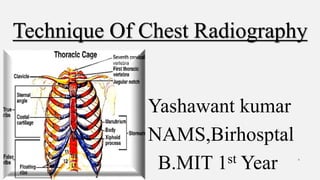
6. Anatomy of chest
The thoracic cavity (or chest cavity) is the chamber of the body of
vertebrates that is protected by the thoracic wall (rib cage and
associated skin, muscle, and fascia). The central compartment of the
thoracic cavity is the mediastinum.
•A typical human rib cage consists of 24 ribs, the sternum (with
xiphoid process),
•costal cartilages, and the 12 thoracic vertebrae.
•A pair of clavicle .
•Lungs
•Mediastinum
6
8. Lungs
•There are 2 lungs, one lying on each side of midline in thoracic
cavity.
•Apex is above the clavicle into root of neck.
• Base rest obliquely on diaphragm.
•Right lung is shorter than left because of large space occupied by
liver & is broader than left because the heart is located towards left
side.
•The diaphragm separates thoracic cavity from abdominal cavity.
• The right hemidiaphragm is about 1.5 cm higher than the left.
• Both costophrenic angles are sharply outlined. 8
9. The portion of left lobe that
corresponds in position to
right middle lobe is lingula
9
10. Mediastinum
• Space between 2 pleural cavities is
mediastinum which contains all thoracic
structures except lungs & pleurae.
• They are heart, great vessels, trachea,
esophagus, thymus, azygos & hemiazygos
vein, lymphatic, nerve, and fat.
• Mediastinal surface has hilum in each lung
that accommodates bronchi, pulmonary
blood vessels, lymph vessels & nerves.
• The hilar regions appear as region of high
radio opacity. 10
11. Contid…
• Inferior mediastinal surface of left lung
contains cardiac notch which conforms
shape of heart.
• The heart is seen as soft tissue with its
apex & inferior wall adjacent to
diaphragm.
• The size of heart is estimated by
calculating cardiothoracic ratio.
• Aortic knuckle is seen to the left of
vertebrae & above the heart shadow 11
13. Technical view(prospect)
•Ask the patient remove all radiopaque material from lungs area.
•Side identification marker must be kept in proper position.
Respiration
•Exposure is normally made on arrested full inspiration to ensure
maximum visualization of air-filled lungs.
•A brief explanation of procedure & rehearsal is beneficial.
•On inspiration, there is a tendency to raise the shoulders, which should
be avoided, as the shadows of the clavicles then obscure the lung
apices. 13
14. Contd..
•Radiographs of heart should be taken at the end of normal inspiration
to prevent distortion.
•Expiratory film is taken in case of suspected pneumothorax,
suspected bronchial obstruction (in case of child) & to demonstrate
movement of diaphragm.
14
15. Exposure factor :-
•Involuntary subject movement reduced by the selection of shortest
exposure time preferably in millisecond range. (Ideally, it is less than
20ms)
•Imaging without a grid is selected when a low-kVp technique is
preferred (mobile x-ray). And grid is selected when high kVp
technique is used for the absorption of scattered radiation .(usually 10:
1 grid ratio used )
•To obtain minimal magnification of the intra-thoracic structures,
especially the heart, FFDs in the range of 150–180 cm are selected.
•The focal spot size should be less than 1.3 mm. 15
16. High kVp
•In general, 60–70 kVp provides adequate penetration for the postero-
anterior projection.
•A high-kilovoltage technique (120–150 kVp), appropriate to the film
speed, enables visualization of the lung fields and mediastinum with
one exposure.
•This technique also have advantage of low radiation dose.
•With this technique there is a loss of subject contrast and therefore
visualization of small lesions of soft-tissue density & ribs becomes
difficult.
•Additionally, rib lesions are more difficult to visualize .
16
17. Contd..
•A range of kilovoltages (80–100 kVp) midway between nongrid and
high kilovoltages is used to compromise between the advantages and
disadvantages of the two techniques.
•In expiration technique, kVp must be increased and in emphysema
patients, kVp must be decreased.
17
18. Rotation
•Obliquity causes the side of the chest furthest removed from the
film plane to appear enlarged and hypodense, whilst the other side
is partially obscured by the spine and more dense.
•Asymmetric appearance of SC joint from the spinous process.
•In lateral projection, no superimposition of posterior ribs.
•A thoracic scoliosis may produce similar artefacts .
18
19. Radiation protection
•An adjustable rectangular diaphragm is used to collimate the
radiation field to the size of lung fields.
•The patient is provided with a waist-fitting lead-rubber apron.
•Avoid irradiation of the eyes and thyroid.
19
20. Reason of erect film?
•Positioning is simplified
•Control of respiration is more satisfactory
•The gravity effect on the diaphragm & abdominal organs allows
for the disclosure of the maximum area of lung tissue
•It prevents enlargement of blood vessels of lung &
mediastinum.
20
21. Chest PA view
Position of patient
21
• Patient stands or sits facing the vertical Bucky
with chin raised and placed in top of cassette.
• The feet are placed slightly apart so that the
patient is able to remain steady.
• The top of cassette should be 2 inch above the
shoulder of patient.
• Elbows flexed and the dorsal aspect of hand placed on hips and
brought well forward, so scapula out of lung fields. This can also be
achieved by allowing the arms to encircle the cassette.
22. CR(central ray)
•Center ray perpendicular to image receptor(IR) midpoint between
scapula at level T7.
Equipment setting or Exposure factor:-
22
KvP MA Time mAs FFD grid Focus size
80 300 0.07 21 180CM yes large 14*14
23. Image criteria
•Entire lung fields from apices to costophrenic angles
•No rotation, the sternal ends of the clavicle should be
equidistant from the vertebral column & clavicle not
obscuring lung apices.
•The scapulae should be clear of the lung fields.
•The lungs well inflated, i.e. it should be possible to visualize
either six ribs anteriorly or ten ribs posteriorly.
•Heart & diaphragm outlined clearly. 23
25. Chest lateral view
Left lateral is most commonly done because it places heart closer to
IR, resulting in a less magnified heart image.
Indication:-
•Localization of structures seen on PA film (opacity, lesions)
•More sensitive for abdominal free air
•Further view of lungs, especially those areas obscured on PA
film. E.g. posterior segments of lower lobes, areas behind hila,
left lower lobe, anterior mediastinal masses.
25
26. Standing or Erect position
Patient position :-
•The patient stands (feet slightly apart for stability) erect left
(normally unless right lateral is indicated) side to the cassette in
vertical Bucky.
•Median sagittal plane is adjusted parallel to the film. The patient’s
arms are folded over the head or raised above the head to rest on a
horizontal bar. The chin is raised up.
•The cassette is adjusted to include the apices & the lower lobes of the
level of the 1st lumbar vertebra. 26
27. CR(Centering ray):-
•The horizontal central ray is centered to mid-axillary line at the level
of T6/7 at a level midway between the xiphisternum and the sternal
angle.
27
28. Ventral or dorsal decubitus position
•It is alternative for medically unable persons & to visualize fluid
levels.
Position of patient:-
•The patient is in prone or supine position.
•The thorax is elevated 2 to 3 inches on folded sheets or a firm pad,
centering the thorax of affected side to the grid.
•The patient’s arm is extended well above the head.
•Adjust the top of the cassette to the level of thyroid cartilage.
28
29. CR:-
•The horizontal central ray is centered to mid-coronal plane & 3 to 4
inches below the jugular notch for dorsal decubitus & at T7 for the
ventral decubitus.
29
31. Image criteria
•Superimposition of ribs posteriorly to vertebra.
•Lateral thoracic vertebrae.
•Arm & chin not overlapping lung fields.
•Long axis of entire lung fields demonstrated in
vertical position without forward or backward
leaning.
•Lateral sternum with no rotation.
•Sharp outline of heart & diaphragm.
•Hilum in approximate center of the radiograph. 31
32. Chest AP view
Indications :-
It is alternative to PA projection for
•Elucidation of opacity seen on PA
•Patient with kyphosis
•Medical condition of the patient
Position of patients: -
Erect :-
32
33. Contd…
•Patient stands or sits with their back against the cassette.
•The top of cassette should be 2 inch above the shoulder of patient.
•If the medical condition of patient allows, the shoulders are brought
downward & forward, with the backs of hands below the hips & the
elbows well forward to project the scapulae clear of the lung fields.
•In the unwell patient, the patient’s arm are rotated laterally &
supported with palms of hands facing forward.
Supine :-
This projection is performed when patient is unable to stand or sit for PA
or AP projection. 33
34. Patients position :-
•The patient is already in supine position.
•A cassette is carefully placed under the patient’s chest with the top of
cassette 2 inch above the shoulder of patient.
•The chin is slightly raised.
•The patient’s arm are rotated laterally & supported with palms of
hands supine.
CR:-
•Center ray is first directed perpendicular to the cassette towards the
sternal notch & then angled until it is coincident with the middle of
cassette to avoid exposure to the eyes. 34
36. Equipment setting:-
KvP mA Time mAs FDD Grid Focus Size
80 300 0.06 18 120cm Yes Large 14*14
36
Picture criteria:
• Entire lung fields from apices to costophrenic angles.
• No rotation, the medial portion of the clavicle should be
equidistant from the vertebral column.
• Equal distance from vertebral column to lateral border of
ribs on each side.
• Heart, mediastinum & diaphragm outlined clearly.
37. Reason for PA over AP
•Heart magnification is reduced.
•Radiation dose to thyroid, eye & breast tissue is reduced.
•Arms can be arranged easily to enable scapulae out of the lung
fields.
•Clavicle is more horizontally directed in AP.
Penetrated PA:
•It is useful for visualization of cardiac chamber, left lower lobe &
lesions obscured by heart & diaphragms.
37
38. CHEST-PA OBLIQUE
(ANTERIOR OBLIQUE)
Indication:
• Separation of heart, aorta & vertebral column
•Cardiac studies
•Peripheral small lesion
Position of patient :-
•Patient stands or sits for PA projection.
•The top of cassette should be 2 inch above the shoulder of patient.38
39. Contd…
•Rotate the patient 45 degrees to place the affected sided shoulder in
contact with the cassette & center the thorax to the cassette
•Then the patient is allowed to place the affected sided hand on the hip
with the palm outward & the other arm is raised to shoulder level to
grasp the top of the Bucky.
CR:-
•Center ray is directed perpendicular to the cassette at the level of T7.
39
41. Image criteria
41
• Both lung fields in their entirety.
• Heart & mediastinal structures within the
lung field of elevated side in oblique
images.
• Maximum area of right lung on the LAO
& maximum area of left lung on the RAO.
42. CHEST-AP OBLIQUE
(RPO & LPO)
•It is performed when the patient is too ill & in case of lesions.
•Posterior aspect of affected side is towards the IR & unaffected side
raised.
•Maximum area of left lung on LPO & maximum area of right lung in
RPO.
42
43. CHEST-LORDOTIC VIEW
Indication:-
•Pain & tingling of arm & chest
•Clearer depiction of apices
•Inter lobar effusion
•Tumor
Position of patient:-
•The patient is placed for PA projection.
•Adjust the upper border of the cassette 3 inches above the shoulder.
43
44. Contd…
•Then patient is allowed to clasp the sides of vertical bucky & the
patient bends backward at the waist about 30-40 degrees.
CR:-
•Horizontal ray is perpendicular to the middle of the cassette at the level
of T3.
Equipment setting:-
44
kVp mA Time mAs FDD Grid Focus Size
80 300 0.08 24 150cm Yes Large 14*14
45. Image criteria :-
45
• Clavicles lying superior to the
apices.
• Sternal ends of clavicles
equidistant from vertebral
column.
• Apices & lungs in their
entirety.
• The apex scapulae should be
clear of the lung fields.
46. CHEST-APICES
Indication:-
•Pain & tingling of arm & chest
•Clearer depiction of apices
•Inter lobar effusion
• Tumor
Modified PA projection
Position of patient:-
•The patient is placed for PA projection.
•Then patient is allowed to clasp the sides of vertical Bucky.
46
47. Contd…
CR:-
•Central ray is angled 30 degrees caudally towards 7th cervical spinous
process coincident with the sternal angle.
47
48. Contd…
48
Modified AP projection
Position of patient:-
• The patient is placed for AP projection.
• Adjust the upper border of the cassette 3
inches above the shoulder.
CR:-
• Central ray is angled 30 degrees cephalad
towards the sternal angle.
49. Contd…
Modified AP with coronal plane angled
Position of patient:-
•The patient is placed in reclining position with their back
against the cassette.
•Coronal plane of the patient body is at 30 degrees to the
cassette so that the nape of the neck could be rest against the
upper border of the cassette.
•Adjust the upper border of the cassette 3 inches above the
shoulder. 49
50. Contd…
CR:-
•Central ray is perpendicular to the cassette towards the sternal angle.
•Alternately if the patient is unable to recline 30 degrees, the patient is
reclined to 15 degrees with the tube angled 15 degrees cephalad
towards the sternal angle.
Equipment setting:-
50
kVp mA Time mAs FFD Grid Focus size
80 300 0.08 24 150cm Yes Large 14*14
51. Contd..
Picture criteria:
•Clavicles lying superior to the apices.
•Sternal ends of clavicles equidistant-
from vertebral column.
•Apices in their entirety.
•Clavicles lying horizontally with their medial end overlapping
only the first or second ribs.
•The apex scapulae should be clear of the lung fields
51
52. STERNUM-ANTERIOR OBLIQUE (PA OBLIQUE
VIEW)
Indications:-
•Trauma
•Pain
•Fracture of sternum
•Swelling on sternum
•Infection/inflammation on sternum area
(osteomyelitis, osteoporosis)
•Congenital Abnormality e.g. Pigeon chest
52
53. Position of patient
•The patient sits or stands facing the vertical Bucky or lies prone on the
table with the right side raised (LAO) approximately 15-20 degrees,
right arm and knee of the raised side to aid stability.
•Align the patient so that long axis of sternum is centered to midline of
cassette.
•The patient is allowed to breathe gently (swallow breathing) during an
exposure time of several seconds using low mA. Or the patient is
allowed to suspend breathing at the end of expiration when short
exposure time is to be used.
53
54. Contd…
CR:
•The vertical central ray is perpendicular towards a point 7.5cm lateral
to 5th thoracic vertebra on the side nearest to x-ray tube.
Equipment setting:-
54
kVp mA Time mAs FDD Grid Focus Size
80 300 0.15 45 150cm yes Large 10*12
55. Contd…
Image criteria:-
•Entire sternum from jugular notch to tip of the xiphoid process.
•Minimally rotated sternum just free of superimposition from vertebral
column.
55
56. STERNUM-LATERAL VIEW
Position of patient:
ERECT:-
•Place the patient in front of vertical Bucky with lateral side touching it.
•The median sagittal plane is parallel to the erect Bucky.
•The hands are clasped together behind the patients back & the
shoulders are pulled back.
•Adjust the upper border of Bucky 1.5 inch above the jugular notch.
CR:-
•The horizontal central ray is centered towards a point 1 inch below
sternal angle.
56
57. Contd…
Recumbent position:-
•Place the patient in lateral decubitus.
•Flex the hip & knees to comfortable position & extend patient’s arm
over the head.
•Place support under lower thoracic region to position long axis of
sternum horizontally & perpendicular to the cassette.
•Center the sternum to midline of the Bucky.
•Adjust the upper border of cassette 4 cm above the jugular notch
57
58. Contd..
CR:-
•Vertical central ray perpendicular to center of the cassette entering
lateral border of mid sternum.
Equipment setting:-
Picture criteria:-
•Superimposed sternoclavicular joints & medial end of clavicles.
•Sternum in its entirety. Manubrium free of superimposition by ribs.
•Lower portion of sternum unobscured by breasts of female.
58
kVp mA Time mAs FFD Grid Focus Size
80 300 0.15 45 100cm Yes Large 10*12
59. STERNOCLAVICULAR JOINT-PA
It is usually done to see the joint space.
Position of patient:
•The patient is in prone position; sits or stands facing the Bucky.
•Center the midsagittal plane of the patient’s body to the midline of grid.
•Place the cassette at the level of spinous process of the third thoracic
vertebra, which lies posterior to jugular notch.
•Adjust the shoulders to lie in the same transverse plane.
59
60. Contd..
•For a bilateral examination, rest the patient’s chin on the table & adjust
it so that midsagittal plane is vertical. For unilateral, ask the patient to
turn the head to the affected side & rest the cheek on the table.
CR:-
•Central ray is perpendicular to center of the cassette & entering T3.
Equipment setting:-
60
kVp mA Time mAs FFD Grid Focus size
80 300 0.15 45 100cm Yes Large 10*12
61. Image criteria
•Both SC joints & medial ends of the clavicles
•SC joints through the superimposing vertebral & rib shadows.
•No rotation present on bilateral examination & slight rotation on
unilateral examination.
61
62. RIBS-AP
Indication:
• Trauma
•Fracture
•Chest pain
•Ribs metastases
•Hepatic, splenic or renal injury
62
Position of patient:
• The patient is in recumbent
position to image ribs below
diaphragm & upright to
image ribs above the
diaphragm.
• Center the midsagittal plane
of the patient’s body to the
midline of grid.
63. Contd…
Ribs above diaphragm:
•Place the cassette lengthwise 1.5
inch above the upper border of
relaxed shoulder.
•Adjust the shoulders to lie in the
same transverse plane & rotate
them forward to draw scapulae
away from the ribcage.
•Exposure is made on arrested full
inspiration to depress diaphragm. 63
Ribs below diaphragm:
• Place the cassette crosswise
with the lower edge at the
level of iliac crest.
• Adjust the shoulders to lie in
the same transverse plane
•
Exposure is made on arrested
full expiration to elevate
diaphragm
64. CR:-
Central ray is perpendicular to center of the cassette
Equipment setting:-
Image criteria :-
•For ribs above diaphragm, first through10 posterior ribs from both sides
in entirety
•For ribs below diaphragm, 8th through 12 posterior ribs on both sides
in entirety.
•Ribs visible through lungs & abdomen. 64
kVp mA Time mAs FDD Grid Focus size
80 300 0.13 40 100cm + Large 10*12
65. RIBS-AP oblique (RPO or LPO)
Position of patient:
•The patient is in recumbent position to image ribs below diaphragm
& upright to image ribs above the diaphragm.
•Place the affected side closest to the cassette & body rotated through
45 degrees.
•Abduct the arm & elevate it to carry scapula away from ribcage.
•The raised side is supported on non-opaque pads. The hips & knees
are flexed to comfortable position.
65
66. Contd…
•Center the cassette with top 1.5 inch above upper border of the relaxed
shoulder to image the ribs above diaphragm or with lower edge of
cassette at the level of iliac crest to image ribs below the diaphragm.
•Exposure is made at the end of deep expiration for ribs below
diaphragm & at the end of full inspiration for ribs above the diaphragm.
CR:-
•Central ray is perpendicular to center of the cassette.
Equipment setting:-
66
kVp mA Time mAs FFD Grid Focus size
80 300 0.13 40 100cm Yes Large 10*12
67. Image criteria
•Approximately twice as much distance between vertebral column & the
lateral border of ribs on affected side as is present on unaffected side.
•Axillary portion of ribs free of superimposition.
•For ribs above diaphragm, first through 10 posterior ribs from both
sides in entirety
•For ribs below diaphragm, 8th through 12 posterior ribs on both sides in
entirety.
67
68. Summary
• Chest X-rays can detect cancer, infection or air collecting in the
space around a lung (pneumothorax). They can also show chronic
lung conditions, such as emphysema or cystic fibrosis, as well as
complications related to these conditions. Heart-related lung problems.
•Different positioning and angulation of tube or patient was done in
chest x ray to obtain the effective image of particular injured area of
chest.
68