SlideShare a Scribd company logo
1 of 20
Download to read offline
Skype is an online communication system that can connect you to your academic advisor in a unique way. By
utilizing Skype, you can be anywhere and be able to contact your academic advisor for a “face to face”
personalized advising session in with the assistance of your computer!
Skype Advising Appointment
Setting up a Skype Advising Appointment is easy!
1. Contact the Neeley Academic Advising Center (NAAC) at 817-257-6772. You will be set up with an
appointment with your academic advisor. Let the office know that you would like a Skype
Appointment. This will help them provide further information to you and your advisor.
2. Contact your NAAC Academic Advisor via phone or email to set up an appointment time. Let your
advisor know that you will be “skyping” with them so they are away of what information to provide to
you for the upcoming appointment.
Skype FAQs
What do you need to Skype with the NAAC Advisors?
You will need a computer with a web cam, microphone, internet connection, and a Skype account.
How do I download Skype?
There are step by step instructions attached to the Getting Started: Skype Advising packet. More info
can be found online at www.skype.com
Is Skype Free?
Yes, Skype is FREE! The NAAC office will be utilizing Skype to Skype calls that are FREE no matter where
you are in the world!
Can I use Skype on phone?
Yes, you can utilize Skype on your phone to speak with an advisor if needed. Ideally, it is easier to work
with an advisor from a computer as the advisor will be able to share documents with you live and in
real time.
How do I know my advisor’s Skype name?
Once you have made a Skype Advising Appointment with your advisor, he or she will send you an
Instruction & Expectation guide that will include their Skype name and other helpful instructions for
the appointment
What if my Skype isn’t working?
Don’t worry, technology issues occur. You can email or call your advisor to complete your advising via
Getting Started:
Skype Advising
phone, email, or in person at the NAAC office in Dan Rogers 130.
To obtain a Skype account, follow the directions below:
Downloading and installing Skype is easy, and it’s free! You can download and install your Skype connection in a matter of minutes,
and then the fun begins.
The Web pages on www.skype.com are constantly being enhanced. So, they may change from time to time. Don't be surprised if the
Web pages you're looking at don't exactly match the screen shots provided here.
Downloading Skype
Ready to get started? First, pick up the latest version of Skype:
1. With your Internet browser open, enter www.skype.com in the address line to open the Home page of the Skype Web
site.
2. Click the Download button on the Skype home page to open the Download page.
3. Skype will begin the download to your computer. It will automatically determine the operating system and the Web browser
that you are using. This screen will tell you what to do after the program downloads.
If the download doesn’t start automatically, you will be able to start it manually by clicking on Start Download Again.
After you click to download the program, you may be prompted to save or open the program SkypeSetup.exe. Always choose to
save the file to your hard drive. Do not open or run the program during the download process.
Skype sometimes posts two types of downloads, the general public version and the next new beta version. If you are just starting
out, it's best to download the general public version because it’s more stable. In time, the beta version will become the public
version, and you can upgrade.
4. Select Save to Disk.
Choose an easy-to-remember location, such as the Windows Desktop, and click OK. Remember this location so that you can
double-click the file after it is saved.
Installing Skype
When your download is complete and the program is saved to disk, follow these steps to install the program:
1. Double-click the SkypeSetup program that you just saved or just click Run if you have that option. If a User Account
Control windows pops up asking you for permission, just click Continue.
2. When the installer program launches, it asks you to choose a language; select it from a drop-down list.
The installer program then asks you to read and accept the End User License Agreement. You need to accept this to continue the
installation. The program may also ask if you want to install certain other programs or browser add-ons. You are under no
obligation to install these. If you don’t want the extras, just uncheck the box and click on Next.
3. Click the Options button.
On this page you have the choice to launch Skype as soon as the installation is complete. This box is already checked. If you
don't want Skype to start up right away, deselect the box by clicking it. You also have the option to update the Skype Extras
Manager and to install a Skype Plugin for the web browser (s) that you have installed on the computer.
4. Click I agree -- Install.
Skype asks you to set up an account by entering a Name, a Skype Name, and Password. The next screen asks for your e-mail
address, country, and city. If the Skype name you specified is already in use, you will get a chance to choose another name. Once
you complete this, Skype is installed and automatically launches itself (unless you deselected the Launch Skype check box on the
Options screen).
Skype downloading instructions written by Loren & Susan Abdulezer with Howard Dammond for www.dummies.com
10 Etiquette steps for A Skype
Appointment
1. Make sure you are set up to go at least 10 minutes prior to your appointment. Remember, you
are dealing with technology and sometimes things can go wrong!
2. Feel free to instant message with Skype prior to your appointment beginning to let your
advisor know that you are ready to go. Be courteous.
3. Remember you are going to be live on video. Make sure you are
in a space that is quiet where you can concentrate, there isn’t a
lot of background noise, and that will provide you access to your
computer, etc. A restaurant, the library, or a bookstore may not
be the best environment to call in.
4. Mobile devices utilizing Skype are popular, but consider calling
in via computer and webcam. By linking in with your advisor for
a face to face discussion you will be able to see documents,
have tutorials, and be aware of tones and inflexion in voices to
help round out this unique advising experience.
5. This is a professional call. This is not a communication with your
family or best friend. Make sure to treat this just as you would
an in person appointment coming into the office. Be prepared for the conversation.
6. Do not use text speak when instant messaging.
7. Be aware of your Skype profile. Do not post things you do not want your advisor to see.
8. Be careful of multitasking while on video. Remember, your advisor can see what you are doing
and what guests may be doing behind your camera. It is helpful to close all other applications
on your computer to avoid distractions.
9. Speak audibly, but do not yell into the camera or microphone.
10.Remember to ask questions. If you need to use the instant messaging function to help get your
thoughts across in written form, let your advisor know to be aware of the message coming in.
Getting Started with Skype
Step 1: Log Into Skype
First, double click on the Skype Icon.
Your log on window will appear, enter your password and hit “Sign Me In”
Step 2: Home Screen
Your home screen will allow you to navigate your contacts, calls, & more!
Step 3: Setting up your profile
Your profile identifies who you
are via Skype. It also allows
contacts to obtain other
information such as an email
address and phone number. You
can put as much or as little as you
want on your profile. You can
make your profile public or
private.
To edit your profile, click the profile tab on your home screen. It will open up your profile
window as seen below.
To change any information on your profile, click on the link “Edit” above.
To add or change your profile picture, click the link “Change Picture.”
Step 4: Adding Contacts
To be able to communicate with others via Skype, you need to add them to your Contacts.
Follow the steps below to add
contacts:
To add contact, hit the Contact
tab located on the left side of the
home screen
The following screen will appear and will allow you to add information to form a Contact.
Fill in the fields that are blank with
information provided. You can add as
much information as you want.
Key information for
connection would be
Email & Skype Name.
Students should be instructed by the advisor to send by email their Skype account name
prior to the Skype Advising Appointment utilizing the Skype Appointment Reminder
Email that has been set up on the I drive for your convenience. This will give you a
standard email that sets out instructions for the appointment, date and time zone, as well
as your Skype Name for the student to add to their account.
Step 5: Preparing for Connection
Complete Sound Test
Under your Contacts list, highlight the
ECHO/Sound Test Service.
This will run through a scenario that will test
your microphone and allow you to record a
message.
Below is an image of the screen that will appear
when you are completing your sound test.
The image to the
right is part of the
sound test and will
show the
connection for
calling. Your profile
picture will appear
there will NOT be a
live feed at this
point.
Complete Check Your Connection
First, highlight the contact you
want to call on the left side of the
screen.
Click on the button
The connection button will allow you to complete a number of tests that will make sure
your connection is ready for a call.
Connection Test
between 2 users
Microphone
Test
Webcam
Test
Once your connection, microphone, and webcam are set up and connected to your liking,
you should not have to re-do this process each time prior to a call. It is good to check in
with these items on a regular basis, but not necessarily a daily activity.
Step 6: Make a Call
Connect to Caller
First, highlight the
contact in blue on the
left side of the screen.
Once the contact is
highlighted, note that
the contact’s online
status will be noted. If
the contact is online,
both the video call and
call button will be highlighted in green.
To start a conversation with a student or other contact, it is Skype etiquette to alert the
caller that you are prepared to begin the conversation prior to connecting via video. You
can do this by sending an Instant Message through the text box. See below for example.
Once you have sent/ your student has sent you an Instant Message you can connect by
clicking on the green button labeled video call
When you have connected with a
video call you will be able to see
your student live and they will be
able to see you. Your screen should
look similar to the screen on the left.
You will see your video is seen in
the bottom right hand corner. Make
sure your webcam is in the right
location so that you feel
comfortable.
Step 7: Communicating with the Student
Share Files
To share a file, first click the blue plus sign located
at the bottom of the Skype window. This will bring
up a black pop up screen that you see to the right.
Select the Send File tab
Once Send File is selected a
window will open up allowing
you to pick a file to be able to
send to student live via Skype
transfer.
Documents are located
i/:SkypeDocs
When you send a file via Skype window, you will see the file appear in the Instant Message
window. The file will prompt a window open to the caller to accept the file being sent.
The student will need to accept the file by pressing “OK.” The file will transfer and they
will be save it on their computer to view.
Share Your Screen
Why share your screen? Sharing your screen with the student will allow the student to see
your computer live. This would be an excellent tool in showing a student a guided step-by-
step in using class search or where to find something located on the web. Remember, to
close confidential information because once you
share your screen, the viewer can see what you see.
To share your screen, first click the blue plus sign
located at the bottom of the Skype window. This will
bring up a black pop up screen that you see to the
right.
Select the Share Screen tab
Instant Message
When on a video call, the Instant
Message function on the Skype
window is not automatically turned
on.
The quote shaped button is located
on the bottom left hand side of the
chat window.
To turn the Instant Message function on, click the
white quote shaped button. When the button is
clicked, the Instant Message feed will turn on
automatically. Now you can type a message to the
student or vice versa.
You can type in the box above to communicate
Step 8: Closing the Call & Saving Transcript of the Conversation
When you finish the advising appointment, it is important to sign off the video call. This is
very important because if you step away from your webcam the caller could still hear
what is being said etc.
To close the call properly complete the following step.
Press the red call button (as seen on the right). This
will disengage both the video call as well as the audio.
Transcript
There is no way to save the video/audio portion of the call. The free Skype edition does
not allow you to transcribe the call, but if you utilized the Instant Message portion of the
Skype appointment, you can save this to be
placed in a student file.
To save the written text, complete the
following steps.
Once you have closed the call, review Recent
Messages by clicking the Recent tab on the left
hand side of the screen.
You will see recent calls made in order from
Today, Yesterday, etc. Highlight the
conversation you want to review by clicking on
the name of the contact you spoke with.
You will see the
conversation of text
that was exchanged
between you and the
caller appear.
Copy the text with
your mouse.
Open a Microsoft
Word document.
Paste the text into the file. You are then able to save and print the document to file with
the student’s NAAC File.
Step 9: Signing Off
To sign off from Skype, click on the Skype tab at the
top left hand side of the window. Pull down the grey
drop down screen and choose SIGN OUT.
Your Skype window will close.
You will need to log back into Skype if
you see the following screen below
Skype Advising
Appointment
Your Advisor is Melissa Nabors
Skype Name: advisingnabors
Be aware of the time that the Skype
meeting will occur.
Texas is located in the
Central Time Zone.
Instructions on connecting with your Advisor
1. Go into your Skype account and add your Advisor’s Skype Name to
your friend list
2. Your advisor will start the Skype meeting.
3. When you are ready, feel free to instant message your advisor to let
them know that you are set up and ready to be advised!
Skype is an online communication system that can connect you to your academic advisor in a unique way. By
utilizing Skype, you can be anywhere and be able to contact your academic advisor for a “face to face”
personalized advising session in with the assistance of your computer!
Skype Advising Appointment
Setting up a Skype Advising Appointment is easy!
1. Contact the Neeley Academic Advising Center (NAAC) at 817-257-6772. You will be set up with an
appointment with your academic advisor. Let the office know that you would like a Skype
Appointment. This will help them provide further information to you and your advisor.
2. Contact your NAAC Academic Advisor via phone or email to set up an appointment time. Let your
advisor know that you will be “skyping” with them so they are away of what information to provide to
you for the upcoming appointment.
Skype FAQs
What do you need to Skype with the NAAC Advisors?
You will need a computer with a web cam, microphone, internet connection, and a Skype account.
How do I download Skype?
There are step by step instructions attached to the Getting Started: Skype Advising packet. More info
can be found online at www.skype.com
Is Skype Free?
Yes, Skype is FREE! The NAAC office will be utilizing Skype to Skype calls that are FREE no matter where
you are in the world!
Can I use Skype on phone?
Yes, you can utilize Skype on your phone to speak with an advisor if needed. Ideally, it is easier to work
with an advisor from a computer as the advisor will be able to share documents with you live and in
real time.
How do I know my advisor’s Skype name?
Once you have made a Skype Advising Appointment with your advisor, he or she will send you an
Instruction & Expectation guide that will include their Skype name and other helpful instructions for
the appointment
What if my Skype isn’t working?
Don’t worry, technology issues occur. You can email or call your advisor to complete your advising via
phone, email, or in person at the NAAC office in Dan Rogers 130.
To obtain a Skype account, follow the directions below:
Getting Started:
Skype Advising
Downloading and installing Skype is easy, and it’s free! You can download and install your Skype connection in a matter of minutes,
and then the fun begins.
The Web pages on www.skype.com are constantly being enhanced. So, they may change from time to time. Don't be surprised if the
Web pages you're looking at don't exactly match the screen shots provided here.
Downloading Skype
Ready to get started? First, pick up the latest version of Skype:
1. With your Internet browser open, enter www.skype.com in the address line to open the Home page of the Skype Web
site.
2. Click the Download button on the Skype home page to open the Download page.
3. Skype will begin the download to your computer. It will automatically determine the operating system and the Web browser
that you are using. This screen will tell you what to do after the program downloads.
If the download doesn’t start automatically, you will be able to start it manually by clicking on Start Download Again.
After you click to download the program, you may be prompted to save or open the program SkypeSetup.exe. Always choose to
save the file to your hard drive. Do not open or run the program during the download process.
Skype sometimes posts two types of downloads, the general public version and the next new beta version. If you are just starting
out, it's best to download the general public version because it’s more stable. In time, the beta version will become the public
version, and you can upgrade.
4. Select Save to Disk.
Choose an easy-to-remember location, such as the Windows Desktop, and click OK. Remember this location so that you can
double-click the file after it is saved.
Installing Skype
When your download is complete and the program is saved to disk, follow these steps to install the program:
1. Double-click the SkypeSetup program that you just saved or just click Run if you have that option. If a User Account
Control windows pops up asking you for permission, just click Continue.
2. When the installer program launches, it asks you to choose a language; select it from a drop-down list.
The installer program then asks you to read and accept the End User License Agreement. You need to accept this to continue the
installation. The program may also ask if you want to install certain other programs or browser add-ons. You are under no
obligation to install these. If you don’t want the extras, just uncheck the box and click on Next.
3. Click the Options button.
On this page you have the choice to launch Skype as soon as the installation is complete. This box is already checked. If you
don't want Skype to start up right away, deselect the box by clicking it. You also have the option to update the Skype Extras
Manager and to install a Skype Plugin for the web browser (s) that you have installed on the computer.
4. Click I agree -- Install.
Skype asks you to set up an account by entering a Name, a Skype Name, and Password. The next screen asks for your e-mail
address, country, and city. If the Skype name you specified is already in use, you will get a chance to choose another name. Once
you complete this, Skype is installed and automatically launches itself (unless you deselected the Launch Skype check box on the
Options screen).
Skype downloading instructions written by Loren & Susan Abdulezer with Howard Dammond for www.dummies.com
10 Etiquette steps for A Skype
Appointment
1. Make sure you are set up to go at least 10 minutes prior to your appointment. Remember, you
are dealing with technology and sometimes things can go wrong!
2. Feel free to instant message with Skype prior to your appointment beginning to let your
advisor know that you are ready to go. Be courteous.
3. Remember you are going to be live on video. Make sure you are
in a space that is quiet where you can concentrate, there isn’t a
lot of background noise, and that will provide you access to your
computer, etc. A restaurant, the library, or a bookstore may not
be the best environment to call in.
4. Mobile devices utilizing Skype are popular, but consider calling in
via computer and webcam. By linking in with your advisor for a
face to face discussion you will be able to see documents, have
tutorials, and be aware of tones and inflexion in voices to help
round out this unique advising experience.
5. This is a professional call. This is not a communication with your
family or best friend. Make sure to treat this just as you would an in person appointment
coming into the office. Be prepared for the conversation.
6. Do not use text speak when instant messaging.
7. Be aware of your Skype profile. Do not post things you do not want your advisor to see.
8. Be careful of multitasking while on video. Remember, your advisor can see what you are doing
and what guests may be doing behind your camera. It is helpful to close all other applications
on your computer to avoid distractions.
9. Speak audibly, but do not yell into the camera or microphone.
10.Remember to ask questions. If you need to use the instant messaging function to help get your
thoughts across in written form, let your advisor know to be aware of the message coming in.

More Related Content

More from UCAN at UNT

Reality Check resource guide unt adv14
Reality Check resource guide unt adv14Reality Check resource guide unt adv14
Reality Check resource guide unt adv14UCAN at UNT
 
Reality Check Worksheet #untadv14
Reality Check Worksheet #untadv14Reality Check Worksheet #untadv14
Reality Check Worksheet #untadv14UCAN at UNT
 
#UNTAdv14 #EdTech Can Simplify Your Life: Practical Tools for Advisors
#UNTAdv14 #EdTech Can Simplify Your Life: Practical Tools for Advisors#UNTAdv14 #EdTech Can Simplify Your Life: Practical Tools for Advisors
#UNTAdv14 #EdTech Can Simplify Your Life: Practical Tools for AdvisorsUCAN at UNT
 
#UNTAdv14 Graduation 101: Am I Done Yet?
#UNTAdv14 Graduation 101: Am I Done Yet?#UNTAdv14 Graduation 101: Am I Done Yet?
#UNTAdv14 Graduation 101: Am I Done Yet?UCAN at UNT
 
Welcome to the 2014 unt advising conference #unt adv14
Welcome to the 2014 unt advising conference #unt adv14 Welcome to the 2014 unt advising conference #unt adv14
Welcome to the 2014 unt advising conference #unt adv14 UCAN at UNT
 
#UNTAdv14 The DEEP Framework Case Study
#UNTAdv14 The DEEP Framework Case Study#UNTAdv14 The DEEP Framework Case Study
#UNTAdv14 The DEEP Framework Case StudyUCAN at UNT
 
#UNTAdv14 Making Advising Personal through Skype
#UNTAdv14 Making Advising Personal through Skype#UNTAdv14 Making Advising Personal through Skype
#UNTAdv14 Making Advising Personal through SkypeUCAN at UNT
 
#UNTAdv14 Advising Conference Prep
#UNTAdv14 Advising Conference Prep#UNTAdv14 Advising Conference Prep
#UNTAdv14 Advising Conference PrepUCAN at UNT
 
#UNTAdv14 Advising as Coaching: Get Results with realistic Advising Strategies
#UNTAdv14 Advising as Coaching: Get Results with realistic Advising Strategies#UNTAdv14 Advising as Coaching: Get Results with realistic Advising Strategies
#UNTAdv14 Advising as Coaching: Get Results with realistic Advising StrategiesUCAN at UNT
 
#UNTAdv14 Student Distress Identification, Intervention & Referral
#UNTAdv14 Student Distress Identification, Intervention & Referral#UNTAdv14 Student Distress Identification, Intervention & Referral
#UNTAdv14 Student Distress Identification, Intervention & ReferralUCAN at UNT
 
#UNTAdv14 SCORE Making the Most of Departmental Advising
#UNTAdv14 SCORE Making the Most of Departmental Advising#UNTAdv14 SCORE Making the Most of Departmental Advising
#UNTAdv14 SCORE Making the Most of Departmental AdvisingUCAN at UNT
 
#UNTAdv14 North Lake College's Advising Manual on Blackboard
#UNTAdv14 North Lake College's Advising Manual on Blackboard#UNTAdv14 North Lake College's Advising Manual on Blackboard
#UNTAdv14 North Lake College's Advising Manual on BlackboardUCAN at UNT
 
#UNTAdv14 P.A.S.S.Promoting Academic Student Success
#UNTAdv14 P.A.S.S.Promoting Academic Student Success#UNTAdv14 P.A.S.S.Promoting Academic Student Success
#UNTAdv14 P.A.S.S.Promoting Academic Student SuccessUCAN at UNT
 
2014 UNT Advising Conference Program (#UNTAdv14)
2014 UNT Advising Conference Program (#UNTAdv14)2014 UNT Advising Conference Program (#UNTAdv14)
2014 UNT Advising Conference Program (#UNTAdv14)UCAN at UNT
 
#UNTAdv14 Advising Conference 2014
#UNTAdv14 Advising Conference 2014#UNTAdv14 Advising Conference 2014
#UNTAdv14 Advising Conference 2014UCAN at UNT
 
#UNTAdv14 Advising Conference Agenda
#UNTAdv14 Advising Conference Agenda#UNTAdv14 Advising Conference Agenda
#UNTAdv14 Advising Conference AgendaUCAN at UNT
 
#UNTAdv14 Advising Conference Agenda
#UNTAdv14 Advising Conference Agenda#UNTAdv14 Advising Conference Agenda
#UNTAdv14 Advising Conference AgendaUCAN at UNT
 
Which MATH Class @ UNT? [2014-2015 edition]
Which MATH Class @ UNT? [2014-2015 edition]Which MATH Class @ UNT? [2014-2015 edition]
Which MATH Class @ UNT? [2014-2015 edition]UCAN at UNT
 
Career Pathways to Student Success - UNT Advising Conference 2012
Career Pathways to Student Success - UNT Advising Conference 2012Career Pathways to Student Success - UNT Advising Conference 2012
Career Pathways to Student Success - UNT Advising Conference 2012UCAN at UNT
 
Career Pathway Quick Reference Guide
Career Pathway Quick Reference GuideCareer Pathway Quick Reference Guide
Career Pathway Quick Reference GuideUCAN at UNT
 

More from UCAN at UNT (20)

Reality Check resource guide unt adv14
Reality Check resource guide unt adv14Reality Check resource guide unt adv14
Reality Check resource guide unt adv14
 
Reality Check Worksheet #untadv14
Reality Check Worksheet #untadv14Reality Check Worksheet #untadv14
Reality Check Worksheet #untadv14
 
#UNTAdv14 #EdTech Can Simplify Your Life: Practical Tools for Advisors
#UNTAdv14 #EdTech Can Simplify Your Life: Practical Tools for Advisors#UNTAdv14 #EdTech Can Simplify Your Life: Practical Tools for Advisors
#UNTAdv14 #EdTech Can Simplify Your Life: Practical Tools for Advisors
 
#UNTAdv14 Graduation 101: Am I Done Yet?
#UNTAdv14 Graduation 101: Am I Done Yet?#UNTAdv14 Graduation 101: Am I Done Yet?
#UNTAdv14 Graduation 101: Am I Done Yet?
 
Welcome to the 2014 unt advising conference #unt adv14
Welcome to the 2014 unt advising conference #unt adv14 Welcome to the 2014 unt advising conference #unt adv14
Welcome to the 2014 unt advising conference #unt adv14
 
#UNTAdv14 The DEEP Framework Case Study
#UNTAdv14 The DEEP Framework Case Study#UNTAdv14 The DEEP Framework Case Study
#UNTAdv14 The DEEP Framework Case Study
 
#UNTAdv14 Making Advising Personal through Skype
#UNTAdv14 Making Advising Personal through Skype#UNTAdv14 Making Advising Personal through Skype
#UNTAdv14 Making Advising Personal through Skype
 
#UNTAdv14 Advising Conference Prep
#UNTAdv14 Advising Conference Prep#UNTAdv14 Advising Conference Prep
#UNTAdv14 Advising Conference Prep
 
#UNTAdv14 Advising as Coaching: Get Results with realistic Advising Strategies
#UNTAdv14 Advising as Coaching: Get Results with realistic Advising Strategies#UNTAdv14 Advising as Coaching: Get Results with realistic Advising Strategies
#UNTAdv14 Advising as Coaching: Get Results with realistic Advising Strategies
 
#UNTAdv14 Student Distress Identification, Intervention & Referral
#UNTAdv14 Student Distress Identification, Intervention & Referral#UNTAdv14 Student Distress Identification, Intervention & Referral
#UNTAdv14 Student Distress Identification, Intervention & Referral
 
#UNTAdv14 SCORE Making the Most of Departmental Advising
#UNTAdv14 SCORE Making the Most of Departmental Advising#UNTAdv14 SCORE Making the Most of Departmental Advising
#UNTAdv14 SCORE Making the Most of Departmental Advising
 
#UNTAdv14 North Lake College's Advising Manual on Blackboard
#UNTAdv14 North Lake College's Advising Manual on Blackboard#UNTAdv14 North Lake College's Advising Manual on Blackboard
#UNTAdv14 North Lake College's Advising Manual on Blackboard
 
#UNTAdv14 P.A.S.S.Promoting Academic Student Success
#UNTAdv14 P.A.S.S.Promoting Academic Student Success#UNTAdv14 P.A.S.S.Promoting Academic Student Success
#UNTAdv14 P.A.S.S.Promoting Academic Student Success
 
2014 UNT Advising Conference Program (#UNTAdv14)
2014 UNT Advising Conference Program (#UNTAdv14)2014 UNT Advising Conference Program (#UNTAdv14)
2014 UNT Advising Conference Program (#UNTAdv14)
 
#UNTAdv14 Advising Conference 2014
#UNTAdv14 Advising Conference 2014#UNTAdv14 Advising Conference 2014
#UNTAdv14 Advising Conference 2014
 
#UNTAdv14 Advising Conference Agenda
#UNTAdv14 Advising Conference Agenda#UNTAdv14 Advising Conference Agenda
#UNTAdv14 Advising Conference Agenda
 
#UNTAdv14 Advising Conference Agenda
#UNTAdv14 Advising Conference Agenda#UNTAdv14 Advising Conference Agenda
#UNTAdv14 Advising Conference Agenda
 
Which MATH Class @ UNT? [2014-2015 edition]
Which MATH Class @ UNT? [2014-2015 edition]Which MATH Class @ UNT? [2014-2015 edition]
Which MATH Class @ UNT? [2014-2015 edition]
 
Career Pathways to Student Success - UNT Advising Conference 2012
Career Pathways to Student Success - UNT Advising Conference 2012Career Pathways to Student Success - UNT Advising Conference 2012
Career Pathways to Student Success - UNT Advising Conference 2012
 
Career Pathway Quick Reference Guide
Career Pathway Quick Reference GuideCareer Pathway Quick Reference Guide
Career Pathway Quick Reference Guide
 

Recently uploaded

Disha NEET Physics Guide for classes 11 and 12.pdf
Disha NEET Physics Guide for classes 11 and 12.pdfDisha NEET Physics Guide for classes 11 and 12.pdf
Disha NEET Physics Guide for classes 11 and 12.pdfchloefrazer622
 
Call Girls in Dwarka Mor Delhi Contact Us 9654467111
Call Girls in Dwarka Mor Delhi Contact Us 9654467111Call Girls in Dwarka Mor Delhi Contact Us 9654467111
Call Girls in Dwarka Mor Delhi Contact Us 9654467111Sapana Sha
 
Unit-IV- Pharma. Marketing Channels.pptx
Unit-IV- Pharma. Marketing Channels.pptxUnit-IV- Pharma. Marketing Channels.pptx
Unit-IV- Pharma. Marketing Channels.pptxVishalSingh1417
 
BASLIQ CURRENT LOOKBOOK LOOKBOOK(1) (1).pdf
BASLIQ CURRENT LOOKBOOK  LOOKBOOK(1) (1).pdfBASLIQ CURRENT LOOKBOOK  LOOKBOOK(1) (1).pdf
BASLIQ CURRENT LOOKBOOK LOOKBOOK(1) (1).pdfSoniaTolstoy
 
Paris 2024 Olympic Geographies - an activity
Paris 2024 Olympic Geographies - an activityParis 2024 Olympic Geographies - an activity
Paris 2024 Olympic Geographies - an activityGeoBlogs
 
fourth grading exam for kindergarten in writing
fourth grading exam for kindergarten in writingfourth grading exam for kindergarten in writing
fourth grading exam for kindergarten in writingTeacherCyreneCayanan
 
Russian Escort Service in Delhi 11k Hotel Foreigner Russian Call Girls in Delhi
Russian Escort Service in Delhi 11k Hotel Foreigner Russian Call Girls in DelhiRussian Escort Service in Delhi 11k Hotel Foreigner Russian Call Girls in Delhi
Russian Escort Service in Delhi 11k Hotel Foreigner Russian Call Girls in Delhikauryashika82
 
Holdier Curriculum Vitae (April 2024).pdf
Holdier Curriculum Vitae (April 2024).pdfHoldier Curriculum Vitae (April 2024).pdf
Holdier Curriculum Vitae (April 2024).pdfagholdier
 
Kisan Call Centre - To harness potential of ICT in Agriculture by answer farm...
Kisan Call Centre - To harness potential of ICT in Agriculture by answer farm...Kisan Call Centre - To harness potential of ICT in Agriculture by answer farm...
Kisan Call Centre - To harness potential of ICT in Agriculture by answer farm...Krashi Coaching
 
Software Engineering Methodologies (overview)
Software Engineering Methodologies (overview)Software Engineering Methodologies (overview)
Software Engineering Methodologies (overview)eniolaolutunde
 
Measures of Dispersion and Variability: Range, QD, AD and SD
Measures of Dispersion and Variability: Range, QD, AD and SDMeasures of Dispersion and Variability: Range, QD, AD and SD
Measures of Dispersion and Variability: Range, QD, AD and SDThiyagu K
 
Nutritional Needs Presentation - HLTH 104
Nutritional Needs Presentation - HLTH 104Nutritional Needs Presentation - HLTH 104
Nutritional Needs Presentation - HLTH 104misteraugie
 
Grant Readiness 101 TechSoup and Remy Consulting
Grant Readiness 101 TechSoup and Remy ConsultingGrant Readiness 101 TechSoup and Remy Consulting
Grant Readiness 101 TechSoup and Remy ConsultingTechSoup
 
1029-Danh muc Sach Giao Khoa khoi 6.pdf
1029-Danh muc Sach Giao Khoa khoi  6.pdf1029-Danh muc Sach Giao Khoa khoi  6.pdf
1029-Danh muc Sach Giao Khoa khoi 6.pdfQucHHunhnh
 
A Critique of the Proposed National Education Policy Reform
A Critique of the Proposed National Education Policy ReformA Critique of the Proposed National Education Policy Reform
A Critique of the Proposed National Education Policy ReformChameera Dedduwage
 
Sports & Fitness Value Added Course FY..
Sports & Fitness Value Added Course FY..Sports & Fitness Value Added Course FY..
Sports & Fitness Value Added Course FY..Disha Kariya
 

Recently uploaded (20)

Disha NEET Physics Guide for classes 11 and 12.pdf
Disha NEET Physics Guide for classes 11 and 12.pdfDisha NEET Physics Guide for classes 11 and 12.pdf
Disha NEET Physics Guide for classes 11 and 12.pdf
 
Call Girls in Dwarka Mor Delhi Contact Us 9654467111
Call Girls in Dwarka Mor Delhi Contact Us 9654467111Call Girls in Dwarka Mor Delhi Contact Us 9654467111
Call Girls in Dwarka Mor Delhi Contact Us 9654467111
 
Unit-IV- Pharma. Marketing Channels.pptx
Unit-IV- Pharma. Marketing Channels.pptxUnit-IV- Pharma. Marketing Channels.pptx
Unit-IV- Pharma. Marketing Channels.pptx
 
BASLIQ CURRENT LOOKBOOK LOOKBOOK(1) (1).pdf
BASLIQ CURRENT LOOKBOOK  LOOKBOOK(1) (1).pdfBASLIQ CURRENT LOOKBOOK  LOOKBOOK(1) (1).pdf
BASLIQ CURRENT LOOKBOOK LOOKBOOK(1) (1).pdf
 
Paris 2024 Olympic Geographies - an activity
Paris 2024 Olympic Geographies - an activityParis 2024 Olympic Geographies - an activity
Paris 2024 Olympic Geographies - an activity
 
fourth grading exam for kindergarten in writing
fourth grading exam for kindergarten in writingfourth grading exam for kindergarten in writing
fourth grading exam for kindergarten in writing
 
Russian Escort Service in Delhi 11k Hotel Foreigner Russian Call Girls in Delhi
Russian Escort Service in Delhi 11k Hotel Foreigner Russian Call Girls in DelhiRussian Escort Service in Delhi 11k Hotel Foreigner Russian Call Girls in Delhi
Russian Escort Service in Delhi 11k Hotel Foreigner Russian Call Girls in Delhi
 
Holdier Curriculum Vitae (April 2024).pdf
Holdier Curriculum Vitae (April 2024).pdfHoldier Curriculum Vitae (April 2024).pdf
Holdier Curriculum Vitae (April 2024).pdf
 
Mattingly "AI & Prompt Design: Structured Data, Assistants, & RAG"
Mattingly "AI & Prompt Design: Structured Data, Assistants, & RAG"Mattingly "AI & Prompt Design: Structured Data, Assistants, & RAG"
Mattingly "AI & Prompt Design: Structured Data, Assistants, & RAG"
 
Kisan Call Centre - To harness potential of ICT in Agriculture by answer farm...
Kisan Call Centre - To harness potential of ICT in Agriculture by answer farm...Kisan Call Centre - To harness potential of ICT in Agriculture by answer farm...
Kisan Call Centre - To harness potential of ICT in Agriculture by answer farm...
 
INDIA QUIZ 2024 RLAC DELHI UNIVERSITY.pptx
INDIA QUIZ 2024 RLAC DELHI UNIVERSITY.pptxINDIA QUIZ 2024 RLAC DELHI UNIVERSITY.pptx
INDIA QUIZ 2024 RLAC DELHI UNIVERSITY.pptx
 
Software Engineering Methodologies (overview)
Software Engineering Methodologies (overview)Software Engineering Methodologies (overview)
Software Engineering Methodologies (overview)
 
Measures of Dispersion and Variability: Range, QD, AD and SD
Measures of Dispersion and Variability: Range, QD, AD and SDMeasures of Dispersion and Variability: Range, QD, AD and SD
Measures of Dispersion and Variability: Range, QD, AD and SD
 
Nutritional Needs Presentation - HLTH 104
Nutritional Needs Presentation - HLTH 104Nutritional Needs Presentation - HLTH 104
Nutritional Needs Presentation - HLTH 104
 
Grant Readiness 101 TechSoup and Remy Consulting
Grant Readiness 101 TechSoup and Remy ConsultingGrant Readiness 101 TechSoup and Remy Consulting
Grant Readiness 101 TechSoup and Remy Consulting
 
1029-Danh muc Sach Giao Khoa khoi 6.pdf
1029-Danh muc Sach Giao Khoa khoi  6.pdf1029-Danh muc Sach Giao Khoa khoi  6.pdf
1029-Danh muc Sach Giao Khoa khoi 6.pdf
 
Advance Mobile Application Development class 07
Advance Mobile Application Development class 07Advance Mobile Application Development class 07
Advance Mobile Application Development class 07
 
A Critique of the Proposed National Education Policy Reform
A Critique of the Proposed National Education Policy ReformA Critique of the Proposed National Education Policy Reform
A Critique of the Proposed National Education Policy Reform
 
Sports & Fitness Value Added Course FY..
Sports & Fitness Value Added Course FY..Sports & Fitness Value Added Course FY..
Sports & Fitness Value Added Course FY..
 
Código Creativo y Arte de Software | Unidad 1
Código Creativo y Arte de Software | Unidad 1Código Creativo y Arte de Software | Unidad 1
Código Creativo y Arte de Software | Unidad 1
 

Getting Started with Skype

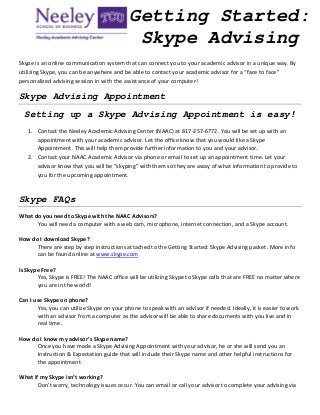
  • 1. Skype is an online communication system that can connect you to your academic advisor in a unique way. By utilizing Skype, you can be anywhere and be able to contact your academic advisor for a “face to face” personalized advising session in with the assistance of your computer! Skype Advising Appointment Setting up a Skype Advising Appointment is easy! 1. Contact the Neeley Academic Advising Center (NAAC) at 817-257-6772. You will be set up with an appointment with your academic advisor. Let the office know that you would like a Skype Appointment. This will help them provide further information to you and your advisor. 2. Contact your NAAC Academic Advisor via phone or email to set up an appointment time. Let your advisor know that you will be “skyping” with them so they are away of what information to provide to you for the upcoming appointment. Skype FAQs What do you need to Skype with the NAAC Advisors? You will need a computer with a web cam, microphone, internet connection, and a Skype account. How do I download Skype? There are step by step instructions attached to the Getting Started: Skype Advising packet. More info can be found online at www.skype.com Is Skype Free? Yes, Skype is FREE! The NAAC office will be utilizing Skype to Skype calls that are FREE no matter where you are in the world! Can I use Skype on phone? Yes, you can utilize Skype on your phone to speak with an advisor if needed. Ideally, it is easier to work with an advisor from a computer as the advisor will be able to share documents with you live and in real time. How do I know my advisor’s Skype name? Once you have made a Skype Advising Appointment with your advisor, he or she will send you an Instruction & Expectation guide that will include their Skype name and other helpful instructions for the appointment What if my Skype isn’t working? Don’t worry, technology issues occur. You can email or call your advisor to complete your advising via Getting Started: Skype Advising
  • 2. phone, email, or in person at the NAAC office in Dan Rogers 130. To obtain a Skype account, follow the directions below: Downloading and installing Skype is easy, and it’s free! You can download and install your Skype connection in a matter of minutes, and then the fun begins. The Web pages on www.skype.com are constantly being enhanced. So, they may change from time to time. Don't be surprised if the Web pages you're looking at don't exactly match the screen shots provided here. Downloading Skype Ready to get started? First, pick up the latest version of Skype: 1. With your Internet browser open, enter www.skype.com in the address line to open the Home page of the Skype Web site. 2. Click the Download button on the Skype home page to open the Download page. 3. Skype will begin the download to your computer. It will automatically determine the operating system and the Web browser that you are using. This screen will tell you what to do after the program downloads. If the download doesn’t start automatically, you will be able to start it manually by clicking on Start Download Again. After you click to download the program, you may be prompted to save or open the program SkypeSetup.exe. Always choose to save the file to your hard drive. Do not open or run the program during the download process. Skype sometimes posts two types of downloads, the general public version and the next new beta version. If you are just starting out, it's best to download the general public version because it’s more stable. In time, the beta version will become the public version, and you can upgrade. 4. Select Save to Disk. Choose an easy-to-remember location, such as the Windows Desktop, and click OK. Remember this location so that you can double-click the file after it is saved.
  • 3. Installing Skype When your download is complete and the program is saved to disk, follow these steps to install the program: 1. Double-click the SkypeSetup program that you just saved or just click Run if you have that option. If a User Account Control windows pops up asking you for permission, just click Continue. 2. When the installer program launches, it asks you to choose a language; select it from a drop-down list. The installer program then asks you to read and accept the End User License Agreement. You need to accept this to continue the installation. The program may also ask if you want to install certain other programs or browser add-ons. You are under no obligation to install these. If you don’t want the extras, just uncheck the box and click on Next. 3. Click the Options button. On this page you have the choice to launch Skype as soon as the installation is complete. This box is already checked. If you don't want Skype to start up right away, deselect the box by clicking it. You also have the option to update the Skype Extras Manager and to install a Skype Plugin for the web browser (s) that you have installed on the computer. 4. Click I agree -- Install. Skype asks you to set up an account by entering a Name, a Skype Name, and Password. The next screen asks for your e-mail address, country, and city. If the Skype name you specified is already in use, you will get a chance to choose another name. Once you complete this, Skype is installed and automatically launches itself (unless you deselected the Launch Skype check box on the Options screen). Skype downloading instructions written by Loren & Susan Abdulezer with Howard Dammond for www.dummies.com
  • 4. 10 Etiquette steps for A Skype Appointment 1. Make sure you are set up to go at least 10 minutes prior to your appointment. Remember, you are dealing with technology and sometimes things can go wrong! 2. Feel free to instant message with Skype prior to your appointment beginning to let your advisor know that you are ready to go. Be courteous. 3. Remember you are going to be live on video. Make sure you are in a space that is quiet where you can concentrate, there isn’t a lot of background noise, and that will provide you access to your computer, etc. A restaurant, the library, or a bookstore may not be the best environment to call in. 4. Mobile devices utilizing Skype are popular, but consider calling in via computer and webcam. By linking in with your advisor for a face to face discussion you will be able to see documents, have tutorials, and be aware of tones and inflexion in voices to help round out this unique advising experience. 5. This is a professional call. This is not a communication with your family or best friend. Make sure to treat this just as you would an in person appointment coming into the office. Be prepared for the conversation. 6. Do not use text speak when instant messaging. 7. Be aware of your Skype profile. Do not post things you do not want your advisor to see. 8. Be careful of multitasking while on video. Remember, your advisor can see what you are doing and what guests may be doing behind your camera. It is helpful to close all other applications on your computer to avoid distractions. 9. Speak audibly, but do not yell into the camera or microphone. 10.Remember to ask questions. If you need to use the instant messaging function to help get your thoughts across in written form, let your advisor know to be aware of the message coming in.
  • 5. Getting Started with Skype Step 1: Log Into Skype First, double click on the Skype Icon. Your log on window will appear, enter your password and hit “Sign Me In” Step 2: Home Screen Your home screen will allow you to navigate your contacts, calls, & more!
  • 6. Step 3: Setting up your profile Your profile identifies who you are via Skype. It also allows contacts to obtain other information such as an email address and phone number. You can put as much or as little as you want on your profile. You can make your profile public or private. To edit your profile, click the profile tab on your home screen. It will open up your profile window as seen below. To change any information on your profile, click on the link “Edit” above. To add or change your profile picture, click the link “Change Picture.”
  • 7. Step 4: Adding Contacts To be able to communicate with others via Skype, you need to add them to your Contacts. Follow the steps below to add contacts: To add contact, hit the Contact tab located on the left side of the home screen The following screen will appear and will allow you to add information to form a Contact. Fill in the fields that are blank with information provided. You can add as much information as you want. Key information for connection would be Email & Skype Name. Students should be instructed by the advisor to send by email their Skype account name prior to the Skype Advising Appointment utilizing the Skype Appointment Reminder Email that has been set up on the I drive for your convenience. This will give you a standard email that sets out instructions for the appointment, date and time zone, as well as your Skype Name for the student to add to their account.
  • 8. Step 5: Preparing for Connection Complete Sound Test Under your Contacts list, highlight the ECHO/Sound Test Service. This will run through a scenario that will test your microphone and allow you to record a message. Below is an image of the screen that will appear when you are completing your sound test. The image to the right is part of the sound test and will show the connection for calling. Your profile picture will appear there will NOT be a live feed at this point.
  • 9. Complete Check Your Connection First, highlight the contact you want to call on the left side of the screen. Click on the button The connection button will allow you to complete a number of tests that will make sure your connection is ready for a call. Connection Test between 2 users Microphone Test
  • 10. Webcam Test Once your connection, microphone, and webcam are set up and connected to your liking, you should not have to re-do this process each time prior to a call. It is good to check in with these items on a regular basis, but not necessarily a daily activity. Step 6: Make a Call Connect to Caller First, highlight the contact in blue on the left side of the screen. Once the contact is highlighted, note that the contact’s online status will be noted. If the contact is online, both the video call and call button will be highlighted in green. To start a conversation with a student or other contact, it is Skype etiquette to alert the caller that you are prepared to begin the conversation prior to connecting via video. You can do this by sending an Instant Message through the text box. See below for example.
  • 11. Once you have sent/ your student has sent you an Instant Message you can connect by clicking on the green button labeled video call When you have connected with a video call you will be able to see your student live and they will be able to see you. Your screen should look similar to the screen on the left. You will see your video is seen in the bottom right hand corner. Make sure your webcam is in the right location so that you feel comfortable. Step 7: Communicating with the Student Share Files To share a file, first click the blue plus sign located at the bottom of the Skype window. This will bring up a black pop up screen that you see to the right. Select the Send File tab Once Send File is selected a window will open up allowing you to pick a file to be able to send to student live via Skype transfer. Documents are located i/:SkypeDocs
  • 12. When you send a file via Skype window, you will see the file appear in the Instant Message window. The file will prompt a window open to the caller to accept the file being sent. The student will need to accept the file by pressing “OK.” The file will transfer and they will be save it on their computer to view. Share Your Screen Why share your screen? Sharing your screen with the student will allow the student to see your computer live. This would be an excellent tool in showing a student a guided step-by- step in using class search or where to find something located on the web. Remember, to close confidential information because once you share your screen, the viewer can see what you see. To share your screen, first click the blue plus sign located at the bottom of the Skype window. This will bring up a black pop up screen that you see to the right. Select the Share Screen tab
  • 13. Instant Message When on a video call, the Instant Message function on the Skype window is not automatically turned on. The quote shaped button is located on the bottom left hand side of the chat window. To turn the Instant Message function on, click the white quote shaped button. When the button is clicked, the Instant Message feed will turn on automatically. Now you can type a message to the student or vice versa. You can type in the box above to communicate Step 8: Closing the Call & Saving Transcript of the Conversation When you finish the advising appointment, it is important to sign off the video call. This is very important because if you step away from your webcam the caller could still hear what is being said etc.
  • 14. To close the call properly complete the following step. Press the red call button (as seen on the right). This will disengage both the video call as well as the audio. Transcript There is no way to save the video/audio portion of the call. The free Skype edition does not allow you to transcribe the call, but if you utilized the Instant Message portion of the Skype appointment, you can save this to be placed in a student file. To save the written text, complete the following steps. Once you have closed the call, review Recent Messages by clicking the Recent tab on the left hand side of the screen. You will see recent calls made in order from Today, Yesterday, etc. Highlight the conversation you want to review by clicking on the name of the contact you spoke with. You will see the conversation of text that was exchanged between you and the caller appear. Copy the text with your mouse. Open a Microsoft Word document. Paste the text into the file. You are then able to save and print the document to file with the student’s NAAC File.
  • 15. Step 9: Signing Off To sign off from Skype, click on the Skype tab at the top left hand side of the window. Pull down the grey drop down screen and choose SIGN OUT. Your Skype window will close. You will need to log back into Skype if you see the following screen below
  • 16. Skype Advising Appointment Your Advisor is Melissa Nabors Skype Name: advisingnabors Be aware of the time that the Skype meeting will occur. Texas is located in the Central Time Zone. Instructions on connecting with your Advisor 1. Go into your Skype account and add your Advisor’s Skype Name to your friend list 2. Your advisor will start the Skype meeting. 3. When you are ready, feel free to instant message your advisor to let them know that you are set up and ready to be advised!
  • 17. Skype is an online communication system that can connect you to your academic advisor in a unique way. By utilizing Skype, you can be anywhere and be able to contact your academic advisor for a “face to face” personalized advising session in with the assistance of your computer! Skype Advising Appointment Setting up a Skype Advising Appointment is easy! 1. Contact the Neeley Academic Advising Center (NAAC) at 817-257-6772. You will be set up with an appointment with your academic advisor. Let the office know that you would like a Skype Appointment. This will help them provide further information to you and your advisor. 2. Contact your NAAC Academic Advisor via phone or email to set up an appointment time. Let your advisor know that you will be “skyping” with them so they are away of what information to provide to you for the upcoming appointment. Skype FAQs What do you need to Skype with the NAAC Advisors? You will need a computer with a web cam, microphone, internet connection, and a Skype account. How do I download Skype? There are step by step instructions attached to the Getting Started: Skype Advising packet. More info can be found online at www.skype.com Is Skype Free? Yes, Skype is FREE! The NAAC office will be utilizing Skype to Skype calls that are FREE no matter where you are in the world! Can I use Skype on phone? Yes, you can utilize Skype on your phone to speak with an advisor if needed. Ideally, it is easier to work with an advisor from a computer as the advisor will be able to share documents with you live and in real time. How do I know my advisor’s Skype name? Once you have made a Skype Advising Appointment with your advisor, he or she will send you an Instruction & Expectation guide that will include their Skype name and other helpful instructions for the appointment What if my Skype isn’t working? Don’t worry, technology issues occur. You can email or call your advisor to complete your advising via phone, email, or in person at the NAAC office in Dan Rogers 130. To obtain a Skype account, follow the directions below: Getting Started: Skype Advising
  • 18. Downloading and installing Skype is easy, and it’s free! You can download and install your Skype connection in a matter of minutes, and then the fun begins. The Web pages on www.skype.com are constantly being enhanced. So, they may change from time to time. Don't be surprised if the Web pages you're looking at don't exactly match the screen shots provided here. Downloading Skype Ready to get started? First, pick up the latest version of Skype: 1. With your Internet browser open, enter www.skype.com in the address line to open the Home page of the Skype Web site. 2. Click the Download button on the Skype home page to open the Download page. 3. Skype will begin the download to your computer. It will automatically determine the operating system and the Web browser that you are using. This screen will tell you what to do after the program downloads. If the download doesn’t start automatically, you will be able to start it manually by clicking on Start Download Again. After you click to download the program, you may be prompted to save or open the program SkypeSetup.exe. Always choose to save the file to your hard drive. Do not open or run the program during the download process. Skype sometimes posts two types of downloads, the general public version and the next new beta version. If you are just starting out, it's best to download the general public version because it’s more stable. In time, the beta version will become the public version, and you can upgrade. 4. Select Save to Disk. Choose an easy-to-remember location, such as the Windows Desktop, and click OK. Remember this location so that you can double-click the file after it is saved. Installing Skype
  • 19. When your download is complete and the program is saved to disk, follow these steps to install the program: 1. Double-click the SkypeSetup program that you just saved or just click Run if you have that option. If a User Account Control windows pops up asking you for permission, just click Continue. 2. When the installer program launches, it asks you to choose a language; select it from a drop-down list. The installer program then asks you to read and accept the End User License Agreement. You need to accept this to continue the installation. The program may also ask if you want to install certain other programs or browser add-ons. You are under no obligation to install these. If you don’t want the extras, just uncheck the box and click on Next. 3. Click the Options button. On this page you have the choice to launch Skype as soon as the installation is complete. This box is already checked. If you don't want Skype to start up right away, deselect the box by clicking it. You also have the option to update the Skype Extras Manager and to install a Skype Plugin for the web browser (s) that you have installed on the computer. 4. Click I agree -- Install. Skype asks you to set up an account by entering a Name, a Skype Name, and Password. The next screen asks for your e-mail address, country, and city. If the Skype name you specified is already in use, you will get a chance to choose another name. Once you complete this, Skype is installed and automatically launches itself (unless you deselected the Launch Skype check box on the Options screen). Skype downloading instructions written by Loren & Susan Abdulezer with Howard Dammond for www.dummies.com
  • 20. 10 Etiquette steps for A Skype Appointment 1. Make sure you are set up to go at least 10 minutes prior to your appointment. Remember, you are dealing with technology and sometimes things can go wrong! 2. Feel free to instant message with Skype prior to your appointment beginning to let your advisor know that you are ready to go. Be courteous. 3. Remember you are going to be live on video. Make sure you are in a space that is quiet where you can concentrate, there isn’t a lot of background noise, and that will provide you access to your computer, etc. A restaurant, the library, or a bookstore may not be the best environment to call in. 4. Mobile devices utilizing Skype are popular, but consider calling in via computer and webcam. By linking in with your advisor for a face to face discussion you will be able to see documents, have tutorials, and be aware of tones and inflexion in voices to help round out this unique advising experience. 5. This is a professional call. This is not a communication with your family or best friend. Make sure to treat this just as you would an in person appointment coming into the office. Be prepared for the conversation. 6. Do not use text speak when instant messaging. 7. Be aware of your Skype profile. Do not post things you do not want your advisor to see. 8. Be careful of multitasking while on video. Remember, your advisor can see what you are doing and what guests may be doing behind your camera. It is helpful to close all other applications on your computer to avoid distractions. 9. Speak audibly, but do not yell into the camera or microphone. 10.Remember to ask questions. If you need to use the instant messaging function to help get your thoughts across in written form, let your advisor know to be aware of the message coming in.