
Recomendados
Más contenido relacionado
Similar a Otras perspectivas2
Similar a Otras perspectivas2 (20)
Otras perspectivas2
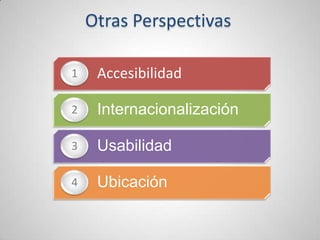
- 1. Otras Perspectivas •1 Accesibilidad •2 Internacionalización •3 Usabilidad •4 Ubicación
- 2. No todas estas perspectivas son relevantes para todas las situaciones. Pueden tener un impacto menos significativo en la arquitectura. Pueden referirse a las propiedades del sistema menos altamente visibles
- 3. La perspectiva de accesibilidad La perspectiva de accesibilidad asegura que las personas con discapacidad puedan utilizar el sistema.
- 4. Las empresas progresistas han llegado a reconocer las contribuciones que pueden hacer las personas con discapacidad y muchos tienen programas de alto perfil para fomentar su participación activa en las operaciones comerciales. Además, muchos países han aprobado legislación que prohíbe la discriminación contra personas con discapacidad y obliga a los empleadores a proporcionar instalaciones adecuadas para sus necesidades
- 6. EXCEPCIONES • Para los sistemas con exposición directa a los clientes . o Sistemas de Internet y de comunicaciones. o Cajeros automáticos . No abordar las necesidades de la población discapacitada puede reducir significativamente el alcance y eficacia del mismo, además de reflejar desfavorablemente la organización en los ojos del público.
- 7. EXCEPCIONES • La accesibilidad debe tener en cuenta no sólo los usuarios directos del sistema, es decir, los que están sentados en las terminales, pero los usuarios indirectos también. o Por ejemplo, un sistema financiero que tenga que proporcionar estados de cuenta bancarios en Braille para clientes ciegos.
- 9. LA PERSPECTIVA DE INTERNACIONALIZACIÓN • Garantiza la independencia del sistema de cualquier grupo particular de idioma, país o cultural. • Por ejemplo, un sistema que opera en un solo país no es probablemente afectado por la perspectiva de internacionalización. • Un sistema como Google es afectado por la perspectiva de internacionalización.
- 11. Perspectiva de Ubicación La capacidad del sistema para superar los problemas causados por la ubicación absoluta de sus elementos calidad deseada y las distancias entre ellas Aplicabilidad Cualquier sistema cuyos elementos (u otros sistemas con los que interactúa) son o pueden ser físicamente lejos una de otra. Preocupaciones horarios de funcionamiento, las características de enlace de red, resistencia a fallos de enlace, alto volumen de operaciones, entre países preocupaciones (políticas, comerciales y legales) y físicos variaciones entre ubicaciones actividades de cartografía geográfica, la estimación de la calidad del enlace, la estimación de la latencia, y el modelado de las características geográficas Problemas y errores Zona horaria primaria; seguridad; suposición de un período de lotes durante la noche; fracaso tener en cuenta las diferencias políticas, comerciales o legales, y suposición de un entorno físico estándar.
- 12. Aplicabilidad de la perspectiva en los puntos de vista VISTA APLICABILIDAD funcional El punto de vista funcional se presenta a menudo independientemente de la ubicación en el mundo. información Si los datos están muy distribuidos, la vista de la información debería describir cómo la información se mantiene sincronizado, las latencias de actualización, y cómo la información se transforma entre lugares concurrencia Procesamiento concurrente a través de partes altamente distribuidos del sistema es probable que sea problemático por razones de fiabilidad y latencia. El enfoque de concurrencia elegido puede tener que cambiar para adaptarse a las realidades de ubicación. desarrollo Si el desarrollo del sistema se distribuye en varias ubicaciones, el desarrollo debe visualiza y tiene que explicar cómo el software será administrado, integrado y probado. despliegue El punto de vista de implementación debe considerar cómo los sistemas están físicamente y como sera su extensibilidad en una forma controlada, sincronizada. Cuestiones importantes como la latencia, tiempos de entrega y los costos son a menudo asociados con la selección y el despliegue de redes y sistemas en áreas amplias. operacional El punto de vista operacional debe considerar cómo los sistemas están ampliamente distribuidas monitoreado, administrado y reparado
- 13. Perspectiva de Usabilidad calidad deseada La facilidad con que las personas que interactúan con el sistema puede y debe funcionar eficazmente. aplicabilidad Cualquier sistema que tenga una interacción significativa con los seres humanos (usuarios, operacional personal, y así sucesivamente) o que está expuesto a los miembros del público Preocupaciones Usabilidad de la interfaz de usuario, flujo de procesos de negocio, la calidad de la información, alineación de la interfaz hombre-ordenador (HCI) con prácticas de trabajo, habilidades de los usuarios, la maximización de la percepción, facilidad de uso y facilidad de interfaces de usuariocambiantes. Actividades Diseño de la interfaz de usuario, el diseño participativo, evaluación de la interfaz, y prototipos Tácticas arquitectónicas Separación de la interfaz de usuario de procesamiento funcional. Problemas y errores Si no se consideran las capacidades del usuario,, el diseño basado en la tecnología en lugar de necesidades, las interfaces inconsistentes, el desprecio por las normas de organización, y falta de separación entre las implementaciones de interfaz y procesamiento.
- 14. Aplicabilidad de la perspectiva en los puntos de Vista VISTA APLICABILIDAD funcional La estructura funcional indica donde las interfaces externas del sistema están y por lo tanto donde la usabilidad necesita ser considerada. Puede verse afectados por la usabilidad necesidades (por ejemplo, la adición de servicios de interfaz para apoyar la interacción cierto estilos), pero es poco probable que sea cambiado de manera significativa. información Calidad de la información (el suministro de información precisa, consistente relevante y oportuna datos) puede tener un gran impacto en la usabilidad. Concurrencia Esta perspectiva suele tener poco o ningún impacto en la opinión de la simultaneidad. desarrollo Los resultados de la aplicación de la perspectiva de usabilidad impacto de la vista para el Desarrollo en términos de los lineamientos, normas y pautas que aseguren la creación de un conjunto coherente y apropiado de interfaces de usuario para el sistema. desarrollo Esta perspectiva tiene poco o ningún impacto en la opinión de implementación, aunque la usabilidad preocupaciones podrían requerir cambios en el despliegue elemento (por ejemplo, debido a la respuesta requisitos de tiempo). operacional La perspectiva de usabilidad deben considerar las necesidades de usabilidad del sistema de los administradores.
- 15. El restaurante “Good Food” con una alta experiencia en casi 20 años en ofrecer servicio de bar restaurante en la ciudad natal de su dueño, desea ampliar sus servicios a varias sucursales fuera del país. Para esto requiere implementar un sistema informático que le permita ofrecer los distintos servicios de comidas con sus menús correspondientes, bebidas y atención e eventos sociales a muchos y variados clientes. PAISES VENEZUELA ESPAÑA ARGENTINA ESTADOS UNIDOS
- 16. El dueño del restaurante necesita además mantener un registro de sus empleados en todas sus sucursales, datos personales, préstamos solicitados, aceptados y negados, informe de labor diaria y sanciones por faltas y retrasos. Además se requiere mantener un registro del movimiento de gastos y entradas general por día y que debe ser reportado a la central en Colombia, desde cada uno de los restaurantes que inicia labores a las 8:00 a.m. y termina a las 9:00 p.m. En caso de que haya un evento social las labores son extendidas hasta un máximo de 3:00 a.m. Al final el sistema mensualmente debe generar un reporte del estado financiero del restaurante, donde se especifique detalladamente cada una de las facturas reportadas en el mes, su responsable, valor y razón de gasto. Así mismo se espera que genere las proyecciones para el siguiente mes y preste el servicio de asesoría en la escogencia de nuevos menús, bebidas y personal requerido.
- 17. Se debe tener en cuenta que en el departamento de cocina existe personal sordo para lo cual el sistema debe implementar la manera de comunicación para que los cocineros reciban el pedido para llevar a cabo su preparacion. Alcanzar el primer lugar en el mercado como el mejor restaurante de cocina, con un excelente servicio y calidad dentro de nuestros productos, para lograr la consolidación en la preferencia de nuestros clientes. Llegar a ser el mejor restaurante de a nivel nacional e internacional, constituirnos como el más exitoso, y convertirnos también como una muy atractiva fuente de trabajo. Desarrollar una estructura integral en nuestro equipo de colaboradores, actitud de servicio, convivencia y armonía en un ambiente de profesionalismo, honestidad y entusiasmo, en el trabajo. Que el cliente disfrute de su estancia con sus familiares y amigos sin perder el espíritu que identifica el país en el que se encuentra. Así como también que en cada una de sus visitas, se lleven una excelente imagen de la buena mesa y del buen servicio que en este restaurante.
- 18. 1) Identificar las perspectivas que se deben aplicar al sistema. 2) Citar los casos puntuales en lo que se deben aplicar las perspectivas anteriormente identificadas. 3) Indique como la perspectiva de ubicación se aplicaría en cada uno de los puntos de vista. 4) Identifique 3 problemas que se podrían presentar a la hora de diseñar una arquitectura para el caso mencionado y a su vez indique las posibles soluciones si las tiene. 5)Realice un dibujo del diseño de la arquitectura para el caso mencionado identificando sus componentes.
Notas del editor
- Animated vertical block list (Intermediate)To reproduce the SmartArt graphic effects on this slide, do the following:On the Home tab, in the Slides group, click Layout, and then clickBlank. On the Insert tab, in the Illustrations group, click SmartArt. In the Choose a SmartArt Graphic dialog box, in the left pane, click List. In the List pane, click Vertical Block List, and then click OK to insert the graphic into the slide.To create a fourth row, do the following:Select the third block shape (the shape on the left side)at the bottom of the graphic, and then under SmartArtTools, on the Design tab, in the CreateGraphic group, click the arrow next to AddShape, and select AddShapeAfter.To add a bulleted, rectangle shape next to the fourth block shape, select the fourth block shape, and then under SmartArtTools, on the Design tab, in the CreateGraphic group, click AddBullet.To enter numbers and text in the blocks and rectangles, select the graphic, and then click one of the arrows on the left border. In the Type your text here dialog box, enter text for each shape. (Note: In the example slide, the highest level text are the “1,” “2,” “3,” and “4.” The next level text is only one bullet (delete the second bullet) and are “First statement,” “Second statement,” and so on.)To reproduce the rectangle effects on this slide, do the following:Press and hold CTRL, and then select each of the rectangles (on the right of the graphic).Under SmartArtTools, on the Format tab, in the Shapes group, click the arrow to the right of ChangeShape, and under Rectangles select SnipDiagonalCornerRectangle (the fifth option from the left).With the rectangles still selected, drag one of the left center sizing handles to the left 1” to lengthen all four at once.Also with the rectangles selected, on the Home tab, in the bottom right corner of the Paragraph group, click the Paragraph dialog box launcher. In the Paragraph dialog box, under Indentation do the following:In the BeforeText box, enter 1”.In the Special list, select Hanging.Next to the Special list, in the By box enter 1”.Click OK.Select the SmartArt graphic, and then under SmartArtTools, on the Design tab, in the SmartArtStyles group, click MoreStyles, and under 3-D select PolishedEffect (the first option form the left). Select the first rectangle from the top (“First statement” in the example slide), and on the Home tab, in the Drawing group, click the arrow to the right of ShapeFill, and under ThemeColors select Red, Accent 2 (first row, the sixth option from the right).Select the second rectangle from the top (“Second statement” in the example slide), and on the Home tab, in the Drawing group, click the arrow to the right of ShapeFill, and under ThemeColors select Olive Green, Accent 3 (first row, the seventh option from the right).Select the third rectangle from the top (“Third statement” in the example slide), and on the Home tab, in the Drawing group, click the arrow to the right of ShapeFill, and under ThemeColors select Purple, Accent 4 (first row, the eighth option from the right). Select the fourth rectangle from the top (“Fourth statement” in the example slide), and on the Home tab, in the Drawing group, click the arrow to the right of ShapeFill, and under ThemeColors select Orange, Accent 6 (first row, the tenth option from the right). Press and hold CTRL, and select all of the rectangles (on the right side of the graphic). On the Home tab, in the Font group, in the FontSize box, select 36 pt., and in the FontColor list, under ThemeColors select White, Background 1 (first row, the first option from the left). To reproduce the circleson this slide, do the following:Press and hold CTRL, and then select the four block shapes (the shapes on the left) in the SmartArt graphic, and then under SmartArtTools, on the Format tab, in the Shapes group, click the arrow to the right of ChangeShape, and under BasicShapes select Oval (first row, first option from the left). On the slide, drag one of the top right sizing handles to the left to make the ovals into a circle and to make them smaller.Also with the four circles selected, position the circles so that they cover the bullet on the rectangles, and then on the Home tab, in the Font group, in the FontColor list, under ThemeColors select White, Background 1, Darker 50% (sixth row, first option from the left). Also on the Home tab, in the bottom right corner of the Drawing group, click the FormatShape dialog box launcher. In the FormatShape dialog box, click Fill in the left pane, in the Fill pane, click Gradient fill, and then do the following:In the Type list, select Radial.In the Direction list, select FromCenter (third option from the left).Under Gradient stops, click Add gradient stop or Remove gradient stop until two stops appear in the sliderAlso under Gradient stops, customize the gradient stops that you added as follows:Select the first stop in the slider, and then do the following:In the Position box, enter 0%.Click the button next to Color, and then under ThemeColors select White, Background 1 (first row, first option from the left). Select the last stop in the slider, and then do the following: In the Position box, enter 100%.Click the button next to Color, and then under ThemeColors select White, Background 2, Darker 25% (fourth row, first option from the left). To reproduce the animation effects on this slide, do the following:On the slide, select the SmartArt graphic. On the Animations tab, in the Advanced Animation group, click Add Animation, and then under Entrance click Fade.Also on the Animations tab, in the Advanced Animation group, click Add Animation, and then under Motion Paths click Lines.Also on the Animations tab, in the Animation group, click Effect Options, and then click Right.On the slide, right-click the motion path and select ReversePathDirection. On the Animations tab, in the Advanced Animation group, click Animation Pane. Press and hold CTRL, and select the two effects in the Animation Pane. Click the arrow to the right of the selected effects and select EffectOptions. In the EffectsOptions dialog box, do the following:On the Timing tab, in the Duration box enter 1.00.On the SmartArtAnimation tab, in the Group graphic list select Onebyone.Click OK. In the Animation Pane, click the double arrows under the two effects to show all the effects for all the shapes (16 effects).Press and hold CTRL, and select all of the effects in the Animation Pane. On the Animations tab, in the Timing group, in the Start list, select WithPrevious.Press and hold CTRL, and select the first, third, fifth, and seventh effects (fade entrance effects). On the Animations tab, do the following:In the AdvancedAnimation group, click Add Animation, and then under Entrance click Grow & Turn.In the Timing group, in the Start list, select After Previous.Press and hold CTRL, and select the ninth, eleventh, thirteenth, and fifteenth effects (right motion paths) in the Animation Pane. Click the arrow next to the effect and then click Remove.Select the ninth effect (right motion path) in the Animation Pane and drag it before the third effect in the list.Select the tenth effect (right motion path) in the Animation Pane and drag it before the sixth effect in the list.Select the eleventh effect (right motion path) in the Animation Paneand drag it before the ninth effect in the list.To reproduce the background effects on this slide, do the following:Right-click the slide background area, and then click Format Background. In the Format Background dialog box, click Fill in the left pane, select Gradient fill in the Fill pane, and then do the following:In the Type list, select Radial.Click the button next to Direction, and then click From Center (third option from the left). Under Gradient stops, click Add gradient stop or Remove gradient stop until two stops appear in the sliderAlso under Gradient stops, customize the gradient stops that you added as follows:Select the first stop in the slider, and then do the following:In the Position box, enter 33%.Click the button next to Color, and then under ThemeColors select White, Background 1 (first row, the first option from the left). Select the last stop in the slider, and then do the following: In the Position box, enter 100%.Click the button next to Color, and then under ThemeColors select White, Background 1, Darker 25% (fourth row, first option from the left).
- Animated pointer and light-up text(Advanced)To reproduce the background effects on this slide, do the following:On the Home tab, in theSlides group, click Layout, and then click Blank.Right-click the slide background area, and then click Format Background. In the Format Background dialog box, click Fill in the left pane, select Solid fill in the right pane, and select White, Background 1 (first row, first option from the left).To reproduce the rectangle on this slide, do the following:On the Home tab, in the Drawing group, click Shapes, and then under Rectangles click Rounded Rectangle (second option from the left). On the slide, drag to draw a rounded rectangle.Select the rectangle. Drag the yellow diamond adjustment handle to the left to decrease the amount of rounding on the corners. With the rounded rectangle still selected, under Drawing Tools, on the Format tab, in the Size group, do the following:In the Shape Height box, enter 3.5”.In the Shape Width box, enter 0.25”.Under Drawing Tools, on the Format tab, in the bottom right corner of the Shape Styles group, click the Format Shape dialog box launcher. In the Format Shape dialog box, click Fill in the left pane. In the Fill pane, select Solid fill, click the button next to Color, and then under Theme Colors click White, Background 1, Darker 15% (third row, first option from the left).Also in the Format Shape dialog box, click Line Color in the left pane. In the Line Color pane, select No line. Also in the Format Shape dialog box, click Shadow in the left pane. In the Shadow pane, click the button next to Presets, under Outer select Offset Bottom (first row, second option from the left), and then do the following:In the Transparency box, enter 0%.In the Sizebox, enter 100%.In the Blur box, enter 8.5 pt.In the Angle box, enter 90°.In the Distance box, enter 1 pt.Also in the Format Shape dialog box, click 3-D Format in the left pane. In the 3-D Format tab, do the following:Under Bevel, click the button next to Top, and then under Bevel click Circle (first row, first option from the left). Next to Top, in the Width box, enter 5 pt, and in the Height box, enter 5 pt.Under Surface, click the button next to Material, and then under Standard clickMatte (first row, first option from the left).Click the button next to Lighting, and then under Neutral click Soft (first row, third option from the left).On the slide, select the rounded rectangle. On the Home tab, in the Clipboard group, click the arrow to the right of Copy, and then click Duplicate.Select the duplicate rectangle. On the Home tab, in the Drawing group, do the following:Click the arrow next to Shape Fill, and then click No Fill.Click the arrow next to Shape Outline, and then click No Outline.Drag the second rectangle above the first rectangle until the lower edge overlays the top edge of the first rectangle. (Note:When the spinning animation effect is created later for these rectangles, the spin will center where the edges of the rectangles meet.)Press and hold CTRL, and then select both rectangles. On the Home tab, in the Drawing group, click Arrange, and do the following:Point to Align, and then click Align Selected Objects.Point to Align, and then click Align Center.Click Group. On the slide, drag the group until it is centered horizontally on the left edge of the slide (straddling the edge).On the Home tab, in the Drawing group, click Arrange, point to Align, and then do the following:Click Align to Slide.Click Align Middle.To reproduce the dashed arc on this slide, do the following:On the Home tab, in the Drawing group, click Shapes, and then under Basic Shapes click Arc (third row, 12th option from the left). On the slide, drag to draw an arc.Select the arc. Under Drawing Tools, on the Format tab, in the Size group, do the following:In the Shape Height box, enter 7.5”.In the Shape Width box, enter 7.5”.With the arc still selected, on the Home tab, in the Drawing group, click the arrow next to Shape Outline and then do the following:Under Theme Colors, click White, Background 1, Darker 15% (third row, first option from the left).Point to Dashes, and then click Dash (fourth option from the top).On the slide, drag the yellow diamond adjustment handle on the right side of the arc to the bottom of the arc to create a half circle.Drag the arc until the yellow diamond adjustment handles are on the left edge of the slide.With the arc still selected, on the Home tab, in the Drawing group, click the arrow under Arrange, point to Align, and then do the following:Click Align to Slide. Click Align Middle. To reproduce the half circle on this slide, do the following:On the slide, select the arc. On the Home tab, in the Clipboard group, click the arrow to the right of Copy, and then click Duplicate.Select the duplicate arc. Under Drawing Tools, on the Format tab, in the Size group, do the following:In the Shape Height box, enter 3.33”.In the Shape Width box, enter 3.33”.With the second arc still selected, under Drawing Tools, on the Format tab, in the Shape Styles group, click the arrow next to Shape Fill, and then under Theme Colors click White, Background 1, Darker 5% (second row, first option from the left).Under Drawing Tools, on the Format tab, in the Shape Styles group, click the arrow next to Shape Outline,and then click No Outline.Under Drawing Tools, on the Format tab, in the Shape Styles group, click Shape Effects, point to Shadow, and then click ShadowOptions. In the Format Shape dialog box, click Shadow in the left pane. In the Shadow pane, click the button next to Presets , under Inner click Inside Right (second row, third option from the left), and then do the following:In the Transparency box, enter 86%.In the Blur box, enter 24 pt.In the Angle box, enter 315°.In the Distance box, enter 4 pt.On the slide, drag the second arc until the yellow diamond adjustment handles are on the left edge of the slide. On the Home tab, in the Drawing group, click Arrange, and then do the following:Point to Align, and then click Align to Slide. Point to Align, and then click Align Middle. Click Send to Back.To reproduce the button shapes on this slide, do the following:On the Home tab, in the Drawing group, click Shapes, and then under Basic Shapes click Oval (first row, second option from the left). On the slide, drag to draw an oval.Select the oval. Under Drawing Tools, on the Format tab, in the Size group, do the following:In the Shape Height box, enter 0.34”.In the Shape Width box, enter 0.34”.Under Drawing Tools, on the Format tab, in the Shape Styles group, click More, and then click Light 1 Outline, Colored Fill – Olive Green, Accent 3 (third row, first option from the left).Under Drawing Tools, on the Format tab, in the bottom right corner of the Shape Styles group, click the Format Shape dialog box launcher. In the Format Shape dialog box, click Fill in the left pane. In the Fill pane, select Solid Fill. Click the button next to Color, and then under Theme Colors click Olive Green, Accent 3, Lighter 80°(second row, seventh option from the left).Also in the Format Shape dialog box, click Line Color in the left pane. In the Line Color pane, select No line. Also in the Format Shape dialog box, click Shadow in the left pane. In the Shadow pane, click the button next to Presets, under Outer click Offset Bottom (first row, second option from the left), and then do the following:In the Transparency box, enter 0%.In the Size box, enter 100%.In the Blur box, enter 8.5 pt.In the Angle box, enter 90°.In the Distance box, enter 1 pt.Also in the Format Shape dialog box, click 3-D Format in the left pane, and then do the following in the 3-D Format pane:Under Bevel, click the button next to Top, and then under Bevel click Art Deco (third row, fourth option from the left). Next to Top, in the Width box, enter 5 pt, and in the Height box, enter 5 pt.UnderContour, click the button next to Color, and then under Theme Colors click White, Background 1 (first row, first option from the left). In the Size box, enter 3.5 pt.Under Surface, click the button next to Material, and then under Standard click Matte (first row, first option from the left). Click the button next to Lighting, and then under Neutral click Soft (first row, third option from the left).On the slide, select the oval. Under Drawing Tools, on the Format tab, in the bottom right corner of the Size group, click the Size and Position dialog box launcher. In the Format Shape dialog box, click Position in the left pane, and in the Position pane, do the following to position the third and fourth ovals:In the Horizontal box, enter 2.98”.In the Vertical box, enter 1.5”.Select the oval. On the Home tab, in the Clipboard group, click the arrow under Paste, and then click Duplicate.Select the duplicate oval. Under Drawing Tools, on the Format tab, in the bottom right corner of the Size group, click the Size and Position dialog box launcher. In the Format Shape dialog box, click Position in the left pane, and in the Position pane, do the following to position the third and fourth ovals:In the Horizontal box, enter 3.52”.In the Vertical box, enter 2.98”. Repeat step 9 two more times, for a total of four ovals. Under Drawing Tools, on the Format tab, in the bottom right corner of the Size group, click the Size and Position dialog box launcher. In the Format Shape dialog box, click Position in the left pane, and in the Position pane, do the following to position the third and fourth ovals:Select the third oval on the slide, and then enter 3.52” in theHorizontal box and 4.27” in the Vertical box.Select the fourth oval on the slide, and then enter 2.99” in theHorizontal box and 5.66” in the Vertical box.To reproduce the text on this slide, do the following:On the Insert tab, in the Text group, click Text Box, and then on the slide, drag to draw the text box. Enter text in the text box and select the text. On the Home tab, in the Font group, do the following: In the Font list, select Corbel.In the Font Size list, select 22.Click the arrow next to Font Color, and then under Theme Colors click White, Background 1, Darker 50% (sixth row, first option from the left).On the Home tab, in the Paragraph group, click Align Text Left to align the text left in the text box.On the slide, drag the text box to the right of the first oval.Select the text box. On the Home tab, in the Clipboard group, click the arrow to the right of Copy, and then click Duplicate. Click in the text box and edit the text. Drag the second text box to the right of the second oval.Repeat steps 5-7 to create the third and fourth text boxes, dragging them to the right of the third and fourth ovals. To reproduce the animation effects on this slide, do the following:On the Home tab, in the Editing group, click Select, and then click Selection Pane. In the Selection and Visibility task pane, select the rectangle group. On the Animations tab, in the Advanced Animation group, click Add Animation, and then under Emphasis click Spin.Also on the Animations tab, in the Animation group, click the Effect Options dialog box launcher. In the Spin dialog box, do the following:On the Effects tab, in the Amount list, in the Custom box, enter 123°,and then press ENTER. Also in the Amount list, clickCounterclockwise.On the Timing tab, in the Duration box, select 1.00. On the Timing tab, in theStart list, selectWith Previous. On the slide, select the first oval. On the Animations tab, in the Advanced Animation group, click Add Animation, and then click More Emphasis Effects.In the Add Emphasis Effect dialog box, under Basic, click Fill Color. On the Animations tab, in the Animation group, click the Effect Options dialog box launcher. In Fill Color dialog box, the do the following:On the Effects tab, in the Fill Color list, click More Colors. In the Colors dialog box, on the Custom tab, enter values for Red:130, Green:153, Blue: 117. On the Timing tab, in the Duration box, , enter 0.50.On the Timing tab, in the Startlist, select After Previous. On the slide, select the first text box. On the Animations tab, in the Advanced Animation group, click Add Animation, and then under Entrance click Fade.Also on the Animations tab, in the Timing group, do the following:In theStart list, selectWith Previous.In the Duration box, enter 0.50. In the Selection and Visibility task pane, select the rectangle group. On the Animations tab, in the Advanced Animation group, click Add Animation, and then under Emphasis click Spin. Also on the Animations tab, in the Animation group, click the Effect Options dialog box launcher. In the Spin dialog box, do the following:On the Effects tab, in the Amount list, in the Custom box, enter 22°, and then press ENTER. Also in the Amount list, click Clockwise.On the Timing tab, in theStart list, selectOn Click. On the Timing tab, in the Duration box, enter 0.50.On the slide, select the second oval. On the Animations tab, in the Advanced Animation group, click AddAnimation, and then click More Emphasis Effects. In the Add Emphasis Effect dialog box, under Basic, click Fill Color. On the Animations tab, in the Animation group, click the Effect Options dialog box launcher. In the Fill Color dialog box, do the following:On the Effects tab, in the Fill Color list, click More Colors. In the Colors dialog box, on the Custom tab, enter values for Red:130, Green:153, Blue: 117. On the Timing tab, in the Startlist, select After Previous. On the Timing tab, in the Duration box, enter 0.50.On the slide, select the second text box. On the Animations tab, in the Advanced Animation group, click Add Animation, and then under Entrance click Fade.Also on the Animations tab, in the Timing group, do the following:In theStart list, selectWith Previous.In the Duration box, enter 0.50. On the slide, select the third oval. On the Animations tab, in the Advanced Animation group, click Add Animation, and then click More Emphasis Effects. In the Add Emphasis Effect dialog box, under Basic, click Fill Color. On the Animations tab, in the Animation group, click the Effect Options dialog box launcher. In the Fill Color dialog box, do the following:On the Effects tab, in the Fill Color list, click More Colors. In the Colors dialog box, on the Custom tab, enter values for Red:130, Green:153, Blue: 117. On the Timing tab, in the Startlist, select After Previous. On the Timing tab, in the Speedlist, select Very Fast.On the slide, select the third text box. On the Animations tab, in the Advanced Animation group, click Add Animation, and then under Entrance clickFade. Also on the Animations tab, in the Timing group, do the following:In theStart list, selectWith Previous.In the Duration box, enter 0.50.On the slide, select the fourth oval. On the Animations tab, in the Advanced Animation group, click Add Animation, and then click More Emphasis Effects. In the Add Emphasis Effect dialog box, under Basic, click Fill Color. On the Animations tab, in the Animation group, click the Effect Options dialog box launcher. In the Fill Color dialog box, do the following:On the Effects tab, in the Fill Color list, click More Colors. In the Colors dialog box, on the Custom tab, enter values for Red:130, Green:153, Blue: 117. On the Timing tab, in the Startlist, select After Previous. On the Timing tab, in the Duration box, enter 0.50.On the slide, select the fourth text box. On the Animations tab, in the Advanced Animation group, click Add Animation,and then under Entrance click Fade. On the Animations tab, in the Timing group, do the following:In theStart list, selectWith Previous.In the Duration box, enter 0:50.