SlideShare una empresa de Scribd logo
1 de 13
Descargar para leer sin conexión
International Journal of Computational Engineering Research||Vol, 03||Issue, 10||

3-Phase Ac Motor Monitoring and Parameter Calculation Using
Labview and Daq
1

Dr. K.Ravichandrudu, 2P.Suman Pramod Kumar,3YN.Vijay Kumar, 4C.Praveen
1,

Professor of EEE, Krishnaveni Engg College/Women, Guntur,A.P, India
2,
Associate Professor of EEE, C.R.Engg College, Tirupathi, A.p, India
3
Associate Professor of EEE, S.V.C.E.T, Chittoor, A.P, India
4
Assistant Professor of EEE, C.R.Engg College, Tirupathi, A.p, India

ABSTRACT
3-phase AC motor monitoring and parameter calculation using lab VIEW is the project which
makes use of lab VIEW to monitor and control operation of the electrical machine. The real time
variables of electrical machine are measured and given to lab VIEW through DAQ. Lab VIEW allows
us to program as per our requirements. We continuously observe the operating voltage and current of
the motor and trip the circuit if the motor exceeds a safe value. A comparison has been made such that
the voitage or current above safe value would turn on an LED emitting red light. When the light glows,
a digital signal of 5V is generated at the selected line on DAQ. This 5V is drawn into the relay
arrangement, which is used to energized itself and trip the contact, hence isolating the machine from
the main supply.s A Data Acquisition Card (DAQ) is used to perform the core of the control action by
switching on the relay. The DAQ, USB 6009 is selected for this project. In order to provide precise
input voltages to the DAQ, such that change in each volt of voltage or amp of current is observable;
the current is read to the DAQ through current sensor. A suitable logic using is written into the DAQ
in the Lab VIEW. Observing the voltages that are obtained from the step down transformer the relay is
operated. When the voltage or current exceeds its operating range the relay is operated

KEYWORDS: 3-Ph Motor, LabView, DAQ, Voltage, Current

I.

INTRODUCTION

1.1: INTRODUCTION TO 3-PHASE MOTOR
An electric motor is a device which converts an electric energy into a mechanical energy. This
mechanical energy then can be supplied to various types of load the motors can operate on dc as well as single
and 3 phase ac supply. The motors operating on dc supply are called dc motors while motors operating on ac
supply are called ac motors. As ac supply is commonly available, the ac motors are popularly used in practice.
The ac motors are classified as single and 3 phase induction motors, synchronous motor and some special
purpose motors. Out of all these types 3 phase induction motors are widely used various industrial applications.
The important advantages of 3 phase induction motors over other types are self starting property, no need of
starting device, high power factor, good speed regulation and robotics construction. The working principle of 3
phase induction is based on the production of rotating magnetic field.
1.3. PRINCIPLE OF OPERATION

Fig: 1.1.Rotating Magnetic Field
||Issn 2250-3005 ||

||October||2013||

Page 36
3-Phase Ac Motor Monitoring And Parameter…
A three-phase power supply provides a rotating magnetic field in an induction motor. In both induction and
synchronous motors, the AC power supplied to the motor's stator creates a magnetic field that rotates in time
with the AC oscillations. Whereas a synchronous motor's rotor turns at the same rate as the stator field, an
induction motor's rotor rotates at a slower speed than the stator field. The induction motor stator's magnetic field
is therefore changing or rotating relative to the rotor. This induces an opposing current in the induction motor's
rotor, in effect the motor's secondary winding, when the latter is short-circuited or closed through an external
impedance. The rotating magnetic flux induces currents in the windings of the rotor; in a manner similar to
currents induced in transformer's secondary windings. These currents in turn create magnetic fields in the rotor
that react against the stator field. Due to Lenz's Law, the direction of the magnetic field created will be such as
to oppose the change in current through the windings. The cause of induced current in the rotor is the rotating
stator magnetic field, so to oppose this the rotor will start to rotate in the direction of the rotating stator magnetic
field. The rotor accelerates until the magnitude of induced rotor current and torque balances the applied load.
Since rotation at synchronous speed would result in no induced rotor current, an induction motor always
operates slower than synchronous speed. The difference between actual and synchronous speed or slip varies
from about 0.5 to 5% for standard Design B torque curve induction motors. The induction machine's essential
character is that it is created solely by induction instead of being separately excited as in synchronous or DC
machines or being self-magnetized as in permanent magnet motors.
For these currents to be induced, the speed of the physical rotor must be lower than that of the
stator's rotating magnetic field ( ), or the magnetic field would not be moving relative to the rotor conductors
and no currents would be induced. As the speed of the rotor drops below synchronous speed, the rotation rate of
the magnetic field in the rotor increases, inducing more current in the windings and creating more torque. The
ratio between the rotation rate of the magnetic field as seen by the rotor (slip speed) and the rotation rate of the
stator's rotating field is called slip. Under load, the speed drops and the slip increases enough to create sufficient
torque to turn the load. For this reason, induction motors are sometimes referred to as asynchronous motors. An
induction motor can be used as an induction generator, or it can be unrolled to form the linear induction motor
which can directly generate linear motion.
1.4. NEED FOR MONITORING
Monitoring of ac motor is necessary for operating efficiently. There are many undesirable things
that happen to electric motors and other electrical equipment as a result of operating a power system in an over
voltage manner. Operating a motor beyond its nominal range of its voltage requirements will reduce its
efficiency and cause premature failure. The economic loss from premature motor failure can be devastating. In
most cases, the price of the motor itself is trivial compared to the cost of unscheduled shutdowns of the process.
Both high and low voltages can cause premature motor failure, as well as voltage imbalance.
So the best life and most efficient operation occur when motors are operated at voltages close to
the nameplate ratings. Monitoring of ac motor provides not only reducing the cost of the electricity bill, but also
extending the life of the electrical motors while
Preventing unexpected failures.

II.

EFFECTS OF HIGH VOLTAGE

For example, many motors are rated at 220/230 volts and had a tolerance band of plus/minus 10%.
Thus, the actual voltage range that they can tolerate on the high voltage connections would be at least 207 volts
to 253 volts. Even though this is the so-called tolerance band, the best performance of larger motors would
occur at or near the rated voltage. The extreme ends, either high or low, would be putting unnecessary stress on
the motor. Generally speaking, these voltage tolerance ranges are in existence, not to set a standard that can be
used all the time, but rather to set a range that can be used to accommodate the normal hour-to-hour swings in
received voltage. An operation of a motor on a continuous basis at either the high extreme or the low extreme
will shorten the life of the motor. Although this paper covers the effects of high and low voltage on motors, the
operation of other magnetic devices is often affected in similar ways. Solenoids and coils used in relays and
starters are punished by high voltage more than they are by low voltage. This is also true of ballasts in
fluorescent, mercury, and high pressure sodium light fixtures. Transformers of all types, including welding
transformers, are damaged in the same way. Incandescent lights are especially susceptible to high voltage
conditions. A 5% increase in voltage results in a 50% reduction in bulb life. A 10% increase in voltage above
the rating reduces incandescent bulb life by 70%. Overall, it is definitely in the equipment’s best interest to
have incoming voltage close to the equipment ratings. High voltage will always tend to reduce power factor and
increase the losses in the system which results in higher operating costs for the equipment and the system.
||Issn 2250-3005 ||

||October||2013||

Page 37
3-Phase Ac Motor Monitoring And Parameter…
III.

LOW VOLTAGE

When electric motors are subjected to voltages below the nameplate rating, some of the characteristics
will change slightly and others will change more dramatically. A basic point to note is that to drive a fixed
mechanical load connected to the shaft, a motor must draw a fixed amount of power from the power line. The
amount of power the motor draws is roughly related to the voltage x current (amps). Thus, whenVoltage gets
low, the current must get higher to provide the same amount of power. The fact that current gets higher is not
alarming unless it exceeds the nameplate current rating of the motor. When amps go above the nameplate rating,
it is safe to assume that the buildup of heat within the motor will become damaging if it is left unchecked. If a
motor is lightly loaded and the voltage drops, the current will increase in roughly the same proportion that the
voltage decreases. For example, say a 10% voltage decrease would cause a 10% amperage increase. This would
not be damaging if the motor current stays below the nameplate value. However, if a motor is heavily loaded
and a voltage reduction occurs, the current would go up from an already fairly high value to a new value which
might be in excess of the full load rated amps. This could be damaging. It can thus be safely said that low
voltage in itself is not a problem unless the motor amperage is pushed beyond the nameplate rating. That is it
must be controlled in a safe range. Aside from the possibility of over-temperature and shortened lifespan created
by low voltage, some other important items need to be understood. The first is that the starting torque, pull-up
torque, and pull-out torque of induction motors, all change based on the applied voltage squared . Thus, a 10%
reduction from nameplate voltage (100% to 90%, 230 volts to 207 volts) would reduce the starting torque, pullup torque, and pull-out torque by a factor of .9 x .9. The resulting values would be 81% of the full voltage
values. At 80% voltage, the result would be .8 x .8, or a value of 64% of the full voltage value. In this case, it is
easy to see why it would be difficult to start “hard-to-start” loads if the voltage happens to be low. Similarly the
motor’s pull-out torque would be much lower than it would be under normal voltage conditions.To summarise:
low voltage can cause high currents and overheating which will subsequently shorten motor life. Too low
voltage can also reduce the motor’s ability to get started and its values of pull-up and pull-out torque. On lightly
loaded motors with easy-to-start loads, reducing the voltage will not have any appreciable effect except that it
might help reduce the light load losses and improve the efficiency under this condition.

IV.

OVER CURRENT IN AC MOTOR

Over current is a condition in electronics when too much current is running through an electrical
circuit. This problem is relatively common in the electrical engineering field. Over current protection is one of
the essential elements of a proper electrical installation. The problem has many symptoms and can eventually
lead to permanent damage to the motor or electrical device. A few of the symptoms of over current in a motor
are shorts, blown fuses and unintended switching on and off of the motor. An over current exists when the
normal load current for a circuit is exceeded. It can be in the form of an overload or short circuit. When applied
to motor circuits an overload is any current, flowing within the normal circuit path that is higher than the
motor’s normal Full Load Amps (FLA). A short-circuit is an Over current which greatly exceeds the normal full
load current of the circuit. Also, as its name infers, a short-circuit leaves the normal current carrying path of the
circuit and takes a “short cut” around the load and back to the power source. Motors can be damaged by both
types of currents. Single-phasing, overworking and locked rotor conditions are just a few of the situations that
can be protected against with the careful choice of protective devices. If left unprotected, motors will continue to
operate even under abnormal conditions. The excessive current causes the motor to overheat, which in turn
causes the motor winding insulation to deteriorate and ultimately fail. Good motor overload protection can
greatly extend the useful life of a motor. Because of a motor’s characteristics, many common over
currentdevices actually offer limited or no protection.
4.1.PROBLEM DEFINITION
The aim of the paper is to monitor the 3 phase ac motor so that when over voltages or under voltage
and over current or under current occur in motor, the motor can disconnects from the supply.
The problem is that there are many undesirable things that happen to electric motors and other electrical
equipment as a result of operating a power system in an over voltage manner. Operating a motor beyond its
nominal range of its voltage requirements will reduce its efficiency and cause premature failure.
The problem with low voltage in motor can cause high currents and overheating which will subsequently
shorten motor life. Too low voltage can also reduce the motor’s ability to get started and its values of pull-up
and pull-out torque. The problem with over current in motor has many symptoms and can eventually lead to
permanent damage to the motor or electrical device. A few of the symptoms of overcurrent in a motor are shorts,
blown fuses and unintended switching on and off of the motor.The problems with over voltage, under voltage
and over current can overcome by monitoring ac motor using NI-LabVIEW and DAQ.
||Issn 2250-3005 ||

||October||2013||

Page 38
3-Phase Ac Motor Monitoring And Parameter…
4.2.HOW 3-PHASE AC MOTOR IS MONITORING
The monitoring is done by monitoring the parameters of the motor. These parameters include
voltage, current, speed. The motor is disconnected if the voltage exceeds its operating range. Each phase of the
ac motor is connected to the step-down transformer in order to step-down the voltage. The output of the stepdown transformer from each phase is connected to the voltage and current transducer (sensor). These voltage
and current transducer senses the voltage and currents which are act as input to the DAQ and it is connected to
a PC. By programming in PC using GUI, a relay is operated to disconnect the motor if the output voltage is out
of range.

V.

SYSTEM SPECIFICATIONS

5.1.BLOCK DIAGRAM

load

3-phase ac motor

Analog
Analog

Step down transformer

Current sensor

Analog
DAQ

Analog
Analog Analog Analog

Step down transformer

Analog
Current sensor

Analog

Step down transformer

Analog

Current sensur

Switching device

PC
Analog

Analog

Analog

Analog

POWER SUPPLY

Fig 1.2: Monitoring of motor using DAQ
Motor Monitoring

Fig 2.1: Block Diagram of 3 Phase Ac

5.2. DESCRIPTION
5.3.PHASE AC MOTOR
An induction or asynchronous motor is an AC motor in which all electromagnetic energy is
transferred by inductive coupling from a primary winding to a secondary winding, the two windings being
separated by an air gap. In three-phase induction motors, that are inherently self-starting, energy transfer is
usually from the stator to either a wound rotor or a short-circuited squirrel cage rotor. Three-phase cage rotor
induction motors are widely used in industrial drives because they are rugged, reliable and economical. Singlephase induction motors are also used extensively for smaller loads. Although most AC motors have long been
used in fixed-speed load drive service, they are increasingly being used in variable-frequency drive (VFD)
service, variable-torque centrifugal fan, pump and compressor loads being by far the most important energy
saving applications for VFD service. Squirrel cage induction motors are most commonly used in both fixedspeed and VFD applications.

Fig 2.2:3-Phase Ac Motor

Fig 2.3: Stepdown Transformer

5.4.CURRENT SENSOR
Components used in designing the circuit
Hall Effect Base Linear Current Sensor
5.5.Functional Description
The Winson WCS2720 provides economical and precise solution for both DC and AC current
sensing in industrial, commercial and communications systems. The unique package allows for easy
implementation by the customer. Typical applications include motor control, load detection and management,
over-current fault detection and any intelligent power management system etc…

||Issn 2250-3005 ||

||October||2013||

Page 39
3-Phase Ac Motor Monitoring And Parameter…
The WCS2720 consists of a precise, low-temperature drift linear hall sensor IC with temperature
compensation circuit and a current path with 0.4 mΩ typical internal conductor resistance. This extremely low
resistance can effectively reduce power loss, operating temperature and increase the reliability greatly. Applied
current flowing through this conduction path generates a magnetic field which is sensed by the integrated Hall
IC and converted into a proportional voltage. The terminals of the conductive path are electrically isolated from
the sensor leads. This allows the WCS2720 current sensor to be used in applications requiring electrical
isolation without the use of opto-isolators or other costly isolation techniques and make system more
competitive in cost.
FUNCTIONAL BLOCK

PIN CONFIGURATION AND RATINGS

Fig: 2.4.Functional Block Of Current Sensor
Se nso r

Fig : 2 .5 . V - I C ha r ect e r ist ic s O f C urr ent

5.6.DAQ (NI USB – 6009)
DAQ is data acquisition. It is device which contains both ADC & DAC in it. It is interface between
analog output of sensor and the PC. The data traditional experiments in it signal from sensors are sent to analog
or digital domain, read by experimenter, and recorded by hand. In automated data acquisition systems the
sensors transmit a voltage or current signal directly to a computer via data acquisition board. Software such as
Lab VIEW controls the acquisition and processing of such data. Here we have to consider the following
properties of the input signal.
1. Sampling rate
2. Resolution
3. Range
4. Amplification
Here the DAQ being used is NI USB – 6009.
NI USB – 6009
Features
 8 analog inputs (14-bit, 48 kS/s)
 2 analog outputs (12-bit, 150 S/s); 12 digital I/O; 32-bit counter
 Bus-powered for high mobility; built-in signal connectivity
 Compatible with LabVIEW, LabWindows/CVI, and Measurement Studio for Visual Studio .NET
Description
The NI USB – 6009 provides connection to eight single-ended analog input (AI) channels, two analog
output (AO) channels, 12 digital input/output (DIO) channels, and a 32-bit counter with a full-speed USB
interface. The National Instruments USB-6009 provides basic data acquisition functionality for applications
such as simple data logging, portable measurements, and academic lab experiments. It is affordable for student
use and powerful enough for more sophisticated measurement applications.

||Issn 2250-3005 ||

||October||2013||

Page 40
3-Phase Ac Motor Monitoring And Parameter…
Block Diagram

PIN Diagram

Fig: 2.6. Block Diagram of DAQ

Fig: 2.7.Pin Diagram

Of DAQ
COMPUTER (Lab VIEW)
NI Lab VIEW is software where all the code is implemented and interfacing of DAQ is done.
Lab VIEW is a graphical programming environment used by millions of engineers and scientists
to develop sophisticated measurement, test, and control systems using intuitive graphical icons and wires that
resemble a flowchart. It offers unrivaled integration with thousands of hardware devices and provides hundreds
of built-in libraries for advanced analysis and data visualization – all for creating virtual instrumentation. The
Lab VIEW platform is scalable across multiple targets and OSs, and, since its introduction in 1986, it has
become an industry leader. The programming that is done in this Lab VIEW software is mainly Graphical
Programming that is Program with drag-and-drop, graphical function blocks instead of writing lines of text.
The representation is mainly Dataflow Representation which is easily developed, maintain, and understand
code with an intuitive flowchart representation.
Lab VIEW is the center piece of graphical system design and provides engineers and scientists
with the tools you need to create and deploy measurement and control systems. You can get more done in less
time with Lab VIEW through its unique graphical programming environment; built-in engineering-specific
libraries of software functions and hardware interfaces; and data analysis, visualization, and sharing features.
You can bring your vision to life with Lab VIEW. Through a world-class ecosystem of partners and technology
alliances, a global and active user community, and consistent annual releases, you can have the confidence to
continually innovate. Lab VIEW makes complex control simple and accessible.
Lab VIEW makes us better because code reuse saves time and effort because one of the most
efficient ways to shorten development time is through code reuse. By taking advantage of existing code,
whether it has already been written or is part of a resource library, developers and domain experts can focus on
their applications rather than committing valuable time and resources to programming. Lab VIEW is an ideal
platform for prototyping, designing, and deploying high-quality products to market fast. You can use one
development environment to quickly iterate on your embedded hardware and software designs and then reuse
the best parts in a final product.

VI.

SYSTEM DESIGN

6.1.HARDWARE
Designing of this system is possible when you select the specific device and software to suite.
For this we selected NI USB – 6009, DAQ device and NI LabVIEW software. With the help of these, 3-phase
ac motor monitoring can be implemented successfully with the help of sensor technology. To the DAQ we
connected sensor circuit. Whenever the motor getting started, sensors detect the voltage and current of the ac
motor and sends the signal to computer (LabVIEW) through DAQ device. Based on the voltage and
current(Low, Medium and High), the motor operated through relay circuit.

||Issn 2250-3005 ||

||October||2013||

Page 41
3-Phase Ac Motor Monitoring And Parameter…
6.2.HARDWARE SCHEMATIC

Fig 3.1: Schematic Diagram Of Hardware Component
Description
DAQ (NI USB – 6009) is connected through the USB port of a computer. In this project we
are using only the analog pins of the device. It has a total of 12 analog I/O ports. The output port of each sensor
is connected to the each port of the DAQ in a sequence in order to avoid complexity in connections. The
connections are made sequentially so that while interfacing the DAQ to the LabVIEW order of sensors may be
understood easily.
The power supply to the DAQ is through the USB of the computer. It has two positive voltage
pins i.e., one +2.5V and other 5V. sensors are connected to the +5V supply through connectors as shown. The
ground terminal of each IR Transceiver is connected to the GND pin of the DAQ.
6.7. SOFTWARE
Software used: NI LabVIEW (2011 version, 32-bit)
Opening a New VI from a Template
LabVIEW provides built-in template VIs that include the subVIs, functions, structures, and
front panel objects we need to get started building common measurement applications. Complete the following
steps to create a VI that generates a signal and displays it in the front panel window.
1. Launch LabVIEW.
2. In the Getting Started window, click the New or VI from Template link to display the New dialog box.
3. From the Create New list, select VI»From Template»Tutorial (Getting Started)»Generate and Display.
This template VI generates and displays a signal.
4. Click the OK button to create a VI from the template. We also can double-click the name of the template VI
in the Create New list to create a VI from a template. LabVIEW displays two windows: the front panel
window and the block diagram window.A preview and a brief description of the template VI appear in the
Description section. Figure below shows the new dialog box and the preview of the Generate and Display
template VI.

Fig 3.2: Creating New VI
5. Examine the front panel window. The user interface, or front panel, appears with a gray
background and includes controls and indicators. The title bar of the front panel indicates
that this window is the front panel for the Generate and Display VI.
Note If the front panel is not visible, we can display the front panel by
selecting Window»Show Front Panel. We also can switch between the front panel
window and block diagram window at any time by pressing the <Ctrl-E> keys. The <Ctrl>
||Issn 2250-3005 ||

||October||2013||

Page 42
3-Phase Ac Motor Monitoring And Parameter…
key in keyboard shortcuts corresponds to the (Mac OS X) <Option> or <Command> key
or (Linux) <Alt> key.
6. Select Window»Show Block Diagram and examine the block diagram of the VI. The block diagram appears
with a white background and includes Vis and structures that control the front panel objects. The title bar of
the block diagram indicates that this window is the block diagram for the Generate and Display VI.
7. On the front panel toolbar, click the Run button, shown at left. We also can press the <Ctrl-R> keys to run a
VI. A sine wave appears on the graph in the front panel window.

8. Stop the VI by clicking the front panel STOP button, shown at left.
Configuring a VI to Run Continuously until the User Stops It
In the current state, the VI runs once, generates one signal, and then stops running. To run the VI until a
condition occurs, We can use a While Loop.
Complete the following steps to add a While Loop to the block diagram.
[1]
[2]
[3]

[4]
[5]
[6]
[7]
[8]

[9]
[10]

Display the front panel and run the VI. The VI runs once and then stops. The front panel does not have a
stop button.
Display the block diagram.
Click the Search button, shown at left, on the Functions palette, and enter while in the text box.
LabVIEW searches as we type the first few letters and display any matches in the search results text box.
If there are objects with the same name, use the information in the brackets to the right of each object
name to decide which object to select. Some objects are located on multiple palettes because we can use
them for multiple applications.
Double-click While Loop <<Execution Control>> to display the Execution Control subpalette and
temporarily highlight the While Loop on the subpalette.
Select the While Loop on the Execution Control palette.
Move the cursor to the upper left corner of the block diagram. Click and drag the cursor diagonally to
enclose all the Express VIs and wires, as shown in Figure.
Release the mouse to place the While Loop around the Express VIs and wires.
The While Loop, shown at left, appears with a STOP button wired to the
conditional terminal. This While Loop is configured to stop when the user clicks the
STOP button.
Display the front panel and run the VI. The VI now runs until you click the STOP button. A While Loop
executes the VIs and functions inside the loop until the user clicks the STOP button.
Click the STOP button and save the VI.

Fig 3.3: Working Of Stop Button
Controlling the Speed of Execution of a VI loop
To plot the points on the waveform graph more slowly, we can add a time delay to the block
diagram.
Complete the following steps to control the speed at which the VI runs.

||Issn 2250-3005 ||

||October||2013||

Page 43
3-Phase Ac Motor Monitoring And Parameter…
[1]

[2]
[3]
[4]
[5]
[6]

On the block diagram, search for the Time Delay Express VI, shown at left, on the Functions palette and
place it inside the While Loop. We can use the Time Delay Express VI to control the execution rate of the
VI.
Enter 0.25 in the Time delay (seconds) text box. This time delay specifies how fast the loop runs. With a
0.25 second time delay, the loop iterates once every quarter of a second.
Click the OK button to save the current configuration and close the Configure Time Delay dialog box.
Display the front panel and run the VI.
Click the Enable switch and examine the change on the graph. If the Enable switch is on, the graph
displays the reduced signal. If the Enable switch is off, the graph does not display the reduced signal.
Click the STOP button to stop the VI.

Acquiring a Signal in NI-DAQmx
We will use the DAQ Assistant Express VI to create a task in NI-DAQmx. NI-DAQmx is a
programming interface we can use to communicate with data acquisition devices. Refer to the Getting Started
with LabVIEW» Getting Started with DAQ»Taking an NI-DAQmx Measurement in LabVIEW book on
the Contents tab in the LabVIEW Help for information about additional ways to create NI-DAQmx tasks. In the
following exercises, we will create an NI-DAQmx task that continuously takes a voltage reading and plots the
data on a waveform graph.
Creating an NI-DAQmx Task
In NI-DAQmx, a task is a collection of one or more channels, which contains timing,
triggering, and other properties. Conceptually, a task represents a measurement or generation you want to
perform. For example, we can create a task to measure temperature from one or more channels on a DAQ
device.
Complete the following steps to create and configure a task that reads a voltage level from a DAQ device.
[1] Open a new, blank VI.
[2] On the block diagram, display the Functions palette and select Express»Input to display the Input palette.
[3] Select the DAQ Assistant Express VI, shown at left, on the Input palette and place it on the block diagram.
The DAQ Assistant launches and the Create New Express Task dialog box appears.
[4] Click Acquire Signals»Analog Input to display the Analog Input options.
[5] Select Voltage to create a new voltage analog input task. The dialog box displays a list of channels on each
installed DAQ device. The number of channels listed depends on the number of channels you have on the
DAQ device.
[6] In the Supported Physical Channels list, select the physical channel to which the device connects the
signal, such as ai0, and then click the Finish button. The DAQ Assistant opens a new dialog box, shown in
Figure 4-1 that displays options for configuring the channel you selected to complete a task.
[7]

Fig 3.4: DAQ Assistant
Graphing Data from a DAQ Device
We can use the task you created in the previous exercise to graph the data acquired from a DAQ
device.Complete the following steps to plot the data from the channel on a waveform graph and change the
name of the signal.
[1] On the block diagram, right-click the data output and select Create» Graph Indicator from the shortcut
menu.
[2] Display the front panel and run the VI three or four times. Observe the waveform graph. Voltage appears in
the plot legend at the top of the waveform graph.
[3] On the block diagram, right-click the DAQ Assistant Express VI and select Properties from the shortcut
menu to open the DAQ Assistant.
[4] Right-click Voltage in the list of channels and select Rename from the shortcut menu to display the
Rename a channel or channels dialog box. You also can select the name of the channel and press the
<F2> key to display the Rename a channel or channels dialog box.
[5] In the New Name text box, enter First Voltage Reading, and click the OK button.
||Issn 2250-3005 ||

||October||2013||

Page 44
3-Phase Ac Motor Monitoring And Parameter…
[6] In the DAQ Assistant dialog box, click the OK button to save the current configuration and close the DAQ
Assistant.
[7] Display the front panel and run the VI. First Voltage Reading appears in the waveform graph plot legend.
[8] Save the VI.
[9] Editing an NI-DAQmx Task
i.
You can add a channel to the task so you can compare two separate voltage readings.
[10]
You also can customize the task to acquire the voltage readings continuously.
[11] Complete the following steps to add a new channel to the task and acquire data continuously.
1. In the block diagram window, double-click the DAQ Assistant Express VI to open the DAQ Assistant.
2. Click the Add Channels button, shown at left, and select Voltage to display the Add Channels To Task
dialog box.
3. Select any unused physical channel in the Supported Physical Channels list, and click the OK button to
return to the DAQ Assistant.
4. Rename the channel Second Voltage Reading.
5. In the Timing Settings section of the Configuration page, select Continuous Samples from the
Acquisition Mode pull-down menu. When you set timing and triggering options in the DAQ Assistant,
these options apply to all the channels in the list of channels.
6. Click the OK button to save the current configuration and close the DAQ Assistant. The Confirm Auto
Loop Creation dialog box appears.
7. Click the Yes button. LabVIEW places a While Loop around the DAQ Assistant Express VI and the graph
indicator on the block diagram. A stop button appears wired to the stop input of the DAQ Assistant Express
VI. The stopped output of the Express VI is wired to the conditional terminal of the While Loop. The block
diagram should appear similar to Figure.

Fig 3.5: Block Diagram Of The Read Voltage VI
8. If an error occurs or you click the stop button while the VI is running, the DAQ Assistant Express VI stops
reading data and the stopped output returns a TRUE value and stops the While Loop.


IMPLEMENTATION, TESTING & RESULTS
Connect the step down transformers for each phase of the 3-phase ac motor. For the convenient daq ratings
with maximum 10v, the suitable step down transformer or the step down transformer with voltage divider
can be used.

Screen 1: Circuit Of The Project






Screen 2: Pins Of DAQ

Connect the current sensors in series with the each phase of the 3- phase ac motor.
Place the IC for supplying constant 5v to energise the current sensor.
All those arrangements placed on the pcb for convenient purpose.
Connections are made to DAQ as shown in the hardware schematic. Use a common pin for ground and
+5V supply.
Connections should be made carefully such that there is no interference of connections in between.

||Issn 2250-3005 ||

||October||2013||

Page 45
3-Phase Ac Motor Monitoring And Parameter…
PROGRAMMING
 LabVIEW is a graphical user interface language where we can drag and drop the code instead of writing
 The code design for this project is shown below.

Fig4.1: VI of 3-Phase Ac Motor

Fig4.2: Sub VI for Voltage Monitoring Of Motor



Sub VI for calculate voltage used in the above code is shown below



Sub VI for calculate current used in the above code is shown below

Fig 4.3: Sub VI for Current Monitoring


Several functions used in the above code are

o

Select function: Returns the value wired to the t input or f input, depending on the value of s. If s is TRUE,
this function returns the value wired to t. If s is FALSE, this function returns the value wired to f. The
connector pane displays the default data types for this polymorphic function.

o

Fig 4.7: Acquring signals through DAQ

Fig 4.8: Selection of Ports in DAQ

[1] On the first screen, select Acquire Signals and then Digital Input for the Measurement Type.
[2] Next, select line input.
[3] The next screen lets the user to select the physical channel (or channels) for which the task is being created.
All supported data acquisition hardware devices should appear in the tree control, and the user can expand
them to view a list of the physical channels that can be selected for the task. To select more than one
channel, hold down the Ctrl button while clicking on the channel names.
||Issn 2250-3005 ||

||October||2013||

Page 46
3-Phase Ac Motor Monitoring And Parameter…
[4] Click Finish to move on to the configuration stage.
After interfacing is done click run to run the program. The front panel of the LabVIEW will be used to
display the status of the motor.

Screen 3: Front Panel View of VI

Screen 4.4: System Testing

RESULTS
Results include the successful operation of 3 phase Ac motor monitoring and parameter calculation. Whenever
the motor exceeds its ratings the pc detects and the signal is acquired by the DAQ. Based on the voltage and
current rating i.e., low, medium, and high, voltage and current rating is set.

Screen 4.5:Waveform of voltage
of output VI of 3-phase ac motor

VII.

Fig 4.9:Motor VI with DAQ assistance

Screen 4.6:Front panal

CONCLUSION AND FUTURE SCOPE

7.1.CONCLUSION
The protection of 3-phase ac motor is largely dependent on the modern ways of power supply and
control. Advanced power technologies and control system contribute to the improvement of the motor
efficiency. we designed a system by which the motor voltage and current controlled automatically based upon
the supply. If motor exceeds its rating the motor will shut down automatically by switching the relay. So it
protect the motor from the damage. So the motor gives good efficiency and efficient voltage and current
waveforms. So it saves money and time.
By comparing with normal operation of motor it will
measure all the parameters easily and efficiently. It will helpful to the industrial management.
7.2.FUTURE SCOPE
The 3 phase Ac motor monitoring system should be programmed and necessary circuitry added
to operate the motor in normal condition. The monitoring of 3 phase ac motor can be used in industrial purpose.
The control of ac motor is necessary for the continuous operation of motor. FEEDBACK CONTROL LOOPS
are implemented to increase dynamical performance or precision of scientific and industrial equipment. The
basic principle of such loops is to take into account actual measurements in order to compute appropriate
actuations that adjust the operational conditions to meet given requirements. Motion control and process control
||Issn 2250-3005 ||

||October||2013||

Page 47
3-Phase Ac Motor Monitoring And Parameter…
are two major application areas of this paradigm. Due to this broad application field and its interdisciplinary
nature, Automatic Control is a fundamental subject usually taught in many engineering disciplines, such as
electrical, mechanical and chemical engineering. Implementing a complete control solution from scratch
requires knowledge not only of the matter studied but also of the different technologies needed to interface the
real process such as sensors and actuators, to the computer used to conduct the experiment.

BIBLIOGRAPHY
[1]
[2]
[3]
[4]
[5]
[6]
[7]
[8]

Electrical machines by "P.S.BIMBRA”
Electrical machines by “J.B.GUPTHA”
Douglas Lewin& David Protheroe (1992), Design of Logic Systems, 2ndEdition, Chapman and Hall, London.
Pallas-Areny, R., Webster, J., 2001, “Sensors and Signal Conditioning”,John Wiley & Sons.
http://www.enggjournals.com/ijcse/doc/IJCSE12-04-09-070.pdf
http://ethesis.nitrkl.ac.in/3836/2/FINAL_DOC.pdf
http://www.ni.com/dataacquisition/nidaqmx.htm
http://sine.ni.com/ds/app/doc/p/id/ds-218/lang/en

BIOGRAPHY
Dr. K.Ravichandrudu obtained his M.Tech and Ph.D from S.V.University and Prasently Working as Professor of EEE in Krishnaveni Engg
College/Women.His area of interest are in Electrical Machines and Power systems.

P.Suman Pramod Kumar Obtained his B.Tech from N.B.K.R.I.S.T, S.V. University and M.Tech from Bharath Institute of Higher Education
& Research, Chennai. Prasently Working as Associate Professor of EEE in Chadalawada Ramanamma Engg College, Tirupathi. His Area of
Interest are in AC Machines, Control Systems & Power system Stability.

YN. Vijay Kumar persuing his Ph.D from JNTU Kakinada and prasently working as Associate Professor of EEE in S.V.C.E.T, Chittor.
His Area of Interest are in Power system and Electrical Machines.

C.Praveen Kumar obtained his M.Tech From S.V.P.C.E.T, Puttur and Prasently working as Assistant Professor of EEE in Chadalawada
Ramanamma Engg College, Tirupathi. His area of Interest are in Electrical Machines and Electromagnetic fields.

||Issn 2250-3005 ||

||October||2013||

Page 48

Más contenido relacionado

La actualidad más candente

Fire Pump Motor Starting
Fire Pump Motor StartingFire Pump Motor Starting
Fire Pump Motor StartingJames S Nasby
 
Single phasing of three phase induction motor
Single phasing of three phase induction motorSingle phasing of three phase induction motor
Single phasing of three phase induction motorJUNAID SK
 
basic electrical
basic electrical basic electrical
basic electrical dev_88
 
Dol and star delta
Dol and star deltaDol and star delta
Dol and star deltaEr Ramgarhia
 
Automatic Star Delta Starter Using Relays And Adjustable Electronic Timer For...
Automatic Star Delta Starter Using Relays And Adjustable Electronic Timer For...Automatic Star Delta Starter Using Relays And Adjustable Electronic Timer For...
Automatic Star Delta Starter Using Relays And Adjustable Electronic Timer For...Edgefxkits & Solutions
 
synchronous motor for presentation
 synchronous motor for presentation synchronous motor for presentation
synchronous motor for presentationprasantakcs
 
Starting Time Calculation for Induction Motor.
Starting Time Calculation for Induction Motor.Starting Time Calculation for Induction Motor.
Starting Time Calculation for Induction Motor.IJERA Editor
 
Single phase-induction-motor(eee499.blogspot.com)
Single phase-induction-motor(eee499.blogspot.com)Single phase-induction-motor(eee499.blogspot.com)
Single phase-induction-motor(eee499.blogspot.com)slmnsvn
 
Selection criteria of motors for various applications
Selection criteria of motors for various applicationsSelection criteria of motors for various applications
Selection criteria of motors for various applicationsPrasanth Ravula
 
Electric Actuator
Electric ActuatorElectric Actuator
Electric Actuatordiego5wh
 
DC Motors
DC MotorsDC Motors
DC Motorsillpa
 
Speed control of Three phase Induction motor using AC voltage regulator
Speed control of Three phase Induction motor using AC voltage regulatorSpeed control of Three phase Induction motor using AC voltage regulator
Speed control of Three phase Induction motor using AC voltage regulatorShivagee Raj
 
Power driver circuits of stepper motor
Power driver circuits of stepper motorPower driver circuits of stepper motor
Power driver circuits of stepper motorkarthi1017
 

La actualidad más candente (20)

Ap inverter manual
Ap inverter manualAp inverter manual
Ap inverter manual
 
Fire Pump Motor Starting
Fire Pump Motor StartingFire Pump Motor Starting
Fire Pump Motor Starting
 
Single phasing of three phase induction motor
Single phasing of three phase induction motorSingle phasing of three phase induction motor
Single phasing of three phase induction motor
 
basic electrical
basic electrical basic electrical
basic electrical
 
1 phase induction motor
1 phase induction motor1 phase induction motor
1 phase induction motor
 
Actuators
ActuatorsActuators
Actuators
 
Motor.ppt
Motor.pptMotor.ppt
Motor.ppt
 
Dol and star delta
Dol and star deltaDol and star delta
Dol and star delta
 
Automatic Star Delta Starter Using Relays And Adjustable Electronic Timer For...
Automatic Star Delta Starter Using Relays And Adjustable Electronic Timer For...Automatic Star Delta Starter Using Relays And Adjustable Electronic Timer For...
Automatic Star Delta Starter Using Relays And Adjustable Electronic Timer For...
 
Electric Motor
Electric MotorElectric Motor
Electric Motor
 
synchronous motor for presentation
 synchronous motor for presentation synchronous motor for presentation
synchronous motor for presentation
 
Electric Motor Repair
Electric Motor RepairElectric Motor Repair
Electric Motor Repair
 
Starting Time Calculation for Induction Motor.
Starting Time Calculation for Induction Motor.Starting Time Calculation for Induction Motor.
Starting Time Calculation for Induction Motor.
 
Single phase-induction-motor(eee499.blogspot.com)
Single phase-induction-motor(eee499.blogspot.com)Single phase-induction-motor(eee499.blogspot.com)
Single phase-induction-motor(eee499.blogspot.com)
 
Selection criteria of motors for various applications
Selection criteria of motors for various applicationsSelection criteria of motors for various applications
Selection criteria of motors for various applications
 
Electric Actuator
Electric ActuatorElectric Actuator
Electric Actuator
 
DC Motors
DC MotorsDC Motors
DC Motors
 
Speed control of Three phase Induction motor using AC voltage regulator
Speed control of Three phase Induction motor using AC voltage regulatorSpeed control of Three phase Induction motor using AC voltage regulator
Speed control of Three phase Induction motor using AC voltage regulator
 
Power driver circuits of stepper motor
Power driver circuits of stepper motorPower driver circuits of stepper motor
Power driver circuits of stepper motor
 
Vk
VkVk
Vk
 

Destacado

Merancang dan menganalisa_wan
Merancang dan menganalisa_wanMerancang dan menganalisa_wan
Merancang dan menganalisa_wanrizkameipratama
 
Learn BEM: CSS Naming Convention
Learn BEM: CSS Naming ConventionLearn BEM: CSS Naming Convention
Learn BEM: CSS Naming ConventionIn a Rocket
 
Lightning Talk #9: How UX and Data Storytelling Can Shape Policy by Mika Aldaba
Lightning Talk #9: How UX and Data Storytelling Can Shape Policy by Mika AldabaLightning Talk #9: How UX and Data Storytelling Can Shape Policy by Mika Aldaba
Lightning Talk #9: How UX and Data Storytelling Can Shape Policy by Mika Aldabaux singapore
 

Destacado (6)

Doc1
Doc1Doc1
Doc1
 
Merancang dan menganalisa_wan
Merancang dan menganalisa_wanMerancang dan menganalisa_wan
Merancang dan menganalisa_wan
 
Tara de op1 lingo
Tara de  op1 lingoTara de  op1 lingo
Tara de op1 lingo
 
Learn BEM: CSS Naming Convention
Learn BEM: CSS Naming ConventionLearn BEM: CSS Naming Convention
Learn BEM: CSS Naming Convention
 
Lightning Talk #9: How UX and Data Storytelling Can Shape Policy by Mika Aldaba
Lightning Talk #9: How UX and Data Storytelling Can Shape Policy by Mika AldabaLightning Talk #9: How UX and Data Storytelling Can Shape Policy by Mika Aldaba
Lightning Talk #9: How UX and Data Storytelling Can Shape Policy by Mika Aldaba
 
Succession “Losers”: What Happens to Executives Passed Over for the CEO Job?
Succession “Losers”: What Happens to Executives Passed Over for the CEO Job? Succession “Losers”: What Happens to Executives Passed Over for the CEO Job?
Succession “Losers”: What Happens to Executives Passed Over for the CEO Job?
 

Similar a International Journal of Computational Engineering Research(IJCER)

Minimization of Starting Torque and Inrush Current of Induction Motor by Diff...
Minimization of Starting Torque and Inrush Current of Induction Motor by Diff...Minimization of Starting Torque and Inrush Current of Induction Motor by Diff...
Minimization of Starting Torque and Inrush Current of Induction Motor by Diff...ijtsrd
 
Induction Synchronous Motor
Induction Synchronous MotorInduction Synchronous Motor
Induction Synchronous MotorShahzad Khalil
 
COMPARATIVE STUDY OF INDUCTION MOTOR STARTERS USING MATLAB SIMULINK
COMPARATIVE STUDY OF INDUCTION MOTOR STARTERS USING MATLAB SIMULINKCOMPARATIVE STUDY OF INDUCTION MOTOR STARTERS USING MATLAB SIMULINK
COMPARATIVE STUDY OF INDUCTION MOTOR STARTERS USING MATLAB SIMULINKIJARIIT
 
Unit 3 EHV - I.pptx
Unit 3 EHV - I.pptxUnit 3 EHV - I.pptx
Unit 3 EHV - I.pptxPavanP76
 
Electrical interview questions from ac
Electrical interview questions from acElectrical interview questions from ac
Electrical interview questions from acSabaz Ali
 
E 1005
E 1005E 1005
E 1005dvd13
 
Electrictraction 120802004329-phpapp01
Electrictraction 120802004329-phpapp01Electrictraction 120802004329-phpapp01
Electrictraction 120802004329-phpapp0176392
 
Speed Control System of Induction Motor by using Direct Torque Control Method...
Speed Control System of Induction Motor by using Direct Torque Control Method...Speed Control System of Induction Motor by using Direct Torque Control Method...
Speed Control System of Induction Motor by using Direct Torque Control Method...ijtsrd
 
Ee2537473768
Ee2537473768Ee2537473768
Ee2537473768brindham
 
star delta auto starter with forward reverse and motor protection
star delta auto starter with forward reverse and motor protectionstar delta auto starter with forward reverse and motor protection
star delta auto starter with forward reverse and motor protectionBHUPATI PRADHAN
 
How does a 3-phase motor works
How does a 3-phase motor worksHow does a 3-phase motor works
How does a 3-phase motor worksShashi Katiyar
 

Similar a International Journal of Computational Engineering Research(IJCER) (20)

Minimization of Starting Torque and Inrush Current of Induction Motor by Diff...
Minimization of Starting Torque and Inrush Current of Induction Motor by Diff...Minimization of Starting Torque and Inrush Current of Induction Motor by Diff...
Minimization of Starting Torque and Inrush Current of Induction Motor by Diff...
 
Induction Synchronous Motor
Induction Synchronous MotorInduction Synchronous Motor
Induction Synchronous Motor
 
Mech EE6365 EE lab_manual
Mech EE6365 EE lab_manualMech EE6365 EE lab_manual
Mech EE6365 EE lab_manual
 
COMPARATIVE STUDY OF INDUCTION MOTOR STARTERS USING MATLAB SIMULINK
COMPARATIVE STUDY OF INDUCTION MOTOR STARTERS USING MATLAB SIMULINKCOMPARATIVE STUDY OF INDUCTION MOTOR STARTERS USING MATLAB SIMULINK
COMPARATIVE STUDY OF INDUCTION MOTOR STARTERS USING MATLAB SIMULINK
 
Induction generator
Induction generatorInduction generator
Induction generator
 
Unit 3 EHV - I.pptx
Unit 3 EHV - I.pptxUnit 3 EHV - I.pptx
Unit 3 EHV - I.pptx
 
Electrical interview questions from ac
Electrical interview questions from acElectrical interview questions from ac
Electrical interview questions from ac
 
E 1005
E 1005E 1005
E 1005
 
Electrictraction 120802004329-phpapp01
Electrictraction 120802004329-phpapp01Electrictraction 120802004329-phpapp01
Electrictraction 120802004329-phpapp01
 
Sprabq8
Sprabq8Sprabq8
Sprabq8
 
Speed Control System of Induction Motor by using Direct Torque Control Method...
Speed Control System of Induction Motor by using Direct Torque Control Method...Speed Control System of Induction Motor by using Direct Torque Control Method...
Speed Control System of Induction Motor by using Direct Torque Control Method...
 
Ee2537473768
Ee2537473768Ee2537473768
Ee2537473768
 
star delta auto starter with forward reverse and motor protection
star delta auto starter with forward reverse and motor protectionstar delta auto starter with forward reverse and motor protection
star delta auto starter with forward reverse and motor protection
 
Electric Motors
Electric MotorsElectric Motors
Electric Motors
 
braking.ppt
braking.pptbraking.ppt
braking.ppt
 
How does a 3-phase motor works
How does a 3-phase motor worksHow does a 3-phase motor works
How does a 3-phase motor works
 
s.pptx
s.pptxs.pptx
s.pptx
 
Gymr motor starting_solutions
Gymr motor starting_solutionsGymr motor starting_solutions
Gymr motor starting_solutions
 
PROJECT SEMINAR
PROJECT SEMINARPROJECT SEMINAR
PROJECT SEMINAR
 
AC Motors-Asynchronous
AC Motors-AsynchronousAC Motors-Asynchronous
AC Motors-Asynchronous
 

Último

Automating Google Workspace (GWS) & more with Apps Script
Automating Google Workspace (GWS) & more with Apps ScriptAutomating Google Workspace (GWS) & more with Apps Script
Automating Google Workspace (GWS) & more with Apps Scriptwesley chun
 
Slack Application Development 101 Slides
Slack Application Development 101 SlidesSlack Application Development 101 Slides
Slack Application Development 101 Slidespraypatel2
 
CNv6 Instructor Chapter 6 Quality of Service
CNv6 Instructor Chapter 6 Quality of ServiceCNv6 Instructor Chapter 6 Quality of Service
CNv6 Instructor Chapter 6 Quality of Servicegiselly40
 
EIS-Webinar-Prompt-Knowledge-Eng-2024-04-08.pptx
EIS-Webinar-Prompt-Knowledge-Eng-2024-04-08.pptxEIS-Webinar-Prompt-Knowledge-Eng-2024-04-08.pptx
EIS-Webinar-Prompt-Knowledge-Eng-2024-04-08.pptxEarley Information Science
 
TrustArc Webinar - Stay Ahead of US State Data Privacy Law Developments
TrustArc Webinar - Stay Ahead of US State Data Privacy Law DevelopmentsTrustArc Webinar - Stay Ahead of US State Data Privacy Law Developments
TrustArc Webinar - Stay Ahead of US State Data Privacy Law DevelopmentsTrustArc
 
Driving Behavioral Change for Information Management through Data-Driven Gree...
Driving Behavioral Change for Information Management through Data-Driven Gree...Driving Behavioral Change for Information Management through Data-Driven Gree...
Driving Behavioral Change for Information Management through Data-Driven Gree...Enterprise Knowledge
 
Breaking the Kubernetes Kill Chain: Host Path Mount
Breaking the Kubernetes Kill Chain: Host Path MountBreaking the Kubernetes Kill Chain: Host Path Mount
Breaking the Kubernetes Kill Chain: Host Path MountPuma Security, LLC
 
Finology Group – Insurtech Innovation Award 2024
Finology Group – Insurtech Innovation Award 2024Finology Group – Insurtech Innovation Award 2024
Finology Group – Insurtech Innovation Award 2024The Digital Insurer
 
The 7 Things I Know About Cyber Security After 25 Years | April 2024
The 7 Things I Know About Cyber Security After 25 Years | April 2024The 7 Things I Know About Cyber Security After 25 Years | April 2024
The 7 Things I Know About Cyber Security After 25 Years | April 2024Rafal Los
 
Histor y of HAM Radio presentation slide
Histor y of HAM Radio presentation slideHistor y of HAM Radio presentation slide
Histor y of HAM Radio presentation slidevu2urc
 
The Role of Taxonomy and Ontology in Semantic Layers - Heather Hedden.pdf
The Role of Taxonomy and Ontology in Semantic Layers - Heather Hedden.pdfThe Role of Taxonomy and Ontology in Semantic Layers - Heather Hedden.pdf
The Role of Taxonomy and Ontology in Semantic Layers - Heather Hedden.pdfEnterprise Knowledge
 
08448380779 Call Girls In Civil Lines Women Seeking Men
08448380779 Call Girls In Civil Lines Women Seeking Men08448380779 Call Girls In Civil Lines Women Seeking Men
08448380779 Call Girls In Civil Lines Women Seeking MenDelhi Call girls
 
Powerful Google developer tools for immediate impact! (2023-24 C)
Powerful Google developer tools for immediate impact! (2023-24 C)Powerful Google developer tools for immediate impact! (2023-24 C)
Powerful Google developer tools for immediate impact! (2023-24 C)wesley chun
 
08448380779 Call Girls In Greater Kailash - I Women Seeking Men
08448380779 Call Girls In Greater Kailash - I Women Seeking Men08448380779 Call Girls In Greater Kailash - I Women Seeking Men
08448380779 Call Girls In Greater Kailash - I Women Seeking MenDelhi Call girls
 
Understanding Discord NSFW Servers A Guide for Responsible Users.pdf
Understanding Discord NSFW Servers A Guide for Responsible Users.pdfUnderstanding Discord NSFW Servers A Guide for Responsible Users.pdf
Understanding Discord NSFW Servers A Guide for Responsible Users.pdfUK Journal
 
Apidays Singapore 2024 - Building Digital Trust in a Digital Economy by Veron...
Apidays Singapore 2024 - Building Digital Trust in a Digital Economy by Veron...Apidays Singapore 2024 - Building Digital Trust in a Digital Economy by Veron...
Apidays Singapore 2024 - Building Digital Trust in a Digital Economy by Veron...apidays
 
Scaling API-first – The story of a global engineering organization
Scaling API-first – The story of a global engineering organizationScaling API-first – The story of a global engineering organization
Scaling API-first – The story of a global engineering organizationRadu Cotescu
 
A Domino Admins Adventures (Engage 2024)
A Domino Admins Adventures (Engage 2024)A Domino Admins Adventures (Engage 2024)
A Domino Admins Adventures (Engage 2024)Gabriella Davis
 
Advantages of Hiring UIUX Design Service Providers for Your Business
Advantages of Hiring UIUX Design Service Providers for Your BusinessAdvantages of Hiring UIUX Design Service Providers for Your Business
Advantages of Hiring UIUX Design Service Providers for Your BusinessPixlogix Infotech
 
Data Cloud, More than a CDP by Matt Robison
Data Cloud, More than a CDP by Matt RobisonData Cloud, More than a CDP by Matt Robison
Data Cloud, More than a CDP by Matt RobisonAnna Loughnan Colquhoun
 

Último (20)

Automating Google Workspace (GWS) & more with Apps Script
Automating Google Workspace (GWS) & more with Apps ScriptAutomating Google Workspace (GWS) & more with Apps Script
Automating Google Workspace (GWS) & more with Apps Script
 
Slack Application Development 101 Slides
Slack Application Development 101 SlidesSlack Application Development 101 Slides
Slack Application Development 101 Slides
 
CNv6 Instructor Chapter 6 Quality of Service
CNv6 Instructor Chapter 6 Quality of ServiceCNv6 Instructor Chapter 6 Quality of Service
CNv6 Instructor Chapter 6 Quality of Service
 
EIS-Webinar-Prompt-Knowledge-Eng-2024-04-08.pptx
EIS-Webinar-Prompt-Knowledge-Eng-2024-04-08.pptxEIS-Webinar-Prompt-Knowledge-Eng-2024-04-08.pptx
EIS-Webinar-Prompt-Knowledge-Eng-2024-04-08.pptx
 
TrustArc Webinar - Stay Ahead of US State Data Privacy Law Developments
TrustArc Webinar - Stay Ahead of US State Data Privacy Law DevelopmentsTrustArc Webinar - Stay Ahead of US State Data Privacy Law Developments
TrustArc Webinar - Stay Ahead of US State Data Privacy Law Developments
 
Driving Behavioral Change for Information Management through Data-Driven Gree...
Driving Behavioral Change for Information Management through Data-Driven Gree...Driving Behavioral Change for Information Management through Data-Driven Gree...
Driving Behavioral Change for Information Management through Data-Driven Gree...
 
Breaking the Kubernetes Kill Chain: Host Path Mount
Breaking the Kubernetes Kill Chain: Host Path MountBreaking the Kubernetes Kill Chain: Host Path Mount
Breaking the Kubernetes Kill Chain: Host Path Mount
 
Finology Group – Insurtech Innovation Award 2024
Finology Group – Insurtech Innovation Award 2024Finology Group – Insurtech Innovation Award 2024
Finology Group – Insurtech Innovation Award 2024
 
The 7 Things I Know About Cyber Security After 25 Years | April 2024
The 7 Things I Know About Cyber Security After 25 Years | April 2024The 7 Things I Know About Cyber Security After 25 Years | April 2024
The 7 Things I Know About Cyber Security After 25 Years | April 2024
 
Histor y of HAM Radio presentation slide
Histor y of HAM Radio presentation slideHistor y of HAM Radio presentation slide
Histor y of HAM Radio presentation slide
 
The Role of Taxonomy and Ontology in Semantic Layers - Heather Hedden.pdf
The Role of Taxonomy and Ontology in Semantic Layers - Heather Hedden.pdfThe Role of Taxonomy and Ontology in Semantic Layers - Heather Hedden.pdf
The Role of Taxonomy and Ontology in Semantic Layers - Heather Hedden.pdf
 
08448380779 Call Girls In Civil Lines Women Seeking Men
08448380779 Call Girls In Civil Lines Women Seeking Men08448380779 Call Girls In Civil Lines Women Seeking Men
08448380779 Call Girls In Civil Lines Women Seeking Men
 
Powerful Google developer tools for immediate impact! (2023-24 C)
Powerful Google developer tools for immediate impact! (2023-24 C)Powerful Google developer tools for immediate impact! (2023-24 C)
Powerful Google developer tools for immediate impact! (2023-24 C)
 
08448380779 Call Girls In Greater Kailash - I Women Seeking Men
08448380779 Call Girls In Greater Kailash - I Women Seeking Men08448380779 Call Girls In Greater Kailash - I Women Seeking Men
08448380779 Call Girls In Greater Kailash - I Women Seeking Men
 
Understanding Discord NSFW Servers A Guide for Responsible Users.pdf
Understanding Discord NSFW Servers A Guide for Responsible Users.pdfUnderstanding Discord NSFW Servers A Guide for Responsible Users.pdf
Understanding Discord NSFW Servers A Guide for Responsible Users.pdf
 
Apidays Singapore 2024 - Building Digital Trust in a Digital Economy by Veron...
Apidays Singapore 2024 - Building Digital Trust in a Digital Economy by Veron...Apidays Singapore 2024 - Building Digital Trust in a Digital Economy by Veron...
Apidays Singapore 2024 - Building Digital Trust in a Digital Economy by Veron...
 
Scaling API-first – The story of a global engineering organization
Scaling API-first – The story of a global engineering organizationScaling API-first – The story of a global engineering organization
Scaling API-first – The story of a global engineering organization
 
A Domino Admins Adventures (Engage 2024)
A Domino Admins Adventures (Engage 2024)A Domino Admins Adventures (Engage 2024)
A Domino Admins Adventures (Engage 2024)
 
Advantages of Hiring UIUX Design Service Providers for Your Business
Advantages of Hiring UIUX Design Service Providers for Your BusinessAdvantages of Hiring UIUX Design Service Providers for Your Business
Advantages of Hiring UIUX Design Service Providers for Your Business
 
Data Cloud, More than a CDP by Matt Robison
Data Cloud, More than a CDP by Matt RobisonData Cloud, More than a CDP by Matt Robison
Data Cloud, More than a CDP by Matt Robison
 

International Journal of Computational Engineering Research(IJCER)

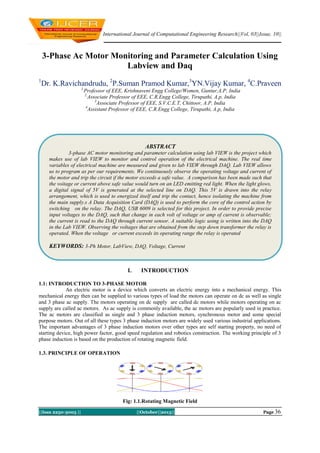
  • 1. International Journal of Computational Engineering Research||Vol, 03||Issue, 10|| 3-Phase Ac Motor Monitoring and Parameter Calculation Using Labview and Daq 1 Dr. K.Ravichandrudu, 2P.Suman Pramod Kumar,3YN.Vijay Kumar, 4C.Praveen 1, Professor of EEE, Krishnaveni Engg College/Women, Guntur,A.P, India 2, Associate Professor of EEE, C.R.Engg College, Tirupathi, A.p, India 3 Associate Professor of EEE, S.V.C.E.T, Chittoor, A.P, India 4 Assistant Professor of EEE, C.R.Engg College, Tirupathi, A.p, India ABSTRACT 3-phase AC motor monitoring and parameter calculation using lab VIEW is the project which makes use of lab VIEW to monitor and control operation of the electrical machine. The real time variables of electrical machine are measured and given to lab VIEW through DAQ. Lab VIEW allows us to program as per our requirements. We continuously observe the operating voltage and current of the motor and trip the circuit if the motor exceeds a safe value. A comparison has been made such that the voitage or current above safe value would turn on an LED emitting red light. When the light glows, a digital signal of 5V is generated at the selected line on DAQ. This 5V is drawn into the relay arrangement, which is used to energized itself and trip the contact, hence isolating the machine from the main supply.s A Data Acquisition Card (DAQ) is used to perform the core of the control action by switching on the relay. The DAQ, USB 6009 is selected for this project. In order to provide precise input voltages to the DAQ, such that change in each volt of voltage or amp of current is observable; the current is read to the DAQ through current sensor. A suitable logic using is written into the DAQ in the Lab VIEW. Observing the voltages that are obtained from the step down transformer the relay is operated. When the voltage or current exceeds its operating range the relay is operated KEYWORDS: 3-Ph Motor, LabView, DAQ, Voltage, Current I. INTRODUCTION 1.1: INTRODUCTION TO 3-PHASE MOTOR An electric motor is a device which converts an electric energy into a mechanical energy. This mechanical energy then can be supplied to various types of load the motors can operate on dc as well as single and 3 phase ac supply. The motors operating on dc supply are called dc motors while motors operating on ac supply are called ac motors. As ac supply is commonly available, the ac motors are popularly used in practice. The ac motors are classified as single and 3 phase induction motors, synchronous motor and some special purpose motors. Out of all these types 3 phase induction motors are widely used various industrial applications. The important advantages of 3 phase induction motors over other types are self starting property, no need of starting device, high power factor, good speed regulation and robotics construction. The working principle of 3 phase induction is based on the production of rotating magnetic field. 1.3. PRINCIPLE OF OPERATION Fig: 1.1.Rotating Magnetic Field ||Issn 2250-3005 || ||October||2013|| Page 36
  • 2. 3-Phase Ac Motor Monitoring And Parameter… A three-phase power supply provides a rotating magnetic field in an induction motor. In both induction and synchronous motors, the AC power supplied to the motor's stator creates a magnetic field that rotates in time with the AC oscillations. Whereas a synchronous motor's rotor turns at the same rate as the stator field, an induction motor's rotor rotates at a slower speed than the stator field. The induction motor stator's magnetic field is therefore changing or rotating relative to the rotor. This induces an opposing current in the induction motor's rotor, in effect the motor's secondary winding, when the latter is short-circuited or closed through an external impedance. The rotating magnetic flux induces currents in the windings of the rotor; in a manner similar to currents induced in transformer's secondary windings. These currents in turn create magnetic fields in the rotor that react against the stator field. Due to Lenz's Law, the direction of the magnetic field created will be such as to oppose the change in current through the windings. The cause of induced current in the rotor is the rotating stator magnetic field, so to oppose this the rotor will start to rotate in the direction of the rotating stator magnetic field. The rotor accelerates until the magnitude of induced rotor current and torque balances the applied load. Since rotation at synchronous speed would result in no induced rotor current, an induction motor always operates slower than synchronous speed. The difference between actual and synchronous speed or slip varies from about 0.5 to 5% for standard Design B torque curve induction motors. The induction machine's essential character is that it is created solely by induction instead of being separately excited as in synchronous or DC machines or being self-magnetized as in permanent magnet motors. For these currents to be induced, the speed of the physical rotor must be lower than that of the stator's rotating magnetic field ( ), or the magnetic field would not be moving relative to the rotor conductors and no currents would be induced. As the speed of the rotor drops below synchronous speed, the rotation rate of the magnetic field in the rotor increases, inducing more current in the windings and creating more torque. The ratio between the rotation rate of the magnetic field as seen by the rotor (slip speed) and the rotation rate of the stator's rotating field is called slip. Under load, the speed drops and the slip increases enough to create sufficient torque to turn the load. For this reason, induction motors are sometimes referred to as asynchronous motors. An induction motor can be used as an induction generator, or it can be unrolled to form the linear induction motor which can directly generate linear motion. 1.4. NEED FOR MONITORING Monitoring of ac motor is necessary for operating efficiently. There are many undesirable things that happen to electric motors and other electrical equipment as a result of operating a power system in an over voltage manner. Operating a motor beyond its nominal range of its voltage requirements will reduce its efficiency and cause premature failure. The economic loss from premature motor failure can be devastating. In most cases, the price of the motor itself is trivial compared to the cost of unscheduled shutdowns of the process. Both high and low voltages can cause premature motor failure, as well as voltage imbalance. So the best life and most efficient operation occur when motors are operated at voltages close to the nameplate ratings. Monitoring of ac motor provides not only reducing the cost of the electricity bill, but also extending the life of the electrical motors while Preventing unexpected failures. II. EFFECTS OF HIGH VOLTAGE For example, many motors are rated at 220/230 volts and had a tolerance band of plus/minus 10%. Thus, the actual voltage range that they can tolerate on the high voltage connections would be at least 207 volts to 253 volts. Even though this is the so-called tolerance band, the best performance of larger motors would occur at or near the rated voltage. The extreme ends, either high or low, would be putting unnecessary stress on the motor. Generally speaking, these voltage tolerance ranges are in existence, not to set a standard that can be used all the time, but rather to set a range that can be used to accommodate the normal hour-to-hour swings in received voltage. An operation of a motor on a continuous basis at either the high extreme or the low extreme will shorten the life of the motor. Although this paper covers the effects of high and low voltage on motors, the operation of other magnetic devices is often affected in similar ways. Solenoids and coils used in relays and starters are punished by high voltage more than they are by low voltage. This is also true of ballasts in fluorescent, mercury, and high pressure sodium light fixtures. Transformers of all types, including welding transformers, are damaged in the same way. Incandescent lights are especially susceptible to high voltage conditions. A 5% increase in voltage results in a 50% reduction in bulb life. A 10% increase in voltage above the rating reduces incandescent bulb life by 70%. Overall, it is definitely in the equipment’s best interest to have incoming voltage close to the equipment ratings. High voltage will always tend to reduce power factor and increase the losses in the system which results in higher operating costs for the equipment and the system. ||Issn 2250-3005 || ||October||2013|| Page 37
  • 3. 3-Phase Ac Motor Monitoring And Parameter… III. LOW VOLTAGE When electric motors are subjected to voltages below the nameplate rating, some of the characteristics will change slightly and others will change more dramatically. A basic point to note is that to drive a fixed mechanical load connected to the shaft, a motor must draw a fixed amount of power from the power line. The amount of power the motor draws is roughly related to the voltage x current (amps). Thus, whenVoltage gets low, the current must get higher to provide the same amount of power. The fact that current gets higher is not alarming unless it exceeds the nameplate current rating of the motor. When amps go above the nameplate rating, it is safe to assume that the buildup of heat within the motor will become damaging if it is left unchecked. If a motor is lightly loaded and the voltage drops, the current will increase in roughly the same proportion that the voltage decreases. For example, say a 10% voltage decrease would cause a 10% amperage increase. This would not be damaging if the motor current stays below the nameplate value. However, if a motor is heavily loaded and a voltage reduction occurs, the current would go up from an already fairly high value to a new value which might be in excess of the full load rated amps. This could be damaging. It can thus be safely said that low voltage in itself is not a problem unless the motor amperage is pushed beyond the nameplate rating. That is it must be controlled in a safe range. Aside from the possibility of over-temperature and shortened lifespan created by low voltage, some other important items need to be understood. The first is that the starting torque, pull-up torque, and pull-out torque of induction motors, all change based on the applied voltage squared . Thus, a 10% reduction from nameplate voltage (100% to 90%, 230 volts to 207 volts) would reduce the starting torque, pullup torque, and pull-out torque by a factor of .9 x .9. The resulting values would be 81% of the full voltage values. At 80% voltage, the result would be .8 x .8, or a value of 64% of the full voltage value. In this case, it is easy to see why it would be difficult to start “hard-to-start” loads if the voltage happens to be low. Similarly the motor’s pull-out torque would be much lower than it would be under normal voltage conditions.To summarise: low voltage can cause high currents and overheating which will subsequently shorten motor life. Too low voltage can also reduce the motor’s ability to get started and its values of pull-up and pull-out torque. On lightly loaded motors with easy-to-start loads, reducing the voltage will not have any appreciable effect except that it might help reduce the light load losses and improve the efficiency under this condition. IV. OVER CURRENT IN AC MOTOR Over current is a condition in electronics when too much current is running through an electrical circuit. This problem is relatively common in the electrical engineering field. Over current protection is one of the essential elements of a proper electrical installation. The problem has many symptoms and can eventually lead to permanent damage to the motor or electrical device. A few of the symptoms of over current in a motor are shorts, blown fuses and unintended switching on and off of the motor. An over current exists when the normal load current for a circuit is exceeded. It can be in the form of an overload or short circuit. When applied to motor circuits an overload is any current, flowing within the normal circuit path that is higher than the motor’s normal Full Load Amps (FLA). A short-circuit is an Over current which greatly exceeds the normal full load current of the circuit. Also, as its name infers, a short-circuit leaves the normal current carrying path of the circuit and takes a “short cut” around the load and back to the power source. Motors can be damaged by both types of currents. Single-phasing, overworking and locked rotor conditions are just a few of the situations that can be protected against with the careful choice of protective devices. If left unprotected, motors will continue to operate even under abnormal conditions. The excessive current causes the motor to overheat, which in turn causes the motor winding insulation to deteriorate and ultimately fail. Good motor overload protection can greatly extend the useful life of a motor. Because of a motor’s characteristics, many common over currentdevices actually offer limited or no protection. 4.1.PROBLEM DEFINITION The aim of the paper is to monitor the 3 phase ac motor so that when over voltages or under voltage and over current or under current occur in motor, the motor can disconnects from the supply. The problem is that there are many undesirable things that happen to electric motors and other electrical equipment as a result of operating a power system in an over voltage manner. Operating a motor beyond its nominal range of its voltage requirements will reduce its efficiency and cause premature failure. The problem with low voltage in motor can cause high currents and overheating which will subsequently shorten motor life. Too low voltage can also reduce the motor’s ability to get started and its values of pull-up and pull-out torque. The problem with over current in motor has many symptoms and can eventually lead to permanent damage to the motor or electrical device. A few of the symptoms of overcurrent in a motor are shorts, blown fuses and unintended switching on and off of the motor.The problems with over voltage, under voltage and over current can overcome by monitoring ac motor using NI-LabVIEW and DAQ. ||Issn 2250-3005 || ||October||2013|| Page 38
  • 4. 3-Phase Ac Motor Monitoring And Parameter… 4.2.HOW 3-PHASE AC MOTOR IS MONITORING The monitoring is done by monitoring the parameters of the motor. These parameters include voltage, current, speed. The motor is disconnected if the voltage exceeds its operating range. Each phase of the ac motor is connected to the step-down transformer in order to step-down the voltage. The output of the stepdown transformer from each phase is connected to the voltage and current transducer (sensor). These voltage and current transducer senses the voltage and currents which are act as input to the DAQ and it is connected to a PC. By programming in PC using GUI, a relay is operated to disconnect the motor if the output voltage is out of range. V. SYSTEM SPECIFICATIONS 5.1.BLOCK DIAGRAM load 3-phase ac motor Analog Analog Step down transformer Current sensor Analog DAQ Analog Analog Analog Analog Step down transformer Analog Current sensor Analog Step down transformer Analog Current sensur Switching device PC Analog Analog Analog Analog POWER SUPPLY Fig 1.2: Monitoring of motor using DAQ Motor Monitoring Fig 2.1: Block Diagram of 3 Phase Ac 5.2. DESCRIPTION 5.3.PHASE AC MOTOR An induction or asynchronous motor is an AC motor in which all electromagnetic energy is transferred by inductive coupling from a primary winding to a secondary winding, the two windings being separated by an air gap. In three-phase induction motors, that are inherently self-starting, energy transfer is usually from the stator to either a wound rotor or a short-circuited squirrel cage rotor. Three-phase cage rotor induction motors are widely used in industrial drives because they are rugged, reliable and economical. Singlephase induction motors are also used extensively for smaller loads. Although most AC motors have long been used in fixed-speed load drive service, they are increasingly being used in variable-frequency drive (VFD) service, variable-torque centrifugal fan, pump and compressor loads being by far the most important energy saving applications for VFD service. Squirrel cage induction motors are most commonly used in both fixedspeed and VFD applications. Fig 2.2:3-Phase Ac Motor Fig 2.3: Stepdown Transformer 5.4.CURRENT SENSOR Components used in designing the circuit Hall Effect Base Linear Current Sensor 5.5.Functional Description The Winson WCS2720 provides economical and precise solution for both DC and AC current sensing in industrial, commercial and communications systems. The unique package allows for easy implementation by the customer. Typical applications include motor control, load detection and management, over-current fault detection and any intelligent power management system etc… ||Issn 2250-3005 || ||October||2013|| Page 39
  • 5. 3-Phase Ac Motor Monitoring And Parameter… The WCS2720 consists of a precise, low-temperature drift linear hall sensor IC with temperature compensation circuit and a current path with 0.4 mΩ typical internal conductor resistance. This extremely low resistance can effectively reduce power loss, operating temperature and increase the reliability greatly. Applied current flowing through this conduction path generates a magnetic field which is sensed by the integrated Hall IC and converted into a proportional voltage. The terminals of the conductive path are electrically isolated from the sensor leads. This allows the WCS2720 current sensor to be used in applications requiring electrical isolation without the use of opto-isolators or other costly isolation techniques and make system more competitive in cost. FUNCTIONAL BLOCK PIN CONFIGURATION AND RATINGS Fig: 2.4.Functional Block Of Current Sensor Se nso r Fig : 2 .5 . V - I C ha r ect e r ist ic s O f C urr ent 5.6.DAQ (NI USB – 6009) DAQ is data acquisition. It is device which contains both ADC & DAC in it. It is interface between analog output of sensor and the PC. The data traditional experiments in it signal from sensors are sent to analog or digital domain, read by experimenter, and recorded by hand. In automated data acquisition systems the sensors transmit a voltage or current signal directly to a computer via data acquisition board. Software such as Lab VIEW controls the acquisition and processing of such data. Here we have to consider the following properties of the input signal. 1. Sampling rate 2. Resolution 3. Range 4. Amplification Here the DAQ being used is NI USB – 6009. NI USB – 6009 Features  8 analog inputs (14-bit, 48 kS/s)  2 analog outputs (12-bit, 150 S/s); 12 digital I/O; 32-bit counter  Bus-powered for high mobility; built-in signal connectivity  Compatible with LabVIEW, LabWindows/CVI, and Measurement Studio for Visual Studio .NET Description The NI USB – 6009 provides connection to eight single-ended analog input (AI) channels, two analog output (AO) channels, 12 digital input/output (DIO) channels, and a 32-bit counter with a full-speed USB interface. The National Instruments USB-6009 provides basic data acquisition functionality for applications such as simple data logging, portable measurements, and academic lab experiments. It is affordable for student use and powerful enough for more sophisticated measurement applications. ||Issn 2250-3005 || ||October||2013|| Page 40
  • 6. 3-Phase Ac Motor Monitoring And Parameter… Block Diagram PIN Diagram Fig: 2.6. Block Diagram of DAQ Fig: 2.7.Pin Diagram Of DAQ COMPUTER (Lab VIEW) NI Lab VIEW is software where all the code is implemented and interfacing of DAQ is done. Lab VIEW is a graphical programming environment used by millions of engineers and scientists to develop sophisticated measurement, test, and control systems using intuitive graphical icons and wires that resemble a flowchart. It offers unrivaled integration with thousands of hardware devices and provides hundreds of built-in libraries for advanced analysis and data visualization – all for creating virtual instrumentation. The Lab VIEW platform is scalable across multiple targets and OSs, and, since its introduction in 1986, it has become an industry leader. The programming that is done in this Lab VIEW software is mainly Graphical Programming that is Program with drag-and-drop, graphical function blocks instead of writing lines of text. The representation is mainly Dataflow Representation which is easily developed, maintain, and understand code with an intuitive flowchart representation. Lab VIEW is the center piece of graphical system design and provides engineers and scientists with the tools you need to create and deploy measurement and control systems. You can get more done in less time with Lab VIEW through its unique graphical programming environment; built-in engineering-specific libraries of software functions and hardware interfaces; and data analysis, visualization, and sharing features. You can bring your vision to life with Lab VIEW. Through a world-class ecosystem of partners and technology alliances, a global and active user community, and consistent annual releases, you can have the confidence to continually innovate. Lab VIEW makes complex control simple and accessible. Lab VIEW makes us better because code reuse saves time and effort because one of the most efficient ways to shorten development time is through code reuse. By taking advantage of existing code, whether it has already been written or is part of a resource library, developers and domain experts can focus on their applications rather than committing valuable time and resources to programming. Lab VIEW is an ideal platform for prototyping, designing, and deploying high-quality products to market fast. You can use one development environment to quickly iterate on your embedded hardware and software designs and then reuse the best parts in a final product. VI. SYSTEM DESIGN 6.1.HARDWARE Designing of this system is possible when you select the specific device and software to suite. For this we selected NI USB – 6009, DAQ device and NI LabVIEW software. With the help of these, 3-phase ac motor monitoring can be implemented successfully with the help of sensor technology. To the DAQ we connected sensor circuit. Whenever the motor getting started, sensors detect the voltage and current of the ac motor and sends the signal to computer (LabVIEW) through DAQ device. Based on the voltage and current(Low, Medium and High), the motor operated through relay circuit. ||Issn 2250-3005 || ||October||2013|| Page 41
  • 7. 3-Phase Ac Motor Monitoring And Parameter… 6.2.HARDWARE SCHEMATIC Fig 3.1: Schematic Diagram Of Hardware Component Description DAQ (NI USB – 6009) is connected through the USB port of a computer. In this project we are using only the analog pins of the device. It has a total of 12 analog I/O ports. The output port of each sensor is connected to the each port of the DAQ in a sequence in order to avoid complexity in connections. The connections are made sequentially so that while interfacing the DAQ to the LabVIEW order of sensors may be understood easily. The power supply to the DAQ is through the USB of the computer. It has two positive voltage pins i.e., one +2.5V and other 5V. sensors are connected to the +5V supply through connectors as shown. The ground terminal of each IR Transceiver is connected to the GND pin of the DAQ. 6.7. SOFTWARE Software used: NI LabVIEW (2011 version, 32-bit) Opening a New VI from a Template LabVIEW provides built-in template VIs that include the subVIs, functions, structures, and front panel objects we need to get started building common measurement applications. Complete the following steps to create a VI that generates a signal and displays it in the front panel window. 1. Launch LabVIEW. 2. In the Getting Started window, click the New or VI from Template link to display the New dialog box. 3. From the Create New list, select VI»From Template»Tutorial (Getting Started)»Generate and Display. This template VI generates and displays a signal. 4. Click the OK button to create a VI from the template. We also can double-click the name of the template VI in the Create New list to create a VI from a template. LabVIEW displays two windows: the front panel window and the block diagram window.A preview and a brief description of the template VI appear in the Description section. Figure below shows the new dialog box and the preview of the Generate and Display template VI. Fig 3.2: Creating New VI 5. Examine the front panel window. The user interface, or front panel, appears with a gray background and includes controls and indicators. The title bar of the front panel indicates that this window is the front panel for the Generate and Display VI. Note If the front panel is not visible, we can display the front panel by selecting Window»Show Front Panel. We also can switch between the front panel window and block diagram window at any time by pressing the <Ctrl-E> keys. The <Ctrl> ||Issn 2250-3005 || ||October||2013|| Page 42
  • 8. 3-Phase Ac Motor Monitoring And Parameter… key in keyboard shortcuts corresponds to the (Mac OS X) <Option> or <Command> key or (Linux) <Alt> key. 6. Select Window»Show Block Diagram and examine the block diagram of the VI. The block diagram appears with a white background and includes Vis and structures that control the front panel objects. The title bar of the block diagram indicates that this window is the block diagram for the Generate and Display VI. 7. On the front panel toolbar, click the Run button, shown at left. We also can press the <Ctrl-R> keys to run a VI. A sine wave appears on the graph in the front panel window. 8. Stop the VI by clicking the front panel STOP button, shown at left. Configuring a VI to Run Continuously until the User Stops It In the current state, the VI runs once, generates one signal, and then stops running. To run the VI until a condition occurs, We can use a While Loop. Complete the following steps to add a While Loop to the block diagram. [1] [2] [3] [4] [5] [6] [7] [8] [9] [10] Display the front panel and run the VI. The VI runs once and then stops. The front panel does not have a stop button. Display the block diagram. Click the Search button, shown at left, on the Functions palette, and enter while in the text box. LabVIEW searches as we type the first few letters and display any matches in the search results text box. If there are objects with the same name, use the information in the brackets to the right of each object name to decide which object to select. Some objects are located on multiple palettes because we can use them for multiple applications. Double-click While Loop <<Execution Control>> to display the Execution Control subpalette and temporarily highlight the While Loop on the subpalette. Select the While Loop on the Execution Control palette. Move the cursor to the upper left corner of the block diagram. Click and drag the cursor diagonally to enclose all the Express VIs and wires, as shown in Figure. Release the mouse to place the While Loop around the Express VIs and wires. The While Loop, shown at left, appears with a STOP button wired to the conditional terminal. This While Loop is configured to stop when the user clicks the STOP button. Display the front panel and run the VI. The VI now runs until you click the STOP button. A While Loop executes the VIs and functions inside the loop until the user clicks the STOP button. Click the STOP button and save the VI. Fig 3.3: Working Of Stop Button Controlling the Speed of Execution of a VI loop To plot the points on the waveform graph more slowly, we can add a time delay to the block diagram. Complete the following steps to control the speed at which the VI runs. ||Issn 2250-3005 || ||October||2013|| Page 43
  • 9. 3-Phase Ac Motor Monitoring And Parameter… [1] [2] [3] [4] [5] [6] On the block diagram, search for the Time Delay Express VI, shown at left, on the Functions palette and place it inside the While Loop. We can use the Time Delay Express VI to control the execution rate of the VI. Enter 0.25 in the Time delay (seconds) text box. This time delay specifies how fast the loop runs. With a 0.25 second time delay, the loop iterates once every quarter of a second. Click the OK button to save the current configuration and close the Configure Time Delay dialog box. Display the front panel and run the VI. Click the Enable switch and examine the change on the graph. If the Enable switch is on, the graph displays the reduced signal. If the Enable switch is off, the graph does not display the reduced signal. Click the STOP button to stop the VI. Acquiring a Signal in NI-DAQmx We will use the DAQ Assistant Express VI to create a task in NI-DAQmx. NI-DAQmx is a programming interface we can use to communicate with data acquisition devices. Refer to the Getting Started with LabVIEW» Getting Started with DAQ»Taking an NI-DAQmx Measurement in LabVIEW book on the Contents tab in the LabVIEW Help for information about additional ways to create NI-DAQmx tasks. In the following exercises, we will create an NI-DAQmx task that continuously takes a voltage reading and plots the data on a waveform graph. Creating an NI-DAQmx Task In NI-DAQmx, a task is a collection of one or more channels, which contains timing, triggering, and other properties. Conceptually, a task represents a measurement or generation you want to perform. For example, we can create a task to measure temperature from one or more channels on a DAQ device. Complete the following steps to create and configure a task that reads a voltage level from a DAQ device. [1] Open a new, blank VI. [2] On the block diagram, display the Functions palette and select Express»Input to display the Input palette. [3] Select the DAQ Assistant Express VI, shown at left, on the Input palette and place it on the block diagram. The DAQ Assistant launches and the Create New Express Task dialog box appears. [4] Click Acquire Signals»Analog Input to display the Analog Input options. [5] Select Voltage to create a new voltage analog input task. The dialog box displays a list of channels on each installed DAQ device. The number of channels listed depends on the number of channels you have on the DAQ device. [6] In the Supported Physical Channels list, select the physical channel to which the device connects the signal, such as ai0, and then click the Finish button. The DAQ Assistant opens a new dialog box, shown in Figure 4-1 that displays options for configuring the channel you selected to complete a task. [7] Fig 3.4: DAQ Assistant Graphing Data from a DAQ Device We can use the task you created in the previous exercise to graph the data acquired from a DAQ device.Complete the following steps to plot the data from the channel on a waveform graph and change the name of the signal. [1] On the block diagram, right-click the data output and select Create» Graph Indicator from the shortcut menu. [2] Display the front panel and run the VI three or four times. Observe the waveform graph. Voltage appears in the plot legend at the top of the waveform graph. [3] On the block diagram, right-click the DAQ Assistant Express VI and select Properties from the shortcut menu to open the DAQ Assistant. [4] Right-click Voltage in the list of channels and select Rename from the shortcut menu to display the Rename a channel or channels dialog box. You also can select the name of the channel and press the <F2> key to display the Rename a channel or channels dialog box. [5] In the New Name text box, enter First Voltage Reading, and click the OK button. ||Issn 2250-3005 || ||October||2013|| Page 44
  • 10. 3-Phase Ac Motor Monitoring And Parameter… [6] In the DAQ Assistant dialog box, click the OK button to save the current configuration and close the DAQ Assistant. [7] Display the front panel and run the VI. First Voltage Reading appears in the waveform graph plot legend. [8] Save the VI. [9] Editing an NI-DAQmx Task i. You can add a channel to the task so you can compare two separate voltage readings. [10] You also can customize the task to acquire the voltage readings continuously. [11] Complete the following steps to add a new channel to the task and acquire data continuously. 1. In the block diagram window, double-click the DAQ Assistant Express VI to open the DAQ Assistant. 2. Click the Add Channels button, shown at left, and select Voltage to display the Add Channels To Task dialog box. 3. Select any unused physical channel in the Supported Physical Channels list, and click the OK button to return to the DAQ Assistant. 4. Rename the channel Second Voltage Reading. 5. In the Timing Settings section of the Configuration page, select Continuous Samples from the Acquisition Mode pull-down menu. When you set timing and triggering options in the DAQ Assistant, these options apply to all the channels in the list of channels. 6. Click the OK button to save the current configuration and close the DAQ Assistant. The Confirm Auto Loop Creation dialog box appears. 7. Click the Yes button. LabVIEW places a While Loop around the DAQ Assistant Express VI and the graph indicator on the block diagram. A stop button appears wired to the stop input of the DAQ Assistant Express VI. The stopped output of the Express VI is wired to the conditional terminal of the While Loop. The block diagram should appear similar to Figure. Fig 3.5: Block Diagram Of The Read Voltage VI 8. If an error occurs or you click the stop button while the VI is running, the DAQ Assistant Express VI stops reading data and the stopped output returns a TRUE value and stops the While Loop.  IMPLEMENTATION, TESTING & RESULTS Connect the step down transformers for each phase of the 3-phase ac motor. For the convenient daq ratings with maximum 10v, the suitable step down transformer or the step down transformer with voltage divider can be used. Screen 1: Circuit Of The Project      Screen 2: Pins Of DAQ Connect the current sensors in series with the each phase of the 3- phase ac motor. Place the IC for supplying constant 5v to energise the current sensor. All those arrangements placed on the pcb for convenient purpose. Connections are made to DAQ as shown in the hardware schematic. Use a common pin for ground and +5V supply. Connections should be made carefully such that there is no interference of connections in between. ||Issn 2250-3005 || ||October||2013|| Page 45
  • 11. 3-Phase Ac Motor Monitoring And Parameter… PROGRAMMING  LabVIEW is a graphical user interface language where we can drag and drop the code instead of writing  The code design for this project is shown below. Fig4.1: VI of 3-Phase Ac Motor Fig4.2: Sub VI for Voltage Monitoring Of Motor  Sub VI for calculate voltage used in the above code is shown below  Sub VI for calculate current used in the above code is shown below Fig 4.3: Sub VI for Current Monitoring  Several functions used in the above code are o Select function: Returns the value wired to the t input or f input, depending on the value of s. If s is TRUE, this function returns the value wired to t. If s is FALSE, this function returns the value wired to f. The connector pane displays the default data types for this polymorphic function. o Fig 4.7: Acquring signals through DAQ Fig 4.8: Selection of Ports in DAQ [1] On the first screen, select Acquire Signals and then Digital Input for the Measurement Type. [2] Next, select line input. [3] The next screen lets the user to select the physical channel (or channels) for which the task is being created. All supported data acquisition hardware devices should appear in the tree control, and the user can expand them to view a list of the physical channels that can be selected for the task. To select more than one channel, hold down the Ctrl button while clicking on the channel names. ||Issn 2250-3005 || ||October||2013|| Page 46
  • 12. 3-Phase Ac Motor Monitoring And Parameter… [4] Click Finish to move on to the configuration stage. After interfacing is done click run to run the program. The front panel of the LabVIEW will be used to display the status of the motor. Screen 3: Front Panel View of VI Screen 4.4: System Testing RESULTS Results include the successful operation of 3 phase Ac motor monitoring and parameter calculation. Whenever the motor exceeds its ratings the pc detects and the signal is acquired by the DAQ. Based on the voltage and current rating i.e., low, medium, and high, voltage and current rating is set. Screen 4.5:Waveform of voltage of output VI of 3-phase ac motor VII. Fig 4.9:Motor VI with DAQ assistance Screen 4.6:Front panal CONCLUSION AND FUTURE SCOPE 7.1.CONCLUSION The protection of 3-phase ac motor is largely dependent on the modern ways of power supply and control. Advanced power technologies and control system contribute to the improvement of the motor efficiency. we designed a system by which the motor voltage and current controlled automatically based upon the supply. If motor exceeds its rating the motor will shut down automatically by switching the relay. So it protect the motor from the damage. So the motor gives good efficiency and efficient voltage and current waveforms. So it saves money and time. By comparing with normal operation of motor it will measure all the parameters easily and efficiently. It will helpful to the industrial management. 7.2.FUTURE SCOPE The 3 phase Ac motor monitoring system should be programmed and necessary circuitry added to operate the motor in normal condition. The monitoring of 3 phase ac motor can be used in industrial purpose. The control of ac motor is necessary for the continuous operation of motor. FEEDBACK CONTROL LOOPS are implemented to increase dynamical performance or precision of scientific and industrial equipment. The basic principle of such loops is to take into account actual measurements in order to compute appropriate actuations that adjust the operational conditions to meet given requirements. Motion control and process control ||Issn 2250-3005 || ||October||2013|| Page 47
  • 13. 3-Phase Ac Motor Monitoring And Parameter… are two major application areas of this paradigm. Due to this broad application field and its interdisciplinary nature, Automatic Control is a fundamental subject usually taught in many engineering disciplines, such as electrical, mechanical and chemical engineering. Implementing a complete control solution from scratch requires knowledge not only of the matter studied but also of the different technologies needed to interface the real process such as sensors and actuators, to the computer used to conduct the experiment. BIBLIOGRAPHY [1] [2] [3] [4] [5] [6] [7] [8] Electrical machines by "P.S.BIMBRA” Electrical machines by “J.B.GUPTHA” Douglas Lewin& David Protheroe (1992), Design of Logic Systems, 2ndEdition, Chapman and Hall, London. Pallas-Areny, R., Webster, J., 2001, “Sensors and Signal Conditioning”,John Wiley & Sons. http://www.enggjournals.com/ijcse/doc/IJCSE12-04-09-070.pdf http://ethesis.nitrkl.ac.in/3836/2/FINAL_DOC.pdf http://www.ni.com/dataacquisition/nidaqmx.htm http://sine.ni.com/ds/app/doc/p/id/ds-218/lang/en BIOGRAPHY Dr. K.Ravichandrudu obtained his M.Tech and Ph.D from S.V.University and Prasently Working as Professor of EEE in Krishnaveni Engg College/Women.His area of interest are in Electrical Machines and Power systems. P.Suman Pramod Kumar Obtained his B.Tech from N.B.K.R.I.S.T, S.V. University and M.Tech from Bharath Institute of Higher Education & Research, Chennai. Prasently Working as Associate Professor of EEE in Chadalawada Ramanamma Engg College, Tirupathi. His Area of Interest are in AC Machines, Control Systems & Power system Stability. YN. Vijay Kumar persuing his Ph.D from JNTU Kakinada and prasently working as Associate Professor of EEE in S.V.C.E.T, Chittor. His Area of Interest are in Power system and Electrical Machines. C.Praveen Kumar obtained his M.Tech From S.V.P.C.E.T, Puttur and Prasently working as Assistant Professor of EEE in Chadalawada Ramanamma Engg College, Tirupathi. His area of Interest are in Electrical Machines and Electromagnetic fields. ||Issn 2250-3005 || ||October||2013|| Page 48