
Recomendados
Recomendados
Más contenido relacionado
Último
Último (20)
Destacado
Destacado (20)
Espresso-coffee-machine-India-online-user manual-Coffeeza
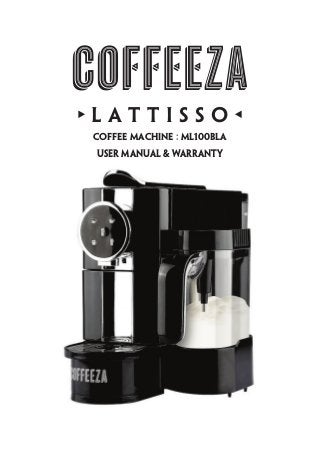
- 1. COFFEE MACHINE ml100bla USER MANUAL & WARRANTY L A T T I S S O
- 2. Safety Precautions ............................................................................................... 1 Features and Functions........................................................................................... 3 First Use ................................................................................................................. 3 Using your Coffee Machine .................................................................................... 4 Preparing Espresso/Lungo ................................................................................... 4 Preparing Cappuccino ........................................................................................... 5 Preparing Latte ...................................................................................................... 6 Preparing Cold Froth ............................................................................................. 7 Cleaning Guidelines ............................................................................................. 8 How to Descale ....................................................................................................... 8 Trouble Shooting ................................................................................................... 9 Warranty ................................................................................................................ 10 Coffee Guide ......................................................................................................... 11 cONTENTS
- 3. Read all instructions carefully before using this electrical appliance and keep these instructions for future reference. IMPORTANT SAFEGAURDS Make sure that the voltage of the appliance corresponds to that of the mains supply. Warning: This appliance must be earthed. Unplug the appliance from the main socket before cleaning and maintenance and let the appliance cool down. Do not operate this appliance with a damaged cord or plug. If the supply cord is damaged it must be replaced by Coffeeza or its service agent or similarly qualified persons to avoid all risks. Never touch the cord with wet hands. Never immerse the appliance or part of it in water or other liquid. Never put the appliance in a dishwasher. Only Capsule Container, Drip Tray and Water Tank are dishwasher safe. Put them in the top rack only at 40-degree cycle. In case of an emergency: immediately remove the plug from the power socket. Do not pull the cord over sharp edges, clamp it or allow it to hang down. Keep the cord away from heat and dampness. Do not leave the appliance unattended during operation and unplug after each use (as there may be a risk of fire if an unattended appliance is left operating). Keep the appliance and its cord out of reach of children. This appliance can be used by children aged 8 years and above and by persons with reduced physical, sensory or mental capabilities, or whose experience or knowledge is not sufficient, provided they are supervised or have received instructions to use the appliance safely and understand the hazards involved. Cleaning and user maintenance shall not be made by children without supervision. Children shall not play with the appliance. This appliance is mainly intended for household or personal use. Do not use outdoors or for commercial purpose. Do not use the appliance for other than its intended use. Coffeeza accepts no responsibility and the warranty will not apply for any commercial use, inappropriate handling or use of the appliance, any damage resulting from use for other purposes, faulty operation, non-professionals repair or failure to comply with the instructions. Refer to “Warranty” section for more details. Unplug the appliance from the main switch before refilling the water tank. Do not remove the water tank until unit is turned off. Do not overfill the water tank. Never fill the water tank with hot or boiling water. Always fill the water tank with cold, fresh drinking water. Do not use milk or any other liquid. Always be sure to install the water tank securely back in the unit with its lid closed after filling the minimum level of water before turning the appliance on. Empty water tank if the appliance will not be used for an extended time. The use of accessory attachments not recommended by Coffeeza as this may result in fire, electric shock or injury to persons. Always place the appliance on a hard and even surface only. Do not place the appliance on a polished wood surface or other porous materials as it could damage the surface. Do not place the appliance on or beside hot surfaces such as, stoves, ovens, gas burners, open flames, or similar. Disconnect the appliance from the main switch when not in use for a long period. The environment temperature of operating or storing the appliance should be more than 0˚C. ELECTRICAL SAFETY GENERAL SAFETY Copyright 2018 Cravium Foods LLP 1 IMPORTANT SAFETY PRECAUTIONS
- 4. Protect the appliance from direct sunlight, water splashes and humidity. Do not remove the milk container during use (Risk of scalding). Do not use latte or cappuccino functions without milk in the container. Do not place warm or hot milk in the milk container (risk of burns and scalding). Wash the milk container with warm soapy water. Do not submerge the machine. If there is an internal water leakage, do not operate the coffee machine and unplug it at once to avoid electric hazard. Please note, condensation under the machine is normal. Do not use the appliance without the drip tray and drip tray cover to avoid spilling any liquid on surrounding surfaces. After each use empty the capsule container. Be very careful while taking out the capsule container and drip tray to avoid spillage on surfaces. Do not use any strong cleaning agent or solvent cleaner. Use a damp cloth and mild cleaning agent to clean the surface of the appliance. Do not put fingers under coffee outlet (risk of burns and scalding). Do not put fingers into capsule compartment or the capsule shaft (Danger of injury!). Never use a damaged/deformed/non-compatible capsule as this could cause damage to the appliance. If a capsule gets blocked in the capsule compartment, turn the machine off and unplug it before any further operation. Contact customer service. Always completely close the lever and never lift it during operation. Scalding may occur. Lever will be warm after extraction. We recommend that the appliance is plugged into a socket that has no other appliance connected to it. Failure to do this may cause an overload, trip a circuit breaker or blow a fuse. The safety precautions are part of the appliance. Read them carefully before using your new appliance for the first time. Keep them in a place where you can find and refer to them later on. CAUTION Copyright 2018 Cravium Foods LLP 2
- 5. Check that all accessories are complete and the unit is not damaged. FEATURES & FUNCTIONS FIRST USE 1. 2. 3. 4. 5. 6. MAX MIN HANDLE WHISK MILK LEVEL STEAM WAND POWER SWITCH MILK CONTAINER WATER TANKWATER TANK LIDLEVER NOZZLE CAPSULE CONTAINER DRIP TRAY COVER TALL CUP STAND REMOVABLE DRIP TRAY MILK CONTAINER LID Espresso Lungo Cold Froth Latte Cappuccino ATTACH DRIP TRAY TURN ON PLACE A LARGE CUP Fill water into water tank, make sure the lid is closed. Once filled secure back into its position. Insert the plug, press the power switch to “I” position and then all the indicators start to flash, wait until the indicators light steadily. Ensure that the drip tray is removed then place a container or large cup under the nozzle. Once all the indicators stop flashing then press the Espresso button and wait for water to dispense from the nozzle. Repeat this process 5 times. This will rinse the internals ready for your first drink. Position the drip tray back onto the machine. The machine is now ready for use. PRESS ESPRESSO BUTTON 5x FILL WATER TANK AND SECURE INTO POSITION 3 5 READY TO USE 6 4 1 2 Copyright 2018 Cravium Foods LLP 3
- 6. 1. 2. 3. 4. 5. 6. 7. 8. 9. PREPARING ESPRESSO/ LUNGO Use with Coffeeza capsules. Shop online at www.coffeeza.com Fill the water tank with drinking water. The water level should not exceed MAX level marked on the tank. Insert the plug, press the power switch to “I” position and then all the indicators start to flash, wait until the indicators light steadily. Place a small cup on the Drip Tray. Lift the lever fully and insert a capsule. Close the lever by pushing it down directly. Follow steps ‘6’ for Espresso and step ‘7’ for Lungo Once all the indicators stop flashing then press the Espresso button to dispense an Espresso. Then its corresponding indicator starts to flash till the coffee is dispensed. Once all the indicators stop flashing then press the Lungo button to dispense a Lungo. Then its corresponding indicator starts to flash till the coffee is dispensed. The indicators will illuminate when the coffee is dispensed completely. Your beverage is now ready to be consumed. Ensure the Drip Tray is in place to collect any drips from the Nozzle. Lift the Lever fully, to empty the capsule into the capsule container. We recommend to rinse and empty the Capsule container after every use. NOTE: Be very careful while taking out the capsule container and drip tray to avoid spillage on surfaces. NOTE: During brewing process, you can cancel the coffee brewing process anytime by pressing your selected coffee button once. NOTE: The appliance will enter into standby mode and all the indicators will go off if there is no operation within 4 minutes. • Switch off and unplug when not in use. • Do not leave capsule in machine after use. • Empty Drip Tray and Capsule Container regularly. NOTE: FILL WATER TANK AND SECURE INTO POSITION TURN ONUSE COFFEEZA CAPSULES PLACE A CUP PRESS ESPRESSO/LUNGO COFFEE DISPENSES READY TO DRINKLIFT LEVER & INSERT CAPSULE LUNGO ESPRESSO 1 2 3 4 5 6 7 8 Copyright 2018 Cravium Foods LLP 4 USING YOUR COFFEE MACHINE
- 7. PREPARING CAPPUCCINO Never open the handle during brewing cycles. CAUTION LIFT LEVER & INSERT CAPSULE PRESS ESPRESSO READY TO DRINK PUSH MILK CONTAINER BACK PRESS CAPPUCCINO SWIRL & POUR PLACE A CUP ON DRIP TRAY TURN ON REMOVE MILK CONTAINER FILL MILK & REPLACE LID 2 3 4 5 6 7 8 9 Copyright 2018 Cravium Foods LLP 5 10 1. 2. 3. 4. 5. 6. 7. 8. 9. 10. 11. Once all the indicators are illuminated, press “ ” the Cappuccino button and its indicator starts to flash for some time, and then the machine starts to froth milk which can take up to 2 mins. After frothing finishies, all the indicators light steadily. Swirl and Pour: For a truly professional touch, try gently swirling the milk. Remove the Lid and pour immediately into a cup. Place a cup on the Drip Tray. Lift the lever fully and insert a capsule.Then close the lever. Press the Espresso button. The indicators will illuminate when the coffee is dispensed completely. Your Cappuccino is now ready to be consumed. Fill the water tank with drinking water. The water level should not exceed MAX level marked on the tank. Insert the plug, press the power switch to “I” position and then all the indicators start to flash, wait until the indicators light steadily. Remove the milk container by following the arrow “←” marked on the milk container lid. Fill the milk container with fresh cold milk upto the level marked by the following icon “ ” (milk temperature should be: 4-8°C). Replace the lid & push the milk container back into position by following the arrow “→” marked. Ensure that the Cappuccino, Latte & Cold Froth buttons are illuminated as this indicates its fitted correctly. FILL WATER TANK AND SECURE INTO POSITION 1 NOTE: Be very careful while taking out the capsule container and drip tray to avoid spillage on surfaces.
- 8. PREPARING LATTE TURN ON PUSH MILK CONTAINER BACK PRESS LATTE REMOVE MILK CONTAINER LIFT LEVER & INSERT CAPSULE PRESS ESPRESSO READY TO DRINK SWIRL & POUR PLACE A CUP ON DRIP TRAY FILL MILK & REPLACE LID 2 3 4 5 6 7 8 9 10 Copyright 2018 Cravium Foods LLP 6 Fill the water tank with drinking water. The water level should not exceed MAX level marked on the tank. Insert the plug, press the power switch to “I” position and then all the indicators start to flash, wait until the indicators light steadily. Remove the milk container by following the arrow “←” marked on the milk container lid. Fill the milk container with fresh cold milk upto the level marked by the following icon “ ” (milk temperature should be: 4-8°C). Replace the lid & push the milk container back into position by following the arrow “→” marked. Ensure that the Cappuccino, Latte & Cold Froth buttons are illuminated as this indicates its fitted correctly. 1. 2. 3. 4. 5. 6. 7. 8. 9. 10. 11. Once all the indicators are illuminated, press “ ” the Latte button and its indicator starts to flash for some time, and then the machine starts to froth milk which can take up to 2 mins. After frothing finishies, all the indicators light steadily. Swirl and Pour: For a truly professional touch, try gently swirling the milk. Remove the Lid and pour immediately into a cup. Place a cup on the Drip Tray. Lift the lever fully and insert a capsule. Then close the lever. Press the Espresso button. The indicators will illuminate when the coffee is dispensed completely. Your Latte is now ready to be consumed. FILL WATER TANK AND SECURE INTO POSITION 1 Never open the handle during brewing cycles. CAUTIONNOTE: Be very careful while taking out the capsule container and drip tray to avoid spillage on surfaces.
- 9. Never fill the milk container beyond the level Marked by “ ” or “ ” icon as doing so can cause hot milk to spurt out during the steaming/frothing cycle. Always use milk taken directly from the fridge. Using warm milk may cause excess froth that can spill out of Milk Container Spout. Do not remove the Milk Container when frothing – Risk of scalding. Never leave the machine unattended when frothing. If the milk froth rises to the top of Milk Container, repress the corresponding button to stop the cycle. Never froth milk without the Capsule Container located. Water is purged into the Capsule Container between frothing and dispensing coffee. We recommend that you empty Capsule Container every 3 brewing cycle. Do not leave milk in the Milk Container. Rinse and clean immediately. WARNING Remove the milk container by following the arrow “←” marked on the milk container lid. Fill the milk container with fresh cold milk upto the level marked by the following icon “ ” (milk temperature should be: 4-8°C). Replace the lid and push the milk container back into position by following the arrow “→” marked. Ensure that the Cappuccino, Latte & Cold Froth buttons are illuminated as this indicates its fitted correctly. Once all the indicators are illuminated, press the “ ” Cold Froth button and its indicator starts to flash for some time, and then the machine starts to froth milk which can take up to 2 mins. After frothing finishes the machine will automatically stop and all the indicators light steadily. Remove the Lid and pour the frothed milk into a cup. Optional: you can add flavoured powders (chocolate powder), syrups or ice cream for a refreshing shake. (Do not put any flavourings into the milk container as it will damage the machine). Your flavoured frothed milk is now ready to be consumed. 1. 2. 3. 4. 5. 6. PREPARING COLD FROTH LOW TEMP PROTECTION: When environment temeprature is lower than 5˚C. LED of Latte button will blink in blue and LED of other button will extinguish. Once environment temperature rises and reaches above 5˚C, appliance will resume to normal operation. REMOVE MILK CONTAINER FILL MILK & REPLACE LID 1 2 SWRIL & POUR READY TO DRINK 5 Copyright 2018 Cravium Foods LLP 7 PRESS COLD FROTHPUSH MILK CONTAINER 3 4 NOTE: Be very careful while taking out the capsule container and drip tray to avoid spillage on surfaces. NOTE: Milk container must be rinsed after every use.
- 10. CLEANING GUIDELINES Remove the Capsule Container and Drip Tray and rinse it. Dispose the capsules in the bin. Also empty the water tank and rinse it well. Empty the Milk Container and clean with warm soapy water and rinse. Use a damp cloth to gently wipe the container Lid. Remove the Steam wand from the Milk Container Lid and pull the metal coil off the Whisk. Rinse the Steam Wand to remove the residues and clean the Whisk components fully. Re-attach the metal coil onto the whisk. Wipe the machine and nozzle with a damp cloth. To keep your coffee machine operating efficiently, we recommend descaling once every 6 months to prevent mineral deposits left by the water in the machine. Fill the water tank with water and descaling solution to the MAX level. Make sure the ratio is 4:1, also refer to instructions on the descaler. Please use “household descaler”. Press the power switch to “I” position and all the indicators start to flash, wait until the indicators light steadily. Make sure the lever is closed. Position a container on the Tall Cup Stand. Press the Lungo or Espresso coffee button and allow the liquid to flow. Repeat this process until all the water is used up. Rinse the water tank well and fill with clean water. Repeat the Lungo or Espresso cycles 3-5 times to rinse. The machine is now ready for use. 1. 2. 3. 4. 1. 3. 2. 4. 5. 6. WATER TANK & SOLUTION RINSE WATER TANK READY TO USE PLACE A LARGE CUP PRESS ESPRESSO OR LUNGO The descaling solution can be harmful. Avoid contact with eyes, skin and other surfaces. CAUTION REMOVE RE-ATTACH WIPE 1 3 6 4 EMPTY CAPSULE CONTAINER & DRIP TRAY RINSE MILK CONTAINER DISASSEMBLE & CLEAN WIPE DOWN & STORE 2 2 3 4 1 Copyright 2018 Cravium Foods LLP 8 HOW TO DESCALE NOTE: Only Capsule Container, Drip Tray and Water tank are dishwasher safe. Put them in the top rack only at 40-degree cycle. 5x 5 TURN ON
- 11. TROUBLE SHOOTING Copyright 2018 Cravium Foods LLP 9 My Coffee Machine is leaking Indicator lights don’t turn on The lights are on, but no coffee comes out The Machine makes a strange noise Pump stops running during a dispense Milk is not frothing up The Milk spurts over during the Cappuccino /Latte function Capsule container fills with water I can hear whistling / steaming sound after the cappuccino/ latte function is complete. There could be water beneath the coffee machine. This is safe and does not mean the machine is leaking. There could be water in Drip tray and Capsule container. Plug & Socket. The Capsule inserted may be faulty. The water tank is empty. The water tank is empty. Internal pipes may be blocked. The Milk may not be suitable for frothing. The whisk may not be positioned correctly. The steam wand may be blocked. Not Enough Milk. Milk is too warm. After using any of the Milk functions, water is dumped into the Capsule Container to cool the heating unit. Machine’s is cooling down the heating unit by purging cold water through it. Ensure that water tank has been inserted correctly. When refilling with water, always switch off the coffee machine and only then remove and refill the water tank. Otherwise, water could leak from the appliance. Ensure that the drip tray and capsule container does not contain water. If you still feel the coffee machine is leaking, stop, switch off and unplug and contact Coffeeza on 1-800-123-5171. Check that the plug has been inserted correctly into the socket and the power button has been pressed. Wait for few seconds, then try again with a new capsule. Check that there is water in the tank. Fill up the water tank & dispense just water. Descale regularly. Refer to page no.8 For optimal performance, use fresh, cold, semi-skimmed milk. Check the whisk coil is fitted properly on the whisk cylinder. Slide the whisk all the way down away from the lid. Rinse the milk container lid throughly and descale regularly. Ensure you fill the Milk upto the level marked by the following icon “ ” “ ”. Use cold milk from the fridge. This is normal operation and not a cause for concern. Coffeeza recommends emptying the Capsule Container every 3 drinks when using the milk function to avoid overspill. This is normal operation and not a cause for concerns. • • • • • • • • • • • • • • • • • • PROBLEM CAUSE OF PROBLEM SOLUTION
- 12. This Warranty covers both parts and labour. Carriage is not included. Your Warranty period is 1 year from the date of purchase. This Warranty provides benefits which are additional to, and do not affect, your statutory rights. This Warranty does not cover the cost of returning the product to Coffeeza Service Centre. It does not cover liability in respect of replacement of plugs, cables or fuses and does not cover defects due to: • Failure to use or maintain product in accordance with Coffeeza’s User Manual/Instructions. • The product being connected to an unsuitable electricity supply. • Accidental damage to or abuse or misuse of the product. • Product modification except by Coffeeza. • Dismantling of or interference with the product. • Theft or attempted theft of the product. • The use of incompatible coffee capsules. • The use of any other liquid (besides water) in the water tank. • The use of any other liquid (besides milk) in the milk container. • Commercial use of the product. Before returning any product under this Warranty, please check that: • You have followed the product instructions correctly. • Your mains electricity supply is functional. • The defect is not due to a blown fuse. If you wish to claim under this Warranty you should contact Coffeeza Service Centre for technical support. In case they deem that the product cannot be remotely repaired, please follow the steps hereunder: • Send the product, postage or carriage paid, to Coffeeza directly. • Ensure that the product is clean and packed carefully (preferably in its original carton). • Purchase receipt must be included in the return. • Give exact details of the nature of the defect. This Warranty does not cover any other claims whatsoever, including, without limitation, any liability for incidental, indirect or consequential damage, nor does it cover any claims for conversion or modification or for the costs of repair carried out by any third party without the prior consent of Coffeeza. If replacement parts are fitted to the product this will not extend the period of Warranty. For further advice contact the Coffeeza customer helpline on 1800-123-5171 (09:00 to 17:00 Monday to Friday). Alternatively, email at info@craviumfoods.com or visit coffeeza.com 1. 4. 5. 6. 7. 8. 3. 2. It has been our endeavour to make this appliance of excellent quality and construction. However, if any defects in materials or workmanship do appear during the relevant Warranty period, we will, at our discretion, either repair or replace the defective parts, free of charge, subject to the terms and conditions of our Warranty shown below. Copyright 2018 Cravium Foods LLP 10 WARRANTY Coffeeza reserves the right, at any time, to modify the present warranty Terms & Conditions.
- 13. COFFEE GUIDE Macchiato Mocha Latte Cappuccino Americano Espresso Espresso Espresso Espresso Espresso Espresso Espresso Hot Milk Hot Milk Hot Milk Milk Foam Milk Foam Milk Foam Milk Foam Chocolate Syrup Hot Water All illustrations are for representation only. Cravium Foods LLP S1-4, Belmont, NH-4A Ribandar Bypass Road, Ribandar,Goa (India)- 403 006 Toll Free: 1-800-123-5171 Email: info@craviumfoods.com Please remember to respect the local regulations: hand in the non-working electrical equipments to an appropriate waste disposal center. 11Copyright 2018 Cravium Foods LLP www.coffeeza.com Shop Coffee Capsules & accessories at /coffeezaindia DON’T FORGET TO REGISTER YOUR PRODUCT TO CLAIM WARRANTY www.coffeeza.com C L A S S I C O CO F F E E Z A® & N E S P R E S S O®* C O M PAT I B L E c e n t r a l a n d s o u t h A m e r i c a n b l e n d o f A r a b i c a c o f f e e , m e d i u m r o a s t e d r e s u lt i n g i n a n a r o m at i c , f r u i t y a n d e n c h a n t i n g a r o m a . I N T E N S O CO F F E E Z A® & N E S P R E S S O®* C O M PAT I B L E S o u t h A m e r i c a n A r a b i c a c o f f e e b a l a n c e d w i t h f l a v o u r s f r o m A s i a r e s u l t i n g i n a n i n t e n s e a n d f u l l a r r a y o f a r o m a s .