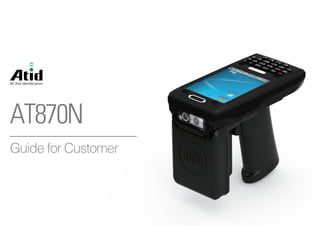
Atid AT870N 옵션(13.56MHz, 900MHz, 2D) 휴대형 RFID 리더 WinCE 매뉴얼

Atid AT870N RFID 리더기는 기존 모델 보다 메모리 용량 및 무게가 개선되었으며, 1.5 미터 콘트리트 낙하 테스트와 IP65 적용된 견고한 휴대용 RFID 리더기입니다. 물류관리, 재고관리, 창고관리에 용도에 특화된 RFID PDA입니다. Windows CE 5.0 Marvell™ PXA 320 806Mhz Memory 512MB RAM / 512MB ROM RFID UHF 900MHz GEN2, ISO/IEC 18000-6C HF 13.56MHz ISO15693, MIFARE, ISO14443 A/B (Option) 1D Laser or 2D Imager Barcode Scanner WLAN(IEEE802.11 a/b/g/n Option) Bluetooth Class II, v2.0 + SPP Only Camera with Flash | GPS PERFORMANCE CHARACTERISTICS Processor : Marvell™ PXA 320 806Mhz Operating System : Windows CE 5.0 Memory : 512MB RAM / 512MB ROM Display : 3.5" QVGA with Backlight, TFT LCD, 240×320Pixel, 262K Color Weight : 250g (PDA only, without battery) Operating Temp. : `-20℃ ~ 60℃ Storage Temp. : `-30℃ ~ 70℃ Humidity : 95% non-condensing Drop Spec. : 1.5M Drop to concrete Dust & Water Proof : IP65 PHYSICAL CHARACTERISTICS Audio : Speaker, Ear Jack, Microphone+ Standard I/O Port : USB 1.1 Client / USB Host & Serial (RS-232) via gender cable or Cradle Expansion Slot : 1Micro SD Slot (SDHC), 1SIM Slot Notification : Vibrator and LED, Speaker Dimensions (L x W x H) : 148 x 76 x 26 (30.5)mm BATTERY SUPPLY Main Battery : Lithium Polymer 3.7V 2,960mAh (Rechargeable) Backup Battery : Lithium Polymer 3.7V 80mAh (Rechargeable) Power Adapter : Input AC100V ~ 240V / Output DC 5V 3A NETWORK CHARACTERISTICS WLAN : IEEE 802.11 a/b/g Compliant (a/b/g/n Option) Bluetooth : Bluetooth Class II, v2.0 + SPP Only Radio : MODEM 3G (GSM / GPRS / EDGE / WCDMA / HSPA+) GNSS : Internal Antenna (GPS + Glonass Option DATA CAPTURE & DATA PROCESSING DEVICE Barcode Engine : 1D Laser or 2D Imager Barcode Scanner Camera : 3.0 Mega Pixel Auto Focus with Flash UHF 900Mhz RFID READER/ WRITER Frequency : CE 865MHz ~ 868MHz / FCC 902MHz ~ 928MHz Reading range : 0M ~ 5M (According to Tag & Environment) Writing range : 0M ~ 0.5M (According to Tag & Environment) RF output : 1W (MAX) Protocol : GEN2, ISO/IEC 18000-6C Special function : Anti-Collision HF 13.56Mhz RFID READER/ WRITER Applied RFID Tag : ISO15693, MIFARE, ISO14443 A/B (Option) Reading range : According to Tag : 0Cm ~ 5Cm (Internal or External) CRADLE Standard Interface : USB 1.1 Host / USB Client / DC Power Jack / Extra Battery Charger / Serial (RS232) via gender cable Ethernet Interface : RJ-45 Ethernet Interface (Option) GUN HANDLE Gun Handle Grip (Pistol Grip) : Body, UHF /HF Available Gun Handle Battery : Lithium-Ion 3.7V 5,200mAh (Rechargeable) Option ACCERSSORIES Adaptor AC Cable Protection Film : LCD screen protective film USB Cable : This 20 Pin USB data cable supports data transfer and charging. Hand Strap : Hand Strap adds protection against accidental drops. Stylus Pen Cradle (Option) : Products for charging GUN Handle (Option) : Convenient to use >하이온아이티 주소 : 서울 금천구 가산디지털2로 165, 1304호 (백상스타타워2차) 대표번호 : 02-2038-0018 / 이메일 : hion@hionit.com 홈페이지 : http://hionsmart.com

Recomendados
Recomendados
Más contenido relacionado
La actualidad más candente
La actualidad más candente (14)
Similar a Atid AT870N 옵션(13.56MHz, 900MHz, 2D) 휴대형 RFID 리더 WinCE 매뉴얼
Similar a Atid AT870N 옵션(13.56MHz, 900MHz, 2D) 휴대형 RFID 리더 WinCE 매뉴얼 (20)
Más de HION IT
Más de HION IT (20)
Último
Último (20)
Atid AT870N 옵션(13.56MHz, 900MHz, 2D) 휴대형 RFID 리더 WinCE 매뉴얼
- 2. 2 ATID is a registered trademark of ATID CO.LTD. AT870N is a registered trademark of ATID CO.LTD. and of its wholly owned subsidiaries. Microsoft Windows®, Windows® 2000, Windows® CE .NET, Windows® NT, and Windows® XP are registered trademarks of Microsoft Corporation. ATID CO.LTD. Disclaimer #1211 Byuksan/Kyungin Digitalvalley 11, 184, Gasan digital 2-ro, Geumcheon-gu, Seoul, Korea Tel: +82-2-544-1436 Fax: +82-2-2113-0040 www.atid1.com
- 3. 3 Contents Page Contents 5 Before using manual for AT870N Chapter 1. Caution when using AT870N 6 1. How to use battery correctly 6 2. Caution when using AT870N Chapter 2. Product composition 7 1. Product composition 8 2. Name of each part 9 3. Function of each part 22 16. Data and time setting Chapter 3. Basic function 10 1. Switch On Backup Battery 11 2. Attaching and Detaching the battery 12 3. Charging battery 12 14 5. Checking Battery Gauge 15 6. Backup Battery 15 7. Battery replacement 16 8. Soft Reset 16 9. Hard Reset 17 10. Initializing System 19 11. Attaching Micro SD card 20 12. Attaching SIM Card 21 13. Screen brightness setting 21 14. Screen adjustment 22 15. Volume and sounds setting
- 4. 4 Page Contents Chapter 3. Basic function(continues) 24 17. Using keypad 24 18. Inputting Data 25 19. Using <Fun> Button 20. Use of stylus 26 21. Connecting PDA to PC 28 22. Data transfer 29 23. Firmware upgrading Chapter 4. Optional module 31 1. Using 1D or 2D barcode scanner 32 2. Barcode emulator setting 34 3. Barcode symbology setting 36 4. Barcode scanning 37 5. WLAN connection and termination 39 6. Bluetooth connection and termination 41 7. Bixolon SPP-R200 Printer Demo 42 8. GPS demo program execution 43 9. Use of camera 44 10. HF13.56 demo program execution 44 11. Mifare tag recognition 45 12. ISO15693 tag recognition 46 13. UHF 900Mhz Program 47 14. Modem ON/OFF Chapter 5. Appendix 48 25
- 5. 5 ■ ◆ ● Before using manual for AT870N Safety information Please read and follow all warnings and cautions for user`s safety in this document before you handle and operate ATID equipment. WARNING! A warning requires that you must strictly pay attention to operate procedure, practice, condition, and state, or might be injured seriously. CAUTION A caution explains the important point which has a huge possibility to break the device and make a malfunction NOTICE User guide inclusive of text, images, logos, product names is either the property of, or used with permission by ATID CO.,LTD. The information may not be distributed, tten permission of ATID CO.,LTD en user guide and actual function of device User guide can be adjusted by ATID CO.,LTD without consent of user discretionally. User guide is written for users who want to use and maintain the AT870N. Please read and understand these instruction prior to operating this unit. A notice provides you with needed additional information while using AT870N. Do not expose your device to extreme temperatures lower than - 10°C and higher than + 40°C. Distance of operation When using a data feature, position the phone a minimum of 0.5 cm from your body for the whole duration of the data transmission. Adapter Adapter shall be installed near the equipment and shall be easily accessible. Manufacture:ATID CO., LTD Model No.: BPI020S05N03 I/p: 100-240V~50/60Hz ,MAX/0.5A O/p: 5V 3A The plug considered as disconnect device of adapter Battery Caution Risk of explosion if battery is replaced by an incorrect type. Dispose of used batteries according to the instructions. Proper use As described in this manual, your device can be used only in right location. If possible, please do not touch the antenna area on your device. The product shall only be connected to a USB interface of version USB2.0 Regulatory Conformance Hereby, ATID CO.,LTD. declares that this device is in compliance with the essential requirements and other relevant provisions of Directive 1999/5/EC
- 6. 6Chapter 1. Caution when using AT870N • Caution when using AT870N Please aware of the manual contents in advance before you handle and operate your AT870N and other ATID Products. How to use battery correctly In case that you dropped the main body or battery in water, please do not put into the stove or heater for drying. Just keep it in natural drying or contact purchase place. Please note that the battery terminal doesn’t have to be contacted to metallic object. If you do not use the battery for a long time, please keep it at room temperature after charging. Operating time of battery can be shorter than usual in accordance with loss of battery and use time. In this case, please contact us. You have to use provided adaptor when charging the device. Turn o the device properly then detach or replace the battery. Caution when using AT870N separately. If you habe a problem on product, do not try to repair or disassemble it by yourself, please contact our customer service center. r. Please note that using the device in environment of high temperature and humidity for long hours can make a malfunction of device. • • • • • • • • • User careless or products repair would damage the stored data. Manufacturer is not responsible for this damage, so please do back-up the important data • • I the power immediately, then please contact our customer service center. If you have any other questions on use of device, please contact our customer service center.
- 7. 7Chapter 2. Product composition Product Composition Product composition * Please contact our customer service in defect of product composition and need to be changed. 5. 3. Standard battery 6. Hand strap 2. Power Adapter and AC cable 1. AT870N main body 4. USB sync cable AT870N is based upon Microsoft window CE 5.0 and as the state of the art product. it is equipped with barcode scanner, RFID Tag reader, MSR card reader, printer, smart card reader, MODEM, Camera and so on and it can be applied to Industry, Enterprise, 7. Stylus pen
- 8. Camera (option) Camera ash (option) Cradle connector Earphone jack Charger jack Sync Cable Connector Phone receiver WLAN LED (option) Internal HF Charge LED Touch Screen Keypad Reset button Microphone UHF Scan button (F7,F8) Gun handle 1D/2D Scanner (option) 8Chapter 2. Product composition Name of each part Battery latch Hand strap hole Battery Volume button UHF Connecting port
- 9. 9 Function of each part Chapter 2. Product composition NAME FUNCTION Enableyoutoconnecttoadaptorwhichprovidedfromfactory.Charger jack EnableyoutoconnecttoPCorchargingthebatterywhileusingcradle.Cradle connector Camera (option) Itispossibletoimagecaptureandsave. Earphone jack Enableyoutoconnecttoearphone. EnableyoutoconnectandsenddatatoPCviaUSBsynccable.Sync cable connector ChargerLEDwillbeRedwhenthebatteryischarging,orwillbegreenwhenitischargedcompletely.Charger LED Enableyoutoinputkeyvalue(number,alphabets,symbol),orexecutingassignedprograms.Keypad Displayrunningprograms,andcouldexecute,use,andexitprogramsviatotouchthescreen.Touch screen EnableyoutoperformawarmReset,Press<Power>buttonsimultaneously,Enable youtoperformahardResetReset button DisplayswhetherthewirelessWLANpowersupplyWLAN LED (option) Laserbeamemittedthroughthiswindow. Pleasebecarefultheforeignsubstancesandpreventingfromthedamage. Warning! Donotlookatthelaserbeamdirectly. 1D/2D Scanner (option) Internal HF HF13.56MhzEmbeddedmodulemountinglocation. Enableyoutoattachahandstraporastylusfortheconvenienceofusing,whileneedtousethedeviceforalongperiodtime.Hand strap hole EnableyoutoconductcommunicationMicrophone Enableyoutodetachingandattachingthemainbattery.Battery latch Enabletosupplythepowertotheproduct.Battery ItispossibletoscanbarcodeorRFIDtagScan button (F7, F8) EnableyoutoinstallaUHF900Mhztagreadermodule.UHF Connecting port
- 10. 10Chapter 3. Basic Function Basic Function Switch On Backup Battery Battery for AT870N is composed of main battery and backup battery. A main battery supplies the power to the system and RAM which could keep the data. A backup battery could keep the data of RAM when the main battery discharged completely. Main Battery: 3.7V 2,960mA Lithium - Polymer Backup Battery: 3.7V 80mA Lithium - Polymer ◆ Note: Please switch on the back-up battery as below instruction in advance at the beginning then, attach the main battery to body and then, charge it in full before using the product ◆ Note: Please press the <POWER> button a couple of seconds for shortening the charging time, in case of that window screen has shown. The image as below shows the status of battery compartment on the rear of body Please slide the switch of backup battery to right for switching on the device. If the switch turns on, the power of battery will supply to the system. Please attach the main battery on the rear of body. Please attach the main battery to the body by moving the latch lever in case of attaching the battery. Please refer to section 1.2 of attaching and detaching the battery Please connect the charger with charger jack and then do check if red light is lit on the LED. Please charge it until the green light is lit on the LED Backup Battery Switch
- 11. 11Chapter 3. Basic Function Attaching and Detaching the battery ▶ Battery detachment Below images are shown the bottom of device Please slide the battery latch to the right (Direction to UNLOCK), and then lift the main battery to detach the main battery after grapping the laver at the bottom. ▶ Battery attachment Please put the top of the battery into the above gap of device and then, push the bottom of battery into the below gap of device and then, slide the lever to right (Direction to LOCK). Above gap for attachment/ top of battery Battery Latch Both Side of the Gap
- 12. 12 ▶ Connecting Adapter 1. Connect the adapter plug with 220V socket 2. Connect adapter DC cable with “Power Connecting Jack” 3. LED will be changed when the red light is lit on the LED ◆ Caution: You must use provided adapter with device. Otherwise your device might be damaged You have to charge it through dedicated adapter which is provided when you bought Red light is lit on LED when it starts charging. It will be changed with green light in case of full Chapter 3. Basic Function In case of that there is window screen as below or you don`t use the system in the status of running other program, the device is able to enter the low-power mode (Sleep mode) If you want to use it again, please press the <POWER> button Start button Taskbar Taskbar : Displayed section of running program Start button : Initial button for starting the program which you want to activate Charging battery
- 13. 13 The device will be automatically entered to low-power mode (Sleep mode) if user does not use it for the designated time. User can change the designated time at the control panel and power as below. If user sets proper time-out, the device can be protected from the situation of power-on without user and battery can be prolonged. ▶ Automatic Power OFF Chapter 3. Basic Function ▶ Power Button 1. If you push the <POWER> button for 2 ~3 seconds in the state of running on the screen, Power On: 1 2. The system will be automatically turned on when ActiveSync USB cable is connected with device. ◆ Note: and these programs will be recovered in case of power-on. If both main battery and backup battery are in the discharge state, the RAM data will disappear, and the system will be re-starting if the power is charged again. Please do not afraid that you will enter the above situation in case of double-click on Icon of POWER indication The system can be turned on in case of entering the low-power mode by Automatic Power-OFF Power Icon
- 14. 14Chapter 3. Basic Function ▶ Battery Discharging The system is automatically going to enter the low-power mode (Sleep Mode), if the system is not available due to dead battery. In this situation, the system cannot be turned on despite of pushing <POWER> button If the system enters low-power mode (Sleep mode) due to dead battery, user is able to turn on the device by pushing <POWER> button after plugging the adapter in adapter jack or charging the main battery. Checking Battery Gauge ◆ Note: In general, you can use the device from 6 hours to 12 hours after 2200 mA battery is fully charged. ▶ Checking Battery Gauge [Start Button] -> [Setting] -> [Control Panel] -> [Power Management] -> [Battery]
- 15. 15Chapter 3. Basic Function ▶ Low Power Warning If the system is unavailable for low-battery, caution screen for lack of battery will be came out. Backup Battery ◆ Caution: RAM data will be disappeared if both main and back-up battery completely discharge. Activated RAM data will be disappeared at the running program and the system will restart in case of inputting the power instead of recovering. Back-up battery can be used for protecting the RAM data in case of discharging the main battery Battery replacement ◆ Warning! Please discard the expired battery at the designated location You need to purchase a new battery if existing battery got damaged or reached to its life
- 16. 16 [Process of Soft Reset] Please press the Reset button which is located on the device with stylus pen for a moment. The system will be restarted after turning off the screen a moment automatically. [Result of Soft Reset] - System will be restarted. - OS will be restarted. Soft Reset Chapter 3. Basic Function Please do restart the system when the application doesn`t work properly or system receives no Response When do you need to perform Soft Reset? - Screen will be reshown after 10 seconds - Adjusted registry information, copied file and installed program will be remained Reset button Power Button When do you need to perform Hard Reset? [Process of hard reset] Please press the Power button and reset button with stylus pen simultaneously and then, unhand those buttons. [Result of Hard Reset] Hard reset Hard reset which is called cold reset can be used for initializing the hardware completely. Registry value, copied file and installed program can be remained originally even though user uses the hard reset, but please note that time/date will be initialized. Therefore, please do reset the time if user uses the hard rest Please use hard reset if it is impossible to recover the system despite of soft reset - System will be restarted. - OS will be restarted. - Screen will be reshown - There are setting screen of time / date and user have to reset the setting og time and date. There is a Hang-up, which means that the system receives no response in case of running the program. When user encounters Hang-up, please do reset the system for recovering the device. Please note that warm reset can make the program terminate and clear the using memory. But it doesn`t influence on installed program and data etc.
- 17. 17 Initializing System Chapter 3. Basic Function Please use [Boot Menu] when user encounters below situation 1. When user wants to recover the adjusted registry information back again. 2. When user wants to initialize the storage space inside the “My Computer” 3. When user wants to initialize the storage space inside the “Flash Disk” 4. When user wants to make system a comeback as the state of beginning Press <POWER> button and <FUN> button simultaneously and then, press <RESET> button Reset Button Power Button FunButton [Boot Menu] is came out at the screen as below after 2 ~ 3 seconds ◆ Caution: Do not use any other functions except for [Clean System] at the [Boot Menu] There is a huge possibility to do abnormal movement if you use other functions [Boot Menu] [System Information] [Firmware Upgrade] [Clean System] Select : Enter [Boot Menu] Initial Screen [Boot Menu] [System Information] [Firmware Upgrade] [Clean System] Select : Enter Select the <Clean System> by using <8> button and <2> button and then, press <Enter> button [Exit Boot Menu] Move : 2(Up)/8(Down) [Exit Boot Menu] Move : 2(Up)/8(Down)
- 18. 18Chapter 3. Basic Function [Boot Menu] [Clean System] Select : Enter Select the clause > by using <8> button and <2> button. Please note that you can go back to the main menu if you press <BKS> button [Boot Menu] [System Information] [Firmware Upgrade] [Clean System] [Configuration Setting] Select : Enter Select the [Exit Boot menu] by using <8> button and <2> button and then, press the <Enter> button to get out of [Boot Menu] Preview : <- BKS [Exit Boot Menu] Move : 2(Up)/8(Down) Clean Registry It makes registry as initial state Clean OS Root It makes “My Computer” as initial state Clean Flash Disk It makes “Flash Disk” as initial state Factory Reset It makes the device as factory default Clean Registry Clean OS Root Clean Flash Disk Factory Reset Move : 2(Up)/8(Down)
- 19. 19 Do unlock the Micro SD CARD by sliding the card slot cover right side Lift the slot cover up Put the SD memory on the slot and then, shut the cover up Do lock the slot cover by sliding it left side and then, turn on the device after installing the battery Attaching Micro SD card Below image shows the back side of device when separating the main battery from device There are 1EA SIM Card Slot and 1EA Micro SD Card Slot. Micro SD card slot Chapter 3. Basic Function SIM card slot
- 20. 20 Attaching SIM Card Chapter 3. Basic Function Below image shows the state of equipping the SIM CARD with device. Please do insert it in accordance with card shape and edge shape
- 21. 21 The default setting on brightness is set up around 80% and user is able to set brightness up in accordance with his/her need since the power can be influenced by brightness [Setting the screen brightness] 1. [Start Button] -> [Setting] -> [Control Panel] -> [Backlight] 2. [MyDevice] -> [Control Panel] -> [Brightness] Timeout: Key Light: Adjust the timeout of key light Adjust the timeout Screen brightness setting Brightness: Control the brightness Chapter 3. Basic Function Please adjust the coordinate correction as below in case that the screen cannot be selected by stylus pen when using it first or using it for a long time Touch screen calibration [Start Button] -> [Setting] -> [Control Panel] -> [Stylus] -> [Calibration] -> [Recalibration] Screen adjustment Please softly press the center of target 5 times using stylus pen along the target moving. If screen adjustment is over, countdown is come up on the screen. In this case, it will be disappeared if you touch the screen, but if you don`t touch the screen, screen adjustment also will be disappeared.
- 22. 22Chapter 3. Basic Function The default setting on sound is set up around 80% and user is able to set sound up in the section of “Control Panel->Volume & Sound” Setting Volume and Sounds [Start Button] –> [Setting] -> [Control Panel] -> [Volume and Sounds] Volume and sounds setting [Start Button] -> [Setting] -> [Control Panel] -> [Date and Time] Data and time setting Setting Year: Please double click the year and then, select the year using rudder
- 23. 23Chapter 3. Basic Function Setting Time Zone: If you select the exact time-zone, user easily can adjust the time setting by selecting the time-zone on regional movement from the next time. Setting Day: Please select the relevant month Setting Month: Please select the month either using rudder or clicking the month directly Setting Time: Please click the time and then, adjust by using rudder
- 24. 24Chapter 3. Basic Function User easily inputs the number and alphabet by using keypad which is useful input method editor. It also can do a programmed function in combination with <Fun> Please press the <1<=>ALP> button as below step, if user wants to change the input language It will be converted in the order of [Number] -> [Small Letter] –> [Capital Letter] Using keypad Inputting Data Input mode can be converted if user clicks input language icon on the task bar Numeric Keypad Mode : Press the <1<=>ALP > button or input language icon on the task bar to change the number keypad mode Alphabet Keypad Mode : Press the <1<=>ALP > button or input language icon on the task bar to change the small or capital letter and then, input the word you want. As shown in the button for the device, there are 2 or 3 words in each button and user can input the pertinent word as per a next instruction. First word needs to push just 1 time, second word needs to push 2 times in a row and third word needs to push 3 times in a row.
- 25. 25Chapter 3. Basic Function Device can implement the programmed function in case that you push the number button with <Fun> button simultaneously. Using <Fun> Button Fun + button Function description It is able to cancel the selected command and movement & state of program.<Esc> Key button for right and left and top and bottom. It delete the letter behind the cursor It can be used Tab button It uses for page UP / DOWN.<3>,<9> <2>,<4>,<5>,<6>,<8> <Del> <7> Use of stylus User is able to use stylus pen that has same function with computer mouse and it can be used in connection with hand strap hole located on back bottom side of PDA ◆ Caution: There is a danger of getting damaged if you use any other sharp objects except for provided stylus pen since it is very sensitive one It uses for sound controlLeft side of <↑>, <↓> It inputs the + sign, 000 sign and –sign. It uses for function button <*>,<0>,<#> <F3>,<F4> ● ● Selection of letter on the soft keypad ● Setting Direction of Screen Display Use of stylus: Applied program on the main screen or task bar ● Selection of button, field and tap at the applied program and dialog box
- 26. 26Chapter 3. Basic Function Please install the program at the PC after downloading the latest version of Microsoft Windows CE. Connecting PDA to PC User can work in concert with computer and device by using ActiveSync through the synchronization of data one another such as installation, copy, Delete, Movement and so on. ◆ Caution: User has to use Microsoft ActiveSync 3.7 or above if you want to synchronize by using ActiveSync Clickthe[Next]Button Selectthelicenseagreementandthen,click the[Next]Button Inputthenameofuserandgroupandthen, clicktheNextButton Selectthelicenseagreementandthen,click the[Next]Button LinkforDownload:http://www.microsoft.com/downloads/. ActiveSync:WindowsXP WindowsMobileDeviceCenter6.1(64bit):WindowsXPorabove
- 27. 27Chapter 3. Basic Function Click the Installation button ActiveSync are installing Press End button for termination of installation
- 28. 28Chapter 3. Basic Function Data transfer Please connect the USB sink cable with PC User can check the connection state of ActivSync on the task bar Start button/Programs/Microsoft ActiveSync <WindowsXP> Connected State Disconnected State AfterActiveSyncconnected,clickExplore button. Designatetransmittingfilepath. Transmittingfiles.
- 29. 29Chapter 3. Basic Function [Start Button] -> [Setting] -> [Control Panel] -> [Firmware Upgrade] Firmware upgrading Please click the firmware update icon at the control panel if you want to upgrade the firmware of AT870N
- 30. 30 Optional module This chapter shows various option module which can be equipped in AT870N. Please refer to the explanation of optional module. Chapter 4. Optional module Various optional modules for AT870N 1) Barcode reader -. 1D Laser Barcode Scanner -. 2D Imager Barcode Scanner 2) Wireless LAN – 802.11 a/b/g/n Option 3) Bluetooth 4) HF13.56 Reader 5) UHF 900MHz RFID – GEN2, ISO/IEC 18000 6C 6) GPS Module 7) Camera
- 31. 31 AT870N can be equipped with 1D & 2D barcode scanner Using 1D or 2D barcode scanner Start->Program->Scanner-> Barcodedemo Chapter 4. Optional module Device can read the barcode by clicking the Start button or scanner button located on front of device or left/right side of device
- 32. 32Chapter 4. Optional module Barcode emulator setting Executing Barcode Emulator [Start Button] -> [Programs] -> [Demo Apps] -> [Scanner] -> [BarcodeEmulator] User can input the barcode value at the cursor by setting the scan sound, button, input method of barcode value through barcode emulator. Result Type Keyboard Event : keyboard input method (Default method) Copy Paste : Clipboard method Barcode Emulator can be shown up at the task bar Run a Barcode Emulator first Run a WordPad program and then, click the Emulator icon Setting the delivery method for barcode value
- 34. 34Chapter 4. Optional module Barcode symbology setting [Start Button] -> [Program] -> [Demo Apps] -> [Scanner] -> [BarcodeDemo] Set up the specific barcode typeRun a BarcodeSetup Click the “Set Enable Status” Check whether user will use barcode type or not User can set various barcode using provided program and work more comfortably by distributing the symbology as frequent use and infrequent use. For example, user continuously can work if symbology uses most often is set just one time.
- 35. 35Chapter 4. Optional module 1D Symbology selection: 1. Initialization of all barcode setting 2. Setting all barcode not to read 3. Setting all barcode to read 4. Setting the label which can read more than two barcodes at one ago 2D Symbology Selection: 1. Initialization of all barcode setting 2. Setting all barcode not to read 3. Setting all barcode to read 1. 2. 3. 1. 2. 3. 4. ◆ CAUTION! Do not use it to human eyes directly since laser beam is harmful to health.
- 36. 36Chapter 4. Optional module Barcode scanning 1. Please eliminate the protect film in front of scanner at the first. 2. Please run a barcode demo program 3. Please use the scan bean to center of barcode • Please adjust the range in accordance with barcode size • It will stop to read if user deviates from reading range [Correct barcode reading] [Incorrect barcode reading] Please bring it close to barcode in case of smaller barcode. This device can read the barcode in range of 40~300mm. If you have failure to read the barcode, please do check the angle and range. Laser beam will be shown up as a clear red line when using it at the barcode Laser bean have to be crossed in the barcode If laser beam partly will be shown up on the barcode, it doesn`t work well. 2. 1. 1. 2.
- 37. 37 AT870N enable to explain wireless communication including APN since it can communicate through 802.11 a/b/g/n radio. AT870N supports the TCP/IP network protocol and AT870N directly uses the TCP/IP and host computer at this protocol Device will be started as OFF state at the beginning [Start Button] -> [Programs] -> [Demo Apps] -> [Wireless Lan] WLAN connection and termination Chapter 4. Optional module Select the ON and then, click the OK button Click the Wireless Lan Click the scan button and then, select and double click if there is proper AP or captured router. Input the key password and then, click the OK button
- 38. 38Chapter 4. Optional module Click Start->Program->ATID App ->Wireless Lan OK button and terminate the wireless lan Click Status button and then, check signal quality and IP information. ◆ Warning! LED for Wireless LAN will be changed as green light and mark for task bar will be changed as in case of success in connection with wireless LAN, but it will be Changed as if it fails to connect
- 39. [WinCE Start] -> [Programs] -> [Demo Apps] -> [Bluetooth] 1. Start Bluetooth function Bluetooth connection and termination Chapter 4. Optional module Execute “BT Manager” at the start menu Ready state is on the screen if you click the Open button at the initial screen of BT Manager The device is on-state If you click Open button and then, input the pin code and then, press the connect button 39 User can only control the Power ON/OFF of Bluetooth module since AT870N basically uses stack at the windows system
- 40. 40Chapter 4. Optional module [WinCE Start] -> [Programs] -> [Demo Apps] -> [Bluetooth] 1. End Bluetooth function It will be terminated if you press the X button on the screen
- 41. 41Chapter 4. Optional module Bixolon SPP-R200 Printer Demo with homepage contents according to the Bixolon policy. 1. Download “SPP-R200 Windows SDK” from the Bixolon homepage (www.bixolon.com 2. Bluetooth Power-On 3. Execute “Bluetooth Device Properties” programs at the Control Panel. 4. SPP-R200 printer power ON. 5. Setting the SPP-R200 printer to be in the status of pairing. (Please refer to the User Guide of SPP-R200 Printer) 6. Press “Scan Device” button to search device nearby. 7. In the status of pairing, the factory setting password is “0000” usually. be not shown) sk. 10. Execute the Sample.exe program in the Flash Disk 11. Change from COM8 to COM2, then press “Open” button to test printer
- 42. 42 GPS can be selected as optional and it will be equipped on AT870N as built-in [Start Button] -> [Program] -> [DEMO Apps] ->[GPS-Demo] GPS demo program execution Execute GPSDemo Program. If you press Func key on the keyboard with Cold start simultaneously, you can check the data from GPS. Confirm GPS receiving Data: 1. Finding an open place to check your GPS signals. 2. According to the actual environment, the time to receive data is different (about 3~10min) , After receiving GPS data once, it is faster to receive GPS data than the first attempt. Chapter 4. Optional module COM6 has been set as Baud – 9600
- 43. 43Chapter 4. Optional module AT870N enables to equips with 3.0-megapixel camera which has function to adjust the brightness, video solution and screen capture. [Start Button] -> [Program] -> [DEMO Apps] -> [CameraDemo] Use of camera Execute Camera Program. Camera’s Main Screen. Camera UI Preview Window Image files store path Setting Resolution Preview Button Preview Stop ButtonSetting Image Effect Stored images Number Re-rotation Button Capture Button Brightness Bar
- 44. 44Chapter 4. Optional module [Start Button] -> [Program] -> [DEMO Apps] -> [RF13.56Demo] HF13.56 demo program execution Mifare tag recognition AT870N enables to equip with HF13.56Mhz module as a option, and the recognition range is 3-8.5cm according to the standard of ISO, in the case of Mifare Tag, its range will be 1~3.5cm. Click M_UID button to read a Mifare Tag Mifare: Open : Open device Close : close device Version : Read firmware version of ISO15693. Dll : Read library version. AntennaOff : Stop the Antenna. ISO : Show ISO15693 Tag Window M_UID : Read Mifare Tag ID. R/Block : Read Block Data.. WriteBlock : Write Block Data. APDU : send APDU data KeyLoad : Register authorization key to the R/W while to access Mifare Increment : Increase the values to data block. Decrement : Decrease the values to data block.
- 45. 45Chapter 4. Optional module ISO15693 tag recognition Click UID button to read ISO 15693 Tag UHF Reader ISO15693: UID : Read ISO15693 Tag ID. R/Block : Read ISO15693 Block data. W/Block : Write ISO15693 Block data. Clear : Clear data information. Close : Close this window AT870N enables to equip with UHF 900Mhz Tag Reader and this reader enables to read and write RFID Tag which supports protocol of GEN2, ISO/IEC 18000-6C. The Frequency range is CE 865 ~ 868MHz, FCC 902 ~ 928MHz and it could be adjusted in accordance with country
- 46. 46Chapter 4. Optional module [Start button] -> [Program] -> [DEMO Apps] -> [RF900Demo] Run RF900Demo Program INVENTORY Mode: UHF 900Mhz Program Start: click Start button to read the tag Clear : delete all tag values on the screen
- 47. 47Chapter 4. Optional module Modem ON/OFF Click Start->Demo Apps -> ModemTest Press <Power Up> button, wait tillpowerup succeed. Press Settings button for setting the country and mobile service company after ready state (If user is not able to find the country and mobile service company at the setting screen, please do set it by hand power) Press connect button after setting the country and mobile service company for use of modem
- 48. 48 Appendix PHYSICAL CHARACTERISTICS 76 X 148 X 24.8(30.5) mmDimension(L*W*H) 320g (PDA only, without Battery)Weight -10℃ ~ 40℃Storage Temp. Operating Temp. -10℃ ~ 40℃ Chapter 5. Appendix 95% Non-condensingHumidity 1.5m Drop to concreteDrop Lithium ion 3.7V Above 2,970mAH(Rechargeable)Battery Lithium Polymer 3.7V, 80mAH(Rechargeable)Back-up Battery Vibrator and LED, Speaker POWER SYSTEM PERFORMANCE CHARACTERISTICS Marvell PXA320 806MHzProcessor Windows CE 5.0Operating System 512MB RAM / 512MB ROMMemory 3.5" QVGA with Backlight TFT LCD, 240*320 Pixel, 262,144color Stylus Touch Screen InterfaceDisplay Phone Receiver, Speaker, Ear Jack, MicrophoneAudio USB 1.1 Client / USB Host & Serial (RS-232) via gender cable or cradleStandard I/O Port 1 Micro SD slot (SDHC support) 1 SIM slotExpansion Slot Input AC100~240V / Output DC 5V 3APower Adapter
- 49. 49Chapter 5. Appendix MODEM 3G (GSM / GPRS / HSDPA / HSPA+)Radio IEEE 802.11 b/g/a compliantWLAN Internal LAN & WANAntenna NETWORK CHARACTERISTICS 1D Laser, 2D Imager Barcode ScannerScanner 3.0 Megapixel Auto Focus with FlashCamera DATA CAPTURE DEVICE UHF 900MHZ TAG READER 865.7MHz- 867.5Mhz(Adjustable)Frequency Reading Range 0m ~ 3m (According to Tag & Environment)Writing Range 2 dbi (Standard)Antenna Gain 62.5 kbpsSpeed 1W EIRPRF Output EPC Gen2 ISO 18000 6C ISO 18000 6B(Optional) Protocol Anti-collisionSpecial Function