인터맥PDA Intermec CN51 2D 산업용PDA 바코드PDA 매뉴얼

인터맥 CN51 모바일 컴퓨터는 1.5GHz 듀얼 코어 프로세서, 1GB RAM, 16GB 플래시 메모리에 Windows® 또는 Android ™ 운영 체제를 선택할 수있는 탁월한 다 기능성을 제공합니다. 탁월한 사용자 경험을 위해 설계된 CN51 산업용 PDA는 대형, 멀티 터치, 실외 판독 가능 화면은 스크롤을 줄이고 생산성을 높이며 판독이 용이 한 서명을 캡처 할 수있는 공간을 넓히면서 애플리케이션을 볼 수있는 충분한 공간을 제공합니다. 인터맥 CN51 바코드 PDA의 고성능 이미저는 모션 허용 오차와 스캐닝이 탁월하며, 저조도 스캐닝 환경에서도 최적의 바코드 스캐닝 기능을 제공하여 스캔 집약적인 애플리케이션에서 많은 시간과 사용자의 불만을 없애줍니다. Intermec의 최첨단 이미지 처리 기술과 결합된 5 메가 픽셀 컬러 카메라는 바코드 판독 이상의 고급 기능을 제공합니다. MDI (Mobile Document Imaging) 및 RDC (Remote Deposit Capture)는 이동 중에도 풀 사이즈 문서 또는 수표를 캡쳐하여 전자 파일로 변환 지점에서 본사로 전송하는 빠르고 안정적인 방법을 제공합니다. Multi OS (O/S VERSATILITY) Supports Microsoft® Windows Embedded Handheld 6.5 and Android™ 4.1 Operating Systems for flexible application support and migration. DISPLAY Large 4” brilliant WVGA multi-touch display allows for more graphical user interface, display-centric applications. RUGGED Withstands multiple 1.5m (5ft) drops to concrete across the operating temperature range and an IP64 seal rating against rain and dust. SCANNING Features best-in-class motion tolerance, and support for omnidirectional 1D & 2D barcode scanning. FLEXIBLE NETWORK Features WAN radio options with voice and data support including UMTS and Flexible Network UMTS/CDMA, PTT, as well as 802.11 a/b/g/n, Bluetooth, and GPS with GLONASS support. BATTERY Industry-leading performance that lasts a full shift and beyond, enhanced by smart battery technology. PROCESSOR Equipped with a power-efficient 1.5GHz dual core multi-engine Texas Instruments OMAP4 processor architecture, with 1GB RAM and 16GB Flash memory. PHYSICAL CHARACTERISTICS Dimensions with battery : L X W X D: 164 x 74 x 28 mm (base of unit) 32 mm (top of unit) (6.45 x 2.93 x 1.09-1.26 in) Weight with battery : 350 g (12.3 oz) POWER Smart Battery Pack: 3.7V, 3900 mAh; Batteries are IEEE 1725 compliant, Li-Ion, removable, rechargeable. OPERATING SYSTEM Microsoft Windows Embedded Handheld v6.5 or Android v4.1* MULTI-PROCESSOR ARCHITECTURE Texas Instruments 1.5 GHz OMAP 4470 dual core, multi-engine processor architecture MEMORY AND STORAGE Memory: 1 GB RAM ROM: 16 GB Flash Customer - accessible miniSD slot for removable memory cards DISPLAY 10.16 cm (4.0 in), 480 x 800 pixel (WVGA) TFT-LCD display LCD supports 24 bpp color depth LED backlight Ambient light sensor Resistive multi-touch touch panel STANDARD COMMUNICATIONS USB – High Speed 2.0 Host, USB – High Speed 2.0 Client INTEGRATED CAMMERA OPTION 5 Megapixel auto focus color camera with LED flash KEYPAD OPTIONS (27 Key) Numeric or (43 Key) QWERTY with backlit keypad ACCESSORIES Supports all CN50 charging and docking accessories as well as FlexDock modular docking system, vehicle dock, vehicle holder, snap on adaptors, removable scan handle, and magnetic stripe reader. >하이온아이티 주소 : 서울 금천구 가산디지털2로 165, 1304호 (백상스타타워2차) 대표번호 : 02-2038-0018 / 이메일 : hion@hionit.com 홈페이지 : http://hionsmart.com

Recomendados
Más contenido relacionado
La actualidad más candente
La actualidad más candente (19)
Similar a 인터맥PDA Intermec CN51 2D 산업용PDA 바코드PDA 매뉴얼
Similar a 인터맥PDA Intermec CN51 2D 산업용PDA 바코드PDA 매뉴얼 (16)
Más de HION IT
Más de HION IT (20)
Último
Último (20)
인터맥PDA Intermec CN51 2D 산업용PDA 바코드PDA 매뉴얼
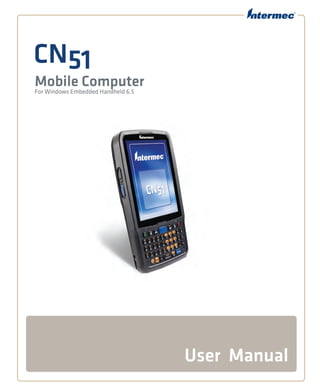
- 1. CN51 Mobile Computer For Windows Embedded Handheld 6.5 User Manual
- 2. ii CN51 Mobile Computer User Manual Intermec by Honeywell 6001 36th Ave.W. Everett, WA 98203 U.S.A. www.intermec.com The information contained herein is provided solely for the purpose of allowing customers to operate and service Intermec-manufactured equipment and is not to be released, reproduced, or used for any other purpose without written permission of Intermec Technologies Corporation. Information and specifications contained in this document are subject to change without prior notice and do not represent a commitment on the part of Intermec Technologies Corporation. © 2014 by Intermec Technologies Corporation. All rights reserved. The word Intermec, the Intermec logo, Ready-to-Work, and SmartSystems are either trademarks or registered trademarks of Intermec Technologies Corporation. Wi-Fi is a registered certification mark of the Wi-Fi Alliance. Microsoft, Windows, and the Windows logo are registered trademarks of Microsoft Corporation in the United States and/or other countries. Bluetooth is a trademark of Bluetooth SIG, Inc., U.S.A. This product includes software developed by the OpenSSL Project for use in the OpenSSL Toolkit (www.openssl.org). This product includes cryptographic software written by Eric Young (EAY@cryptsoft.com). This product uses Regex++, Index software during its operational phases. The owner of Regex++ has granted use of the software to anyone provided such use is accompanied by the following copyright and permission notice: Regex++, Index. (Version 3.31, 16th Dec 2001) Copyright © 1998-2001 Dr John Maddock Permission to use, copy, modify, distribute and sell this software and its documentation for any purpose is hereby granted without fee, provided that the above copyright notice appear in all copies and that both that copyright notice and this permission notice appear in supporting documentation. Dr John Maddock makes no representations about the suitability of this software for any purpose. It is provided “as is” without express or implied warranty.
- 3. Contents CN51 Mobile Computer User Manual iii Contents Before You Begin. . . . . . . . . . . . . . . . . . . . . . . . . . . . . . . . . . . . . . . . . . . . . . . . . . . . . . . . . . . . . . . . . ix Safety Information. . . . . . . . . . . . . . . . . . . . . . . . . . . . . . . . . . . . . . . . . . . . . . . . . . . . . . . ix Global Services and Support . . . . . . . . . . . . . . . . . . . . . . . . . . . . . . . . . . . . . . . . . . . . . . ix Warranty Information. . . . . . . . . . . . . . . . . . . . . . . . . . . . . . . . . . . . . . . . . . . . ix Web Support . . . . . . . . . . . . . . . . . . . . . . . . . . . . . . . . . . . . . . . . . . . . . . . . . . . . . x Send Feedback. . . . . . . . . . . . . . . . . . . . . . . . . . . . . . . . . . . . . . . . . . . . . . . . . . . . x Telephone Support . . . . . . . . . . . . . . . . . . . . . . . . . . . . . . . . . . . . . . . . . . . . . . . x Who Should Read This Manual . . . . . . . . . . . . . . . . . . . . . . . . . . . . . . . . . . . . . . . . . . . . x Related Documents . . . . . . . . . . . . . . . . . . . . . . . . . . . . . . . . . . . . . . . . . . . . . . . . . . . . . . . x Patent Information . . . . . . . . . . . . . . . . . . . . . . . . . . . . . . . . . . . . . . . . . . . . . . . . . . . . . . xi 1 About the Computer Features . . . . . . . . . . . . . . . . . . . . . . . . . . . . . . 1 About the CN51 Mobile Computer . . . . . . . . . . . . . . . . . . . . . . . . . . . . . . . . . . . . . . . . . . . . . . . . . 2 About Language Provisioning . . . . . . . . . . . . . . . . . . . . . . . . . . . . . . . . . . . . . . . . . . . . . . . . . . . . . . 4 About the Battery . . . . . . . . . . . . . . . . . . . . . . . . . . . . . . . . . . . . . . . . . . . . . . . . . . . . . . . . . . . . . . . . . 4 Charge the Battery . . . . . . . . . . . . . . . . . . . . . . . . . . . . . . . . . . . . . . . . . . . . . . . . . . . . . . . . 4 Change the Battery. . . . . . . . . . . . . . . . . . . . . . . . . . . . . . . . . . . . . . . . . . . . . . . . . . . . . . . . 5 About Battery Status . . . . . . . . . . . . . . . . . . . . . . . . . . . . . . . . . . . . . . . . . . . . . . . . . . . . . . 6 About Battery Life and Conservation . . . . . . . . . . . . . . . . . . . . . . . . . . . . . . . . . . . . . . . 8 About the Status LEDs . . . . . . . . . . . . . . . . . . . . . . . . . . . . . . . . . . . . . . . . . . . . . . . . . . . . . . . . . . . . 9 About the Keypad. . . . . . . . . . . . . . . . . . . . . . . . . . . . . . . . . . . . . . . . . . . . . . . . . . . . . . . . . . . . . . . .12 Configure the Keypad Backlight. . . . . . . . . . . . . . . . . . . . . . . . . . . . . . . . . . . . . . . . . . .13 About the Color-Coded Keys. . . . . . . . . . . . . . . . . . . . . . . . . . . . . . . . . . . . . . . . . . . . . .13 How to Capitalize Characters on the QWERTY Keypad . . . . . . . . . . . . . . . . . . . . .14 How to Capitalize Characters on the Numeric Keypad . . . . . . . . . . . . . . . . . . . . . .15 About the Power Button. . . . . . . . . . . . . . . . . . . . . . . . . . . . . . . . . . . . . . . . . . . . . . . . . .15 About the Screen Backlight . . . . . . . . . . . . . . . . . . . . . . . . . . . . . . . . . . . . . . . . . . . . . . . . . . . . . . .17 Configure the Screen Backlight Brightness . . . . . . . . . . . . . . . . . . . . . . . . . . . . . . . . .17 About the Audio Features. . . . . . . . . . . . . . . . . . . . . . . . . . . . . . . . . . . . . . . . . . . . . . . . . . . . . . . . .17 Adjust the Speaker Volume . . . . . . . . . . . . . . . . . . . . . . . . . . . . . . . . . . . . . . . . . . . . . . .17 About the Scanner . . . . . . . . . . . . . . . . . . . . . . . . . . . . . . . . . . . . . . . . . . . . . . . . . . . . . . . . . . . . . . .18 Scan Bar Codes . . . . . . . . . . . . . . . . . . . . . . . . . . . . . . . . . . . . . . . . . . . . . . . . . . . . . . . . . .18 Connect a Bluetooth Scanner . . . . . . . . . . . . . . . . . . . . . . . . . . . . . . . . . . . . . . . . . . . . .20
- 4. Contents iv CN51 Mobile Computer User Manual Insert a MicroSD Card . . . . . . . . . . . . . . . . . . . . . . . . . . . . . . . . . . . . . . . . . . . . . . . . . . . . . . . . . . .21 How to Transfer Files. . . . . . . . . . . . . . . . . . . . . . . . . . . . . . . . . . . . . . . . . . . . . . . . . . . . . . . . . . . . .23 Set Up the Computer as a Mass Storage Device . . . . . . . . . . . . . . . . . . . . . . . . . . . . . . . . . . . . .23 CN51 Accessories . . . . . . . . . . . . . . . . . . . . . . . . . . . . . . . . . . . . . . . . . . . . . . . . . . . . . . . . . . . . . . . .24 2 About the User Interface and Intermec Applications. . . . . . . . . . 27 About the User Interface. . . . . . . . . . . . . . . . . . . . . . . . . . . . . . . . . . . . . . . . . . . . . . . . . . . . . . . . . .28 About the Home Screen . . . . . . . . . . . . . . . . . . . . . . . . . . . . . . . . . . . . . . . . . . . . . . . . . .28 About Screen Gestures . . . . . . . . . . . . . . . . . . . . . . . . . . . . . . . . . . . . . . . . . . . . . . . . . . .30 Title Bar Status Icons . . . . . . . . . . . . . . . . . . . . . . . . . . . . . . . . . . . . . . . . . . . . . . . . . . . .30 Configure the Screen Brightness . . . . . . . . . . . . . . . . . . . . . . . . . . . . . . . . . . . . . . . . . .32 Calibrate the Screen . . . . . . . . . . . . . . . . . . . . . . . . . . . . . . . . . . . . . . . . . . . . . . . . . . . . . .32 About Intermec Applications . . . . . . . . . . . . . . . . . . . . . . . . . . . . . . . . . . . . . . . . . . . . . . . . . . . . .32 Intermec Applications on the Computer . . . . . . . . . . . . . . . . . . . . . . . . . . . . . . . . . . .32 Downloadable Intermec Applications for the Computer. . . . . . . . . . . . . . . . . . . . .34 About Features Demo . . . . . . . . . . . . . . . . . . . . . . . . . . . . . . . . . . . . . . . . . . . .34 About Intermec Browser. . . . . . . . . . . . . . . . . . . . . . . . . . . . . . . . . . . . . . . . . .34 About Intermec HTML5 Browser. . . . . . . . . . . . . . . . . . . . . . . . . . . . . . . . . .34 About Intermec Launcher . . . . . . . . . . . . . . . . . . . . . . . . . . . . . . . . . . . . . . . .35 About Intermec Terminal Emulator . . . . . . . . . . . . . . . . . . . . . . . . . . . . . . .35 About SmartSystems . . . . . . . . . . . . . . . . . . . . . . . . . . . . . . . . . . . . . . . . . . . . .35 3 Use the Phone . . . . . . . . . . . . . . . . . . . . . . . . . . . . . . . . . . . . . . . . . . 37 About the Phone. . . . . . . . . . . . . . . . . . . . . . . . . . . . . . . . . . . . . . . . . . . . . . . . . . . . . . . . . . . . . . . . .38 Activate the UMTS Phone . . . . . . . . . . . . . . . . . . . . . . . . . . . . . . . . . . . . . . . . . . . . . . . .38 About Worldwide UMTS . . . . . . . . . . . . . . . . . . . . . . . . . . . . . . . . . . . . . . . . .42 Activate the CDMA Phone . . . . . . . . . . . . . . . . . . . . . . . . . . . . . . . . . . . . . . . . . . . . . . . .42 Make a Phone Call . . . . . . . . . . . . . . . . . . . . . . . . . . . . . . . . . . . . . . . . . . . . . . . . . . . . . . . . . . . . . . .43 Make an Emergency Phone Call . . . . . . . . . . . . . . . . . . . . . . . . . . . . . . . . . . . . . . . . . . . . . . . . . . .43 Configure Phone Sounds . . . . . . . . . . . . . . . . . . . . . . . . . . . . . . . . . . . . . . . . . . . . . . . . . . . . . . . . .44 How to Add and Switch Between Network Carriers . . . . . . . . . . . . . . . . . . . . . . . . . . . . . . . . .45 Enable Automatic Configuration of Carrier Settings . . . . . . . . . . . . . . . . . . . . . . . .45 Switch Carriers Using Intermec Settings . . . . . . . . . . . . . . . . . . . . . . . . . . . . . . . . . . .45
- 5. Contents CN51 Mobile Computer User Manual v 4 Use the Camera. . . . . . . . . . . . . . . . . . . . . . . . . . . . . . . . . . . . . . . . . 47 About the Color Camera. . . . . . . . . . . . . . . . . . . . . . . . . . . . . . . . . . . . . . . . . . . . . . . . . . . . . . . . . .48 How to Take Pictures and Record Videos. . . . . . . . . . . . . . . . . . . . . . . . . . . . . . . . . . . . . . . . . . .48 Take a Picture . . . . . . . . . . . . . . . . . . . . . . . . . . . . . . . . . . . . . . . . . . . . . . . . . . . . . . . . . . .49 Record a Video. . . . . . . . . . . . . . . . . . . . . . . . . . . . . . . . . . . . . . . . . . . . . . . . . . . . . . . . . . .49 Save Pictures and Videos to a microSD Card. . . . . . . . . . . . . . . . . . . . . . . . . . . . . . . .50 Configure or Create Camera Scenes . . . . . . . . . . . . . . . . . . . . . . . . . . . . . . . . . . . . . . .50 Scene Settings . . . . . . . . . . . . . . . . . . . . . . . . . . . . . . . . . . . . . . . . . . . . . . . . . . .50 Configure Camera Settings for Pictures and Videos . . . . . . . . . . . . . . . . . . . . . . . . .53 Camera Settings for Pictures and Videos . . . . . . . . . . . . . . . . . . . . . . . . . . .54 How To Read Bar Codes with the Camera . . . . . . . . . . . . . . . . . . . . . . . . . . . . . . . . . . . . . . . . . .65 Enable or Disable Reading Bar Codes with the Camera . . . . . . . . . . . . . . . . . . . . . .65 Read Bar Codes with the Camera . . . . . . . . . . . . . . . . . . . . . . . . . . . . . . . . . . . . . . . . . .66 Camera Settings for Reading Bar Codes. . . . . . . . . . . . . . . . . . . . . . . . . . . . . . . . . . . .66 How to Perform Document Capture with the Camera . . . . . . . . . . . . . . . . . . . . . . . . . . . . . . .68 Enable or Disable Document Capture with the Camera . . . . . . . . . . . . . . . . . . . . .69 Perform Document Capture with the Camera . . . . . . . . . . . . . . . . . . . . . . . . . . . . . .69 Camera Settings for Document Imaging . . . . . . . . . . . . . . . . . . . . . . . . . . . . . . . . . . .70 5 Use GPS . . . . . . . . . . . . . . . . . . . . . . . . . . . . . . . . . . . . . . . . . . . . . . . 73 About the Integrated GPS on Your Computer . . . . . . . . . . . . . . . . . . . . . . . . . . . . . . . . . . . . . .74 Use the GPSID Installed on the Computer . . . . . . . . . . . . . . . . . . . . . . . . . . . . . . . . .74 About the GPS Module Operating Modes . . . . . . . . . . . . . . . . . . . . . . . . . . . . . . . . . .75 Improve GPS Performance on the Computer . . . . . . . . . . . . . . . . . . . . . . . . . . . . . . .76 6 Configure the Computer . . . . . . . . . . . . . . . . . . . . . . . . . . . . . . . . . 77 How to Configure the Computer . . . . . . . . . . . . . . . . . . . . . . . . . . . . . . . . . . . . . . . . . . . . . . . . . .78 About Intermec Settings on the Computer . . . . . . . . . . . . . . . . . . . . . . . . . . . . . . . . . . . . . . . . .78 Start Intermec Settings . . . . . . . . . . . . . . . . . . . . . . . . . . . . . . . . . . . . . . . . . . . . . . . . . . .79 About the Structure of Intermec Settings . . . . . . . . . . . . . . . . . . . . . . . . . . . . . . . . . .79 How to Navigate in Intermec Settings. . . . . . . . . . . . . . . . . . . . . . . . . . . . . . . . . . . . . .84 Enable Intermec Settings Password . . . . . . . . . . . . . . . . . . . . . . . . . . . . . . . . . . . . . . . .85 Restore Default Settings. . . . . . . . . . . . . . . . . . . . . . . . . . . . . . . . . . . . . . . . . . . . . . . . . .85 Configure the Computer Remotely with SmartSystems . . . . . . . . . . . . . . . . . . . . . . . . . . . . .86
- 6. Contents vi CN51 Mobile Computer User Manual About Network Communications . . . . . . . . . . . . . . . . . . . . . . . . . . . . . . . . . . . . . . . . . . . . . . . . .86 Configure 802.11 Radio Communications . . . . . . . . . . . . . . . . . . . . . . . . . . . . . . . . .87 About Bluetooth Communications . . . . . . . . . . . . . . . . . . . . . . . . . . . . . . . . . . . . . . . .87 Turn On the Bluetooth Radio. . . . . . . . . . . . . . . . . . . . . . . . . . . . . . . . . . . . .88 Connect a Bluetooth Scanner . . . . . . . . . . . . . . . . . . . . . . . . . . . . . . . . . . . . .89 Create a Configuration Bar Code with EasySet . . . . . . . . . . . . . . . . . . . . .90 Connect to a Bluetooth Printer. . . . . . . . . . . . . . . . . . . . . . . . . . . . . . . . . . . .90 Connect a Bluetooth Audio Device . . . . . . . . . . . . . . . . . . . . . . . . . . . . . . . .92 About Serial and USB Communications . . . . . . . . . . . . . . . . . . . . . . . . . . . . . . . . . . .92 About Wireless Security . . . . . . . . . . . . . . . . . . . . . . . . . . . . . . . . . . . . . . . . . . . . . . . . . . . . . . . . . .93 Load a Certificate . . . . . . . . . . . . . . . . . . . . . . . . . . . . . . . . . . . . . . . . . . . . . . . . . . . . . . . .94 How to Make Your Security Choice . . . . . . . . . . . . . . . . . . . . . . . . . . . . . . . . . . . . . . . .95 Select a Funk Security Profile . . . . . . . . . . . . . . . . . . . . . . . . . . . . . . . . . . . . . . . . . . . . .95 Configure WPA or WPA2 Enterprise (802.1x) Security with Funk Security . . . . . . . . . . . . . . . . . . . . . . . . . . . . . . . . . . . . . . . . . . . .96 Configure WPA or WPA2 Personal (PSK) Security with Funk Security . . . . . . . . . . . . . . . . . . . . . . . . . . . . . . . . . . . . . . . . . . . .97 Configure 802.1x Security with Funk Security . . . . . . . . . . . . . . . . . . . . . .97 Configure LEAP Security with Funk Security. . . . . . . . . . . . . . . . . . . . . . .98 Configure Static WEP Security with Funk Security. . . . . . . . . . . . . . . . . .98 Use Open (No Security) Associations with Funk Security . . . . . . . . . . . .99 Select Microsoft as Your Security Choice . . . . . . . . . . . . . . . . . . . . . . . . . . . . . . . . . .100 Configure WPA or WPA2 Enterprise (802.1x) Security with Microsoft Security. . . . . . . . . . . . . . . . . . . . . . . . . . . . . . . . . . . . . . .100 Configure WPA or WPA2 Personal (PSK) Security with Microsoft Security. . . . . . . . . . . . . . . . . . . . . . . . . . . . . . . . . . . . . . .101 Configure 802.1x Security with Microsoft Security. . . . . . . . . . . . . . . . .101 Configure Static WEP Security with Microsoft Security . . . . . . . . . . . .102 Use Open (No Security) Associations with Microsoft Security. . . . . . .103 7 Manage the Computer . . . . . . . . . . . . . . . . . . . . . . . . . . . . . . . . . . 105 How to Manage the Computer in Your Network . . . . . . . . . . . . . . . . . . . . . . . . . . . . . . . . . . .106 How to Manage the Computer Using CloneNGo . . . . . . . . . . . . . . . . . . . . . . . . . .106 How to Manage the Computer Using SmartSystems . . . . . . . . . . . . . . . . . . . . . . .106 How to Develop and Install Applications. . . . . . . . . . . . . . . . . . . . . . . . . . . . . . . . . . . . . . . . . .107 How To Package Your Application. . . . . . . . . . . . . . . . . . . . . . . . . . . . . . . . . . . . . . . .107 Install Applications with SmartSystems. . . . . . . . . . . . . . . . . . . . . . . . . . . . . . . . . . .108 Install Applications with Microsoft Synchronization Software . . . . . . . . . . . . . .108 Install Applications with a microSD Card . . . . . . . . . . . . . . . . . . . . . . . . . . . . . . . . .109 How to Launch Applications Automatically . . . . . . . . . . . . . . . . . . . . . . . . . . . . . . .109
- 7. Contents CN51 Mobile Computer User Manual vii How to Update the System Software . . . . . . . . . . . . . . . . . . . . . . . . . . . . . . . . . . . . . . . . . . . . . .109 Update the Computer with SmartSystems . . . . . . . . . . . . . . . . . . . . . . . . . . . . . . . .110 Update the Computer with a microSD Card. . . . . . . . . . . . . . . . . . . . . . . . . . . . . . .111 8 Troubleshoot and Maintain the Computer . . . . . . . . . . . . . . . . . .113 About the Intermec Dashboard . . . . . . . . . . . . . . . . . . . . . . . . . . . . . . . . . . . . . . . . . . . . . . . . . .114 About Troubleshooting the Computer. . . . . . . . . . . . . . . . . . . . . . . . . . . . . . . . . . . . . . . . . . . .115 Wi-Fi Connection Problems. . . . . . . . . . . . . . . . . . . . . . . . . . . . . . . . . . . . . . . . . . . . . .115 Check Wi-Fi Network Status . . . . . . . . . . . . . . . . . . . . . . . . . . . . . . . . . . . . . . . . . . . . .116 802.1x Security Problems . . . . . . . . . . . . . . . . . . . . . . . . . . . . . . . . . . . . . . . . . . . . . . . .117 Troubleshoot the Scanner with Scan Diagnostics . . . . . . . . . . . . . . . . . . . . . . . . . .119 Problems Reading Bar Codes. . . . . . . . . . . . . . . . . . . . . . . . . . . . . . . . . . . . . . . . . . . . .120 Problems Using the Computer . . . . . . . . . . . . . . . . . . . . . . . . . . . . . . . . . . . . . . . . . . .122 Call Product Support. . . . . . . . . . . . . . . . . . . . . . . . . . . . . . . . . . . . . . . . . . . . . . . . . . . . . . . . . . . .122 Locate Your Configuration Number . . . . . . . . . . . . . . . . . . . . . . . . . . . . . . . . . . . . . .123 Locate Your Operating System Version. . . . . . . . . . . . . . . . . . . . . . . . . . . . . . . . . . . .123 How to Restart the Computer. . . . . . . . . . . . . . . . . . . . . . . . . . . . . . . . . . . . . . . . . . . . . . . . . . . .124 Reboot the Computer . . . . . . . . . . . . . . . . . . . . . . . . . . . . . . . . . . . . . . . . . . . . . . . . . . .124 Cold Boot the Computer . . . . . . . . . . . . . . . . . . . . . . . . . . . . . . . . . . . . . . . . . . . . . . . .124 Clean Boot the Computer. . . . . . . . . . . . . . . . . . . . . . . . . . . . . . . . . . . . . . . . . . . . . . . .125 Clean the Computer. . . . . . . . . . . . . . . . . . . . . . . . . . . . . . . . . . . . . . . . . . . . . . . . . . . . . . . . . . . . .126 A Specifications. . . . . . . . . . . . . . . . . . . . . . . . . . . . . . . . . . . . . . . . . 127 Physical and Environmental Specifications. . . . . . . . . . . . . . . . . . . . . . . . . . . . . . . . . . . . . . . .128 EA31 Extended Reading Range. . . . . . . . . . . . . . . . . . . . . . . . . . . . . . . . . . . . . . . . . . .130 EA31 Minimum Reading Distances. . . . . . . . . . . . . . . . . . . . . . . . . . . . . . . . . . . . . . .131 EA31 Typical Reading Distances . . . . . . . . . . . . . . . . . . . . . . . . . . . . . . . . . . . . . . . . .132 EA30 Extended Reading Range. . . . . . . . . . . . . . . . . . . . . . . . . . . . . . . . . . . . . . . . . . .134 EA30 Minimum Reading Distances. . . . . . . . . . . . . . . . . . . . . . . . . . . . . . . . . . . . . . .135 EA30 Typical Reading Distances . . . . . . . . . . . . . . . . . . . . . . . . . . . . . . . . . . . . . . . . .136
- 8. Contents viii CN51 Mobile Computer User Manual B Default Settings . . . . . . . . . . . . . . . . . . . . . . . . . . . . . . . . . . . . . . . 139 Data Collection Settings. . . . . . . . . . . . . . . . . . . . . . . . . . . . . . . . . . . . . . . . . . . . . . . . . . . . . . . . .140 Internal Scanner Settings . . . . . . . . . . . . . . . . . . . . . . . . . . . . . . . . . . . . . . . . . . . . . . . .140 Bluetooth Scanner Settings . . . . . . . . . . . . . . . . . . . . . . . . . . . . . . . . . . . . . . . . . . . . . .145 Camera Settings . . . . . . . . . . . . . . . . . . . . . . . . . . . . . . . . . . . . . . . . . . . . . . . . . . . . . . . .145 Magstripe Reader Settings . . . . . . . . . . . . . . . . . . . . . . . . . . . . . . . . . . . . . . . . . . . . . . .150 Communications Settings . . . . . . . . . . . . . . . . . . . . . . . . . . . . . . . . . . . . . . . . . . . . . . . . . . . . . . .151 802.11 Radio Settings . . . . . . . . . . . . . . . . . . . . . . . . . . . . . . . . . . . . . . . . . . . . . . . . . . .151 Ethernet Adapter Settings . . . . . . . . . . . . . . . . . . . . . . . . . . . . . . . . . . . . . . . . . . . . . . .153 Bluetooth Settings . . . . . . . . . . . . . . . . . . . . . . . . . . . . . . . . . . . . . . . . . . . . . . . . . . . . . .154 WWAN Settings . . . . . . . . . . . . . . . . . . . . . . . . . . . . . . . . . . . . . . . . . . . . . . . . . . . . . . . .154 Device Settings . . . . . . . . . . . . . . . . . . . . . . . . . . . . . . . . . . . . . . . . . . . . . . . . . . . . . . . . . . . . . . . . .154 GPS Bread Crumbing State . . . . . . . . . . . . . . . . . . . . . . . . . . . . . . . . . . . . . . . . . . . . . . . . . . . . . .157 Core Messaging Service Settings. . . . . . . . . . . . . . . . . . . . . . . . . . . . . . . . . . . . . . . . . . . . . . . . . .157 SmartSystems Information Settings . . . . . . . . . . . . . . . . . . . . . . . . . . . . . . . . . . . . . . . . . . . . . .157 Device Monitor Settings . . . . . . . . . . . . . . . . . . . . . . . . . . . . . . . . . . . . . . . . . . . . . . . . . . . . . . . . .158 Virtual Wedge Settings . . . . . . . . . . . . . . . . . . . . . . . . . . . . . . . . . . . . . . . . . . . . . . . . . . . . . . . . . .159 Location Services Settings . . . . . . . . . . . . . . . . . . . . . . . . . . . . . . . . . . . . . . . . . . . . . . . . . . . . . . .159
- 9. Before You Begin CN51 Mobile Computer User Manual ix Before You Begin This section provides you with safety information, technical support information, and sources for additional product information. Safety Information Your safety is extremely important. Read and follow all warnings and cautions in this document before handling and operating Intermec equipment. You can be seriously injured, and equipment and data can be damaged if you do not follow the safety warnings and cautions. This section explains how to identify and understand dangers, warnings, cautions, and notes that are in this document. You may also see icons that tell you when to follow ESD procedures and when to take special precautions for handling optical parts. Global Services and Support Warranty Information To understand the warranty for your Intermec product, visit the Intermec website at www.intermec.com and click Support > Returns and Repairs > Warranty. Disclaimer of warranties: The sample code included in this document is presented for reference only. The code does not necessarily represent complete, tested programs. The code is provided “as is with all faults.” All warranties are expressly disclaimed, including the implied warranties of merchantability and fitness for a particular purpose. A caution alerts you to an operating procedure, practice, condition, or statement that must be strictly observed to prevent equipment damage or destruction, or corruption or loss of data. Note: Notes either provide extra information about a topic or contain special instructions for handling a particular condition or set of circumstances.
- 10. Before You Begin x CN51 Mobile Computer User Manual Web Support Visit the Intermec website at www.intermec.com to download our current manuals (in PDF). Visit the Intermec technical knowledge base (Knowledge Central) at www.intermec.com and click Support > Knowledge Central to review technical information or to request technical support for your Intermec product. Send Feedback Your feedback is crucial to the continual improvement of our documentation. To provide feedback about this manual, please contact the Intermec Technical Communications department directly at TechnicalCommunications@intermec.com. Telephone Support In the U.S.A. and Canada, call 1-800-755-5505. Outside the U.S.A. and Canada, contact your local Intermec representative. To search for your local representative, from the Intermec website, click About Us > Contact Us. Who Should Read This Manual This user manual is for the person who is responsible for installing, configuring, and maintaining the CN51. This document provides you with information about the features of the CN51, and how to install, configure, operate, maintain, and troubleshoot it. Before you work with the CN51, you should be familiar with your network and general networking terms, such as IP address. Related Documents The Intermec website at www.intermec.com contains our documents (as .pdf files) that you can download for free. 1 Visit the Intermec website at www.intermec.com. 2 Click the Products tab.
- 11. Before You Begin CN51 Mobile Computer User Manual xi 3 Using the Products menu, navigate to your product page. For example, to find the CN51 computer product page, click Computers > Handheld Computers > CN51. 4 Click the Manuals tab. If your product does not have its own product page, click Support > Manuals. Use the Product Category, the Product Family, and Product menus to find your documentation. Patent Information For patent information, refer to www.honeywellaidc.com/patents.
- 12. Before You Begin xii CN51 Mobile Computer User Manual
- 13. 1 1 About the Computer Features This chapter introduces the CN51 Mobile Computer with Windows® Embedded Handheld 6.5 operating system. Use this chapter to learn about basic computer features and functions, as well as the available accessories for it.
- 14. Chapter 1 — About the Computer Features 2 CN51 Mobile Computer User Manual About the CN51 Mobile Computer The Intermec CN51 Mobile Computer is the class-leading mid-range rugged mobile computer that empowers mobile workers with the resources to satisfy and delight customers efficiently today and earn new business tomorrow. The CN51 is available with the following features: • Windows Embedded Handheld 6.5 operating system • 1.5 GHz dual-core multi-engine processor with extended battery life • 1 GB DRAM, 16 GB flash memory • Large, outdoor-viewable WVGA display with full-size keypad • Resistive touch panel display • Bluetooth radio • UMTS/HSPA+/CDMA or UMTS/HSPA+ WAN radio options; both options support voice and data • IEEE 802.11a/b/g/n on computers without a cellular radio, IEEE 802.11b/g/n on computers with a cellular radio • Customer-accessible microSD slot for removable memory cards (up to 32 GB) • High-performance EA30orEA31 area imager options, for scanning bar codes and capturing signatures • HTML5 support • Integrated GPS receiver (with WAN radio option) • Accelerometer that can automatically sense the angle of the computer and rotate the display between portrait and landscape • 5-megapixel color camera
- 15. Chapter 1 — About the Computer Features CN51 Mobile Computer User Manual 3 CN51 Front View CN51 Back View
- 16. Chapter 1 — About the Computer Features 4 CN51 Mobile Computer User Manual About Language Provisioning You are prompted to select a language provision when the computer starts for the first time. It may take as little as three minutes to load your language. Once loaded, your selected language persists through all boot scenarios (warm, cold, or clean). Make sure you select the correct language before you tap Provision. If you need to change the language provisioning, you must reinstall the operating system and restart the computer. When the computer restarts, select your new language. About the Battery The CN51 uses a Model 1015AB01 battery as its main power source. The battery has a 14.4 Watt hour capacity. Several factors determine the life of your battery, such as display brightness, display timeout, input devices, extreme temperatures, and your usage. Fully charge the battery before you use the CN51. When you change the battery, the computer automatically goes into a power-off state and then cold boots. Contact your Intermec representative for replacement batteries. Charge the Battery Make sure you fully charge the battery (Model 1015AB01) before you use your CN51. You can charge the battery before or after you install it in the CN51. A fully discharged battery charges in approximately 6 hours. • Insert the battery into a quad battery charger, a single dock, or a multidock, or attach external power to the CN51 with the battery installed. The battery is fully charged when the battery status LED shows a steady green. Caution: The battery used in this device may present a fire or chemical burn hazard if it is mistreated. Do not disassemble it, heat it above 100 °C (212 °F) or incinerate it. Dispose of used batteries promptly. Keep away from children.
- 17. Chapter 1 — About the Computer Features CN51 Mobile Computer User Manual 5 Use these Intermec accessories to charge the CN51 batteries: • Quad Battery Charger (Model AC21) • Charge-Only Multidock (Model AD23) • Ethernet Multidock (Model AD24) • Single Dock (Model AD27) • Vehicle Power Adapter (Model AE36) • AC Power Adapter (Model AE37) Change the Battery When the battery in the CN51 has a low charge, replace it with a charged battery. 1 Save your files and close all open applications. 2 Press the Power button, and then select Hibernate from the menu. 3 If necessary, disconnect the handstrap from the top of the computer. Note: When you remove a battery from the computer, Intermec recommends that you install a charged battery within one minute to maintain your network connections.
- 18. Chapter 1 — About the Computer Features 6 CN51 Mobile Computer User Manual 4 Push forward on the battery release tab until the battery releases, and then lift the battery away from the computer. 5 Insert the bottom of a fully charged battery into the CN51, and press down on the top until it clicks into place. 6 If necessary, reattach the handstrap. About Battery Status Use the battery icon on the Title bar to view the power status of the battery. Battery Status Icons Icon Status Battery is fully charged. Battery has medium charge. Battery is low. You need to change the battery soon. Battery is critically low. You need to change the battery now or place the computer in a charging dock immediately. Battery is charging.
- 19. Chapter 1 — About the Computer Features CN51 Mobile Computer User Manual 7 The Battery status LED below the computer screen indicates the charging status of the battery. Battery LED States LED State Description Steady green The computer is connected to a charger and the battery is more than 95% charged. Steady red The computer is connected to a charger and the battery is less than 95% charged. Blinking red The battery is very low. The computer will soon go into Suspend mode. Charge or replace the battery. Amber There is a battery error. The battery is not charging because it is missing, faulty, or outside the allowable charging temperature range. If it is outside the charging temperature range, charging will resume when the battery temperature returns to the acceptable range of 0 °C to 45 °C (32 °F to 113 °F). Off No battery is installed. The CN51 does not turn on if no battery is installed.The battery is not critically low, and the CN51 is not connected to an external power source.
- 20. Chapter 1 — About the Computer Features 8 CN51 Mobile Computer User Manual About Battery Life and Conservation Batteries that are stored outside the computer for long periods of time slowly discharge. Intermec recommends storing the battery in a charger to maintain battery performance. Battery Conservation Tips When You Want to: Do this to Save Battery Power: Use the computer and the low battery status icon appears or the battery light turns on. • Connect the computer to an external power source. • Or, save your data, press the Power button, and select Hibernate. After the computer turns off, remove the battery and insert a fully charged battery. Stop using the computer for 5 minutes or longer. Make sure that the low batterystatus icon is not on the screen and the battery status LED is not on. Press the Power button and select Suspend to suspend the computer. If you have enabled the Sleep face down feature in Intermec Settings, the CN51 automatically suspends when you lay the computer face down. Store the computer for more than a day. • If you are storing the computer for a few days, like over the weekend, install a charged battery or connect the computer to a power source. • If you are storing the computer for longer, remove and charge the battery, and then store both the battery and computer in a cool location. Do not place the charged battery in the computer, which runs the battery down over time even when the computer is not in use. • If you store the battery for several months, recharge the battery to keep it at peak performance. Store the battery outside the computer. Store the battery in a charger.
- 21. Chapter 1 — About the Computer Features CN51 Mobile Computer User Manual 9 About the Status LEDs The status LEDs turn on, turn off, or blink to indicate a specific activity on your computer. Status LED Locations Main Status LED Descriptions Callout LED Color Description 1 Notification Orange Windows Mobile 6.5 notification. 2 Good Read Green Good read of a bar code. Blinking red Bad read of a bar code. Blinking green The data collection engine is processing or starting up.
- 22. Chapter 1 — About the Computer Features 10 CN51 Mobile Computer User Manual 2 Intermec Ready-to-Work™ indicator Blue IfIntermec Terminal Emulator (ITE) is installed, the application is running and is connected to the host. If you do not have ITE, you can configure the Ready-to-Work indicator to turn on or off to indicate a healthy state. Blinking blue ITE is running but not connected to the host. The computer is unhealthy. Off ITE is not installed or not running. The computer is healthy. 3 Battery status Steady green The computer is connected to a charger and the battery is more than 95% charged. Steady red The computer is connected to a charger and the battery is charging. Blinking red The battery is very low, and the computerwillgointoSuspendmode soon. Charge or replace the battery. Amber There is a battery error. The battery is not charging because it is missing, faulty, or outside the allowable charging temperature range. If it is outside the charging temperature range, charging will resume when the battery temperature returns to the acceptable range of 0 °C to 45 °C (32 °F to 113 °F). Off The computer is not on external power and the battery is operating normally. Main Status LED Descriptions (Continued) Callout LED Color Description
- 23. Chapter 1 — About the Computer Features CN51 Mobile Computer User Manual 11 Location of Orange and Green Key LEDs Orange and Green Key Status LEDs Callout LED Color Description 4 Orange/green key status Orange or green When the LED is orange, the Orange shift plane is enabled. You can type characters or access functions printed in orange on the keypad. When the LED is green, the Green shift plane is enabled. You can type characters or access functions printed in green on the keypad.
- 24. Chapter 1 — About the Computer Features 12 CN51 Mobile Computer User Manual About the Keypad The CN51 comes with either a numeric keypad or a QWERTY keypad: • The numeric keypad is for applications that require mainly numeric data. This keypad also lets you enter special characters, including the alphabet, by pressing color-coded key sequences. • The QWERTY keypad is designed for applications that require primarily alphabetic data. This keypad also lets you enter special characters by pressing color-coded key sequences. CN51 Numeric Keypad CN51 QWERTY Keypad
- 25. Chapter 1 — About the Computer Features CN51 Mobile Computer User Manual 13 Configure the Keypad Backlight You can configure the keypad backlight to always turn on, always stay off, or turn on depending on the lighting level of your work environment. 1 Start Intermec Settings. 2 Tap Device Settings > Backlight > Keypad. 3 Select the options you want for the keypad backlight: • Select Always off to prevent the keypad backlight from turning on. • Select Automatic to turn on the keypad backlight automatically based on the ambient light level. • Select On With the Display to turn on the keypad backlight only when the display is on. When the CN51 suspends, the keypad backlight turns off to save power. • Select Always on to turn the keypad backlight on all the time. 4 Tap OK. About the Color-Coded Keys Use the orange key and the green key to access additional characters, symbols, and functions printed on the keypad overlay. After you understand how to use the color-coded keys and key sequences, you can access all of the additional features printed on the keypad overlay. Press the Green or Orange key twice to lock it. When the key is locked, the LED turns on. Press the key once to unlock it. Note: The CN51 with QWERTY keypad does not have a green key.
- 26. Chapter 1 — About the Computer Features 14 CN51 Mobile Computer User Manual The default setting for the Green/Orange keys is Press twice to lock. You can also set the keys to Press once to lock if you do not want the Green/Orange keys to lock after pressing them twice. The information in this section assumes that you are using the default setting for the Green/Orange keys lock options. To change the setting for the Green/Orange keys, go to Start > Settings > System > Intermec Settings > Device Settings > Keypad. How to Capitalize Characters on the QWERTY Keypad If your CN51 has the QWERTY keypad, you can capitalize characters individually, or you can type all capital letters by enabling Caps Lock: • To capitalize a single character, press the Shift key, and then the character. • To enable Caps Lock, press and then press the Shift key. • When Caps Lock is enabled, press and then press the Shift key to disable Caps Lock. How to Use the Color-Coded Keys You Want To Press Example Use an orange character or function printed above a key. (LED turns on), and then the key with the character or function printed above it (LED stays on). On the alphanumeric keypad, press , then press M to type the number 9. Use a green character or function printed above a key. (LED turns on), and then the key with the character or function printed above it (LED stays on). On the numeric keypad, press , then press 3 twice to type the letter “e”. Unlock the green or orange key. or once. Press or once to unlock the key. The LED turns off.
- 27. Chapter 1 — About the Computer Features CN51 Mobile Computer User Manual 15 How to Capitalize Characters on the Numeric Keypad If your CN51 has the numeric keypad, you can capitalize characters individually, or you can type all capital letters by enabling Caps Lock: • To capitalize a single character, press the key, and then the 1 key. Select the key with the letter you want to capitalize. Press 1 again to return to lowercase letters. • To enable Caps Lock, press and then press 1. • To disable Caps Lock, press 1 again. About the Power Button When you press and release the Power button, the Intermec Power Options screen appears with a list of power options. If you do not select a power options setting, the currently selected action (the button outlined in bold) occurs after the timeout. Hibernate does not appear as an option if the computer is connected to external power. Use the next table to understand the Intermec Power Options and what settings are available for your computer.
- 28. Chapter 1 — About the Computer Features 16 CN51 Mobile Computer User Manual If you are using WPA or 802.1x security, the computer may need to reauthenticate before it resumes your application. The Real Time Clock (RTC) will persist through all of the power options as long as it receives power from the Real Time Clock battery. The Intermec Power Options screen is customizable. You can use Intermec Settings to determine which options are available to end users, the timeout until the default choice is selected, the default action if no option is selected, or to disable the Power Options Screen. Intermec Power Options Option Description Hibernate (battery swap) High power saving mode. The computer saves the current system state, registry, and file system and then powers off all radios and internal devices. You can wake the computer by pressing the Power button or connecting the computer to external power. Suspend Medium power saving mode. When on battery power, Suspend mode saves the current system state and then turns off most radios and internal devices. The WWAN radio remains in a lower power state and can still receive calls. When the computer is connected to external power, Suspend mode turns off the screen but leaves all radios on. You can wake the computer by pressing the Power button, pulling the scanner trigger, or scheduling an event such as an alarm. If the computer is on battery power during Suspend mode, you can also wake the computer by connecting it to external power. Reboot The computer does not save the current system state, but the registry and file systems are saved. The computer shuts down all running processes and restarts. Cancel Cancels the Intermec Power Options menu. Screen Off Lowest power saving mode. The screen turns off, but the radios and internal devices stay on. Tap the screen to turn it back on. Shutdown Very high power saving mode. The computer turns off everything. You must press Power or apply external power to restart the computer.
- 29. Chapter 1 — About the Computer Features CN51 Mobile Computer User Manual 17 About the Screen Backlight The display has an ambient light sensor that automatically adjusts the backlight intensity to conserve power and ensure the display is readable. You can set the backlight intensity levels as needed for your environment. Configure the Screen Backlight Brightness Use Intermec Settings to configure the brightness of the screen backlight. 1 Tap Start > Settings > System > Intermec Settings. 2 Tap Device Settings > Backlight > Display. 3 Select a brightness level. The default value is +1. 4 Tap OK and exit Intermec Settings. About the Audio Features Your mobile computer has a speaker, a microphone, and several software tools for configuring the volume of sounds. Adjust the Speaker Volume The computer volume includes sounds you hear when you tap the screen or scan bar codes with a scanner. 1 Tap the Title bar at the top of the screen. 2 Tap the Volume icon . 3 Use your stylus to adjust the volume slider, or use the side volume buttons to change the volume setting. 4 Tap OK.
- 30. Chapter 1 — About the Computer Features 18 CN51 Mobile Computer User Manual About the Scanner The internal scanner can read 1D and 2D bar code symbologies, composite symbologies, and postal codes. You can also use the imager to take pictures as if it were a camera. You can also use Bluetooth communications to connect the computer to cordless scanners, such as the SF51 and SR61. Scan Bar Codes All of the scanners have an aiming beam to help you correctly frame bar codes and they support omni-directional (360°) scanning. 1 Point the scanner window at the bar code and hold the computer steady a few inches from the bar code. 2 Press the Scan button or pull the scan handle trigger. The illumination beam, laser pointer, or frame appear. Note: Before you start scanning bar codes, use the Settings app to enable only the bar code symbologies that you need.
- 31. Chapter 1 — About the Computer Features CN51 Mobile Computer User Manual 19 For near or close-in scanning distances of 30 cm (11.8 in) or less, use the laser pointer as a guide and aim slightly to the right of the center of the bar code. Make sure the illumination beam covers the bar code you are trying to decode. For standard and long range scanning distances of 30 cm (11.8 in) or more, use the laser pointer as a guide and aim toward the middle of the bar code. Make sure that the illumination beam covers the bar code you are trying to decode. When the scanner successfully reads a bar code label, you hear a high beep, and the Good Read LED turns on briefly. 3 Release the Scan button or trigger.
- 32. Chapter 1 — About the Computer Features 20 CN51 Mobile Computer User Manual Connect a Bluetooth Scanner You can connect the computer to an Intermec Bluetooth scanner, such as the SF51 or SR61. Make sure that the Bluetooth radio in the computer is turned on before you try to connect to a scanner. 1 Tap Start > Settings > System > Wireless Scanning. 2 Tap Add Device. 3 Select Quick Connect, Search, or Manual. Follow the instructions on the screen to add a Bluetooth scanner. After you add a Bluetooth scanner, you can configure scanner settings and parameters in Intermec Settings.
- 33. Chapter 1 — About the Computer Features CN51 Mobile Computer User Manual 21 Insert a MicroSD Card You can use a micro Secure Digital (SD) card to increase file storage capacity or to install software. The CN51 supports an optional microSD™ card (up to 32 GB maximum capacity). The card slot is located in the battery compartment. 1 Remove the battery and open the card access door in the battery compartment. 2 Slide the SIM card holder to the left to unlatch it, and lift the holder to open it and access the microSD card holder. 3 Slide the microSD card holder towards the top of the CN51 to unlatch it, and lift the holder to open it.
- 34. Chapter 1 — About the Computer Features 22 CN51 Mobile Computer User Manual 4 Place the microSD card in the holder with the contacts facing away from the holder. 5 Close and latch the microSD card holder. 6 Close and latch the SIM card holder, and close the card access door until it snaps shut. 7 Install the battery and turn on the computer.
- 35. Chapter 1 — About the Computer Features CN51 Mobile Computer User Manual 23 How to Transfer Files To transfer files you need to physically connect your mobile computer to your PC and install either Microsoft ActiveSync (Windows XP or earlier) or Windows Mobile Device Center (Windows Vista or Windows 7) on your PC. ActiveSync and Windows Mobile Device Center are free applications available from the Microsoft website at www.microsoft.com/downloads. Use one of these accessories to connect your mobile computer to your PC: • USB cable (P/N 236-297-001) • CN51 USB Snap-On Adapter • CN51 Desktop USB Adapter • AD27 Single Dock Set Up the Computer as a Mass Storage Device Use the computer as a mass storage device so you can easily copy files to and from the mobile computer and your desktop PC. 1 Go to www.datalight.com and download the Reliance Nitro Windows Driver (RNWD). 2 Connect the mobile computer to your desktop PC using a USB cable or USB-capable accessory. 3 On the mobile computer, tap Start > Settings > System > Intermec Settings. 4 Tap Device Settings > USB. 5 From the USB function driver menu, select Mass storage - Flash File Store and tap OK. 6 Copy files to and from your desktop PC to the mobile computer.
- 36. Chapter 1 — About the Computer Features 24 CN51 Mobile Computer User Manual CN51 Accessories The CN51 ships with a battery. All other accessories are sold and ordered separately. For help, contact your local Intermec sales representative. CN51 Accessory Descriptions Accessory Description CN51 AC Power Adapter (Model AE37) The CN51 AC Power Adapter provides a connection for external AC power to the CN51. To use this adapter, you need to purchase a country-specific power cord. CN51 Battery (Model 1015AB01) The battery provides power to the CN51. Keep a spare battery pack on hand for longer shifts. CN51 Charge-Only Multidock (Model AD23) Use thecharge-onlymultidockto holdup to four CN51s with batteries installed, chargebatteries, and provide power to the computers. FlexDock: DX4 Quad Dock Use the DX4 Quad Dock to charge up to 4 computers and batteries simultaneously. The Quad Dock is available in Ethernet and charge-only versions. CN51 Ethernet Multidock (Model AD24) Use the multidock to hold up to four CN51s with the batteries installed. The multidock charges the batteries and providespowerandEthernetconnections to each computer. CN51 Replacement Handstrap Use a replacement handstrap to replace a worn-out or lost handstrap. CN51 Magnetic Stripe Reader (Model AR9) This accessory snaps on to the CN51 and provides magnetic stripe reading capabilities. CN51 Quad Charger (Model AC21) Use the quad battery charger to charge up to four batteries. CN51 RS-232 Adapter This accessory snaps on to the CN51 and provides serial connectivity.
- 37. Chapter 1 — About the Computer Features CN51 Mobile Computer User Manual 25 CN51 Single Dock (Model AD27) Use the single dock to hold a CN51 with its battery installed, charge a spare battery pack, charge the main battery pack, and provide power to the mobile computer. The dock has USB host and client connectors. Optional adapters are available to convert the USB host to Ethernet or to a landline modem. Ethernet Adapter (Model 1004UA01) Use this Ethernet adapter with the Model AD27 Single Dock to connect the CN51 to your Ethernet network. Modem Adapter (Model 1004UA02) Use this modem adapter with the Model AD27 Single Dock to connect the CN51 to a landline modem. CN51 Tethered Stylus Replacement Use a replacement stylus to replace a lost or broken stylus. CN51 Vehicle Docks (AV6, AV9) Use the vehicle docks to hold and charge the CN51 while using it on a vehicle. CN51 Vehicle Power Adapter (Model AE36) Use the vehicle power adapter to charge the battery installed in the CN51 from your vehicle. CN51 Accessory Descriptions (Continued) Accessory Description
- 38. Chapter 1 — About the Computer Features 26 CN51 Mobile Computer User Manual
- 39. 27 2 About the User Interface and Intermec Applications Use this chapter to learn about the Windows Embedded Handheld user interface and how to interact with the screen. You can also use this chapter to learn about the Intermec applications on your computer, as well as additional applications you can download.
- 40. Chapter 2 — About the User Interface and Intermec Applications 28 CN51 Mobile Computer User Manual About the User Interface The Windows Embedded Handheld 6.5 operating system provides a touch-friendly and easy to navigate user interface. About the Home Screen When you turn on your mobile computer, the Home screen is the first screen that appears after language provisioning is complete. Windows Embedded Handheld 6.5 Home Screen
- 41. Chapter 2 — About the User Interface and Intermec Applications CN51 Mobile Computer User Manual 29 The Clock & Alarms screen shows how the horizontal scroll bar appears when you open an application. Clock & Alarms Screen with Horizontal Scroll Bar Home Screen Navigation Bars Callout Navigation Bar Description 1 Title bar Use the Title bar icons to view the current status of information such as signal strength and battery power remaining. 2 Horizontal scroll bar A horizontal scroll bar appears when you tap the Title bar. The horizontal scroll bar makes it easy to access the applications associated with the Tile bar icons. The horizontal scroll bar also contains a magnifier which improves the touch experience by making parts of the screen large enough to tap with your finger. The horizontal scroll bar also replaces tabs within Windows screens and allows for easier navigation. 3 Tile bar Use the Tile bar to access the Start menu, navigate within applications, and open the SIP.
- 42. Chapter 2 — About the User Interface and Intermec Applications 30 CN51 Mobile Computer User Manual About Screen Gestures The Windows Embedded Handheld 6.5 interface supports the use of gestures with the finger or stylus to move around the screen. Title Bar Status Icons Tappable icons on the Title bar immediately show you the status of your network, the volume, the battery, and the time. Screen Gestures Gesture Description Tap Represents the left click of a mouse. Double-tap Represents the left double-click of a mouse. Hold Represents the right click of a mouse when you press and hold on the screen and a context menu appears. Flick Initiates scrolling in the direction (horizontal or vertical) the finger or stylus moves across the screen. Pan Press and hold on the screen and then drag in any direction. Title Bar Status Icons Icon Description You have a new notification. You have a new text message. You have a new email message. You have a new instant message. An alarm is set. Microphone is on. Internet call is in progress. Bluetooth is on.
- 43. Chapter 2 — About the User Interface and Intermec Applications CN51 Mobile Computer User Manual 31 Bluetooth headset is detected. ActiveSync connection is established. ActiveSync synchronization is in progress. There is a problem with the ActiveSync synchronization. Connected to a Wi-Fi network. Connected to a Wi-Fi network, and other networks are detected. Wi-Fi synchronization is in progress. Other Wi-Fi networks are detected. Information about a new Wi-Fi network is available. Wi-Fi is on, but not connected to a network, and other networks are detected. Wi-Fi is on, but not connected to a network, and no networks are detected. A network connection is active. A network connection is inactive. The volume is on. The volume is off. The battery has full charge. The battery has a high charge. The battery has a medium charge. The battery has a low charge. Title Bar Status Icons (Continued) Icon Description
- 44. Chapter 2 — About the User Interface and Intermec Applications 32 CN51 Mobile Computer User Manual Configure the Screen Brightness You can configure the screen brightness from the Start menu. 1 Tap Start > Settings > System > Backlight. 2 Adjust the slider to the desired brightness level. 3 Tap OK. Calibrate the Screen If the touch screen does not respond as expected when you tap it with the stylus, you may need to calibrate the screen. 1 Tap Start > Settings > Systems > Screen. 2 Tap Align Screen and follow the instructions to align the screen. 3 Tap OK. About Intermec Applications Intermec provides several useful applications to help you configure, troubleshoot, and connect your computer to other devices and networks. You can also download additional applications from the Intermec website to help you use all of the features of your computer. Intermec Applications on the Computer Intermec applications help you configure, troubleshoot, and connect your computer to other devices and networks. The battery has a very low charge. The computer is attached to external power and the battery is charging. No battery is installed in the computer. Title Bar Status Icons (Continued) Icon Description
- 45. Chapter 2 — About the User Interface and Intermec Applications CN51 Mobile Computer User Manual 33 Intermec Applications Available on the Computer Icon Application Description Bluetooth Audio Use the Bluetooth Audio application to connect to a Bluetooth headset or hands-free device. CloneNGo Use CloneNGo to configure basic device settings on multiple client computers from one master computer. For more information, see the CloneNGo User Guide. Intermec Settings Use Intermec Settings to configure your computer. You can use Intermec Settings to individually configure a computer or you can use it through SmartSystems to configure all of your computers. ISpyWiFi Use ISpyWiFi to check your 802.11 status and diagnose issues with the connection. Profile Settings Use Profile Settings to easily configure the computer for a specific use. You can choose predefined values for the Power, Camera, and Scanning settings. ScanDiagnostic Use the ScanDiagnostic application to troubleshoot problems with the internal or external scanner. Sensor Calibration Use the Sensor Calibration application to demonstrate the accelerometer. Wireless Center Use the Wireless Center to turn the phone and radios (Wi-Fi, Bluetooth) on and off and configure settings for each radio. Wireless Printing Use the Wireless Printing application to connect to a Bluetooth printer. Wireless Scanning Use the Wireless Scanning application to connect to a Bluetooth scanner.
- 46. Chapter 2 — About the User Interface and Intermec Applications 34 CN51 Mobile Computer User Manual Downloadable Intermec Applications for the Computer You can download Intermec applications to extend the capabilities of the computer. You may need to purchase an Intermec license to run some applications. To find an application, go to www.intermec.com > Support > Downloads. About Features Demo Intermec Features Demo provides a simple way to explore the key features of your mobile computer. Features Demo applications demonstrate scanning, document imaging, image capture, and printing functionality. Many of the applications that are part of Features Demo also have separate full-featured versions that you can download and license for your computer. For more information on Features Demo, see Intermec Features Demo User Guide. About Intermec Browser Intermec Browser is a web browser designed for Intermec computers and is compatible with Microsoft® Internet Explorer® 6 (IE6) and Pocket Internet Explorer (PIE). This locked-down application deliberately limits normal web browser functionality. For example, users cannot exit the program, type URLs, or use the Back button. You can configure Intermec Browser for your specific application requirements and you can design your own web pages. You can download and use Intermec Browser for free for a 60-day evaluation period. After the evaluation period expires, you need to purchase a license. For more information on Intermec Browser, see the Intermec Browser User Manual. About Intermec HTML5 Browser Intermec HTML5 Browser provides a free open-platform application environment for Intermec computers. You can now run the same cross-platform web applications on an Intermec computer that you can run on iOS and Android devices. Intermec HTML5 Browser also lets you run applications while the computer is connected to the web or while it is offline. For more information on the HTML5 Browser, see the Intermec HTML5 Browser User Guide.
- 47. Chapter 2 — About the User Interface and Intermec Applications CN51 Mobile Computer User Manual 35 About Intermec Launcher Intermec Launcher is a Microsoft Windows application, designed for Intermec mobile computers, that provides a platform from which other applications may be launched while attempting to provide a locked-down environment. You can configure Intermec Launcher for your specific application requirements. You can download and use Intermec Launcher for a 60-day evaluation period. After the evaluation period expires, you will need to purchase a license. For more information on Intermec Launcher, see the Intermec Launcher Version 2.2x User Guide. About Intermec Terminal Emulator Intermec Terminal Emulator (ITE) is Intermec’s popular terminal emulation client designed for enterprise-level data collection. In a single client, ITE supports multiple emulation protocols. Its features include session persistence, remote management and configuration, and multiple security options. ITE provides a consistent user interface and a common menu structure (Intermec Settings), simplifying the use and management of applications running on Intermec mobile computers. You can download and use ITE for free for a 60-day demo period. During the demo period, a demo mode message box appears each time you launch ITE. Press Enter to close the message box. When the demo period expires, you need to purchase a license. For more information on ITE, see the Intermec Terminal Emulator (ITE) User Guide. About SmartSystems Intermec SmartSystems™ is an easy-to-use centralized software platform. With SmartSystems, IT Administrators and Integrators can perform hands-free provisioning and deploy and manage Intermec devices. SmartSystems provides a consistent way to manage Intermec devices located on-site or remotely to maximize IT resources and lower the total cost of ownership for Intermec data collection equipment. SmartSystems Foundation can be downloaded at no charge from the Intermec website. For more information, visit www.intermec.com/SmartSystems.
- 48. Chapter 2 — About the User Interface and Intermec Applications 36 CN51 Mobile Computer User Manual
- 49. 37 3 Use the Phone You can use the phone feature to make and receive telephone calls, as well as transmit data through cellular wide-area networks (WANs).
- 50. Chapter 3 — Use the Phone 38 CN51 Mobile Computer User Manual About the Phone Phone features on the computer include a speaker and a microphone. You can also use a Bluetooth headset or hands-free kit. The phone feature is enabled by default. The WAN radio in your computer determines the supported network types: • If your computer includes the UMTS/HSPA+ WAN radio, you can connect to UMTS networks. • If your computer includes the Flexible Network Radio, you can connect to CDMA or UMTS networks in all regions that support these technologies. The Flexible Network Radio is a software-defined radio (SDR) that can be configured for CDMA or UMTS depending on your wireless communication needs. Intermec supports these CDMA network carriers: • Sprint (United States only) • Verizon (United States only) For other carriers, contact Intermec Product Support. After you turn on the phone and activate service with your wireless carrier, you can customize the phone features and network settings in the Wireless & Networks section of the Settings app. Activate the UMTS Phone Activating the UMTS phone on your CN51 is done the same way whether your computer has the Flexible Network Radio or the UMTS/HSPA+WAN radio. You use a SIM card to activate the UMTS phone on the CN51. You can purchase the SIM card from your network provider. 1 Press to turn off the CN51. 2 Disconnect the handstrap from the top of the computer. Note: Both WAN radios support Network Information and Time Zone (NITZ) messages to automatically set the system time.
- 51. Chapter 3 — Use the Phone CN51 Mobile Computer User Manual 39 3 Push forward on the battery release tab until the battery releases, and then lift the battery away from the computer. 4 Open the card access door and slide the SIM card holder to the left to open it.
- 52. Chapter 3 — Use the Phone 40 CN51 Mobile Computer User Manual 5 Place the SIM card in the holder. 6 Close the SIM card holder and slide it to the right to secure it, and then close the card access door. 7 Insert the battery and press down until it clicks in place. 8 Reconnect the handstrap.
- 53. Chapter 3 — Use the Phone CN51 Mobile Computer User Manual 41 9 Press to turn on the CN51. This screen (or similar) appears: 10 If your computer has the UMTS-only WAN radio, tap Yes. The computer attempts to connect to your UMTS network. When the connection is successful, a confirming message appears. Tap OK to close the message. The phone is ready to use. If your computer has the software-defined radio, tap No. The Home screen appears and the phone is ready to use. If you plan to add additional carriers, you need to enable automatic configuration of carrier settings in Intermec Settings. Note: Data connections are to the public domain on your network.
- 54. Chapter 3 — Use the Phone 42 CN51 Mobile Computer User Manual About Worldwide UMTS If your computer has the UMTS-only WAN radio, when you perform a clean boot all user-created network connections are deleted, and only the generic Worldwide UMTS remains. After you perform a clean boot, you can find more information about Worldwide UMTS by tapping Start > Settings > Connections > Connections > Tasks tab > Manage Existing Connections > Modem tab. Activate the CDMA Phone To activate the CDMA phone in your mobile computer, you need to contact your wireless carrier and set up an account. You also need to provide the carrier with the Mobile Equipment Identifier (MEID) for the computer. You can find the MEID: • on a label located in the battery compartment. • on the outside of the computer shipping box. The activation process is slightly different for each CDMA carrier. Your carrier sales contact and an Intermec representative can guide you through the process. In general, you activate the CDMA phone as follows: 1 Contact your wireless provider and give the provider the MEID for the computer. 2 If your carrier is Sprint, reboot the computer. As soon as the Sprint network detects your phone, Hands-Free Activation (HFA) begins, and a series of notification messages appear. When activation is complete, a completion message appears and the WAN radio reboots. The phone is ready to use. If your carrier is Verizon, tap Start > Phone, enter *228 on the phone keypad, and press Talk. After a short wait, a message appears, confirming either success or failure of the activation. After successful activation, the phone is ready to use. Note: For the CDMA phone, settings are permanently stored in the WAN radio after activation. CDMA settings persist through a cold boot.
- 55. Chapter 3 — Use the Phone CN51 Mobile Computer User Manual 43 3 (Optional) If you plan to use the network for data connections (such as browsing the web), you should enable automatic configuration of carrier settings in Intermec Settings. Make a Phone Call After you activate your UMTS or CDMA phone, you are ready to start making phone calls. 1 Press Phone. 2 Tap the keys to enter the telephone number you want to call, and tap Talk. Make an Emergency Phone Call You can use the phone to make an emergency phone call, even if the SIM card is missing from your UMTS phone or if you do not have a valid CDMA account. In either case, the phone shows that you have no service. However, if you dial certain emergency numbers (such as 112, 911, 000, 08, 118, 119, or 999) the call will go through. Note: Data connections are to the public domain on your network.
- 56. Chapter 3 — Use the Phone 44 CN51 Mobile Computer User Manual Configure Phone Sounds You can customize the ringtone, keypad sounds, and voicemail notification sounds for the phone. 1 Tap Start > Phone > the Menu button > Options. 2 Select options for the phone sounds: • Select a Ring type from the list. • Select a Ring tone from the list. To hear the selected ring tone, tap the Play button. • Select a Keypad sound from the list. • Enter the name of the sound you want to use for voicemail notifications in the Voicemail field. 3 Tap OK.
- 57. Chapter 3 — Use the Phone CN51 Mobile Computer User Manual 45 How to Add and Switch Between Network Carriers If your computer includes the software-defined radio, you can easily add carriers and switch between them as needed. When you enable automatic configuration of carrier settings through Intermec Settings, you only need to select a different carrier to change networks. If you plan to add a carrier, you should enable automatic configuration of carrier settings before you activate the phone for the new carrier. This feature is disabled by default. Enable Automatic Configuration of Carrier Settings If you plan to add another WAN radio network carrier, you should enable automatic confguration of carrier settings before you activate the phone for the new carrier. 1 Tap Start > Settings > System > Intermec Settings. 2 Tap Communications > WWAN > Carrier Settings Auto Config. 3 Select Enabled and tap OK. Switch Carriers Using Intermec Settings Use Intermec Settings to quickly change your WAN radio network carrier. 1 Tap Start > Settings > System > Intermec Settings > Communications > WWAN > Carrier Choice. Note: Your computer must have the software-defined radio to use this feature. Note: Your computer must have the software-defined radio to switch carriers using this method.
- 58. Chapter 3 — Use the Phone 46 CN51 Mobile Computer User Manual 2 Select a Carrier and tap OK. If the update is successful, your new carrier appears in the WWAN settings list. If the update is unsuccessful, the carrier does not change. 3 Tap Ok to exit Intermec Settings.
- 59. 47 4 Use the Camera Learn to use the color camera to take pictures and record videos, read bar codes, perform document capture, or perform signature capture.
- 60. Chapter 4 — Use the Camera 48 CN51 Mobile Computer User Manual About the Color Camera The camera and flash are located on the back of the computer. You can use the camera for several tasks, including: • Taking pictures and videos • Reading bar codes • Signature capture • Document imaging How to Take Pictures and Record Videos You use the Pictures & Videos application to use the camera for taking pictures or recording videos, and to configure still photo and video recording settings. In the Pictures & Videos application, you can: • take, view, and edit pictures. • switch between Still (camera) mode and Video mode. • record and launch video clips stored on the computer or a microSD card. • configure camera settings for taking pictures and videos. You can send pictures and videos to others or save an image as the background on the Home screen. Note: While the Pictures & Videos camera application is running, you cannot use either the imager or the camera to read bar codes. If Windows Media Player is running when you start the Pictures & Videos camera application, Windows Media Player is automatically closed. Note: You must use Intermec Settings to configure camera settings for reading bar codes, document imaging, or signature capture.
- 61. Chapter 4 — Use the Camera CN51 Mobile Computer User Manual 49 Take a Picture You run the Pictures & Videos application to use the camera for taking pictures. When you take a picture, the image is saved as a .jpg file and stored in the /My Documents/My Pictures folder. 1 Tap Start > Pictures & Videos. 2 Tap the Camera icon in the grid, or tap Camera on the taskbar. 3 Using the screen as a viewfinder, move the camera until you have the image you want to take a picture of. 4 Hold the computer as still as possible, and press Enter to take and save the picture. If you select to save pictures to the main memory, the pictures are saved to permanent storage on the computer. Record a Video You run the Pictures & Videos application to use the camera for recording videos. Recorded video is stored in the /My Documents/My Pictures folder. 1 Tap Start > Pictures & Videos. 2 Tap the Camera icon in the grid or the Camera button on the Tile bar. 3 Tap Menu > Video. 4 Using the screen as a viewfinder, move the computer until you see the scene you want to record. 5 Press Enter to start recording. 6 When you are done, tap Stop or press Enter to stop recording and save the video. If you choose to save your videos to main memory, the videos are saved to permanent storage on the computer.
- 62. Chapter 4 — Use the Camera 50 CN51 Mobile Computer User Manual Save Pictures and Videos to a microSD Card By default, pictures and videos are saved to the /My Documents/My Pictures folder on the computer. You can save your pictures and video to a microSD card to easily transport them to another device. 1 Install a microSD card in the computer. 2 Tap Start > Pictures & Videos. 3 Tap the Camera icon. 4 Tap Menu > Options. 5 From the Save file to list, select SD card and tap OK. Configure or Create Camera Scenes Camera scenes are sets of preset values for camera settings. You can select or create a scene to accommodate your specific needs. 1 Tap Start > SceneEditor. 2 Select a Scene to configure and then tap . Or, to create a new scene, tap New. 3 Configure the necessary settings. You do not need to configure all possible settings for the scene, and the values for settings you do not configure are determined by the last use. If you are creating a new scene, type the name in the Scene box. 4 Tap Save. 5 When you are prompted to save the settings, tap Yes. The changes you made are saved. 6 Tap ok to close the message box. Scene Settings When you use SceneEditor to create a scene for the camera, you can configure these settings.
- 63. Chapter 4 — Use the Camera CN51 Mobile Computer User Manual 51 Scene Settings Setting Description Exposure Metering The area of the image the camera uses to determine optimal exposure: • Whole screen avg: Uses the image as a whole. • Center weighted avg: Uses the entire image but places emphasis on the center quarter of the image. • Center 1/4 averaged (default): Uses the center quarter of the image. • Lower 1/4 averaged: Uses the lower quarter of the image. • Upper 1/4 averaged: Uses the upper quarter of the image. • Lower 1/2 averaged: Uses the lower half of the image. • Upper 1/2 averaged: Uses the upper half of the image. Exposure Compensation Exposure level of the image. Values are from -2.5 (darker, underexposed) to +2.5 (lighter, overexposed) in increments of 0.5. Default is 0. Focus Determines the focus method: • Touch: Tap the screen to set the focal point. • Portrait: Uses a depth of field of 50 cm to the focal point. • Infinity: Uses a depth of field of greater than 4 m. • Extended: Uses a depth of field of 10 cm to infinity. • Macro: Uses a depth of field of 10 to 50 cm. • Auto: Focuses once within a depth of field range of 50 cm to infinity. • Continuous: Focuses when movement is detected in the scene. • Manual: You must enter a focus distance. Focus Distance The distance at which the camera focuses. Values are 2.5 in, 4.5 in, 7.5 in, 1-3 ft, 3-9 ft, and Infinity (focuses the lens so that an infinitely distant object is in focus). Brightness Brightness level of the image. Manual settings are from -4 (very dark) to +4 (very light) in increments of 1. Default is 0.
- 64. Chapter 4 — Use the Camera 52 CN51 Mobile Computer User Manual Contrast Amount of contrast in the image. Manual settings are from -4 (least contrast) to +4 (most contrast) in increments of 1. Default is 0. Sharpness Sharpness of the image. Manual settings are from -4 (very soft) to +4 (very sharp) in increments of 1. Default is 0. Saturation Color saturation level. Manual settings are from -4 (black and white) to +4 (maximum color) in increments of 1. Default is 0. White Balance Compensates for specific lighting conditions to produce true color images: • Auto (default): Automatic White Balance (AWB) control. • Shade • Sunset • Face priority • Warm fluorescent • Twilight • Horizon • Incandescent: • Office • Tungsten • Cloudy: • Daylight Torch Turns the LED on or off when streaming preview frames. If set to Auto, the camera system automatically determines when to turn the LED on and off when streaming preview frames. Flash The state of the camera flash when you take a picture: automatic, on, or off. Scene Settings (Continued) Setting Description
- 65. Chapter 4 — Use the Camera CN51 Mobile Computer User Manual 53 Configure Camera Settings for Pictures and Videos Use the Pictures & Videos application to configure the camera. 1 Tap Start > Pictures & Videos. 2 Tap the Camera icon. Color Effects Sets the color effect for pictures: • None • Negative • Solarize • Sepia • Gray • Natural • Vivid • Color Swap • Black Board • White Board • Aqua • Posterize • Black White ISO Sets the equivalent ISO film speed: Auto, 100, 200, 400, or 800. Noise Reduction Controls the amount of noise or graininess in the image. Scene Settings (Continued) Setting Description Note: You must use Intermec Settings to configure camera settings for reading bar codes, document imaging, or signature capture.
- 66. Chapter 4 — Use the Camera 54 CN51 Mobile Computer User Manual 3 Tap Menu. By default, all settings in the list apply to still pictures. To configure settings for taking videos, tap Video at the top of the list. 4 Select a setting to configure. Camera Settings for Pictures and Videos You can configure camera settings to meet the needs of your operating environment. In the Pictures & Videos application, camera settings are available from the menu when the camera is operating. Certain settings are only available when taking either Video or Still pictures, but not for both. Note: You must use Intermec Settings to configure camera settings for reading bar codes, document imaging, or signature capture.
- 67. Chapter 4 — Use the Camera CN51 Mobile Computer User Manual 55 Camera Settings (Still) Setting Description Choices Mode Determines the camera operating mode. • Normal: Takes one picture. • Burst: Takes a series of five pictures. To change this value, in the Camera app tap Menu > Options and enter a new value in the Burst Mode Num. of images field. • Timer: Waits 10 seconds before taking the picture. To change this value, in the Camera app tap Menu > Options and enter a new value in the Timer mode Hold duration field. Zoom Sets the amount of digital zoom. • 1.0x • 1.5x • 2.0x • 2.5x • 3.0x • 3.5x • 4.0x • 6.0x • 8.0x • Manual Scenes Selects a Scene for the camera. Scenes are sets of preset values for the camera, optimized for different environments. • Auto • Manual • Van Interior • Office Store • Warehouse • Daylight • Night • Cloudy • Check • DocCap
- 68. Chapter 4 — Use the Camera 56 CN51 Mobile Computer User Manual Settings Brightness • +100 • +50 • 0 • Manual Contrast • +100 • +50 • 0 • -50 • -100 • Manual Sharpness • +100 • +50 • 0 • -50 • -100 • Manual Saturation • +100 • +50 • 0 • -50 • -100 • Manual Color Effects • None • Negative • Solarize • Sepia • Gray • Natural • Vivid • Color Swap • Black Board • White Board • Aqua • Posterize • Black White Camera Settings (Still) (Continued) Setting Description Choices
- 69. Chapter 4 — Use the Camera CN51 Mobile Computer User Manual 57 White Balance • Auto • DayLight • Cloudy • Shade • Tungsten • Fluorescent • Incandescent • Horizon • Twilight • Warm Fluorescent • Sunset Exposure Compensation From +2.5 to -2.5 in .5 increments. ISO Speed • Auto • 100 • 200 • 400 • 800 Exposure - Auto Exposure Auto Exposure: • Auto • Night • Spot Light • Sport • Snow • Beach • Aperture • Small Aperture Exposure - Manual Exposure Manual Exposure: • 1/200 • 1/100 • 1/50 • 1/33 • 1/20 • 1/8 Camera Settings (Still) (Continued) Setting Description Choices
- 70. Chapter 4 — Use the Camera 58 CN51 Mobile Computer User Manual Exposure - Metering Metering: • Whole Average • Whole Center Weight • Center 1/4 Average • Lower 1/4 Average • Upper 1/4 Average • Lower 1/2 Average • Upper 1/2 Average Torch Sets whether or not to use the lighting LED. • Off • On • Auto Flash Sets when to use the flash. • Off • On • Auto • FillIn • RedEye Focus Sets the focus mode for the camera when shooting video. • Auto (default) • Continuous • Touch • Macro • Potrait • Extended • Infinite Full Screen When enabled, this setting hides the task bar. To view the task bar, double-tap the bottom of the screen. Options (Camera tab) Image filename prefix Default is img. Location for saved still picture files • Main Memory (default) • Flash File Store • RAM Drive Camera Settings (Still) (Continued) Setting Description Choices
- 71. Chapter 4 — Use the Camera CN51 Mobile Computer User Manual 59 Flicker Tolimitpossibleproblemswith light/dark exposures when recording video, select the value matching the fluorescent light flicker in the environment: • 50 Hz (typical in Europe) • 60 Hz (typical in North America) Resolution • 1936 x 2592 (5.0 mp) • 1536 x 2048 (3.2 mp) • 1200 x 1600 (2.0 mp) • 1072 x 1920 (2.2 mp) • 960 x 1280 (1.2 mp) • 720 x 1280 (0.9 mp) • 768 x 1024 (0.8 mp) • 592 x 800 (0.5 mp) • 480 x 800 (0.4 mp) • 480 x 640 (0.3 mp) • 288 x 352 (0.1 mp) • 240 x 320 (0.1 mp) • 144 x 176 • 112 x 160 • 96 x 128 JPEG quality • High quality • Normal quality (default) • Low quality • Custom quality. If you select Custom, eneter avaluein the Custom field. Post processing Enable or disable the noise filter. Burst mode number of pictures to take Default is 5. Timer mode hold duration (in seconds) Default is 5. Camera Settings (Still) (Continued) Setting Description Choices
- 72. Chapter 4 — Use the Camera 60 CN51 Mobile Computer User Manual Hold snapshot (seconds) Amount of time that a snapshot remains in the viewfinder before the screen returns to showing preview frames. Variable frame rate Enable variable frame rate to allow the camera to automatically adjust the frame rate for better exposure. This may result in slower preview start. Camera Settings (Video) Setting Description Choices Mode Determines the camera operating mode. • Normal: Records video immediately. • Timer: Waits 10 seconds before starting video recording. To change this value, with the Camera app in Video mode, tap Menu > Options and enter a new value in the Hold record field. Zoom Sets the amount of digital zoom. • 1.0x • 1.5x • 2.0x • 2.5x • 3.0x • 3.5x • 4.0x • 6.0x • 8.0x • Manual Camera Settings (Still) (Continued) Setting Description Choices
- 73. Chapter 4 — Use the Camera CN51 Mobile Computer User Manual 61 Scenes Selects a Scene for the camera. Scenes are sets of preset values for the camera, optimized for different environments. • Auto • Manual • Van Interior • Office Store • Warehouse • Daylight • Night • Cloudy • Check • DocCap Settings Brightness • +100 • +50 • 0 • Manual Contrast • +100 • +50 • 0 • -50 • -100 • Manual Sharpness • +100 • +50 • 0 • -50 • -100 • Manual Saturation • +100 • +50 • 0 • -50 • -100 • Manual Camera Settings (Video) (Continued) Setting Description Choices
- 74. Chapter 4 — Use the Camera 62 CN51 Mobile Computer User Manual Color Effects • None • Negative • Solarize • Sepia • Gray • Natural • Vivid • Color Swap • Black Board • White Board • Aqua • Posterize • Black White White Balance • Auto • DayLight • Cloudy • Shade • Tungsten • Fluorescent • Incandescent • Horizon • Twilight • Warm Fluorescent • Sunset Exposure Compensation From +2.5 to -2.5 in .5 increments. ISO Speed • Auto • 100 • 200 • 400 • 800 Camera Settings (Video) (Continued) Setting Description Choices
- 75. Chapter 4 — Use the Camera CN51 Mobile Computer User Manual 63 Exposure - Auto Exposure Auto Exposure: • Auto • Night • Spot Light • Sport • Snow • Beach • Aperture • Small Aperture Exposure - Manual Exposure Manual Exposure: • 1/200 • 1/100 • 1/50 • 1/33 • 1/20 • 1/8 Exposure - Metering Metering: • Whole Average • Whole Center Weight • Center 1/4 Average • Lower 1/4 Average • Upper 1/4 Average • Lower 1/2 Average • Upper 1/2 Average Torch Sets whether or not to use the lighting LED. • Off • On • Auto Full Screen When enabled, this setting hides the task bar. To view the task bar, double-tap the bottom of the screen. Options (Video tab) Video filename prefix Default is vid. Camera Settings (Video) (Continued) Setting Description Choices
- 76. Chapter 4 — Use the Camera 64 CN51 Mobile Computer User Manual Location for saved video files • Main Memory (default) • Flash File Store • RAM Drive Include audio when encoding video files Enable or disable. Video resolution • 720 x 1280 (720p) (Default) • 768 x 1024 (XGA) • 480 x 800 (WVGA) • 480 x 640 (VGA) • 288 x 352 (CIF) • 240 x 320 (QVGA) Video encoder • H263 • H264 (default) • MPEG4 • WMV Video file format • *.3gp • *mp4 Hold record When Timer mode is enabled, this value is the delay in seconds before recording begins. Enable video stabilization Check the box to enable video stabilization. Enable video noise filtering Check the box to enable video noise filtering. Enable video noise filtering Check the box to enable video noise filtering. Frame rate • 15 fps • 30 fps (default) • Custom. Adjust the frame rate with the slider. Camera Settings (Video) (Continued) Setting Description Choices
- 77. Chapter 4 — Use the Camera CN51 Mobile Computer User Manual 65 How To Read Bar Codes With the Camera You can use the camera to read bar codes. When you read bar codes with the camera, the computer treats the camera as it would any input device, such as a Bluetooth scanner, and bar code data is sent to an application as if it came from a scanner or imager. There are two ways to enable reading bar codes with the camera: • You can use the Profile Settings application to enable bar code reading. The computer uses the current symbology decode settings to read bar code data. • You can configure individual parameters in Intermec Settings (Data Collection > Camera > Scanner Settings) to enable bar code reading. Enable or Disable Reading Bar Codes With the Camera You use the Profile Settings application to enable or disable reading bar codes with the camera. Reading bar codes with the camera is disabled by default. 1 Tap Start > ProfileSettings. 2 Tap Camera. 3 In the Camera menu, tap Enable bar code scan or Disable bar code scan as necessary. 4 Tap OK. Note: To read bar codes using the camera, you must use Intermec Settings to configure bar code symbology decode settings. Note: Parameters set in Data Collection > Internal Scanner > Scanner Settings are applied to the internal imager, not the camera. Note: You can also enable reading bar codes by setting parameters in Intermec Settings.
- 78. Chapter 4 — Use the Camera 66 CN51 Mobile Computer User Manual Read Bar Codes With the Camera After you enable reading bar codes with the camera, the computer sends bar code data to applications as keyboard input. 1 Start the application that is to receive the bar code data. 2 Position the computer about 20 cm (8 in) over the bar code you want to read. Make sure nothing is blocking the camera lens. 3 Press and hold the Scan button. The screen turns into a viewfinder with an aiming bar across the middle of the screen. 4 Center the aiming bar over the bar code. The bar code is read and the data appears in the active application. If the computer does not read the bar code right away, release the Scan button and try again. You may need to move the computer closer to or further away from the bar code for best results. You may also need to select a different focus mode depending on your environment. Camera Settings for Reading Bar Codes To use the camera for reading bar codes, you must use the Intermec Settings application to configure the camera. From the main screen of Intermec Settings, select Data Collection > Camera > Camera Settings. Note: Before you use the camera to read bar codes, make sure the camera window is clean. Optimized Imager Mode (Advanced) Settings and Descriptions Setting Description Choices Imager decode mode • Linear imager emulation • 2D imager Lighting mode • Illumination LED priority • Aperture priority Lighting goal Default is 30.
- 79. Chapter 4 — Use the Camera CN51 Mobile Computer User Manual 67 Illumination level Default is 3. Initial 1D search area • Center • Full • Smart raster Damaged 1D codes • Disable • Enable Viewfinder and Focus Settings and Descriptions Setting Description Choices Enable viewfinder Enable or disable. Focus mode Sets the focus mode for the camera when reading bar codes, document imaging, or capturing signatures. • Manual • Continuous autofocus • Single shot autofocus • Macro • Extended (10 cm to infinity) Manual focus value When Focus Mode is set to Manual, this value sets the manual focus level. Default is 65. Set to 0 for infinity, or 255 for closeups. Lighting Settings and Descriptions Setting Description Choices Torch • Off • On • Auto Optimized Imager Mode (Advanced) Settings and Descriptions Setting Description Choices
- 80. Chapter 4 — Use the Camera 68 CN51 Mobile Computer User Manual How to Perform Document Capture with the Camera You can use the camera to perform document capture. Document capture is a specialized feature for taking a picture of a document, and automatically applying perspective correction to the image so that only the document appears in the image. Document Capture Image with No Perspective Correction Document Capture Image with Perspective Correction There are two ways to enable document imaging with the camera: • You can use the Profile Settings application to enable document capture. The computer uses the current document capture settings to apply perspective correction (and other postprocessing features if specified). • You can configure individual parameters in Intermec Settings to enable document capture.
- 81. Chapter 4 — Use the Camera CN51 Mobile Computer User Manual 69 Enable or Disable Document Capture with the Camera You use the Profile Settings application to enable or disable document capture with the camera. Performing document capture with the camera is disabled by default. 1 Tap Start > ProfileSettings. 2 Tap Camera. 3 In the Camera menu, tap Enable document image to enble document capture. To disable document capture, tap Disable bar code scan. 4 Tap OK. Perform Document Capture with the Camera After you enable document capture with the camera, document capture images are saved to the MyDocumentsMDI directory on the computer by default. 1 Place your document on a flat surface. 2 Position the computer a few inches above the center of the document. 3 Press and hold the Scan button. The video preview and camera viewfinder frame appear. When the viewfinder tries to detect the document edges, the viewfinder frame is red and pulses slightly. 4 Move the camera to align the document edges with the viewfinder. When the viewfinder detects the document edges, the viewfinder Note: To perform document capture using the camera, you must use Intermec Settings to configure all document capture settings. Note: You can also enable document capture by setting parameters in Intermec Settings.
- 82. Chapter 4 — Use the Camera 70 CN51 Mobile Computer User Manual frame turns white and a red target appears. The camera tries to focus on the center of the document. When the focus and distance are correct, the target turns white and the document image is captured. 5 To view the document capture image, you can browse to MyDocumentsMDI and tap the image file to view it. Camera Settings for Document Imaging To use the camera for document imaging, you must use the Intermec Settings application to configure the camera. From the main screen of Intermec Settings, select Data Collection > Camera > Camera Settings > Document Imaging. Settings Description Choices Enable document imaging Enables or disables document imaging. • Disable • Enable without decode Focus check Sets the acceptable focus level for document imaging. • Disable (no focus check) • Medium level • High level Image/area to capture ratio Default is 30. Output compression Sets the image compression level. • Bitmap • JPEG • TIFFG4 Output compression quality Sets the output compression quality level. Default is 60. Perspective correction Corrects the document image for perspective. Enable (default) or disable. Color conversion • None (default) • Monochrome • Enhanced monochrome (TIFF)
- 83. Chapter 4 — Use the Camera CN51 Mobile Computer User Manual 71 Conversion threshold • Very dark (default) • Dark • Normal • Bright • Very bright Contrast enhancement • None (default) • Photo • Black on white • White on black Text enhancement • None • Low • Medium (default) • High Noise reduction Sets the noise reduction level. Default is 3. Image rotation Rotates the image counterclockwisebya set amount. • None (default) • 90 degrees • 180 degrees • 270 degrees Image lighting correction Default is disabled. Document file name Name for the document image file. Default is doc_$(num). Settings Description Choices
- 84. Chapter 4 — Use the Camera 72 CN51 Mobile Computer User Manual
- 85. 73 5 Use GPS The computer comes equipped with an integrated Global Positioning System (GPS) receiver if your computer has phone capability (WWAN radio). The GPS receiver can deliver standards-based National Marine Electronics Association (NMEA) data strings to GPS applications.
- 86. Chapter 5 — Use GPS 74 CN51 Mobile Computer User Manual About the Integrated GPS on Your Computer Intermec recommends that you use the GPS Intermediate Driver (GPSID) instead of directly accessing the GPS hardware. The GPSID is a Microsoft hardware component that interacts between applications and the GPS hardware. As a Microsoft software component, the GPSID: • allows multiple applications to simultaneously access the GPS data stream. • provides access to GPS data without requiring applications to recognize and parse NMEA syntax. Use the GPSID Installed on the Computer To use the GPSID installed on your mobile computer, you need to configure the GPSID settings. 1 Tap Start > Settings > System > External GPS. The GPS Settings screen appears with Programs selected. Note: To use GPS, you must enable the WWAN radio on the computer.
- 87. Chapter 5 — Use GPS CN51 Mobile Computer User Manual 75 2 Select the COM port that you want your program to use to get GPS data from your computer. 3 Tap Access in the horizontal scroll bar and select the Manage GPS automatically check box. 4 Tap OK. About the GPS Module Operating Modes The integrated GPS module has three operating modes: • Standalone • MS Assisted (Mobile Station Assisted) • gpsOneXTRA™ (UMTS computers only) In Standalone mode, the GPS module relies solely on GPS satellites to determine position. Note: The CN51 also supports GLONASS.
- 88. Chapter 5 — Use GPS 76 CN51 Mobile Computer User Manual In MS Assisted mode, the computer can determine position without receiving GPS signals directly from satellites. Instead, the computer receives GPS signals and information provided by the cellular network. Even when the computer can receive a satellite signal, MS Assisted can improve position accuracy and reduce the time to determine initial position (Time-to-first-Fix). Check with your cell phone carrier for availability and pricing for MS Assisted service. Qualcomm’s gpsOneXTRA Assistance technology provides enhanced operation for Standalone GPS. This option enables the UMTS-enabled computer to automatically download a small assistance data file from the XTRA servers through a brief internet access session. To use this option, you must have a valid and activated WAN data connection. Another option you can configure with iGPS is the fix interval. The fix interval defines how often the GPS provides new information. Larger intervals use less power, but many applications require small intervals to work correctly. The default for fix interval, in seconds, is 4. The Flexible Network Radio has a maximum interval of 4. Improve GPS Performance on the Computer Use the iGPS application to improve the performance of the GPS on your computer. Any time you change the GPS settings, the phone automatically resets. 1 Go to Start > Settings > System > iGPS. 2 In the Fix Interval tab, enter a value for the fix interval. The default setting is 4 and should be optimized for most applications. 3 Tap the Fix Type tab and select one of these options: Standalone (1), MS assisted (2), or Enable gpsOneXTRA (check box). 4 Tap OK. Note: Internet connection fees may apply. Note: GLONASS reception is enabled by default. Intermec recommends that you keep GLONASS enabled for better accuracy. To disable GLONASS, make sure that Enable Glonass is not selected.
- 89. 77 6 Configure the Computer Use this chapter to learn about the available methods for configuring your computer and how to use Intermec Settings. You can also use this chapter to learn how to configure network communications and wireless security.
- 90. Chapter 6 — Configure the Computer 78 CN51 Mobile Computer User Manual How to Configure the Computer You can configure many parameters on the computer such as the bar code symbologies it decodes or the network settings. The values you set for these parameters determine how the computer operates. There are several ways to configure the computer: • Directly on the computer. You can use Intermec Settings directly on the computer to change only the settings on that computer. • Remotely using Intermec SmartSystems. With SmartSystems, you can remotely configure all of your mobile computers as well as other SmartSystems-enabled Intermec devices and peripherals. • Using a third-party device management product that supports the computer and Intermec Settings, such as Soti MobiControl or Wavelink Avalanche. • Using configuration bundles that you create with SmartSystems. About Intermec Settings on the Computer Use Intermec Settings to configure parameters for Intermec applications on the computer, as well as some device-specific parameters like volume. You can configure parameters for important functions like data collection and communications. You can also password protect Intermec Settings to prevent users from making changes to the configuration settings.