
Recomendados
Recomendados
Más contenido relacionado
La actualidad más candente
La actualidad más candente (10)
Similar a Cs Pe Create Slide Show
Similar a Cs Pe Create Slide Show (20)
Cs Pe Create Slide Show
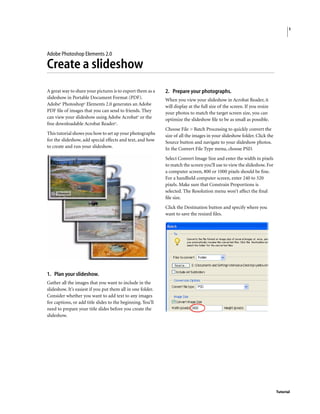
- 1. 1 Adobe Photoshop Elements 2.0 Create a slideshow A great way to share your pictures is to export them as a 2. Prepare your photographs. slideshow in Portable Document Format (PDF). When you view your slideshow in Acrobat Reader, it Adobe® Photoshop® Elements 2.0 generates an Adobe will display at the full size of the screen. If you resize PDF file of images that you can send to friends. They your photos to match the target screen size, you can can view your slideshow using Adobe Acrobat® or the optimize the slideshow file to be as small as possible. free downloadable Acrobat Reader®. Choose File > Batch Processing to quickly convert the This tutorial shows you how to set up your photographs size of all the images in your slideshow folder. Click the for the slideshow, add special effects and text, and how Source button and navigate to your slideshow photos. to create and run your slideshow. In the Convert File Type menu, choose PSD. Select Convert Image Size and enter the width in pixels to match the screen you’ll use to view the slideshow. For a computer screen, 800 or 1000 pixels should be fine. For a handheld computer screen, enter 240 to 320 pixels. Make sure that Constrain Proportions is selected. The Resolution menu won’t affect the final file size. Click the Destination button and specify where you want to save the resized files. 1. Plan your slideshow. Gather all the images that you want to include in the slideshow. It’s easiest if you put them all in one folder. Consider whether you want to add text to any images for captions, or add title slides to the beginning. You’ll need to prepare your title slides before you create the slideshow. Tutorial
- 2. ADOBE PHOTOSHOP ELEMENTS 2.0 2 Create a slideshow 3. Add text and effects. Under Output File, specify a location to save your Open any of the resized photos that you want to add slideshow. captions to, and use the type tool to add your text. To make the text easier to read, you can add a panel to the image before you type your text. Using the marquee tool, create a selection box the size of the text panel you need to fit your text. Then, select the Text Panel effect from the Effects palette and click Apply. Note: You can add other effects to each image using the Effects panel. You might want to add a border or frame to an image. 5. Set viewing options and slide transitions. Under Slide Show Options, set the number of seconds to show each image. If you don’t specify a time, each image displays until the viewer clicks the mouse or presses the Return key. Set a transition effect between slides. You can choose a simple replace, a dissolve effect, or one of several wipes 4. Create the PDF slideshow. or special effects. Create versions of your slideshow with Choose File > Automation Tool > PDF Slideshow. Click different effects to see which ones you like. the Browse button and navigate to the folder that contains the photos for your slideshow. Select all the If you need to keep the file size as small as possible, click files and then click Open. the Advanced button and set the JPEG quality to medium or low. In the PDF Slideshow dialog box, rearrange the files into the order you want them to appear in the In the PDF Slideshow dialog box, click OK to generate slideshow. To move a file in the list, click to select it and the slideshow. then drag it to a new location in the list. 6. View your slideshow. Open the slideshow file in Adobe Acrobat or Adobe Acrobat Reader. The slideshow will start automatically. You can stop the slideshow by pressing the Escape key. To restart the slideshow, choose View > Full Screen. Adobe, the Adobe logo, Acrobat, Acrobat Reader, and Photoshop Elements are either registered trademarks or trademarks of Adobe Systems Incorporated in the United States and/or other countries. ©2002 Adobe Systems Incorporated. All rights reserved.