SlideShare una empresa de Scribd logo
1 de 44
Descargar para leer sin conexión
Application
Engineering
Bulletin
Subject This AEB is for the following applications:
OEM Components and Interfaces
Automotive Industrial Power Generation
Date June 2001 (Rev. May 2002) Page 1 of 44 AEB 15.42
Engine Models included: QSB, QSC, QSL9, QSM11, QSX15, QSK19, QST30, QSK45, QSK60
Fuel Systems included:
Changes in blue
Introduction
The OEM components and interfaces technical package is written to assist OEMs in designing and interfacing
with electronics and electrical components.
Refer to the following other Industrial AEB’s:
AEB 15.40 – Electronic Features
AEB 15.43 – Datalinks and Diagnostics
AEB 15.44 – Installation Recommendations
Authors: Scott Decker, Michael L. Hill, Brian Landes, Stewart Sullivan, Tiffany Walker
AEB 15.42
Page 2 of 44
Table of Contents
Introduction....................................................................................................................................1
Table of Contents..........................................................................................................................2
Section I: Connectors............................................................................................................3- 18
31-Pin OEM Connector.................................................................................................................... 4
50-pin OEM Connector - QSM11, QSX15 ......................................................................................... 5
50-Pin OEM Connector - QSB, QSC, QSL9 ...................................................................................... 6
Datalink Interface Connector ............................................................................................................ 7
J1939 Datalink Connector ................................................................................................................ 8
WIF Extension Harness ................................................................................................................... 9
23-Pin OEM Connector - CENSE ....................................................................................................10
21-Pin OEM Connector - QST30, QSK19, QSK45, QSK60................................................................11
Datalink Interface 6-Pin Connector ..................................................................................................12
23-Pin OEM Connector - QSB, QSC, QSL9 .....................................................................................13
Exhaust Brake Connector - QSB, QSC, QSL9..................................................................................14
Coolant Level Extension Harness Connector (4-Pin).........................................................................15
Coolant Level Extension Harness Connector (3-Pin) - CENSE ..........................................................16
Acceptable Coolant Level Switch.....................................................................................................17
RS232 In-Cab Connector................................................................................................................18
Section II: Lamps...................................................................................................................19-21
Lamp Specifications .......................................................................................................................19
Water-in-Fuel (WIF) Lamp...............................................................................................................19
Maintenance Lamp .........................................................................................................................19
Stop Lamp.....................................................................................................................................19
Wait-to-Start Lamp .........................................................................................................................20
Warning Lamp................................................................................................................................20
Engine Protection Lamp..................................................................................................................20
Switched Sink Driver Output Pin-out Specification ............................................................................20
Section III: Relays..................................................................................................................22-26
Low Idle Shutdown Relay................................................................................................................22
Intake Air Heater Relay ...................................................................................................................23
24 VDC Power Relay......................................................................................................................23
Power Relay VP44 .........................................................................................................................24
Switched Outputs Relay..................................................................................................................25
Acceptable Relay ...........................................................................................................................26
Section IV: Switches.............................................................................................................27-37
Switch Conventions ........................................................................................................................27
Switch Configuration.......................................................................................................................27
Switch Characteristics ....................................................................................................................27
Alternation Droop Switch.................................................................................................................28
Alternate Low Idle Switch................................................................................................................29
Alternate Torque Switch..................................................................................................................30
AXG On/Off Switch.........................................................................................................................31
Air Conditioner Pressure Switch......................................................................................................32
Pressure Switches: Brake Switch ....................................................................................................33
Switches and Switch Assemblies: Rotary Clutch Switch Assembly ....................................................34
Switches and Switch Assemblies: Optional Clutch Brake Switch........................................................35
Section V: Sensors.................................................................................................................36-37
Vehicle Speed Sensor (Variable Reluctance Magnetic Pickup)..........................................................36
Water-in-Fuel Sensor and Drain Unit (For Spin-on FWS) ..................................................................37
AEB 15.42
Page 3 of 44
Section I: OEM Connectors
OEM Connector Installation Kits
Application Description Required Cummins’ Part Numbers Part Description
QSX/QSM with EA1040 or EA2043
Option
3164585 OEM connectors / contacts including
coolant level without J1939 datalink
parts. Assumes using the 50 pin OEM
connector.
3164589 J1939 Stub kit which includes
connectors and contacts for one stub.
3164590 J1939 Termination kit includes
connectors, termination resistors, and
contacts
QSX/QSM with EA2036, EA2037, or
EA1039 Option
3164585 OEM connectors / contacts including
coolant level without J1939 datalink
parts. Assumes using the 47 pin OEM
connector.
3164589 J1939 Stub kit which includes
connectors and contacts for one stub.
3164590 J1939 Termination kit includes
connectors, termination resistors, and
contacts
QSB/C/L9
3164589 J1939 Stub kit which includes
connectors and contacts for one stub.
QST30
3164590 J1939 Termination kit includes
connectors, termination resistors, and
contacts
3164587 OEM connectors / contacts including
coolant level
QSK19/45/60/78
3164588 OEM connectors / contacts including
coolant level
Crimp Tool Kit
3164591 Crimp tools for the various contacts
required by the various OEM installation
kits
AEB 15.42
Page 4 of 44
Connector Components
Description Mfg. Mfg. Part Number QSX
QSM
QST30 QSK19 QSK
45/60
QSB
QSC
QSL9
CENSE
General Connectors
31-Pin Deutsch HD36-24-31SE X X X X
23-Pin Deutsch HD36-24-23ST X
23-Pin Deutsch HD36-24-23PT X
21-Pin Deutsch HD36-24-21SE X X X
3-Pin Deutsch HD10-3-96P X
9-Pin Deutsch HD10-9-1939P Only Only Primary Primary Primary
6-Pin Deutsch HD10-6-12P Optional Optional Optional
6 –Pin – Switched Outputs Deutsch DTM06-6S X
2-Pin Power Packard 1201 0973 X
50-Pin Deutsch DRC26-50S-01 X
50-Pin Deutsch DRC26-50S-05 X
J1939
9-Pin Extension Harness Cummins 4060578 QSM
J1939 Receptacle Deutsch DT04-3P-E008 X X X X X X
Plug Deutsch DT06-3S-E008 X X X X X X
Terminal Receptacle Deusch DT04-3P-P006 (Blue) X X X X X X
Specialty Connectors
RS422/Modular Mining GSP Interface Bendix PT06-E1419P(SR) X
Coolant Level Sensor
Coolant Level Sensor-Connector & Seal Packard 1206 5298 X X X X X X
Coolant Level Sensor Wiring Harness
4-Pin Tower Packard 1201 5797 X
3-Pin Tower Packard 1201 5793 X
Coolant Level Sensor Shorting Plug
4-Pin Tower Cummins 3613298 X X X
Water in Fuel Extension Harness
WIF Receptacle Deutsch DT04-2P QSM
WIF Plug Deutsch DT06-2S QSM
Water in Fuel Sensor
WIF Mating Connector Packard 1204 0753 X
Connector Suppliers:
Deutsch Industrial Products Division Packard Electric
37140 Industrial Avenue P.O. Box 431
Hemet, CA 92543 Warren, OH 44486
Phone: (714) 929-1200 1-800-722-5273
(909) 765-2250
Fax (714) 652-9784
Deutsch Distributor
Ladd Industrial Sales
1-800-223-1236
1-513-438-0033
AEB 15.42
Page 5 of 44
Connector Descriptions
31-Pin OEM Connector – QSM11, QSX15, QSK19, QST30
Application – This connector mates with the 31-pin general disconnect which is mounted on an engine
bracket. This connector carries multiple OEM signals to and from components located in the engine
compartment and at remote locations. Consult OEM Interfaces to determine which signals interface via this
connector.
Hardware – This connector is a 31-pin Deutsch HD30 series. Terminals are nickel-plated sockets. The
assembly shown below is the –059, which includes a backshell kit. This backshell kit is recommended.
31-Pin OEM Connector
31-Pin OEM Connector Part List
Item Manufacturer Manufacturer Part No. Cummins Part No.
Connector Deutsch HD36-24-31SE 3659012
Connector & Backshell Kit Deutsch HD36-24-31SE-059 3171028
Backshell Kit Only Deutsch 0409-201-2400
Terminal Reel Deutsch 1062-16-0122 3615978
Sealing Plug Deutsch HD10-114017 3824002
AEB 15.42
Page 6 of 44
50-Pin OEM Connector – QSM11, QSX15
Application – This connector system utilizes 20 AWG gold sockets with 20 AWG cavity plugs, and a
convoluted wire seal. It has an environmentally sealed, hard-shell connector. The plug is keyed to fit the
mating module header and is secured to the ECM with one socket head capscrew. The OEM connector is
used as an integral part of an electronic control module for the wiring harness interface. Cavity plugs should be
inserted in any unused cavities, which are labeled NC in the connector illustration.
Hardware – This connector is a 50-pin Deutsch DRC series, key 01. Terminals are gold-flashed sockets. The
assembly shown below includes a 90
o
backshell. This backshell is required for all installation.
50-Pin OEM Connector
50-Pin OEM Connector Part List
Item Manufacturer Manufacturer Part No. Cummins Part No.
Connector, Key-01 Deutsch DRC26-50S-01 3657520
Terminal Reel Deutsch 1062-20-0144 3658470
90
o
Backshell Deutsch 0528-001-5005 3658522
AEB 15.42
Page 7 of 44
50-Pin OEM Connector – QSB, QSC, QSL9
Application – This connector system utilizes 20 AWG gold sockets with 20 AWG cavity plugs, and a
convoluted wire seal. It has an environmentally sealed, hard-shell connector. The plug is keyed to fit the
mating module header and is secured to the ECM with one socket head capscrew. The OEM connector is
used as an integral part of an electronic control module for the wiring harness interface. Cavity plugs should be
inserted in any unused cavities, which are labeled NC in the connector illustration.
Hardware – This connector is a 50-pin Deutsch DRC series, key 05. Terminals are gold-flashed sockets
50-Pin OEM Connector Part List
Item Manufacturer Manufacturer Part No. Cummins Part No.
Connector Deutsch DRC26-50S-05
Gold Sockets Deutsch 1062-20-0144
AEB 15.42
Page 8 of 44
Datalink Interface Connector
Application – This connector mates with a Cummins service tool such as Insite to allow service, parameter
adjustment, and calibration download. A Datalink Interface connector is required on every machine. Connector
installation must meet requirements defined in AEB 15.44 Installation Recommendations.
Hardware – This connector is a 9-pin Deutsch HD10 series. Two types of terminals are available, a solid and a
stamped and formed (S&F). Both types are gold-plated.
Datalink Interface Connector
Datalink Interface Connector Part List
Item Manufacturer Manufacturer Part No. Cummins Part No.
9-Way Connector Deutsch HD10-9-1939P 3658643
9-Way Solid Terminal Deutsch 0460-202-1631 3658462
9-Way S&F Terminal Deutsch 1060-16-0144 3658431
Protective Cap * Deutsch HDC16-9
• Tiewrap the protective cap to the main engine harness to prevent loss.
AEB 15.42
Page 9 of 44
J1939 Datalink Connector
Application – These connectors are used throughout the SAE J1939 datalink backbone and stubs. The 3-pin
receptacle connects a node to the backbone; it is located on the node side. The 3-pin plug connects the
backbone to a node; it is located on the backbone side. The 3-pin termination receptacle is located at each end
of the backbone.
Hardware – Two connectors are a 3-way Deutsch DT series receptacle and a mating 3-way Deutsch DT series
plug. Terminals are gold-plated. A wedge lock and locking insert are required. There is a pre-assembled
Deutsch termination receptacle assembly, which consists of a DT04-3P receptacle, W3S-1939-P012 wedge
lock, gold-plated pins, cavity plugs, and a 120-ohm resistor.
J1939 Backbone Connectors
J1939 Backbone Connectors Part List
Item Manufacturer Manufacturer Part No. Cummins Part No.
Receptacle Deutsch DT04-3P-E008 3659369
Receptacle Pin Reel Deutsch 1060-16-0144 3658431
Receptacle Wedge Lock Deutsch W3P (orange) 3616471
Plug Deutsch DT06-3S-E008 3659400
Plug Terminal Reel Deutsch 1062-16-0144 3658430
Plug Wedge Lock Deutsch W3S (orange) 3616472
Termination Receptacle Deutsch DT04-3P-P006 (Blue) 3942041
Termination Wedge Lock Deutsch W3S-1939-P012 (Blue)
AEB 15.42
Page 10 of 44
WIF Extension Harness
Application – The WIF Extension harness connects a remotely mounted Water-In-Fuel (WIF) sensor to the
Cummins engine harness. The WIF sensor is located on the bottom of a special fuel filter, and sometimes
must be installed somewhere other than the stock engine location. When this occurs, the OEM must construct
a WIF Extension harness between the sensor and the WIF Disconnect on the Cummins engine harness. For
QSX15 the WIF harness is not needed because it is a part of the standard engine harness.
Hardware – The WIF Extension harness includes two Deutsch DT series connectors, one plug and one
receptacle. All terminals are gold-plated. Wedge locks are required. Harness length and construction details
vary according to application.
Insert Picture Here
Need New Picture
WIF Extension Harness
WIF Extension Harness Part List
Item Manufacturer Manufacturer Part No. Cummins Part No.
Receptacle Deutsch DT04-2P 3616616
Receptacle Wedgelock Deutsch W2P 3616614
Pin Reel Deutsch 1060-16-0144 3658431
Plug Deutsch DT06-2S 3616615
Plug Wedgelock Deutsch W2SA 3658856
Socket Reel Deutsch 1062-16-0144 3658430
AEB 15.42
Page 11 of 44
23-Pin OEM Connector – CENSE
Application – This connector mates with the 23-pin OEM CENSE breakout connector which is mounted below
the OEM A & B engine bracket. This connector carries signals for components that interface with the CENSE
subsystem. This connector is required with application. For QSKV engines the only connection that needs to
be made is for RS232 and RS422.
Hardware – This connector is a 23-pin Deutsch HD30 series. Terminals are nickel-plated sockets.
23-Pin OEM CENSE Connector
23-Pin OEM CENSE Connector Part List
Item Manufacturer Manufacturer Part No. Cummins Part No.
Connector Deutsch HD36-24-23PT 3824814
Connector & Backshell Kit Deutsch HD36-24-23PT-059
Terminal Deutsch 0460-202-16141
AEB 15.42
Page 12 of 44
21-Pin OEM Connector – QST30, QSK19, QSK45, QSK60
Application – This connector mates with the 21-pin OEM breakout connector which is mounted on an engine
bracket. This connector carries signals for components that interface with the QSK19, QST30, QSK45 and
QSK60. This connector is required for all applications.
Hardware – This connector is a 21-way Deutsch HD30 series. Terminals are nickel-plated sockets. The
assembly shown below is the –059, which includes a backshell kit.
,
21-Pin OEM Connector
21-Pin OEM Connector Part List
Item Manufacturer Manufacturer Part No. Cummins Part No.
Connector Deutsch HD36-24-21SE 3824826
Connector & Backshell Kit Deutsch HD36-24-21SE-09
Backshell Kit Only Deutsch
Terminal Reel (16AWG) Deutsch 0462-201-16141
Terminal Reel (12AWG) Deutsch 0460-203-12141
AEB 15.42
Page 13 of 44
Datalink Interface 6-Pin Connector
Application - This connector mates to a service tool. This connector carries signals for J1587 datalink and
service tool operating power. It is recommended to use a 9-pin connector for new installations.
Hardware - This connect is a 6-pin Deutsch HD10 series. Terminals are gold-plated pins.
Datalink Interface 6-Pin Connector
Item Manufacturer Manufacturer Part No. Cummins Part No.
Connector Deutsch HD10-6-12P 3824805
Terminal Deutsch 0460-204-12141
AEB 15.42
Page 14 of 44
23-Pin OEM Connector - QSB, QSC, QSL9
Application - This connector is a 23-pin circular Deutsch connector with bayonet coupling. This connector will
replace the connectors identified below. This connector is environmentally sealed and accommodates both low
level signals and battery currents for the fuel pump.
Hardware - Sealed circular Deutsch connectors are useful in severe environments ranging from under hood to
on chassis. A lubricant applied to the mating surfaces of the terminals is recommended to preclude fretting and
corrosion of terminals.
23-Pin OEM Connector
OEM Engine Access Connector Part List
Item Manufacturer Manufacturer Part No. Cummins Part No.
Connector Deutsch HD36-24-23ST
Connector Pins Deutsch 1062-14-0122
AEB 15.42
Page 15 of 44
Exhaust Brake Connector - QSB, QSC, QSL9
Application - This is a 2-position connector. The in-line connectors are environmentally sealed, have positive-
locking hard shells and are used on both wiring harness and devices employing pigtail wiring. Low signal levels
as well as those carrying significant current levels are accommodated. The units employ silicone connector
seals.
Hardware - Sealed connectors are useful in severe environments ranging from under hood to on chassis. A
lubricant applied to the mating surfaces of the terminals is recommended to preclude fretting and corrosion of
terminals.
Exhaust Brake Connector
OEM Engine Access Connector
Item Manufacturer Manufacturer Part No. Cummins Part No.
Plug Deutsch DT06-2S
Receptacle Deutsch DT04-2P
AEB 15.42
Page 16 of 44
Coolant Level Extension Harness Connector (4-Pin)
Application - This connector is a 4-position weather pack tower. The in-line connectors are environmentally
sealed, have positive-locking hard shells and are used on both wiring harnesses and devices employing pigtail
wiring. Low signal levels as well as those carrying significant current levels are accommodated. The units
employ convoluted silicone wire seals and connector seals.
Hardware - Sealed tower and shroud connectors are useful in severe environments ranging from under hood
to on chassis. A lubricant applied to the mating surfaces of the terminals is recommended to preclude fretting
corrosion terminals.
Coolant Level Connector
Coolant Level Extension Harness Connector (4-Pin) Part List
Item Manufacturer Manufacturer Part No. Cummins Part No.
Connector Packard 1201 5797
AEB 15.42
Page 17 of 44
Coolant Level Extension Harness Connector (3-Pin) - CENSE
Application - This connector is a 4-position weather pack tower. The in-line connectors are environmentally
sealed, have positive-locking hard shells and are used on both wiring harnesses and devices employing pigtail
wiring. Low signal levels as well as those carrying significant current levels are accommodated. The units
employ convoluted silicone wire seals and connector seals.
Hardware - Sealed tower and shroud connectors are useful in severe environments ranging from under hood
to on chassis. A lubricant applied to the mating surfaces of the terminals is recommended to preclude fretting
corrosion terminals.
Coolant Level Extension Harness Connector (3-Pin) Part List
Item Manufacturer Manufacturer Part No. Cummins Part No.
Connector Packard 1201 5793
AEB 15.42
Page 18 of 44
Acceptable Coolant Level Switch
Application - This device is suitable for use as a Coolant Level switch. Its complementary outputs satisfy the
unique functional requirements of the ECM interface. The switch is mounted with the sensor probe extending
into the radiator or overflow tank at the minimum coolant level. The radiator or overflow tank requires a 1/4
NPT boss to mount the switch. Apply thread sealant before installing the switch, omit sealant on first full
thread. The switch is available in limited quantities through Cummins distributors.
Hardware - The switch is manufactured by Robert Shaw. The switch is an electronic switch which operates on
the capacitance sensing principle. The probe of the component detects a change in electrical capacitance
when the liquid displaces the air immediately surrounding the probe. The change is converted within the
component into the required logic. The sensor requires a +5V power supply for operation, which is available
from the ECM. The switch mates to a Packard Metri-Pack 150 series connector. A cable seal and secondary
lock are available and required.
Acceptable Coolant Level Switch
Acceptable Coolant Level Switch Part List
Item Manufacturer Manufacturer Part No. Cummins Part No.
Switch Robert Shaw 85927-C1 3612521
Connector & Seal Packard 1206 5298 3617139
Secondary Lock (TPA) Packard 1206 6176 3620902
Cable Seal (White) Packard 1208 9678
AEB 15.42
Page 19 of 44
RS232 In-Cab Connector
Application - This connector is a round 3-pin Deutsch connector. It uses Deutsch 1060-16-0122 terminal pins
that will accept 16-18 AWG wire.
RS232 Datalink 3-Pin Plug (CENSE only)
RS232 In-Cab Connector Part List
Item Manufacturer Manufacturer Part No. Cummins Part No.
Connector Deutsch HD10-3-96P 3657367
Terminal Deutsch 1060-16-0122
Cap Deutsch HDC16-3 3824851
AEB 15.42
Page 20 of 44
Section II: Lamps
Lamp Specification QSX/QSM QST30 QSB/C/9 QSK19 QSKV45/60 CENSE
Maximum current draw 600 mA@28V 600 mA@28V 600 mA@28V 600 mA@28V 600 mA@28V 600 mA@28V
Leakage current when lamp driver is off .51ma-.25ma .51ma-.25ma
Maximum voltage 32V 32V 32V 32V 32V 32V
Suggested Luminosity 2 CP 2 CP 2 CP 2 CP 2 CP 2 CP
Recommended Lamps
Maintenance X X
Engine Protection (EP) X X X X
Stop X X X X X X
Wait-to-Start X X X
Warning X X X X X X
Water-in-Fuel X
Supplier Information
Cutler - Hammer Products
Eaton Corporation
310 West Lake Street
Elmhurst, IL 60126
Use of LEDs is generally not recommended due to the leakage current. LEDs may be dimly lit instead of
completely off.
Water-in-Fuel (WIF) Lamp
The water-in-fuel lamp indicates there is water in the fuel. When the lamp is illuminated the vehicle
driver/operator should release the water from the fuel filter.
As an option the WIF lamp may be eliminated and the maintenance lamp can be used to provide the water-in-
fuel indication. This can be done by routing a wire from the ECM OEM connector WIF lamp signal in parallel
with the wire from the ECM OEM connector maintenance lamp signal. The WIF lamp should be installed on the
operator switch panel.
Maintenance Lamp
The Maintenance lamp indicates that routine engine maintenance should be performed. The Maintenance
lamp should be installed on the operator switch panel. The lamp is used by the following features.
• Maintenance Monitor
• Real Time Clock (RTC)
• Water-in-Fuel (WIF) optional
Stop Lamp
The Stop lamp provides critical operator messages. These messages require immediate and decisive operator
response. The Stop lamp is also used to flash out Diagnostics fault codes. Refer to AEB15.43 Diagnostics
Datalinks for description of the fault code flashout procedure. The lamp should be prominently installed on the
operator switch panel. This lamp is used by the following features:
• Diagnostic Fault Code Flashout
• Engine Protection
AEB 15.42
Page 21 of 44
Wait-to-Start Lamp
The Wait-to-Start lamp indicates that the pre-start intake manifold heater warm-up sequence is active. An
OEM-supplied grid heater will automatically heat the intake manifold when needed prior to engine starting.
Intake manifold heating improves engine starting in cold temperatures and reduces white smoke. The operator
should delay engine starting until after the lamp has extinguished. This lamp is used by the follow feature:
• Grid Heaters
Warning Lamp
The Warning lamp provides important operator messages. These messages require timely operator attention.
The Warning lamp is also used to delineate Diagnostics fault codes. Refer to AEB 15.43 Datalink and
Diagnostics for a description of the fault code flashout procedure. The lamp should be prominently installed on
the operator switch panel.
0
• Engine Protection for QSB, QSC, QSL9
Engine Protection Lamp
The engine protection lamp indicates that the engine protection feature has detected a fault. This lamp
requires immediate and decisive operator response. This lamp need to be installed in the operator switch
panel. This lamp is used by the following feature:
• Engine Protection
Switched Sink Driver Output Pinout Specifications
Applications
The Switched Sink Driver Output Pinout type sinks an OEM-supplied load, which are typically dashboard
lamps. The Pinout is connected to one side of the OEM load. A voltage source, typically Vbatt+, is connected
to the other side of the OEM load.
Operation
The Switched Sink Driver Output Pinout can exist in one of two states: Sink (low impedance) or Off (high
impedance). These states are dictated by a microprocessor-controlled FET switch.
• Sink State - Pinout Voltage can be measured at the pinout with respect to ECM ground. When the FET
switch is opened, Pinout Current is present through the pinout by way of the FET switch. Load Resistance
can be measured between the pinout and the OEM voltage source. The OEM load is on or energized.
• Off State - When the FET switch is closed, some leakage Pinout current is still present by way of the 47K
resistor. The OEM load is off or de-energized.
Switched Sink Driver Output Pinout Simplified Circuit
AEB 15.42
Page 22 of 44
Switched Sink Driver Output Pinout Specifications
Item Requirement
Number of States Two: SINK or OFF
Maximum Pinout Voltage 32V
Maximum Pinout Current (Non-Inductive Load) 600 mA
Minimum Load Resistance 20 Ω @ 12V, 40 Ω @ 24V
Maximum Peak Current (Non-Inductive Load) 6.0A @ 12V, 1 A @ 24V
Maximum Pinout Current (Inductive Load) 2.5 A @ 12V, 130 mH @ 24V
Maximum Load Induction 40 mH @ 12V, 130 mH @ 24V
AEB 15.42
Page 23 of 44
Section III: Relays
Low Idle Shutdown Relay
The Low Idle Shutdown relay removes power from high-current machine devices when the engine is shut down
by the Low Idle Shutdown feature. This feature shuts down the engine in the presence of excessive engine
idling with no operator interaction, in the effort to increase fuel economy. When shutdown occurs, battery drain
may occur because the engine is stopped but the keyswitch is on. To reduce battery drain, the Low Idle
Shutdown relay disconnects power from high-current devices such as the HVAC blower. The relay is usually
installed on the fuse panel.
The Low Idle Shutdown relay has two states, powered and shutdown. When the relay is in the powered
state, the engine is keyed off, running, or in any condition other than a shutdown condition initiated by the Low
Idle Shutdown feature. The relay is de-energized, high-current devices receive electrical power through
normally closed contacts of the relay. When the relay is in the shutdown state, the engine has been shut
down by the Low Idle Shutdown feature. The relay is energized, the high-current devices are unpowered. The
relay remains in this state until the keyswitch is turned off or the engine is cranked for restart.
Low Idle Shutdown Relay Diagram
Low Idle Shutdown Relay Specifications
Item Requirement
Relay Type 1 Form B or better
Minimum No. of Terminals Four: Terminals 1,2,3, and 4 (reference only)
Minimum No. of States Two: POWERED or SHUTDOWN
- Powered De-energized: Terminals 3-4 Closed
- Shutdown Energized: Terminals 3-4 Open
Nominal Coil Voltage 12 VDC/24 VDC
Maximum Coil Current 2 A
Minimum Coil Resistance 6 Ω @ 12V, 12 Ω @ 24V
Maximum Coil Induction 130 mH
Contact Rating OEM Responsibility
AEB 15.42
Page 24 of 44
Intake Air Heater Relay (Grid Heater)
Applications
The Air Heater relay controls operating power to an OEM-supplied grid heater. The grid heater heats the intake
manifold immediately before and after the engine is started, which improves cold engine starting and reduces
white smoke. The grid heater is automatically activated by the Intake Air heater feature when the engine is
cold. The Intake Air Heater relay is normally installed in the engine compartment.
The Intake Air Heater relay has two states, heat or off. Intake manifold heating will occur immediately before
and after engine start depending on a combination of intake manifold temperature and coolant temperature.
When intake manifold heating is required, the relay assumes heat. Operating power is applied to the grid
heater through normally open contacts of the relay. When intake manifold heating is no longer required, the
relay assumes off. Operating power is removed from the grid heater.
Intake Air Heater Relay Diagram
Intake Air Heater Relay Specifications
Item Requirement
Relay Type 1 Form A or better
Minimum No. of Terminals Four: Terminals 1,2,3, and 4 (reference only)
Minimum No. of States Two: HEAT or OFF
- HEAT Terminals 3-4 Closed
- OFF Terminals 3-4 Open
Nominal Coil Voltage 12 VDC/24 VDC
Maximum Coil Current 2 A
Minimum Coil Resistance 6 Ω @ 12V, 12 Ω @ 24V
Maximum Coil Induction 130 mH
Contact Rating OEM Responsibility
Item Manufacturer Manufacturer Part No. Cummins Part No.
12v Relay White-Roger 120-105111-5 3916301
24v Relay White-Roger 120-114751-5 3916302
24 VDC High Power Relay
AEB 15.42
Page 25 of 44
Power Relay VP44 - QSB
The VP44 Power Relay controls the power to the VP44 module. It is controlled by the Quantum control and the
control signal follows the key switch state. The VP44 Power Relay along with a 5 foot extension harness is
shipped with the engine. The OEM is responsible for choosing an appropriate location for the relay and
mounting it in the equipment. The relay can be mounted in any loacation where exposure to road splash is
absent and vibration is minimized. It should be mounted with the tab up (wires down) in a vertical orientation.
Power Relay
Item Requirement
Operate Voltage 3.0 - 7.2V
Coil Resistance 90 Ohms +/- 10%
Maximum Break Current 40A @ 14 VDC Resistive
Maximum Continuous Current 30 Amp max
Contact Material Silver Plated, over Nickel
AEB 15.42
Page 26 of 44
Switched Outputs Relay
The Switched Outputs feature can drive one or both relays, Switched Outputs Relay A and/or Switched Outputs
Relay B. Each relay may be used for any desired purpose, such as control of heaters, valves, etc. Solenoids
are also acceptable that meet the coil specifications shown below. Each relay may respond to trigger
parameters such as engine speed, engine torque, boost pressure, shaft speed, oil pressure, coolant
temperature, commanded throttle, ISC status. Refer to AEB 15.40 for all parameters. Each relay is configured
separately and operates independently.
Switched Outputs Relay A & B Diagram
Switched Outputs Relay A & B Specifications
Item Requirement
Relay Type 1 Form C or as required by application
Minimum No. of Terminals Five: Terminals 1,2,3,4, and 5 (reference only)
Minimum No. of States Two: ENERGIZED or DEENERGIZED
- DEENERGIZED Terminals 3-4 closed, Terminals 3-5 open
- ENGERIZED Terminals 3-4 open, Terminals 3-5 closed
Nominal Coil Voltage 12 VDC/24 VDC
Maximum Coil Current 2 A
Minimum Coil Resistance 6 Ω @ 12V, 12 Ω @ 24V
Maximum Coil Inductance 130 mH
Contact Rating OEM Responsibility
AEB 15.42
Page 27 of 44
Acceptable Relay
This relay is suitable for use as a Low Idle Shutdown relay, Switched Outputs Relay A, or Switched Outputs
Relay B. The relay can be mounted anywhere, engine compartment or in-cab mounting is preferred. There are
actually two visually identical relays which differ by solenoid voltage, 12V or 24V. Choose the relay that
corresponds to your machine system voltage. Both relays are available in limited quantities through Cummins
distributors.
It is a Form C relay rated at 30 amps continuous. It can operate at temperatures from -40 to +125
o
C and is
water-resistant. The 12V relay has a coil resistance of 90 ohms, the 24V relay has a coil resistance of 360
ohms. The relay will mate to any standard DIN base, it is shown mating a Packard bracket mount socket which
is supplied with a terminal retainer. This socket can be mounted individually on a single stud, or it can be
interlocked with other relays.
Acceptable Relay
Acceptable Relay Part List
Item Manufacturer Manufacturer Part No. Cummins Part No.
12V Relay Siemens VF28-65F14-Z03/S01 3658948
24V Relay Siemens VF28-65H14-Z03/S08 3658780
Base Packard 12110539
Terminal Packard 12129409
TPA Packard 12110540
Seal Packard 1215323
AEB 15.42
Page 28 of 44
Section IV: Switches
Switch Conventions
Introduction
This document has standardized the manner in which switches are defined in order to promote maximum
comprehension of the switch requirements. There are two features of every switch, configuration and
characteristics. Each feature may be described for a switch using words or symbols. This document uses both
methods.
Switch Configuration
A switch configuration is the number of poles and the number of throws. Poles are the number of electrically
independent switch contacts that are simultaneously switched. Throws are the number of switch positions that
result in a switch contact.
• Descriptions - When defining switch configuration by words, the number of poles are indicated by prefix (S
for single, D for double, 3,5,etc.) followed by the letter P. The number of throws is indicated by the same
prefixes, followed by the letter T. For example, a single-pole, double-throw switch is written as SPDT.
• Symbols - When defining switch configuration using a picture, the number of poles are indicated by the
number of switch wipers connected by a dashed line. The number of throws are typically indicated by the
number of terminals (numbered open circles) to which a wiper connects.
Switch Diagram Legend
Switch Characteristics
A switch characteristic is the contact and action at each switch position. Contact is whether the switch position
makes or breaks an electrical connection at that position. Action is whether the switch position is momentary or
latched.
• Descriptions - When defining switch characteristics by words, contact is indicated by an on or an off
which is supplied for each switch position. Momentary action is indicated by parenthesis around (on) or
(off); latched action is indicated by an absence of parenthesis
• Symbols - When defining switch characteristics by pictures, contact is indicated if a terminal (numbered
open circle) is present at that switch position. Momentary action is indicated by a filled triangle at that
switch position; latched action is indicated by a filled circle at that switch position.
AEB 15.42
Page 29 of 44
Alternate Droop Switch
Application
The Alternate Droop switch selects different droop characteristics for the High Idle Governor feature or the All
Speed Governor (ASG) feature or both. This is desirable when the machine is transitioning to a different mode
of operation, for example from loading to hauling. The transition may be performed by any dedicated switch
contacts, including a relay or a manual operator switch. Installation depends on the type of switch that is used..
Alternate Droop Switch Diagram
Alternate Droop Switch Specifications
Item Requirement
Switch Type SPST Contacts
Minimum No. of Terminals Two: Terminal 1 and Terminal 2 (reference only)
Minimum No. of States Two: BASE DROOP and ALTERNATE DROOP
- BASE DROOP Terminals 1-2 Open
- ALTERNATE DROOP Terminals 1-2 Closed
Contact Resistance (Closed) < 10 Ohm
Contact Resistance (Open > 50 KOhm
Nominal Current 10 mA
Contact Material Gold Flash
AEB 15.42
Page 30 of 44
Alternate Low Idle Switch
Application
The Alternate Low Idle switch selects a different low idle engine speed. A higher low idle engine speed is
useful for warming up the engine, or when an application operates the engine on low idle governor. The
alternate low idle engine speed may be selected by any dedicated switch contacts, including a relay or a
manual operator switch. Installation depends on the type of switch that is used.
Operation
The Alternate low Idle switch has two positions, base low idle or alternate low idle. The switch operates in
the Normal or Transition mode depending on an optional customer selection.
• Normal Mode - When the switch is in the base low idle position, the engine's low idle speed is defined by
the Low Idle Governor feature. When the switch is in the alternate low idle position, engine low idle speed
is instead defined by the Switchable Low Idle feature.
• Transition Mode - This mode requires a switch transition from base low idle to alternate low idle
subsequent to key-on to select the alternate low idle. Until this transition has occurred, or when the switch
is in the Base Low Idle position, engine low idle speed is defined by the Low Idle Governor feature. If the
transition has occurred and the switch is in the alternate low idle position, engine low idle speed is instead
defined by the Switchable Low Idle feature.
Alternate Low Idle Switch Diagram
Alternate Low Idle Switch Specifications
Item Requirement
Switch Type SPST Contacts
Minimum No. of Terminals Two: Terminal 1 and Terminal 2 (reference only)
Minimum No. of States Two: BASE LOW IDLE and ALTERNATE LOW IDLE
- BASE LOW IDLE Terminals 1-2 Open
- ALTERNATE LOW IDLE Terminals 1-2 Closed
Contact Resistance (Closed) < 10 Ohm
Contact Resistance (Open > 50 KOhm
Nominal Current 10 mA
Contact Material Gold Flash
AEB 15.42
Page 31 of 44
Alternate Torque Switch
Applications
The Alternate Torque switch toggles between the normal 100% curve and up to two alternate torque curves. A
different torque curve results in an engine with different HP ratings. Different horsepower ratings are desirable
when the same engine is used for dual modes of operation, for example hauling vs. loading. A torque curve
may be selected by any dedicated switch contacts, including a relay or a manual operator switch. Installation
depends on the type of switch that is used.
Operation without Boost Power
The following operational description applies when the Automatic Boost Power feature is not enabled. The
Alternate Torque switch has two or three switch positions (see switch diagram). When the switch is in the Low
position, a lower calibratible torque curve is used. Engine torque is limited to the lower curve. The ECM may
be calibrated for either a Normal or Failsafe configuration of the switch.
Alternate Torque Switch Diagram
Figure 1-5 Switches Configuration
Alternate Torque Switch Specifications
Item Requirement
Configuration Type Normal Failsafe
Switch Type SPST Contacts SPST Contacts
Minimum No. of Terminals Two: Terminal 1 and 2 (ref only) Two: Terminal A and B (ref only)
Minimum No. of States Two: HIGH or LOW Two: HIGH or LOW
- HIGH Terminal 1-2 Open Terminal A_B Closed
- LOW Terminals 1-2 Closed Terminals A-B Open
Contact Resistance (Closed) < 10 Ohm
Contact Resistance (Open > 50 KOhm
Nominal Current 10 mA
Contact Material Gold Flash
Open
2
1
1: Normal 100% curve
2: Alternate torque curve
Open
resistive 3
2
1
1: Normal 100% curve
2: Alternate torque curve 2
3: Alternate torque curve 1
a) Two-Position Switch
b) Three-Position Switch
1.5K 1%
1/8 watt
ground
AEB 15.42
Page 32 of 44
AXG On/Off Switch
Application
The AXG On/Off switch selects operation of the Auxiliary Speed Governor (AXG), AXG is an auxiliary fueling
governor that varies engine torque in an attempt to control either shaft speed or an application-specific
pressure, depending upon the engine configuration.
The AXG On/Off switch has two positions, on or off. When the switch is in the off position, the engine fueling
is not controlled by the AXG. When the switch is in the on position and there are no AXG faults, engine fueling
is controlled by the AXG, permitting shaft speed control or pressure control from a commanded throttle input.
AXG on/off Switch Diagram
Alternate Low Idle Switch Specifications
Item Requirement
Switch Type SPST on-off Toggle
Minimum No. of Terminals Two: Terminal 1 and Terminal 2 (reference only)
Minimum No. of States Two: OFF or ON
- OFF Terminals 1-2 Open
- ON Terminals 1-2 Closed
Contact Resistance (Closed) < 10 Ohm
Contact Resistance (Open > 50 KOhm
Nominal Current 10 mA
Contact Material Gold Flash
AEB 15.42
Page 33 of 44
Air Conditioner Pressure Switch
Applications
The Air Conditioner Pressure switch detects air condition refrigerant pressure relative to two pressure
thresholds defined by the switch. It generates a control signal for the Electronic Fan Clutch feature which in
turn operates an air conditioning condenser fan. This switch is inserted into the high-pressure side of the air
conditioner refrigerant system. A hysteresis of 2-4 PSI is recommended between the two pressure thresholds
to prevent an excessive number of fan clutch state transitions.
The Air Condition Pressure switch has two positions, pressure high or pressure not high, and two thresholds,
upper and lower. On rising refrigerant pressure, the switch will transition to the Pressure High position when
pressure exceed the upper threshold. In this position, On/Off fan will operate at its characteristic RPM, a
Variable-Speed fan will operate at selectable rpm. On falling refrigerant pressure, the switch will transition to
the pressure not high position when pressure falls below the lower threshold. In this switch position, the fan
does not operate due to refrigerant pressure. However, the fan may still run in response to some other need
such as high coolant temperature.
Air Conditioner Pressure Switch Diagram
Air Conditioner Pressure Switch Specifications
Item Requirement
Switch Type SPST (On)-Off Activated
Minimum No. of Terminals Two: Terminal 1 and Terminal 2 (reference only)
Minimum No. of States Two: PRESSURE NOT HIGH or PRESSURE HIGH
- PRESSURE NOT HIGH Latched Action: Terminals 1-2 Closed
- PRESSURE HIGH Momentary Action: Terminals 1-2 Open
Contact Resistance (Closed) < 10 Ohm
Contact Resistance (Open) > 50 KOhm
Nominal Current 10 mA
Contact Material Gold Flash
AEB 15.42
Page 34 of 44
Pressure Switches: Brake Switch
Description
This normally closed sing pole, single throw (SPST) plunger design limit switch is rated for one million switch
cycles. It has an actuation force of 4.17 N [0.937 lbf] (15 ounces) and the total plunger movement is 4.928 mm
[0.1938 in]. The recommended switch actuation is 3.175 mm [0.1249 in] to avoid undesirable bottoming out.
An elastomeric sealing boot keeps harsh abrasive from damaging the plunger body and guide. Gold contacts
make the switch reliable for low voltage and current switching.
Application
The signal from the brake pressure is used to disable cruise control and ISC operations. It is mounted directly,
or with a T-fitting, into the low pressure control side of the truck's pneumatic brake system. When the brake
pedal is actuated or the trailer brake is applied, the pneumatic pressure rises from 0 psig to 90 psig. An open
circuit to the control module, whether by this switch or a wiring circuit failure, will disable the cruise control
function. This switch is qualified for under-the-dashboard mounting only. A molded rubber boot is
recommended for use with the mating connector.
Pressure Switch
Item Requirement
Contact Regulator 10mA through contacts; 2A max
Prime Accuracy +/- 2psig
Switch Threshold 4 psig
Proof Pressure 150 psig
AEB 15.42
Page 35 of 44
Switches and Switch Assemblies: Rotary Clutch Switch Assembly
Description
The Clutch Switch Assembly is comprised of a rotary switch, lever and rod assembly and a switch bracket. The
rotary switch is a normally closed single pole, single throw switch that is designed to exceed one million switch
cycles. Gold contacts make it reliable for low voltage and current switching. The shaft is 7.87 millimeters
[0.309 in] in diameter. At the open position, actuation torque is 1.34 N-m [0.988 ft-lbf] (190 inch-ounces). Total
mechanical travel is 40 degrees of maximum rotation with 35 degrees of maximum pretravel and 3 degrees of
differential travel. The ruggedness of this switch allows it to be used in high vibration environments.
Application
The device can be mounted either in the cab or under the cab. The rod is cut or bent to fit the top or front side
of the clutch arm so that the clutch rest position has the switch in the closed-circuit mode. As the clutch pedal
is depressed, the linkage arm will move and the spring preload in the switch will cause the rod to follow and
open the switch circuit. When mounted under the cab, a shield should be added to prevent direct road splash
on the rotary shaft area.
Switch and Switch Assembly
Item Requirement
Current Rating 10 mA +/- @ 5V +/- 0.25
Voltage Maximum 16V
Contact Material Gold-Plated
AEB 15.42
Page 36 of 44
Switches and Switch Assemblies: Optional Clutch Brake Switch
Description
This normally closed single pole, single throw (SPST) plunger design limit switch is rated for one million switch
cycles. It has an actuation force of 4.17 N [0.937 lbf[ (15 ounces) and the total plunger movement is 4.928 mm
[0/1938 in]. The recommended switch actuation is 3.176 mm [0.1249 in] to avoid undesirable bottoming out.
An elastomeric sealing boot keeps harsh abrasives from damaging the plunger body and guide. Gold contacts
make the switch reliable for low voltage and current switching.
Application
The limit switch may be closed as an optional clutch switch instead of the rotary clutch switch assembly. It is
mounted on the bell housing of the transmission and is operated by an actuating bracket attached to the bell
crank. The slim packaging of this harsh environment plunger switch allows it to be easily mounted for limited
switch application. Two mounting holes 5.08 mm [0.199 in] in diameter accommodate number 10 capscrews
for bracket compatibility. The actuators that impinge on the plunger should be adjusted to the specified range
of the switch.
Optional Clutch Switch
Item Requirement
Current Rating 10 mA +/- @ 5V +/- 0.25
Output Inductive load of 2.7 ohms @ 50 mH
Voltage 16 Vdc maximum
Supply Voltage 5V
Contact Material Gold-Plated
AEB 15.42
Page 37 of 44
SECTION V: SENSORS
Vehicle Speed Sensor (Variable Reluctance Magnetic Pickup)
Application - This sensor is mounted through the transmission case and senses passing teeth from a 16-tooth
or optional 11-tooth gear. Each revolution of the gear produces 16 or 11 cycles of quasi-sinusoidal voltage.
The sensor responds down to 1 mph which is 31 rpm of the 16-tooth speedometer gear shown in the
accompanying illustration. At the time of installation, the sensor is to be hand turned until it touches the target,
then backed off one-half turn and the jam nut tightened. The sensor is polarity sensitive and a sharp positive-
to-negative transition is accomplished by using the white lead wire as the positive reference and the black wire
as the negative reference. It can also be used as a dual output engine speed sensor, mounted through the ring
gear housing to sense ring gear teeth.
Hardware - This sensor is a single pole piece, dual output variable reluctance magnetic pickup in which each
output is physically isolated from the other. The output swings positive when the target approaches, passes
through zero when the target and pole piece are coincident, and then swings negative when the target leaves.
Voltage amplitude is a function of gap, target size and angular velocity.
Magnetic Pickup Sensor
Magnetic Pickup Sensor Part List
Item Manufacturer Manufacturer Part No. Cummins Part No.
Shrouds Packard 12010973
Terminals Packard 12089040
Seals Packard 12015323
AEB 15.42
Page 38 of 44
Water-in-Fuel Sensor and Drain Unit (For Spin-on FWS)
Application - The WIF sensor drain unit is designed to be installed at the bottom of the spin-on fuel water
separator (FWS). This fuel water separator is designed for the QSB, QSC & QSL9 engines. The 1.25-10uns -
2A threads are required in the filter shell to accept the unit.
Hardware - The design includes a water drain unit, WIF sensor, harness, and Packard connector. This water
in fuel sensor is a double pin injection molded part. The pins are injection molded and sealed from possible
fuel leakage. The drain valve is a push-up type of water drain valve. The assembly has a 0-ring in the
threaded area for an installation seal between the WIF sensor and the filter shell nut. The Packard connector is
a type of weather tight sealed connector.
Water-in-Fuel Sensor (Spin-on)
Water-in-Fuel Sensor Part List
Item Manufacturer Manufacturer Part No. Cummins Part No.
Connector Packard 12066016
Mating Connector Packard 12040753
AEB 15.42
Page 39 of 44
ANALOG SENSORS
OEM Pressure Sensor
Application -The OEM Pressure sensor may be used to detect the pressure of any desired liquid or gas. OEM
pressure can be used to switch any device on or off, to initiate an engine shutdown, or to control a fan. OEM
Pressure can be governed to a reference pressure in order to drive air- or hydraulically-powered equipment.
Any or all applications can be met at once. Installation varies according to application.
Operation - The OEM Pressure sensor converts detected pressure into a DC voltage. This voltage is detected
by the ECM and converted into OEM pressure using a calculation that performs a linear interpolation between
two breakpoints. OEM pressure may be used by any or all of the following features:
• Auxiliary Governor - This feature converts throttle input into a reference OEM pressure. Then using a
feedback loop, engine torque is varied as required to maintain this OEM pressure. Depending on the
application, OEM pressure can be maintained at a pre-selected value, or continuously variable OEM
pressure control is possible.
• Electronic Fan Clutch - If the fan type is Variable-Speed, OEM pressure is applied to a calibration table to
generate a characteristic PWM frequency. The fan will operate at the minimum fan speed corresponding to
the characteristic PWM frequency. If the fan type is On/Off, the fan will turn on or off when OEM pressure
transitions through a pressure threshold.
• Switched Outputs - OEM pressure is one of several trigger parameters for three options: Relay A, Relay
B, and Engine Shutdown. Each option has one or more associated pressure thresholds. Depending on
OEM pressure value relative to these thresholds, the OEM pressure trigger parameter is either ACTIVE or
INACTIVE for each option. When the desired combination of trigger parameters is ACTIVE for the Relay A
option, that relay energizes or de-energizes. When the desired combination of trigger parameters is
ACTIVE for the Relay B option, that relay energizes or de-energizes. When the desired combination of
trigger parameters is ACTIVE for the Engine Shutdown option, an engine shutdown is initiated.
Increasing Pressure
OEM Pressure Sensor Diagram
OEM Pressure Sensor Specifications
Item Requirement
Sensor Type Ratiometric Pressure
Minimum No. of Terminals Three: Supply (+), Return, and Pressure
Default Pressure Range 0-350 PSI
Supply Voltage 5V + 5%
Maximum Supply Current 50 mA
Output Voltage Range 0.5-4.5 V
Default Output Voltage @ Pressure [(4xPSI)/350] + 0.5 V
Maximum Output Current 100 µA
SUPPLY (+)
RETURN
PRESSURE
AEB 15.42
Page 40 of 44
Acceptable OEM Pressure Sensor
Application – This sensor is suitable for use as an OEM pressure sensor when the default calibration is used.
Its pressure vs. voltage curve is compatible with the baseline CM570 calibration for the OEM pressure sensor.
This sensor is especially suited to detect hydraulic fluid pressure, compressed air pressure, and fuel pressure.
The sensor cannot be used to detect coolant pressure. The sensor has been exhaustively qualified by
Cummins, resulting in a highly accurate, highly reliable, low cost component. The sensor is available in limited
quantities through Cummins distributors.
Hardware – This sensor is a Kavlico P165 series. It is a 0-350 PSIA sensor with a brass housing and a
fluorocarbon o-ring. It can operate at temperatures from –40 to +125
o
C. Its output voltage is accurate to +4%
(160 mV) over its entire temperature and pressure range. However, in the critical 200-300 PSIA pressure
range and 26 to 85
o
C temperature range, accuracy is +0.5% (20 mV). The sensor mates to a Packard Metri-
Pack 150 series connector. A connector boot is available and recommended for external applications.
Acceptable OEM Pressure Sensor
Acceptable OEM Pressure Sensor Part List
Item Manufacturer Manufacturer Part No. Cummins Part No.
Sensor Only Kavlico P165-5383 3330999
Sensor + O-Ring Cummins 3330998 3330998
Mating Connector Packard 12162280 3657184
Connector Socket Packard 12124075
Connector Boot Ell-Tron 3656059 3656059
AEB 15.42
Page 41 of 44
OEM Temperature Sensor Specifications
Application – The OEM temperature sensor may be used to detect the temperature of any desired liquid or
gas. The detected temperature can be used to switch any device on or off, to initiate an engine shutdown, or to
control a fan. Any or all applications can be met at once. Installation varies according to application.
Operation – The OEM temperature sensor converts detected temperature into a resistance. This resistance is
detected by ECM and converted into OEM temperature using a table with 20 breakpoints. OEM temperature
may be used by either or both of the following features.
a. Electronic Fan Clutch – If the fan type is variable-speed, OEM temperature is applied to a calibration
table to generate a characteristic PWM frequency. The fan will operate at the minimum fan speed
corresponding to the characteristic PWM frequency. If the fan type is on/off, the fan will turn on or off
when OEM temperature transitions through a temperature threshold.
b. Switched Outputs – OEM temperature is one of several trigger parameters for three options: Relay A,
Relay B, and Engine Shutdown. Each option has one or more associated temperature thresholds.
Depending on OEM temperature relative to these thresholds, the OEM temperature trigger parameter
is either ACTIVE or INACTIVE for each option. When the desired combination of trigger parameters is
ACTIVE for the Relay A option, that relay energizes or deenergizes. When the desired combination of
trigger parameters is ACTIVE for Relay B option, that relay energizes or deenergizes. When the
desired combination of trigger parameters is ACTIVE for the engine Shutdown option and Engine
Shutdown is initiated.
OEM Temperature Sensor Specifications
Item Requirement
Sensor Type Resistive Temperature
Minimum No. of Terminals Two: Return and Temperature
Default Temperature Range -15 to + 150
o
C (5 to 302
o
F)
Output Voltage Range 0.28-4.82 V
Default Resistance @ Temperature Refer to OEM Temperature Sensor Baseline Calibration table
Maximum Output Current 1.7 mA
AEB 15.42
Page 42 of 44
OEM Temperature Sensor Baseline Calibration
BP Counts Deg. F Volts K Ohms Deg. C
0 58 302 .28 .17 150
1 74 282 .36 .22 139
2 96 262 .47 .30 128
3 109 252 .53 .34 122
4 125 242 .61 .40 117
5 143 232 .70 .47 111
6 161 223 .79 .54 106
7 185 213 .90 .63 101
8 211 203 1.03 .74 95
9 242 193 1.18 .89 89
10 276 183 1.35 1.06 84
11 357 163 1.74 1.53 73
12 453 143 2.21 2.27 62
13 554 124 2.71 3.40 51
14 663 104 3.24 5.28 40
15 765 84 3.74 8.52 29
16 850 64 4.15 14.01 18
17 915 44 4.47 24.20 7
18 958 25 4.68 41.97 -1
19 987 5 4.82 76.85 -15
AEB 15.42
Page 43 of 44
Acceptable OEM Temperature Sensor
Application – There are four Cummins-qualified sensors suitable for use as an OEM Temperature sensor.
Their temperatures vs. resistance curves are compatible with the baseline CM570 calibration for the OEM
Temperature sensor. The sensors are listed in the Acceptable OEM Temperature Sensor Application table.
The variations among these sensors ensure that one of these sensors should be capable of detecting the
temperature of almost any type of gas or liquid in an internal or external environment. The sensors cannot be
used to detect coolant temperature. The sensors are available in limited quantities through Cummins
distributors.
Acceptable OEM Temperature Sensor Application
# Assembly Hardware Medium Environment Probe Style
1 3865312 English Gas or Liquid External Unvented
2 3865346 English Gas Internal Vented
3 3085185 Metric Gas or Liquid External Unvented
4 3408345 Metric Gas Internal Vented
Hardware – All sensors are manufactured by Hi-Stat. They are –40 to +150
o
C sensors with a fluorocarbon o-
ring. They can operate at pressures as high as 350 PSIB. Their resistance is highly accurate in the critical
upper temperature ranges: +1.65% from 100 to 145
o
C, +2.1% from 85 to 100
o
C. The sensors mate to a
Packard Metri-Pack 150 series connector. A connector boot is available and recommended for external
applications. Dimensions are identical for every sensor except as noted in the Acceptable OEM Temperature
Sensor Dimensions table.
Acceptable OEM Temperature Sensor
AEB 15.42
Page 44 of 44
Acceptable OEM Temperature Sensors
Acceptable OEM Temperature Sensor Part List
Item Manufacturer Manufacturer Part No. Cummins Part No.
Sensor 1 Only Hi-Stat 8316-202 3865323
Sensor 1 + O-Ring Cummins 3865312 3865312
Sensor 2 Only Hi-Stat 8416-206 3096153
Sensor 2 + O-Ring Cummins 3865346 3865346
Sensor 3 Only Hi-Stat 8316-201 3085198
Sensor 3 + O-Ring Cummins 3085185 3085185
Sensor 4 Only Hi-Stat 8416-211 3408346
Sensor 4 + O-Ring Cummins 3408345 3408345
Mating Connector Packard 1216 2193 3657186
Connector Socket Packard 1212 4076
Connector Boot Ell-Tron 3656057 3656057
Acceptable OEM Temperature Sensor Dimensions
# Assembly
Part Number
Integral Hex
Across Flats
Thread
Size
1 3865312 13/16 in. 9/16-18 UNF-2A
2 3865346 13/16 in. 9/16-18 UNF-2A
3 3085185 21 mm M14 X 1.5-6H
4 3408345 21 mm M14 X 1.5-6H

Más contenido relacionado

La actualidad más candente

PERKINS 2200 SERIES 2206D-E13TA INDUSTRIAL ENGINE Service Repair Manual
PERKINS 2200 SERIES 2206D-E13TA INDUSTRIAL ENGINE Service Repair ManualPERKINS 2200 SERIES 2206D-E13TA INDUSTRIAL ENGINE Service Repair Manual
PERKINS 2200 SERIES 2206D-E13TA INDUSTRIAL ENGINE Service Repair Manualjsnekmse
 
Sistema de combustível PDE e S6 Motor scania
Sistema de combustível PDE e S6 Motor scaniaSistema de combustível PDE e S6 Motor scania
Sistema de combustível PDE e S6 Motor scaniaLuiz Antonio da Silva
 
17071 02 b13 r d13c chn 125761-132856
17071 02 b13 r d13c chn 125761-13285617071 02 b13 r d13c chn 125761-132856
17071 02 b13 r d13c chn 125761-132856marco
 
Codigos de falhas volvo fh12 d12 a
Codigos de falhas volvo fh12 d12 aCodigos de falhas volvo fh12 d12 a
Codigos de falhas volvo fh12 d12 aEdivaldo Veronese
 
Componentes Elétricos Motor Scania
Componentes Elétricos Motor Scania Componentes Elétricos Motor Scania
Componentes Elétricos Motor Scania Luiz Antonio da Silva
 
PERKINS 2200 SERIES 2206D-E13TA INDUSTRIAL ENGINE Service Repair Manual
PERKINS 2200 SERIES 2206D-E13TA INDUSTRIAL ENGINE Service Repair ManualPERKINS 2200 SERIES 2206D-E13TA INDUSTRIAL ENGINE Service Repair Manual
PERKINS 2200 SERIES 2206D-E13TA INDUSTRIAL ENGINE Service Repair Manualhfjskefmmmse
 
Cajas de cambios manuales vt2214 b vt2514b y vt2814b
Cajas de cambios manuales vt2214 b vt2514b y vt2814bCajas de cambios manuales vt2214 b vt2514b y vt2814b
Cajas de cambios manuales vt2214 b vt2514b y vt2814bjjhernandezch
 
2006 Toyota Hiace OEm Electrical Wiring Diagrams
2006 Toyota Hiace OEm Electrical Wiring Diagrams2006 Toyota Hiace OEm Electrical Wiring Diagrams
2006 Toyota Hiace OEm Electrical Wiring DiagramsDardoorASM
 
204406142 sistema-electrico-p-r-y-t
204406142 sistema-electrico-p-r-y-t204406142 sistema-electrico-p-r-y-t
204406142 sistema-electrico-p-r-y-tandre1765
 
Manual de servicio toyota / KIJYANG INNOVA / ONNOVA 1KD/2KD
Manual de servicio toyota / KIJYANG INNOVA / ONNOVA 1KD/2KDManual de servicio toyota / KIJYANG INNOVA / ONNOVA 1KD/2KD
Manual de servicio toyota / KIJYANG INNOVA / ONNOVA 1KD/2KDJordan Felipe Cabrera Nuñez
 
Perkins 2500 series 2506 15 industrial engine (mga ) service repair manual
Perkins 2500 series 2506 15 industrial engine (mga ) service repair manualPerkins 2500 series 2506 15 industrial engine (mga ) service repair manual
Perkins 2500 series 2506 15 industrial engine (mga ) service repair manualjkmsedopl
 
Anti bloqueo (abs) para camiones, tractores y autobuses
Anti bloqueo (abs) para camiones, tractores y autobusesAnti bloqueo (abs) para camiones, tractores y autobuses
Anti bloqueo (abs) para camiones, tractores y autobusesJuan Carlos Jimenez Perez
 
Allison 4500 Rds Service Manual
Allison 4500 Rds Service ManualAllison 4500 Rds Service Manual
Allison 4500 Rds Service ManualFranklin Martinez
 
Manual actros mpii
Manual actros mpiiManual actros mpii
Manual actros mpiiJose Delgado
 

La actualidad más candente (20)

volvo wiring diagram vm
volvo wiring diagram vmvolvo wiring diagram vm
volvo wiring diagram vm
 
Manual volvo
Manual volvoManual volvo
Manual volvo
 
PERKINS 2200 SERIES 2206D-E13TA INDUSTRIAL ENGINE Service Repair Manual
PERKINS 2200 SERIES 2206D-E13TA INDUSTRIAL ENGINE Service Repair ManualPERKINS 2200 SERIES 2206D-E13TA INDUSTRIAL ENGINE Service Repair Manual
PERKINS 2200 SERIES 2206D-E13TA INDUSTRIAL ENGINE Service Repair Manual
 
Sistema de combustível PDE e S6 Motor scania
Sistema de combustível PDE e S6 Motor scaniaSistema de combustível PDE e S6 Motor scania
Sistema de combustível PDE e S6 Motor scania
 
Motor Scania Dc 12
Motor Scania Dc 12 Motor Scania Dc 12
Motor Scania Dc 12
 
wiring diagram fh 4
wiring diagram fh 4wiring diagram fh 4
wiring diagram fh 4
 
17071 02 b13 r d13c chn 125761-132856
17071 02 b13 r d13c chn 125761-13285617071 02 b13 r d13c chn 125761-132856
17071 02 b13 r d13c chn 125761-132856
 
Manual Volvo
Manual VolvoManual Volvo
Manual Volvo
 
Codigos de falhas volvo fh12 d12 a
Codigos de falhas volvo fh12 d12 aCodigos de falhas volvo fh12 d12 a
Codigos de falhas volvo fh12 d12 a
 
Componentes Elétricos Motor Scania
Componentes Elétricos Motor Scania Componentes Elétricos Motor Scania
Componentes Elétricos Motor Scania
 
PERKINS 2200 SERIES 2206D-E13TA INDUSTRIAL ENGINE Service Repair Manual
PERKINS 2200 SERIES 2206D-E13TA INDUSTRIAL ENGINE Service Repair ManualPERKINS 2200 SERIES 2206D-E13TA INDUSTRIAL ENGINE Service Repair Manual
PERKINS 2200 SERIES 2206D-E13TA INDUSTRIAL ENGINE Service Repair Manual
 
Cajas de cambios manuales vt2214 b vt2514b y vt2814b
Cajas de cambios manuales vt2214 b vt2514b y vt2814bCajas de cambios manuales vt2214 b vt2514b y vt2814b
Cajas de cambios manuales vt2214 b vt2514b y vt2814b
 
2006 Toyota Hiace OEm Electrical Wiring Diagrams
2006 Toyota Hiace OEm Electrical Wiring Diagrams2006 Toyota Hiace OEm Electrical Wiring Diagrams
2006 Toyota Hiace OEm Electrical Wiring Diagrams
 
204406142 sistema-electrico-p-r-y-t
204406142 sistema-electrico-p-r-y-t204406142 sistema-electrico-p-r-y-t
204406142 sistema-electrico-p-r-y-t
 
Manual de servicio toyota / KIJYANG INNOVA / ONNOVA 1KD/2KD
Manual de servicio toyota / KIJYANG INNOVA / ONNOVA 1KD/2KDManual de servicio toyota / KIJYANG INNOVA / ONNOVA 1KD/2KD
Manual de servicio toyota / KIJYANG INNOVA / ONNOVA 1KD/2KD
 
Sistema elétrico constelation
Sistema elétrico constelationSistema elétrico constelation
Sistema elétrico constelation
 
Perkins 2500 series 2506 15 industrial engine (mga ) service repair manual
Perkins 2500 series 2506 15 industrial engine (mga ) service repair manualPerkins 2500 series 2506 15 industrial engine (mga ) service repair manual
Perkins 2500 series 2506 15 industrial engine (mga ) service repair manual
 
Anti bloqueo (abs) para camiones, tractores y autobuses
Anti bloqueo (abs) para camiones, tractores y autobusesAnti bloqueo (abs) para camiones, tractores y autobuses
Anti bloqueo (abs) para camiones, tractores y autobuses
 
Allison 4500 Rds Service Manual
Allison 4500 Rds Service ManualAllison 4500 Rds Service Manual
Allison 4500 Rds Service Manual
 
Manual actros mpii
Manual actros mpiiManual actros mpii
Manual actros mpii
 

Destacado

u7ygiuk54472306 diagrama-electronico-isx
u7ygiuk54472306 diagrama-electronico-isxu7ygiuk54472306 diagrama-electronico-isx
u7ygiuk54472306 diagrama-electronico-isxYonatan Romero
 
Cummins engine 4 bt3.9 automotive manual parts catalog
Cummins engine 4 bt3.9 automotive manual parts catalogCummins engine 4 bt3.9 automotive manual parts catalog
Cummins engine 4 bt3.9 automotive manual parts catalogPartCatalogs Net
 
Esquemas-de-Instalaciones-Eléctricas
Esquemas-de-Instalaciones-EléctricasEsquemas-de-Instalaciones-Eléctricas
Esquemas-de-Instalaciones-EléctricasArmando Aguilar
 
Guia Identificacion de Riel Comun Motor ISB215
Guia Identificacion de Riel Comun Motor ISB215Guia Identificacion de Riel Comun Motor ISB215
Guia Identificacion de Riel Comun Motor ISB215Beyker Cervantes Rosellon
 
PASSAT B5 3B6 CONVENIENCE WIRING DIAGRAM
PASSAT B5 3B6 CONVENIENCE WIRING DIAGRAMPASSAT B5 3B6 CONVENIENCE WIRING DIAGRAM
PASSAT B5 3B6 CONVENIENCE WIRING DIAGRAMvwmaster
 
101856639 apresentacao-sistema-eletrico-pc-2000
101856639 apresentacao-sistema-eletrico-pc-2000101856639 apresentacao-sistema-eletrico-pc-2000
101856639 apresentacao-sistema-eletrico-pc-2000paulo cesar
 
Manual de Serviço
Manual de ServiçoManual de Serviço
Manual de Serviçocerjs
 
Constellation com motor 9.3 mwm
Constellation com motor 9.3 mwmConstellation com motor 9.3 mwm
Constellation com motor 9.3 mwmJunior Iung
 
manuais serviço caminhões VW
manuais serviço caminhões VWmanuais serviço caminhões VW
manuais serviço caminhões VWMauro Reis
 
A Guide to SlideShare Analytics - Excerpts from Hubspot's Step by Step Guide ...
A Guide to SlideShare Analytics - Excerpts from Hubspot's Step by Step Guide ...A Guide to SlideShare Analytics - Excerpts from Hubspot's Step by Step Guide ...
A Guide to SlideShare Analytics - Excerpts from Hubspot's Step by Step Guide ...SlideShare
 

Destacado (13)

Diagrama cummins
Diagrama cumminsDiagrama cummins
Diagrama cummins
 
Pcc 3.3
Pcc 3.3Pcc 3.3
Pcc 3.3
 
u7ygiuk54472306 diagrama-electronico-isx
u7ygiuk54472306 diagrama-electronico-isxu7ygiuk54472306 diagrama-electronico-isx
u7ygiuk54472306 diagrama-electronico-isx
 
Cummins engine 4 bt3.9 automotive manual parts catalog
Cummins engine 4 bt3.9 automotive manual parts catalogCummins engine 4 bt3.9 automotive manual parts catalog
Cummins engine 4 bt3.9 automotive manual parts catalog
 
Esquemas-de-Instalaciones-Eléctricas
Esquemas-de-Instalaciones-EléctricasEsquemas-de-Instalaciones-Eléctricas
Esquemas-de-Instalaciones-Eléctricas
 
Guia Identificacion de Riel Comun Motor ISB215
Guia Identificacion de Riel Comun Motor ISB215Guia Identificacion de Riel Comun Motor ISB215
Guia Identificacion de Riel Comun Motor ISB215
 
Kenr6200 01
Kenr6200 01Kenr6200 01
Kenr6200 01
 
PASSAT B5 3B6 CONVENIENCE WIRING DIAGRAM
PASSAT B5 3B6 CONVENIENCE WIRING DIAGRAMPASSAT B5 3B6 CONVENIENCE WIRING DIAGRAM
PASSAT B5 3B6 CONVENIENCE WIRING DIAGRAM
 
101856639 apresentacao-sistema-eletrico-pc-2000
101856639 apresentacao-sistema-eletrico-pc-2000101856639 apresentacao-sistema-eletrico-pc-2000
101856639 apresentacao-sistema-eletrico-pc-2000
 
Manual de Serviço
Manual de ServiçoManual de Serviço
Manual de Serviço
 
Constellation com motor 9.3 mwm
Constellation com motor 9.3 mwmConstellation com motor 9.3 mwm
Constellation com motor 9.3 mwm
 
manuais serviço caminhões VW
manuais serviço caminhões VWmanuais serviço caminhões VW
manuais serviço caminhões VW
 
A Guide to SlideShare Analytics - Excerpts from Hubspot's Step by Step Guide ...
A Guide to SlideShare Analytics - Excerpts from Hubspot's Step by Step Guide ...A Guide to SlideShare Analytics - Excerpts from Hubspot's Step by Step Guide ...
A Guide to SlideShare Analytics - Excerpts from Hubspot's Step by Step Guide ...
 

Similar a Oem ecm cummins

Toyota 6 bwc10 electric walkie high lifter truck service repair manual
Toyota 6 bwc10 electric walkie high lifter truck service repair manualToyota 6 bwc10 electric walkie high lifter truck service repair manual
Toyota 6 bwc10 electric walkie high lifter truck service repair manualfjskekxcddmmme
 
Toyota 6 bwc15 electric walkie high lifter truck service repair manual
Toyota 6 bwc15 electric walkie high lifter truck service repair manualToyota 6 bwc15 electric walkie high lifter truck service repair manual
Toyota 6 bwc15 electric walkie high lifter truck service repair manualfjskekxcddmmme
 
Toyota 6 bwc10 electric walkie high lifter truck service repair manual
Toyota 6 bwc10 electric walkie high lifter truck service repair manualToyota 6 bwc10 electric walkie high lifter truck service repair manual
Toyota 6 bwc10 electric walkie high lifter truck service repair manualdfjjsjkemmm
 
Toyota 6 bwc20 electric walkie high lifter truck service repair manual
Toyota 6 bwc20 electric walkie high lifter truck service repair manualToyota 6 bwc20 electric walkie high lifter truck service repair manual
Toyota 6 bwc20 electric walkie high lifter truck service repair manualfjskekxcddmmme
 
Toyota 6 bwr15 electric walkie high lifter truck service repair manual
Toyota 6 bwr15 electric walkie high lifter truck service repair manualToyota 6 bwr15 electric walkie high lifter truck service repair manual
Toyota 6 bwr15 electric walkie high lifter truck service repair manualfjskekxcddmmme
 
Toyota 6 bws15 electric walkie high lifter truck service repair manual
Toyota 6 bws15 electric walkie high lifter truck service repair manualToyota 6 bws15 electric walkie high lifter truck service repair manual
Toyota 6 bws15 electric walkie high lifter truck service repair manualdfjjsjkemmm
 
Toyota 6 bwc20 electric walkie high lifter truck service repair manual
Toyota 6 bwc20 electric walkie high lifter truck service repair manualToyota 6 bwc20 electric walkie high lifter truck service repair manual
Toyota 6 bwc20 electric walkie high lifter truck service repair manualdfjjsjkemmm
 
Toyota 6 bwc15 electric walkie high lifter truck service repair manual
Toyota 6 bwc15 electric walkie high lifter truck service repair manualToyota 6 bwc15 electric walkie high lifter truck service repair manual
Toyota 6 bwc15 electric walkie high lifter truck service repair manualdfjjsjkemmm
 
Toyota 6 bws20 electric walkie high lifter truck service repair manual
Toyota 6 bws20 electric walkie high lifter truck service repair manualToyota 6 bws20 electric walkie high lifter truck service repair manual
Toyota 6 bws20 electric walkie high lifter truck service repair manualdfjjsjkemmm
 
Toyota 6 bws11 electric walkie high lifter truck service repair manual
Toyota 6 bws11 electric walkie high lifter truck service repair manualToyota 6 bws11 electric walkie high lifter truck service repair manual
Toyota 6 bws11 electric walkie high lifter truck service repair manualdfjjsjkemmm
 
Toyota 6 bwr15 electric walkie high lifter truck service repair manual
Toyota 6 bwr15 electric walkie high lifter truck service repair manualToyota 6 bwr15 electric walkie high lifter truck service repair manual
Toyota 6 bwr15 electric walkie high lifter truck service repair manualdfjjsjkemmm
 
Toyota 6 bws20 electric walkie high lifter truck service repair manual
Toyota 6 bws20 electric walkie high lifter truck service repair manualToyota 6 bws20 electric walkie high lifter truck service repair manual
Toyota 6 bws20 electric walkie high lifter truck service repair manualfjskekdmmmse
 
Toyota 6 bwc10 electric walkie high lifter truck service repair manual
Toyota 6 bwc10 electric walkie high lifter truck service repair manualToyota 6 bwc10 electric walkie high lifter truck service repair manual
Toyota 6 bwc10 electric walkie high lifter truck service repair manualfjskekdmmmse
 
Toyota 6 bwc20 electric walkie high lifter truck service repair manual
Toyota 6 bwc20 electric walkie high lifter truck service repair manualToyota 6 bwc20 electric walkie high lifter truck service repair manual
Toyota 6 bwc20 electric walkie high lifter truck service repair manualfjskekdmmmse
 
Toyota 6 bws11 electric walkie high lifter truck service repair manual
Toyota 6 bws11 electric walkie high lifter truck service repair manualToyota 6 bws11 electric walkie high lifter truck service repair manual
Toyota 6 bws11 electric walkie high lifter truck service repair manualfjskekdmmmse
 
Toyota 6 bwr15 electric walkie high lifter truck service repair manual
Toyota 6 bwr15 electric walkie high lifter truck service repair manualToyota 6 bwr15 electric walkie high lifter truck service repair manual
Toyota 6 bwr15 electric walkie high lifter truck service repair manualfjskekdmmmse
 
Toyota 6 bwc15 electric walkie high lifter truck service repair manual
Toyota 6 bwc15 electric walkie high lifter truck service repair manualToyota 6 bwc15 electric walkie high lifter truck service repair manual
Toyota 6 bwc15 electric walkie high lifter truck service repair manualfjskekdmmmse
 
New holland t6050 tractor service repair manual instant download
New holland t6050 tractor service repair manual instant downloadNew holland t6050 tractor service repair manual instant download
New holland t6050 tractor service repair manual instant downloadufjjskekemem
 
New holland ts110 a tractor service repair manual
New holland ts110 a tractor service repair manualNew holland ts110 a tractor service repair manual
New holland ts110 a tractor service repair manualfusjejkdkmse
 
New holland ts125 a tractor service repair manual
New holland ts125 a tractor service repair manualNew holland ts125 a tractor service repair manual
New holland ts125 a tractor service repair manualsoeldksejdksem
 

Similar a Oem ecm cummins (20)

Toyota 6 bwc10 electric walkie high lifter truck service repair manual
Toyota 6 bwc10 electric walkie high lifter truck service repair manualToyota 6 bwc10 electric walkie high lifter truck service repair manual
Toyota 6 bwc10 electric walkie high lifter truck service repair manual
 
Toyota 6 bwc15 electric walkie high lifter truck service repair manual
Toyota 6 bwc15 electric walkie high lifter truck service repair manualToyota 6 bwc15 electric walkie high lifter truck service repair manual
Toyota 6 bwc15 electric walkie high lifter truck service repair manual
 
Toyota 6 bwc10 electric walkie high lifter truck service repair manual
Toyota 6 bwc10 electric walkie high lifter truck service repair manualToyota 6 bwc10 electric walkie high lifter truck service repair manual
Toyota 6 bwc10 electric walkie high lifter truck service repair manual
 
Toyota 6 bwc20 electric walkie high lifter truck service repair manual
Toyota 6 bwc20 electric walkie high lifter truck service repair manualToyota 6 bwc20 electric walkie high lifter truck service repair manual
Toyota 6 bwc20 electric walkie high lifter truck service repair manual
 
Toyota 6 bwr15 electric walkie high lifter truck service repair manual
Toyota 6 bwr15 electric walkie high lifter truck service repair manualToyota 6 bwr15 electric walkie high lifter truck service repair manual
Toyota 6 bwr15 electric walkie high lifter truck service repair manual
 
Toyota 6 bws15 electric walkie high lifter truck service repair manual
Toyota 6 bws15 electric walkie high lifter truck service repair manualToyota 6 bws15 electric walkie high lifter truck service repair manual
Toyota 6 bws15 electric walkie high lifter truck service repair manual
 
Toyota 6 bwc20 electric walkie high lifter truck service repair manual
Toyota 6 bwc20 electric walkie high lifter truck service repair manualToyota 6 bwc20 electric walkie high lifter truck service repair manual
Toyota 6 bwc20 electric walkie high lifter truck service repair manual
 
Toyota 6 bwc15 electric walkie high lifter truck service repair manual
Toyota 6 bwc15 electric walkie high lifter truck service repair manualToyota 6 bwc15 electric walkie high lifter truck service repair manual
Toyota 6 bwc15 electric walkie high lifter truck service repair manual
 
Toyota 6 bws20 electric walkie high lifter truck service repair manual
Toyota 6 bws20 electric walkie high lifter truck service repair manualToyota 6 bws20 electric walkie high lifter truck service repair manual
Toyota 6 bws20 electric walkie high lifter truck service repair manual
 
Toyota 6 bws11 electric walkie high lifter truck service repair manual
Toyota 6 bws11 electric walkie high lifter truck service repair manualToyota 6 bws11 electric walkie high lifter truck service repair manual
Toyota 6 bws11 electric walkie high lifter truck service repair manual
 
Toyota 6 bwr15 electric walkie high lifter truck service repair manual
Toyota 6 bwr15 electric walkie high lifter truck service repair manualToyota 6 bwr15 electric walkie high lifter truck service repair manual
Toyota 6 bwr15 electric walkie high lifter truck service repair manual
 
Toyota 6 bws20 electric walkie high lifter truck service repair manual
Toyota 6 bws20 electric walkie high lifter truck service repair manualToyota 6 bws20 electric walkie high lifter truck service repair manual
Toyota 6 bws20 electric walkie high lifter truck service repair manual
 
Toyota 6 bwc10 electric walkie high lifter truck service repair manual
Toyota 6 bwc10 electric walkie high lifter truck service repair manualToyota 6 bwc10 electric walkie high lifter truck service repair manual
Toyota 6 bwc10 electric walkie high lifter truck service repair manual
 
Toyota 6 bwc20 electric walkie high lifter truck service repair manual
Toyota 6 bwc20 electric walkie high lifter truck service repair manualToyota 6 bwc20 electric walkie high lifter truck service repair manual
Toyota 6 bwc20 electric walkie high lifter truck service repair manual
 
Toyota 6 bws11 electric walkie high lifter truck service repair manual
Toyota 6 bws11 electric walkie high lifter truck service repair manualToyota 6 bws11 electric walkie high lifter truck service repair manual
Toyota 6 bws11 electric walkie high lifter truck service repair manual
 
Toyota 6 bwr15 electric walkie high lifter truck service repair manual
Toyota 6 bwr15 electric walkie high lifter truck service repair manualToyota 6 bwr15 electric walkie high lifter truck service repair manual
Toyota 6 bwr15 electric walkie high lifter truck service repair manual
 
Toyota 6 bwc15 electric walkie high lifter truck service repair manual
Toyota 6 bwc15 electric walkie high lifter truck service repair manualToyota 6 bwc15 electric walkie high lifter truck service repair manual
Toyota 6 bwc15 electric walkie high lifter truck service repair manual
 
New holland t6050 tractor service repair manual instant download
New holland t6050 tractor service repair manual instant downloadNew holland t6050 tractor service repair manual instant download
New holland t6050 tractor service repair manual instant download
 
New holland ts110 a tractor service repair manual
New holland ts110 a tractor service repair manualNew holland ts110 a tractor service repair manual
New holland ts110 a tractor service repair manual
 
New holland ts125 a tractor service repair manual
New holland ts125 a tractor service repair manualNew holland ts125 a tractor service repair manual
New holland ts125 a tractor service repair manual
 

Último

Call Girls Service Nagpur Tanvi Call 7001035870 Meet With Nagpur Escorts
Call Girls Service Nagpur Tanvi Call 7001035870 Meet With Nagpur EscortsCall Girls Service Nagpur Tanvi Call 7001035870 Meet With Nagpur Escorts
Call Girls Service Nagpur Tanvi Call 7001035870 Meet With Nagpur EscortsCall Girls in Nagpur High Profile
 
VIP Call Girls Service Hitech City Hyderabad Call +91-8250192130
VIP Call Girls Service Hitech City Hyderabad Call +91-8250192130VIP Call Girls Service Hitech City Hyderabad Call +91-8250192130
VIP Call Girls Service Hitech City Hyderabad Call +91-8250192130Suhani Kapoor
 
result management system report for college project
result management system report for college projectresult management system report for college project
result management system report for college projectTonystark477637
 
Structural Analysis and Design of Foundations: A Comprehensive Handbook for S...
Structural Analysis and Design of Foundations: A Comprehensive Handbook for S...Structural Analysis and Design of Foundations: A Comprehensive Handbook for S...
Structural Analysis and Design of Foundations: A Comprehensive Handbook for S...Dr.Costas Sachpazis
 
Microscopic Analysis of Ceramic Materials.pptx
Microscopic Analysis of Ceramic Materials.pptxMicroscopic Analysis of Ceramic Materials.pptx
Microscopic Analysis of Ceramic Materials.pptxpurnimasatapathy1234
 
Call Girls Pimpri Chinchwad Call Me 7737669865 Budget Friendly No Advance Boo...
Call Girls Pimpri Chinchwad Call Me 7737669865 Budget Friendly No Advance Boo...Call Girls Pimpri Chinchwad Call Me 7737669865 Budget Friendly No Advance Boo...
Call Girls Pimpri Chinchwad Call Me 7737669865 Budget Friendly No Advance Boo...roncy bisnoi
 
UNIT-III FMM. DIMENSIONAL ANALYSIS
UNIT-III FMM.        DIMENSIONAL ANALYSISUNIT-III FMM.        DIMENSIONAL ANALYSIS
UNIT-III FMM. DIMENSIONAL ANALYSISrknatarajan
 
Call Girls Service Nashik Vaishnavi 7001305949 Independent Escort Service Nashik
Call Girls Service Nashik Vaishnavi 7001305949 Independent Escort Service NashikCall Girls Service Nashik Vaishnavi 7001305949 Independent Escort Service Nashik
Call Girls Service Nashik Vaishnavi 7001305949 Independent Escort Service NashikCall Girls in Nagpur High Profile
 
SPICE PARK APR2024 ( 6,793 SPICE Models )
SPICE PARK APR2024 ( 6,793 SPICE Models )SPICE PARK APR2024 ( 6,793 SPICE Models )
SPICE PARK APR2024 ( 6,793 SPICE Models )Tsuyoshi Horigome
 
(SHREYA) Chakan Call Girls Just Call 7001035870 [ Cash on Delivery ] Pune Esc...
(SHREYA) Chakan Call Girls Just Call 7001035870 [ Cash on Delivery ] Pune Esc...(SHREYA) Chakan Call Girls Just Call 7001035870 [ Cash on Delivery ] Pune Esc...
(SHREYA) Chakan Call Girls Just Call 7001035870 [ Cash on Delivery ] Pune Esc...ranjana rawat
 
Introduction to Multiple Access Protocol.pptx
Introduction to Multiple Access Protocol.pptxIntroduction to Multiple Access Protocol.pptx
Introduction to Multiple Access Protocol.pptxupamatechverse
 
Introduction to IEEE STANDARDS and its different types.pptx
Introduction to IEEE STANDARDS and its different types.pptxIntroduction to IEEE STANDARDS and its different types.pptx
Introduction to IEEE STANDARDS and its different types.pptxupamatechverse
 
Call for Papers - African Journal of Biological Sciences, E-ISSN: 2663-2187, ...
Call for Papers - African Journal of Biological Sciences, E-ISSN: 2663-2187, ...Call for Papers - African Journal of Biological Sciences, E-ISSN: 2663-2187, ...
Call for Papers - African Journal of Biological Sciences, E-ISSN: 2663-2187, ...Christo Ananth
 
Porous Ceramics seminar and technical writing
Porous Ceramics seminar and technical writingPorous Ceramics seminar and technical writing
Porous Ceramics seminar and technical writingrakeshbaidya232001
 
KubeKraft presentation @CloudNativeHooghly
KubeKraft presentation @CloudNativeHooghlyKubeKraft presentation @CloudNativeHooghly
KubeKraft presentation @CloudNativeHooghlysanyuktamishra911
 
Introduction and different types of Ethernet.pptx
Introduction and different types of Ethernet.pptxIntroduction and different types of Ethernet.pptx
Introduction and different types of Ethernet.pptxupamatechverse
 
Call Girls in Nagpur Suman Call 7001035870 Meet With Nagpur Escorts
Call Girls in Nagpur Suman Call 7001035870 Meet With Nagpur EscortsCall Girls in Nagpur Suman Call 7001035870 Meet With Nagpur Escorts
Call Girls in Nagpur Suman Call 7001035870 Meet With Nagpur EscortsCall Girls in Nagpur High Profile
 
Software Development Life Cycle By Team Orange (Dept. of Pharmacy)
Software Development Life Cycle By  Team Orange (Dept. of Pharmacy)Software Development Life Cycle By  Team Orange (Dept. of Pharmacy)
Software Development Life Cycle By Team Orange (Dept. of Pharmacy)Suman Mia
 
Java Programming :Event Handling(Types of Events)
Java Programming :Event Handling(Types of Events)Java Programming :Event Handling(Types of Events)
Java Programming :Event Handling(Types of Events)simmis5
 
Sheet Pile Wall Design and Construction: A Practical Guide for Civil Engineer...
Sheet Pile Wall Design and Construction: A Practical Guide for Civil Engineer...Sheet Pile Wall Design and Construction: A Practical Guide for Civil Engineer...
Sheet Pile Wall Design and Construction: A Practical Guide for Civil Engineer...Dr.Costas Sachpazis
 

Último (20)

Call Girls Service Nagpur Tanvi Call 7001035870 Meet With Nagpur Escorts
Call Girls Service Nagpur Tanvi Call 7001035870 Meet With Nagpur EscortsCall Girls Service Nagpur Tanvi Call 7001035870 Meet With Nagpur Escorts
Call Girls Service Nagpur Tanvi Call 7001035870 Meet With Nagpur Escorts
 
VIP Call Girls Service Hitech City Hyderabad Call +91-8250192130
VIP Call Girls Service Hitech City Hyderabad Call +91-8250192130VIP Call Girls Service Hitech City Hyderabad Call +91-8250192130
VIP Call Girls Service Hitech City Hyderabad Call +91-8250192130
 
result management system report for college project
result management system report for college projectresult management system report for college project
result management system report for college project
 
Structural Analysis and Design of Foundations: A Comprehensive Handbook for S...
Structural Analysis and Design of Foundations: A Comprehensive Handbook for S...Structural Analysis and Design of Foundations: A Comprehensive Handbook for S...
Structural Analysis and Design of Foundations: A Comprehensive Handbook for S...
 
Microscopic Analysis of Ceramic Materials.pptx
Microscopic Analysis of Ceramic Materials.pptxMicroscopic Analysis of Ceramic Materials.pptx
Microscopic Analysis of Ceramic Materials.pptx
 
Call Girls Pimpri Chinchwad Call Me 7737669865 Budget Friendly No Advance Boo...
Call Girls Pimpri Chinchwad Call Me 7737669865 Budget Friendly No Advance Boo...Call Girls Pimpri Chinchwad Call Me 7737669865 Budget Friendly No Advance Boo...
Call Girls Pimpri Chinchwad Call Me 7737669865 Budget Friendly No Advance Boo...
 
UNIT-III FMM. DIMENSIONAL ANALYSIS
UNIT-III FMM.        DIMENSIONAL ANALYSISUNIT-III FMM.        DIMENSIONAL ANALYSIS
UNIT-III FMM. DIMENSIONAL ANALYSIS
 
Call Girls Service Nashik Vaishnavi 7001305949 Independent Escort Service Nashik
Call Girls Service Nashik Vaishnavi 7001305949 Independent Escort Service NashikCall Girls Service Nashik Vaishnavi 7001305949 Independent Escort Service Nashik
Call Girls Service Nashik Vaishnavi 7001305949 Independent Escort Service Nashik
 
SPICE PARK APR2024 ( 6,793 SPICE Models )
SPICE PARK APR2024 ( 6,793 SPICE Models )SPICE PARK APR2024 ( 6,793 SPICE Models )
SPICE PARK APR2024 ( 6,793 SPICE Models )
 
(SHREYA) Chakan Call Girls Just Call 7001035870 [ Cash on Delivery ] Pune Esc...
(SHREYA) Chakan Call Girls Just Call 7001035870 [ Cash on Delivery ] Pune Esc...(SHREYA) Chakan Call Girls Just Call 7001035870 [ Cash on Delivery ] Pune Esc...
(SHREYA) Chakan Call Girls Just Call 7001035870 [ Cash on Delivery ] Pune Esc...
 
Introduction to Multiple Access Protocol.pptx
Introduction to Multiple Access Protocol.pptxIntroduction to Multiple Access Protocol.pptx
Introduction to Multiple Access Protocol.pptx
 
Introduction to IEEE STANDARDS and its different types.pptx
Introduction to IEEE STANDARDS and its different types.pptxIntroduction to IEEE STANDARDS and its different types.pptx
Introduction to IEEE STANDARDS and its different types.pptx
 
Call for Papers - African Journal of Biological Sciences, E-ISSN: 2663-2187, ...
Call for Papers - African Journal of Biological Sciences, E-ISSN: 2663-2187, ...Call for Papers - African Journal of Biological Sciences, E-ISSN: 2663-2187, ...
Call for Papers - African Journal of Biological Sciences, E-ISSN: 2663-2187, ...
 
Porous Ceramics seminar and technical writing
Porous Ceramics seminar and technical writingPorous Ceramics seminar and technical writing
Porous Ceramics seminar and technical writing
 
KubeKraft presentation @CloudNativeHooghly
KubeKraft presentation @CloudNativeHooghlyKubeKraft presentation @CloudNativeHooghly
KubeKraft presentation @CloudNativeHooghly
 
Introduction and different types of Ethernet.pptx
Introduction and different types of Ethernet.pptxIntroduction and different types of Ethernet.pptx
Introduction and different types of Ethernet.pptx
 
Call Girls in Nagpur Suman Call 7001035870 Meet With Nagpur Escorts
Call Girls in Nagpur Suman Call 7001035870 Meet With Nagpur EscortsCall Girls in Nagpur Suman Call 7001035870 Meet With Nagpur Escorts
Call Girls in Nagpur Suman Call 7001035870 Meet With Nagpur Escorts
 
Software Development Life Cycle By Team Orange (Dept. of Pharmacy)
Software Development Life Cycle By  Team Orange (Dept. of Pharmacy)Software Development Life Cycle By  Team Orange (Dept. of Pharmacy)
Software Development Life Cycle By Team Orange (Dept. of Pharmacy)
 
Java Programming :Event Handling(Types of Events)
Java Programming :Event Handling(Types of Events)Java Programming :Event Handling(Types of Events)
Java Programming :Event Handling(Types of Events)
 
Sheet Pile Wall Design and Construction: A Practical Guide for Civil Engineer...
Sheet Pile Wall Design and Construction: A Practical Guide for Civil Engineer...Sheet Pile Wall Design and Construction: A Practical Guide for Civil Engineer...
Sheet Pile Wall Design and Construction: A Practical Guide for Civil Engineer...
 

Oem ecm cummins

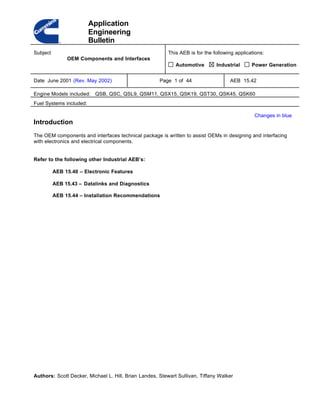
  • 1. Application Engineering Bulletin Subject This AEB is for the following applications: OEM Components and Interfaces Automotive Industrial Power Generation Date June 2001 (Rev. May 2002) Page 1 of 44 AEB 15.42 Engine Models included: QSB, QSC, QSL9, QSM11, QSX15, QSK19, QST30, QSK45, QSK60 Fuel Systems included: Changes in blue Introduction The OEM components and interfaces technical package is written to assist OEMs in designing and interfacing with electronics and electrical components. Refer to the following other Industrial AEB’s: AEB 15.40 – Electronic Features AEB 15.43 – Datalinks and Diagnostics AEB 15.44 – Installation Recommendations Authors: Scott Decker, Michael L. Hill, Brian Landes, Stewart Sullivan, Tiffany Walker
  • 2. AEB 15.42 Page 2 of 44 Table of Contents Introduction....................................................................................................................................1 Table of Contents..........................................................................................................................2 Section I: Connectors............................................................................................................3- 18 31-Pin OEM Connector.................................................................................................................... 4 50-pin OEM Connector - QSM11, QSX15 ......................................................................................... 5 50-Pin OEM Connector - QSB, QSC, QSL9 ...................................................................................... 6 Datalink Interface Connector ............................................................................................................ 7 J1939 Datalink Connector ................................................................................................................ 8 WIF Extension Harness ................................................................................................................... 9 23-Pin OEM Connector - CENSE ....................................................................................................10 21-Pin OEM Connector - QST30, QSK19, QSK45, QSK60................................................................11 Datalink Interface 6-Pin Connector ..................................................................................................12 23-Pin OEM Connector - QSB, QSC, QSL9 .....................................................................................13 Exhaust Brake Connector - QSB, QSC, QSL9..................................................................................14 Coolant Level Extension Harness Connector (4-Pin).........................................................................15 Coolant Level Extension Harness Connector (3-Pin) - CENSE ..........................................................16 Acceptable Coolant Level Switch.....................................................................................................17 RS232 In-Cab Connector................................................................................................................18 Section II: Lamps...................................................................................................................19-21 Lamp Specifications .......................................................................................................................19 Water-in-Fuel (WIF) Lamp...............................................................................................................19 Maintenance Lamp .........................................................................................................................19 Stop Lamp.....................................................................................................................................19 Wait-to-Start Lamp .........................................................................................................................20 Warning Lamp................................................................................................................................20 Engine Protection Lamp..................................................................................................................20 Switched Sink Driver Output Pin-out Specification ............................................................................20 Section III: Relays..................................................................................................................22-26 Low Idle Shutdown Relay................................................................................................................22 Intake Air Heater Relay ...................................................................................................................23 24 VDC Power Relay......................................................................................................................23 Power Relay VP44 .........................................................................................................................24 Switched Outputs Relay..................................................................................................................25 Acceptable Relay ...........................................................................................................................26 Section IV: Switches.............................................................................................................27-37 Switch Conventions ........................................................................................................................27 Switch Configuration.......................................................................................................................27 Switch Characteristics ....................................................................................................................27 Alternation Droop Switch.................................................................................................................28 Alternate Low Idle Switch................................................................................................................29 Alternate Torque Switch..................................................................................................................30 AXG On/Off Switch.........................................................................................................................31 Air Conditioner Pressure Switch......................................................................................................32 Pressure Switches: Brake Switch ....................................................................................................33 Switches and Switch Assemblies: Rotary Clutch Switch Assembly ....................................................34 Switches and Switch Assemblies: Optional Clutch Brake Switch........................................................35 Section V: Sensors.................................................................................................................36-37 Vehicle Speed Sensor (Variable Reluctance Magnetic Pickup)..........................................................36 Water-in-Fuel Sensor and Drain Unit (For Spin-on FWS) ..................................................................37
  • 3. AEB 15.42 Page 3 of 44 Section I: OEM Connectors OEM Connector Installation Kits Application Description Required Cummins’ Part Numbers Part Description QSX/QSM with EA1040 or EA2043 Option 3164585 OEM connectors / contacts including coolant level without J1939 datalink parts. Assumes using the 50 pin OEM connector. 3164589 J1939 Stub kit which includes connectors and contacts for one stub. 3164590 J1939 Termination kit includes connectors, termination resistors, and contacts QSX/QSM with EA2036, EA2037, or EA1039 Option 3164585 OEM connectors / contacts including coolant level without J1939 datalink parts. Assumes using the 47 pin OEM connector. 3164589 J1939 Stub kit which includes connectors and contacts for one stub. 3164590 J1939 Termination kit includes connectors, termination resistors, and contacts QSB/C/L9 3164589 J1939 Stub kit which includes connectors and contacts for one stub. QST30 3164590 J1939 Termination kit includes connectors, termination resistors, and contacts 3164587 OEM connectors / contacts including coolant level QSK19/45/60/78 3164588 OEM connectors / contacts including coolant level Crimp Tool Kit 3164591 Crimp tools for the various contacts required by the various OEM installation kits
  • 4. AEB 15.42 Page 4 of 44 Connector Components Description Mfg. Mfg. Part Number QSX QSM QST30 QSK19 QSK 45/60 QSB QSC QSL9 CENSE General Connectors 31-Pin Deutsch HD36-24-31SE X X X X 23-Pin Deutsch HD36-24-23ST X 23-Pin Deutsch HD36-24-23PT X 21-Pin Deutsch HD36-24-21SE X X X 3-Pin Deutsch HD10-3-96P X 9-Pin Deutsch HD10-9-1939P Only Only Primary Primary Primary 6-Pin Deutsch HD10-6-12P Optional Optional Optional 6 –Pin – Switched Outputs Deutsch DTM06-6S X 2-Pin Power Packard 1201 0973 X 50-Pin Deutsch DRC26-50S-01 X 50-Pin Deutsch DRC26-50S-05 X J1939 9-Pin Extension Harness Cummins 4060578 QSM J1939 Receptacle Deutsch DT04-3P-E008 X X X X X X Plug Deutsch DT06-3S-E008 X X X X X X Terminal Receptacle Deusch DT04-3P-P006 (Blue) X X X X X X Specialty Connectors RS422/Modular Mining GSP Interface Bendix PT06-E1419P(SR) X Coolant Level Sensor Coolant Level Sensor-Connector & Seal Packard 1206 5298 X X X X X X Coolant Level Sensor Wiring Harness 4-Pin Tower Packard 1201 5797 X 3-Pin Tower Packard 1201 5793 X Coolant Level Sensor Shorting Plug 4-Pin Tower Cummins 3613298 X X X Water in Fuel Extension Harness WIF Receptacle Deutsch DT04-2P QSM WIF Plug Deutsch DT06-2S QSM Water in Fuel Sensor WIF Mating Connector Packard 1204 0753 X Connector Suppliers: Deutsch Industrial Products Division Packard Electric 37140 Industrial Avenue P.O. Box 431 Hemet, CA 92543 Warren, OH 44486 Phone: (714) 929-1200 1-800-722-5273 (909) 765-2250 Fax (714) 652-9784 Deutsch Distributor Ladd Industrial Sales 1-800-223-1236 1-513-438-0033
  • 5. AEB 15.42 Page 5 of 44 Connector Descriptions 31-Pin OEM Connector – QSM11, QSX15, QSK19, QST30 Application – This connector mates with the 31-pin general disconnect which is mounted on an engine bracket. This connector carries multiple OEM signals to and from components located in the engine compartment and at remote locations. Consult OEM Interfaces to determine which signals interface via this connector. Hardware – This connector is a 31-pin Deutsch HD30 series. Terminals are nickel-plated sockets. The assembly shown below is the –059, which includes a backshell kit. This backshell kit is recommended. 31-Pin OEM Connector 31-Pin OEM Connector Part List Item Manufacturer Manufacturer Part No. Cummins Part No. Connector Deutsch HD36-24-31SE 3659012 Connector & Backshell Kit Deutsch HD36-24-31SE-059 3171028 Backshell Kit Only Deutsch 0409-201-2400 Terminal Reel Deutsch 1062-16-0122 3615978 Sealing Plug Deutsch HD10-114017 3824002
  • 6. AEB 15.42 Page 6 of 44 50-Pin OEM Connector – QSM11, QSX15 Application – This connector system utilizes 20 AWG gold sockets with 20 AWG cavity plugs, and a convoluted wire seal. It has an environmentally sealed, hard-shell connector. The plug is keyed to fit the mating module header and is secured to the ECM with one socket head capscrew. The OEM connector is used as an integral part of an electronic control module for the wiring harness interface. Cavity plugs should be inserted in any unused cavities, which are labeled NC in the connector illustration. Hardware – This connector is a 50-pin Deutsch DRC series, key 01. Terminals are gold-flashed sockets. The assembly shown below includes a 90 o backshell. This backshell is required for all installation. 50-Pin OEM Connector 50-Pin OEM Connector Part List Item Manufacturer Manufacturer Part No. Cummins Part No. Connector, Key-01 Deutsch DRC26-50S-01 3657520 Terminal Reel Deutsch 1062-20-0144 3658470 90 o Backshell Deutsch 0528-001-5005 3658522
  • 7. AEB 15.42 Page 7 of 44 50-Pin OEM Connector – QSB, QSC, QSL9 Application – This connector system utilizes 20 AWG gold sockets with 20 AWG cavity plugs, and a convoluted wire seal. It has an environmentally sealed, hard-shell connector. The plug is keyed to fit the mating module header and is secured to the ECM with one socket head capscrew. The OEM connector is used as an integral part of an electronic control module for the wiring harness interface. Cavity plugs should be inserted in any unused cavities, which are labeled NC in the connector illustration. Hardware – This connector is a 50-pin Deutsch DRC series, key 05. Terminals are gold-flashed sockets 50-Pin OEM Connector Part List Item Manufacturer Manufacturer Part No. Cummins Part No. Connector Deutsch DRC26-50S-05 Gold Sockets Deutsch 1062-20-0144
  • 8. AEB 15.42 Page 8 of 44 Datalink Interface Connector Application – This connector mates with a Cummins service tool such as Insite to allow service, parameter adjustment, and calibration download. A Datalink Interface connector is required on every machine. Connector installation must meet requirements defined in AEB 15.44 Installation Recommendations. Hardware – This connector is a 9-pin Deutsch HD10 series. Two types of terminals are available, a solid and a stamped and formed (S&F). Both types are gold-plated. Datalink Interface Connector Datalink Interface Connector Part List Item Manufacturer Manufacturer Part No. Cummins Part No. 9-Way Connector Deutsch HD10-9-1939P 3658643 9-Way Solid Terminal Deutsch 0460-202-1631 3658462 9-Way S&F Terminal Deutsch 1060-16-0144 3658431 Protective Cap * Deutsch HDC16-9 • Tiewrap the protective cap to the main engine harness to prevent loss.
  • 9. AEB 15.42 Page 9 of 44 J1939 Datalink Connector Application – These connectors are used throughout the SAE J1939 datalink backbone and stubs. The 3-pin receptacle connects a node to the backbone; it is located on the node side. The 3-pin plug connects the backbone to a node; it is located on the backbone side. The 3-pin termination receptacle is located at each end of the backbone. Hardware – Two connectors are a 3-way Deutsch DT series receptacle and a mating 3-way Deutsch DT series plug. Terminals are gold-plated. A wedge lock and locking insert are required. There is a pre-assembled Deutsch termination receptacle assembly, which consists of a DT04-3P receptacle, W3S-1939-P012 wedge lock, gold-plated pins, cavity plugs, and a 120-ohm resistor. J1939 Backbone Connectors J1939 Backbone Connectors Part List Item Manufacturer Manufacturer Part No. Cummins Part No. Receptacle Deutsch DT04-3P-E008 3659369 Receptacle Pin Reel Deutsch 1060-16-0144 3658431 Receptacle Wedge Lock Deutsch W3P (orange) 3616471 Plug Deutsch DT06-3S-E008 3659400 Plug Terminal Reel Deutsch 1062-16-0144 3658430 Plug Wedge Lock Deutsch W3S (orange) 3616472 Termination Receptacle Deutsch DT04-3P-P006 (Blue) 3942041 Termination Wedge Lock Deutsch W3S-1939-P012 (Blue)
  • 10. AEB 15.42 Page 10 of 44 WIF Extension Harness Application – The WIF Extension harness connects a remotely mounted Water-In-Fuel (WIF) sensor to the Cummins engine harness. The WIF sensor is located on the bottom of a special fuel filter, and sometimes must be installed somewhere other than the stock engine location. When this occurs, the OEM must construct a WIF Extension harness between the sensor and the WIF Disconnect on the Cummins engine harness. For QSX15 the WIF harness is not needed because it is a part of the standard engine harness. Hardware – The WIF Extension harness includes two Deutsch DT series connectors, one plug and one receptacle. All terminals are gold-plated. Wedge locks are required. Harness length and construction details vary according to application. Insert Picture Here Need New Picture WIF Extension Harness WIF Extension Harness Part List Item Manufacturer Manufacturer Part No. Cummins Part No. Receptacle Deutsch DT04-2P 3616616 Receptacle Wedgelock Deutsch W2P 3616614 Pin Reel Deutsch 1060-16-0144 3658431 Plug Deutsch DT06-2S 3616615 Plug Wedgelock Deutsch W2SA 3658856 Socket Reel Deutsch 1062-16-0144 3658430
  • 11. AEB 15.42 Page 11 of 44 23-Pin OEM Connector – CENSE Application – This connector mates with the 23-pin OEM CENSE breakout connector which is mounted below the OEM A & B engine bracket. This connector carries signals for components that interface with the CENSE subsystem. This connector is required with application. For QSKV engines the only connection that needs to be made is for RS232 and RS422. Hardware – This connector is a 23-pin Deutsch HD30 series. Terminals are nickel-plated sockets. 23-Pin OEM CENSE Connector 23-Pin OEM CENSE Connector Part List Item Manufacturer Manufacturer Part No. Cummins Part No. Connector Deutsch HD36-24-23PT 3824814 Connector & Backshell Kit Deutsch HD36-24-23PT-059 Terminal Deutsch 0460-202-16141
  • 12. AEB 15.42 Page 12 of 44 21-Pin OEM Connector – QST30, QSK19, QSK45, QSK60 Application – This connector mates with the 21-pin OEM breakout connector which is mounted on an engine bracket. This connector carries signals for components that interface with the QSK19, QST30, QSK45 and QSK60. This connector is required for all applications. Hardware – This connector is a 21-way Deutsch HD30 series. Terminals are nickel-plated sockets. The assembly shown below is the –059, which includes a backshell kit. , 21-Pin OEM Connector 21-Pin OEM Connector Part List Item Manufacturer Manufacturer Part No. Cummins Part No. Connector Deutsch HD36-24-21SE 3824826 Connector & Backshell Kit Deutsch HD36-24-21SE-09 Backshell Kit Only Deutsch Terminal Reel (16AWG) Deutsch 0462-201-16141 Terminal Reel (12AWG) Deutsch 0460-203-12141
  • 13. AEB 15.42 Page 13 of 44 Datalink Interface 6-Pin Connector Application - This connector mates to a service tool. This connector carries signals for J1587 datalink and service tool operating power. It is recommended to use a 9-pin connector for new installations. Hardware - This connect is a 6-pin Deutsch HD10 series. Terminals are gold-plated pins. Datalink Interface 6-Pin Connector Item Manufacturer Manufacturer Part No. Cummins Part No. Connector Deutsch HD10-6-12P 3824805 Terminal Deutsch 0460-204-12141
  • 14. AEB 15.42 Page 14 of 44 23-Pin OEM Connector - QSB, QSC, QSL9 Application - This connector is a 23-pin circular Deutsch connector with bayonet coupling. This connector will replace the connectors identified below. This connector is environmentally sealed and accommodates both low level signals and battery currents for the fuel pump. Hardware - Sealed circular Deutsch connectors are useful in severe environments ranging from under hood to on chassis. A lubricant applied to the mating surfaces of the terminals is recommended to preclude fretting and corrosion of terminals. 23-Pin OEM Connector OEM Engine Access Connector Part List Item Manufacturer Manufacturer Part No. Cummins Part No. Connector Deutsch HD36-24-23ST Connector Pins Deutsch 1062-14-0122
  • 15. AEB 15.42 Page 15 of 44 Exhaust Brake Connector - QSB, QSC, QSL9 Application - This is a 2-position connector. The in-line connectors are environmentally sealed, have positive- locking hard shells and are used on both wiring harness and devices employing pigtail wiring. Low signal levels as well as those carrying significant current levels are accommodated. The units employ silicone connector seals. Hardware - Sealed connectors are useful in severe environments ranging from under hood to on chassis. A lubricant applied to the mating surfaces of the terminals is recommended to preclude fretting and corrosion of terminals. Exhaust Brake Connector OEM Engine Access Connector Item Manufacturer Manufacturer Part No. Cummins Part No. Plug Deutsch DT06-2S Receptacle Deutsch DT04-2P
  • 16. AEB 15.42 Page 16 of 44 Coolant Level Extension Harness Connector (4-Pin) Application - This connector is a 4-position weather pack tower. The in-line connectors are environmentally sealed, have positive-locking hard shells and are used on both wiring harnesses and devices employing pigtail wiring. Low signal levels as well as those carrying significant current levels are accommodated. The units employ convoluted silicone wire seals and connector seals. Hardware - Sealed tower and shroud connectors are useful in severe environments ranging from under hood to on chassis. A lubricant applied to the mating surfaces of the terminals is recommended to preclude fretting corrosion terminals. Coolant Level Connector Coolant Level Extension Harness Connector (4-Pin) Part List Item Manufacturer Manufacturer Part No. Cummins Part No. Connector Packard 1201 5797
  • 17. AEB 15.42 Page 17 of 44 Coolant Level Extension Harness Connector (3-Pin) - CENSE Application - This connector is a 4-position weather pack tower. The in-line connectors are environmentally sealed, have positive-locking hard shells and are used on both wiring harnesses and devices employing pigtail wiring. Low signal levels as well as those carrying significant current levels are accommodated. The units employ convoluted silicone wire seals and connector seals. Hardware - Sealed tower and shroud connectors are useful in severe environments ranging from under hood to on chassis. A lubricant applied to the mating surfaces of the terminals is recommended to preclude fretting corrosion terminals. Coolant Level Extension Harness Connector (3-Pin) Part List Item Manufacturer Manufacturer Part No. Cummins Part No. Connector Packard 1201 5793
  • 18. AEB 15.42 Page 18 of 44 Acceptable Coolant Level Switch Application - This device is suitable for use as a Coolant Level switch. Its complementary outputs satisfy the unique functional requirements of the ECM interface. The switch is mounted with the sensor probe extending into the radiator or overflow tank at the minimum coolant level. The radiator or overflow tank requires a 1/4 NPT boss to mount the switch. Apply thread sealant before installing the switch, omit sealant on first full thread. The switch is available in limited quantities through Cummins distributors. Hardware - The switch is manufactured by Robert Shaw. The switch is an electronic switch which operates on the capacitance sensing principle. The probe of the component detects a change in electrical capacitance when the liquid displaces the air immediately surrounding the probe. The change is converted within the component into the required logic. The sensor requires a +5V power supply for operation, which is available from the ECM. The switch mates to a Packard Metri-Pack 150 series connector. A cable seal and secondary lock are available and required. Acceptable Coolant Level Switch Acceptable Coolant Level Switch Part List Item Manufacturer Manufacturer Part No. Cummins Part No. Switch Robert Shaw 85927-C1 3612521 Connector & Seal Packard 1206 5298 3617139 Secondary Lock (TPA) Packard 1206 6176 3620902 Cable Seal (White) Packard 1208 9678
  • 19. AEB 15.42 Page 19 of 44 RS232 In-Cab Connector Application - This connector is a round 3-pin Deutsch connector. It uses Deutsch 1060-16-0122 terminal pins that will accept 16-18 AWG wire. RS232 Datalink 3-Pin Plug (CENSE only) RS232 In-Cab Connector Part List Item Manufacturer Manufacturer Part No. Cummins Part No. Connector Deutsch HD10-3-96P 3657367 Terminal Deutsch 1060-16-0122 Cap Deutsch HDC16-3 3824851
  • 20. AEB 15.42 Page 20 of 44 Section II: Lamps Lamp Specification QSX/QSM QST30 QSB/C/9 QSK19 QSKV45/60 CENSE Maximum current draw 600 mA@28V 600 mA@28V 600 mA@28V 600 mA@28V 600 mA@28V 600 mA@28V Leakage current when lamp driver is off .51ma-.25ma .51ma-.25ma Maximum voltage 32V 32V 32V 32V 32V 32V Suggested Luminosity 2 CP 2 CP 2 CP 2 CP 2 CP 2 CP Recommended Lamps Maintenance X X Engine Protection (EP) X X X X Stop X X X X X X Wait-to-Start X X X Warning X X X X X X Water-in-Fuel X Supplier Information Cutler - Hammer Products Eaton Corporation 310 West Lake Street Elmhurst, IL 60126 Use of LEDs is generally not recommended due to the leakage current. LEDs may be dimly lit instead of completely off. Water-in-Fuel (WIF) Lamp The water-in-fuel lamp indicates there is water in the fuel. When the lamp is illuminated the vehicle driver/operator should release the water from the fuel filter. As an option the WIF lamp may be eliminated and the maintenance lamp can be used to provide the water-in- fuel indication. This can be done by routing a wire from the ECM OEM connector WIF lamp signal in parallel with the wire from the ECM OEM connector maintenance lamp signal. The WIF lamp should be installed on the operator switch panel. Maintenance Lamp The Maintenance lamp indicates that routine engine maintenance should be performed. The Maintenance lamp should be installed on the operator switch panel. The lamp is used by the following features. • Maintenance Monitor • Real Time Clock (RTC) • Water-in-Fuel (WIF) optional Stop Lamp The Stop lamp provides critical operator messages. These messages require immediate and decisive operator response. The Stop lamp is also used to flash out Diagnostics fault codes. Refer to AEB15.43 Diagnostics Datalinks for description of the fault code flashout procedure. The lamp should be prominently installed on the operator switch panel. This lamp is used by the following features: • Diagnostic Fault Code Flashout • Engine Protection
  • 21. AEB 15.42 Page 21 of 44 Wait-to-Start Lamp The Wait-to-Start lamp indicates that the pre-start intake manifold heater warm-up sequence is active. An OEM-supplied grid heater will automatically heat the intake manifold when needed prior to engine starting. Intake manifold heating improves engine starting in cold temperatures and reduces white smoke. The operator should delay engine starting until after the lamp has extinguished. This lamp is used by the follow feature: • Grid Heaters Warning Lamp The Warning lamp provides important operator messages. These messages require timely operator attention. The Warning lamp is also used to delineate Diagnostics fault codes. Refer to AEB 15.43 Datalink and Diagnostics for a description of the fault code flashout procedure. The lamp should be prominently installed on the operator switch panel. 0 • Engine Protection for QSB, QSC, QSL9 Engine Protection Lamp The engine protection lamp indicates that the engine protection feature has detected a fault. This lamp requires immediate and decisive operator response. This lamp need to be installed in the operator switch panel. This lamp is used by the following feature: • Engine Protection Switched Sink Driver Output Pinout Specifications Applications The Switched Sink Driver Output Pinout type sinks an OEM-supplied load, which are typically dashboard lamps. The Pinout is connected to one side of the OEM load. A voltage source, typically Vbatt+, is connected to the other side of the OEM load. Operation The Switched Sink Driver Output Pinout can exist in one of two states: Sink (low impedance) or Off (high impedance). These states are dictated by a microprocessor-controlled FET switch. • Sink State - Pinout Voltage can be measured at the pinout with respect to ECM ground. When the FET switch is opened, Pinout Current is present through the pinout by way of the FET switch. Load Resistance can be measured between the pinout and the OEM voltage source. The OEM load is on or energized. • Off State - When the FET switch is closed, some leakage Pinout current is still present by way of the 47K resistor. The OEM load is off or de-energized. Switched Sink Driver Output Pinout Simplified Circuit
  • 22. AEB 15.42 Page 22 of 44 Switched Sink Driver Output Pinout Specifications Item Requirement Number of States Two: SINK or OFF Maximum Pinout Voltage 32V Maximum Pinout Current (Non-Inductive Load) 600 mA Minimum Load Resistance 20 Ω @ 12V, 40 Ω @ 24V Maximum Peak Current (Non-Inductive Load) 6.0A @ 12V, 1 A @ 24V Maximum Pinout Current (Inductive Load) 2.5 A @ 12V, 130 mH @ 24V Maximum Load Induction 40 mH @ 12V, 130 mH @ 24V
  • 23. AEB 15.42 Page 23 of 44 Section III: Relays Low Idle Shutdown Relay The Low Idle Shutdown relay removes power from high-current machine devices when the engine is shut down by the Low Idle Shutdown feature. This feature shuts down the engine in the presence of excessive engine idling with no operator interaction, in the effort to increase fuel economy. When shutdown occurs, battery drain may occur because the engine is stopped but the keyswitch is on. To reduce battery drain, the Low Idle Shutdown relay disconnects power from high-current devices such as the HVAC blower. The relay is usually installed on the fuse panel. The Low Idle Shutdown relay has two states, powered and shutdown. When the relay is in the powered state, the engine is keyed off, running, or in any condition other than a shutdown condition initiated by the Low Idle Shutdown feature. The relay is de-energized, high-current devices receive electrical power through normally closed contacts of the relay. When the relay is in the shutdown state, the engine has been shut down by the Low Idle Shutdown feature. The relay is energized, the high-current devices are unpowered. The relay remains in this state until the keyswitch is turned off or the engine is cranked for restart. Low Idle Shutdown Relay Diagram Low Idle Shutdown Relay Specifications Item Requirement Relay Type 1 Form B or better Minimum No. of Terminals Four: Terminals 1,2,3, and 4 (reference only) Minimum No. of States Two: POWERED or SHUTDOWN - Powered De-energized: Terminals 3-4 Closed - Shutdown Energized: Terminals 3-4 Open Nominal Coil Voltage 12 VDC/24 VDC Maximum Coil Current 2 A Minimum Coil Resistance 6 Ω @ 12V, 12 Ω @ 24V Maximum Coil Induction 130 mH Contact Rating OEM Responsibility
  • 24. AEB 15.42 Page 24 of 44 Intake Air Heater Relay (Grid Heater) Applications The Air Heater relay controls operating power to an OEM-supplied grid heater. The grid heater heats the intake manifold immediately before and after the engine is started, which improves cold engine starting and reduces white smoke. The grid heater is automatically activated by the Intake Air heater feature when the engine is cold. The Intake Air Heater relay is normally installed in the engine compartment. The Intake Air Heater relay has two states, heat or off. Intake manifold heating will occur immediately before and after engine start depending on a combination of intake manifold temperature and coolant temperature. When intake manifold heating is required, the relay assumes heat. Operating power is applied to the grid heater through normally open contacts of the relay. When intake manifold heating is no longer required, the relay assumes off. Operating power is removed from the grid heater. Intake Air Heater Relay Diagram Intake Air Heater Relay Specifications Item Requirement Relay Type 1 Form A or better Minimum No. of Terminals Four: Terminals 1,2,3, and 4 (reference only) Minimum No. of States Two: HEAT or OFF - HEAT Terminals 3-4 Closed - OFF Terminals 3-4 Open Nominal Coil Voltage 12 VDC/24 VDC Maximum Coil Current 2 A Minimum Coil Resistance 6 Ω @ 12V, 12 Ω @ 24V Maximum Coil Induction 130 mH Contact Rating OEM Responsibility Item Manufacturer Manufacturer Part No. Cummins Part No. 12v Relay White-Roger 120-105111-5 3916301 24v Relay White-Roger 120-114751-5 3916302 24 VDC High Power Relay
  • 25. AEB 15.42 Page 25 of 44 Power Relay VP44 - QSB The VP44 Power Relay controls the power to the VP44 module. It is controlled by the Quantum control and the control signal follows the key switch state. The VP44 Power Relay along with a 5 foot extension harness is shipped with the engine. The OEM is responsible for choosing an appropriate location for the relay and mounting it in the equipment. The relay can be mounted in any loacation where exposure to road splash is absent and vibration is minimized. It should be mounted with the tab up (wires down) in a vertical orientation. Power Relay Item Requirement Operate Voltage 3.0 - 7.2V Coil Resistance 90 Ohms +/- 10% Maximum Break Current 40A @ 14 VDC Resistive Maximum Continuous Current 30 Amp max Contact Material Silver Plated, over Nickel
  • 26. AEB 15.42 Page 26 of 44 Switched Outputs Relay The Switched Outputs feature can drive one or both relays, Switched Outputs Relay A and/or Switched Outputs Relay B. Each relay may be used for any desired purpose, such as control of heaters, valves, etc. Solenoids are also acceptable that meet the coil specifications shown below. Each relay may respond to trigger parameters such as engine speed, engine torque, boost pressure, shaft speed, oil pressure, coolant temperature, commanded throttle, ISC status. Refer to AEB 15.40 for all parameters. Each relay is configured separately and operates independently. Switched Outputs Relay A & B Diagram Switched Outputs Relay A & B Specifications Item Requirement Relay Type 1 Form C or as required by application Minimum No. of Terminals Five: Terminals 1,2,3,4, and 5 (reference only) Minimum No. of States Two: ENERGIZED or DEENERGIZED - DEENERGIZED Terminals 3-4 closed, Terminals 3-5 open - ENGERIZED Terminals 3-4 open, Terminals 3-5 closed Nominal Coil Voltage 12 VDC/24 VDC Maximum Coil Current 2 A Minimum Coil Resistance 6 Ω @ 12V, 12 Ω @ 24V Maximum Coil Inductance 130 mH Contact Rating OEM Responsibility
  • 27. AEB 15.42 Page 27 of 44 Acceptable Relay This relay is suitable for use as a Low Idle Shutdown relay, Switched Outputs Relay A, or Switched Outputs Relay B. The relay can be mounted anywhere, engine compartment or in-cab mounting is preferred. There are actually two visually identical relays which differ by solenoid voltage, 12V or 24V. Choose the relay that corresponds to your machine system voltage. Both relays are available in limited quantities through Cummins distributors. It is a Form C relay rated at 30 amps continuous. It can operate at temperatures from -40 to +125 o C and is water-resistant. The 12V relay has a coil resistance of 90 ohms, the 24V relay has a coil resistance of 360 ohms. The relay will mate to any standard DIN base, it is shown mating a Packard bracket mount socket which is supplied with a terminal retainer. This socket can be mounted individually on a single stud, or it can be interlocked with other relays. Acceptable Relay Acceptable Relay Part List Item Manufacturer Manufacturer Part No. Cummins Part No. 12V Relay Siemens VF28-65F14-Z03/S01 3658948 24V Relay Siemens VF28-65H14-Z03/S08 3658780 Base Packard 12110539 Terminal Packard 12129409 TPA Packard 12110540 Seal Packard 1215323
  • 28. AEB 15.42 Page 28 of 44 Section IV: Switches Switch Conventions Introduction This document has standardized the manner in which switches are defined in order to promote maximum comprehension of the switch requirements. There are two features of every switch, configuration and characteristics. Each feature may be described for a switch using words or symbols. This document uses both methods. Switch Configuration A switch configuration is the number of poles and the number of throws. Poles are the number of electrically independent switch contacts that are simultaneously switched. Throws are the number of switch positions that result in a switch contact. • Descriptions - When defining switch configuration by words, the number of poles are indicated by prefix (S for single, D for double, 3,5,etc.) followed by the letter P. The number of throws is indicated by the same prefixes, followed by the letter T. For example, a single-pole, double-throw switch is written as SPDT. • Symbols - When defining switch configuration using a picture, the number of poles are indicated by the number of switch wipers connected by a dashed line. The number of throws are typically indicated by the number of terminals (numbered open circles) to which a wiper connects. Switch Diagram Legend Switch Characteristics A switch characteristic is the contact and action at each switch position. Contact is whether the switch position makes or breaks an electrical connection at that position. Action is whether the switch position is momentary or latched. • Descriptions - When defining switch characteristics by words, contact is indicated by an on or an off which is supplied for each switch position. Momentary action is indicated by parenthesis around (on) or (off); latched action is indicated by an absence of parenthesis • Symbols - When defining switch characteristics by pictures, contact is indicated if a terminal (numbered open circle) is present at that switch position. Momentary action is indicated by a filled triangle at that switch position; latched action is indicated by a filled circle at that switch position.
  • 29. AEB 15.42 Page 29 of 44 Alternate Droop Switch Application The Alternate Droop switch selects different droop characteristics for the High Idle Governor feature or the All Speed Governor (ASG) feature or both. This is desirable when the machine is transitioning to a different mode of operation, for example from loading to hauling. The transition may be performed by any dedicated switch contacts, including a relay or a manual operator switch. Installation depends on the type of switch that is used.. Alternate Droop Switch Diagram Alternate Droop Switch Specifications Item Requirement Switch Type SPST Contacts Minimum No. of Terminals Two: Terminal 1 and Terminal 2 (reference only) Minimum No. of States Two: BASE DROOP and ALTERNATE DROOP - BASE DROOP Terminals 1-2 Open - ALTERNATE DROOP Terminals 1-2 Closed Contact Resistance (Closed) < 10 Ohm Contact Resistance (Open > 50 KOhm Nominal Current 10 mA Contact Material Gold Flash
  • 30. AEB 15.42 Page 30 of 44 Alternate Low Idle Switch Application The Alternate Low Idle switch selects a different low idle engine speed. A higher low idle engine speed is useful for warming up the engine, or when an application operates the engine on low idle governor. The alternate low idle engine speed may be selected by any dedicated switch contacts, including a relay or a manual operator switch. Installation depends on the type of switch that is used. Operation The Alternate low Idle switch has two positions, base low idle or alternate low idle. The switch operates in the Normal or Transition mode depending on an optional customer selection. • Normal Mode - When the switch is in the base low idle position, the engine's low idle speed is defined by the Low Idle Governor feature. When the switch is in the alternate low idle position, engine low idle speed is instead defined by the Switchable Low Idle feature. • Transition Mode - This mode requires a switch transition from base low idle to alternate low idle subsequent to key-on to select the alternate low idle. Until this transition has occurred, or when the switch is in the Base Low Idle position, engine low idle speed is defined by the Low Idle Governor feature. If the transition has occurred and the switch is in the alternate low idle position, engine low idle speed is instead defined by the Switchable Low Idle feature. Alternate Low Idle Switch Diagram Alternate Low Idle Switch Specifications Item Requirement Switch Type SPST Contacts Minimum No. of Terminals Two: Terminal 1 and Terminal 2 (reference only) Minimum No. of States Two: BASE LOW IDLE and ALTERNATE LOW IDLE - BASE LOW IDLE Terminals 1-2 Open - ALTERNATE LOW IDLE Terminals 1-2 Closed Contact Resistance (Closed) < 10 Ohm Contact Resistance (Open > 50 KOhm Nominal Current 10 mA Contact Material Gold Flash
  • 31. AEB 15.42 Page 31 of 44 Alternate Torque Switch Applications The Alternate Torque switch toggles between the normal 100% curve and up to two alternate torque curves. A different torque curve results in an engine with different HP ratings. Different horsepower ratings are desirable when the same engine is used for dual modes of operation, for example hauling vs. loading. A torque curve may be selected by any dedicated switch contacts, including a relay or a manual operator switch. Installation depends on the type of switch that is used. Operation without Boost Power The following operational description applies when the Automatic Boost Power feature is not enabled. The Alternate Torque switch has two or three switch positions (see switch diagram). When the switch is in the Low position, a lower calibratible torque curve is used. Engine torque is limited to the lower curve. The ECM may be calibrated for either a Normal or Failsafe configuration of the switch. Alternate Torque Switch Diagram Figure 1-5 Switches Configuration Alternate Torque Switch Specifications Item Requirement Configuration Type Normal Failsafe Switch Type SPST Contacts SPST Contacts Minimum No. of Terminals Two: Terminal 1 and 2 (ref only) Two: Terminal A and B (ref only) Minimum No. of States Two: HIGH or LOW Two: HIGH or LOW - HIGH Terminal 1-2 Open Terminal A_B Closed - LOW Terminals 1-2 Closed Terminals A-B Open Contact Resistance (Closed) < 10 Ohm Contact Resistance (Open > 50 KOhm Nominal Current 10 mA Contact Material Gold Flash Open 2 1 1: Normal 100% curve 2: Alternate torque curve Open resistive 3 2 1 1: Normal 100% curve 2: Alternate torque curve 2 3: Alternate torque curve 1 a) Two-Position Switch b) Three-Position Switch 1.5K 1% 1/8 watt ground
  • 32. AEB 15.42 Page 32 of 44 AXG On/Off Switch Application The AXG On/Off switch selects operation of the Auxiliary Speed Governor (AXG), AXG is an auxiliary fueling governor that varies engine torque in an attempt to control either shaft speed or an application-specific pressure, depending upon the engine configuration. The AXG On/Off switch has two positions, on or off. When the switch is in the off position, the engine fueling is not controlled by the AXG. When the switch is in the on position and there are no AXG faults, engine fueling is controlled by the AXG, permitting shaft speed control or pressure control from a commanded throttle input. AXG on/off Switch Diagram Alternate Low Idle Switch Specifications Item Requirement Switch Type SPST on-off Toggle Minimum No. of Terminals Two: Terminal 1 and Terminal 2 (reference only) Minimum No. of States Two: OFF or ON - OFF Terminals 1-2 Open - ON Terminals 1-2 Closed Contact Resistance (Closed) < 10 Ohm Contact Resistance (Open > 50 KOhm Nominal Current 10 mA Contact Material Gold Flash
  • 33. AEB 15.42 Page 33 of 44 Air Conditioner Pressure Switch Applications The Air Conditioner Pressure switch detects air condition refrigerant pressure relative to two pressure thresholds defined by the switch. It generates a control signal for the Electronic Fan Clutch feature which in turn operates an air conditioning condenser fan. This switch is inserted into the high-pressure side of the air conditioner refrigerant system. A hysteresis of 2-4 PSI is recommended between the two pressure thresholds to prevent an excessive number of fan clutch state transitions. The Air Condition Pressure switch has two positions, pressure high or pressure not high, and two thresholds, upper and lower. On rising refrigerant pressure, the switch will transition to the Pressure High position when pressure exceed the upper threshold. In this position, On/Off fan will operate at its characteristic RPM, a Variable-Speed fan will operate at selectable rpm. On falling refrigerant pressure, the switch will transition to the pressure not high position when pressure falls below the lower threshold. In this switch position, the fan does not operate due to refrigerant pressure. However, the fan may still run in response to some other need such as high coolant temperature. Air Conditioner Pressure Switch Diagram Air Conditioner Pressure Switch Specifications Item Requirement Switch Type SPST (On)-Off Activated Minimum No. of Terminals Two: Terminal 1 and Terminal 2 (reference only) Minimum No. of States Two: PRESSURE NOT HIGH or PRESSURE HIGH - PRESSURE NOT HIGH Latched Action: Terminals 1-2 Closed - PRESSURE HIGH Momentary Action: Terminals 1-2 Open Contact Resistance (Closed) < 10 Ohm Contact Resistance (Open) > 50 KOhm Nominal Current 10 mA Contact Material Gold Flash
  • 34. AEB 15.42 Page 34 of 44 Pressure Switches: Brake Switch Description This normally closed sing pole, single throw (SPST) plunger design limit switch is rated for one million switch cycles. It has an actuation force of 4.17 N [0.937 lbf] (15 ounces) and the total plunger movement is 4.928 mm [0.1938 in]. The recommended switch actuation is 3.175 mm [0.1249 in] to avoid undesirable bottoming out. An elastomeric sealing boot keeps harsh abrasive from damaging the plunger body and guide. Gold contacts make the switch reliable for low voltage and current switching. Application The signal from the brake pressure is used to disable cruise control and ISC operations. It is mounted directly, or with a T-fitting, into the low pressure control side of the truck's pneumatic brake system. When the brake pedal is actuated or the trailer brake is applied, the pneumatic pressure rises from 0 psig to 90 psig. An open circuit to the control module, whether by this switch or a wiring circuit failure, will disable the cruise control function. This switch is qualified for under-the-dashboard mounting only. A molded rubber boot is recommended for use with the mating connector. Pressure Switch Item Requirement Contact Regulator 10mA through contacts; 2A max Prime Accuracy +/- 2psig Switch Threshold 4 psig Proof Pressure 150 psig
  • 35. AEB 15.42 Page 35 of 44 Switches and Switch Assemblies: Rotary Clutch Switch Assembly Description The Clutch Switch Assembly is comprised of a rotary switch, lever and rod assembly and a switch bracket. The rotary switch is a normally closed single pole, single throw switch that is designed to exceed one million switch cycles. Gold contacts make it reliable for low voltage and current switching. The shaft is 7.87 millimeters [0.309 in] in diameter. At the open position, actuation torque is 1.34 N-m [0.988 ft-lbf] (190 inch-ounces). Total mechanical travel is 40 degrees of maximum rotation with 35 degrees of maximum pretravel and 3 degrees of differential travel. The ruggedness of this switch allows it to be used in high vibration environments. Application The device can be mounted either in the cab or under the cab. The rod is cut or bent to fit the top or front side of the clutch arm so that the clutch rest position has the switch in the closed-circuit mode. As the clutch pedal is depressed, the linkage arm will move and the spring preload in the switch will cause the rod to follow and open the switch circuit. When mounted under the cab, a shield should be added to prevent direct road splash on the rotary shaft area. Switch and Switch Assembly Item Requirement Current Rating 10 mA +/- @ 5V +/- 0.25 Voltage Maximum 16V Contact Material Gold-Plated
  • 36. AEB 15.42 Page 36 of 44 Switches and Switch Assemblies: Optional Clutch Brake Switch Description This normally closed single pole, single throw (SPST) plunger design limit switch is rated for one million switch cycles. It has an actuation force of 4.17 N [0.937 lbf[ (15 ounces) and the total plunger movement is 4.928 mm [0/1938 in]. The recommended switch actuation is 3.176 mm [0.1249 in] to avoid undesirable bottoming out. An elastomeric sealing boot keeps harsh abrasives from damaging the plunger body and guide. Gold contacts make the switch reliable for low voltage and current switching. Application The limit switch may be closed as an optional clutch switch instead of the rotary clutch switch assembly. It is mounted on the bell housing of the transmission and is operated by an actuating bracket attached to the bell crank. The slim packaging of this harsh environment plunger switch allows it to be easily mounted for limited switch application. Two mounting holes 5.08 mm [0.199 in] in diameter accommodate number 10 capscrews for bracket compatibility. The actuators that impinge on the plunger should be adjusted to the specified range of the switch. Optional Clutch Switch Item Requirement Current Rating 10 mA +/- @ 5V +/- 0.25 Output Inductive load of 2.7 ohms @ 50 mH Voltage 16 Vdc maximum Supply Voltage 5V Contact Material Gold-Plated
  • 37. AEB 15.42 Page 37 of 44 SECTION V: SENSORS Vehicle Speed Sensor (Variable Reluctance Magnetic Pickup) Application - This sensor is mounted through the transmission case and senses passing teeth from a 16-tooth or optional 11-tooth gear. Each revolution of the gear produces 16 or 11 cycles of quasi-sinusoidal voltage. The sensor responds down to 1 mph which is 31 rpm of the 16-tooth speedometer gear shown in the accompanying illustration. At the time of installation, the sensor is to be hand turned until it touches the target, then backed off one-half turn and the jam nut tightened. The sensor is polarity sensitive and a sharp positive- to-negative transition is accomplished by using the white lead wire as the positive reference and the black wire as the negative reference. It can also be used as a dual output engine speed sensor, mounted through the ring gear housing to sense ring gear teeth. Hardware - This sensor is a single pole piece, dual output variable reluctance magnetic pickup in which each output is physically isolated from the other. The output swings positive when the target approaches, passes through zero when the target and pole piece are coincident, and then swings negative when the target leaves. Voltage amplitude is a function of gap, target size and angular velocity. Magnetic Pickup Sensor Magnetic Pickup Sensor Part List Item Manufacturer Manufacturer Part No. Cummins Part No. Shrouds Packard 12010973 Terminals Packard 12089040 Seals Packard 12015323
  • 38. AEB 15.42 Page 38 of 44 Water-in-Fuel Sensor and Drain Unit (For Spin-on FWS) Application - The WIF sensor drain unit is designed to be installed at the bottom of the spin-on fuel water separator (FWS). This fuel water separator is designed for the QSB, QSC & QSL9 engines. The 1.25-10uns - 2A threads are required in the filter shell to accept the unit. Hardware - The design includes a water drain unit, WIF sensor, harness, and Packard connector. This water in fuel sensor is a double pin injection molded part. The pins are injection molded and sealed from possible fuel leakage. The drain valve is a push-up type of water drain valve. The assembly has a 0-ring in the threaded area for an installation seal between the WIF sensor and the filter shell nut. The Packard connector is a type of weather tight sealed connector. Water-in-Fuel Sensor (Spin-on) Water-in-Fuel Sensor Part List Item Manufacturer Manufacturer Part No. Cummins Part No. Connector Packard 12066016 Mating Connector Packard 12040753
  • 39. AEB 15.42 Page 39 of 44 ANALOG SENSORS OEM Pressure Sensor Application -The OEM Pressure sensor may be used to detect the pressure of any desired liquid or gas. OEM pressure can be used to switch any device on or off, to initiate an engine shutdown, or to control a fan. OEM Pressure can be governed to a reference pressure in order to drive air- or hydraulically-powered equipment. Any or all applications can be met at once. Installation varies according to application. Operation - The OEM Pressure sensor converts detected pressure into a DC voltage. This voltage is detected by the ECM and converted into OEM pressure using a calculation that performs a linear interpolation between two breakpoints. OEM pressure may be used by any or all of the following features: • Auxiliary Governor - This feature converts throttle input into a reference OEM pressure. Then using a feedback loop, engine torque is varied as required to maintain this OEM pressure. Depending on the application, OEM pressure can be maintained at a pre-selected value, or continuously variable OEM pressure control is possible. • Electronic Fan Clutch - If the fan type is Variable-Speed, OEM pressure is applied to a calibration table to generate a characteristic PWM frequency. The fan will operate at the minimum fan speed corresponding to the characteristic PWM frequency. If the fan type is On/Off, the fan will turn on or off when OEM pressure transitions through a pressure threshold. • Switched Outputs - OEM pressure is one of several trigger parameters for three options: Relay A, Relay B, and Engine Shutdown. Each option has one or more associated pressure thresholds. Depending on OEM pressure value relative to these thresholds, the OEM pressure trigger parameter is either ACTIVE or INACTIVE for each option. When the desired combination of trigger parameters is ACTIVE for the Relay A option, that relay energizes or de-energizes. When the desired combination of trigger parameters is ACTIVE for the Relay B option, that relay energizes or de-energizes. When the desired combination of trigger parameters is ACTIVE for the Engine Shutdown option, an engine shutdown is initiated. Increasing Pressure OEM Pressure Sensor Diagram OEM Pressure Sensor Specifications Item Requirement Sensor Type Ratiometric Pressure Minimum No. of Terminals Three: Supply (+), Return, and Pressure Default Pressure Range 0-350 PSI Supply Voltage 5V + 5% Maximum Supply Current 50 mA Output Voltage Range 0.5-4.5 V Default Output Voltage @ Pressure [(4xPSI)/350] + 0.5 V Maximum Output Current 100 µA SUPPLY (+) RETURN PRESSURE
  • 40. AEB 15.42 Page 40 of 44 Acceptable OEM Pressure Sensor Application – This sensor is suitable for use as an OEM pressure sensor when the default calibration is used. Its pressure vs. voltage curve is compatible with the baseline CM570 calibration for the OEM pressure sensor. This sensor is especially suited to detect hydraulic fluid pressure, compressed air pressure, and fuel pressure. The sensor cannot be used to detect coolant pressure. The sensor has been exhaustively qualified by Cummins, resulting in a highly accurate, highly reliable, low cost component. The sensor is available in limited quantities through Cummins distributors. Hardware – This sensor is a Kavlico P165 series. It is a 0-350 PSIA sensor with a brass housing and a fluorocarbon o-ring. It can operate at temperatures from –40 to +125 o C. Its output voltage is accurate to +4% (160 mV) over its entire temperature and pressure range. However, in the critical 200-300 PSIA pressure range and 26 to 85 o C temperature range, accuracy is +0.5% (20 mV). The sensor mates to a Packard Metri- Pack 150 series connector. A connector boot is available and recommended for external applications. Acceptable OEM Pressure Sensor Acceptable OEM Pressure Sensor Part List Item Manufacturer Manufacturer Part No. Cummins Part No. Sensor Only Kavlico P165-5383 3330999 Sensor + O-Ring Cummins 3330998 3330998 Mating Connector Packard 12162280 3657184 Connector Socket Packard 12124075 Connector Boot Ell-Tron 3656059 3656059
  • 41. AEB 15.42 Page 41 of 44 OEM Temperature Sensor Specifications Application – The OEM temperature sensor may be used to detect the temperature of any desired liquid or gas. The detected temperature can be used to switch any device on or off, to initiate an engine shutdown, or to control a fan. Any or all applications can be met at once. Installation varies according to application. Operation – The OEM temperature sensor converts detected temperature into a resistance. This resistance is detected by ECM and converted into OEM temperature using a table with 20 breakpoints. OEM temperature may be used by either or both of the following features. a. Electronic Fan Clutch – If the fan type is variable-speed, OEM temperature is applied to a calibration table to generate a characteristic PWM frequency. The fan will operate at the minimum fan speed corresponding to the characteristic PWM frequency. If the fan type is on/off, the fan will turn on or off when OEM temperature transitions through a temperature threshold. b. Switched Outputs – OEM temperature is one of several trigger parameters for three options: Relay A, Relay B, and Engine Shutdown. Each option has one or more associated temperature thresholds. Depending on OEM temperature relative to these thresholds, the OEM temperature trigger parameter is either ACTIVE or INACTIVE for each option. When the desired combination of trigger parameters is ACTIVE for the Relay A option, that relay energizes or deenergizes. When the desired combination of trigger parameters is ACTIVE for Relay B option, that relay energizes or deenergizes. When the desired combination of trigger parameters is ACTIVE for the engine Shutdown option and Engine Shutdown is initiated. OEM Temperature Sensor Specifications Item Requirement Sensor Type Resistive Temperature Minimum No. of Terminals Two: Return and Temperature Default Temperature Range -15 to + 150 o C (5 to 302 o F) Output Voltage Range 0.28-4.82 V Default Resistance @ Temperature Refer to OEM Temperature Sensor Baseline Calibration table Maximum Output Current 1.7 mA
  • 42. AEB 15.42 Page 42 of 44 OEM Temperature Sensor Baseline Calibration BP Counts Deg. F Volts K Ohms Deg. C 0 58 302 .28 .17 150 1 74 282 .36 .22 139 2 96 262 .47 .30 128 3 109 252 .53 .34 122 4 125 242 .61 .40 117 5 143 232 .70 .47 111 6 161 223 .79 .54 106 7 185 213 .90 .63 101 8 211 203 1.03 .74 95 9 242 193 1.18 .89 89 10 276 183 1.35 1.06 84 11 357 163 1.74 1.53 73 12 453 143 2.21 2.27 62 13 554 124 2.71 3.40 51 14 663 104 3.24 5.28 40 15 765 84 3.74 8.52 29 16 850 64 4.15 14.01 18 17 915 44 4.47 24.20 7 18 958 25 4.68 41.97 -1 19 987 5 4.82 76.85 -15
  • 43. AEB 15.42 Page 43 of 44 Acceptable OEM Temperature Sensor Application – There are four Cummins-qualified sensors suitable for use as an OEM Temperature sensor. Their temperatures vs. resistance curves are compatible with the baseline CM570 calibration for the OEM Temperature sensor. The sensors are listed in the Acceptable OEM Temperature Sensor Application table. The variations among these sensors ensure that one of these sensors should be capable of detecting the temperature of almost any type of gas or liquid in an internal or external environment. The sensors cannot be used to detect coolant temperature. The sensors are available in limited quantities through Cummins distributors. Acceptable OEM Temperature Sensor Application # Assembly Hardware Medium Environment Probe Style 1 3865312 English Gas or Liquid External Unvented 2 3865346 English Gas Internal Vented 3 3085185 Metric Gas or Liquid External Unvented 4 3408345 Metric Gas Internal Vented Hardware – All sensors are manufactured by Hi-Stat. They are –40 to +150 o C sensors with a fluorocarbon o- ring. They can operate at pressures as high as 350 PSIB. Their resistance is highly accurate in the critical upper temperature ranges: +1.65% from 100 to 145 o C, +2.1% from 85 to 100 o C. The sensors mate to a Packard Metri-Pack 150 series connector. A connector boot is available and recommended for external applications. Dimensions are identical for every sensor except as noted in the Acceptable OEM Temperature Sensor Dimensions table. Acceptable OEM Temperature Sensor
  • 44. AEB 15.42 Page 44 of 44 Acceptable OEM Temperature Sensors Acceptable OEM Temperature Sensor Part List Item Manufacturer Manufacturer Part No. Cummins Part No. Sensor 1 Only Hi-Stat 8316-202 3865323 Sensor 1 + O-Ring Cummins 3865312 3865312 Sensor 2 Only Hi-Stat 8416-206 3096153 Sensor 2 + O-Ring Cummins 3865346 3865346 Sensor 3 Only Hi-Stat 8316-201 3085198 Sensor 3 + O-Ring Cummins 3085185 3085185 Sensor 4 Only Hi-Stat 8416-211 3408346 Sensor 4 + O-Ring Cummins 3408345 3408345 Mating Connector Packard 1216 2193 3657186 Connector Socket Packard 1212 4076 Connector Boot Ell-Tron 3656057 3656057 Acceptable OEM Temperature Sensor Dimensions # Assembly Part Number Integral Hex Across Flats Thread Size 1 3865312 13/16 in. 9/16-18 UNF-2A 2 3865346 13/16 in. 9/16-18 UNF-2A 3 3085185 21 mm M14 X 1.5-6H 4 3408345 21 mm M14 X 1.5-6H