SlideShare una empresa de Scribd logo
1 de 23
Descargar para leer sin conexión
Lexis®
for Microsoft®
Office
QUICKSTARTGUIDE
Sign-In
First, click the LexisNexis®
tab in the top right corner of the Microsoft®
Word ribbon.
You will need to sign in the first time you use the product with your Lexis Advance®
ID and password. Once you have
signed in the first time, you will not have to sign in again unless you change your ID or password. The sign-in page should
automatically pop up the first time you click on the LexisNexis tab; if it does not, click on Options.
Table of Contents
Sign-In............................................................................................................................................................................................................................... 1
Options............................................................................................................................................................................................................................. 2
Remove Citation Metadata/Hyperlinks................................................................................................................................................................ 2
Check Cite Format....................................................................................................................................................................................................... 3
Step-by-Step Check Cite Format “How To”........................................................................................................................................................ 4
Check Cite Format with Shepard’s Signal™ Indicators.................................................................................................................................. 10
How to Check Quotes.............................................................................................................................................................................................. 11
How to Create a TOA............................................................................................................................................................................................... 12
Report Delivery..........................................................................................................................................................................................................20
Link to Cites................................................................................................................................................................................................................. 21
Appendix—How to Turn off “Hidden Text” in Word 2016......................................................................................................................... 21
Options
Before using the latest version of Lexis®
for Microsoft®
Office for the first time, you will want to set your default Options
for Citation Format. The default setting for the product out of the box is The Bluebook®
with italics for case names.
You can change this to underlining if that is your organization’s standard formatting for case names. You can also choose
to have case names appear in bold in addition to your choice of italics or underlining in both your document and Table of
Authorities (TOA).
Before using any feature of Lexis for Microsoft Office (like Prepare
TOA), you should first perform Remove Citation Metadata and
Remove Hyperlinks. These tools are located under Set Cite Format.
1. If your document has never had Lexis for Microsoft Office
used on it before or if it was converted from .pdf or
WordPerfect®
, you should use Remove Citation Metadata
at the outset to avoid unexpected Lexis for Microsoft Office
behavior caused by underlying field codes, etc.
2. After your document has had Lexis for Microsoft Office used
on it, you may click Remove Citation Metadata just prior to
submission to court. (Note: Lexis for Microsoft Office uses its
own metadata to create TOAs, so you can’t update a TOA after
clicking Remove Citation Metadata.)
If creating a TOA is part of your workflow, you
should also review the options for creating a
default layout. The default layout can be different
for each document without affecting the standard
settings by utilizing the Customize format option
in the TOA preview pane (more detail provided in
the Prepare TOA section of this document).
Remove Citation Metadata/Hyperlinks
2
Check Cite Format
The Check Cite Format feature pulls your cites into the right-hand pane for review. While this feature does
not have to be used before performing other Lexis for Microsoft Office features like Prepare TOA, we recommend
that you use this feature for optimal results and proceed as follows for the most efficient use of this tool.
OVERVIEW
• After the Check Cite Format report appears in the right-hand pane, scan the results and:
	° Change cite boundaries as appropriate
	° Change parent citation if necessary
	° Choose Let me edit text of current citation or Use current as desired
	° Mark multiple citations as Not a Cite so they will not be included in your TOA if necessary
• Review your citations with the suggested corrections created by Lexis for Microsoft Office. If there are any
corrections you do not wish to accept, click on Use Current to mark the citation with a yellow checkmark
and it will be left “as is” (i.e., confirmed but uncorrected).
• If you need to edit a child citation (like Id. or other short form), first review the parent cite and either confirm
or correct it—which should lead to automatic correction of the child cite(s) or conversion to confirmed-but-
uncorrected status.
• After performing the above steps, you can run either Correct All or Use Current All on all the remaining
citations with suggestions.
	° Run Correct All to automatically correct all cites for which there are suggested corrections (and that you
have not marked as confirmed but uncorrected).
	° If you have multiple citations you would like to leave “as is” (marked as confirmed but uncorrected), you can
use the Use Current All button to mark those in a batch.
• Use the Undo button to restore a citation to the original format if you decide not to use a suggested format after
having selected the Use Suggestion option for a particular citation or Correct All for improperly formatted citations.
• Use the Show feature if you want to look only at citations marked as correct, citations with a suggestion for
correction, citations that are confirmed but uncorrected, unrecognized citations or cites marked as “not a citation.”
3
Step-by-Step Check Cite Format “How To”
Check Cite Format Step 1. Select Check Cite Format
After ensuring in Set Cite Format that the proper style manual is checked (i.e., The Bluebook, California, New York,
Florida, Texas, Illinois, or Washington), click on Check Cite Format in the Lexis for Microsoft Office ribbon.
Check Cite Format Step 2. Review your citations in the right-hand pane
Citations that are already in correct format are automatically marked with a green checkmark, and no further
review is needed. Cites flagged for further review (e.g., with a yellow exclamation mark) will appear with
“suggestions” in the right-hand pane.
You can then scroll within your document to review those cites in context and determine whether:
(a) You agree with the suggestions and wish to fix the cites via a Correct All batch
(b) You wish to perform a Change cite boundaries procedure
(c) You wish to perform a Change parent procedure
(d) You wish to manually edit your cite (via Let me edit text of current citation)
(e) You wish to Use Current (to keep your citation as is)
(f) You wish to mark a flagged cite as Not a Cite (either individually or in a batch)
Use the Show feature if you want to look only at citations marked as correct, citations with a suggestion for correction,
citations that are confirmed but uncorrected, unrecognized citations or cites marked as Not a Cite.
4
Check Cite Format Step 3. How to use Batch Not a Cite
The Check Cite Format feature allows you to mark multiple citations as Not a Cite at one time (i.e., the Statement
of Facts section of your document has numerous Id. cites to the record). To more efficiently mark these citations so
they are not included in your TOA or linked via Get Cited Docs or Link to Cites, please do the following:
• Run Check Cite Format.
• In your original document in the left-hand pane, highlight the section/paragraph/pages that contain multiple citations
you wish to mark as Not a Cite. (If you have more than one non-consecutive section/paragraph/page in which this is
the case, you will have to repeat this process.)
• Click on the Not a Cite button in the right-hand pane.
• To confirm the process, click on the Not a Cite button when the pop-up dialog box appears.
5
Check Cite Format Step 4. How to Change cite boundaries
Click the Change cite boundaries link in the dialog box to launch a pop-up box displaying the cite. You can then highlight
the precise text you want included in the citation that will be displayed in your TOA and click Submit (screenshot below).
6
Check Cite Format Step 5. How to change a parent citation
If you see that an Id. (or other short-form) citation is associated with the incorrect parent (full) citation, you
can click on the Change parent link in the dialog box. You can then choose the correct parent citation from the
pull-down menu, highlight it and click on Check Parent to validate the change. To accept the change, click on
Submit (see next two screenshots).
7
Parenting for United States Code (U.S.C.) citations works slightly differently than parenting for case citations
in Lexis for Microsoft Office. Lexis for Microsoft Office will associate child citations as a subsequent citation
under the same title even if the sections do not match.
Lexis for Microsoft Office does this because it strictly follows The Bluebook rules for citations and Bluebook Rule
4.1 permits the use of “Id. § X” for U.S.C. citations that have the same title:
Therefore, Lexis for Microsoft Office performs parenting as noted above so the tool can properly suggest Id. formatting
for citations with the same title but different sections.
How will these citations appear in the TOA? When performing the Check Cite Format function, a citation might be
noted as a child for a citation with the same title but a different section; however, there will be separate entries for each
distinct section in the TOA preview and in the TOA itself. There is no need to perform Change Parent in this situation.
8
Check Cite Format Step 6. How to batch correct citations with Correct All
The Correct All command will batch correct all cites that have only one suggested correction.
Lexis for Microsoft Office will not batch correct cites that are already correct (denoted by a green checkmark),
are unrecognized (red question mark) or are marked with a yellow checkmark because a suggested correction
was not accepted.
Once you click on Correct All at the top of the right-hand pane, a pop-up box will appear listing all the citations
to be corrected with their suggestions for correction. To correct all the listed cites, click on Correct All at the
bottom of the pop-up box (screenshot below).
Note: After Correct All is performed, all cites that previously had yellow exclamation marks should have green
checkmarks (screenshot below).
Note regarding case names: Occasionally, you may see suggestions for case names that seem inconsistent with
The Bluebook rules. This may happen because citations are checked for accuracy against Lexis Advance, and
older cases were provided directly from the court. You can always click on Get suggested document to pull up
the full-text document to check what’s online.
9
Check Cite Format with Shepard’s Signal™ Indicators
You have the option of having Shepard’s Signal™ indicators included in your Check Cite Format report. This option is a
default setting, so if you do not wish to use this additional capability, please uncheck the Include Shepard’s Signal™
indicators in the Check Cite Format report choice.
This option allows you to check each individual citation’s Shepard’s®
report from the Check Cite Format dialog box
via the Get Shepard’s®
Report link.
10
How to Check Quotes
Check Quotes Step 2. In the right-hand pane, you can review the quotes in context
When you open the dialog box to check a quote, you will be given the following options:
• Keep the quote as is (by choosing Use Current)
• Choose Use Source Text to use the original language from the opinion
• Have any changes to the original quote marked in conformity with The Bluebook rules (by choosing
Mark my changes to the source text)
• Edit your quote as it appears in the document (by choosing Let me edit my text)
• Mark text as Not a Quotation if the text is not a quotation that requires review
You can Check Quotes without performing Check Cite Format first, although
we do recommend performing Check Cite Format first for optimal results.
Check Quotes Step 1. Select Check Quotes
Check Quotes will indicate if the pinpoint page associated with the quote is incorrect; however, if the Check Cite
Format tool is not used first, the pinpoint page will not be changed in the document via Lexis for Microsoft Office—and
you can simply view the suggestion. You can, of course, make a manual edit in the original document in the left-hand
pane instead (screenshot below).
11
How to Create a TOA
TOA Step 1. Click Set Cite Format (next to Prepare TOA)
a. In Set Cite Format, select a style manual preference (The Bluebook®
, California, New York, Florida, Texas, Illinois, or
Washington).
b. In Set Cite Format, select Remove Citation Metadata for best results.
Tip: If your document has never had Lexis for Microsoft Office used on it before or if it was converted from .pdf
or WordPerfect, you should use Remove Citation Metadata at the outset to avoid unexpected Lexis for Microsoft Office
behavior caused by underlying field codes, etc.
Tip: After your document has had Lexis for Microsoft Office used on it, you may click Remove Citation Metadata just
prior to submission to court. (Note: Lexis for Microsoft Office uses its own metadata to create TOAs, so you can’t
update a TOA after clicking Remove Citation Metadata.)
c. Under Options, leave the choice, Do Not AutoCorrect selected as a default if you want the citations in your document
included in your TOA with no standardization performed by Lexis for Microsoft Office.
Note: You have the option to create a TOA without first performing
a Check Cite Format, although we do recommend doing so, as outlined
above (see page 4).
12
TOA Step 2. Click on Prepare TOA in the Lexis for Microsoft Office ribbon
v
TOA Step 3. The right-hand preview pane will display all citations found in the document
The format of the citations is whatever was set in your Options—i.e., The Bluebook, California, New York, Florida, Texas,
Illinois, or Washington. To make any adjustments to the layout of the TOA itself, just click on Customize format at the top
left of the citations preview pane. (These changes will only apply to the particular document you are working on.)
13
Please be aware that certain formatting options will only appear in the TOA upon insertion into the document,
not in the preview shown in the TOA preview pane. This includes the use of “passim” for multiple references
to the same citation.
Note: Citations in parentheses—e.g., United States v. Johnson, 988 F.2d 941, 945 (9th Cir. 1993) (citing United States v.
Frady, 456 U.S. 152, 168 (1982))—will be included as separate entries in your TOA if List citations mentioned in citing
or quoting parentheticals separately is checked in the Content Options section of the LexisNexis®
Options dialog box
(screenshot above). This can be made part of your default layout if desired. Choose the option under Content Options
to Merge federal statutory, regulatory, rule citations and state statutory citations into one Table of Authorities
entry when the citations reference the same section or rule number but different subsections if your organization’s
preference is to list those types of citations only by section in the TOA.
14
TOA Step 4. How to add/edit/move/delete TOA section headings and entries (optional)
In the citations preview pane, you can add customized section headings to your TOA, edit existing headings,
move citation entries from one heading to another or delete entries so they do not appear in the TOA, if so desired.
For example, you can add a section heading called “Federal Rules” to your TOA by clicking on Add Heading
at the top of the TOA preview pane (screenshot below).
In addition, you can edit existing TOA section headings. For example, you can rename the heading titled
“Other” to “U.S. Sentencing Guidelines” (see screenshot below).
15
If you need to delete multiple TOA entries,
you first need to click on the checkbox in
front of the specific entries and then click
on Manage Citations. You will next click
on Delete Citations on the dropdown. As
with Move Citations, please note that you
can only delete multiple citation entries
from one category at a time; if the citation
entries are in different categories, you will
have to repeat this step.
Using the up/down arrows, you can move
citation entries within a section heading.
If you want to move one or more citation
entries to a different section heading, you
need to click on the checkbox in front
of the specific entry and then click on
Manage Citations at the top left of the
TOA preview pane. You next click on Move
Citations on the dropdown. You then
choose which category you would like to
move the entries into. Please note that you
can only move multiple citation entries from
one category to another; if the citation
entries are in different categories, you will
have to repeat this step.
16
Screenshot of the TOA preview pane—ready to click the Insert TOA button (see Step 5).
You can also delete TOA
headings, but only if the heading
has no citation entries under it.
17
Below is an example of a Table of Authorities with the overall heading centered and the individual category
headings left justified with a Page(s) heading included.
TOA Step 5. When ready, click Insert TOA in the right-hand preview pane
Important: Before clicking Insert TOA, be sure to place your cursor exactly where you want the
TOA to be inserted in your document (e.g., immediately after the document cover page).
The right-hand preview pane will close, and the TOA will be inserted where you placed your cursor.
18
UNBALANCED PARENTHESES
When a document contains unbalanced parentheses,
the portion of text (which will generally contain citations)
will be pulled into Check Cite Format with a red question
mark and no suggestions. See example to the left.
If you encounter this situation, you should review the
paragraph for unbalanced parentheses (generally, this
involves a missing double end parenthesis in a citing/
quoting parenthetical—after (Tenn. 2012) in the example
on the left). Make the edits to add the missing parenthesis
in the document itself and then run Refresh Report.
TOA Step 6. Update TOA
Once your TOA is inserted, you can update it by clicking on Update TOA (in the Lexis for Microsoft Office ribbon)
and then clicking on Update TOA (in the right-hand preview pane).
19
Report Delivery
1. Click on the button in the Lexis for Microsoft Office ribbon for the function you wish to perform
(i.e., Check Cite Format, Check Quotes or Prepare TOA).
2. Once the results populate in the right-hand pane, you will see icons for email and print at the top right.
Simply click on your choice to create a report. The report will note the name of the document you are
working on (screenshots below).
In Check Cite Format, you can create an email or print report of all results or you can use the Show feature
and create a report of only select results. For example, if you want a report showing only citations that have
suggestions for correction, you can select the yellow exclamation mark from the Show pull-down menu before
you create a report. This is also true for reports created from Check Quotes.
20
Link to Cites
If you need to submit your document to court with hyperlinks to its citations, you can easily do so with
the Link to Cites feature (screenshot below).
Simply click on the Link to Cites button and permanent hyperlinks will be created for all the citations in your document.
These hyperlinks will be saved with your document and can be opened by anyone with a Lexis Advance subscription.
You should perform Link to Cites as a last step before submitting a document because utilizing other Lexis for Microsoft
Office features will remove the hyperlinks. Also, it is recommended that Check Cite Format be performed before using
Link to Cites.
If you choose Include link and Shepard’s Signal™ indicator from the Link to Cites button pull-down menu, you can create
permanent hyperlinks for all the citations in your document along with Shepard’s Signal indicators and save both with
your document.
If you wish to have separate hyperlinks created for citations which appear in parentheticals, be sure that the option in Link
to Cites to Create additional separate hyperlinks for citations in parentheticals (introductory signals, explanatory
parenthetical text not included) is chosen.
If you wish to have no hyperlink created for citations that do not resolve to a full text document on Lexis Advance (i.e., the
citation (42 U.S.C. § 1983, for example) resolves to multiple parts), be sure that the preference in Link to Cites options to
Do not create hyperlinks for citations without full document match is chosen.
In some jurisdictions, permanent hyperlinks are required for entries in the TOA as well. You can choose the preference
under the Link to Cites options to Create hyperlinks for Table of Authorities entries as a default setting.
Appendix—How to Turn off “Hidden Text” in Word 2016
To avoid pagination issues, please turn off Hidden text (if set to display) before creating a TOA. Here’s how:
Click File (top left of the Word ribbon); click Options; click Display; then uncheck the Hidden text
option (highlighted below) and click OK.
21
GENERAL TROUBLESHOOTING
If the Lexis for Microsoft Office (LexisNexis®
tab) add-in is disabled (you do not see the tab on your Word ribbon),
you may take the following steps:
Click on File and choose Options (see screenshots below).
From the Word Options menu choose Add-ins (see screenshot below).
22
Go to the bottom of the Add-ins dialog box and click on the down arrow next to Manage.
On the Disabled Items screen, click on Lexis for Microsoft Office and press enable.
When you return to the Add-ins screen, go to the Manage area.
Choose Manage COM Add-ins, then press Go.
On the COM Add-ins page, click the box next to Lexis®
for Microsoft®
Office and click OK.
It will take a few seconds, then the LexisNexis (Lexis for Microsoft Office) Add-in should appear on your
Microsoft Word ribbon.
LexisNexis, Lexis, Lexis Advance, Shepard’s and the Knowledge Burst logo are registered trademarks and Shepard’s Signal is a
trademark of RELX Inc. Microsoft is a registered trademark of Microsoft Corporation. The Bluebook is a registered trademark of
The Columbia Law Review Association, Inc., The Harvard Law Review Association, the University of Pennsylvania Law Review,
and The Yale Law Journal Company, Inc. Other products or services may be trademarks or registered trademarks of their
respective companies. © 2018 LexisNexis. BMH00478-9 0618
24/7 Customer Support:
888.539.4770 or online at LEXISNEXIS.COM/OFFICE

Más contenido relacionado

La actualidad más candente

Microsoft word features
Microsoft word featuresMicrosoft word features
Microsoft word featuresSaira Randhawa
 
Document Generation in Dynamics CRM 2016
Document Generation in Dynamics CRM 2016Document Generation in Dynamics CRM 2016
Document Generation in Dynamics CRM 2016Pankaj Shukla
 
All PDFs are Not Created Equal - Adlib White Paper - From Atidan
All PDFs are Not Created Equal - Adlib White Paper - From AtidanAll PDFs are Not Created Equal - Adlib White Paper - From Atidan
All PDFs are Not Created Equal - Adlib White Paper - From AtidanDavid J Rosenthal
 
Microsoft Word 2007 PDF
Microsoft Word 2007 PDFMicrosoft Word 2007 PDF
Microsoft Word 2007 PDFnaadaan72
 
Lesson 4- Developing ict content for specific purposes
Lesson 4- Developing ict content for specific purposesLesson 4- Developing ict content for specific purposes
Lesson 4- Developing ict content for specific purposesJuvywen
 
intro of ms word 2007
intro of ms word 2007intro of ms word 2007
intro of ms word 2007Pakeeza Noor
 
[EMPOWERMENT TECHNOLOGIES] - ADVANCED WORD PROCESSING SKILLS
[EMPOWERMENT TECHNOLOGIES] - ADVANCED WORD PROCESSING SKILLS[EMPOWERMENT TECHNOLOGIES] - ADVANCED WORD PROCESSING SKILLS
[EMPOWERMENT TECHNOLOGIES] - ADVANCED WORD PROCESSING SKILLSJazzyNF
 
Unit C - CSCI 64
Unit C - CSCI 64Unit C - CSCI 64
Unit C - CSCI 64dpd
 
Manual word-2010-ingles-by reparaciondepc.cl
Manual word-2010-ingles-by reparaciondepc.clManual word-2010-ingles-by reparaciondepc.cl
Manual word-2010-ingles-by reparaciondepc.clthedriverpilot
 
Mail merge made easy
Mail merge made easyMail merge made easy
Mail merge made easyRoel Palmaers
 
SharePoint Document Sets - SharePoint Saturday Denver 2013
SharePoint Document Sets - SharePoint Saturday Denver 2013SharePoint Document Sets - SharePoint Saturday Denver 2013
SharePoint Document Sets - SharePoint Saturday Denver 2013SharePointWolfe
 
IJSER Template (International Journal of Scientific & Engineering Research- i...
IJSER Template (International Journal of Scientific & Engineering Research- i...IJSER Template (International Journal of Scientific & Engineering Research- i...
IJSER Template (International Journal of Scientific & Engineering Research- i...IJSER
 
computer applications in business unit 3
computer applications in business unit 3computer applications in business unit 3
computer applications in business unit 3Dr T.Sivakami
 
computer applications in Business unit 2
computer applications in Business unit 2computer applications in Business unit 2
computer applications in Business unit 2Dr T.Sivakami
 

La actualidad más candente (20)

Microsoft word features
Microsoft word featuresMicrosoft word features
Microsoft word features
 
Document Generation in Dynamics CRM 2016
Document Generation in Dynamics CRM 2016Document Generation in Dynamics CRM 2016
Document Generation in Dynamics CRM 2016
 
All PDFs are Not Created Equal - Adlib White Paper - From Atidan
All PDFs are Not Created Equal - Adlib White Paper - From AtidanAll PDFs are Not Created Equal - Adlib White Paper - From Atidan
All PDFs are Not Created Equal - Adlib White Paper - From Atidan
 
Microsoft Word 2007 PDF
Microsoft Word 2007 PDFMicrosoft Word 2007 PDF
Microsoft Word 2007 PDF
 
Lesson 4- Developing ict content for specific purposes
Lesson 4- Developing ict content for specific purposesLesson 4- Developing ict content for specific purposes
Lesson 4- Developing ict content for specific purposes
 
Word ch06
Word ch06Word ch06
Word ch06
 
intro of ms word 2007
intro of ms word 2007intro of ms word 2007
intro of ms word 2007
 
Intro To Share Point
Intro To Share PointIntro To Share Point
Intro To Share Point
 
Word 2016
Word 2016Word 2016
Word 2016
 
[EMPOWERMENT TECHNOLOGIES] - ADVANCED WORD PROCESSING SKILLS
[EMPOWERMENT TECHNOLOGIES] - ADVANCED WORD PROCESSING SKILLS[EMPOWERMENT TECHNOLOGIES] - ADVANCED WORD PROCESSING SKILLS
[EMPOWERMENT TECHNOLOGIES] - ADVANCED WORD PROCESSING SKILLS
 
Getting Started
Getting StartedGetting Started
Getting Started
 
Unit C - CSCI 64
Unit C - CSCI 64Unit C - CSCI 64
Unit C - CSCI 64
 
Manual word-2010-ingles-by reparaciondepc.cl
Manual word-2010-ingles-by reparaciondepc.clManual word-2010-ingles-by reparaciondepc.cl
Manual word-2010-ingles-by reparaciondepc.cl
 
Getting Started
Getting StartedGetting Started
Getting Started
 
Mail merge made easy
Mail merge made easyMail merge made easy
Mail merge made easy
 
SharePoint Document Sets - SharePoint Saturday Denver 2013
SharePoint Document Sets - SharePoint Saturday Denver 2013SharePoint Document Sets - SharePoint Saturday Denver 2013
SharePoint Document Sets - SharePoint Saturday Denver 2013
 
IJSER Template (International Journal of Scientific & Engineering Research- i...
IJSER Template (International Journal of Scientific & Engineering Research- i...IJSER Template (International Journal of Scientific & Engineering Research- i...
IJSER Template (International Journal of Scientific & Engineering Research- i...
 
computer applications in business unit 3
computer applications in business unit 3computer applications in business unit 3
computer applications in business unit 3
 
What's New in Office 2016
What's New in Office 2016What's New in Office 2016
What's New in Office 2016
 
computer applications in Business unit 2
computer applications in Business unit 2computer applications in Business unit 2
computer applications in Business unit 2
 

Similar a Lexis for Microsoft Office Getting Started Guide

Lexis(R) for Microsoft(R) Office on Office 365 Quick Start Guide
Lexis(R) for Microsoft(R) Office on Office 365 Quick Start Guide Lexis(R) for Microsoft(R) Office on Office 365 Quick Start Guide
Lexis(R) for Microsoft(R) Office on Office 365 Quick Start Guide LexisNexis
 
Track changes 2007
Track changes 2007Track changes 2007
Track changes 2007Khoa (K.A)
 
Procedural_Orion-Petitclerc
Procedural_Orion-PetitclercProcedural_Orion-Petitclerc
Procedural_Orion-PetitclercOrion Petitclerc
 
How to use wordpress
How to use wordpressHow to use wordpress
How to use wordpressKyle Roberts
 
Getting Started with SharePoint Status Indicators - EPC Group
Getting Started with SharePoint Status Indicators - EPC GroupGetting Started with SharePoint Status Indicators - EPC Group
Getting Started with SharePoint Status Indicators - EPC GroupEPC Group
 
2580 microsoft excel2010_rtm_wsg_external
2580 microsoft excel2010_rtm_wsg_external2580 microsoft excel2010_rtm_wsg_external
2580 microsoft excel2010_rtm_wsg_externalBrittanyShatia
 
Microsoft Excel Tutorial
Microsoft Excel TutorialMicrosoft Excel Tutorial
Microsoft Excel TutorialFaHaD .H. NooR
 
Office 365 Productivity Tips - The Wasatch Wrangle
Office 365 Productivity Tips - The Wasatch WrangleOffice 365 Productivity Tips - The Wasatch Wrangle
Office 365 Productivity Tips - The Wasatch WrangleChristian Buckley
 
Office 365 Productivity Tips February 2018 Wasatch Wrangle
Office 365 Productivity Tips February 2018 Wasatch WrangleOffice 365 Productivity Tips February 2018 Wasatch Wrangle
Office 365 Productivity Tips February 2018 Wasatch WrangleThomas Duff
 
Getting started with the visual basic editor
Getting started with the visual basic editorGetting started with the visual basic editor
Getting started with the visual basic editorputiadetiara
 
Managing Tracking Edit911
Managing Tracking Edit911Managing Tracking Edit911
Managing Tracking Edit911Marc Baldwin
 
Office 365 Productivity Tips "April Affray"
Office 365 Productivity Tips "April Affray"Office 365 Productivity Tips "April Affray"
Office 365 Productivity Tips "April Affray"Christian Buckley
 
Benefit of MS word in an organisation
Benefit of MS word in an organisation Benefit of MS word in an organisation
Benefit of MS word in an organisation Shubham Agrawal
 
I Simply Excel
I Simply ExcelI Simply Excel
I Simply ExcelEric Couch
 

Similar a Lexis for Microsoft Office Getting Started Guide (20)

Lexis(R) for Microsoft(R) Office on Office 365 Quick Start Guide
Lexis(R) for Microsoft(R) Office on Office 365 Quick Start Guide Lexis(R) for Microsoft(R) Office on Office 365 Quick Start Guide
Lexis(R) for Microsoft(R) Office on Office 365 Quick Start Guide
 
Toa study guide
Toa study guideToa study guide
Toa study guide
 
Track changes 2007
Track changes 2007Track changes 2007
Track changes 2007
 
Procedural_Orion-Petitclerc
Procedural_Orion-PetitclercProcedural_Orion-Petitclerc
Procedural_Orion-Petitclerc
 
How to use wordpress
How to use wordpressHow to use wordpress
How to use wordpress
 
Word ch08
Word ch08Word ch08
Word ch08
 
Balloons Essay
Balloons EssayBalloons Essay
Balloons Essay
 
Getting Started with SharePoint Status Indicators - EPC Group
Getting Started with SharePoint Status Indicators - EPC GroupGetting Started with SharePoint Status Indicators - EPC Group
Getting Started with SharePoint Status Indicators - EPC Group
 
Tugas testing
Tugas testingTugas testing
Tugas testing
 
2580 microsoft excel2010_rtm_wsg_external
2580 microsoft excel2010_rtm_wsg_external2580 microsoft excel2010_rtm_wsg_external
2580 microsoft excel2010_rtm_wsg_external
 
Microsoft Excel Tutorial
Microsoft Excel TutorialMicrosoft Excel Tutorial
Microsoft Excel Tutorial
 
Office 365 Productivity Tips - The Wasatch Wrangle
Office 365 Productivity Tips - The Wasatch WrangleOffice 365 Productivity Tips - The Wasatch Wrangle
Office 365 Productivity Tips - The Wasatch Wrangle
 
Office 365 Productivity Tips February 2018 Wasatch Wrangle
Office 365 Productivity Tips February 2018 Wasatch WrangleOffice 365 Productivity Tips February 2018 Wasatch Wrangle
Office 365 Productivity Tips February 2018 Wasatch Wrangle
 
Getting started with the visual basic editor
Getting started with the visual basic editorGetting started with the visual basic editor
Getting started with the visual basic editor
 
Access4
Access4Access4
Access4
 
Managing Tracking Edit911
Managing Tracking Edit911Managing Tracking Edit911
Managing Tracking Edit911
 
Office 365 Productivity Tips "April Affray"
Office 365 Productivity Tips "April Affray"Office 365 Productivity Tips "April Affray"
Office 365 Productivity Tips "April Affray"
 
Benefit of MS word in an organisation
Benefit of MS word in an organisation Benefit of MS word in an organisation
Benefit of MS word in an organisation
 
1121.pdf
1121.pdf1121.pdf
1121.pdf
 
I Simply Excel
I Simply ExcelI Simply Excel
I Simply Excel
 

Más de LexisNexis

2022-California-Product-Listing.pdf
2022-California-Product-Listing.pdf2022-California-Product-Listing.pdf
2022-California-Product-Listing.pdfLexisNexis
 
2022-MidAtlantic-State-Catalog.pdf
2022-MidAtlantic-State-Catalog.pdf2022-MidAtlantic-State-Catalog.pdf
2022-MidAtlantic-State-Catalog.pdfLexisNexis
 
2022-New-York-Catalog.pdf
2022-New-York-Catalog.pdf2022-New-York-Catalog.pdf
2022-New-York-Catalog.pdfLexisNexis
 
2022-Bankruptcy-Product-Listing.pdf
2022-Bankruptcy-Product-Listing.pdf2022-Bankruptcy-Product-Listing.pdf
2022-Bankruptcy-Product-Listing.pdfLexisNexis
 
2022-Intellectual-Property-Catalog.pdf
2022-Intellectual-Property-Catalog.pdf2022-Intellectual-Property-Catalog.pdf
2022-Intellectual-Property-Catalog.pdfLexisNexis
 
2021 Washington State catalog
2021 Washington State catalog2021 Washington State catalog
2021 Washington State catalogLexisNexis
 
2021 Southwest Product Listing
2021 Southwest Product Listing2021 Southwest Product Listing
2021 Southwest Product ListingLexisNexis
 
2021 Southeastern States Product Listing
2021 Southeastern States Product Listing2021 Southeastern States Product Listing
2021 Southeastern States Product ListingLexisNexis
 
2021 Ohio Product Listing
2021 Ohio Product Listing2021 Ohio Product Listing
2021 Ohio Product ListingLexisNexis
 
2021 Illinois Product Listing
2021 Illinois Product Listing2021 Illinois Product Listing
2021 Illinois Product ListingLexisNexis
 
2021 Florida Product Listing
2021 Florida Product Listing2021 Florida Product Listing
2021 Florida Product ListingLexisNexis
 
2021 Estate Planning Catalog
2021 Estate Planning Catalog2021 Estate Planning Catalog
2021 Estate Planning CatalogLexisNexis
 
2021 California Product Listing
2021 California Product Listing2021 California Product Listing
2021 California Product ListingLexisNexis
 
2021 Workers Compensation product listing
2021 Workers Compensation product listing2021 Workers Compensation product listing
2021 Workers Compensation product listingLexisNexis
 
2020 New England Product Listing
2020 New England Product Listing2020 New England Product Listing
2020 New England Product ListingLexisNexis
 
Voss on Delaware Contract Law
Voss on Delaware Contract LawVoss on Delaware Contract Law
Voss on Delaware Contract LawLexisNexis
 
Be Confident in Your Research with LexisNexis
Be Confident in Your Research with LexisNexisBe Confident in Your Research with LexisNexis
Be Confident in Your Research with LexisNexisLexisNexis
 
Legal Research Solutions for Correctional Facilities
Legal Research Solutions for Correctional FacilitiesLegal Research Solutions for Correctional Facilities
Legal Research Solutions for Correctional FacilitiesLexisNexis
 
Real Estate Product Listing
Real Estate Product ListingReal Estate Product Listing
Real Estate Product ListingLexisNexis
 
AHLA Catalog 2019
AHLA Catalog 2019AHLA Catalog 2019
AHLA Catalog 2019LexisNexis
 

Más de LexisNexis (20)

2022-California-Product-Listing.pdf
2022-California-Product-Listing.pdf2022-California-Product-Listing.pdf
2022-California-Product-Listing.pdf
 
2022-MidAtlantic-State-Catalog.pdf
2022-MidAtlantic-State-Catalog.pdf2022-MidAtlantic-State-Catalog.pdf
2022-MidAtlantic-State-Catalog.pdf
 
2022-New-York-Catalog.pdf
2022-New-York-Catalog.pdf2022-New-York-Catalog.pdf
2022-New-York-Catalog.pdf
 
2022-Bankruptcy-Product-Listing.pdf
2022-Bankruptcy-Product-Listing.pdf2022-Bankruptcy-Product-Listing.pdf
2022-Bankruptcy-Product-Listing.pdf
 
2022-Intellectual-Property-Catalog.pdf
2022-Intellectual-Property-Catalog.pdf2022-Intellectual-Property-Catalog.pdf
2022-Intellectual-Property-Catalog.pdf
 
2021 Washington State catalog
2021 Washington State catalog2021 Washington State catalog
2021 Washington State catalog
 
2021 Southwest Product Listing
2021 Southwest Product Listing2021 Southwest Product Listing
2021 Southwest Product Listing
 
2021 Southeastern States Product Listing
2021 Southeastern States Product Listing2021 Southeastern States Product Listing
2021 Southeastern States Product Listing
 
2021 Ohio Product Listing
2021 Ohio Product Listing2021 Ohio Product Listing
2021 Ohio Product Listing
 
2021 Illinois Product Listing
2021 Illinois Product Listing2021 Illinois Product Listing
2021 Illinois Product Listing
 
2021 Florida Product Listing
2021 Florida Product Listing2021 Florida Product Listing
2021 Florida Product Listing
 
2021 Estate Planning Catalog
2021 Estate Planning Catalog2021 Estate Planning Catalog
2021 Estate Planning Catalog
 
2021 California Product Listing
2021 California Product Listing2021 California Product Listing
2021 California Product Listing
 
2021 Workers Compensation product listing
2021 Workers Compensation product listing2021 Workers Compensation product listing
2021 Workers Compensation product listing
 
2020 New England Product Listing
2020 New England Product Listing2020 New England Product Listing
2020 New England Product Listing
 
Voss on Delaware Contract Law
Voss on Delaware Contract LawVoss on Delaware Contract Law
Voss on Delaware Contract Law
 
Be Confident in Your Research with LexisNexis
Be Confident in Your Research with LexisNexisBe Confident in Your Research with LexisNexis
Be Confident in Your Research with LexisNexis
 
Legal Research Solutions for Correctional Facilities
Legal Research Solutions for Correctional FacilitiesLegal Research Solutions for Correctional Facilities
Legal Research Solutions for Correctional Facilities
 
Real Estate Product Listing
Real Estate Product ListingReal Estate Product Listing
Real Estate Product Listing
 
AHLA Catalog 2019
AHLA Catalog 2019AHLA Catalog 2019
AHLA Catalog 2019
 

Último

ASMA JILANI EXPLAINED CASE PLD 1972 FOR CSS
ASMA JILANI EXPLAINED CASE PLD 1972 FOR CSSASMA JILANI EXPLAINED CASE PLD 1972 FOR CSS
ASMA JILANI EXPLAINED CASE PLD 1972 FOR CSSCssSpamx
 
一比一原版(CQU毕业证书)中央昆士兰大学毕业证如何办理
一比一原版(CQU毕业证书)中央昆士兰大学毕业证如何办理一比一原版(CQU毕业证书)中央昆士兰大学毕业证如何办理
一比一原版(CQU毕业证书)中央昆士兰大学毕业证如何办理Airst S
 
一比一原版(KPU毕业证书)昆特兰理工大学毕业证如何办理
一比一原版(KPU毕业证书)昆特兰理工大学毕业证如何办理一比一原版(KPU毕业证书)昆特兰理工大学毕业证如何办理
一比一原版(KPU毕业证书)昆特兰理工大学毕业证如何办理ss
 
一比一原版(UM毕业证书)美国密歇根大学安娜堡分校毕业证如何办理
一比一原版(UM毕业证书)美国密歇根大学安娜堡分校毕业证如何办理一比一原版(UM毕业证书)美国密歇根大学安娜堡分校毕业证如何办理
一比一原版(UM毕业证书)美国密歇根大学安娜堡分校毕业证如何办理A AA
 
Career As Legal Reporters for Law Students
Career As Legal Reporters for Law StudentsCareer As Legal Reporters for Law Students
Career As Legal Reporters for Law StudentsNilendra Kumar
 
Reason Behind the Success of Law Firms in India
Reason Behind the Success of Law Firms in IndiaReason Behind the Success of Law Firms in India
Reason Behind the Success of Law Firms in IndiaYash
 
一比一原版(Griffith毕业证书)格里菲斯大学毕业证如何办理
一比一原版(Griffith毕业证书)格里菲斯大学毕业证如何办理一比一原版(Griffith毕业证书)格里菲斯大学毕业证如何办理
一比一原版(Griffith毕业证书)格里菲斯大学毕业证如何办理bd2c5966a56d
 
一比一原版(RMIT毕业证书)皇家墨尔本理工大学毕业证如何办理
一比一原版(RMIT毕业证书)皇家墨尔本理工大学毕业证如何办理一比一原版(RMIT毕业证书)皇家墨尔本理工大学毕业证如何办理
一比一原版(RMIT毕业证书)皇家墨尔本理工大学毕业证如何办理ss
 
一比一原版(纽大毕业证书)美国纽约大学毕业证如何办理
一比一原版(纽大毕业证书)美国纽约大学毕业证如何办理一比一原版(纽大毕业证书)美国纽约大学毕业证如何办理
一比一原版(纽大毕业证书)美国纽约大学毕业证如何办理e9733fc35af6
 
judicial remedies against administrative actions.pptx
judicial remedies against administrative actions.pptxjudicial remedies against administrative actions.pptx
judicial remedies against administrative actions.pptxIshikaChauhan30
 
一比一原版(UM毕业证书)密苏里大学毕业证如何办理
一比一原版(UM毕业证书)密苏里大学毕业证如何办理一比一原版(UM毕业证书)密苏里大学毕业证如何办理
一比一原版(UM毕业证书)密苏里大学毕业证如何办理F La
 
Performance of contract-1 law presentation
Performance of contract-1 law presentationPerformance of contract-1 law presentation
Performance of contract-1 law presentationKhushdeep Kaur
 
一比一原版(KPU毕业证书)加拿大昆特兰理工大学毕业证如何办理
一比一原版(KPU毕业证书)加拿大昆特兰理工大学毕业证如何办理一比一原版(KPU毕业证书)加拿大昆特兰理工大学毕业证如何办理
一比一原版(KPU毕业证书)加拿大昆特兰理工大学毕业证如何办理e9733fc35af6
 
Understanding the Role of Labor Unions and Collective Bargaining
Understanding the Role of Labor Unions and Collective BargainingUnderstanding the Role of Labor Unions and Collective Bargaining
Understanding the Role of Labor Unions and Collective Bargainingbartzlawgroup1
 
3 Formation of Company.www.seribangash.com.ppt
3 Formation of Company.www.seribangash.com.ppt3 Formation of Company.www.seribangash.com.ppt
3 Formation of Company.www.seribangash.com.pptseri bangash
 
一比一原版(QUT毕业证书)昆士兰科技大学毕业证如何办理
一比一原版(QUT毕业证书)昆士兰科技大学毕业证如何办理一比一原版(QUT毕业证书)昆士兰科技大学毕业证如何办理
一比一原版(QUT毕业证书)昆士兰科技大学毕业证如何办理Airst S
 
一比一原版(Monash毕业证书)澳洲莫纳什大学毕业证如何办理
一比一原版(Monash毕业证书)澳洲莫纳什大学毕业证如何办理一比一原版(Monash毕业证书)澳洲莫纳什大学毕业证如何办理
一比一原版(Monash毕业证书)澳洲莫纳什大学毕业证如何办理F La
 
一比一原版(QUT毕业证书)昆士兰科技大学毕业证如何办理
一比一原版(QUT毕业证书)昆士兰科技大学毕业证如何办理一比一原版(QUT毕业证书)昆士兰科技大学毕业证如何办理
一比一原版(QUT毕业证书)昆士兰科技大学毕业证如何办理bd2c5966a56d
 
A SHORT HISTORY OF LIBERTY'S PROGREE THROUGH HE EIGHTEENTH CENTURY
A SHORT HISTORY OF LIBERTY'S PROGREE THROUGH HE EIGHTEENTH CENTURYA SHORT HISTORY OF LIBERTY'S PROGREE THROUGH HE EIGHTEENTH CENTURY
A SHORT HISTORY OF LIBERTY'S PROGREE THROUGH HE EIGHTEENTH CENTURYJulian Scutts
 
Sangyun Lee, Duplicate Powers in the Criminal Referral Process and the Overla...
Sangyun Lee, Duplicate Powers in the Criminal Referral Process and the Overla...Sangyun Lee, Duplicate Powers in the Criminal Referral Process and the Overla...
Sangyun Lee, Duplicate Powers in the Criminal Referral Process and the Overla...Sangyun Lee
 

Último (20)

ASMA JILANI EXPLAINED CASE PLD 1972 FOR CSS
ASMA JILANI EXPLAINED CASE PLD 1972 FOR CSSASMA JILANI EXPLAINED CASE PLD 1972 FOR CSS
ASMA JILANI EXPLAINED CASE PLD 1972 FOR CSS
 
一比一原版(CQU毕业证书)中央昆士兰大学毕业证如何办理
一比一原版(CQU毕业证书)中央昆士兰大学毕业证如何办理一比一原版(CQU毕业证书)中央昆士兰大学毕业证如何办理
一比一原版(CQU毕业证书)中央昆士兰大学毕业证如何办理
 
一比一原版(KPU毕业证书)昆特兰理工大学毕业证如何办理
一比一原版(KPU毕业证书)昆特兰理工大学毕业证如何办理一比一原版(KPU毕业证书)昆特兰理工大学毕业证如何办理
一比一原版(KPU毕业证书)昆特兰理工大学毕业证如何办理
 
一比一原版(UM毕业证书)美国密歇根大学安娜堡分校毕业证如何办理
一比一原版(UM毕业证书)美国密歇根大学安娜堡分校毕业证如何办理一比一原版(UM毕业证书)美国密歇根大学安娜堡分校毕业证如何办理
一比一原版(UM毕业证书)美国密歇根大学安娜堡分校毕业证如何办理
 
Career As Legal Reporters for Law Students
Career As Legal Reporters for Law StudentsCareer As Legal Reporters for Law Students
Career As Legal Reporters for Law Students
 
Reason Behind the Success of Law Firms in India
Reason Behind the Success of Law Firms in IndiaReason Behind the Success of Law Firms in India
Reason Behind the Success of Law Firms in India
 
一比一原版(Griffith毕业证书)格里菲斯大学毕业证如何办理
一比一原版(Griffith毕业证书)格里菲斯大学毕业证如何办理一比一原版(Griffith毕业证书)格里菲斯大学毕业证如何办理
一比一原版(Griffith毕业证书)格里菲斯大学毕业证如何办理
 
一比一原版(RMIT毕业证书)皇家墨尔本理工大学毕业证如何办理
一比一原版(RMIT毕业证书)皇家墨尔本理工大学毕业证如何办理一比一原版(RMIT毕业证书)皇家墨尔本理工大学毕业证如何办理
一比一原版(RMIT毕业证书)皇家墨尔本理工大学毕业证如何办理
 
一比一原版(纽大毕业证书)美国纽约大学毕业证如何办理
一比一原版(纽大毕业证书)美国纽约大学毕业证如何办理一比一原版(纽大毕业证书)美国纽约大学毕业证如何办理
一比一原版(纽大毕业证书)美国纽约大学毕业证如何办理
 
judicial remedies against administrative actions.pptx
judicial remedies against administrative actions.pptxjudicial remedies against administrative actions.pptx
judicial remedies against administrative actions.pptx
 
一比一原版(UM毕业证书)密苏里大学毕业证如何办理
一比一原版(UM毕业证书)密苏里大学毕业证如何办理一比一原版(UM毕业证书)密苏里大学毕业证如何办理
一比一原版(UM毕业证书)密苏里大学毕业证如何办理
 
Performance of contract-1 law presentation
Performance of contract-1 law presentationPerformance of contract-1 law presentation
Performance of contract-1 law presentation
 
一比一原版(KPU毕业证书)加拿大昆特兰理工大学毕业证如何办理
一比一原版(KPU毕业证书)加拿大昆特兰理工大学毕业证如何办理一比一原版(KPU毕业证书)加拿大昆特兰理工大学毕业证如何办理
一比一原版(KPU毕业证书)加拿大昆特兰理工大学毕业证如何办理
 
Understanding the Role of Labor Unions and Collective Bargaining
Understanding the Role of Labor Unions and Collective BargainingUnderstanding the Role of Labor Unions and Collective Bargaining
Understanding the Role of Labor Unions and Collective Bargaining
 
3 Formation of Company.www.seribangash.com.ppt
3 Formation of Company.www.seribangash.com.ppt3 Formation of Company.www.seribangash.com.ppt
3 Formation of Company.www.seribangash.com.ppt
 
一比一原版(QUT毕业证书)昆士兰科技大学毕业证如何办理
一比一原版(QUT毕业证书)昆士兰科技大学毕业证如何办理一比一原版(QUT毕业证书)昆士兰科技大学毕业证如何办理
一比一原版(QUT毕业证书)昆士兰科技大学毕业证如何办理
 
一比一原版(Monash毕业证书)澳洲莫纳什大学毕业证如何办理
一比一原版(Monash毕业证书)澳洲莫纳什大学毕业证如何办理一比一原版(Monash毕业证书)澳洲莫纳什大学毕业证如何办理
一比一原版(Monash毕业证书)澳洲莫纳什大学毕业证如何办理
 
一比一原版(QUT毕业证书)昆士兰科技大学毕业证如何办理
一比一原版(QUT毕业证书)昆士兰科技大学毕业证如何办理一比一原版(QUT毕业证书)昆士兰科技大学毕业证如何办理
一比一原版(QUT毕业证书)昆士兰科技大学毕业证如何办理
 
A SHORT HISTORY OF LIBERTY'S PROGREE THROUGH HE EIGHTEENTH CENTURY
A SHORT HISTORY OF LIBERTY'S PROGREE THROUGH HE EIGHTEENTH CENTURYA SHORT HISTORY OF LIBERTY'S PROGREE THROUGH HE EIGHTEENTH CENTURY
A SHORT HISTORY OF LIBERTY'S PROGREE THROUGH HE EIGHTEENTH CENTURY
 
Sangyun Lee, Duplicate Powers in the Criminal Referral Process and the Overla...
Sangyun Lee, Duplicate Powers in the Criminal Referral Process and the Overla...Sangyun Lee, Duplicate Powers in the Criminal Referral Process and the Overla...
Sangyun Lee, Duplicate Powers in the Criminal Referral Process and the Overla...
 

Lexis for Microsoft Office Getting Started Guide

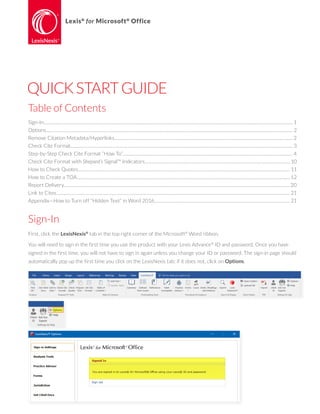
  • 1. Lexis® for Microsoft® Office QUICKSTARTGUIDE Sign-In First, click the LexisNexis® tab in the top right corner of the Microsoft® Word ribbon. You will need to sign in the first time you use the product with your Lexis Advance® ID and password. Once you have signed in the first time, you will not have to sign in again unless you change your ID or password. The sign-in page should automatically pop up the first time you click on the LexisNexis tab; if it does not, click on Options. Table of Contents Sign-In............................................................................................................................................................................................................................... 1 Options............................................................................................................................................................................................................................. 2 Remove Citation Metadata/Hyperlinks................................................................................................................................................................ 2 Check Cite Format....................................................................................................................................................................................................... 3 Step-by-Step Check Cite Format “How To”........................................................................................................................................................ 4 Check Cite Format with Shepard’s Signal™ Indicators.................................................................................................................................. 10 How to Check Quotes.............................................................................................................................................................................................. 11 How to Create a TOA............................................................................................................................................................................................... 12 Report Delivery..........................................................................................................................................................................................................20 Link to Cites................................................................................................................................................................................................................. 21 Appendix—How to Turn off “Hidden Text” in Word 2016......................................................................................................................... 21
  • 2. Options Before using the latest version of Lexis® for Microsoft® Office for the first time, you will want to set your default Options for Citation Format. The default setting for the product out of the box is The Bluebook® with italics for case names. You can change this to underlining if that is your organization’s standard formatting for case names. You can also choose to have case names appear in bold in addition to your choice of italics or underlining in both your document and Table of Authorities (TOA). Before using any feature of Lexis for Microsoft Office (like Prepare TOA), you should first perform Remove Citation Metadata and Remove Hyperlinks. These tools are located under Set Cite Format. 1. If your document has never had Lexis for Microsoft Office used on it before or if it was converted from .pdf or WordPerfect® , you should use Remove Citation Metadata at the outset to avoid unexpected Lexis for Microsoft Office behavior caused by underlying field codes, etc. 2. After your document has had Lexis for Microsoft Office used on it, you may click Remove Citation Metadata just prior to submission to court. (Note: Lexis for Microsoft Office uses its own metadata to create TOAs, so you can’t update a TOA after clicking Remove Citation Metadata.) If creating a TOA is part of your workflow, you should also review the options for creating a default layout. The default layout can be different for each document without affecting the standard settings by utilizing the Customize format option in the TOA preview pane (more detail provided in the Prepare TOA section of this document). Remove Citation Metadata/Hyperlinks 2
  • 3. Check Cite Format The Check Cite Format feature pulls your cites into the right-hand pane for review. While this feature does not have to be used before performing other Lexis for Microsoft Office features like Prepare TOA, we recommend that you use this feature for optimal results and proceed as follows for the most efficient use of this tool. OVERVIEW • After the Check Cite Format report appears in the right-hand pane, scan the results and: ° Change cite boundaries as appropriate ° Change parent citation if necessary ° Choose Let me edit text of current citation or Use current as desired ° Mark multiple citations as Not a Cite so they will not be included in your TOA if necessary • Review your citations with the suggested corrections created by Lexis for Microsoft Office. If there are any corrections you do not wish to accept, click on Use Current to mark the citation with a yellow checkmark and it will be left “as is” (i.e., confirmed but uncorrected). • If you need to edit a child citation (like Id. or other short form), first review the parent cite and either confirm or correct it—which should lead to automatic correction of the child cite(s) or conversion to confirmed-but- uncorrected status. • After performing the above steps, you can run either Correct All or Use Current All on all the remaining citations with suggestions. ° Run Correct All to automatically correct all cites for which there are suggested corrections (and that you have not marked as confirmed but uncorrected). ° If you have multiple citations you would like to leave “as is” (marked as confirmed but uncorrected), you can use the Use Current All button to mark those in a batch. • Use the Undo button to restore a citation to the original format if you decide not to use a suggested format after having selected the Use Suggestion option for a particular citation or Correct All for improperly formatted citations. • Use the Show feature if you want to look only at citations marked as correct, citations with a suggestion for correction, citations that are confirmed but uncorrected, unrecognized citations or cites marked as “not a citation.” 3
  • 4. Step-by-Step Check Cite Format “How To” Check Cite Format Step 1. Select Check Cite Format After ensuring in Set Cite Format that the proper style manual is checked (i.e., The Bluebook, California, New York, Florida, Texas, Illinois, or Washington), click on Check Cite Format in the Lexis for Microsoft Office ribbon. Check Cite Format Step 2. Review your citations in the right-hand pane Citations that are already in correct format are automatically marked with a green checkmark, and no further review is needed. Cites flagged for further review (e.g., with a yellow exclamation mark) will appear with “suggestions” in the right-hand pane. You can then scroll within your document to review those cites in context and determine whether: (a) You agree with the suggestions and wish to fix the cites via a Correct All batch (b) You wish to perform a Change cite boundaries procedure (c) You wish to perform a Change parent procedure (d) You wish to manually edit your cite (via Let me edit text of current citation) (e) You wish to Use Current (to keep your citation as is) (f) You wish to mark a flagged cite as Not a Cite (either individually or in a batch) Use the Show feature if you want to look only at citations marked as correct, citations with a suggestion for correction, citations that are confirmed but uncorrected, unrecognized citations or cites marked as Not a Cite. 4
  • 5. Check Cite Format Step 3. How to use Batch Not a Cite The Check Cite Format feature allows you to mark multiple citations as Not a Cite at one time (i.e., the Statement of Facts section of your document has numerous Id. cites to the record). To more efficiently mark these citations so they are not included in your TOA or linked via Get Cited Docs or Link to Cites, please do the following: • Run Check Cite Format. • In your original document in the left-hand pane, highlight the section/paragraph/pages that contain multiple citations you wish to mark as Not a Cite. (If you have more than one non-consecutive section/paragraph/page in which this is the case, you will have to repeat this process.) • Click on the Not a Cite button in the right-hand pane. • To confirm the process, click on the Not a Cite button when the pop-up dialog box appears. 5
  • 6. Check Cite Format Step 4. How to Change cite boundaries Click the Change cite boundaries link in the dialog box to launch a pop-up box displaying the cite. You can then highlight the precise text you want included in the citation that will be displayed in your TOA and click Submit (screenshot below). 6
  • 7. Check Cite Format Step 5. How to change a parent citation If you see that an Id. (or other short-form) citation is associated with the incorrect parent (full) citation, you can click on the Change parent link in the dialog box. You can then choose the correct parent citation from the pull-down menu, highlight it and click on Check Parent to validate the change. To accept the change, click on Submit (see next two screenshots). 7
  • 8. Parenting for United States Code (U.S.C.) citations works slightly differently than parenting for case citations in Lexis for Microsoft Office. Lexis for Microsoft Office will associate child citations as a subsequent citation under the same title even if the sections do not match. Lexis for Microsoft Office does this because it strictly follows The Bluebook rules for citations and Bluebook Rule 4.1 permits the use of “Id. § X” for U.S.C. citations that have the same title: Therefore, Lexis for Microsoft Office performs parenting as noted above so the tool can properly suggest Id. formatting for citations with the same title but different sections. How will these citations appear in the TOA? When performing the Check Cite Format function, a citation might be noted as a child for a citation with the same title but a different section; however, there will be separate entries for each distinct section in the TOA preview and in the TOA itself. There is no need to perform Change Parent in this situation. 8
  • 9. Check Cite Format Step 6. How to batch correct citations with Correct All The Correct All command will batch correct all cites that have only one suggested correction. Lexis for Microsoft Office will not batch correct cites that are already correct (denoted by a green checkmark), are unrecognized (red question mark) or are marked with a yellow checkmark because a suggested correction was not accepted. Once you click on Correct All at the top of the right-hand pane, a pop-up box will appear listing all the citations to be corrected with their suggestions for correction. To correct all the listed cites, click on Correct All at the bottom of the pop-up box (screenshot below). Note: After Correct All is performed, all cites that previously had yellow exclamation marks should have green checkmarks (screenshot below). Note regarding case names: Occasionally, you may see suggestions for case names that seem inconsistent with The Bluebook rules. This may happen because citations are checked for accuracy against Lexis Advance, and older cases were provided directly from the court. You can always click on Get suggested document to pull up the full-text document to check what’s online. 9
  • 10. Check Cite Format with Shepard’s Signal™ Indicators You have the option of having Shepard’s Signal™ indicators included in your Check Cite Format report. This option is a default setting, so if you do not wish to use this additional capability, please uncheck the Include Shepard’s Signal™ indicators in the Check Cite Format report choice. This option allows you to check each individual citation’s Shepard’s® report from the Check Cite Format dialog box via the Get Shepard’s® Report link. 10
  • 11. How to Check Quotes Check Quotes Step 2. In the right-hand pane, you can review the quotes in context When you open the dialog box to check a quote, you will be given the following options: • Keep the quote as is (by choosing Use Current) • Choose Use Source Text to use the original language from the opinion • Have any changes to the original quote marked in conformity with The Bluebook rules (by choosing Mark my changes to the source text) • Edit your quote as it appears in the document (by choosing Let me edit my text) • Mark text as Not a Quotation if the text is not a quotation that requires review You can Check Quotes without performing Check Cite Format first, although we do recommend performing Check Cite Format first for optimal results. Check Quotes Step 1. Select Check Quotes Check Quotes will indicate if the pinpoint page associated with the quote is incorrect; however, if the Check Cite Format tool is not used first, the pinpoint page will not be changed in the document via Lexis for Microsoft Office—and you can simply view the suggestion. You can, of course, make a manual edit in the original document in the left-hand pane instead (screenshot below). 11
  • 12. How to Create a TOA TOA Step 1. Click Set Cite Format (next to Prepare TOA) a. In Set Cite Format, select a style manual preference (The Bluebook® , California, New York, Florida, Texas, Illinois, or Washington). b. In Set Cite Format, select Remove Citation Metadata for best results. Tip: If your document has never had Lexis for Microsoft Office used on it before or if it was converted from .pdf or WordPerfect, you should use Remove Citation Metadata at the outset to avoid unexpected Lexis for Microsoft Office behavior caused by underlying field codes, etc. Tip: After your document has had Lexis for Microsoft Office used on it, you may click Remove Citation Metadata just prior to submission to court. (Note: Lexis for Microsoft Office uses its own metadata to create TOAs, so you can’t update a TOA after clicking Remove Citation Metadata.) c. Under Options, leave the choice, Do Not AutoCorrect selected as a default if you want the citations in your document included in your TOA with no standardization performed by Lexis for Microsoft Office. Note: You have the option to create a TOA without first performing a Check Cite Format, although we do recommend doing so, as outlined above (see page 4). 12
  • 13. TOA Step 2. Click on Prepare TOA in the Lexis for Microsoft Office ribbon v TOA Step 3. The right-hand preview pane will display all citations found in the document The format of the citations is whatever was set in your Options—i.e., The Bluebook, California, New York, Florida, Texas, Illinois, or Washington. To make any adjustments to the layout of the TOA itself, just click on Customize format at the top left of the citations preview pane. (These changes will only apply to the particular document you are working on.) 13
  • 14. Please be aware that certain formatting options will only appear in the TOA upon insertion into the document, not in the preview shown in the TOA preview pane. This includes the use of “passim” for multiple references to the same citation. Note: Citations in parentheses—e.g., United States v. Johnson, 988 F.2d 941, 945 (9th Cir. 1993) (citing United States v. Frady, 456 U.S. 152, 168 (1982))—will be included as separate entries in your TOA if List citations mentioned in citing or quoting parentheticals separately is checked in the Content Options section of the LexisNexis® Options dialog box (screenshot above). This can be made part of your default layout if desired. Choose the option under Content Options to Merge federal statutory, regulatory, rule citations and state statutory citations into one Table of Authorities entry when the citations reference the same section or rule number but different subsections if your organization’s preference is to list those types of citations only by section in the TOA. 14
  • 15. TOA Step 4. How to add/edit/move/delete TOA section headings and entries (optional) In the citations preview pane, you can add customized section headings to your TOA, edit existing headings, move citation entries from one heading to another or delete entries so they do not appear in the TOA, if so desired. For example, you can add a section heading called “Federal Rules” to your TOA by clicking on Add Heading at the top of the TOA preview pane (screenshot below). In addition, you can edit existing TOA section headings. For example, you can rename the heading titled “Other” to “U.S. Sentencing Guidelines” (see screenshot below). 15
  • 16. If you need to delete multiple TOA entries, you first need to click on the checkbox in front of the specific entries and then click on Manage Citations. You will next click on Delete Citations on the dropdown. As with Move Citations, please note that you can only delete multiple citation entries from one category at a time; if the citation entries are in different categories, you will have to repeat this step. Using the up/down arrows, you can move citation entries within a section heading. If you want to move one or more citation entries to a different section heading, you need to click on the checkbox in front of the specific entry and then click on Manage Citations at the top left of the TOA preview pane. You next click on Move Citations on the dropdown. You then choose which category you would like to move the entries into. Please note that you can only move multiple citation entries from one category to another; if the citation entries are in different categories, you will have to repeat this step. 16
  • 17. Screenshot of the TOA preview pane—ready to click the Insert TOA button (see Step 5). You can also delete TOA headings, but only if the heading has no citation entries under it. 17
  • 18. Below is an example of a Table of Authorities with the overall heading centered and the individual category headings left justified with a Page(s) heading included. TOA Step 5. When ready, click Insert TOA in the right-hand preview pane Important: Before clicking Insert TOA, be sure to place your cursor exactly where you want the TOA to be inserted in your document (e.g., immediately after the document cover page). The right-hand preview pane will close, and the TOA will be inserted where you placed your cursor. 18
  • 19. UNBALANCED PARENTHESES When a document contains unbalanced parentheses, the portion of text (which will generally contain citations) will be pulled into Check Cite Format with a red question mark and no suggestions. See example to the left. If you encounter this situation, you should review the paragraph for unbalanced parentheses (generally, this involves a missing double end parenthesis in a citing/ quoting parenthetical—after (Tenn. 2012) in the example on the left). Make the edits to add the missing parenthesis in the document itself and then run Refresh Report. TOA Step 6. Update TOA Once your TOA is inserted, you can update it by clicking on Update TOA (in the Lexis for Microsoft Office ribbon) and then clicking on Update TOA (in the right-hand preview pane). 19
  • 20. Report Delivery 1. Click on the button in the Lexis for Microsoft Office ribbon for the function you wish to perform (i.e., Check Cite Format, Check Quotes or Prepare TOA). 2. Once the results populate in the right-hand pane, you will see icons for email and print at the top right. Simply click on your choice to create a report. The report will note the name of the document you are working on (screenshots below). In Check Cite Format, you can create an email or print report of all results or you can use the Show feature and create a report of only select results. For example, if you want a report showing only citations that have suggestions for correction, you can select the yellow exclamation mark from the Show pull-down menu before you create a report. This is also true for reports created from Check Quotes. 20
  • 21. Link to Cites If you need to submit your document to court with hyperlinks to its citations, you can easily do so with the Link to Cites feature (screenshot below). Simply click on the Link to Cites button and permanent hyperlinks will be created for all the citations in your document. These hyperlinks will be saved with your document and can be opened by anyone with a Lexis Advance subscription. You should perform Link to Cites as a last step before submitting a document because utilizing other Lexis for Microsoft Office features will remove the hyperlinks. Also, it is recommended that Check Cite Format be performed before using Link to Cites. If you choose Include link and Shepard’s Signal™ indicator from the Link to Cites button pull-down menu, you can create permanent hyperlinks for all the citations in your document along with Shepard’s Signal indicators and save both with your document. If you wish to have separate hyperlinks created for citations which appear in parentheticals, be sure that the option in Link to Cites to Create additional separate hyperlinks for citations in parentheticals (introductory signals, explanatory parenthetical text not included) is chosen. If you wish to have no hyperlink created for citations that do not resolve to a full text document on Lexis Advance (i.e., the citation (42 U.S.C. § 1983, for example) resolves to multiple parts), be sure that the preference in Link to Cites options to Do not create hyperlinks for citations without full document match is chosen. In some jurisdictions, permanent hyperlinks are required for entries in the TOA as well. You can choose the preference under the Link to Cites options to Create hyperlinks for Table of Authorities entries as a default setting. Appendix—How to Turn off “Hidden Text” in Word 2016 To avoid pagination issues, please turn off Hidden text (if set to display) before creating a TOA. Here’s how: Click File (top left of the Word ribbon); click Options; click Display; then uncheck the Hidden text option (highlighted below) and click OK. 21
  • 22. GENERAL TROUBLESHOOTING If the Lexis for Microsoft Office (LexisNexis® tab) add-in is disabled (you do not see the tab on your Word ribbon), you may take the following steps: Click on File and choose Options (see screenshots below). From the Word Options menu choose Add-ins (see screenshot below). 22
  • 23. Go to the bottom of the Add-ins dialog box and click on the down arrow next to Manage. On the Disabled Items screen, click on Lexis for Microsoft Office and press enable. When you return to the Add-ins screen, go to the Manage area. Choose Manage COM Add-ins, then press Go. On the COM Add-ins page, click the box next to Lexis® for Microsoft® Office and click OK. It will take a few seconds, then the LexisNexis (Lexis for Microsoft Office) Add-in should appear on your Microsoft Word ribbon. LexisNexis, Lexis, Lexis Advance, Shepard’s and the Knowledge Burst logo are registered trademarks and Shepard’s Signal is a trademark of RELX Inc. Microsoft is a registered trademark of Microsoft Corporation. The Bluebook is a registered trademark of The Columbia Law Review Association, Inc., The Harvard Law Review Association, the University of Pennsylvania Law Review, and The Yale Law Journal Company, Inc. Other products or services may be trademarks or registered trademarks of their respective companies. © 2018 LexisNexis. BMH00478-9 0618 24/7 Customer Support: 888.539.4770 or online at LEXISNEXIS.COM/OFFICE