SlideShare una empresa de Scribd logo
1 de 21
Descargar para leer sin conexión
*GTA 05-02-013
How To Find Your Way
Purpose: This graphic training aid (GTA) explains
and illustrates the fundamentals of map reading. The
information conforms as closely as possible to
approved Department of the Army (DA) doctrine and
is intended to complement existing training literature.
Refer to Field Manual (FM) 3-25.26 for more
information.
The proponent for this publication is the United States
Army Training and Doctrine Command (TRADOC).
Send comments and recommendations on DA Form
2028 (Recommended Changes to Publications and
Blank Forms) to:
Commandant, United States Army Engineer School,
ATTN: ATSE-DT, Individual Training Division,
320 MANSCEN Loop, Suite 370
Fort Leonard Wood, Missouri 65473-8929.
Headquarters, Department of the Army
February 2006
DISTRIBUTION RESTRICTION: Approved for public release; distribution is unlimited.
DISTRIBUTION: United States Army Training Support Centers (TSCs).
*This publication supersedes GTA 05-02-013, 17 October 2001.
05-02-013.pdf 1 2/28/2006 11:33:49 AM
1.
The
Denis
Sabourin
Generator
2.
Ground
Power
Generator
3.
Earth
Battery
Table of Contents
INTRODUCTION ...................................................................................................................................................................... 3
FINDING YOUR LOCATION .................................................................................................................................................... 4
DETERMINING THE DISTANCE ............................................................................................................................................. 6
Graphic (Bar) Scale Method................................................................................................................................................. 6
Pacing Method...................................................................................................................................................................... 7
FINDING THE CORRECT DIRECTION ................................................................................................................................... 8
Azimuth................................................................................................................................................................................. 8
North..................................................................................................................................................................................... 9
Compass ............................................................................................................................................................................ 10
OTHER TECHNIQUES OF FINDING DIRECTION................................................................................................................ 11
Compass-to-Cheek Technique........................................................................................................................................... 12
Shadow-Tip Field-Expedient Technique ............................................................................................................................ 12
Watch Technique................................................................................................................................................................ 14
Star Technique ................................................................................................................................................................... 14
FINDING YOUR POSITION ................................................................................................................................................... 15
Resection............................................................................................................................................................................ 15
Modified Resection............................................................................................................................................................. 16
Intersection......................................................................................................................................................................... 17
DETERMINING RELIEF AND ELEVATION ........................................................................................................................... 18
CONCLUSION........................................................................................................................................................................ 21
2 GTA 05-02-013 February 2006
05-02-013.pdf 2 2/28/2006 11:33:49 AM
1.
The
Denis
Sabourin
Generator
2.
Ground
Power
Generator
3.
Earth
Battery
INTRODUCTION
Figure 1. Sample Map Legend
When you get lost in combat,
you may encounter the enemy,
fail your mission, and have
trouble getting back to your unit.
To avoid getting lost, use—
• A map.
• A compass.
• Other ways to find
directions.
• Common sense.
You will learn what you need to
know about military maps and
direction finding so that you can
move about with confidence
without getting lost. A map is
nothing more than a drawing of
a section of the earth's surface
as you would see it if looking
straight down from an airplane.
Maps show man-made objects,
such as roads, buildings, and
bridges. All of these man-made
objects are represented by a
symbol. The symbols are
explained in the legend, located
at the lower left-hand corner of
every map (Figure 1).
GTA 05-02-013 February 2006 3
05-02-013.pdf 3 2/28/2006 11:33:49 AM
1.
The
Denis
Sabourin
Generator
2.
Ground
Power
Generator
3.
Earth
Battery
Besides giving symbols for man-made objects, the legend gives the color coding used on the map and explains the
meaning of other symbols, which gives you a better idea of what the ground actually looks like. Always look at the legend
before using your map.
FINDING YOUR LOCATION
Read right,
then
up
11 12 13 14
10
81
81
Figure 2. Map Grid Squares
10
80
1181
11 12 13 14
81
Figure 3. Grid-Square Location
Your
location
To avoid getting lost, you have to know how to find your location. There
are no street addresses in a combat area. However, by using a military
map, you can find your location without difficulty. Maps have black lines
running up and down (north and south) and crosswise (east and west).
These lines form small squares called "grid squares" that are numbered
along the outside edge of the map picture. Using these numbers, you can
identify each grid square.
No two squares have the same number. To get the right numbers for a
certain grid square, read from left to right along the bottom and locate the
line that borders the grid square on the left. Then read up, and find the
east-west line that borders the grid square along the bottom (Figure 2).
Figure 3 shows your location as grid square 1181. How do you know
this? Start from the left and read right until you come to 11, and then read
up to 81. Your location is somewhere in the grid square of 1181.
Remember to read from left to right, then up.
Grid square 1181 gives your general location, but there is a lot of area
inside that grid square. To make your location even more accurate, you
will need to add another number to the first half and another to the last
half.
To get these numbers, imagine that each grid square has ten lines inside
it running north and south, and another ten lines running east and west.
This makes 100 small squares (Figure 4). You can estimate where these
imaginary lines are.
4 GTA 05-02-013 February 2006
05-02-013.pdf 4 2/28/2006 11:33:49 AM
1.
The
Denis
Sabourin
Generator
2.
Ground
Power
Generator
3.
Earth
Battery
11 12
10
81
13
82
80
Figure 4. Grid-Square Coordinates
Figure 5. Coordinate Scale and Protractor
These are your
coordinate
scales.
If you are exactly halfway between line 11 and
line 12, your first added number is 5 and the first
half of your location is 115. And suppose that you
are also two tenths of the way between line 81
and line 82. Then the second half of the number
is 812. If you were exactly on line 81, the second
half would be 810.
Figure 4 shows that if you were located where
the dot is in grid square 1181, your location
would be 115812. These six numbers are called
your "coordinates." They give your location, and
if you always know your coordinates, you can
never be lost.
If you have GTA 05-02-012 (Figure 5), you do not
have to worry about estimating where you are
inside a certain grid square or use imaginary
lines. You can determine your exact coordinates.
GTA 05-02-013 February 2006 5
05-02-013.pdf 5 2/28/2006 11:33:49 AM
1.
The
Denis
Sabourin
Generator
2.
Ground
Power
Generator
3.
Earth
Battery
The coordinate scale and protractor is a square piece of
clear, thin plastic—called a "protractor" for short. The
protractor helps to measure small distances inside grid
squares. You can also measure angles with it. You will learn
more about measuring angles later. Your squad leader can
show you exactly how to use the protractor.
Figure 6. Finding Straight-Line
Distance Using Bar Scales
DETERMINING THE DISTANCE
You can use your map to measure the distance between t
places, because maps are drawn to scale. This means that
a certain distance on the map equals a certain distance on
the earth. This scale is printed at the bottom and top of a
map (for example, Scale 1:50,000). This signifies that 1 inch
on the map equals 50,000 inches on the ground. Any ground
distance equals 50,000 times that distance on the map.
NOTE
wo
: Always check the scale on your map before
termine distance are the—graphic
G
scales at the bottom of your
to
trying to measure distance, because different maps
have different scales.
Two methods used to de
(bar) scale method and the pacing method.
raphic (Bar) Scale Method
There are three different bar
map. Use these scales to help convert the map distance in
miles, meters, or yards. To figure the distance on the ground
using the graphic (bar) scale method, take the edge of a
piece of paper and put a tick mark on it at the straight-line
distance between your two points (Figure 6). Then put the
paper beneath one of the bar scales and read the ground
distance in miles, meters, or yards. For example, the
estimated ground distance on the bar scale between the
marks in Figure 6 is about 3,950 meters.
6 GTA 05-02-013 February 2006
05-02-013.pdf 6 2/28/2006 11:33:49 AM
1.
The
Denis
Sabourin
Generator
2.
Ground
Power
Generator
3.
Earth
Battery
Suppose you want to find the distance between point A and point B around a
curve in a road (Figure 7). Take a strip of paper, make a small tick mark on it, and
line up the tick mark with point A. Align the paper with the road's edge until you
come to a curve, make another tick mark on the paper and on the map, then piv
the paper so it continues along the road's edge. Repeat this until you get to point
B, always following along the road's edge with your paper. Make a mark on your
paper at point B, then go to the bar scales to find the distance.
ot
he black grid lines on your map). Put 10
Pacing Method
When you have to go a certain distance on foot without any landmarks to guide
you, you can measure distance pretty accurately by counting your paces. The
average pace is just a little less than 1 meter. The average person uses
116 paces to travel 100 meters.
NOTE: If you do not take 116 paces for 100 meters, determine how many
paces you do take by pacing yourself on a known 100-meter distance.
When traveling cross-country, as you do in the field, you will use more paces to
travel 100 meters—usually about 148 instead of 116. This is because you are not
traveling over level ground and must use more paces to make up for your
movement up and down hills. Pace yourself over at least 600 meters of cross-
country terrain in order to learn how many paces it takes you to travel an average
100 meters. Be sure you know how many paces it takes you to walk 100 meters
on both level and cross-country terrain.
The big problem with pacing is maintaining a straight line. At night, the average
person tends to walk in a circle when not using a compass. During the day, you
should use a compass and steering points (well-defined objects in your direction
of travel). Also, remember to figure only the straight-line distance when you have
to walk around an obstacle.
Another problem with pacing is keeping count of the paces that you have taken.
One way to keep count is to use pebbles. For instance, suppose you want to
pace off 1 kilometer (1 kilometer is 1,000 meters or the distance between two of t
pebbles in your right pocket. When you go 100 meters, move one pebble to your left pocket and start your count over.
Figure 7. Finding Distance
Around Curves Using
Bar Scales
GTA 05-02-013 February 2006 7
05-02-013.pdf 7 2/28/2006 11:33:50 AM
1.
The
Denis
Sabourin
Generator
2.
Ground
Power
Generator
3.
Earth
Battery
When all 10 pebbles have been moved to your left pocket, you h
traveled 1 kilometer. Another way to keep count is by tying knots
a string—one knot per 100 kilometers.
INDING THE COR
ave
in
F RECT DIRECTION
(map coordinates) and
t
A
of the map is north, the right is east, the bottom is south,
ce there
muth from a map, you have to use a protractor. If
es of the
ubtract 180°, just add 180°.
Figure 8. Azimuth
N
E
W
S
270
°
360
°
180°
90
°
11 12 13 14
80
B
A
81
86
85
84
21 22 23 24
83
Figure 9. Finding Azimuths With a Protractor
223°
You have learned how to find your location
how you can use the map scale to determine the distance. The nex
step is to find the correct direction. Knowing how to find these three
things will keep you from getting lost.
zimuth
The top
and the left is west. The direction from one point to another point
(either on the map or on the ground) is called an azimuth.
Azimuths are given in degrees in a clockwise direction. Sin
are 360° in a circle, your azimuth can be any number up to 360°.
Due east is 90°, due south is 180°, due west is 270°, and due north
is 360° (Figure 8).
To get the right azi
your coordinate is 220850 and you want to find the azimuth to a
certain road junction, draw a line from your location to the road
junction. Then place the protractor as shown in Figure 9.
Be sure to line it up properly, keeping the cross-center lin
protractor parallel with the grid lines. The azimuth as shown by the
protractor is 223°. Suppose you follow the 223° azimuth to the road
junction, and then you want to go back to your original location. To
do this, you must take a back azimuth. Simply subtract 180o
from
the first azimuth (223° - 180° = 43°).
If your first azimuth it is too small to s
For example, if your azimuth was 40°, you know that you cannot
8 GTA 05-02-013 February 2006
05-02-013.pdf 8 2/28/2006 11:33:50 AM
1.
The
Denis
Sabourin
Generator
2.
Ground
Power
Generator
3.
Earth
Battery
subtract 180° from it, so add 180° (40° + 180° = 220°). Remember, a back azimuth goes in the opposite direction from th
azimuth.
e
CAUTION
When converting azimuths to back azimuths, use extreme care when adding or subtracting
the 180°. A simple mathematical mistake could have disastrous consequences.
North
The north-south lines on a map give grid north. The compass needle points to magnetic north. Grid north and magnetic
north usually have a few degrees difference. Neither points straight at the North Pole—that is called "true north."
However, it is not necessary to know where true north is to
avoid getting lost in a combat area.
Figure 10. North
62 63 64
68
67
61
66
To convert a magnetic
azimuth to a grid
azimuth, subtract the
G-M Angle.
To convert a grid
azimuth to a
magnetic azimuth,
add the G-M
angle.
Grid north
Grid north
To convert a magnetic
azimuth to a grid
azimuth, add the G-M
angle.
To convert a grid
azimuth to a
magnetic azimuth,
subtract the
G-M angle.
Magnetic
north
1995 G-M
angle 2º
(40 mil)
True north
If the declination diagram on
your map is reverse, then
conversion factors are
reversed as shown here.
The difference in degrees for every map between grid north
and magnetic north is shown at the bottom of the map
(Figure 10). This difference is called the "G-M angle"
(Figure 11). The diagram at the bottom of newer maps shows
how to change grid azimuths to magnetic azimuths and
magnetic azimuths to grid azimuths.
For example, you aim your compass at a distant tower and get
a compass reading of 190° (Figure 12). This is called a
magnetic azimuth. The diagram on the map shows that the
G-M angle is 2°. To convert the magnetic azimuth to a grid
azimuth, add the G-M angle of 2° to the compass reading of
190°. This gives you a grid azimuth of 192°. Most of the time,
the G-M angle is so small that you do not have to be
concerned with it. It depends on what region of the world you
are in. Your squad leader will tell you if the G-M angle in your
area is large enough to be concerned with.
GTA 05-02-013 February 2006 9
05-02-013.pdf 9 2/28/2006 11:33:50 AM
1.
The
Denis
Sabourin
Generator
2.
Ground
Power
Generator
3.
Earth
Battery
Compass
Use your compass to find or follow an azimuth. The compass arrow points toward magnetic north. The arrow is also
attracted by any mass of metal (such as a jeep, a truck, your rifle, your helmet, and even electrical power lines). Avoid any
metal objects to get correct readings when using your compass. To shoot an azimuth, use the center-hold technique
(Figure 13). It is faster, easier, and more accurate than the old sighting method. You can also use this method at night.
First, open the compass so that the cover forms a straight edge
with the base. Move the lens of the compass out of the way. Place
your thumb through the thumb loop, form a steady base with your
third and fourth fingers, and extend your index finger along the
side of the compass. Next, place the thumb of your other hand
between the eyepiece and the lens, extend your index finger along
the other side of the compass and your remaining fingers around
the fingers of your other hand, and pull your elbows firmly into your
sides. This puts the compass between your chin and your belt.
To measure an azimuth, turn your entire body toward the object,
pointing the compass cover directly at the object. Once you are
pointing at the object, simply look down and read the azimuth from
beneath the fixed black index line.
190°
Figure 12. Magnetic Azimuth
1995 G-M angle
2° (40 mil)
Grid
north
Magnetic
north
Figure 11. G-M Angle
Figure 13. Center-Hold Technique
10 GTA 05-02-013 February 2006
05-02-013.pdf 10 2/28/2006 11:33:50 AM
1.
The
Denis
Sabourin
Generator
2.
Ground
Power
Generator
3.
Earth
Battery
If you are land navigating, stop occasionally to check the azimuth along which you are moving to keep from going in
circles. You can move from object to object along your path of travel by shooting an azimuth to each object and then
moving to that object. Repeating this process while you navigate should keep you on a straight path.
It is important to know your compass. The
lensatic compass shown in Figure 14 is the
most common and simplest instrument used
for measuring direction. Your compass is a
sensitive instrument and care should be taken
in its use and handling.
Figure 14. Lensatic Compass
The lensatic compass shown has luminous
lines and dots. The bezel ring is a ratchet
device that clicks when turned. All of these
features are built into the compass to help you
set an azimuth and follow it at night. How to
keep your compass on course at night takes a
little know-how. Your squad leader will assist
you with all you need to know, or refer to
FM 3-25.26 for more information.
OTHER TECHNIQUES OF FINDING
DIRECTION
There are other techniques of finding your direction when you do not have a compass. These include the—
• Compass-to-cheek technique.
• Shadow-tip field-expedient technique.
• Watch technique.
• Star technique. 5
GTA 05-02-013 February 2006 11
05-02-013.pdf 11 2/28/2006 11:33:50 AM
1.
The
Denis
Sabourin
Generator
2.
Ground
Power
Generator
3.
Earth
Battery
Compass-to-Cheek Technique
The compass-to-cheek technique is used almost exclusively for sighting,
and it is the best technique for this purpose.
Step 1. Fold the cover of the compass containing the sighting wire to a
vertical position.
Step 2. Fold the rear sight slightly forward.
Step 3. Look through the rear sight slot, and align the front sight hairline
with the desired object in the distance.
Step 4. Glance down the dial through the eye lens to read the azimuth
(Figure 15).
Shadow-Tip Field-Expedient Technique
The old rule that "the sun rises in the east and sets in the west" is a
pretty good rule, but it is not quite right. Very seldom does the sun lie
due east (exactly 90°) or due west (exactly 270°) on the horizon. Where
exactly it does rise and set depends on where you are on the earth's
surface and also on what time of year it is. In the morning, the sun rises
almost east and in the afternoon it sets almost west. However, you can still use the sun to find direction by using the
shadow-tip field-expedient technique, which is quick, easy, and very accurate (Figure 16).
Figure 15. Compass-to-Cheek Technique
Step 1. Place a stick or branch in the ground at a level spot where a distinctive shadow will be cast. Mark the shadow tip
with a stone, twig, or other means. This first shadow mark is always west.
Step 2. Wait 10 to 15 minutes until the shadow tip moves a few inches. Mark the new position of the shadow tip in the
same way as the first. This second shadow mark is always east.
Step 3. Draw a straight line through the two shadow-tip marks to obtain an approximate west-east line.
Step 4. Draw a north-south line perpendicular to the west-east line. Stand with the first mark (west) to your left
(Figure 17). The other directions are north to the front, east to the right, and south behind you.
12 GTA 05-02-013 February 2006
05-02-013.pdf 12 2/28/2006 11:33:50 AM
1.
The
Denis
Sabourin
Generator
2.
Ground
Power
Generator
3.
Earth
Battery
First shadow-
tip mark
Second
shadow-tip
mark
West-east
line
Figure 17. North-South Line
Figure 16. Shadow-Tip Field-Expedient Technique
E
W
E
W
GTA 05-02-013 February 2006 13
05-02-013.pdf 13 2/28/2006 11:33:50 AM
1.
The
Denis
Sabourin
Generator
2.
Ground
Power
Generator
3.
Earth
Battery
Watch Technique
You can use your watch to determine the approximate true north and true south. However, it is not as accurate as the
shadow-tip technique.
• North temperate zone. Point the hour hand
toward the sun (Figure 18). Your south line is
midway between the hour hand and
1200 hours, standard time. If on daylight saving
time, the north-south line is found between the
hour hand and 1300 hours.
South temperate zone
Figure 19. South
Temperate Zone
Figure 18. North
Temperate Zone
North temperate zone
• South temperate zone. Point the 1200 hour
toward the sun. Midway between the 1200 hour
and the hour hand will be your north line
(Figure 19). If on daylight saving time, the north
line lies midway between the hour hand and
1300 hours.
NOTE: If there is any doubt to which end of the l
and in the west after noon.
ine is north, remember that the sun is in the east before noon
Star Technique
At night, you can locate north by finding the North Star (also called Polaris) (Figure 20).
First, find the Big Dipper. The last two stars of the dipper’s cup point directly at Polaris.
Polaris is about five times as far out as the distance between those two stars. Facing
Polaris, you are looking north, with east on your right and west on your left.
Figure 20. Polaris
Once you are able to find north (using your compass, the sun, your watch, or the
stars), you are ready to locate your position on the map. There are many good ways to
locate your position on the map. First, you need to do one important thing—orient your
map.
NOTE: Your map must be oriented so that north, south, east, and west on the
map point the same way as they do on the ground.
North
Pole
Polaris
14 GTA 05-02-013 February 2006
05-02-013.pdf 14 2/28/2006 11:33:50 AM
1.
The
Denis
Sabourin
Generator
2.
Ground
Power
Generator
3.
Earth
Battery
FINDING YOUR POSITION
Resection
Use resection to locate your position when you do not know exactly where you are.
Step 1. Orient your map as closely as possible.
Step 2. Look for a feature, such as the water tower (Figure 21 [A]), that you can find on the map.
Step 3. Put a ruler (or anything with a straightedge) on the map, and place its edge right next to the water tower symbol
on the map (B).
Step 4. Align the ruler so that it points exactly at the real water tower.
Step 5. Draw a line along the ruler (the line will cross the water tower symbol on the map).
Step 6. Find another feature, such as the road junction (Figure 22 [C]), and do the same thing.
When you lay the ruler on the map and point it at the real road junction, its edge crosses over the road junction on the
map (D). Draw another line along the ruler until it crosses (intersects) the first line. The point where the lines intersect is
your location. This procedure is called resection. A third line may help you locate your position more accurately.
Remember to not move your map once you have it properly oriented.
Figure 21. Water Tower
A
B
Figure 22. Road Junction
C
D
GTA 05-02-013 February 2006 15
05-02-013.pdf 15 2/28/2006 11:33:50 AM
1.
The
Denis
Sabourin
Generator
2.
Ground
Power
Generator
3.
Earth
Battery
Modified Resection
If you know that you are located somewhere along a certain linear feature
on the map, such as a road or riverbank, then you can use a method called
modified resection to pinpoint your location. This is an easier method to
use.
G-M angle = 9o
You are here.
20°
+ 9°
29°
75°
+ 9°
84°
Convert
magnetic
to grid
29°
+ 180°
209°
84°
+ 180°
264°
Convert grid
to back
azimuth
Figure 23. Calculating Azimuths
20°
75°
Step 1. Orient your map.
Step 2. Locate a feature that you can also find on the map, such as the
water tower in the previous example.
Step 3. Put a straightedge through the water tower symbol on the map and
align the straightedge so that it points exactly at the real water tower.
Step 4. Draw a line along the ruler. The point where the line crosses the
linear feature you are on is your location. If you do not have a regular
straightedge, you can use something such as your rifle cleaning rod, a
section of radio antenna, or even the edge of a C-ration box.
NOTE: Always orient your map as closely as you can—using your
compass is the best way.
Figure 23 shows another way of using resection and modified resection to
locate your position even closer than what you have just learned.
Step 1. Use your compass to shoot azimuths to your reference points,
such as the water tower and the road junction.
Step 2. Convert the magnetic azimuths to grid azimuths.
Step 3. Determine the grid back azimuths, and plot them on your map.
Your position is where these grid back azimuths intersect. For more details
on this method, ask your squad leader or refer to FM 3-25.26.
16 GTA 05-02-013 February 2006
05-02-013.pdf 16 2/28/2006 11:33:50 AM
1.
The
Denis
Sabourin
Generator
2.
Ground
Power
Generator
3.
Earth
Battery
Intersection
Suppose you want to find the
location of a certain object that you
can see in the distance, such as an
enemy observation post (OP), but it
is not on your map (Figure 24). Use
the intersection method as follows:
Figure 24. Intersection Process – Step 1
Your
location
OP
Your
location
Second
location
Figure 25. Intersection Process – Step 2
OP
Step 1. Shoot an azimuth to the
object using your compass. If you
have to, convert the magnetic
azimuth to a grid azimuth.
Step 2. Draw a line on the map
from your location along the grid
azimuth that you came up with. The
enemy OP lies somewhere along
this line.
Step 3. Move to another location
where you can observe the same
enemy OP or have another friendly
element located somewhere else
(who also sees the enemy OP)
shoot an azimuth to it (Figure 25).
Step 4. Convert the azimuth from
magnetic to grid, and draw it on
your map (out from the point where
the azimuth was taken).
The enemy OP lies where the
second line intersects with the first
line.
GTA 05-02-013 February 2006 17
05-02-013.pdf 17 2/28/2006 11:33:50 AM
1.
The
Denis
Sabourin
Generator
2.
Ground
Power
Generator
3.
Earth
Battery
DETERMINING RELIEF AND ELEVATION
Your military map shows something important that ordinary maps do not—relief and elevation (the slopes, hills, and
valleys). You have already learned about locating points, measuring distances, and finding the right direction. But, you
should also check hills and valleys along the direction you intend to travel before you start.
Relief is the representation (as depicted by the mapmaker) of the shapes of hills, valleys, streams, or terrain features on
the earth's surface. Elevation is the vertical distance of a point on the earth's surface above or below sea level. There are
several methods used by mapmakers to depict relief and elevation of the terrain.
Contour lines are the most common method used on standard military
maps. A contour line is shown as a brown line that connects points of the
same elevation. Each line depicts the height above sea level. Contour
lines never cross one another.
Figure 26. Contour Lines and Intervals
A
B
Printed at the bottom of the map is the contour interval—the difference in
height (elevation) between one brown line and the one next to it. On a map
with a scale of 1:50,000, the contour interval is usually 20 feet.
Refer to Figure 26. Point A would be 80 feet lower than point B. You can
determine this because every fifth line is heavier than the rest and has a
number that gives its elevation. You could also get an idea of how steep
the slope is if you knew the ground distance between point A and point B.
The rate of rise or fall of a terrain feature is known as its slope. Widely
spaced contour lines show a gentle slope; closer contour lines show a
steeper slope. You can tell from looking at your map what the slopes, hills,
and valleys will look like on the ground.
NOTE: Look at the slope before following a valley. Close contour
lines equal a steep slope.
18 GTA 05-02-013 February 2006
05-02-013.pdf 18 2/28/2006 11:33:51 AM
1.
The
Denis
Sabourin
Generator
2.
Ground
Power
Generator
3.
Earth
Battery
Figure 27 shows how the same hill would look from the ground. Note that
side A would be the easier side to climb.
Figure 28. Stream
130
140
150
160
170
120
130
140
150
160
170
A
B
Figure 27. Determining Slope
Contour lines across a stream always come together in a V-shape
(Figure 28).
When the contour lines are close together at the top of a hill, the hilltop is
pointed. When the contour lines are widely spaced at the top, the hilltop is
flat (Figure 29).
The legend on the map shows water as blue. To determine the direction
that the water is flowing, look at the contour lines. The V-shape always
points upstream or toward high ground. Looking for a stream is a good way
to find valleys.
Figure 29. Hilltop Contour Intervals
120
140
100
80
60
40
20
120
100
80
60
40
20
120
100
80
60
40
20
140
20
40
12
10
80
60
GTA 05-02-013 February 2006 19
05-02-013.pdf 19 2/28/2006 11:33:51 AM
1.
The
Denis
Sabourin
Generator
2.
Ground
Power
Generator
3.
Earth
Battery
Sometimes contour lines show two hilltops fairly close together. The lower terrain between the two hilltops is called a
saddle (Figure 30).
If you are in a saddle, there is high ground in two opposite directions and lower ground in the other two directions. A
saddle is normally represented as an hourglass shape. Going through a saddle is sometimes the easiest route to use to
get beyond the two hills. You would not want to go through a saddle if the enemy was on the hills.
Another terrain feature you should be familiar with is a ridge (Figure 31). A ridge is a fairly long, narrow section of terrain.
If you are standing on a ridge, the ground will go uphill in one direction and downhill in the other three. Contour lines that
form a ridge tend to be either U- or V-shaped. The closed end of the contour line points away from high ground. The path
of the ridge, depending on your geographic location, may be either an almost unnoticeable slope or a very obvious incline.
Figure 31. Ridge
Figure 30. Saddle
20 GTA 05-02-013 February 2006
05-02-013.pdf 20 2/28/2006 11:33:51 AM
1.
The
Denis
Sabourin
Generator
2.
Ground
Power
Generator
3.
Earth
Battery
You can also use contour lines to determine the line of sight from one point to another. For example, you are at point A
and you want to see point B. To determine the line of sight, draw a line from point A to point B on your map (Figure 32).
Note that it crosses some contour lines with higher elevation than both points. Therefore, you know you will not be able to
see point B.
A
B
Figure 32. Determining the Line of Sight
A B
500
600
CONCLUSION
You have learned from this booklet how to find your location and write it as a six-digit number coordinate. You have also
learned how to measure distance, find directions, and read contour lines. If you use this information, you can avoid getting
lost. Practice and review this information before you have to navigate. Do not wait until you are lost before trying to
remember what you should already know about map reading and land navigation. Also, take time to review FM 3-25.26.
GTA 05-02-013 February 2006 21
05-02-013.pdf 21 2/28/2006 11:33:51 AM
1.
The
Denis
Sabourin
Generator
2.
Ground
Power
Generator
3.
Earth
Battery

Más contenido relacionado

Similar a How to find your way - US Army

Map Skills Revision
Map Skills RevisionMap Skills Revision
Map Skills Revisionwhiskeyhj
 
Cartographic Resources Cataloging for Beginners Slides
Cartographic Resources Cataloging for Beginners SlidesCartographic Resources Cataloging for Beginners Slides
Cartographic Resources Cataloging for Beginners SlidesALATechSource
 
Continuing Our Look At Primary And Secondary Data
Continuing Our Look At Primary And Secondary DataContinuing Our Look At Primary And Secondary Data
Continuing Our Look At Primary And Secondary Dataguest2137aa
 
Continuing Our Look At Primary And Secondary Data
Continuing Our Look At Primary And Secondary DataContinuing Our Look At Primary And Secondary Data
Continuing Our Look At Primary And Secondary Dataguest9fa52
 
6. lecture 5 cadastral maps
6. lecture 5 cadastral maps6. lecture 5 cadastral maps
6. lecture 5 cadastral mapsFenTaHun6
 
Grid and Area references
Grid and Area referencesGrid and Area references
Grid and Area referencesRob Marchetto
 
3D Surface Characterisation of Precision Finished Surfaces
3D Surface Characterisation of Precision Finished Surfaces3D Surface Characterisation of Precision Finished Surfaces
3D Surface Characterisation of Precision Finished Surfacestheijes
 
map-reading (1).pdf
map-reading (1).pdfmap-reading (1).pdf
map-reading (1).pdfQanitaTariq
 
Mapskills Revision
Mapskills RevisionMapskills Revision
Mapskills RevisionEcumene
 

Similar a How to find your way - US Army (13)

Map Skills Revision
Map Skills RevisionMap Skills Revision
Map Skills Revision
 
DSM PPT.pptx
DSM PPT.pptxDSM PPT.pptx
DSM PPT.pptx
 
L08-handout.pdf
L08-handout.pdfL08-handout.pdf
L08-handout.pdf
 
Cartographic Resources Cataloging for Beginners Slides
Cartographic Resources Cataloging for Beginners SlidesCartographic Resources Cataloging for Beginners Slides
Cartographic Resources Cataloging for Beginners Slides
 
K map
K mapK map
K map
 
Continuing Our Look At Primary And Secondary Data
Continuing Our Look At Primary And Secondary DataContinuing Our Look At Primary And Secondary Data
Continuing Our Look At Primary And Secondary Data
 
Continuing Our Look At Primary And Secondary Data
Continuing Our Look At Primary And Secondary DataContinuing Our Look At Primary And Secondary Data
Continuing Our Look At Primary And Secondary Data
 
Final Beam Paper
Final Beam PaperFinal Beam Paper
Final Beam Paper
 
6. lecture 5 cadastral maps
6. lecture 5 cadastral maps6. lecture 5 cadastral maps
6. lecture 5 cadastral maps
 
Grid and Area references
Grid and Area referencesGrid and Area references
Grid and Area references
 
3D Surface Characterisation of Precision Finished Surfaces
3D Surface Characterisation of Precision Finished Surfaces3D Surface Characterisation of Precision Finished Surfaces
3D Surface Characterisation of Precision Finished Surfaces
 
map-reading (1).pdf
map-reading (1).pdfmap-reading (1).pdf
map-reading (1).pdf
 
Mapskills Revision
Mapskills RevisionMapskills Revision
Mapskills Revision
 

Más de NOMADPOWER

The Free Energy Secrets of Cold Electricity
The Free Energy Secrets of Cold ElectricityThe Free Energy Secrets of Cold Electricity
The Free Energy Secrets of Cold ElectricityNOMADPOWER
 
An Experimental Study on the Migration of Pb in the Groundwater Table Fluctua...
An Experimental Study on the Migration of Pb in the Groundwater Table Fluctua...An Experimental Study on the Migration of Pb in the Groundwater Table Fluctua...
An Experimental Study on the Migration of Pb in the Groundwater Table Fluctua...NOMADPOWER
 
An optimized snowmelt lysimeter system for monitoring melt rates and collecti...
An optimized snowmelt lysimeter system for monitoring melt rates and collecti...An optimized snowmelt lysimeter system for monitoring melt rates and collecti...
An optimized snowmelt lysimeter system for monitoring melt rates and collecti...NOMADPOWER
 
Adsorptive/photo-catalytic process for naphthalene removal from aqueous media...
Adsorptive/photo-catalytic process for naphthalene removal from aqueous media...Adsorptive/photo-catalytic process for naphthalene removal from aqueous media...
Adsorptive/photo-catalytic process for naphthalene removal from aqueous media...NOMADPOWER
 
USE THE LASER ENGRAVING MACHINES TO ACHIEVE LASER CLEANING, LASER POST-MELTIN...
USE THE LASER ENGRAVING MACHINES TO ACHIEVE LASER CLEANING, LASER POST-MELTIN...USE THE LASER ENGRAVING MACHINES TO ACHIEVE LASER CLEANING, LASER POST-MELTIN...
USE THE LASER ENGRAVING MACHINES TO ACHIEVE LASER CLEANING, LASER POST-MELTIN...NOMADPOWER
 
Experimental Study of Earth Batteries
Experimental Study of Earth Batteries Experimental Study of Earth Batteries
Experimental Study of Earth Batteries NOMADPOWER
 
FIRST AID FOR SOLDIERS FM 21-11, Special Operations Forces Medical Handbook
FIRST AID FOR SOLDIERS FM 21-11, Special Operations Forces Medical HandbookFIRST AID FOR SOLDIERS FM 21-11, Special Operations Forces Medical Handbook
FIRST AID FOR SOLDIERS FM 21-11, Special Operations Forces Medical HandbookNOMADPOWER
 
Wound Closure Manual
Wound Closure ManualWound Closure Manual
Wound Closure ManualNOMADPOWER
 
Survival Personal Wilderness Medical Kit
Survival Personal Wilderness Medical KitSurvival Personal Wilderness Medical Kit
Survival Personal Wilderness Medical KitNOMADPOWER
 
Sustainable Strategies for the Exploitation of End-of-Life Permanent Magnets
Sustainable Strategies for the Exploitation of End-of-Life Permanent MagnetsSustainable Strategies for the Exploitation of End-of-Life Permanent Magnets
Sustainable Strategies for the Exploitation of End-of-Life Permanent MagnetsNOMADPOWER
 
Permanent magnets: Plugging the gap
Permanent magnets: Plugging the gapPermanent magnets: Plugging the gap
Permanent magnets: Plugging the gapNOMADPOWER
 
ISSUES WITH PERMANENT MAGNETS
ISSUES WITH PERMANENT MAGNETSISSUES WITH PERMANENT MAGNETS
ISSUES WITH PERMANENT MAGNETSNOMADPOWER
 
Characteristics of Nd-Fe-B Permanent Magnets Present in Electronic Components
Characteristics of Nd-Fe-B Permanent Magnets Present in Electronic ComponentsCharacteristics of Nd-Fe-B Permanent Magnets Present in Electronic Components
Characteristics of Nd-Fe-B Permanent Magnets Present in Electronic ComponentsNOMADPOWER
 

Más de NOMADPOWER (13)

The Free Energy Secrets of Cold Electricity
The Free Energy Secrets of Cold ElectricityThe Free Energy Secrets of Cold Electricity
The Free Energy Secrets of Cold Electricity
 
An Experimental Study on the Migration of Pb in the Groundwater Table Fluctua...
An Experimental Study on the Migration of Pb in the Groundwater Table Fluctua...An Experimental Study on the Migration of Pb in the Groundwater Table Fluctua...
An Experimental Study on the Migration of Pb in the Groundwater Table Fluctua...
 
An optimized snowmelt lysimeter system for monitoring melt rates and collecti...
An optimized snowmelt lysimeter system for monitoring melt rates and collecti...An optimized snowmelt lysimeter system for monitoring melt rates and collecti...
An optimized snowmelt lysimeter system for monitoring melt rates and collecti...
 
Adsorptive/photo-catalytic process for naphthalene removal from aqueous media...
Adsorptive/photo-catalytic process for naphthalene removal from aqueous media...Adsorptive/photo-catalytic process for naphthalene removal from aqueous media...
Adsorptive/photo-catalytic process for naphthalene removal from aqueous media...
 
USE THE LASER ENGRAVING MACHINES TO ACHIEVE LASER CLEANING, LASER POST-MELTIN...
USE THE LASER ENGRAVING MACHINES TO ACHIEVE LASER CLEANING, LASER POST-MELTIN...USE THE LASER ENGRAVING MACHINES TO ACHIEVE LASER CLEANING, LASER POST-MELTIN...
USE THE LASER ENGRAVING MACHINES TO ACHIEVE LASER CLEANING, LASER POST-MELTIN...
 
Experimental Study of Earth Batteries
Experimental Study of Earth Batteries Experimental Study of Earth Batteries
Experimental Study of Earth Batteries
 
FIRST AID FOR SOLDIERS FM 21-11, Special Operations Forces Medical Handbook
FIRST AID FOR SOLDIERS FM 21-11, Special Operations Forces Medical HandbookFIRST AID FOR SOLDIERS FM 21-11, Special Operations Forces Medical Handbook
FIRST AID FOR SOLDIERS FM 21-11, Special Operations Forces Medical Handbook
 
Wound Closure Manual
Wound Closure ManualWound Closure Manual
Wound Closure Manual
 
Survival Personal Wilderness Medical Kit
Survival Personal Wilderness Medical KitSurvival Personal Wilderness Medical Kit
Survival Personal Wilderness Medical Kit
 
Sustainable Strategies for the Exploitation of End-of-Life Permanent Magnets
Sustainable Strategies for the Exploitation of End-of-Life Permanent MagnetsSustainable Strategies for the Exploitation of End-of-Life Permanent Magnets
Sustainable Strategies for the Exploitation of End-of-Life Permanent Magnets
 
Permanent magnets: Plugging the gap
Permanent magnets: Plugging the gapPermanent magnets: Plugging the gap
Permanent magnets: Plugging the gap
 
ISSUES WITH PERMANENT MAGNETS
ISSUES WITH PERMANENT MAGNETSISSUES WITH PERMANENT MAGNETS
ISSUES WITH PERMANENT MAGNETS
 
Characteristics of Nd-Fe-B Permanent Magnets Present in Electronic Components
Characteristics of Nd-Fe-B Permanent Magnets Present in Electronic ComponentsCharacteristics of Nd-Fe-B Permanent Magnets Present in Electronic Components
Characteristics of Nd-Fe-B Permanent Magnets Present in Electronic Components
 

Último

Zirakpur Call Girls👧 Book Now📱8146719683 📞👉Mohali Call Girl Service No Advanc...
Zirakpur Call Girls👧 Book Now📱8146719683 📞👉Mohali Call Girl Service No Advanc...Zirakpur Call Girls👧 Book Now📱8146719683 📞👉Mohali Call Girl Service No Advanc...
Zirakpur Call Girls👧 Book Now📱8146719683 📞👉Mohali Call Girl Service No Advanc...rajveermohali2022
 
Call Girls Service In Udaipur 9602870969 Sajjangarh Udaipur EsCoRtS
Call Girls Service In Udaipur 9602870969 Sajjangarh Udaipur EsCoRtSCall Girls Service In Udaipur 9602870969 Sajjangarh Udaipur EsCoRtS
Call Girls Service In Udaipur 9602870969 Sajjangarh Udaipur EsCoRtSApsara Of India
 
Fun Call Girls In Yamunanagar 08168329307 Jagadhri Escort Services
Fun Call Girls In Yamunanagar 08168329307 Jagadhri Escort ServicesFun Call Girls In Yamunanagar 08168329307 Jagadhri Escort Services
Fun Call Girls In Yamunanagar 08168329307 Jagadhri Escort ServicesApsara Of India
 
💗📲09602870969💕-Royal Escorts in Udaipur Call Girls Service Udaipole-Fateh Sag...
💗📲09602870969💕-Royal Escorts in Udaipur Call Girls Service Udaipole-Fateh Sag...💗📲09602870969💕-Royal Escorts in Udaipur Call Girls Service Udaipole-Fateh Sag...
💗📲09602870969💕-Royal Escorts in Udaipur Call Girls Service Udaipole-Fateh Sag...Apsara Of India
 
Hi Profile Escorts In Udaipur 09602870969 Call Girls in Sobaghpura Bhopalpura
Hi Profile Escorts In Udaipur 09602870969 Call Girls in Sobaghpura BhopalpuraHi Profile Escorts In Udaipur 09602870969 Call Girls in Sobaghpura Bhopalpura
Hi Profile Escorts In Udaipur 09602870969 Call Girls in Sobaghpura BhopalpuraApsara Of India
 
👉Chandigarh Call Girls 📞Book Now📞👉 9878799926 👉Zirakpur Call Girl Service No ...
👉Chandigarh Call Girls 📞Book Now📞👉 9878799926 👉Zirakpur Call Girl Service No ...👉Chandigarh Call Girls 📞Book Now📞👉 9878799926 👉Zirakpur Call Girl Service No ...
👉Chandigarh Call Girls 📞Book Now📞👉 9878799926 👉Zirakpur Call Girl Service No ...rajveerescorts2022
 
💞Call Girls In Sonipat 08168329307 Sonipat Kundli GTK Bypass EsCoRt Service
💞Call Girls In Sonipat 08168329307 Sonipat Kundli GTK Bypass EsCoRt Service💞Call Girls In Sonipat 08168329307 Sonipat Kundli GTK Bypass EsCoRt Service
💞Call Girls In Sonipat 08168329307 Sonipat Kundli GTK Bypass EsCoRt ServiceApsara Of India
 
Russian BINDASH Call Girls In Mahipalpur Delhi ☎️9711199012
Russian BINDASH Call Girls In Mahipalpur Delhi ☎️9711199012Russian BINDASH Call Girls In Mahipalpur Delhi ☎️9711199012
Russian BINDASH Call Girls In Mahipalpur Delhi ☎️9711199012Mona Rathore
 
Call girls in Vashi Services : 9167673311 Free Delivery 24x7 at Your Doorstep
Call girls in Vashi Services :  9167673311 Free Delivery 24x7 at Your DoorstepCall girls in Vashi Services :  9167673311 Free Delivery 24x7 at Your Doorstep
Call girls in Vashi Services : 9167673311 Free Delivery 24x7 at Your DoorstepPooja Nehwal
 
💞ROYAL💞 UDAIPUR ESCORTS Call 09602870969 CaLL GiRLS in UdAiPuR EsCoRt SeRvIcE💞
💞ROYAL💞 UDAIPUR ESCORTS Call 09602870969 CaLL GiRLS in UdAiPuR EsCoRt SeRvIcE💞💞ROYAL💞 UDAIPUR ESCORTS Call 09602870969 CaLL GiRLS in UdAiPuR EsCoRt SeRvIcE💞
💞ROYAL💞 UDAIPUR ESCORTS Call 09602870969 CaLL GiRLS in UdAiPuR EsCoRt SeRvIcE💞Apsara Of India
 
Call Girls in mahipalpur Delhi 8264348440 ✅ call girls ❤️
Call Girls in mahipalpur Delhi 8264348440 ✅ call girls ❤️Call Girls in mahipalpur Delhi 8264348440 ✅ call girls ❤️
Call Girls in mahipalpur Delhi 8264348440 ✅ call girls ❤️soniya singh
 
Escorts Service In North Goa Panjim⚕️9971646499⚕️ Team Suport Goa Call girls...
Escorts Service In North Goa Panjim⚕️9971646499⚕️ Team Suport  Goa Call girls...Escorts Service In North Goa Panjim⚕️9971646499⚕️ Team Suport  Goa Call girls...
Escorts Service In North Goa Panjim⚕️9971646499⚕️ Team Suport Goa Call girls...ritikaroy0888
 
Call Girls In Lajpat Nagar__ 8448079011 __Escort Service In Delhi
Call Girls In Lajpat Nagar__ 8448079011 __Escort Service In DelhiCall Girls In Lajpat Nagar__ 8448079011 __Escort Service In Delhi
Call Girls In Lajpat Nagar__ 8448079011 __Escort Service In DelhiRaviSingh594208
 
Call Girls In Panipat 08860008073 ✨Top Call Girl Service Panipat Escorts
Call Girls In Panipat 08860008073 ✨Top Call Girl Service Panipat EscortsCall Girls In Panipat 08860008073 ✨Top Call Girl Service Panipat Escorts
Call Girls In Panipat 08860008073 ✨Top Call Girl Service Panipat EscortsApsara Of India
 
VIP 💞🌷Call Girls In Karnal 08168329307 Escorts Service Nilokheri Call Girls
VIP 💞🌷Call Girls In Karnal 08168329307 Escorts Service Nilokheri Call GirlsVIP 💞🌷Call Girls In Karnal 08168329307 Escorts Service Nilokheri Call Girls
VIP 💞🌷Call Girls In Karnal 08168329307 Escorts Service Nilokheri Call GirlsApsara Of India
 
Dubai Call Girls Phone O525547819 Take+ Call Girls Dubai=
Dubai Call Girls Phone O525547819 Take+ Call Girls Dubai=Dubai Call Girls Phone O525547819 Take+ Call Girls Dubai=
Dubai Call Girls Phone O525547819 Take+ Call Girls Dubai=kojalkojal131
 
❤️Call Girls In Chandigarh 08168329307 Dera Bassi Zirakpur Panchkula Escort S...
❤️Call Girls In Chandigarh 08168329307 Dera Bassi Zirakpur Panchkula Escort S...❤️Call Girls In Chandigarh 08168329307 Dera Bassi Zirakpur Panchkula Escort S...
❤️Call Girls In Chandigarh 08168329307 Dera Bassi Zirakpur Panchkula Escort S...Apsara Of India
 

Último (20)

Zirakpur Call Girls👧 Book Now📱8146719683 📞👉Mohali Call Girl Service No Advanc...
Zirakpur Call Girls👧 Book Now📱8146719683 📞👉Mohali Call Girl Service No Advanc...Zirakpur Call Girls👧 Book Now📱8146719683 📞👉Mohali Call Girl Service No Advanc...
Zirakpur Call Girls👧 Book Now📱8146719683 📞👉Mohali Call Girl Service No Advanc...
 
Call Girls Service In Udaipur 9602870969 Sajjangarh Udaipur EsCoRtS
Call Girls Service In Udaipur 9602870969 Sajjangarh Udaipur EsCoRtSCall Girls Service In Udaipur 9602870969 Sajjangarh Udaipur EsCoRtS
Call Girls Service In Udaipur 9602870969 Sajjangarh Udaipur EsCoRtS
 
Fun Call Girls In Yamunanagar 08168329307 Jagadhri Escort Services
Fun Call Girls In Yamunanagar 08168329307 Jagadhri Escort ServicesFun Call Girls In Yamunanagar 08168329307 Jagadhri Escort Services
Fun Call Girls In Yamunanagar 08168329307 Jagadhri Escort Services
 
💗📲09602870969💕-Royal Escorts in Udaipur Call Girls Service Udaipole-Fateh Sag...
💗📲09602870969💕-Royal Escorts in Udaipur Call Girls Service Udaipole-Fateh Sag...💗📲09602870969💕-Royal Escorts in Udaipur Call Girls Service Udaipole-Fateh Sag...
💗📲09602870969💕-Royal Escorts in Udaipur Call Girls Service Udaipole-Fateh Sag...
 
Hi Profile Escorts In Udaipur 09602870969 Call Girls in Sobaghpura Bhopalpura
Hi Profile Escorts In Udaipur 09602870969 Call Girls in Sobaghpura BhopalpuraHi Profile Escorts In Udaipur 09602870969 Call Girls in Sobaghpura Bhopalpura
Hi Profile Escorts In Udaipur 09602870969 Call Girls in Sobaghpura Bhopalpura
 
👉Chandigarh Call Girls 📞Book Now📞👉 9878799926 👉Zirakpur Call Girl Service No ...
👉Chandigarh Call Girls 📞Book Now📞👉 9878799926 👉Zirakpur Call Girl Service No ...👉Chandigarh Call Girls 📞Book Now📞👉 9878799926 👉Zirakpur Call Girl Service No ...
👉Chandigarh Call Girls 📞Book Now📞👉 9878799926 👉Zirakpur Call Girl Service No ...
 
💞Call Girls In Sonipat 08168329307 Sonipat Kundli GTK Bypass EsCoRt Service
💞Call Girls In Sonipat 08168329307 Sonipat Kundli GTK Bypass EsCoRt Service💞Call Girls In Sonipat 08168329307 Sonipat Kundli GTK Bypass EsCoRt Service
💞Call Girls In Sonipat 08168329307 Sonipat Kundli GTK Bypass EsCoRt Service
 
Russian BINDASH Call Girls In Mahipalpur Delhi ☎️9711199012
Russian BINDASH Call Girls In Mahipalpur Delhi ☎️9711199012Russian BINDASH Call Girls In Mahipalpur Delhi ☎️9711199012
Russian BINDASH Call Girls In Mahipalpur Delhi ☎️9711199012
 
Call girls in Vashi Services : 9167673311 Free Delivery 24x7 at Your Doorstep
Call girls in Vashi Services :  9167673311 Free Delivery 24x7 at Your DoorstepCall girls in Vashi Services :  9167673311 Free Delivery 24x7 at Your Doorstep
Call girls in Vashi Services : 9167673311 Free Delivery 24x7 at Your Doorstep
 
💞ROYAL💞 UDAIPUR ESCORTS Call 09602870969 CaLL GiRLS in UdAiPuR EsCoRt SeRvIcE💞
💞ROYAL💞 UDAIPUR ESCORTS Call 09602870969 CaLL GiRLS in UdAiPuR EsCoRt SeRvIcE💞💞ROYAL💞 UDAIPUR ESCORTS Call 09602870969 CaLL GiRLS in UdAiPuR EsCoRt SeRvIcE💞
💞ROYAL💞 UDAIPUR ESCORTS Call 09602870969 CaLL GiRLS in UdAiPuR EsCoRt SeRvIcE💞
 
Call Girls in mahipalpur Delhi 8264348440 ✅ call girls ❤️
Call Girls in mahipalpur Delhi 8264348440 ✅ call girls ❤️Call Girls in mahipalpur Delhi 8264348440 ✅ call girls ❤️
Call Girls in mahipalpur Delhi 8264348440 ✅ call girls ❤️
 
Rohini Sector 9 Call Girls Delhi 9999965857 @Sabina Saikh No Advance
Rohini Sector 9 Call Girls Delhi 9999965857 @Sabina Saikh No AdvanceRohini Sector 9 Call Girls Delhi 9999965857 @Sabina Saikh No Advance
Rohini Sector 9 Call Girls Delhi 9999965857 @Sabina Saikh No Advance
 
Escorts Service In North Goa Panjim⚕️9971646499⚕️ Team Suport Goa Call girls...
Escorts Service In North Goa Panjim⚕️9971646499⚕️ Team Suport  Goa Call girls...Escorts Service In North Goa Panjim⚕️9971646499⚕️ Team Suport  Goa Call girls...
Escorts Service In North Goa Panjim⚕️9971646499⚕️ Team Suport Goa Call girls...
 
Call Girls In Lajpat Nagar__ 8448079011 __Escort Service In Delhi
Call Girls In Lajpat Nagar__ 8448079011 __Escort Service In DelhiCall Girls In Lajpat Nagar__ 8448079011 __Escort Service In Delhi
Call Girls In Lajpat Nagar__ 8448079011 __Escort Service In Delhi
 
Private : +91 9999965857 Affairs: Paschim Vihar Call Girls {{ Monika}} Delh...
Private : +91 9999965857 Affairs: Paschim Vihar Call Girls  {{ Monika}}  Delh...Private : +91 9999965857 Affairs: Paschim Vihar Call Girls  {{ Monika}}  Delh...
Private : +91 9999965857 Affairs: Paschim Vihar Call Girls {{ Monika}} Delh...
 
Call Girls In Panipat 08860008073 ✨Top Call Girl Service Panipat Escorts
Call Girls In Panipat 08860008073 ✨Top Call Girl Service Panipat EscortsCall Girls In Panipat 08860008073 ✨Top Call Girl Service Panipat Escorts
Call Girls In Panipat 08860008073 ✨Top Call Girl Service Panipat Escorts
 
VIP 💞🌷Call Girls In Karnal 08168329307 Escorts Service Nilokheri Call Girls
VIP 💞🌷Call Girls In Karnal 08168329307 Escorts Service Nilokheri Call GirlsVIP 💞🌷Call Girls In Karnal 08168329307 Escorts Service Nilokheri Call Girls
VIP 💞🌷Call Girls In Karnal 08168329307 Escorts Service Nilokheri Call Girls
 
Rohini Sector 24 Call Girls Delhi 9999965857 @Sabina Saikh No Advance
Rohini Sector 24 Call Girls Delhi 9999965857 @Sabina Saikh No AdvanceRohini Sector 24 Call Girls Delhi 9999965857 @Sabina Saikh No Advance
Rohini Sector 24 Call Girls Delhi 9999965857 @Sabina Saikh No Advance
 
Dubai Call Girls Phone O525547819 Take+ Call Girls Dubai=
Dubai Call Girls Phone O525547819 Take+ Call Girls Dubai=Dubai Call Girls Phone O525547819 Take+ Call Girls Dubai=
Dubai Call Girls Phone O525547819 Take+ Call Girls Dubai=
 
❤️Call Girls In Chandigarh 08168329307 Dera Bassi Zirakpur Panchkula Escort S...
❤️Call Girls In Chandigarh 08168329307 Dera Bassi Zirakpur Panchkula Escort S...❤️Call Girls In Chandigarh 08168329307 Dera Bassi Zirakpur Panchkula Escort S...
❤️Call Girls In Chandigarh 08168329307 Dera Bassi Zirakpur Panchkula Escort S...
 

How to find your way - US Army

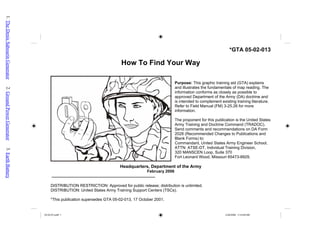
  • 1. *GTA 05-02-013 How To Find Your Way Purpose: This graphic training aid (GTA) explains and illustrates the fundamentals of map reading. The information conforms as closely as possible to approved Department of the Army (DA) doctrine and is intended to complement existing training literature. Refer to Field Manual (FM) 3-25.26 for more information. The proponent for this publication is the United States Army Training and Doctrine Command (TRADOC). Send comments and recommendations on DA Form 2028 (Recommended Changes to Publications and Blank Forms) to: Commandant, United States Army Engineer School, ATTN: ATSE-DT, Individual Training Division, 320 MANSCEN Loop, Suite 370 Fort Leonard Wood, Missouri 65473-8929. Headquarters, Department of the Army February 2006 DISTRIBUTION RESTRICTION: Approved for public release; distribution is unlimited. DISTRIBUTION: United States Army Training Support Centers (TSCs). *This publication supersedes GTA 05-02-013, 17 October 2001. 05-02-013.pdf 1 2/28/2006 11:33:49 AM 1. The Denis Sabourin Generator 2. Ground Power Generator 3. Earth Battery
  • 2. Table of Contents INTRODUCTION ...................................................................................................................................................................... 3 FINDING YOUR LOCATION .................................................................................................................................................... 4 DETERMINING THE DISTANCE ............................................................................................................................................. 6 Graphic (Bar) Scale Method................................................................................................................................................. 6 Pacing Method...................................................................................................................................................................... 7 FINDING THE CORRECT DIRECTION ................................................................................................................................... 8 Azimuth................................................................................................................................................................................. 8 North..................................................................................................................................................................................... 9 Compass ............................................................................................................................................................................ 10 OTHER TECHNIQUES OF FINDING DIRECTION................................................................................................................ 11 Compass-to-Cheek Technique........................................................................................................................................... 12 Shadow-Tip Field-Expedient Technique ............................................................................................................................ 12 Watch Technique................................................................................................................................................................ 14 Star Technique ................................................................................................................................................................... 14 FINDING YOUR POSITION ................................................................................................................................................... 15 Resection............................................................................................................................................................................ 15 Modified Resection............................................................................................................................................................. 16 Intersection......................................................................................................................................................................... 17 DETERMINING RELIEF AND ELEVATION ........................................................................................................................... 18 CONCLUSION........................................................................................................................................................................ 21 2 GTA 05-02-013 February 2006 05-02-013.pdf 2 2/28/2006 11:33:49 AM 1. The Denis Sabourin Generator 2. Ground Power Generator 3. Earth Battery
  • 3. INTRODUCTION Figure 1. Sample Map Legend When you get lost in combat, you may encounter the enemy, fail your mission, and have trouble getting back to your unit. To avoid getting lost, use— • A map. • A compass. • Other ways to find directions. • Common sense. You will learn what you need to know about military maps and direction finding so that you can move about with confidence without getting lost. A map is nothing more than a drawing of a section of the earth's surface as you would see it if looking straight down from an airplane. Maps show man-made objects, such as roads, buildings, and bridges. All of these man-made objects are represented by a symbol. The symbols are explained in the legend, located at the lower left-hand corner of every map (Figure 1). GTA 05-02-013 February 2006 3 05-02-013.pdf 3 2/28/2006 11:33:49 AM 1. The Denis Sabourin Generator 2. Ground Power Generator 3. Earth Battery
  • 4. Besides giving symbols for man-made objects, the legend gives the color coding used on the map and explains the meaning of other symbols, which gives you a better idea of what the ground actually looks like. Always look at the legend before using your map. FINDING YOUR LOCATION Read right, then up 11 12 13 14 10 81 81 Figure 2. Map Grid Squares 10 80 1181 11 12 13 14 81 Figure 3. Grid-Square Location Your location To avoid getting lost, you have to know how to find your location. There are no street addresses in a combat area. However, by using a military map, you can find your location without difficulty. Maps have black lines running up and down (north and south) and crosswise (east and west). These lines form small squares called "grid squares" that are numbered along the outside edge of the map picture. Using these numbers, you can identify each grid square. No two squares have the same number. To get the right numbers for a certain grid square, read from left to right along the bottom and locate the line that borders the grid square on the left. Then read up, and find the east-west line that borders the grid square along the bottom (Figure 2). Figure 3 shows your location as grid square 1181. How do you know this? Start from the left and read right until you come to 11, and then read up to 81. Your location is somewhere in the grid square of 1181. Remember to read from left to right, then up. Grid square 1181 gives your general location, but there is a lot of area inside that grid square. To make your location even more accurate, you will need to add another number to the first half and another to the last half. To get these numbers, imagine that each grid square has ten lines inside it running north and south, and another ten lines running east and west. This makes 100 small squares (Figure 4). You can estimate where these imaginary lines are. 4 GTA 05-02-013 February 2006 05-02-013.pdf 4 2/28/2006 11:33:49 AM 1. The Denis Sabourin Generator 2. Ground Power Generator 3. Earth Battery
  • 5. 11 12 10 81 13 82 80 Figure 4. Grid-Square Coordinates Figure 5. Coordinate Scale and Protractor These are your coordinate scales. If you are exactly halfway between line 11 and line 12, your first added number is 5 and the first half of your location is 115. And suppose that you are also two tenths of the way between line 81 and line 82. Then the second half of the number is 812. If you were exactly on line 81, the second half would be 810. Figure 4 shows that if you were located where the dot is in grid square 1181, your location would be 115812. These six numbers are called your "coordinates." They give your location, and if you always know your coordinates, you can never be lost. If you have GTA 05-02-012 (Figure 5), you do not have to worry about estimating where you are inside a certain grid square or use imaginary lines. You can determine your exact coordinates. GTA 05-02-013 February 2006 5 05-02-013.pdf 5 2/28/2006 11:33:49 AM 1. The Denis Sabourin Generator 2. Ground Power Generator 3. Earth Battery
  • 6. The coordinate scale and protractor is a square piece of clear, thin plastic—called a "protractor" for short. The protractor helps to measure small distances inside grid squares. You can also measure angles with it. You will learn more about measuring angles later. Your squad leader can show you exactly how to use the protractor. Figure 6. Finding Straight-Line Distance Using Bar Scales DETERMINING THE DISTANCE You can use your map to measure the distance between t places, because maps are drawn to scale. This means that a certain distance on the map equals a certain distance on the earth. This scale is printed at the bottom and top of a map (for example, Scale 1:50,000). This signifies that 1 inch on the map equals 50,000 inches on the ground. Any ground distance equals 50,000 times that distance on the map. NOTE wo : Always check the scale on your map before termine distance are the—graphic G scales at the bottom of your to trying to measure distance, because different maps have different scales. Two methods used to de (bar) scale method and the pacing method. raphic (Bar) Scale Method There are three different bar map. Use these scales to help convert the map distance in miles, meters, or yards. To figure the distance on the ground using the graphic (bar) scale method, take the edge of a piece of paper and put a tick mark on it at the straight-line distance between your two points (Figure 6). Then put the paper beneath one of the bar scales and read the ground distance in miles, meters, or yards. For example, the estimated ground distance on the bar scale between the marks in Figure 6 is about 3,950 meters. 6 GTA 05-02-013 February 2006 05-02-013.pdf 6 2/28/2006 11:33:49 AM 1. The Denis Sabourin Generator 2. Ground Power Generator 3. Earth Battery
  • 7. Suppose you want to find the distance between point A and point B around a curve in a road (Figure 7). Take a strip of paper, make a small tick mark on it, and line up the tick mark with point A. Align the paper with the road's edge until you come to a curve, make another tick mark on the paper and on the map, then piv the paper so it continues along the road's edge. Repeat this until you get to point B, always following along the road's edge with your paper. Make a mark on your paper at point B, then go to the bar scales to find the distance. ot he black grid lines on your map). Put 10 Pacing Method When you have to go a certain distance on foot without any landmarks to guide you, you can measure distance pretty accurately by counting your paces. The average pace is just a little less than 1 meter. The average person uses 116 paces to travel 100 meters. NOTE: If you do not take 116 paces for 100 meters, determine how many paces you do take by pacing yourself on a known 100-meter distance. When traveling cross-country, as you do in the field, you will use more paces to travel 100 meters—usually about 148 instead of 116. This is because you are not traveling over level ground and must use more paces to make up for your movement up and down hills. Pace yourself over at least 600 meters of cross- country terrain in order to learn how many paces it takes you to travel an average 100 meters. Be sure you know how many paces it takes you to walk 100 meters on both level and cross-country terrain. The big problem with pacing is maintaining a straight line. At night, the average person tends to walk in a circle when not using a compass. During the day, you should use a compass and steering points (well-defined objects in your direction of travel). Also, remember to figure only the straight-line distance when you have to walk around an obstacle. Another problem with pacing is keeping count of the paces that you have taken. One way to keep count is to use pebbles. For instance, suppose you want to pace off 1 kilometer (1 kilometer is 1,000 meters or the distance between two of t pebbles in your right pocket. When you go 100 meters, move one pebble to your left pocket and start your count over. Figure 7. Finding Distance Around Curves Using Bar Scales GTA 05-02-013 February 2006 7 05-02-013.pdf 7 2/28/2006 11:33:50 AM 1. The Denis Sabourin Generator 2. Ground Power Generator 3. Earth Battery
  • 8. When all 10 pebbles have been moved to your left pocket, you h traveled 1 kilometer. Another way to keep count is by tying knots a string—one knot per 100 kilometers. INDING THE COR ave in F RECT DIRECTION (map coordinates) and t A of the map is north, the right is east, the bottom is south, ce there muth from a map, you have to use a protractor. If es of the ubtract 180°, just add 180°. Figure 8. Azimuth N E W S 270 ° 360 ° 180° 90 ° 11 12 13 14 80 B A 81 86 85 84 21 22 23 24 83 Figure 9. Finding Azimuths With a Protractor 223° You have learned how to find your location how you can use the map scale to determine the distance. The nex step is to find the correct direction. Knowing how to find these three things will keep you from getting lost. zimuth The top and the left is west. The direction from one point to another point (either on the map or on the ground) is called an azimuth. Azimuths are given in degrees in a clockwise direction. Sin are 360° in a circle, your azimuth can be any number up to 360°. Due east is 90°, due south is 180°, due west is 270°, and due north is 360° (Figure 8). To get the right azi your coordinate is 220850 and you want to find the azimuth to a certain road junction, draw a line from your location to the road junction. Then place the protractor as shown in Figure 9. Be sure to line it up properly, keeping the cross-center lin protractor parallel with the grid lines. The azimuth as shown by the protractor is 223°. Suppose you follow the 223° azimuth to the road junction, and then you want to go back to your original location. To do this, you must take a back azimuth. Simply subtract 180o from the first azimuth (223° - 180° = 43°). If your first azimuth it is too small to s For example, if your azimuth was 40°, you know that you cannot 8 GTA 05-02-013 February 2006 05-02-013.pdf 8 2/28/2006 11:33:50 AM 1. The Denis Sabourin Generator 2. Ground Power Generator 3. Earth Battery
  • 9. subtract 180° from it, so add 180° (40° + 180° = 220°). Remember, a back azimuth goes in the opposite direction from th azimuth. e CAUTION When converting azimuths to back azimuths, use extreme care when adding or subtracting the 180°. A simple mathematical mistake could have disastrous consequences. North The north-south lines on a map give grid north. The compass needle points to magnetic north. Grid north and magnetic north usually have a few degrees difference. Neither points straight at the North Pole—that is called "true north." However, it is not necessary to know where true north is to avoid getting lost in a combat area. Figure 10. North 62 63 64 68 67 61 66 To convert a magnetic azimuth to a grid azimuth, subtract the G-M Angle. To convert a grid azimuth to a magnetic azimuth, add the G-M angle. Grid north Grid north To convert a magnetic azimuth to a grid azimuth, add the G-M angle. To convert a grid azimuth to a magnetic azimuth, subtract the G-M angle. Magnetic north 1995 G-M angle 2º (40 mil) True north If the declination diagram on your map is reverse, then conversion factors are reversed as shown here. The difference in degrees for every map between grid north and magnetic north is shown at the bottom of the map (Figure 10). This difference is called the "G-M angle" (Figure 11). The diagram at the bottom of newer maps shows how to change grid azimuths to magnetic azimuths and magnetic azimuths to grid azimuths. For example, you aim your compass at a distant tower and get a compass reading of 190° (Figure 12). This is called a magnetic azimuth. The diagram on the map shows that the G-M angle is 2°. To convert the magnetic azimuth to a grid azimuth, add the G-M angle of 2° to the compass reading of 190°. This gives you a grid azimuth of 192°. Most of the time, the G-M angle is so small that you do not have to be concerned with it. It depends on what region of the world you are in. Your squad leader will tell you if the G-M angle in your area is large enough to be concerned with. GTA 05-02-013 February 2006 9 05-02-013.pdf 9 2/28/2006 11:33:50 AM 1. The Denis Sabourin Generator 2. Ground Power Generator 3. Earth Battery
  • 10. Compass Use your compass to find or follow an azimuth. The compass arrow points toward magnetic north. The arrow is also attracted by any mass of metal (such as a jeep, a truck, your rifle, your helmet, and even electrical power lines). Avoid any metal objects to get correct readings when using your compass. To shoot an azimuth, use the center-hold technique (Figure 13). It is faster, easier, and more accurate than the old sighting method. You can also use this method at night. First, open the compass so that the cover forms a straight edge with the base. Move the lens of the compass out of the way. Place your thumb through the thumb loop, form a steady base with your third and fourth fingers, and extend your index finger along the side of the compass. Next, place the thumb of your other hand between the eyepiece and the lens, extend your index finger along the other side of the compass and your remaining fingers around the fingers of your other hand, and pull your elbows firmly into your sides. This puts the compass between your chin and your belt. To measure an azimuth, turn your entire body toward the object, pointing the compass cover directly at the object. Once you are pointing at the object, simply look down and read the azimuth from beneath the fixed black index line. 190° Figure 12. Magnetic Azimuth 1995 G-M angle 2° (40 mil) Grid north Magnetic north Figure 11. G-M Angle Figure 13. Center-Hold Technique 10 GTA 05-02-013 February 2006 05-02-013.pdf 10 2/28/2006 11:33:50 AM 1. The Denis Sabourin Generator 2. Ground Power Generator 3. Earth Battery
  • 11. If you are land navigating, stop occasionally to check the azimuth along which you are moving to keep from going in circles. You can move from object to object along your path of travel by shooting an azimuth to each object and then moving to that object. Repeating this process while you navigate should keep you on a straight path. It is important to know your compass. The lensatic compass shown in Figure 14 is the most common and simplest instrument used for measuring direction. Your compass is a sensitive instrument and care should be taken in its use and handling. Figure 14. Lensatic Compass The lensatic compass shown has luminous lines and dots. The bezel ring is a ratchet device that clicks when turned. All of these features are built into the compass to help you set an azimuth and follow it at night. How to keep your compass on course at night takes a little know-how. Your squad leader will assist you with all you need to know, or refer to FM 3-25.26 for more information. OTHER TECHNIQUES OF FINDING DIRECTION There are other techniques of finding your direction when you do not have a compass. These include the— • Compass-to-cheek technique. • Shadow-tip field-expedient technique. • Watch technique. • Star technique. 5 GTA 05-02-013 February 2006 11 05-02-013.pdf 11 2/28/2006 11:33:50 AM 1. The Denis Sabourin Generator 2. Ground Power Generator 3. Earth Battery
  • 12. Compass-to-Cheek Technique The compass-to-cheek technique is used almost exclusively for sighting, and it is the best technique for this purpose. Step 1. Fold the cover of the compass containing the sighting wire to a vertical position. Step 2. Fold the rear sight slightly forward. Step 3. Look through the rear sight slot, and align the front sight hairline with the desired object in the distance. Step 4. Glance down the dial through the eye lens to read the azimuth (Figure 15). Shadow-Tip Field-Expedient Technique The old rule that "the sun rises in the east and sets in the west" is a pretty good rule, but it is not quite right. Very seldom does the sun lie due east (exactly 90°) or due west (exactly 270°) on the horizon. Where exactly it does rise and set depends on where you are on the earth's surface and also on what time of year it is. In the morning, the sun rises almost east and in the afternoon it sets almost west. However, you can still use the sun to find direction by using the shadow-tip field-expedient technique, which is quick, easy, and very accurate (Figure 16). Figure 15. Compass-to-Cheek Technique Step 1. Place a stick or branch in the ground at a level spot where a distinctive shadow will be cast. Mark the shadow tip with a stone, twig, or other means. This first shadow mark is always west. Step 2. Wait 10 to 15 minutes until the shadow tip moves a few inches. Mark the new position of the shadow tip in the same way as the first. This second shadow mark is always east. Step 3. Draw a straight line through the two shadow-tip marks to obtain an approximate west-east line. Step 4. Draw a north-south line perpendicular to the west-east line. Stand with the first mark (west) to your left (Figure 17). The other directions are north to the front, east to the right, and south behind you. 12 GTA 05-02-013 February 2006 05-02-013.pdf 12 2/28/2006 11:33:50 AM 1. The Denis Sabourin Generator 2. Ground Power Generator 3. Earth Battery
  • 13. First shadow- tip mark Second shadow-tip mark West-east line Figure 17. North-South Line Figure 16. Shadow-Tip Field-Expedient Technique E W E W GTA 05-02-013 February 2006 13 05-02-013.pdf 13 2/28/2006 11:33:50 AM 1. The Denis Sabourin Generator 2. Ground Power Generator 3. Earth Battery
  • 14. Watch Technique You can use your watch to determine the approximate true north and true south. However, it is not as accurate as the shadow-tip technique. • North temperate zone. Point the hour hand toward the sun (Figure 18). Your south line is midway between the hour hand and 1200 hours, standard time. If on daylight saving time, the north-south line is found between the hour hand and 1300 hours. South temperate zone Figure 19. South Temperate Zone Figure 18. North Temperate Zone North temperate zone • South temperate zone. Point the 1200 hour toward the sun. Midway between the 1200 hour and the hour hand will be your north line (Figure 19). If on daylight saving time, the north line lies midway between the hour hand and 1300 hours. NOTE: If there is any doubt to which end of the l and in the west after noon. ine is north, remember that the sun is in the east before noon Star Technique At night, you can locate north by finding the North Star (also called Polaris) (Figure 20). First, find the Big Dipper. The last two stars of the dipper’s cup point directly at Polaris. Polaris is about five times as far out as the distance between those two stars. Facing Polaris, you are looking north, with east on your right and west on your left. Figure 20. Polaris Once you are able to find north (using your compass, the sun, your watch, or the stars), you are ready to locate your position on the map. There are many good ways to locate your position on the map. First, you need to do one important thing—orient your map. NOTE: Your map must be oriented so that north, south, east, and west on the map point the same way as they do on the ground. North Pole Polaris 14 GTA 05-02-013 February 2006 05-02-013.pdf 14 2/28/2006 11:33:50 AM 1. The Denis Sabourin Generator 2. Ground Power Generator 3. Earth Battery
  • 15. FINDING YOUR POSITION Resection Use resection to locate your position when you do not know exactly where you are. Step 1. Orient your map as closely as possible. Step 2. Look for a feature, such as the water tower (Figure 21 [A]), that you can find on the map. Step 3. Put a ruler (or anything with a straightedge) on the map, and place its edge right next to the water tower symbol on the map (B). Step 4. Align the ruler so that it points exactly at the real water tower. Step 5. Draw a line along the ruler (the line will cross the water tower symbol on the map). Step 6. Find another feature, such as the road junction (Figure 22 [C]), and do the same thing. When you lay the ruler on the map and point it at the real road junction, its edge crosses over the road junction on the map (D). Draw another line along the ruler until it crosses (intersects) the first line. The point where the lines intersect is your location. This procedure is called resection. A third line may help you locate your position more accurately. Remember to not move your map once you have it properly oriented. Figure 21. Water Tower A B Figure 22. Road Junction C D GTA 05-02-013 February 2006 15 05-02-013.pdf 15 2/28/2006 11:33:50 AM 1. The Denis Sabourin Generator 2. Ground Power Generator 3. Earth Battery
  • 16. Modified Resection If you know that you are located somewhere along a certain linear feature on the map, such as a road or riverbank, then you can use a method called modified resection to pinpoint your location. This is an easier method to use. G-M angle = 9o You are here. 20° + 9° 29° 75° + 9° 84° Convert magnetic to grid 29° + 180° 209° 84° + 180° 264° Convert grid to back azimuth Figure 23. Calculating Azimuths 20° 75° Step 1. Orient your map. Step 2. Locate a feature that you can also find on the map, such as the water tower in the previous example. Step 3. Put a straightedge through the water tower symbol on the map and align the straightedge so that it points exactly at the real water tower. Step 4. Draw a line along the ruler. The point where the line crosses the linear feature you are on is your location. If you do not have a regular straightedge, you can use something such as your rifle cleaning rod, a section of radio antenna, or even the edge of a C-ration box. NOTE: Always orient your map as closely as you can—using your compass is the best way. Figure 23 shows another way of using resection and modified resection to locate your position even closer than what you have just learned. Step 1. Use your compass to shoot azimuths to your reference points, such as the water tower and the road junction. Step 2. Convert the magnetic azimuths to grid azimuths. Step 3. Determine the grid back azimuths, and plot them on your map. Your position is where these grid back azimuths intersect. For more details on this method, ask your squad leader or refer to FM 3-25.26. 16 GTA 05-02-013 February 2006 05-02-013.pdf 16 2/28/2006 11:33:50 AM 1. The Denis Sabourin Generator 2. Ground Power Generator 3. Earth Battery
  • 17. Intersection Suppose you want to find the location of a certain object that you can see in the distance, such as an enemy observation post (OP), but it is not on your map (Figure 24). Use the intersection method as follows: Figure 24. Intersection Process – Step 1 Your location OP Your location Second location Figure 25. Intersection Process – Step 2 OP Step 1. Shoot an azimuth to the object using your compass. If you have to, convert the magnetic azimuth to a grid azimuth. Step 2. Draw a line on the map from your location along the grid azimuth that you came up with. The enemy OP lies somewhere along this line. Step 3. Move to another location where you can observe the same enemy OP or have another friendly element located somewhere else (who also sees the enemy OP) shoot an azimuth to it (Figure 25). Step 4. Convert the azimuth from magnetic to grid, and draw it on your map (out from the point where the azimuth was taken). The enemy OP lies where the second line intersects with the first line. GTA 05-02-013 February 2006 17 05-02-013.pdf 17 2/28/2006 11:33:50 AM 1. The Denis Sabourin Generator 2. Ground Power Generator 3. Earth Battery
  • 18. DETERMINING RELIEF AND ELEVATION Your military map shows something important that ordinary maps do not—relief and elevation (the slopes, hills, and valleys). You have already learned about locating points, measuring distances, and finding the right direction. But, you should also check hills and valleys along the direction you intend to travel before you start. Relief is the representation (as depicted by the mapmaker) of the shapes of hills, valleys, streams, or terrain features on the earth's surface. Elevation is the vertical distance of a point on the earth's surface above or below sea level. There are several methods used by mapmakers to depict relief and elevation of the terrain. Contour lines are the most common method used on standard military maps. A contour line is shown as a brown line that connects points of the same elevation. Each line depicts the height above sea level. Contour lines never cross one another. Figure 26. Contour Lines and Intervals A B Printed at the bottom of the map is the contour interval—the difference in height (elevation) between one brown line and the one next to it. On a map with a scale of 1:50,000, the contour interval is usually 20 feet. Refer to Figure 26. Point A would be 80 feet lower than point B. You can determine this because every fifth line is heavier than the rest and has a number that gives its elevation. You could also get an idea of how steep the slope is if you knew the ground distance between point A and point B. The rate of rise or fall of a terrain feature is known as its slope. Widely spaced contour lines show a gentle slope; closer contour lines show a steeper slope. You can tell from looking at your map what the slopes, hills, and valleys will look like on the ground. NOTE: Look at the slope before following a valley. Close contour lines equal a steep slope. 18 GTA 05-02-013 February 2006 05-02-013.pdf 18 2/28/2006 11:33:51 AM 1. The Denis Sabourin Generator 2. Ground Power Generator 3. Earth Battery
  • 19. Figure 27 shows how the same hill would look from the ground. Note that side A would be the easier side to climb. Figure 28. Stream 130 140 150 160 170 120 130 140 150 160 170 A B Figure 27. Determining Slope Contour lines across a stream always come together in a V-shape (Figure 28). When the contour lines are close together at the top of a hill, the hilltop is pointed. When the contour lines are widely spaced at the top, the hilltop is flat (Figure 29). The legend on the map shows water as blue. To determine the direction that the water is flowing, look at the contour lines. The V-shape always points upstream or toward high ground. Looking for a stream is a good way to find valleys. Figure 29. Hilltop Contour Intervals 120 140 100 80 60 40 20 120 100 80 60 40 20 120 100 80 60 40 20 140 20 40 12 10 80 60 GTA 05-02-013 February 2006 19 05-02-013.pdf 19 2/28/2006 11:33:51 AM 1. The Denis Sabourin Generator 2. Ground Power Generator 3. Earth Battery
  • 20. Sometimes contour lines show two hilltops fairly close together. The lower terrain between the two hilltops is called a saddle (Figure 30). If you are in a saddle, there is high ground in two opposite directions and lower ground in the other two directions. A saddle is normally represented as an hourglass shape. Going through a saddle is sometimes the easiest route to use to get beyond the two hills. You would not want to go through a saddle if the enemy was on the hills. Another terrain feature you should be familiar with is a ridge (Figure 31). A ridge is a fairly long, narrow section of terrain. If you are standing on a ridge, the ground will go uphill in one direction and downhill in the other three. Contour lines that form a ridge tend to be either U- or V-shaped. The closed end of the contour line points away from high ground. The path of the ridge, depending on your geographic location, may be either an almost unnoticeable slope or a very obvious incline. Figure 31. Ridge Figure 30. Saddle 20 GTA 05-02-013 February 2006 05-02-013.pdf 20 2/28/2006 11:33:51 AM 1. The Denis Sabourin Generator 2. Ground Power Generator 3. Earth Battery
  • 21. You can also use contour lines to determine the line of sight from one point to another. For example, you are at point A and you want to see point B. To determine the line of sight, draw a line from point A to point B on your map (Figure 32). Note that it crosses some contour lines with higher elevation than both points. Therefore, you know you will not be able to see point B. A B Figure 32. Determining the Line of Sight A B 500 600 CONCLUSION You have learned from this booklet how to find your location and write it as a six-digit number coordinate. You have also learned how to measure distance, find directions, and read contour lines. If you use this information, you can avoid getting lost. Practice and review this information before you have to navigate. Do not wait until you are lost before trying to remember what you should already know about map reading and land navigation. Also, take time to review FM 3-25.26. GTA 05-02-013 February 2006 21 05-02-013.pdf 21 2/28/2006 11:33:51 AM 1. The Denis Sabourin Generator 2. Ground Power Generator 3. Earth Battery