Word2010formathematicsteachers gerritstols-110620140125-phpapp01
•
0 recomendaciones•841 vistas

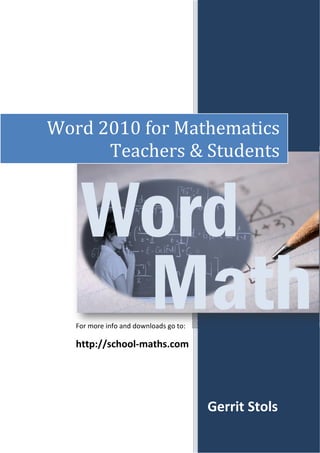
Word 2010 for Mathematics Teacher & Students

Recomendados
Recomendados
Más contenido relacionado
Último
Último (20)
Destacado
Destacado (20)
Word2010formathematicsteachers gerritstols-110620140125-phpapp01
- 2. Word 2010 for Mathematics Teachers and Students © Gerrit Stols 2010 You are allowed to use this document for your own personal use. Written permission from the author must be obtained in order to use it for any other purpose. If you want to use it for workshops or training purposes I request a donation of $5 for each participant or copy. Go to the website http://school-maths.com to make a donation! Any person who does any unauthorised act in relation to this publication may be liable for criminal prosecution and civil claims for damages. First published 2010 For more information contact the author: Gerrit Stols University of Pretoria South Africa gerrit.stols@up.ac.za +27 12 82 415 7583 http://school‐maths.com Last modified: 16 March 2010
- 3. Content Introduction and Overview …………..……………………………........……………… 1 1. Equations ………………….……………………………………………………….……… 4 2. Symbols …………………….……………………………………………………….……… 8 3. Typing mathematics ………………………………………………………….……… 10 4. Graphs and figures ……………………………………………………………….……… 12 5. Tables …………………………….………………………………..………………………….. 16 6. Statistical charts …………………………………….………………………………….. 18 7. Formatting a mathematics test ……………………….…………………………... 22 8. Create mind maps with SmartArt ………………………..…..…………………... 25 9. Solve equations and simplify expressions …..…………….………………….. 27 10. Generate worksheets in seconds ……………...………….……………………….. 29 11. Inking and handwriting in Word …………. ...………….……………………….. 31 Appendix A: AutoCorrect commands …………..………………………………….. 26
- 4. Introduction Word 2010 has an advanced mathematics‐editing tool that has a high level of typographic quality. The Microsoft Math Add‐in for Microsoft Office Word 2010 makes it easy to solve and simplify equations and to create graphs. If you are a teacher or student, you can buy Microsoft Office for a very reasonable price ( R800) from Makro, Incredible Connection, and many others. It includes Word, Excel, PowerPoint, and Outlook. What can a mathematics teacher or learner do with Word? √ Type equations and formulae: lim → y Draw graphs and figures: g P Q A 2r E x D f Use tables: ℚ t (s) ℚ' 0 0 1 2 3 s (m) 12 34 45 67 Draw statistical graphs and charts: 4th Qtr 9% 3rd Qtr 10% 5 4 3 2nd Qtr 23% 2 1 1st Qtr 58% 0 1 2 3 4 Page | 1
- 5. Use short cut keys and AutoCorrect commands to type fast and effectively: Word will replace x2 with Word will replace x3 with Word will replace doubleR with Word will replace Ahat with  Create mindmaps using SmartArt Word can solve equations and simplify expressions: 2 4 6 4 6 0 then 3 2 2 6 С 2 2 1 5 7 2 3 3 1 9 2 4 16 23 48 36
- 9. Example (method 2): Type In your document, click where you want to insert the equation. On the Insert tab, click on the on the Equation button. Use the keyboard to type“x=” Select the Equation Tools design tab and click the Fraction button from the Structural Tools and click the Stacked Fraction. Select the numerator Type “b”, and click the from the symbol gallery. Click the Radical button from the Structural Tools and select the Square Root. Select the square under the root sign: Click the Script button from the Structural Tools and select the Superscript. Use the keyboard to type “b” and click on the exponent and type “2”. Press the forward arrow on the keyboard to move a space forward (get out of superscript mode) and type “4ac” Select the denominator and type “2a”. The result is: √
- 10. Example (method 3): Type In your document, click where you want to insert the equation. On the Insert tab, click on the on the Equation button. Use the keyboard to type “ √ ^2 4 /2 ”. Select the equation, click the arrow at the bottom right of the box, and choose Professional from the new menu. The format of the equation will change: √ TIP: Shortcut (LaText) commands You can also use Math AutoCorrect (LaText) commands directly in the equation box. See Appendix A for more shortcut commands. E.g. doubleR will produce E.g. gamma will produce γ E.g. scriptx will produce E.g. Ahat will produce  TIP: Saving Equations After typing an equation you frequently use, you can save it and it will in future appear in the gallery of equations. From here, you can select and insert the saved equations into your document.
- 11. 2 Symbols Mathematics teachers often use special mathematical symbols, for e.g. , , , , , , , , , Although it is possible to add symbols if you are using an Equation Box, it is also possible to use symbols directly in your document (not in the Equation Box). This section will explain two different ways, firstly by selecting symbols from the symbol gallery, and secondly using Math AutoCorrect (LaText) commands directly in your document. On the Insert tab, click the Symbol button. Select the desired symbol from the gallery (recently used). If the desired symbol does not appear click the More Symbols button. A menu will appear which shows some of the symbols that you recently used. In the Font dropdown menu choose symbol, then choose a symbol from the gallery, and click the Insert button. TIP: If you are going to use a symbol very often, it might save time by creating a short cut for the symbol. Say for example that you need to type the symbol very often. Follow steps 1 and 2, then select . Click the Shortcut Key button and choose a shortcut key, e.g. “Ctrl+A” Click Assign button and Close the window. In future, if you need a symbols just type “Ctrl+a”
- 13. 3 Maths typing We often repeatedly type the same name, phrase, or equation. A way to save time is to assign a name to it. Every time you type this name Word will replace it with the proper text or equation. This Auto correct feature will greatly improve your overall productivity. In this example I am going to ask Word to replace “UP” with “University of Pretoria” every time I type “UP”. Type the name or equation, e.g. “University of Pretoria” Use the mouse and drag it to highlight or select the name: University of Pretoria On the File tab, click the Option button. Click the Proofing button and then the AutoCorrect Option button. Select the AutoCorrect tab and type “UP” in the Replace text box. C Click the Add button and then the OK button. Whenever you want to type “University of Pretoria”, you can just type “UP”.
- 14. TIP: Instead of using the “University of Pretoria”, you can use any mathematical expression. E.g. Use x2 for a code for TIP: You can also use LaTex commands when the cursor is in an equation. E.g. If you type alpha, Word automatically inserts the α symbol. BUT you can also use Math AutoCorrect (LaText) commands also outside an equation box. It is however important to enable the feature in Word. The default setting does not allow you to do it. Follow these steps to enable this feature: On the File tab, click the Option button. Click the Proofing button and then the AutoCorrect Option button. Select the Math AutoCorrect tab and check the Use Math AutoCorrect rules outside of math regions box, and click the OK button. You can create and add your own command or you can use the existing commands. See Appendix A for more shortcut commands. E.g. doubleR will produce E.g. gamma will produce γ E.g. scriptx will produce E.g. Ahat will produce Â
- 16. Shapes menu:
- 17. Example: the construction of a parabola on a coordinate system. On the Insert tab, click the Shapes button and from the Lines in the gallery choose Double Arrow. Click on starting point and click again on endpoint of line. TIP: Press and hold down the “Shift” key during the construction of the line to draw a perfect vertical or horizontal line. Draw the y‐axis by repeating step 2. On the Insert tab, click the Shapes button, and select the Curve from the Lines menu. Double click Click on starting point, click on the turning point, and click again on endpoint of the parabola. To add arrows: click on Shape Outline, select Arrows and choose the Arrow style 3. Name the x‐axis On the Insert tab, click the Shapes button and select Text Box the Basic Shapes category. In your document, click where you want to insert the text box, and drag to the desired size. Click on the text box and type “x” o Remove the border line and white shading: click on the box o From the Shape Fill menu choose No Fill o From the Shape Outline menu choose No Outline y x Repeat the previous step to name the y‐axis.
- 18. Example: the construction of a cyclic quadrilateral. On the Insert tab, click the Shapes button and from the Basic Shapes choose the oval. Release Holding down Shift&Ctrl Do not Click in the document page where you want the centre of release the circle BUT keep in the left mouse button and drag the circle to a required size while holding down the “Shift” and “CTRL” keys simultaneously. To remove the white fill colour in the circle (even if you cannot see it) select the circle or the Drawing Tools design tab and click the Shape Fill and choose No Fill. To change the outline colour of the circle, select the circle and the Drawing Tools design tab and click the Shape Outline and choose a colour. On the Insert tab, click the Shapes button, and select the Freeform from the Lines menu. Click on the four vertices of the cyclic quadrilateral. Click again on starting point of the cyclic quad to end this procerss. Double click the quadrilateral, and choose Edit Points from the Edit shape menu. Drag the vertices to coincide with the circle. TIP: When construction a circle: Holding down the “CTRL” key will enlarge the circle from the centre outward. Holding down the “shift” key will ensure the creation of a perfect circle (not an oval).
- 20. Example: drawing a complex table ℚ ℚ' 0 On the Insert tab, click the Table button and select a 4x4 table. Click anywhere in the table and on the Table Tools design tab click the Eraser button and use it to erase all the unwanted lines in the table: Type what is needed into the cells: doubleR doubleQ doubleZ doubleN doubleQ ' Select the table and right click, then select AutoFit and AutoFit to Contents. ℚ ℚ' 0 Select the table and right click, from the new menu choose Align Centre. Select appropriate shadings, Pen Color, and line width for the final formatting of the table on the Table Tools design tab.
- 22. You can change the headings and data and resize the chart data range by dragging the lower right corner of the range. If you are done close the spreadsheet. 6 5 4 Series 1 3 Series 2 2 Series 3 1 0 Category 1 Category 2 Category 3 Category 4 To edit the chart, double click on the chart and a new menu will appear from where you can change the type and the colours of the chart. 14 12 10 8 Series 3 Series 2 6 Series 1 4 2 0 Category 1 Category 2 Category 4 Category 3
- 23. Example: drawing a Pie chart Illustrate the following information on a pie chart: In a grade 12 class, the following were recorded: 44 learners wanted to go to university 21 learners wanted to go to technikon 38 learners wanted to start working 22 learners did not know what they wanted to do On the Insert tab, click the Chart button, choose Pie, and choose a Pie format. Click the OK button and a spread sheet will open. Enter your data in the spreadsheet and Close the window.
- 25. 7 Formatting a Tests In order to create a neat and organised document or test paper it is impotant that the numbering and layout of the document are well planned. You can use the indents and tabs on the ruler to do this. If you cannot see the ruler in Word, click the View ruler button on the top of the scroll bar on the right and the ruler will appear. In the left‐hand corner of the ruler, you can select the tab that you need. Left tab Center tab Right tab Decimal tab Bar tab First line indent Hanging indent Every time you hit the tab key on the keyboard the cursor will move to the next tab. Click on the ruler and drag the tag to the appropriate position First line indent Right tab Right indent Left indent Left tab
- 27. Example: Reformat the following test to give it a proffesional look: Select all the questions. Highlight it by dragging the mouse. Adjust and create the tabs and indents as follows: Right tab Left tab Right tab Left indent Use the tab key on the keyboard to organise the questions. 1. Solve for : 1.1 0 (2) 1.2 2 4 3 1 (2) 1.3 3 1 0 (3) 1.4 3 6 2 8 (3) 2. Katrina invests a certain sum of money for 6 years. She receives an effective interest of 13% per annum for the first 2 years. The interest rate changes to 18% per annum compounded monthly for the remaining term. At the beginning of the 4th year, she needs money and withdraws R1 500. Her investment appreciates to R20 000 at the end of the 6‐year period. Calculate how much money Katrina invested initially. (10)
- 30. 9 Solve & Simplify The Microsoft Math Add‐in for Microsoft Office Word 2010 makes it easy to solve equations, factorise expressions, diffrentiate expressions and draw graphs. Although this add in is free you have to download and install it first. Download and install the Word 2010 Add‐in: Microsoft Math from the Microsoft download website: http://www.microsoft.com/downloads/ Use the equation function of Word (see section 1) to type any mathematical equation or expression. On the Equation Tools design tab click Math. Select the appropiate operation.
- 31. Example: Construct the graph of On the Insert tab, click the Equation button. Type “y=x^22x12”. Word will reformat it: On the Equation Tools design tab click Math. and find its roots. 4 12 Right click on the equation and choose Plot in 2D. The following graph will appear: Replace the with a 0 to calculate the roots of 0 6 The following answer will appear: 2 4 12 by selecting Solve for .
- 32. 10 Worksheet Generator You can now easily create your own worksheet in just a few seconds with the Math Worksheet Generator. This tool generates many mathematical problems based on a sample problem. It analyse the structure and solution of the given equation or expression and create multiple similar equations or expressions. It will also include the final answer of the problems. Although this tool is free, you have to download and install it. Download and install the Math Worksheet Generator from the Microsoft Educational Labs: http://www.educationlabs.com Run the Math Worksheet Generator. The following window will appear: Type any equation or expression, choose the number of problems and click the Create button. Examples: Type “1/2 4 2 factor 3 solve 2 Type “2 ^2 gcf 3,45 30 1/8” 4 30” Type “gcf 3,45 ” 5 3 2 13,3 Type “factor 3 ^2 2 12 , , 5 2 ”
- 34. 11 Inking in Word Microsoft Word 2010 make provision for digital inking but you need a tablet PC. A tablet PC is a notebook computer which allows the user to operate it with a digital pen instead of a keyboard or mouse. You can therefore write and explain mathematics in Word using a digital pen. Connect a data projector to your computer and you can write on your computer instead of the chalkboard. It is not nessarry to buy an expensive interactive whiteboard. This feature will enable you to write, erase, highligth and then in the end to post your class notes on a website. On the Review tab, click the Start Inking button. On the Ink Tools design tab a pen, highlighter or eraser. Select a pen and a color from the toolbar and you are ready to write in Word. Print or export your class notes as a pdf file. If there is no pdf print option available, download the pdf printer from http://www.microsoft.com/downloads and install it. The name of the file is Microsoft Office Add‐in: Microsoft Save as PDF or XPS.
- 35. Appendix 1: LaText commands Command copied from Micosoft Word 2010 Help menu. To find it go to Word Help and search for Math AotoCorrect symbols.