A Dell Latitude 5320 Business Laptop with an Intel Core i5-1145G7 vPro processor delivered better benchmark performance and battery life
•
0 recomendaciones•63 vistas

A Dell Latitude 5320 Business Laptop with an Intel Core i5-1145G7 vPro processor delivered better benchmark performance and battery life than a Lenovo ThinkPad X13 laptop powered by a six-core AMD Ryzen 5 PRO 4650U processor

Recomendados
Recomendados
Más contenido relacionado
Más de Principled Technologies
Más de Principled Technologies (20)
Último
Último (20)
A Dell Latitude 5320 Business Laptop with an Intel Core i5-1145G7 vPro processor delivered better benchmark performance and battery life
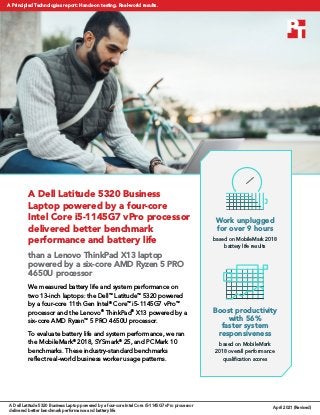
- 1. A Dell Latitude 5320 Business Laptop powered by a four-core Intel Core i5-1145G7 vPro processor delivered better benchmark performance and battery life than a Lenovo ThinkPad X13 laptop powered by a six-core AMD Ryzen 5 PRO 4650U processor We measured battery life and system performance on two 13-inch laptops: the Dell™ Latitude™ 5320 powered by a four-core 11th Gen Intel® Core™ i5-1145G7 vPro™ processor and the Lenovo® ThinkPad® X13 powered by a six-core AMD Ryzen™ 5 PRO 4650U processor. To evaluate battery life and system performance, we ran the MobileMark® 2018, SYSmark® 25, and PCMark 10 benchmarks. These industry-standard benchmarks reflect real-world business worker usage patterns. Boost productivity with 56% faster system responsiveness based on MobileMark 2018 overall performance qualification scores Work unplugged for over 9 hours based on MobileMark 2018 battery life results A Dell Latitude 5320 Business Laptop powered by a four-core Intel Core i5-1145G7 vPro processor delivered better benchmark performance and battery life April 2021 (Revised) A Principled Technologies report: Hands-on testing. Real-world results.
- 2. What we tested We set each business laptop to the “best performance” power mode and equipped both with 8 GB of memory, 256 GB of PCIe® SSD storage, and the largest capacity batteries available for each model: Dell Latitude 5320 laptop powered by a four-core 11th Gen Intel Core i5-1145G7 vPro processor with a four-cell 63-Whr ExpressCharge™ capable battery Lenovo ThinkPad X13 laptop powered by a six-core AMD Ryzen 5 PRO 4650U processor with a six-cell 48-Whr battery with rapid-charge technology The MobileMark 2018, SYSmark 25, and PCMark 10 benchmarks put the devices under test through real-world workloads based on activities business users perform every day.2,3,4 The battery life and benchmark scores we report reflect the specific configurations we tested. Any difference in the configurations you test, as well as screen brightness, network traffic, or software additions, can affect these results. For a deeper dive into our testing parameters and procedures, see the appendices. Dell Latitude 5320 Business Laptop The 13-inch Dell Latitude 5320 laptop runs Windows 10 Pro and offers features such as Dell Optimizer, a Dell ComfortView Plus screen, and a range of memory and storage configuration options.1 Though we tested the laptop form factor, you can also purchase the Dell Latitude 5320 as a 2-in-1. April 2021 (Revised) | 2 A Dell Latitude 5320 Business Laptop powered by a four-core Intel Core i5-1145G7 vPro processor delivered better benchmark performance and battery life
- 3. Longer battery life without forfeiting performance Both laptops delivered a full workday’s worth of battery life. However, the Dell Latitude 5320 laptop, powered by a four-core Intel Core i5-1145G7 vPro processor and a 63-Whr battery, also received a significantly higher MobileMark 2018 overall performance qualification score than the Lenovo ThinkPad X13 laptop powered by a six-core AMD Ryzen 5 PRO 4650U processor and a 48-Whr battery. Figure 1: MobileMark 2018 overall battery life results. Time (hh:mm). More time is better. Source: Principled Technologies. Figure 2: MobileMark 2018 overall performance qualification scores. Higher is better. Source: Principled Technologies. MobileMark 2018 Overall battery life (hh:mm) Dell Latitude 5320 9:18 Lenovo ThinkPad X13 8:01 with an Intel Core i5-1145G7 vPro processor with an AMD Ryzen 5 PRO 4650U processor MobileMark 2018 Overall performance qualification 1,341 Lenovo ThinkPad X13 857 with an Intel Core i5-1145G7 vPro processor with an AMD Ryzen 5 PRO 4650U processor Dell Latitude 5320 Work unplugged 1 hour and 17 minutes longer Boost office productivity with 56% better system performance April 2021 (Revised) | 3 A Dell Latitude 5320 Business Laptop powered by a four-core Intel Core i5-1145G7 vPro processor delivered better benchmark performance and battery life
- 4. Better day-to-day performance on SYSmark 25 The Dell Latitude 5320 laptop, powered by a four-core Intel Core i5-1145G7 vPro processor, received a higher SYSmark 25 overall performance rating score than the Lenovo ThinkPad X13 laptop powered by a six-core AMD Ryzen 5 PRO 4650U processor. Figure 3: SYSmark 25 overall performance rating scores. Higher is better. Source: Principled Technologies. Better collaboration and digital content creation performance on PCMark 10 The Dell Latitude 5320 laptop, powered by a four-core Intel Core i5-1145G7 vPro processor, received a higher PCMark 10 overall rating score than the Lenovo ThinkPad X13 laptop powered by a six-core AMD Ryzen 5 PRO 4650U processor. Figure 4: PCMark 10 overall rating scores. Higher is better. Source: Principled Technologies. To review all benchmark results, see more detail on system configurations, and read more about our testing, see the appendices. 1 Dell, “Latitude 5320 Laptop or 2-in-1,” accessed March 17, 2021, https://www.dell.com/en-us/work/shop/dell-laptops- and-notebooks/latitude-5320-laptop-or-2-in-1/spd/latitude- 13-5320-2-in-1-laptop. 2 BAPCo, “MobileMark 2018,” accessed March 23, 2021, https://bapco.com/products/mobilemark-2018/. 3 BAPCo, “SYSmark 25,” accessed March 23, 2021, https://bapco.com/products/sysmark-25/. 4 UL Benchmarks, “PCMark 10,” accessed March 23, 2021, https://benchmarks.ul.com/pcmark10. SYSmark 25 Overall rating Dell Latitude 5320 1,301 Lenovo ThinkPad X13 1,018 with an Intel Core i5-1145G7 vPro processor with an AMD Ryzen 5 PRO 4650U processor PCMark 10 Overall rating Dell Latitude 5320 5,238 Lenovo ThinkPad X13 4,921 with an Intel Core i5-1145G7 vPro processor with an AMD Ryzen 5 PRO 4650U processor Speed day-to-day activities with 27% better system performance Expedite collaboration efforts with 6% better system performance April 2021 (Revised) | 4 A Dell Latitude 5320 Business Laptop powered by a four-core Intel Core i5-1145G7 vPro processor delivered better benchmark performance and battery life
- 5. We concluded our hands-on testing on March 15, 2021. During testing, we determined the appropriate hardware and software configurations and applied updates as they became available. The results in this report reflect configurations that we finalized on March 2, 2021 or earlier. Unavoidably, these configurations may not represent the latest versions available when this report appears. Our results To learn more about how we have calculated the wins in this report, go to http://facts.pt/calculating-and-highlighting-wins. Unless we state otherwise, we have followed the rules and principles we outline in that document. Table 1: Results of our benchmark testing. Dell Latitude 5320 with a four-core Intel Core i5-1145G7 vPro processor Lenovo ThinkPad X13 with a six-core AMD Ryzen 5 PRO 4650U processor SYSmark® 25 v1.0.1.31 Overall performance rating 1,301 1,018 Productivity scenario score 1,338 1,097 Creativity scenario score 1,296 941 Responsiveness scenario score 1,211 1,032 Mobilemark® 2018 v1.0.6.55 Overall battery life (hours:min) 9:18 8:01 Overall performance qualification score 1,341 857 Productivity scenario score 1,294 890 Creativity scenario score 1,391 953 Web-browsing scenario score 1,339 744 PCMark 10 v2.1.2508 Overall rating 5,238 4,921 Essentials group rating 9,827 9,155 Apps start-up score 13,218 11,793 Video-conferencing score 8,132 7,966 Web-browsing score 8,829 8,168 Productivity group rating 8,182 7,571 Spreadsheets score 9,403 9,262 Writing score 7,121 6,189 Digital content creation group rating 4,852 4,667 Photo-editing score 6,944 6,875 Rendering and visualization score 3,201 4,366 Video-editing score 5,139 3,388 April 2021 (Revised) | 5 A Dell Latitude 5320 Business Laptop powered by a four-core Intel Core i5-1145G7 vPro processor delivered better benchmark performance and battery life
- 6. System configuration information Table 2: Detailed information on the system we tested. System configuration information Dell Latitude 5320 with a four-core Intel Core i5-1145G7 vPro processor Lenovo ThinkPad X13 with a six-core AMD Ryzen 5 PRO 4650U processor Processor Vendor Intel AMD Name Core i5 Ryzen 5 PRO Model number 1145G7 4650U Core frequency (GHz) 2.6-4.4 2.1-4.0 Number of cores 4 6 Cache (MB) 8 8 Memory Amount (GB) 8 8 Type DDR4 DDR4 Speed (MHz) 3,200 3,200 Graphics Vendor Intel AMD Model number Iris® Xe graphics Radeon™ graphics Storage Vendor KIOXIA Samsung® Model Number KBG40ZNS256G MZVLB256HBHQ Amount (GB) 256 256 Type (PCIe® NVMe™ ) M.2 M.2 Connectivity/expansion Wireless internet Intel Wi-Fi 6 AX201 Intel Wi-Fi 6 AX200 Bluetooth 5.1 5.1 USB 2 x Thunderbolt™ 4 ports with DisplayPort™ Alt Mode/USB4/Power Delivery 1 x USB 3.2 Gen 1 port 1 x USB 3.2 Gen1 port with PowerShare 2 x USB 3.2 Gen 1 (1 always on) 2 x USB-C (DisplayPort, Data Transfer, Power Delivery) Video HDMI 2.0 HDMI 2.0 Battery Type Lithium-Ion Lithium-Ion Rated capacity (mAh) 63 48 April 2021 (Revised) | 6 A Dell Latitude 5320 Business Laptop powered by a four-core Intel Core i5-1145G7 vPro processor delivered better benchmark performance and battery life
- 7. System configuration information Dell Latitude 5320 with a four-core Intel Core i5-1145G7 vPro processor Lenovo ThinkPad X13 with a six-core AMD Ryzen 5 PRO 4650U processor Display Size (in.) 13.3 13.3 Type FHD FHD Resolution 1,920 x 1,080 1,920 x 1,080 Touchscreen No No Operating system Vendor Microsoft Microsoft Name Windows 10 Pro Windows 10 Pro Build number or version 19042.844 19042.844 BIOS BIOS name and version Dell 1.3.0 Lenovo R1CET61W(1.30) Dimensions Height (in.) 0.67 0.69 Width (in.) 12.04 12.3 Depth (in.) 8.17 8.6 Weight (lbs.) 2.61 2.84 April 2021 (Revised) | 7 A Dell Latitude 5320 Business Laptop powered by a four-core Intel Core i5-1145G7 vPro processor delivered better benchmark performance and battery life
- 8. How we tested Setting up the systems Capturing driver information from the OEM factory image 1. Connect an external HDD to the system. 2. On the external drive, create a directory named Drivers. 3. Hold the Shift key, and restart the system. 4. Choose TroubleshootAdvanced optionsCommand prompt. 5. Type DISM /image:C: /export-driver /destination:D:drivers (Note: In this scenario the external drive is labeled D; however, this name may differ depending on the configuration of the system.) Installing Windows 10 Pro 1. Connect the external HDD that contains the captured OEM drivers to the system. 2. In the BIOS, disable SecureBoot. 3. Install a clean version of Windows 10 Pro onto the test system. 4. To complete installation, follow the on-screen instructions, using the default selections when appropriate. 5. To install any missing drivers, open Device Manager, and use the OEM factory drivers captured onto the external HDD. 6. Set DPI scaling to 100%, and set Screen and Sleep options to Never. a. Right-click on the desktop and select Display settings. b. Under the Scale and layout section, for the Change the size of text, apps, and other items option select 100%. c. From the left column, select Power & Sleep. d. For all power options listed under Screen and Sleep, select Never. e. From the left column, select Battery. f. Verify that the Battery Saver percentage is set to 20 percent, and uncheck the box next to Lower screen brightness while on battery saver. 7. Disable User Account Control notifications. a. Select Windows Start, type UAC, and press the Enter key. b. Move the slider control to Never notify, and click OK. 8. Run Windows Update, and install all updates available. 9. Launch the Windows Store app, and install all Store app updates. 10. Launch each vendor proprietary utility app installed on each system, and update any drivers or BIOS files. • For Dell, run the Dell Command Update utility. • For Lenovo, run the Lenovo Vantage utility. • To install the latest chipset and graphics drivers available, go to either https://www.intel.com/content/www/us/en/support.html or https://www.amd.com/en/support. 11. Verify the date and time are correct, and synchronize the system clock with the time server. 12. Set the Windows Power mode to Best Performance: a. On the bottom right corner of the task bar, click the battery icon. i. To select best performance while plugged in, slide the slider all the way to the right. ii. To select best performance while on battery, unplug the system, and move the slider all the way to the right. 13. On the system with an Intel processor, install Intel CPU Runtime for OpenCL Applications 18.1 for Windows OS (64bit or 32bit) from https://registrationcenter.intel.com/en/forms/?productid=3207&pass=yes. 14. On the system with an AMD processor, adjust the AMD Vari-Bright setting to Maximum brightness. a. Right-click the desktop, and select AMD Radeon Software. b. At the Welcome to the new Radeon Software experience, click Skip This. c. In the top right corner, click the Settings Gear icon. d. Click the Display tab. e. Move the Vari-Bright slider to Maximum brightness. 15. Disable Automatic Windows Update. a. Right-click the Windows Start button. b. Select Computer Management. April 2021 (Revised) | 8 A Dell Latitude 5320 Business Laptop powered by a four-core Intel Core i5-1145G7 vPro processor delivered better benchmark performance and battery life
- 9. c. Select Services and Applications. d. Select Services. e. Scroll down, and double-click Windows Update. f. Click Stop. g. From the Startup type drop-down menu, select Disabled. Capturing an image 1. Connect an external HDD to the system. 2. Right-click desktop, and select PersonalizeHomeUpdate & securityBackupMore optionsSee advanced settingsSystem Image BackupCreate a system image. 3. Verify that the external HDD is selected as the save drive, and click Next. 4. Verify that all drives are selected to back up, and click Next. 5. Click Start backup. 6. At Do you want to create a system repair disc, select No, and close the dialogs. Restoring an image 1. Connect an external HDD to the system. 2. Press and hold the Shift key while Restarting the system. 3. Select Troubleshoot. 4. Select Advanced options. 5. Select System image recovery. 6. Select the User account. 7. Enter the system password, and click Continue. 8. Verify that the external HDD is selected, and click Next. 9. Once the recovery has completed, click Finish. Measuring performance SYSmark 25 Avoiding antivirus software conflicts SYSmark 25 is not compatible with any virus-scanning software, so we uninstalled any such software present on the notebook PCs before we installed the benchmark. Avoiding pre-installed software conflicts SYSmark 25 installs the following applications, which its test scripts employ: Productivity • Adobe® Acrobat® Pro DC • Audacity 2.3.2 • AutoIT 3.3.15.2 • Corel WinZip 24 Enterprise • Google Chrome™ • Microsoft Excel 2019 • Microsoft Outlook 2019 • Microsoft PowerPoint 2019 • Microsoft Word 2019 • Shotcut v19.09.14 Creativity • Adobe Lightroom® Classic CC 2019 • Adobe Premiere® Pro CC 2019 v20.0.6 • Adobe Photoshop® CC 2019 v13.1.5 Responsiveness • Adobe Acrobat Pro DC • Adobe Lightroom Classic CC 2019 • Adobe Premiere Pro CC 2019 • Adobe Photoshop CC 2019 • Google Chrome • Microsoft Excel 2019 • Microsoft Outlook 2019 • Microsoft PowerPoint 2019 • Microsoft Word 2019 If any of these applications already exist on the system under test, they could cause problems with the benchmark due to software conflicts. To avoid any such issues, we uninstalled all conflicting pre-installed software applications—including different versions of any of the programs SYSmark 25 uses—before we installed the benchmark. April 2021 (Revised) | 9 A Dell Latitude 5320 Business Laptop powered by a four-core Intel Core i5-1145G7 vPro processor delivered better benchmark performance and battery life
- 10. Using the SYSmark built-in configuration tool This tool supports three levels of configuration: 1. Only makes changes that are REQUIRED for the benchmark to run. 2. Additionally, makes changes that are RECOMMENDED for repeatable results. 3. Additionally, makes OPTIONAL changes that help ensure best results. The configuration tool makes the following configuration changes at each of the three levels: Level 1 - Required • Disables User Account Control (UAC) • Set DPI Scaling to 100% • Disables Low Battery Actions • Disables Network Proxies • Disables System Sleep and Hibernate • Disables Windows Update • Disables the WinSAT service Level 2 - Recommended • Disables User Account Control • Set DPI Scaling to 100% • Disables Low Battery Actions • Disables Network Proxies • Disables System Sleep and Hibernate • Disables Windows Update • Create BAPCo power scheme • Set Power Plan Type to High Performance • Set CPU High Performance • Disables Disk Defrag • Disables Windows Error Reporting • Disables Windows Lock Screen • Disables Windows Pop-ups • Disables Screen Saver and Monitor Timeout • Disables Windows Sidebar/Gadgets • Disables Desktop Slideshow • Disables Windows Defender • Disables Windows Firewall • Set Font Smoothing Level 3 - Optional • Disables Hard Disk Timeout • Disables System Restore • Ignores Laptop Lid Close • Enables Dark Mode We chose the official BAPCo “Run Benchmark” default as outlined in the BAPCo SYSmark2018 User Guide (https://bapco.com/wp-content/ uploads/2020/09/BAPCo_SYSmark25_user_guide_v1.4.pdf), which runs the benchmark using the Required and Recommended options. Setting up the test 1. Install SYSmark 25 with the default options. Running the test 1. Launch SYSmark 25. 2. Click on the Settings Gear icon. 3. For iterations, enter 3. 4. Verify that Conditioning Run is enabled. 5. Enable Process Idle Tasks. 6. Enter a name for the benchmark run. 7. Return to the main menu, click the Back button. 8. Click Run Benchmark. 9. When the benchmark finishes, record the SYSmark 25 benchmark results. April 2021 (Revised) | 10 A Dell Latitude 5320 Business Laptop powered by a four-core Intel Core i5-1145G7 vPro processor delivered better benchmark performance and battery life
- 11. MobileMark 2018 Avoiding antivirus software conflicts MobileMark 2018 is not compatible with any virus-scanning software, so we uninstalled any such software present on the notebook PCs before we installed the benchmark. Avoiding pre-installed software conflicts MobileMark 2018 installs the following applications, which its test scripts employ: Productivity • Adobe Acrobat Pro DC • AutoIT 3.3.14.2 • Google Chrome • Microsoft Excel 2016 • Microsoft OneNote 2016 • Microsoft Outlook 2016 • Microsoft PowerPoint 2016 • Microsoft Word 2016 • Windows Zip Creativity • Adobe Photoshop CC • Adobe Lightroom Classic CC • CyberLink PowerDirector® 2015 Web Browsing • Google Chrome • Microsoft Movies & TV If any of these applications already exist on the system under test, they could cause problems with the benchmark due to software conflicts. To avoid any such issues, we uninstalled all conflicting pre-installed software applications—including different versions of any of the programs MobileMark 2018 uses—before we installed the benchmark. Adjusting display brightness and power settings The brightness of a notebook’s display affects its battery life. Therefore, BAPCo requires that, before you test with MobileMark 2018, you ensure the brightness of the notebook’s monitor is greater than or equal to 200 nits in the center of a completely white screen while the notebook is unplugged and running on battery power. The measurement follows the standards from the Video Electronics Standards Association (www.vesa.org). We complied with this standard for all our tests by setting each notebook PC’s brightness as close to 200 nits as we could without going below that level. We used the following procedure before we started each test. Note: This procedure assumes we began with the notebook plugged into the power supply. 1. To create a completely blank, white screen, open Microsoft Paint by clicking StartàAll ProgramsàAccessoriesàPaint. 2. Press Ctrl+W to open the Resize and Skew dialog. 3. Under Horizontal and Vertical, enter 200, and click OK. 4. Click the View tab. 5. To view a white screen, click Full screen. 6. To allow the screen to warm, wait 45 minutes. 7. Unplug the notebook from the power supply, and measure the display’s brightness using a luminance meter in the center of the screen. (We used a Gossen Mavolux5032C luxmeter.) 8. If the reading is below or significantly greater than 200 nits, adjust the screen brightness to as close to 200 nits as you can without going under, and retest: a. Click the Windows Start button. b. In the Windows Start search box, type display settings c. Adjust the slider to change the Display brightness to the correct percentage that produces no less than 200 nits. 9. Allow the notebook to run on battery power for 10 minutes, re-measure the display, and adjust the brightness up or down as necessary. 10. Verify that the notebook saved the brightness setting by plugging in the system, unplugging it, and taking another reading. April 2021 (Revised) | 11 A Dell Latitude 5320 Business Laptop powered by a four-core Intel Core i5-1145G7 vPro processor delivered better benchmark performance and battery life
- 12. Using the MobileMark built-in configuration tool This tool supports three levels of configuration: 1. Only makes changes that are REQUIRED for the benchmark to run. 2. Additionally, makes changes that are RECOMMENDED for repeatable results. 3. Additionally, makes OPTIONAL changes that help ensure best results. The configuration tool makes the following configuration changes at each of the three levels: Level 1 - Required • Disables User Account Control (UAC) • Set DPI Scaling to 100% • Disables Low Battery Actions • Disables Network Proxies • Disables System Sleep and Hibernate • Disables Windows Update • Enables Windows Search Level 2 - Recommended • Create BAPCo power scheme • Set Power Plan Type to Balanced • Set CPU Adaptive Mode • Disables Battery Saver Dimming • Verifies Battery Saver Threshold • Disables Disk Defrag • Disables Windows Error Reporting • Disables Windows Lock Screen • Disables Windows Pop-ups • Disables Screen Saver and Monitor Timeout • Disables Windows Sidebar/Gadgets • Disables Desktop Slideshow • Disables Windows Defender • Disables Windows Firewall • Set Font Smoothing Level 3 - Optional • Disables Hard Disk Timeout • Disables System Restore • Ignores Laptop Lid Close We chose the official BAPCo “Run Benchmark” default as outlined in the BAPCo MobileMark2018 User Guide (http://bapco.com/ wp-content/uploads/2019/03/BAPCo_MobileMark2018_user_guide_v1.3.pdf), which runs the benchmark using the Required and Recommended options. Setting up the performance-qualified battery life test 1. Verify that the wireless adapter is enabled and connected to a wireless router that is not connected to the internet. 2. Verify that the screen brightness is set to no less than 200 nits. 3. Install MobileMark 2018 with the default options. Running the performance-qualified battery life test 1. Boot the system. 2. Select Windows Start. 3. Type cmd, and press Ctrl+Shift+Enter. 4. Type Cmd.exe /c start /wait Rundll32.exe advapi32.dll,ProcessIdleTasks. Do not interact with the system until the command completes. 5. After the command completes, wait five minutes before running the test. 6. Launch MobileMark 2018. 7. Click on the Settings Gear icon. 8. Verify that Conditioning Run is enabled. 9. Enter a name for the benchmark run. 10. To return to the main menu, click the Back button. 11. Click Run Benchmark. 12. When prompted, unplug the AC power adapter. The test will begin immediately. The benchmark is complete when the notebook PC has fully depleted its battery and is no longer operational when running on battery power. We executed the MobileMark 2018 benchmark three times on the system and took the median battery life run as the representative score for that test. April 2021 (Revised) | 12 A Dell Latitude 5320 Business Laptop powered by a four-core Intel Core i5-1145G7 vPro processor delivered better benchmark performance and battery life
- 13. Principled Technologies is a registered trademark of Principled Technologies, Inc. All other product names are the trademarks of their respective owners. DISCLAIMER OF WARRANTIES; LIMITATION OF LIABILITY: Principled Technologies, Inc. has made reasonable efforts to ensure the accuracy and validity of its testing, however, Principled Technologies, Inc. specifically disclaims any warranty, expressed or implied, relating to the test results and analysis, their accuracy, completeness or quality, including any implied warranty of fitness for any particular purpose. All persons or entities relying on the results of any testing do so at their own risk, and agree that Principled Technologies, Inc., its employees and its subcontractors shall have no liability whatsoever from any claim of loss or damage on account of any alleged error or defect in any testing procedure or result. In no event shall Principled Technologies, Inc. be liable for indirect, special, incidental, or consequential damages in connection with its testing, even if advised of the possibility of such damages. In no event shall Principled Technologies, Inc.’s liability, including for direct damages, exceed the amounts paid in connection with Principled Technologies, Inc.’s testing. Customer’s sole and exclusive remedies are as set forth herein. This project was commissioned by Dell Technologies. Principled Technologies® Facts matter.® Principled Technologies® Facts matter.® PCMark 10 Setting up the test 1. Purchase and download the PCMark 10 benchmark from https://benchmarks.ul.com/pcmark10. 2. Install PCMark 10. Running the test 1. Boot the system. 2. Select Windows Start. 3. Type cmd, and press Ctrl+Shift+Enter. 4. Type Cmd.exe /c start /wait Rundll32.exe advapi32.dll,ProcessIdleTasks. Do not interact with the system until the command completes. 5. After the command completes, wait five minutes before running the test. 6. Launch PCMark 10. 7. When launching for the first time, to verify the software, input the license key. 8. While on the Home tab, click Run to begin the test. 9. When the test completes, record the results. 10. Repeat steps 1 through 9 twice more, and record the median results. April 2021 (Revised) | 13 A Dell Latitude 5320 Business Laptop powered by a four-core Intel Core i5-1145G7 vPro processor delivered better benchmark performance and battery life