OLTP with Dell EqualLogic SSD storage arrays: Comparing a single EqualLogic PS6210S array with four EqualLogic 6210XV arrays
•
1 recomendación•1,209 vistas

You choice of storage array affects the efficiency of your OLTP database workload, which can in turn affect the success of your business. We compared the performance and power usage of a single Dell EqualLogic PS6210S SSD storage to that of four Dell EqualLogic PS6210XV hard disk storage arrays. The all-flash PS6210S solution outmatched the PS6210XV in our testing. The PS6210S delivered greater performance and faster application response time, all while consuming less power. Businesses using database applications should consider the excellent advantages that the all-flash SSD Dell EqualLogic PS6210S storage array can provide.

Recomendados
Recomendados
Más contenido relacionado
La actualidad más candente
La actualidad más candente (19)
Destacado
Destacado (8)
Similar a OLTP with Dell EqualLogic SSD storage arrays: Comparing a single EqualLogic PS6210S array with four EqualLogic 6210XV arrays
Similar a OLTP with Dell EqualLogic SSD storage arrays: Comparing a single EqualLogic PS6210S array with four EqualLogic 6210XV arrays (20)
Más de Principled Technologies
Más de Principled Technologies (20)
Último
Último (20)
OLTP with Dell EqualLogic SSD storage arrays: Comparing a single EqualLogic PS6210S array with four EqualLogic 6210XV arrays
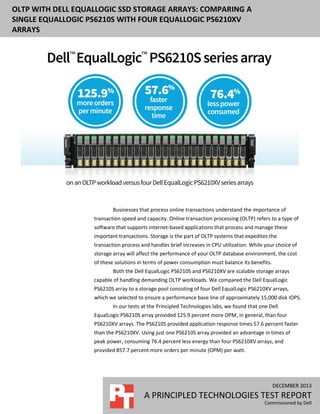
- 1. OLTP WITH DELL EQUALLOGIC SSD STORAGE ARRAYS: COMPARING A SINGLE EQUALLOGIC PS6210S WITH FOUR EQUALLOGIC PS6210XV ARRAYS Businesses that process online transactions understand the importance of transaction speed and capacity. Online transaction processing (OLTP) refers to a type of software that supports internet-based applications that process and manage these important transactions. Storage is the part of OLTP systems that expedites the transaction process and handles brief increases in CPU utilization. While your choice of storage array will affect the performance of your OLTP database environment, the cost of these solutions in terms of power consumption must balance its benefits. Both the Dell EqualLogic PS6210S and PS6210XV are scalable storage arrays capable of handling demanding OLTP workloads. We compared the Dell EqualLogic PS6210S array to a storage pool consisting of four Dell EqualLogic PS6210XV arrays, which we selected to ensure a performance base line of approximately 15,000 disk IOPS. In our tests at the Principled Technologies labs, we found that one Dell EqualLogic PS6210S array provided 125.9 percent more OPM, in general, than four PS6210XV arrays. The PS6210S provided application response times 57.6 percent faster than the PS6210XV. Using just one PS6210S array provided an advantage in times of peak power, consuming 76.4 percent less energy than four PS6210XV arrays, and provided 857.7 percent more orders per minute (OPM) per watt. DECEMBER 2013 A PRINCIPLED TECHNOLOGIES TEST REPORT Commissioned by Dell
- 2. To understand the differences between the SSD storage of the Dell EqualLogic PS6210S and the SAS storage of the EqualLogic PS6210XV, we evaluated both in a realworld OLTP scenario. We tested both configurations using the DVD Store Version 2 tool, which simulates an online ordering system; it measures database performance in orders per minute. We also compared response time and power consumption for both solutions. In our testing, the Dell EqualLogic PS6210S solution demonstrated considerable advantages over the hard disk storage of four Dell EqualLogic PS6210XV arrays in the four following areas: • Performance. The Dell EqualLogic PS6210S solution delivered 125.9 percent more orders per minute than four Dell EqualLogic PS6210XV storage arrays. • Response time. The Dell EqualLogic PS6210S delivered a response time 57.6 percent faster than that of four Dell EqualLogic PS6210XV arrays. • Energy consumption. The Dell EqualLogic PS6210S solution consumed 76.4 percent less energy than four Dell EqualLogic PS6210XV storage arrays. • Orders per minute per watt. The Dell EqualLogic PS6210S solution delivered 857.7 percent more performance per watt than four Dell EqualLogic PS6210XV arrays. The results from our testing show the advantages of the SSD, all-flash Dell EqualLogic PS6210S storage array. When compared to the four EqualLogic PS6210XV SAS arrays, the PS6210S is an energy-saving storage solution that provides superior performance when handling OLTP workloads. As Figure 1 shows, a single Dell EqualLogic PS6210S handled 191,887 orders per minute whereas the four EqualLogic PS6210XV storage arrays together handled 84,949. This means that the Dell EqualLogic PS6210S storage array more than doubled the amount of work the servers could do. Any OLTP environment would benefit from this significant increase in performance. OLTP with Dell EqualLogic SSD storage arrays: Comparing a single EqualLogic PS6210S array with four EqualLogic 6210XV arrays A Principled Technologies test report 2
- 3. Performance in orders per minute (higher numbers are better) 250,000 Figure 1: The Dell EqualLogic PS6210S solution delivered 125.9 percent more OPM than four Dell EqualLogic PS6210XV arrays. 200,000 191,887 150,000 84,949 100,000 50,000 0 Dell EqualLogic PS6210S (one array) Dell EqualLogic PS6210XV (four arrays) Response time is a measure of how long the database server takes to respond to inquiries; the greater the response time, the longer users must wait. As Figure 2 shows, with Dell EqualLogic PS6210S storage, the server was able to deliver a much faster average response time—37.6 milliseconds, which is 57.6 percent faster than the 88.8-millisecond response time of the Dell EqualLogic PS6210XV hard disk array. This means that the Dell EqualLogic PS6210S storage cut the wait time for users by more than half. Database users of any business with can benefit from the increased responsiveness of the EqualLogic PS6210S, which can lead to an increase in worker productivity. Application response time (lower numbers are better) 100 80 Milliseconds Figure 2: The Dell EqualLogic PS6210S delivered a response time 57.6 percent faster than four Dell EqualLogic PS6210XV arrays. 88.8 60 40 37.6 20 0 Dell EqualLogic PS6210S (one array) Dell EqualLogic PS6210XV (four arrays) Businesses see the importance of reducing energy consumption because of its significant cost savings. Server solutions that use less power represent a valuable investment. We measured the power each of the server solutions used during testing. OLTP with Dell EqualLogic SSD storage arrays: Comparing a single EqualLogic PS6210S array with four EqualLogic 6210XV arrays A Principled Technologies test report 3
- 4. As Figure 3 shows, with Dell EqualLogic PS6210S SSD storage, the server consumed 76.4 percent less power than the four Dell EqualLogic PS6210XV SAS arrays consumed. This means that the Dell EqualLogic PS6210S SSD storage array reduced power usage by almost three-fourths. This reduction, due in part to the number of PS6210S storage arrays compared to the number of PS6210XV arrays, can lead to lower electric bills. Figure 3: The Dell EqualLogic PS6210S solution consumed 76.4 percent less energy at peak times than four Dell EqualLogic PS6210XV arrays. Watts Peak power usage (lower numbers are better) 1,600 1,400 1,200 1,000 800 600 400 200 0 1,433 338 Dell EqualLogic PS6210S (one array) Dell EqualLogic PS6210XV (four arrays) Companies consider the performance per watt that storage solutions can deliver because of its importance in terms of cost and productivity. For the database testing we performed in our labs, this metric is a simple calculation: 𝑂𝑟𝑑𝑒𝑟𝑠 𝑝𝑒𝑟 𝑚𝑖𝑛𝑢𝑡𝑒 ÷ 𝑊𝑎𝑡𝑡𝑠 As Figure 4 shows, because it increased performance while using less the power, the Dell EqualLogic PS6210S storage solution delivered more than eight times the performance per watt that the Dell EqualLogic PS6210XV hard disk solution delivered. OLTP with Dell EqualLogic SSD storage arrays: Comparing a single EqualLogic PS6210S array with four EqualLogic 6210XV arrays A Principled Technologies test report 4
- 5. Orders per minute per watt 567.7 Performance per watt 600 Figure 4: The Dell EqualLogic PS6210S delivered 857.7 more orders per minute per watt than four Dell EqualLogic PS6210XV arrays. Lower numbers are better. 500 400 300 200 59.3 100 0 Dell EqualLogic PS6210S (one array) Dell EqualLogic PS6210XV (four arrays) WHAT WE FOUND Figure 5 summarizes our findings. Dell EqualLogic PS6210S solution (one array) 24x 800GB SSD 8 TB 191,887 37.6 88.8 338 1,433 567.7 Configuration Usable capacity Orders per minute Application response time (ms) (lower numbers are better) Peak power usage (watts) (lower numbers are better) Orders per minute per watt (higher numbers are better) Dell EqualLogic PS6210XV solution (four arrays) 96x 300GB 15k SAS 12 TB 84,949 59.3 Figure 5: Summary of OLTP solution test setup and results. WHAT WE TESTED Features of the Dell EqualLogic PS6210S 10GbE iSCSI array The all-flash EqualLogic PS6210S 10GbE iSCSI array offers the low-latency and high-IOPS strength of solid-state storage for enterprise applications. Features include the following: Upgradable. Start out using your existing 10GbE SFP+ modules, and build out to cost-effective 10GBASE-T as your budget allows. Move volumes between storage pools without downtime, and change hardware without disruption. Robust. Vertical port sharing keeps your bandwidth at full speed, even if a network port fails. Automatic load balancing keeps data moving reliably to and from your physical or virtual server farm. OLTP with Dell EqualLogic SSD storage arrays: Comparing a single EqualLogic PS6210S array with four EqualLogic 6210XV arrays A Principled Technologies test report 5
- 6. Easy to manage. EqualLogic Host Software, Host Integration Tools, and EqualLogic SAN Headquarters (SAN HQ) provide the tools administrators need to keep a highlevel view of the storage system, while EqualLogic Group Manger provides the flexibility to make granular changes as needed. The EqualLogic PS6210S holds up to 24 hot-swappable SSDs in either 400GB or 800GB capacities, for a raw capacity of up to 19.2 TB per array. This EqualLogic array comes with dual controllers, each with 16GB non-volatile memory. To learn more about the EqualLogic PS6210S, visit www.dell.com/us/business/p/equallogic-ps6210series/pd. Features of the Dell PowerEdge™ R710 rack server The Dell PowerEdge R710 is a high-performance server that offers many features for maximizing performance and for minimizing operational expenses, including the following: 64-bit computing with large RAM capacities. The Dell PowerEdge R710 allows for up to 144 GB of RAM via its 18 DIMM slots, which accept any of the following sizes of DDR3 RAM: 1 GB, 2 GB, 4 GB, or 8 GB. These amounts of memory, along with the 64-bit Windows software platform, allow you to virtualize multiple servers in a single machine. Power. The Dell PowerEdge R710 includes enhancements that let it use less energy than many older servers do. Processors. The Dell PowerEdge R710 uses the Intel® Xeon® processor 5500 series. These processors automatically adjust their speed and energy usage to meet the requirements of your applications, improving performance and saving power. Management. The Dell PowerEdge R710, like all late-model Dell servers, comes with the Dell Lifecycle Controller. This tool simplifies management by providing a single interface for management functions and by storing critical information in the system itself. There are no CDs or USB keys to keep track of for drivers or firmware. In addition, you can use the Lifecycle Controller in conjunction with Microsoft® System Center Configuration Manager 2007 to streamline remote operating system deployments. About DVD Store Version 2.1 To create our real-world ecommerce workload, we used the DVD Store Version 2.1 benchmarking tool. DS2 models an online DVD store, where customers log in, search for movies, and make purchases. DS2 reports these actions in orders per minute that the system could handle, to show what kind of performance you could expect for your customers. The DS2 workload also performs other actions, such as adding new customers, to exercise the wide range of database functions you would need to run your ecommerce environment. OLTP with Dell EqualLogic SSD storage arrays: Comparing a single EqualLogic PS6210S array with four EqualLogic 6210XV arrays A Principled Technologies test report 6
- 7. CONCLUSION You choice of storage array affects the efficiency of your OLTP database workload, which can in turn affect the success of your business. We compared the performance and power usage of a single Dell EqualLogic PS6210S SSD storage to that of four Dell EqualLogic PS6210XV hard disk storage arrays. The all-flash PS6210S solution outmatched the PS6210XV in our testing. The PS6210S delivered greater performance and faster application response time, all while consuming less power. Businesses using database applications should consider the excellent advantages that the all-flash SSD Dell EqualLogic PS6210S storage array can provide. OLTP with Dell EqualLogic SSD storage arrays: Comparing a single EqualLogic PS6210S array with four EqualLogic 6210XV arrays A Principled Technologies test report 7
- 8. APPENDIX A – SYSTEM CONFIGURATION INFORMATION Figure 6 provides detailed configuration information about the Dell EqualLogic PS6210S array, and Figure 7 details the configuration of the previous-generation Dell EqualLogic PS6210XV. Storage array Number of storage arrays Number of storage controllers per array RAID level Firmware version Number of drives Model number Drive size (GB) Drive buffer size (MB) Drive RPM Drive type Dell EqualLogic PS6210S 1 2 10 7.0.0 24 LB806M 800 N/A N/A SSD Figure 6: Detailed configuration information for the Dell EqualLogic PS6210S array. Storage array Number of storage arrays Number of storage controllers per array RAID level Firmware version Number of drives Model number Drive size (GB) Drive buffer size (MB) Drive RPM Drive type Dell EqualLogic PS6210XV 4 2 10 7.0.0 96 ST9300653SS 300 64 15,000 SAS Figure 7: Detailed configuration information for the previous-generation Dell EqualLogic PS6210XV we tested. OLTP with Dell EqualLogic SSD storage arrays: Comparing a single EqualLogic PS6210S array with four EqualLogic 6210XV arrays A Principled Technologies test report 8
- 9. Figure 8 provides detailed configuration information for the test server. System Power supplies Total number Maximum wattage of each (W) Cooling fans Total number Dimensions (h x w) of each General Number of processor packages Number of cores per processor Number of hardware threads per core CPU Vendor Name Model number Stepping Socket type Core frequency (GHz) Bus frequency (GT/s) L1 cache L2 cache L3 cache (MB) Platform Vendor and model number Motherboard model number BIOS name and version BIOS settings Memory module(s) Total RAM in system (GB) Vendor and model number Type Speed (MHz) Speed running in the system (MHz) Size (GB) Number of RAM module(s) Rank Chip organization Hard disk Vendor and model number Number of disks in system Size (GB) Buffer size (MB) RPM Dell PowerEdge R710 2 870 5 2.5" x 2.5" 2 6 2 Intel Xeon X5670 B1 FCLGA1366 2.93 6.4 GT/s 32 KB + 32 KB (per core) 256 KB (per core) 12 Dell PowerEdge R710 0N0H4P Dell 6.3.0 Default 288 GB Hynix HMT42GR7MFR4C-PB PC3-12800R 1,600 1,600 16 18 Dual Double-sided Dell Enterprise Savvio 15k.2 2 147 16 15K OLTP with Dell EqualLogic SSD storage arrays: Comparing a single EqualLogic PS6210S array with four EqualLogic 6210XV arrays A Principled Technologies test report 9
- 10. System Type Controller Network adapter Vendor and model number Type Dell PowerEdge R710 SAS Dell PERC 6/i Integrated RAID Controller Intel Ethernet Controller 10 Gigabit X520-AT2 PCI-E Figure 8: Detailed configuration information for the test server. OLTP with Dell EqualLogic SSD storage arrays: Comparing a single EqualLogic PS6210S array with four EqualLogic 6210XV arrays A Principled Technologies test report 10
- 11. APPENDIX B: DETAILED CONFIGURATION INFORMATION Figures 9 and 10 show the test bed setup we used for the two solutions. Figure 9: Test bed setup for the Dell EqualLogic PS6210S storage solution. OLTP with Dell EqualLogic SSD storage arrays: Comparing a single EqualLogic PS6210S array with four EqualLogic 6210XV arrays A Principled Technologies test report 11
- 12. Figure 10: Test bed setup for the Dell EqualLogic PS6210XV storage solution. Setting up the storage To host the data for our testing, we first created an EqualLogic storage group called EQL. In the EQL group, we added a Dell EqualLogic PS6210S array to the group and created a RAID 10 pool called EQL. We created one 8TB LUN to host our server VMs, and after testing, we created a second storage pool called EQL-XV and added four PS6210XV arrays to the new pool and initialized them as RAID 10. We migrated the LUN to the new pool which effectively load balanced the LUN across all four PS6210XV arrays. Configuring the EqualLogic PS6210S We configured the EqualLogic PS6210S array with one 8TB LUN. 1. Using the command-line console via serial cable, reset the EqualLogic PS6210S with the reset command. 2. Enter a group name, group IP address, and IP address for eth0. 3. After group creation and with a computer connected to the same subnet as the storage, use the Dell EqualLogic Web interface to do the following: a. Click the array, and when prompted to configure the member, choose Yes. Choose RAID 10. b. Create one 8TB LUN. c. Enable shared access to the iSCSI target from multiple initiators on the volume. d. Create an access control record for the volume. Configuring the EqualLogic PS6210XV arrays We configured a factory reset on all four arrays and added them to the storage group. OLTP with Dell EqualLogic SSD storage arrays: Comparing a single EqualLogic PS6210S array with four EqualLogic 6210XV arrays A Principled Technologies test report 12
- 13. 1. Using the command-line console, via serial cable, reset each EqualLogic PS6210XV array with the reset command. 2. Enter a group name, group IP address, and IP address for eth0. 3. After group creation and with a computer connected to the same subnet as the storage, use the Dell EqualLogic Web interface to do the following: a. Click the array, and when prompted to configure the member, choose Yes. Choose RAID 10. 4. Repeat steps 1 through 4 for all four EqualLogic PS6210XV arrays. Setting up and Configuring Dell R710 servers, local storage, and BIOS settings We installed and configured four Dell PowerEdge R710 servers with system defaults and enabled the Performance power profile. We configured the PERC RAID controller of each server for RAID 1, and installed the server OS on the local RAID 1 storage. We installed VMware® vSphere® 5.5 on all three servers. Installing vSphere 5.5 on a Dell PowerEdge R710 1. Insert the ESXi 5.5 disk, and select Boot from disk. 2. On the Welcome screen, press Enter. 3. On the End User License Agreement (EULA) screen, press F11. 4. On the Select a Disk to install or Upgrade screen, select the relevant volume for ESXi installation, and press Enter. 5. On the Please Select a Keyboard Layout screen, press Enter. 6. On the Enter a Root Password screen, enter a root password, and confirm it by entering it again. Press Enter to continue. 7. On the Confirm Install screen, press F11 to install. 8. On the Installation Complete screen, press Enter to reboot. Configuring ESXi after installation (data network) 1. On the ESXi 5.5 screen, press F2, enter the root password, and press Enter. 2. On the System Customization screen, select Troubleshooting Options, and press Enter. 3. On the Troubleshooting Mode Options screen, select Enable ESXi Shell, and press Enter. 4. Select Enable SSH, press Enter, and press Esc. 5. On the System Customization screen, select Configure Management Network. 6. On the Configure Management Network screen, select IP Configuration. 7. On the IP Configuration screen, select Set static IP; enter an IP address, subnet mask, and default gateway; and press Enter. 8. On the Configure Management Network screen, press Esc. When asked if you want to apply the changes, press Y. 9. Log into the host as root with the vSphere client. 10. Select the Configuration tab, and click Networking. 11. Configure vSwitch0 by clicking Add Networking… 12. Click the Network Adapters tab. 13. Click Add… 14. Select vmnic0, and click Next. OLTP with Dell EqualLogic SSD storage arrays: Comparing a single EqualLogic PS6210S array with four EqualLogic 6210XV arrays A Principled Technologies test report 13
- 14. 15. In the vSwitch0 properties, click Add… 16. Create a virtual machine network, click Next, and click Finish. Configuring ESXi after installation (storage network) 1. Select the Configuration tab, and click Networking. 2. Click Add networking. 3. Select VMkernel, and click Next. 4. Select Create a vSphere standard switch, and click Next. 5. Type iSCSI, and click Next. 6. Enter the appropriate IP address and subnet mask, and click Next. 7. Click Finish. 8. On vSwitch1, click Properties. 9. Click vSwitch, and then click Edit. 10. Type MTU 9000, click OK. 11. Click iSCSI and Edit. 12. Type MTU 9000, click OK. Creating the vSphere data stores on iSCSI targets Note: All data stores are created once on the first vSphere host. Additional vSphere nodes do not require datastore re-creation. 1. Log into the host as root with the vSphere client. 2. Click Configuration tabStorageAdd Storage. 3. Select the first EqualLogic volume, and click Next. 4. Select VMFS-5, and click Next. 5. Review the disk layout, and click Next. 6. For Datastore name, type EQL1 and click Next. 7. For Capacity, select Maximum Available Space, and click Next. 8. To create the data store, click Finish. 9. Repeat steps 1 through 8 to create the second data store on iSCSI storage. Setting up the first virtual machine 1. Connect to the first ESX server via the VMware vSphere Web client. 2. Log in as root to the ESX server. 3. Click the Virtual Machines tab. 4. Right-click, and choose New Virtual Machine. 5. Choose Custom, and click Next. 6. Enter the name of the virtual machine, and click Next. 7. Select the first host, and click Next. 8. Select the first LUN for the storage, and click Next. 9. Choose Virtual Machine Version 9, and click Next. 10. Choose Windows, choose Microsoft Windows Server® 2012 (64-bit), and click Next. 11. For CPUs, select one virtual processor socket, with four cores per virtual socket, and click Next. OLTP with Dell EqualLogic SSD storage arrays: Comparing a single EqualLogic PS6210S array with four EqualLogic 6210XV arrays A Principled Technologies test report 14
- 15. 12. Choose 64GB RAM, and click Next. 13. Click 1 for the number of NICs, select VMXNET3, connect to the vSwitch0 network, and click Next. 14. Leave the default virtual storage controller, and click Next. 15. Choose to Create a new virtual disk, and click Next. 16. Set the OS virtual disk size to 85GB, choose thick-provisioned lazy-zeroed, specify the OS datastore on the external storage, and click Next. 17. Keep the default virtual device node (0:0), and click Next. 18. Click Finish. 19. Right-click the VM, and choose Edit Settings. 20. Click the Resources tab, and click Memory. 21. Select reserve all guest memory, and click OK. 22. Connect the VM virtual CD-ROM to the Microsoft Windows Server 2012 installation disk. 23. Start the VM. Installing the VM operating system on the first VM 1. At the Language Selection Screen, click Next. 2. Click Install Now. 3. Select Windows Server 2012 Enterprise (Full Installation), and click Next. 4. Click the I accept the license terms checkbox, and click Next. 5. Click Custom. 6. Click Next. 7. At the User’s password must be changed before logging on warning screen, click OK. 8. Enter the desired password for the administrator in both fields, and click the arrow to continue. 9. At the Your password has been changed screen, click OK. 10. Install the latest Host Integration Tools package on the VM. Restart as necessary. 11. Connect the machine to the Internet, and install all available Windows updates. Restart as necessary. 12. Enable remote desktop access. 13. Change the hostname, and reboot when prompted. 14. Create a shared folder to store test script files. Set permissions as needed. 15. Set up networking: a. Click StartControl Panel, right-click Network Connections, and choose Open. b. Right-click the VM traffic NIC, and choose Properties. c. Select TCP/IP (v4), and choose Properties. d. Assign the VM a static IP address. 16. Shut down the VM. 17. Clone the VM, hosting two VMs on each Dell PowerEdge R710 host. Installing and configuring Microsoft SQL Server 2012 We installed Microsoft SQL Server 2012 on the VMs residing on the systems under test. Configuring the SQL Server VM After cloning, modify the SQL VM to contain two additional virtual disks: OLTP with Dell EqualLogic SSD storage arrays: Comparing a single EqualLogic PS6210S array with four EqualLogic 6210XV arrays A Principled Technologies test report 15
- 16. 400GB virtual disks for SQL database (Thick provisioned, eager-zeroed) 140GB virtual disks for SQL log data (Thick provisioned, eager-zeroed) In the VM, configure the VM storage: 1. In the taskbar, click the Server Manager icon. 2. In the left pane, expand Storage, and click Disk Management. 3. Right-click the first volume, and choose Initialize Disk. 4. In the right pane, right-click the volume, and choose New Simple Volume… 5. At the welcome window, click Next. 6. At the Specify Volume Size window, leave the default selection, and click Next. 7. At the Assign Drive Letter or Path window, choose a drive letter, and click Next. 8. At the Format Partition window, choose NTFS, and click Next. 9. At the Completing the New Simple Volume Wizard window, click Finish. Installing SQL Server 2012 1. Open the console for the VM or connect to the VM with RDP. 2. Mount the installation ISO to the VM. 3. Click Run SETUP.EXE. If Autoplay does not begin the installation, navigate to the SQL Server 2012 DVD, and double-click. 4. If the installer prompts you with a .NET installation prompt, click Yes to enable the .NET Framework Core role. 5. In the left pane, click Installation. 6. Click New SQL Server stand-alone installation or add features to an existing installation. 7. At the Setup Support Rules screen, wait for the rule check to complete. If there are no failures or relevant warnings, click OK. 8. Select the Specify a free edition from the drop-down menu, and select Evaluation. Click Next. 9. Click the checkbox to accept the license terms, and click Next. 10. If no failures are displayed after the setup support files are installed, click Next. 11. At the Setup Role screen, choose SQL Server Feature Installation. 12. At the Feature Selection screen, select Database Engine Services, Full-Text and Semantic Extractions for Search, Client Tools Connectivity, Client Tools Backwards Compatibility, Management Tools – Basic, and Management Tools – Complete. Click Next. 13. At the Installation Rules screen, click Next after the check completes. 14. At the Instance configuration screen, leave the default selection of default instance, and click Next. 15. At the Disk Space Requirements screen, click Next. 16. At the Server Configuration screen, check that NT AUTHORITYSYSTEM is selected for SQL Server Agent and SQL Server Database Engine. Click Next. 17. Assuming there are no failures, click Next. 18. At the Database Engine Configuration screen, select Mixed Mode. 19. Enter and confirm a password for the system administrator account. 20. Click Add Current user. This may take several seconds. OLTP with Dell EqualLogic SSD storage arrays: Comparing a single EqualLogic PS6210S array with four EqualLogic 6210XV arrays A Principled Technologies test report 16
- 17. 21. Click the Data Directories tab, and enter the appropriate drive and folders for database and logs. 22. Click Next. 23. At the Error and usage reporting screen, click Next. 24. At the Installation Configuration Rules screen, check that there are no failures or relevant warnings, and click Next. 25. At the Ready to Install screen, click Install. 26. After installation completes, click Close. 27. Create a SQL Server login for the ds2user (see the Configuring the database (Data generation overview) section for the specific script to use). 28. Copy the pre-created DVD Store backup to the specified backup volume. 29. Download and install any available updates for Microsoft SQL Server 2012. We installed SQL Server 2012 SP1 and CU5. Configuring the database workload client For our testing, we used a virtual client for the Microsoft SQL Server client. To create this client, we installed Windows Server 2008 R2, assigned a static IP address, and installed .NET 3.5. Configuring the database Data generation overview We generated the data using the Install.pl script included with DVD Store version 2.1 (DS2), providing the parameters for our 400GB database size and the database platform on which we ran Microsoft SQL Server. We ran the Install.pl script on a utility system running Linux. The Install.pl script also generated the database schema. After processing the data generation, we transferred the data files and schema creation files to a Windowsbased system running SQL Server 2012. We built the 400GB database in SQL Server 2012, and then performed a full backup, storing the backup file on the C: drive for quick access. We used that backup file to restore the server between test runs. The only modification we made to the schema creation scripts were the specified file sizes for our database. We explicitly set the file sizes higher than necessary to ensure that no file-growth activity would affect the outputs of the test. Besides this file size modification, the database schema was created and loaded according to the DVD Store documentation. Specifically, we followed these steps: 1. We generated the data and created the database and file structure using database creation scripts in the DS2 download. We made size modifications specific to our 400GB database and the appropriate changes to drive letters. 2. We transferred the files from our Linux data generation system to a Windows system running SQL Server. 3. We created database tables, stored procedures, and objects using the provided DVD Store scripts. 4. We set the database recovery model to bulk-logged to prevent excess logging. 5. We loaded the data we generated into the database. For data loading, we used the import wizard in SQL Server Management Studio. Where necessary, we retained options from the original scripts, such as Enable Identity Insert. 6. We created indices, full-text catalogs, primary keys, and foreign keys using the database-creation scripts. OLTP with Dell EqualLogic SSD storage arrays: Comparing a single EqualLogic PS6210S array with four EqualLogic 6210XV arrays A Principled Technologies test report 17
- 18. 7. We updated statistics on each table according to database-creation scripts, which sample 18 percent of the table data. 8. On the SQL Server instance, we created a ds2user SQL Server login using the following Transact SQL (TSQL) script: USE [master] GO CREATE LOGIN [ds2user] WITH PASSWORD=N’’, DEFAULT_DATABASE=[master], DEFAULT_LANGUAGE=[us_english], CHECK_EXPIRATION.=OFF, CHECK_POLICY=OFF GO 9. We set the database recovery model back to full. 10. We created the necessary full text index using SQL Server Management Studio. 11. We created a database user and mapped this user to the SQL Server login. 12. We then performed a full backup of the database. This backup allowed us to restore the databases to a pristine state relatively quickly between tests. Figure 11 shows our initial file size modifications. Logical name Database files primary cust1 cust2 cust3 cust4 ind1 ind2 ind3 ind4 ds_misc orders1 orders2 orders3 orders4 Log files ds_log Filegroup Initial size (MB) PRIMARY DS_CUST_FG DS_CUST_FG DS_CUST_FG DS_CUST_FG DS_IND_FG DS_IND_FG DS_IND_FG DS_IND_FG DS_MISC_FG DS_ORDERS DS_ORDERS DS_ORDERS DS_ORDERS 5 46,589 46,589 46,589 46,589 28,607 28,607 28,607 28,607 470 22,540 22,540 22,540 22,540 Not applicable 102,400 Figure 11: Our initial file size modifications. OLTP with Dell EqualLogic SSD storage arrays: Comparing a single EqualLogic PS6210S array with four EqualLogic 6210XV arrays A Principled Technologies test report 18
- 19. Running the test Test start and run times We ran all workloads concurrently to start and record all performance counters for this report. The specific testing parameters we used for the benchmark are included in the setup sections, and specifics for launching these tests are described below. About running the DVD Store tests We created a series of batch files, SQL scripts, and shell scripts to automate the complete test cycle. DVD Store outputs an orders-per-minute metric, which is a running average calculated through the test. In this report, we report the last OPM reported by each client/target pair. Each complete test cycle consisted of the following general steps: 1. Clean up prior outputs from the target system and the client driver system. 2. Drop the database from the target. 3. Restore the database on the target. 4. Shut down the target. 5. Reboot the host and client system. 6. Wait for a ping response from the server under test (the hypervisor system), the client system, and the target. 7. Let the test server idle for 10 minutes. 8. Start the DVD Store driver on the client. We used the following DVD Store parameters for testing: ds2sqlserverdriver.exe --target=<target_IP> --ramp_rate=10 --run_time=30 -n_threads=16 --db_size=400GB --think_time=0 --detailed_view=Y -warmup_time=5 --report_rate=1 --csv_output=<drive path> OLTP with Dell EqualLogic SSD storage arrays: Comparing a single EqualLogic PS6210S array with four EqualLogic 6210XV arrays A Principled Technologies test report 19
- 20. ABOUT PRINCIPLED TECHNOLOGIES Principled Technologies, Inc. 1007 Slater Road, Suite 300 Durham, NC, 27703 www.principledtechnologies.com We provide industry-leading technology assessment and fact-based marketing services. We bring to every assignment extensive experience with and expertise in all aspects of technology testing and analysis, from researching new technologies, to developing new methodologies, to testing with existing and new tools. When the assessment is complete, we know how to present the results to a broad range of target audiences. We provide our clients with the materials they need, from market-focused data to use in their own collateral to custom sales aids, such as test reports, performance assessments, and white papers. Every document reflects the results of our trusted independent analysis. We provide customized services that focus on our clients’ individual requirements. Whether the technology involves hardware, software, Web sites, or services, we offer the experience, expertise, and tools to help our clients assess how it will fare against its competition, its performance, its market readiness, and its quality and reliability. Our founders, Mark L. Van Name and Bill Catchings, have worked together in technology assessment for over 20 years. As journalists, they published over a thousand articles on a wide array of technology subjects. They created and led the Ziff-Davis Benchmark Operation, which developed such industry-standard benchmarks as Ziff Davis Media’s Winstone and WebBench. They founded and led eTesting Labs, and after the acquisition of that company by Lionbridge Technologies were the head and CTO of VeriTest. Principled Technologies is a registered trademark of Principled Technologies, Inc. All other product names are the trademarks of their respective owners. Disclaimer of Warranties; Limitation of Liability: PRINCIPLED TECHNOLOGIES, INC. HAS MADE REASONABLE EFFORTS TO ENSURE THE ACCURACY AND VALIDITY OF ITS TESTING, HOWEVER, PRINCIPLED TECHNOLOGIES, INC. SPECIFICALLY DISCLAIMS ANY WARRANTY, EXPRESSED OR IMPLIED, RELATING TO THE TEST RESULTS AND ANALYSIS, THEIR ACCURACY, COMPLETENESS OR QUALITY, INCLUDING ANY IMPLIED WARRANTY OF FITNESS FOR ANY PARTICULAR PURPOSE. ALL PERSONS OR ENTITIES RELYING ON THE RESULTS OF ANY TESTING DO SO AT THEIR OWN RISK, AND AGREE THAT PRINCIPLED TECHNOLOGIES, INC., ITS EMPLOYEES AND ITS SUBCONTRACTORS SHALL HAVE NO LIABILITY WHATSOEVER FROM ANY CLAIM OF LOSS OR DAMAGE ON ACCOUNT OF ANY ALLEGED ERROR OR DEFECT IN ANY TESTING PROCEDURE OR RESULT. IN NO EVENT SHALL PRINCIPLED TECHNOLOGIES, INC. BE LIABLE FOR INDIRECT, SPECIAL, INCIDENTAL, OR CONSEQUENTIAL DAMAGES IN CONNECTION WITH ITS TESTING, EVEN IF ADVISED OF THE POSSIBILITY OF SUCH DAMAGES. IN NO EVENT SHALL PRINCIPLED TECHNOLOGIES, INC.’S LIABILITY, INCLUDING FOR DIRECT DAMAGES, EXCEED THE AMOUNTS PAID IN CONNECTION WITH PRINCIPLED TECHNOLOGIES, INC.’S TESTING. CUSTOMER’S SOLE AND EXCLUSIVE REMEDIES ARE AS SET FORTH HEREIN. OLTP with Dell EqualLogic SSD storage arrays: Comparing a single EqualLogic PS6210S array with four EqualLogic 6210XV arrays A Principled Technologies test report 20