Give DevOps teams self-service resource pools within your private infrastructure with Dell Technologies APEX cloud and storage solutions
•
0 recomendaciones•163 vistas

We confirmed several real-world use cases in a VMware vSphere with Tanzu environment

Recomendados
Recomendados
Más contenido relacionado
La actualidad más candente
La actualidad más candente (20)
Similar a Give DevOps teams self-service resource pools within your private infrastructure with Dell Technologies APEX cloud and storage solutions
Similar a Give DevOps teams self-service resource pools within your private infrastructure with Dell Technologies APEX cloud and storage solutions (20)
Más de Principled Technologies
Más de Principled Technologies (20)
Último
Último (20)
Give DevOps teams self-service resource pools within your private infrastructure with Dell Technologies APEX cloud and storage solutions
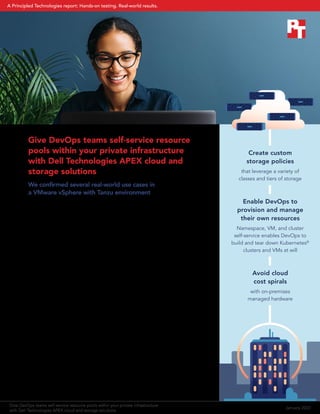
- 1. Give DevOps teams self-service resource pools within your private infrastructure with Dell Technologies APEX cloud and storage solutions We confirmed several real-world use cases in a VMware vSphere with Tanzu environment The fast-paced needs of modern application development and delivery have pushed some companies to subscribe to public cloud-based solutions such as Amazon Web Services (AWS). It can be frustrating for a DevOps team to wait for a separate IT team to approve every individual resource request. Beyond frustration, this fragmented approach can waste time and money as the teams deliberate over resource usage instead of innovating in their own areas. What some companies don’t realize, however, is that ITOps teams can use VMware® vSphere® technology to deliver public-cloud-like self-service to private cloud solutions such as those in the Dell Technologies APEX portfolio. At Principled Technologies, we validated key use cases and functionality for a solution comprising Dell Technologies APEX Private Cloud and APEX Data Storage Services running a VMware vSphere with Tanzu environment. The solution allowed us to set up namespace self-service that could enable DevOps teams to create resources within an ITOps-defined quota; set up VM and Kubernetes cluster self-service that dev teams can use to create and destroy clusters and VMs at will; and configure storage policies within VMware vSphere that dev teams could then use to assign storage with specific quality of service (QoS) to clusters and VMs. We then verified the functionality of each of these features by using them to create a simple containerized application and VM appliance and ensuring that the two could communicate with each other. Though each feature we tested would directly empower a theoretical DevOps team, setting up these capabilities would allow ITOps teams to establish limits up front without the need to approve individual DevOps requests. Enable DevOps to provision and manage their own resources Namespace, VM, and cluster self-service enables DevOps to build and tear down Kubernetes® clusters and VMs at will Create custom storage policies that leverage a variety of classes and tiers of storage Avoid cloud cost spirals with on-premises managed hardware Give DevOps teams self-service resource pools within your private infrastructure with Dell Technologies APEX cloud and storage solutions January 2022 A Principled Technologies report: Hands-on testing. Real-world results.
- 2. How we tested Table 1 shows basic details of the environment we used for testing. For full details on our test environment, including hardware components, see the science behind this report. Table 1: Our testing environment Component Purpose APEX Private Cloud Infrastructure-as-a-service (IaaS) environment built upon Dell EMC VxRail hyperconverged infrastructure with VMware vSphere and vSAN™ . VMware Tanzu Containers-as-a-service functionality with Kubernetes orchestration built into the vSphere hypervisor. Together with APEX Private Cloud, this provides an on-premises, as-a-service VMware private cloud environment VMware vSphere with Tanzu Software-defined data center technology that serves as the basis for the environment APEX Data Storage Services Optional Block Services storage attached to VMware vSphere with Tanzu Fictional scenario A fictional company is modernizing its approach to applications. Their app DevOps team wants to implement a containerized mobile app that runs as a set of microservices in the containerized environment. Those containers will also need to access a legacy data source running in a VM appliance. It’s a complex task, but the DevOps team is more than capable of rising to the challenge. There’s only one problem: their toolset. To hit their aggressive schedules, the DevOps team wants more self-service features for provisioning resources during development and testing. Sean, the ITOps team lead, has some concerns with the DevOps request and thinks they can accomplish everything the DevOps team wants with the tools they already have. After conferring with his team, Sean plans to build a test solution to demonstrate that VMware vSphere with Tanzu together with APEX Private Cloud and APEX Data Storage Services can deliver a DevOps-empowering solution right from the company’s existing on-premises cloud. Aylea, the mobile app DevOps team lead, has requested permission to implement a development sandbox using AWS so her team can easily experiment, stand up and tear down Kubernetes clusters, and configure tools to support the new containerized mobile app without the resource request process that can interrupt the DevOps team’s flow and creativity. Give DevOps teams self-service resource pools within your private infrastructure with Dell Technologies APEX cloud and storage solutions January 2022 | 2
- 3. Management use case sections Figure 1 shows the main use cases we used to deliver and verify DevOps self-service in a VMware vSphere with Tanzu environment on APEX Private Cloud and APEX Data Storage Services solutions. Ultimately, we were able to set up and confirm each use case without issue. The following sections cover these use cases in more detail and demonstrate how they could each help a hypothetical company modernize its mobile applications. Management use cases Configuring storage policies within VMware vSphere with Tanzu Setting up namespace self-service Setting up VM and Kubernetes cluster self-service Confirming self-service use: ✓ Creating and deleting Kubernetes clusters within a namespace ✓ Creating and deleting VMs within a namespace ✓ Provisioning Kubernetes clusters and VMs with higher QoS storage for production ✓ Configuring an application environment Figure 1: Summary of the management uses cases we investigated. Aylea’s DevOps team thinks they need a public cloud solution to accomplish their goals, but as our report will show, the fictional company already has everything it needs at its disposal. Currently, they maintain a highly virtualized VMware vSphere environment and use APEX Private Cloud for IaaS and APEX Data Storage Services to scale their storage with configurable service levels. Can their ITOps team use the existing solution to deliver a self-service app development environment to the DevOps team? Give DevOps teams self-service resource pools within your private infrastructure with Dell Technologies APEX cloud and storage solutions January 2022 | 3
- 4. Configuring storage policies We set up storage policies within the VMware vSphere with Tanzu environment that enabled us to leverage different storage classes and assign low, medium, and high storage tiers to different resources within the environment. Aylea’s DevOps team wants to be able to set guarantees on storage performance and fault-tolerance minimums for their test environment without first needing to go through the ITOps team, which would involve an approval process that may slow down development. Without the ability to guarantee certain levels of performance, the DevOps team’s test environment could have unreliable performance that makes it difficult to optimize their mobile app. Though Aylea thinks cloud storage may be the most viable solution, Sean knows that he can enable the DevOps team to assign storage tiers to their test resources from within their current VMware vSphere with Tanzu environment. Namespace self-service would allow Aylea’s DevOps team to set the pace of their own resource usage, without needing to formally request resources from ITOps—that’s one big reason why they originally wanted to use a public cloud solution. With a public cloud solution, Sean’s ITOps team would be concerned about the ensuing cost spirals should DevOps provision more resources than their budget allows. With a private cloud solution, ITOps would still be concerned that DevOps’ resource usage for the test environment could eat into their production resources. This could cause QoS degradation on the company’s production apps and negatively affect the end- user experience for client-facing work. VMware vSphere allows Sean to set up a self- service namespace with overall resource limits and let Aylea’s DevOps team choose how they want to spend it. Setting up namespace self-service We set up a VMware namespace service that could enable a hypothetical app development team to provision their own VMware vSAN storage resources within a test environment. We then set up a high- performance, high-QoS production namespace that a hypothetical company could use in its production environment. Finally, we verified that we could use namespaces to establish resource quotas for VMs, memory, and disk usage. IT administrators can enable the VMware namespace service with a total resource quota for all resources within that namespace. Once a development team creates their namespace, a vCenter operator will need to provision the namespaces with CPU, memory, storage quotas, and storage tiers (if necessary). After establishing a quota, the dev team is free to provision clusters and VMs within the established resource limits. Give DevOps teams self-service resource pools within your private infrastructure with Dell Technologies APEX cloud and storage solutions January 2022 | 4
- 5. On the day of the demonstration, Sean walks Aylea and the rest of the DevOps team through the solution he’s designed. Though skeptical at first, Aylea is able to confirm that all of the functionality the DevOps team wanted is actually already possible with the APEX solutions the company already uses. With the ITOps demonstration environment, Aylea’s team can use their designated namespace to stand up and wipe away Kubernetes clusters at will; they can use VM self-service to stand up and tear down VMs within that namespace; and they can use storage policies to provision clusters with high- QoS tier storage suitable for a production environment. As a final test, Aylea configures a containerized app and VM appliance, and enables the two to communicate with each other. On a very basic level, this is how Aylea envisions the app will ultimately behave. Because ITOps demonstrated that the desired functionality exists within the APEX solutions the company currently runs, Aylea no longer believes they need a public cloud dev environment to get the job done. Go team! VM and cluster self-service would enable Aylea’s DevOps team to create clusters and VMs for app infrastructure without needing to first request resources from the ITOps team. It’s important for the DevOps team to have access to VMs so they can develop the infrastructure required to link their new, modernized app to the company’s legacy monolithic data service. But Sean’s team is again concerned that without proper approval from ITOps, the DevOps team’s resource usage might exceed their limits and begin to degrade performance for their services already in production. Because the company’s VMware vSphere with Tanzu environment allows for self- service, Aylea’s DevOps team will be able to quickly provision required resources on an ad hoc basis while remaining within the resource limits that Sean’s team sets. Setting up VM and cluster self-service Modern development workflows may require devs to use both containers and VMs. We set up VM and cluster self-service that could enable a hypothetical development team to provision and deprovision both Kubernetes clusters and VMs using the self-service namespaces we configured earlier. This self-service approach could save both time and money for dev and IT teams, as each could focus on their own needs rather than processing infrastructure requests. Confirming self-service use After configuring storage policies for APEX Data Storage Services and setting up namespace and VM self-service, we confirmed that a hypothetical DevOps team would be able to use these features to implement an app using self-service. We created and destroyed Kubernetes clusters and VMs within the dev namespace we set up, and we were able to assign storage with high quality of service to each of those resources. Additionally, we configured a containerized application and a VM appliance and enabled each to communicate with the other. Give DevOps teams self-service resource pools within your private infrastructure with Dell Technologies APEX cloud and storage solutions January 2022 | 5
- 6. Conclusion Giving DevOps teams the power to manage resources at will can provide flexibility and speed to the application modernization process, save valuable time (and therefore money) by avoiding the resource approval process, and give IT administrators peace of mind by enabling them to set overall resource limits that the DevOps team won’t be able to exceed. By deploying a modern applications environment in an existing private cloud, organizations can avoid having to manage multiple environments and can use a consistent governance framework to control resource usage and policy compliance. This can optimize resource utilization through a unified pool of capacity/performance and service levels, thereby reducing management complexity and the need for multiple sets of specialized skills. At Principled Technologies, we successfully used a VMware vSphere with Tanzu environment running on Dell Technologies APEX Private Cloud and APEX Data Storage Services solutions to perform the following real-world tasks: • Set up self-service namespaces that can enable DevOps teams to create resources within established quotas • Set up self-service for VMs and Kubernetes clusters, which can enable dev teams to create and destroy said resources at will • Set up storage policies that can allow dev teams to assign storage with specific QoS to VMs and clusters With these abilities, your DevOps team can enjoy self-service in their private IT infrastructure while ITOps maintains overall control of resources. To learn more about VMware vSphere with Tanzu on Dell Technologies solutions, visit www.delltechnologies.com/tanzu. Give DevOps teams self-service resource pools within your private infrastructure with Dell Technologies APEX cloud and storage solutions January 2022 | 6
- 7. The science behind the report The following sections describe what we tested, how we tested, and what we found. We concluded our hands-on testing on November 9, 2021. The results in this report reflect configurations that we finalized on October 22, 2021 or earlier. Unavoidably, these configurations may not represent the latest versions available when this report appears. System configuration information Table 2: Detailed information on the system we tested. System configuration information 4 x Dell EMC™ VxRail E560F Version VxRail 7.0.240-27141857 BIOS version 2.11.2 Non-default BIOS settings APEX default Operating system name and version/build number VMware ESXi™ , 7.0.2, 18426014 Date of last OS updates/patches applied APEX default Processor Number of processors 2 Vendor and model Intel® Xeon® Gold 6212U Core count (per processor) 24 Core frequency (GHz) 2.40 Stepping B1 (SRF9A) Memory module(s) Total memory in system (GB) 256 Number of memory modules 4 Vendor and model Samsung® M393A8G40MB2-CVF Size (GB) 64 Type DDR4 Speed (MHz) 2,933 Speed running in the server (MHz) 2,933 Storage controller Vendor and model Dell HBA330 Cache size (GB) 0 Distributed storage Storage type vSAN Number of nodes 4 Number of disk groups 4 Number of disks per disk group 4 Give DevOps teams self-service resource pools within your private infrastructure with Dell Technologies APEX cloud and storage solutions January 2022 | 7
- 8. System configuration information 4 x Dell EMC™ VxRail E560F Network adapter Vendor and model Mellanox® ConnectX® -4 MT27710 Family Number and type of ports 2 x 25GbE Firmware version 14.28.45.12 Cooling fans Vendor and model APEX default Number of cooling fans APEX default Power supplies Vendor and model APEX default Number of power supplies 2 Wattage of each (W) APEX default Give DevOps teams self-service resource pools within your private infrastructure with Dell Technologies APEX cloud and storage solutions January 2022 | 8
- 9. How we tested Setting up Storage Policy Based Management (SPBM) Reviewing the native VMware vSAN™ policy 1. Inside the workload vCenter host, navigate to Storage Policy Based Management by following this path: Menu Policies and Profiles. 2. To see the policy rules, select vSAN Default Storage Policy from the list. Creating new tiered storage policies 1. Select Create. 2. Select the appropriate vCenter account to create the Policy. 3. Give the policy a name. We used ADSS-high 4. Select Enable rules for DELLEMC.ADSS.VVOL storage. 5. Click Next. 6. From the dropdown menu, select High. 7. Review compatible Storage. 8. Click Next. 9. Review the settings, and click Finish. 10. Review the VM Storage Policy. In the center-right area of the screen, the Storage Compatibility tab shows you that the storage policy is indeed targeting the external storage you chose. 11. To create the Medium and Low quality of service (QoS) value options, complete steps 1 through 10 twice more. Setting up self-service namespaces In the current iteration of the VMware namespace service, there is only the option for a single overall namespace service template configuration. Meaning, you enable the namespace service with a set resource quota that serves as the overarching quota. After developers create individual namespaces, the vCenter operator must be notified and will need to go into those namespaces and provision them accordingly with CPU, memory, and storage quotas as well as storage tiers, if necessary. Currently, there is no namespace service template option that can provision individual custom namespaces created in this manner ahead of time; however, once the quota is established, the developer is free to work within those limits setting up clusters or VMs. Any new namespaces created at the CLI will need to go through the operator to provision quotas. Enabling the namespace service 1. Log into vCenter, and navigate to Menu Host and Clusters Configure Namespaces General. 2. Expand the Namespace Service. 3. Toggle the Namespace Service Status from Inactive to Active. 4. Enter values for Configuration template. We used the following: • CPU - 128 Ghz • Memory - 128 Gb • Storage - 128 Gb • Storage Policy - vSAN default 5. Review the values, and click Next. 6. Select an Identity Source. 7. For the identity source, select either vsphere.local or an AD/LDAP user if one is connected. 8. Review the namespace template, and click Finish. 9. Review the details of the namespace service. The namespace self-service status should show as activated. Installing kubectl 1. Install kubectl: snap install kubectl --classic Give DevOps teams self-service resource pools within your private infrastructure with Dell Technologies APEX cloud and storage solutions January 2022 | 9
- 10. Getting the link for the Kubernetes CLI Tools download page 1. Using the vSphere client, log into the vCenter Server. 2. Navigate to vSphere Cluster > Namespaces, and select the vSphere Namespace where you are working. 3. Select the Summary tab, and locate the Status area on this page. 4. Beneath the heading for Link to CLI Tools, to open the download page, select Open. (Or, you can copy the link.) Installing Kubernetes CLI Tools 1. Using a browser, navigate to the Kubernetes CLI Tools download URL for your environment. 2. Select the operating system. 3. Download thevsphere-plugin.zipfile. 4. Extract the contents of the ZIP file to a working directory. 5. Add the location of both executables to your system’s PATH variable. 6. Verify the installation of kubectl: kubectl 7. Verify the installation of the vSphere Plugin for kubectl: kubectlvsphere Creating a namespace from CLI 1. Navigate to Menu Host and Clusters Configure Namespaces General. 2. Toward the bottom of the list is a field for Link to CLI tools. To open this link in a new tab, choose Open. This is the IP address of the server you will be logging into for future CLI commands. 3. At the CLI, use the IP address for logging into the --server field: kubectl vsphere login -u demouser@vsphere.local --server=100.80.28.241 --insecure-skip-tls-verify 4. If the context you wish to use is not in this list, you may need to try logging in again later, or contact your cluster administrator. 5. To continue, switch your context: kubectl config use-context 100.80.28.241 Creating the namespace 1. Create the namespace: kubectl create namespace demo1 2. To see the new namespace you have created, log out and log back into the vSphere kubectl CLI: kubectl vsphere logout kubectl vsphere login -u demouser@vsphere.local --server=100.80.28.241 --insecure-skip-tls-verify 3. You can now use the new context: kubectl config use-context demo1 4. To verify that the demo1 context is mapped to the demo1 namespace, list the contexts: kubectl config get-contexts Verifying the namespace in vCenter 1. Navigate to Menu Host and Clusters Namespaces. You will now see the namespace you created at the CLI. Give DevOps teams self-service resource pools within your private infrastructure with Dell Technologies APEX cloud and storage solutions January 2022 | 10
- 11. Enabling and provisioning the VM and Kubernetes cluster services in VMware Tanzu In a modern DevOps workflow, a developer will need access to both container orchestration tools (such as Kubernetes) and traditional standalone VMs. Whether the purpose is to utilize a VM-based appliance style application/database or to spearhead the migration to microservices, having powerful development tools delivered to your team as a service will undoubtedly save time and money, freeing them to focus on development rather than infrastructure requests. Creating the Content Library for VM images To make VMs available for your team members to spin up, we first need to get the VM images and insert them as an item into a content library for the VM service to reference. 1. In the top left, click the vSphere client to reach the shortcuts dashboard. 2. Click Content Libraries. If you have Tanzu enabled, you should see the TKG library. 3. To create a new library, click Create. 4. Name the new library VM service. 5. Click Next. 6. In the Configure content library menu, select Local content library, and click Next. 7. In the Add storage section, select the default vSAN storage array, and click Next. 8. In the Ready to complete section, review your choices, and click Finish. 9. View the Content Libraries section, and verify that the library was indeed created. Importing the Centos VM item into the content library You can download the VM image we used during testing from the following website: https://marketplace.cloud.vmware.com/services/details/vm-service-image-for-centos1111?slug=true 1. In the Content Libraries menu, select the VM Service content library you created earlier. 2. From the Action dropdown menu, select Import Items. 3. Select Local file, and click Upload files. 4. On your local machine, select the OVA image file to upload. 5. Verify that the file uploaded successfully. In the lower left, you should now see the new imported item in the OVA templates window. Adding the demouser and permissions The demouser should already exist. We now need to permit that user to our newly created Tanzu namespace. 1. From the dropdown menu, select Hosts and Clusters, and select the newly created demo1 namespace. 2. Select the permissions tab. 3. Click Add. 4. Select the identity source you will use. We used vsphere.local. 5. In the User field, type the username demouser. 6. From the Role field, choose Can edit. 7. Click OK. 8. Verify that the demo user was added to this namespace. 9. In the namespace summary, the Permissions tile should now show users and their roles. Adding tiered storage policies to the namespace These steps describe how to pull the storage policies that you created earlier into the namespace you just created, so that a hypothetical dev team can choose which storage best suits their needs when building clusters and VMs. 1. In the namespace summary, on the Storage tile, click Edit Storage. 2. Select the three storage tiers you created: ADSS High, Medium, and Low. 3. Click OK. 4. The Storage tile should now show a small summary of storage policies. Adding VM classes for VM creation 1. In the namespace summary, from the VM service tile, choose Manage VM classes. 2. Select the classes you wish to deploy. We chose the three basic "best effort" sizes. 3. Click OK. 4. The VM Service tile should now display the number of available VM classes. Give DevOps teams self-service resource pools within your private infrastructure with Dell Technologies APEX cloud and storage solutions January 2022 | 11
- 12. Adding a content library to the VM service The following steps provide the service with the VM image that we uploaded earlier. 1. From the VM Service tile, select Manage Content Libraries. 2. Select the VM service content library you created previously that contains the Centos VM image you retrieved from VMware. 3. Click OK. 4. The VM Service tile should now display the number of available content libraries. Adding storage capacity limits for tiered storage 1. In the namespace summary, from the Capacity and Usage tile, select Edit Limits. 2. Expand the storage section. You should see the storage tiers you created previously. 3. Choose your desired limits. We chose the following: • adss-high: 500 Gb • adss-medium: 200 Gb • adss-low: 100 Gb 4. Click OK. 5. Return to the namespace summary and review section. Creating the Tanzu Kubernetes cluster (tkc) Bringing up the cluster 1. If you are not already logged in, log into the namespace as the demouser: kubectl vsphere login -u demouser@vsphere.local --server=100.80.28.241 --insecure-skip-tls-verify 2. Set the context to the demo1 context that you created earlier. kubectl config use-context demo1 3. Create a yaml file that has the following contents. Save this file as tkc1.yml: tkc1.yml apiVersion: run.tanzu.vmware.com/v1alpha1 #TKGS API endpoint kind: TanzuKubernetesCluster #required parameter metadata: name: tkc1 #cluster name, user defined namespace: demo1 #vsphere namespace spec: distribution: version: v1.20 #Resolves to the latest v1.18 image settings: storage: # defaultClass: vsan-default-storage-policy defaultClass: ADSS-low topology: controlPlane: count: 1 #number of control plane nodes class: best-effort-small #vmclass for control plane nodes storageClass: ADSS-low #storageclass for control plane workers: count: 2 #number of worker nodes class: best-effort-small #vmclass for worker nodes storageClass: ADSS-low #storageclass for worker nodes 4. Apply the tkc cluster object: kubectl apply -f tkc1.yml tanzukubernetescluster.run.tanzu.vmware.com/tkc1 created Give DevOps teams self-service resource pools within your private infrastructure with Dell Technologies APEX cloud and storage solutions January 2022 | 12
- 13. 5. Check the status of tkc: kubectl get tkc NAME CONTROL PLANE WORKER DISTRIBUTION AGE PHASE TKR COMPATIBLE UPDATES AVAILABLE tkc1 1 2 v1.20 41s creating True 6. You can also retrieve more details from the 'describe' command output. The bottom of the output displays the most recent status and events: kubectl describe tkc tkc1 ... ... Node Status: tkc1-control-plane-4bvtj: ready tkc1-workers-qbffs-5bf887c966-cpbkm: pending tkc1-workers-qbffs-5bf887c966-tdfg5: pending Phase: creating Vm Status: tkc1-control-plane-4bvtj: ready tkc1-workers-qbffs-5bf887c966-cpbkm: pending tkc1-workers-qbffs-5bf887c966-tdfg5: pending Events: <none> 7. If all is well, you should see everything up and running after a few minutes, depending on the number of nodes in your topology choice: Node Status: tkc1-control-plane-4bvtj: ready tkc1-workers-qbffs-5bf887c966-cpbkm: ready tkc1-workers-qbffs-5bf887c966-tdfg5: ready Phase: running Vm Status: tkc1-control-plane-4bvtj: ready tkc1-workers-qbffs-5bf887c966-cpbkm: ready tkc1-workers-qbffs-5bf887c966-tdfg5: ready 8. Because the tkc you created lies in a lower level of administration and privileges, you will need to log out of the kubctl vsphere session, and log back in with some additional arguments: kubectl vsphere logout The login now targets the namespace and the cluster that you created. You should now have access to the new tkc1 context. 9. Set the context to use tkc: kubectl config use-context tkc1 10. Verify the context: kubectl config get-contexts 11. Check the nodes: kubectl get nodes Give DevOps teams self-service resource pools within your private infrastructure with Dell Technologies APEX cloud and storage solutions January 2022 | 13
- 14. Deploying a web-server workload to your cluster 1. Add the docker hub credentials to your cluster. If you are pulling images from the public docker hub, you'll need to create a docker account and a personal access token. Docker recently changed the way images are pulled. The only way to pull multiple images frequently is to set up a personal or a company account. https://docs.docker.com/docker-hub/access-tokens/ 2. Once you have created your docker hub account and have your access token, you will need to create a secret in Kubernetes that allows your worker nodes to authenticate and pull from docker hub. The PASSWORD field should contain your access token: kubectl create secret docker-registry regcred --docker-username=XXXXXX --docker- password=XXXXXXXXXXXXXXXXXXXXX --docker-email=XXXXXXXXXX Adding a pod security policy role to vSphere authenticated users 1. To deploy workloads, your "authenticated" user must be added to the cluster role that has system-level privileges. The following command creates a new role bind and assigns the authenticated users the privileged pod security policy role of psp:vmware-system- privileged. Without this, your deployments will stall. kubectl create clusterrolebinding default-tkg-admin-privileged-binding --clusterrole=psp:vmware- system-privileged --group=system:authenticated 2. Create a webserver deployment file from the following code. Save this file as nginx-deployment.yml nginx-deployment.yml apiVersion: apps/v1 kind: Deployment metadata: name: nginx-deploy spec: selector: matchLabels: app: nginx replicas: 2 template: metadata: labels: app: nginx env: frontend spec: containers: - name: nginx image: nginx ports: - containerPort: 80 imagePullSecrets: - name: regcred 3. Create a load balancer service file from the following code. Save this file as lb-nginx-svc.yml lb-nginx-svc.yml apiVersion: v1 kind: Service metadata: creationTimestamp: null labels: app: nginx env: frontend name: nginx-svc spec: ports: - port: 80 protocol: TCP targetPort: 80 selector: app: nginx type: LoadBalancer status: loadBalancer: {} Apply web server and load balancer objects: kubectl apply -f nginx-deployment.yml kubectl apply -f lb-nginx-svc.yml Give DevOps teams self-service resource pools within your private infrastructure with Dell Technologies APEX cloud and storage solutions January 2022 | 14
- 15. 4. Verify the webserver pod creation: kubectl get pods 5. Verify the load balancer external IP: kubectl get svc 6. Using the GUI, verify the webserver. (Nginx comes with a default homepage that you can reach via the external IP. Use the GUI to reach that page now.) 7. Log out of the tkc: kubectl vsphere logout Creating VMs using the VM service Preparing the VM cloud-init file When spinning up a VM, devs often want some commands or customized configuration executed at run-time so that when they log in, the VM is prepared and ready for their needs. Typically, a dev will create a cloud-init or user-data file in advance that will send this block of configuration commands to the VM during spin up. The following steps guide you through creating the cloud-init file, encoding its contents, and inserting the encoded contents into a Tanzu VM object deployment file. 1. Log into the Tanzu Kubernetes demo1 namespace (note that we are logging into the namespace level and not the lower tkc level): kubectl vsphere login -u demouser@vsphere.local --server=100.80.28.241 --insecure-skip-tls-verify 2. To continue, switch your context: kubectl config use-context demo1 3. Create an ssh key: ssh-keygen -t rsa 4. To skip past each of the prompts, press Enter. 5. Output the contents of the public key to a text file: cat ~/.ssh/id_rsa.pub The expected output is: ssh-rsa AAAPI1yFTrmtg/rJIRVXLBFj9a1GvimhfgjqzhHU+1G+8d9+d/6ef3cqxTccQwMNs1f6Nb0Zf2R/2Z 1A0=... you@your_host Give DevOps teams self-service resource pools within your private infrastructure with Dell Technologies APEX cloud and storage solutions January 2022 | 15
- 16. 6. Create the cloud-init file from the following contents. Save this file as cloud-init.yml cloud-init.yml #cloud-config ## Required syntax at the start of user-data file ## Create a user called centos and give a password of VMware1! and set it to not expire chpasswd: list: | centos:VMware1! expire: false ## Create a docker user group on the OS groups: - docker users: ## Create the default user for the OS - default ## Customise the centos user created above by adding an SSH key that's allowed to login to the VM ## In this case, it's the SSH public key of my laptop - name: centos ssh-authorized-keys: - YOUR-PUBLIC-SSH-KEY-GOES-HERE ## Add the centos user to the sudo group and allow it to escalate to sudo without a password sudo: ALL=(ALL) NOPASSWD:ALL groups: sudo, docker ## Set the default shell of the user to bash shell: /bin/bash ## Enable DHCP on the default network interface provisioned in the VM network: version: 2 ethernets: ens192: dhcp4: true Paste your public key contents into the line shown, preserving the dash and the indentation. Save and exit this file. ssh-authorized-keys: - YOUR-PUBLIC-SSH-KEY-GOES-HERE 7. Encode the cloud-init file into single-line base64 format: cat cloud-init.yml | base64 -w 0 8. Copy the output of the previous command to a text file. You will use this code later. Preparing and deploying VM object files 1. Get the network name that the system created while enabling Tanzu early in the setup for vCenter: kubectl get network 2. On your local machine, create a VM deployment file named deploy-centos-vm.yml from the following code: deploy-centos-vm.yml apiVersion: vmoperator.vmware.com/v1alpha1 kind: VirtualMachine metadata: name: centos-vm-dev namespace: demo1 labels: env: dev spec: networkInterfaces: - networkName: "network-1" ### uncomment if your are NOT using NSX-T load balancing networkType: vsphere-distributed ### uncomment if your are NOT using NSX-T load balancing # - networkType: nsx-t className: best-effort-small imageName: centos-stream-8-vmservice-v1alpha1-1619529007339 ### available at time of writing powerState: poweredOn # storageClass: vsan-default-storage-policy ### this is the default storage class storageClass: ADSS-low ### this is a custom class we created, low Qos, 100Gb capacity vmMetadata: configMapName: centos-vm-cm-dev transport: OvfEnv --- apiVersion: v1 kind: ConfigMap Give DevOps teams self-service resource pools within your private infrastructure with Dell Technologies APEX cloud and storage solutions January 2022 | 16
- 17. metadata: name: centos-vm-cm-dev namespace: demo1 data: user-data: | YOUR-CLOUD-INIT-ENCODED-SINGLE-LINE-CONTENT-HERE-KEEP-INDENTATION hostname: centos-vm 3. Open the text file where you put the encoded user data string from earlier, and copy the string. In the deploy-centos-vm.yml file you just created, replace the relevant part of the final line with the string you copied. 4. Save the deployment file, and exit. 5. Apply the VM deployment file: kubectl apply -f deploy-centos-vm.yml Please note that the VM service places the VMs into the first-tier namespace and not inside a Tanzu Kubernetes Cluster (tkc). In other words, the VMs will be one level above any tkc you create. VMs will not "live" in a tkc, they will "live" in the namespace that created the tkc, not inside the tkc. 6. Create a virtualmachineservice file for ssh access to the VM by establishing port 22 ingress and egress through a Tanzu virtual machine load balancer service. This will allow any VMs with the 'env=dev' label to use this network service. First, create a file from the following code, and name the file vm-ssh-svc.yml vm-ssh-svc.yml apiVersion: vmoperator.vmware.com/v1alpha1 kind: VirtualMachineService metadata: name: vm-ssh-svc namespace: demo1 spec: selector: env: dev type: LoadBalancer ports: - name: ssh port: 22 protocol: TCP targetPort: 22 7. Apply the virtual machine service for ssh access: kubectl apply -f vm-ssh-svc.yml Validating self-service VM creation capability 1. Verify that the VM exists at the CLI. kubectl get vm 2. Verify that the VM exists within vSphere. 3. Verify that the configmap object you created successfully deployed: kubectl get configmap 4. Find the load balancer external IP for ssh access: kubectl get svc 5. Using ssh, log into the VM: ssh centos@100.80.27.162 Give DevOps teams self-service resource pools within your private infrastructure with Dell Technologies APEX cloud and storage solutions January 2022 | 17
- 18. 6. Verify that the system successfully executed the cloud-init items: [centos@centos-vm-dev ~]$ cat /etc/group .... docker:x:1000:centos sudo:x:1001:centos centos:x:1002: cloud-user:x:1003: 7. Using yum, install a simple application to verify external internet connectivity: sudo yum install telnet Communicating between VM and Tanzu Kubernetes cluster Accessing the tkc webserver workload from the VM 1. If you are not already logged into the namespace you created, log in now: kubectl vsphere login -u demouser@vsphere.local --server=100.80.28.241 --insecure-skip-tls-verify 2. Set the context to the demo1 context that you created earlier: kubectl config use-context demo1 3. Get the external IP of the VM: kubectl get svc 4. Log into the VM: ssh centos@100.80.27.162 5. To demonstrate communication between the VM and the tkc application, cURL the webserver pod homepage. [centos@centos-vm-dev ~]$ curl 100.80.27.164 Accessing the VM from the containerized workload in tkc After validating communication from the CentOS VM to the tkc cluster, we connected to the tkc cluster and validated that it was possible to ping and log into the VM we previously created via SSH. In a production environment, this connectivity might be used to connect to a database from a web application cluster hosted in tkc. Give DevOps teams self-service resource pools within your private infrastructure with Dell Technologies APEX cloud and storage solutions January 2022 | 18
- 19. Principled Technologies is a registered trademark of Principled Technologies, Inc. All other product names are the trademarks of their respective owners. DISCLAIMER OF WARRANTIES; LIMITATION OF LIABILITY: Principled Technologies, Inc. has made reasonable efforts to ensure the accuracy and validity of its testing, however, Principled Technologies, Inc. specifically disclaims any warranty, expressed or implied, relating to the test results and analysis, their accuracy, completeness or quality, including any implied warranty of fitness for any particular purpose. All persons or entities relying on the results of any testing do so at their own risk, and agree that Principled Technologies, Inc., its employees and its subcontractors shall have no liability whatsoever from any claim of loss or damage on account of any alleged error or defect in any testing procedure or result. In no event shall Principled Technologies, Inc. be liable for indirect, special, incidental, or consequential damages in connection with its testing, even if advised of the possibility of such damages. In no event shall Principled Technologies, Inc.’s liability, including for direct damages, exceed the amounts paid in connection with Principled Technologies, Inc.’s testing. Customer’s sole and exclusive remedies are as set forth herein. This project was commissioned by Dell Technologies. Principled Technologies® Facts matter.® Principled Technologies® Facts matter.® Cleaning up 1. In the upper-tier namespace where you created the VM (the demo1 context and namespace), to remove the VM objects, issue the following commands: kubectl get vm kubectl delete vm XXXX kubectl get configmap kubectl delete configmap XXXX kubectl get VirtualMachineService kubectl delete VirtualMachineService XXXX 2. Remove the tkc objects: kubectl delete tkc tkc1 Give DevOps teams self-service resource pools within your private infrastructure with Dell Technologies APEX cloud and storage solutions January 2022 | 19