SlideShare una empresa de Scribd logo
1 de 38
Descargar para leer sin conexión
AUGUST 2014
A PRINCIPLED TECHNOLOGIES TEST REPORT
Commissioned by VMware, Inc.
DBaaS WITH VMWARE VCAC, EMC XTREMIO, AND CISCO UCS
Traditionally, the complexity and number of touch points in the traditional
approach to provisioning databases has meant potentially very lengthy service times for
delivery, resulting in frustrations at the executive and user levels. As the popularity of
cloud computing and data center automation have grown significantly in recent years,
these trends have made their way into the database market, and Database-as-a-Service
(DBaaS) has come into its own. Among the many criteria you consider as you evaluate
DBaaS options, one stands out: How quickly and efficiently does the hardware and
software solution stack provision your DBaaS resources?
In this paper, we provide an overview of our DBaaS provisioning tests using
VMware’s vCloud Automation Center™ (vCAC), Cisco UCS® blade server, and the
XtremIO™ all-flash storage array by EMC® to provision virtual machines containing
Oracle 12c databases. Note: between the time we conducted our testing and the
publication date of this report, VMware changed the name of the product from vCloud
A Principled Technologies test report 2DBaaS with VMware vCAC, EMC XtremIO, and Cisco UCS
Automation Center™ to vRealize Automation, which is part of the vRealize Suite Cloud
Management Platform.
In the Principled Technologies labs, we used vCAC to provision database VMs in
an environment with four Cisco UCS B200 M3 servers and an EMC XtremIO storage
array.
We tested three provisioning scenarios:
 A single large VM with 1 TB of virtual disks containing an Oracle 12c
database size of 408 GB
 Multiple VMs (17) of virtual disk sizes ranging from 50 GB to 1 TB,
containing Oracle 12c databases ranging in size from 30 GB to 408 GB
 A single VM provisioned 50 times with 50 GB of virtual disks and an Oracle
12c database size of 30 GB
In each scenario, we ran an OLTP workload concurrently in the DBaaS
infrastructure while the provisioning scenarios executed, simulating a typical Oracle
production environment.
Across these scenarios, we found vCloud Automation Center was able to quickly
provision VMs in a variety of complex environments. Using VMware vCloud Automation
Center to provide a DBaaS platform for your customers has the potential to reduce
administrative overhead, improve responsiveness and service quality, and free your IT
staff time to innovate and improve processes, while customers provision database
environments quickly.
THE PUSH FOR DBaaS
In the past, the traditional manual methods of provisioning databases to both
physical and virtual environments have proved to be time consuming, error prone, and
frustrating. When a group within an enterprise submitted a VM provisioning request to
IT, they could wait days or even weeks for review and for IT to carry out their request
depending on the policies and procedures of the organization. Each VM would have to
be created from scratch, or from base templates, and manually configured according to
the needs of the request. The time spent on reviewing requirements, design and
approval, equipment procurement, manual build, testing, and finally deploying, was
time lost to the user and to the business. Not only were application owners frustrated,
but the CIO or CFO taking a high-level business view would question why all the
investments in IT had not generated a more agile and faster-time-to-market
organization.
Additionally, by definition, the manually executed steps not only took longer,
but also were more prone to human error than if they had been automated. IT staff
could overlook or ignore organization policies and procedures and make mistakes in
configuration details. Even simple typos could delay a project.
A Principled Technologies test report 3DBaaS with VMware vCAC, EMC XtremIO, and Cisco UCS
To increase automation, deliver database applications faster, and showcase a
catalog of services, many IT organizations are researching DBaaS solutions. The benefits
to automation can include:
 Integrated deployment of best practices
 Automation workflow that can be updated over time
 Consistent delivery times and quality of services deployment
 Fast provisioning of complex databases and applications
 Unified management of the DBaaS platform
Now that public cloud service providers can deliver functioning VMs within
minutes, internal enterprise customers expect comparable response time. Automatic
provisioning of database VMs through VMware vCloud Automation Center makes these
increased expectations realistic.
Using vCAC, customers can use a self-service option to request VMs. This
removes burden from IT staff, as they no longer need to manually provision VMs. They
can devote their time to more strategic tasks and the company gains agility. Because
automatic provisioning can reduce errors, service levels and reliability can also improve.
In this study, we detail our experience using vCloud Automation Center to execute three
VM-provisioning scenarios. We found that vCAC provided DBaaS VMs in a matter of
minutes in all our scenarios. In the next sections, we describe each scenario in depth
and present our findings.
See Appendix A for system configuration details, and Appendix B and Appendix
C for detailed testing steps.
vCAC TEMPLATES
Template overview
vCAC uses vSphere® VM templates to create blueprints used for provisioning. A
blueprint allows IT to publish a VM template with a user-friendly name, optional picture,
and options to change details such as CPU, memory, and disk space. These blueprints
are published to a self-service catalog that leverages Active Directory services to limit
who can order VMs from each catalog. IT can also require that any new requests be left
pending DBA or IT approval before being acted upon. When users submit a catalog
request, vCAC leverages the VM template, much the same way a user would to create a
VM, though with automation.
Template sizing in our tests
Our VMs comprised multiple virtual disks: one for the operating system, four for
Oracle database files, and four for Oracle log files. In this report, we refer to our VMs by
name by the sum of the data virtual disks storing the Oracle database. In other words,
A Principled Technologies test report 4DBaaS with VMware vCAC, EMC XtremIO, and Cisco UCS
our 50GB VM used four virtual disks for Oracle database data files, each approximately
13 GB in size, totaling 50 GB. The 50GB VM also used another virtual disk file for its
operating system, along with four virtual disks for its log files. For specific LUN and
virtual disk layout details, see the Our storage configuration section.
Therefore, the provisioned sizes of the VMs are larger than the names we use
suggest. As most environments and administrators would, we allowed for extra data
growth space within each VM. Figure 1 shows the exact size and configuration of each of
our VMs. We report the size from the dba_segments view in Oracle.
VM OS virtual disk Log virtual disks Data virtual disks
Approximate size
of database files
w/in the VM
Total size – all
virtual disks
1 TB 25 GB 4 × 5 GB 4 × 250 GB 407.97 GB 1,045 GB
300 GB 25 GB 4 × 2 GB 4 × 75 GB 254.62 GB 333 GB
100 GB 25 GB 4 × 1 GB 4 × 25 GB 80.87 GB 129 GB
50 GB 25 GB 4 × 1 GB 4 × 13 GB 30.45 GB 81 GB
Figure 1: The configuration and sizing of the VM templates used in our scenarios as reported by running SELECT SUM (bytes) /
1024 / 1024 / 1024 AS GB FROM dba_segments; in sqlplus.
RESULTS OF OUR TESTING
Results summary
In Figure 2, we present a summary of our findings in the three VM-provisioning
scenarios. vCAC provisioned the single 1TB VM in just over six minutes, the 17 VMs of
varying sizes in just under 26 minutes, and finally the 50 VMs, each 50GB in dataset size,
were provisioned in less than 40 minutes. In all tests, the virtual machines ran Oracle
Enterprise Linux® release 6.5 with the Red Hat® compatible kernel, and Oracle 12c
(12.1.0.1.0) Enterprise Edition was installed.
In the following sections, we review the specific VM template sizing and
definitions, and then we review the findings from each scenario in greater detail.
Scenario
Total elapsed scenario time
(mm:ss)
1TB VM scenario 06:13
Mixed VM size scenario 25:57
50GB VM scenario 39:25
Figure 2: Final results for the median run of each scenario.
A Principled Technologies test report 5DBaaS with VMware vCAC, EMC XtremIO, and Cisco UCS
The three VM provisioning scenarios
Scenario 1 – Provisioning a single large VM
In any environment, there can be many copies of a production database to
support activities such as testing of patches, reports, customizations, integrations, and
development activities. The goal of this single large 1TB-VM provisioning test was to
simulate an application owner requesting a single large VM, and to measure the
provisioning time of the 1TB VM.
We prepared a vCAC blueprint containing the 1TB-VM template. Within the
constructs of vCAC, blueprints define the resources for the VM to be provisioned and
can be configured for VMs, vApps, physical, or cloud machines.
We separated the virtual disks into disks containing log and database data and
in the blueprint, we designated specific LUNs on the XtremIO array, much as a database
administrator would do manually, or perhaps as a service provider would wish to do for
performance reasons. Using the vCAC Service Catalog, we requested the provisioning of
the single large VM using the published blueprint. Figure 3 shows the vCAC Service
Catalog with blueprints for users to choose from, making it easy to provision the VM
they need.
Figure 3: The vCAC Service Catalog.
We then timed how long it took vCAC to complete the provisioning. Our timing
results measure the entire process from the click to order the VM to when the VM is
ready to accept requests.
During the provisioning process, we ran an OLTP workload on eight existing
VMs, with two VMs per server in the cluster. In our tests, it took only 6 minutes, 13
seconds to complete the provisioning process and to present a 1TB database VM to the
user (see Figure 4).
A Principled Technologies test report 6DBaaS with VMware vCAC, EMC XtremIO, and Cisco UCS
VM size Total time (mm:ss)
1 TB 06:13
Figure 4: Time the vCAC needed to provision a 1TB VM.
Scenario 2 – Provisioning multiple VMs of mixed sizes
In many businesses, VM provisioning requests can come from several
employees or clients in a short span of time. To show that vCAC could handle such a
situation, we used the 1TB-VM from our previous scenario, as well as 10 VMs with 50GB
database disks, four VMs with 100GB database disks, and two VMs with 300GB database
disks – for a total of 17 VMs and approximately 2.5 TB. We requested these VMs as
close to simultaneously as the user interface would allow to simulate a peak
provisioning request.
To design this scenario, as a one-time task we created four blueprints, one for each
VM size, to provision the VMs. We then did the following for the test:
1) We logged into vCAC and navigated to the catalog of published blueprints.
2) A single person executed four requests, back to back, as each blueprint request
had to be executed on its own. We had only the necessary click time between
each request, resulting in an almost-concurrent execution of the four requests.
For each request, we edited the number of VMs to be provisioned for that
blueprint. Therefore, while we requested 17 VMs, we performed four separate
requests within vCAC.
3) We then timed how long it took vCAC to complete the provisioning. Again,
during the provisioning process, we ran an OLTP workload on eight existing
VMs, with two VMs per server in the cluster.
In our tests, it took vCAC 25 minutes, 57 seconds to complete the provisioning
process for our mixed-size set and have the VMs up and running. The total elapsed time
measures from the click-to-order request of the first blueprint, to the last VM in the
scenario coming online. Because we provisioned different numbers and sizes of VMs in
this scenario, each size VM had a different average completion time, which we show in
Figure 5.
1TB (1x) 300GB (2x) 100GB (4x) 50GB (10x)
579 427.5 212.8 167.7
Figure 5: Average completion times for the VMs.
Taking the total size for all 17 VMs, and the total time from the first request to
the last VM provision, the DBaaS stack was able to provision one VM every 91.6 seconds
on average. Each group and size of VMs had different completion times, as we specify in
the table and chart below. Figures 6 and 7 show the time vCAC and vSphere took to
clone each individual VM in the scenario.
A Principled Technologies test report 7DBaaS with VMware vCAC, EMC XtremIO, and Cisco UCS
VM size Total time (mm:ss)
1TB 0:09:39
300GB_1 0:08:14
300GB_2 0:06:01
100GB_1 0:02:46
100GB_2 0:04:31
100GB_3 0:02:45
100GB_4 0:04:09
50GB_1 0:03:39
50GB_2 0:03:09
50GB_3 0:03:18
50GB_4 0:02:14
50GB_5 0:02:00
50GB_6 0:03:03
50GB_7 0:03:23
50GB_8 0:02:49
50GB_9 0:02:54
50GB_10 0:01:28
Figure 6: Time the vCAC needed to provision VMs in the multiple-VM scenario.
Figure 7: The time to clone
each individual VM in the
multiple request scenario.
0:00 0:05 0:10 0:15 0:20 0:25 0:30
1
2
1
2
3
4
1
2
3
4
5
6
7
8
9
10
1TB300GB100GB50GB
Time Stamp (h:mm)
VMsize
Mixed VM size provisioning test times
A Principled Technologies test report 8DBaaS with VMware vCAC, EMC XtremIO, and Cisco UCS
Scenario 3 – Provisioning of a single VM 50 times
At times, one or more internal customers need to provision a large number of
identical VMs simultaneously. Alternatively, an IT department may schedule several
database VM provisions over the weekend to prepare for the coming week’s work. The
vCAC scheduling options let it perform provisioning tasks with little to no supervision on
a regular schedule. To test vCAC’s ability to meet these needs we used the 50GB
blueprint from the above scenario and did the following:
1) We logged into vCAC and navigated to the catalog of published
blueprints.
2) A single person executed one 50-VM request of the 50GB blueprint.
Therefore, in this scenario, the 50 VMs were provisioned using just one
request and a few clicks.
3) We then timed how long it took vCAC to complete the provisioning.
Again, during the provisioning process, we ran an OLTP workload on
eight existing VMs, with two VMs per server in the cluster.
In our tests, it took just 39 minutes, 25 seconds to complete the provisioning of
50 VMs, providing the company with a new VM, on average, every 47 seconds. This 50-
VM request was executed by a single person.
We ran all three scenarios three times, deleting all cloned VMs between runs.
We report the median run based on the total time to complete the scenario. Figures 8
and 9 show our results.
VM size Total time (mm:ss)
50GB_1 0:03:02
50GB_2 0:03:12
50GB_3 0:02:48
50GB_4 0:03:03
50GB_5 0:01:45
50GB_6 0:02:49
50GB_7 0:02:51
50GB_8 0:02:48
50GB_9 0:01:43
50GB_10 0:02:57
50GB_11 0:02:47
50GB_12 0:02:47
50GB_13 0:02:47
50GB_14 0:02:58
50GB_15 0:02:47
50GB_16 0:02:48
50GB_17 0:01:45
A Principled Technologies test report 9DBaaS with VMware vCAC, EMC XtremIO, and Cisco UCS
VM size Total time (mm:ss)
50GB_18 0:03:08
50GB_19 0:02:48
50GB_20 0:01:45
50GB_21 0:02:46
50GB_22 0:03:07
50GB_23 0:02:47
50GB_24 0:02:58
50GB_25 0:02:17
50GB_26 0:01:36
50GB_27 0:01:43
50GB_28 0:01:44
50GB_29 0:02:47
50GB_30 0:02:47
50GB_31 0:02:47
50GB_32 0:02:57
50GB_33 0:02:47
50GB_34 0:02:49
50GB_35 0:02:49
50GB_36 0:02:47
50GB_37 0:01:43
50GB_38 0:02:56
50GB_39 0:02:46
50GB_40 0:03:07
50GB_41 0:02:46
50GB_42 0:02:52
50GB_43 0:02:45
50GB_44 0:02:51
50GB_45 0:02:45
50GB_46 0:02:51
50GB_47 0:02:46
50GB_48 0:01:44
50GB_49 0:01:58
50GB_50 0:01:42
Figure 8: Time the vCAC needed to provision VMs in the 50 VM scenario.
A Principled Technologies test report 10DBaaS with VMware vCAC, EMC XtremIO, and Cisco UCS
Figure 9: The time to clone
each individual VM in the 50
VM scenario.
OTHER TEST DETAILS
Background storage activity
As it is unlikely that real-world business would clone VMs on completely idle
storage, we created a background workload to simulate typical transactional application
behavior on the array during the VM provisioning test scenarios. We created eight VMs,
two per each of the four Cisco® blade servers, with Oracle 12c databases. Using the
HammerDB utility, we created a 30GB TPC-C database, and ran a constant TPC-C-based
workload on each of the eight workload VMs while the provisioning test scenarios took
place. Each of these VMs ran with 150 HammerDB users and used keying time and think
time from within HammerDB.
Our storage configuration
We created multiple LUNs on the XtremIO array, and aligned these LUNs with
the virtual disks used on the VMs (see Figure 10). Each VM comprised a virtual disk for
the operating system, four virtual disks for database data files, and four virtual disks for
database log files. The underlying XtremIO LUNs aligned with this approach for the VMs’
virtual disks. In addition to these nine LUNs, we created two additional LUNs to hold the
VM templates and the background activity VMs. See Appendix C for detailed steps to
configure the storage.
0:00 0:05 0:10 0:15 0:20 0:25 0:30 0:35 0:40
1
5
10
15
20
25
30
35
40
45
50
Timestamp (h:mm)
VMs
50 GB Median Run
A Principled Technologies test report 11DBaaS with VMware vCAC, EMC XtremIO, and Cisco UCS
Figure 10: The VM virtual disk
layout and XtremIO LUN
mapping.
We sized each LUN to ensure that it could hold the necessary virtual disks for
each scenario. The background activity LUN was 921 GB, the VM template LUN was 1.59
TB, the operating system LUN was 2.09 TB, the four data LUNs were 660 GB each, and
the four log LUNs were 55 GB each.
VMware vSphere settings
vCAC takes advantage of vSphere’s Storage APIs for Array Integration (VAAI) for
communication between the Cisco blade hosts and the XtremIO array. VAAI allows the
storage to take over certain functions, which reduces the stress on the hosts and
accelerates operations. According to VMware, “The goal of VAAI is to help storage
vendors provide hardware assistance to speed up VMware I/O operations that are more
efficiently accomplished in the storage hardware.”1
We ensured that VMware vSphere Storage APIs (VAAI) was enabled, and ran
vSphere with otherwise default settings. We ran with default VMware vSphere settings
after ensuring that VAAI was enabled. We decided to keep default settings after
experimentation with the MaxHWTransferSize setting showed no performance increase
for our environment.
1
www.vmware.com/files/pdf/techpaper/VMware-vSphere-Storage-API-Array-Integration.pdf
A Principled Technologies test report 12DBaaS with VMware vCAC, EMC XtremIO, and Cisco UCS
THE PRODUCTS WE TESTED
About VMware vCloud Automation Center
According to VMware, “VMware vCloud Automation Center (now referred to as
vRealize Automation) empowers IT to accelerate the delivery and ongoing management
of personalized, business-relevant infrastructure, application and custom services while
improving overall IT efficiency.”
Figure 11 illustrates how vCAC fits into the VMware software stack and how it
presents VMs to the end user.
Figure 11: The vCloud Automation
Center software stack.
vCloud Automation Center allows enterprises to deliver a self-service
experience that allows users to provision VMs from a unified IT service catalog, with the
ability to deploy across infrastructures based on products from multiple vendors.
Although not in the scope of our testing, vCAC provides functionality for workflow and
review. Reviewing VM requests can be important for many reasons, such as validating
company standards or policies, or verifying that another database has not already been
provisioned for the same reason.
Also, because many companies can have hundreds of projects underway, some
DBA teams schedule weekend refreshes of databases. In this way, developers and
others can start work Monday morning using the newly created databases. vCAC
A Principled Technologies test report 13DBaaS with VMware vCAC, EMC XtremIO, and Cisco UCS
supports this scheduling of workflows. If you are interested about scheduling workflows,
please read the vCAC Extensibility Guide2
.
VCAC is available as a standalone product (in three editions) or as part of
VMware vCloud® Suite.
To learn more, visit www.vmware.com/products/vcloud-automation-center/.
About the EMC XtremIO 100% Flash Scale-Out Enterprise storage array
XtremIO is an all-flash scale-out enterprise storage array designed to
substantially boost I/O performance. According to EMC “XtremIO delivers new levels of
real-world performance, administrative ease, and advanced data services for
applications.” (See Figure 12.)
Figure 12: XtremIO Storage
Management Application.
In this study, one 10TB X-Brick supported the vCAC provisioning of multiple
virtualized Oracle databases. The multiple sets of tests showed provisioning time was
fast, ranging from 373 seconds for a large 1TB VM, to just 47 seconds on average for
smaller 50GB VMs.
According to EMC specifications, the XtremIO 5TB, 10TB, and 20TB X-Bricks are
populated by either 400GB or 800GB eMLC solid-state drives (SSDs). The Starter X-Brick
has 13 400GB SSDs for a capacity of 5.2 TB and can be dynamically expanded online up
to 10 TB. The 10TB and 20TB X-Bricks have 25 SSDs per system with capacities of 400 GB
and 800 GB, respectively. With the current qualified six X-Brick clusters orderable today,
that allows for up to 120 TB of physical capacity.3
2 pubs.vmware.com/vCAC-61/topic/com.vmware.ICbase/PDF/vcloud-automation-center-61-extensibility.pdf
3
xtremio.com/capacity
A Principled Technologies test report 14DBaaS with VMware vCAC, EMC XtremIO, and Cisco UCS
As Figure 13 shows, the provisioning and LUN mapping process on XtremIO
involves just a few clicks.
Figure 13: XtremIO Storage
Management Application –
provisioning LUNs.
For features, XtremIO includes inline data deduplication4
, compression5
, and
snapshots as part of its standard offering. Inline data deduplication and compression
can potentially translate into significant space savings across databases and
applications. Snapshots in XtremIO are designed by EMC to be very space efficient and
to enable the instant availability of copies of a database.6
Business-critical databases and applications typically require a high degree of
availability and integration with virtualized solutions. XtremIO’s N-way active-active
controller architecture is created to be extremely reliable and use redundancy wherever
possible.7
XtremIO Data Protection (XDP) uses N+2 protection on every X-Brick, and
seeks to provide protection against multiple SSD failures.8
XtremIO integrates with
VMware by providing a Virtual Storage Integrator (VSI) and VAAI plug-ins at no charge.
Using EMC protection technologies like RecoverPoint, VPLEX, or Data Domain
alongside XtremIO offers integrations with these protection solutions, extending the
availability of your data. The performance, space saving technologies, and built-in data
protection and integration with other EMC protection technologies can give your
business a powerful option for virtualization storage. To learn more visit
www.emc.com/XtremIO and for the latest technical papers visit:
www.emc.com/everythingoracle.
4
xtremio.com/data-reduction
5
Compression was available in Q3 2014 but was not included in this testing
6
xtremio.com/snapshot
7
xtremio.com/high-availability
8
xtremio.com/data-protection-2
A Principled Technologies test report 15DBaaS with VMware vCAC, EMC XtremIO, and Cisco UCS
Storage deduplication
Deduplication refers to the ability of the XtremIO array to automatically remove
redundant data as it enters the storage, before writing it to the flash drives. XtremIO
offers inline and always-on deduplication, which allows the data deduplication to be
performed in the application I/O path. EMC has designed the deduplication engine to
remove latency overhead, performance impacts, and post-processing operations,
meaning that for an Oracle DBA all these benefits could come alongside space-efficient
database copy capabilities.
XtremIO reports the deduplication and overall efficiency of the entire storage
array, and after our test scenarios, we saw an efficiency of 5.59
to 1, as seen in Figure
14. We also had VM templates and the background activity VMs stored on the array, so
the efficiency rate could vary based on your specific situation.
Figure 14: Deduplication statistics from the
XtremIO array console after our VM
provisioning scenarios.
EMC designed XtremIO inline deduplication to save DBAs space without
performance penalties, and to reduce resource-consuming background processes that
could hurt performance.
9
This testing was done without compression.
A Principled Technologies test report 16DBaaS with VMware vCAC, EMC XtremIO, and Cisco UCS
About the Cisco UCS B200 M3 Blade Server
The Cisco UCS B200 M3 Blade Server is an enterprise-class blade server
powered by the new Intel® Xeon® processor E5-2600 series to deliver high performance
and outstanding I/O throughput for your applications. Supporting up to 384 GB of RAM
with 24 DIMM slots, the Cisco UCS M200 M3 has expansive memory capabilities with
Cisco Extended Memory Technology to support your heavy workloads. The B200 M3
blade will support a configuration of up to 768 GB when 32GB DIMMs are available later
this year.
According to Cisco, in addition to performance benefits, Cisco UCS “has the
architectural advantage of not having to power and cool switches in each blade chassis.
Having a larger power budget available for blades enables Cisco to design
uncompromised expandability and capabilities in its blade servers…”10
thus saving
enterprises power costs while offering competitive performance.
The Cisco Nexus 5548UP switch offers unified ports that support Ethernet
connections as well as Fibre Channel and Fibre Channel over Ethernet connections. The
flexibility of the switch and its ports provide a unified networking system for both LAN
and storage connections. With 32 ports, support for any Ethernet-based transport, and
storage traffic including iSCSI, NAS, FC, RoE, and IBoE, the Nexus 5548UP switch
provides excellent consolidation, scalability, and support for evolving technologies all
while maintaining a small footprint in your datacenter.11
To learn more, see Appendix A for more detailed hardware specifications, or
visit www.cisco.com/en/US/products/ps12288/index.html.
IN CONCLUSION
VMware vCloud Automation Center, which has been renamed vRealize
Automation as part of the vRealize Cloud Management Platform, automates the process
of provisioning database virtual machines, and is designed by VMware to help IT
without sacrificing control, security, or flexibility. Automating time-consuming processes
has the potential to enable growth, improve service quality, and free IT resources for
innovation and process improvement. As businesses continue to evolve and grow, DBAs
and IT departments must be able to keep up with demand. Quick and easy access to
self-service portals, a streamlined provisioning process that incorporates IT best
practices and security policies, and fast delivery of VMs all attribute to avoiding delays
and providing for increasing demands. DBAs and IT retain control of the content,
upgrades, provisioning, and accessibility of the database VMs while still able to quickly
provide virtualized environments to meet the needs of their business.
10
www.cisco.com/c/en/us/products/servers-unified-computing/ucs-b200-m3-blade-server/index.html
11
www.cisco.com/c/en/us/products/switches/nexus-5548up-switch/index.html
A Principled Technologies test report 17DBaaS with VMware vCAC, EMC XtremIO, and Cisco UCS
In our tests, we found that vCAC was able to provide DBaaS and quickly
provision database VMs when completing three provisioning scenarios: provisioning a
single large VM containing an Oracle database, provisioning multiple VMs of varying
sizes, and mass provisioning a single VM 50 times. For the 1TB database provisioning
test it only took 373 seconds from the time of order to the availability of using the
database. The second and third tests delivered similar results in that virtualized Oracle
databases were provisioned every 47 to 92 seconds. All of these timings were captured
while an active OLTP database load was running on eight VMs also on the XtremIO
array, bringing the results closer to what customers might experience using the same
infrastructure. Finally, the vCAC console using the blueprint approach made the
provisioning process simple and easy by automating a more complex manual process.
By using an automated provisioning solution such as VMware vCloud®
Automation Center™ (vCAC), your company can save time, gain agility, and can be an
excellent platform for providing database as a service (DBaaS) by allowing users to
quickly deploy database VMs at their discretion.
A Principled Technologies test report 18DBaaS with VMware vCAC, EMC XtremIO, and Cisco UCS
APPENDIX A – SYSTEM CONFIGURATION INFORMATION
Figure 15 provides detailed configuration information for the XtremIO storage array.
Storage array EMC XtremIO
 Number of storage shelves 1 × 24 disks enclosure
Number of storage controllers 2
Controller OS XtremIO OS 2.4.1-11
Disk model number 24 × Hitachi® HUSML404
Disk size (GB) 400
Disk type SAS SSD
Figure 15: Detailed configuration information for the storage array.
Figure 16 provides detailed configuration information for the test systems.
System 4x Cisco UCS B200 M3 server
General
Number of processor packages 2
Number of cores per processor 8
Number of hardware threads per core 2
System power management policy Default
CPU
Vendor Intel
Name Xeon
Model number E5-2680
Stepping 7
Socket type LGA2011
Core frequency (GHz) 2.7
Bus frequency 8.00 GT/s
L1 cache 32 KB + 32 KB
L2 cache 256 KB per core
L3 cache 20 MB
Platform
Vendor and model number Cisco UCS B200 M3
Motherboard model number Cisco FCH1607GV4
BIOS name and version Cisco B200M3.2.1.1a.0.111220131105
BIOS settings Default
Memory modules
Total RAM in system (GB) 320
Vendor and model number
16 × Cisco UCS-MR-1X162RY-A16, 8 × Cisco UCS-MR-
1X082RY-A
Type PC3-12800
Speed (MHz) 1,600
Speed running in the system (MHz) 1,333
Size (GB) (16×) 16, (8×) 8
Number of RAM module(s) 24 (16 + 8)
A Principled Technologies test report 19DBaaS with VMware vCAC, EMC XtremIO, and Cisco UCS
System 4x Cisco UCS B200 M3 server
Chip organization Double-sided
Rank Dual
Hypervisor
Name VMware vSphere 5.5.0
Build number 1331820
Language English
RAID controller
Vendor and model number LSI® MegaRAID® SAS 2004
Firmware version 20.10.1-0100
Hard drives
Vendor and model number Seagate® A03-D146GC2
Number of drives 2
Size (GB) 146
RPM 15,000
Type SAS
Converged I/O adapters
Vendor and model number Cisco UCSB-MLOM-40G-01, Cisco UCS-VIC-M82-8P
Type mLOM, Mezzanine
Virtual machine operating system
Name Oracle Enterprise Linux Release 6.5
Kernel 2.6.32-431.el6.x86_64
Language English
Database software Oracle Database 12c Build 12.1.0.1.0
Database benchmarks
Benchmark 1 HammerDB v2.15
Figure 16: Configuration information for the systems used in our tests.
Figure 17 provides the firmware information for the Cisco hardware we used in our tests.
UCS 5108 chassis Firmware version
UCS Manager 2.2(1d)
UCS 2208XP IO Module 1 & 2 2.2(1d)
UCS 6248UP Fabric Interconnect 1 & 2 5.2(3)N2(2.21d)
UCS B200 M3 blades Firmware version
BIOS B200M3.2.2.1a.0.111220131105
CIMC Controller 2.2(1d)
UCS VIC 1240 2.2(1d)
Figure 17: Firmware information for the Cisco hardware used in our tests.
A Principled Technologies test report 20DBaaS with VMware vCAC, EMC XtremIO, and Cisco UCS
APPENDIX B – WHAT WE TESTED
Hardware and software
In our test bed, we configured the Cisco UCS 5108 Blade Server chassis with two cables coming from each FEX
(four in total), going into two UCS 6248UP Fabric Interconnects (FIs). We then cabled each FI via two 10Gb Ethernet
ports to two Cisco Nexus™ 5548UP switches, with two Ethernet links from each FI connected to each switch, resulting in
a fully redundant infrastructure. We aggregated each set of two Ethernet ports into a port channel to ensure maximum
bandwidth. For our Fibre connections, we cabled the EMC XtremIO directly to the two FIs via two Fibre cables each.
Figure 18 illustrates our test bed.
Figure 18: The test bed we used, with details on how the components were connected.
We then configured four Cisco UCS B200 M3 blade servers with VMware vSphere 5.5. On a separate rack server,
we configured a VMware vCenter server, connected it to the UCS chassis network, and created a cluster in the VMware
vSphere Web Console using the four blade servers. We created two vSphere vSwitches on each blade server: the first for
VM management and Oracle Application connections and the second for vMotion traffic. The management and Oracle
Application vSwitches used two uplink ports.
A Principled Technologies test report 21DBaaS with VMware vCAC, EMC XtremIO, and Cisco UCS
Virtual machines
We created four different sizes of VMs to serve as templates for the various cloning scenarios within vCAC. Each
VM consisted of nine VMDKs: one 25GB drive for the OS, four equal sized VMDKs spread across four LUNs on the
XtremIO array for data, and four equal sized VMDKs spread across four LUNs on the XtremIO array for Logs. The 1TB VM
had 250GB data VMDKs, 5GB log VMDKs, and a 500GB Oracle database. The 300GB VM had 75GB data VMDKs, 2GB log
VMDKs, and a 250GB Oracle database. The 100GB VM had 25GB data VMDKs, 1GB log VMDKs, and an 85GB Oracle
database. The 50GB VM had 13GB data VMDKs, 1GB log VMDKs, and a 40GB Oracle database. We created a template
from each of these VMs, and built vCAC blueprints to allow users to request clones based on the templates.
Test tools
HammerDB is an open-source benchmark tool that tests the database performance of many leading databases,
including Oracle Database, Microsoft® SQL Server®, PostgreSQL®, MySQL™, and more. The benchmark includes two
built-in workloads derived from industry-standard benchmarks: a transactional (TPC-C-like) workload and a data
warehouse (TPC-H-like) workload. For more information about HammerDB, visit hammerora.sourceforge.net.
In order to simulate a real work environment, we had eight VMs, two per server node, running a light database
workload on the cluster. Our aim was not to saturate the hardware stack, but to create some activity to better highlight
vCAC’s ability to improve provisioning time in a real-world environment. We used HammerDB on 30GB databases to
exercise the storage during the provisioning tests.
Storage layout
Physical and virtual storage
In our labs, we configured the EMC XtremIO array according to best practices. We coordinated with EMC
XtremIO engineers on management access, cabling, tiering, and monitoring.
We allocated high-performance storage volumes for the vSphere VMDKs. From the EMC XtremIO management
console, we created four 660GB volumes for the data VMDKs, four 55GB volumes for the log VMDKs, one 2.1TB volume
for the OS VMDKs, one 920GB volume for the HammerDB VMs, and one 1.6TB volume to hold the VM templates.
A Principled Technologies test report 22DBaaS with VMware vCAC, EMC XtremIO, and Cisco UCS
APPENDIX C – HOW WE TESTED
Installing VMware vSphere 5.5 (ESXi) on the Cisco UCS B200 M3 blades
1. Insert the disk, and boot from disk.
2. On the Welcome screen, press Enter.
3. On the End User License Agreement (EULA) screen, press F11.
4. On the Select a Disk to Install or Upgrade Screen, select the relevant volume on which to install ESXi, and press
Enter.
5. On the Please Select a Keyboard Layout screen, press Enter.
6. On the Enter a Root Password Screen, assign a root password and confirm it by entering it again. Press Enter to
continue.
7. On the Confirm Install Screen, press F11 to install.
8. On the Installation complete screen, press Enter to reboot.
9. Repeat steps 1-8 for each B200 M3 blade.
Configuring ESXi after Installation
1. On the ESXi 5.5 screen, press F2, enter the root password, and press Enter.
2. On the System Customization screen, select Troubleshooting Options, and press Enter.
3. On the Troubleshooting Mode Options screen, select enable ESXi Shell, and press Enter.
4. Select Enable SSH, press Enter, and press ESC.
5. On the System Customization screen, select Configure Management Network.
6. On the Configure Management Network screen, select IP Configuration.
7. On the IP Configuration screen, select set static IP, enter an IP address, subnet mask, and default gateway, and
press Enter.
8. On the Configure Management Network screen, press Esc. When asked to apply the changes, type Y.
9. Repeat steps 1-8 for each B200 M3 blade.
For our vCenter management server, we deployed the vCenter Appliance on a separate ESXi host and configured
it for our environment.
Configuring the EMC XtremIO array
We worked directly with EMC engineers to install and cable the physical hardware, and to upgrade the array to
the latest firmware and software. Below are the steps we took after initial configuration of the storage array to create
and connect our test LUNs.
1. Log in to the XtremIO Storage Management Application.
2. Once the GUI loads, click Configuration at the top of the screen.
3. Under Initiator Groups, click Add.
4. Enter a name for the new Initiator Group (e.g. Host1), and click Add.
5. Enter a name for the new initiator.
6. If the hosts are connected properly, the Fibre initiators will be listed under Initiator Port Address. Select the first
initiator for the first host, and click OK.
7. Repeat steps 4-6 for the second Fibre port.
8. Click Finish to add the new host.
A Principled Technologies test report 23DBaaS with VMware vCAC, EMC XtremIO, and Cisco UCS
9. Repeat steps 3-8 for the remaining three hosts.
10. Under Volumes, click Add.
11. Enter a name and capacity for the new volume.
12. Accept defaults, and click Finish.
13. Repeat steps 11 and 12 for each desired LUN.
Preparing the prerequisite environment
We created and stored all management VMs on a separate server and local storage, leaving the Cisco blades and
XtremIO array for the provisioned VMs, templates, and background activity VMs.
Creating the VM DNS and NTP
1. In the VMware vSphere client, under Basic Tasks, select Create a new virtual machine.
2. Choose Custom, and click Next.
3. Assign the name AD to the virtual machine, and click Next.
4. Select the management host, and click Next.
5. Select the appropriate storage, and click Next.
6. Choose Virtual Machine Version 10, and click Next.
7. Choose Windows®, choose Microsoft Windows Server® 2008 R2 (64-bit), and click Next.
8. For CPUs, select one virtual processor socket, and two cores per virtual socket, and click Next.
9. Choose 4 GB RAM, and click Next.
10. Click 1 for the number of NICs, select VMXNET3, connect to the private network, and click Next.
11. Leave the default virtual storage controller, and click Next.
12. Choose to create a new virtual disk, and click Next.
13. Make the OS virtual disk size 40 GB, choose thick-provisioned lazy zeroed, specify external storage, and click
Next.
14. Keep the default virtual device node (0:0), and click Next.
15. Click Finish.
16. Start the VM.
Installing the Microsoft Windows Server 2008 R2 operating system on the VM
1. Open a virtual machine console on AD01.
2. Choose the language, time and currency, and keyboard input. Click Next.
3. Click Install Now.
4. Choose Windows Server 2008 R2 Enterprise (Full Installation), and click Next.
5. Accept the license terms, and click Next.
6. Click Custom.
7. Click the Disk, and click Drive options (advanced).
8. Click NewApplyFormat, and click Next.
9. After the installation completes, click OK to set the administrator password.
10. Enter the administrator password twice, and click OK.
11. Install VMware Tools. For more information, see
kb.vmware.com/selfservice/microsites/search.do?language=en_US&cmd=displayKC&externalId=340.
12. Reboot the server.
13. Connect the machine to the Internet, and install all available Windows updates. Restart as necessary.
A Principled Technologies test report 24DBaaS with VMware vCAC, EMC XtremIO, and Cisco UCS
14. Enable remote desktop access.
15. Change the hostname to AD, and reboot when the installation prompts you.
16. Set up networking for the data network:
a. Click StartControl Panel, right-click Network Connections, and choose Open.
b. Right-click the VM traffic NIC, and choose Properties.
c. Uncheck TCP/IP (v6).
d. Select TCP/IP (v4), and choose Properties.
e. Set the IP address.
Installing Active Directory and DNS services on AD
1. Click StartRun, type dcpromo, and click OK.
2. At the Active Directory Domain Services Installation Wizard welcome screen, check the Use advanced mode
installation option, and click Next.
3. In the Choose a Deployment Configuration dialog box, select Create a new domain in a new forest, and click
Next.
4. At the FQDN page, type vdi.com, and click Next.
5. At the NetBIOS name prompt, leave the name VDI, and click Next.
6. At the Forest Functionality level, select Windows Server 2008 R2, and click Next.
7. At the additional Domain Controller Options, leave DNS server selected, and click Next.
8. At the System Folder Location screen leave the default options, and click Next.
9. Assign a Directory Services Restore Mode Administrator account password, and click Next.
10. At the Summary screen, review your selections, and click Next.
11. Once Active Directory Domain Services finishes installing, click Finish, and restart the system.
12. Click StartRun, and type dnsmgmt.msc
13. Create a reverse lookup zone for AD.
Configuring the Windows time service on AD01
To ensure reliable time, we pointed our Active Directory server to a physical NTP server.
1. Open a command prompt.
2. Type the following:
W32tm /config /syncfromflags:manual /manualpeerlist:"<ip address of a NTP
server>"
W32tm /config /reliable:yes
W32tm /config /update
W32tm /resync
Net stop w32time
Net start w32time
Setting up vCAC
Setting up the vCenter Server appliance
1. Install the vCenter appliance:
a. Open a vSphere client session. Connect to your management host.
b. In the vSphere client, select FileDeploy OVF Template.
c. Browse to the location of the vCenter Server Appliance .ovf file, and click Open.
A Principled Technologies test report 25DBaaS with VMware vCAC, EMC XtremIO, and Cisco UCS
d. In the OVF Template Details page, click Next.
e. In Name and Location, enter vCenter Server for the name, and click Next.
f. Select the management storage, and click Next.
g. Select a disk format, and click Next.
h. Check the box for Power on after deployment, and click Finish.
2. Configure the vCenter appliance:
a. Right-click the new vCenter, and select Open Console.
b. Note the instructions and the address to use for configuration.
c. Open a Web browser to the address listed in the console.
d. Log in with root and the password vmware.
e. Check the box to accept the license agreement, and click Next.
f. Select the radio button for Configure with default settings, and click Next.
g. Click Start. Setup will complete and a new database will be configured automatically.
h. Click the Admin Tab.
i. Enter vmware in the current administrator password section.
ii. Enter a new password into both password fields.
iii. Click Change Password.
Setting up the vCAC Identity Appliance
Deploying the vCAC Identity Appliance
1. In the vSphere Web client, right click the management host, and choose Deploy OVF template…
2. Choose Local file, and browse to the OVA file. Click Next.
3. Review the details, and click Next.
4. Accept the EULA, and click Next.
5. Select the datacenter where your host is stored, and click Next.
6. Select the correct storage, and click Next.
7. Select your VM network, and click Next.
8. Enter a password and confirm it.
9. Expand Network Properties, and assign IPs to the DNS, Address and netmask fields. Click Next.
10. Click Finish to deploy the VM.
11. In the domain controller, add a DNS entry for the Identity appliance.
Configuring the vCAC Identity VM
1. Power on the Identity VM.
2. Using the IP you assigned in the deployment section, browse to https://IPofappliance:5480/
3. Log in as root with the password you assigned.
4. Go to the Admin tab, and click Time Settings.
5. In the dropdown menu choose Use Time Server, and enter the IP of your AD server. Click Save Settings.
6. Go to the System tab, click Time Zone, and choose your time zone from the dropdown menu. Click Save Settings.
7. Go to the SSO tab, and type in the Password you want to apply to the admin user. Click Apply.
8. Click Host Settings, and add :7444 to the host name. Click Apply.
9. Click SSL, and choose Generate Self Signed Certificate from the dropdown menu.
10. Fill out the Organization and Organizational Unit fields, and click Replace Certificate.
11. Click on Active Directory.
A Principled Technologies test report 26DBaaS with VMware vCAC, EMC XtremIO, and Cisco UCS
12. Fill in the Domain Name, Domain User, and Password fields. Click Join AD Domain.
Setting up the vCAC Appliance
Deploying the vCAC Applicance
1. In the vSphere Web client, right click the management host, and choose Deploy OVF template…
2. Choose Local file, and browse to the OVA file. Click Next.
3. Review the details, and click Next.
4. Accept the EULA, and click Next.
5. Select the datacenter where your host is stored, and click Next.
6. Select the correct storage, and click Next.
7. Select your VM network, and click Next.
8. Enter a password and confirm it.
9. Expand Network Properties, and assign IPs to the DNS, Address, and Netmask fields. Click Next.
10. Click Finish to deploy the VM.
11. In the domain controller, add a DNS entry for the appliance.
Configuring the vCAC VM
1. Power on the vCAC VM.
2. Using the IP you assigned in the deployment section, browse to https://IPofappliance:5480/
3. Log in as root with the password you assigned.
4. Go to the Admin tab, and click Time Settings.
5. In the dropdown menu, choose Use Time Server, and enter the IP of your AD server. Click Save Settings.
6. Go to the System tab, click Time Zone, and choose your time zone from the dropdown menu. Click Save Settings.
7. Go to the vCAC Settings tab, click Resolve Host Name, and click Save Settings once the hostname is resolved.
8. Click SSL, and choose Generate Self Signed Certificate from the dropdown menu.
9. Fill out the Organization and Organizational Unit fields, and click Replace Certificate.
10. Click on the SSO tab, and enter the FQDN of the Identity Appliance in the SSO Host and Port box (FQDN:port).
11. Enter the default administrator user and password in the boxes (administrator@vsphere.local).
12. Click Save.
13. Click on Licensing, enter the license key, and click Submit Key.
14. To confirm that all is working, open a Web browser and browse to
https://FQDNofvCAC/shell-ui-app
15. Log in with administrator@vsphere.local and the proper password.
16. You can close the Web page once you’ve confirmed it is working.
Setting up the IaaS VM
Installing Windows Server 2008 R2 on the IaaS VM
1. Boot the server, and insert the Windows Server 2008 R2 SP1 installation DVD in the DVD-ROM drive.
2. At the Language Selection screen, click Next.
3. Click Install Now.
4. Select Windows Server 2008 R2 Enterprise (Full Installation), and click Next.
5. Click the I accept the license terms check box, and click Next.
6. Click Custom.
7. Click Next.
8. At the User’s password must be changed before logging on warning screen, click OK.
A Principled Technologies test report 27DBaaS with VMware vCAC, EMC XtremIO, and Cisco UCS
9. Enter the desired password for the administrator in both fields, and click the arrow to continue.
10. At the Your password has been changed screen, click OK.
11. Connect the machine to the Internet, and install all available Windows updates. Restart as necessary.
12. Enable remote desktop access.
13. Change the hostname, and reboot when prompted.
Installing SQL Server 2008 R2
1. Run the SQL Server 2008 R2 setup.
2. Click InstallationNew installation or add features to an existing installation.
3. On the Setup Support Rules screen, click OK.
4. Enter the product key or specify a free edition, and click Next.
5. Check the box for I accept the license terms, and click Next.
6. Click Install to install the setup support files.
7. On the Setup Support Rules screen, and click Next.
8. Choose SQL Server Feature Installation, and click Next.
9. Select the Database Engine Services, Full-Text Search, Client tools Backwards Compatibility, Management Tools
Basic and Complete, and click Next twice.
10. Accept instance configuration defaults, and click Next.
11. Accept defaults for disk space requirements, and click Next.
12. Leave Server Configuration defaults, and click Next.
13. Select Mixed Mode, and enter a password for the SA account. Click Add Current User, and click Next.
14. Accept defaults for error reporting, and click Next.
15. Review installation configuration rules check, and click Next.
16. To begin installation, click Install.
17. Click OK when prompted to reboot.
18. At completion screen, click Close.
19. Open the SQL Server Configuration Manager, and expand SQL Server Network Configuration.
20. Verify that TCP/IP is enabled, and close the manager.
21. Reboot the server.
22. Install the SP1 and SP2 SQL updates.
Installing pre-reqs on the IaaS VM
1. Download and install .NET 4.5 framework (only 4.5 as 4.5.1 and 4.5.2 will cause errors).
2. Download the pre-req automation script from blogs.vmware.com/vsphere/2013/12/vmware-vcloud-
automation-center-6-pre-req-automation-script.html, and extract it.
3. Hit the Windows key, type powershell, and right-click the Windows Powershell result.
4. Click Run as Administrator.
5. Type Set-ExecutionPolicy Unrestricted, and hit Enter.
6. Confirm the setting by typing Y, and hitting Enter.
7. Type R to run once, and hit Enter.
8. Navigate to the unzipped directory you downloaded, and type .vCAC6-PreReq-Automation.ps.1 to
run the script.
9. When the script finishes, restart the VM.
A Principled Technologies test report 28DBaaS with VMware vCAC, EMC XtremIO, and Cisco UCS
Installing IaaS on the VM
1. Open a browser, and navigate to https://vcacvmhostname.domain.name:5480/installer/
2. Click the setup.exe hyperlink to download the IaaS installation file.
3. Right-click setup__vcac.hostname@5480.exe and choose Run as Administrator.
4. Click Next on the Welcome screen.
5. Accept the EULA, and click Next.
6. Enter root as the user and the relevant password, and click Next.
7. Choose Complete Install, and click Next.
8. All prerequisites should have passed the check, so click Next.
9. Enter the domain administrator username and password.
10. Create a Passphrase and confirm it, and click Next.
11. Leave defaults, and click Next.
12. Leave the default server, and click Load for SSO Default Tenant (should auto-populate to vsphere.local).
13. Click Download to receive the certificate, and check Accept Certificate.
14. Enter the domain administrator username and Password, accept the default IaaS server, and click Next.
15. Click Install.
16. Click Finish.
Configuring IaaS Tenants
1. Open a browser window and go to
https://vcac-appliance-hostname.domain.local/shell-ui-app
2. Log in with adminsitrator@vsphere.local and the SSO password.
3. In the Tenants box, click on vsphere.local (we had trouble with IE at this step, and had to download Firefox).
4. Go to the Identity stores tab, and click the green + button.
5. Enter the name of the Identity store.
6. Choose Active Directory from the dropdown box.
7. Enter the URL to the Identity store (i.e. ldap://activedirectoryserver.domain.local:389)
8. Enter the domain.
9. Enter the domain administrator’s distinguished name (i.e. CN=Administrator, CN=Users, DC=domain, DC=local)
10. Type the user password.
11. Enter the Group search base distinguished name (i.e. DC=domain, DC=local), and click Add.
12. Go to the Administrator tab, and assign administrator rights to both Tenant Administrator roles and
Infrastructure roles.
13. Click Update to finish.
14. Log out of the website, and log back in with the domain administrator instead of the vsphere.local admin as
before.
15. You should successfully log into a new screen with Home, Inbox, Administration, and Infrastructure tabs.
16. Go to InfrastructureAdministrationLicensing, and enter your license.
Creating and configuring the vSphere Endpoint
1. Log in to the vCAC appliance site with your domain administrator credentials (you should already be logged in if
coming directly from the previous section).
2. Go to InfrastructureEndpointsCredentials, and click New Credentials.
A Principled Technologies test report 29DBaaS with VMware vCAC, EMC XtremIO, and Cisco UCS
3. Enter an identifying name for the new user, enter the domain administrator (e.g.
administrator@domain.local), and the password.
4. Click the green checkmark to save.
5. Click on Endpoints.
6. In the dropdown menu for New Endpoint, choose VirtualvSphere (vCenter).
7. Type in vCenter for the name, and enter the RUL to the vCenter sdk (e.g.
https://vcenter.domain.local/sdk).
8. Enter the vSphere administrator credentials, and click OK.
Creating a Fabric Group
1. Go to InfrastructureGroupsFabric Groups, and click New Fabric Group.
2. Enter a name and description.
3. Add the domain administrator from the dropdown menu.
4. Select the compute resources by ticking the checkbox, and click OK.
Configuring the machine prefix
1. Since our Fabric Group is set to the same administrator we are logged in as, log out and back in to update the
server.
2. Go to InfrastructureBlueprintsMachine Prefixes, and click Add a New Machine Prefix.
3. Enter a prefix name without including spaces.
4. Enter the ending number for the maximum number of VMs (3 = three digits, or 999 maximum VMs) and a
starting number (usually 1).
5. Click the green checkmark to save.
Creating a Business Group
1. Go to InfrastructureGroupsBusiness Groups, and click Add a New Business Group.
2. Name the group such as IT or Sales.
3. Click the … button, and choose the prefix we just created.
4. Add the domain administrator as the email recipient.
5. Click OK.
Creating a reservation
1. Navigate to InfrastructureReservationsReservation, and click on New ReservationVirtualvSphere.
2. Select a compute resource.
3. The name and tenant should auto-populate.
4. Enter a priority of 1.
5. Click on the Resources tab.
6. Specify the amount of RAM to reserve.
7. Choose which datastores the reserve can access, and set a priority for each datastore (can share the same
priority).
8. Click on the Network tab.
9. Select the networks that you want to have available for users when they provision their VMs, and click OK.
Creating a Blueprint
1. Navigate to InfrastructureBlueprintsBlueprints.
2. Click New BlueprintVirtualvSphere.
3. Enter a name for the blueprint, choose the prefix you created, and enter a number of archive days.
A Principled Technologies test report 30DBaaS with VMware vCAC, EMC XtremIO, and Cisco UCS
4. On the Build Information tab chose the Clone action in the dropdown menu, and choose the relevant template.
5. Add any properties needed, such as to define where each VMDK should reside on the storage, and click OK.
6. Mouse over the new blueprint, click Publish, and click OK.
7. Navigate to AdministrationCatalog ManagementCatalog Items.
8. Click on the new Blueprint, set the status to Active, and choose the Service you created in the dropdown menu.
Click OK.
9. Check the catalog tab to ensure that the blueprint is available.
Creating the VMs
We created four different sized VMs using the same process listed below, but with different sized drives.
Oracle Linux 6.5 and Oracle Database 12c
We configured each VM with Oracle Linux 6.5 and Oracle Database 12c. For our OLTP VMs, we used a basic
install of Oracle Database 12c and used the local file system for database files: one disk for data and a second disk for
redo logs. For our OLAP VMs, we first installed Oracle Grid Infrastructure and utilized Oracle Automatic Storage
Management to create three four-disk ASM groups for data, redo logs, and temp table spaces. We then installed and
configured Oracle Database 12c utilizing these ASM disk groups for our database files.
Installing Oracle Linux 6.5
1. Insert the Oracle Linux 6.5 DVD into the server, and boot to it.
2. Select Install or upgrade an existing system.
3. If you are unsure of the fidelity of the installation disk, select OK to test the installation media; otherwise, select
Skip.
4. In the opening splash screen, select Next.
5. Choose the language you wish to use, and click Next.
6. Select the keyboard layout, and click Next.
7. Select Basic Storage Devices, and click Next.
8. Select Fresh Installation, and click Next.
9. Insert the hostname, and select Configure Network.
10. In the Network Connections menu, configure network connections.
10. After configuring the network connections, click Close.
11. Click Next.
12. Select the nearest city in your time zone, and click Next.
13. Enter the root password, and click Next.
14. Select Use All Space, and click Next.
15. When the installation prompts you to confirm that you are writing changes to the disk, select Write changes to
disk.
16. Select Software Basic Server, and click Next. Oracle Linux installation begins.
17. When the installation completes, select Reboot to restart the server.
Installing VMware Tools
1. Install guest tools or agents.
2. (VMware only) Install VMware Tools on the guest:
 Right-click the VM in the Web Client, and select Install/Upgrade VMware Tools.
 Log on to the guest as root.
A Principled Technologies test report 31DBaaS with VMware vCAC, EMC XtremIO, and Cisco UCS
 Mount the CD ROM device:
# mount /dev/cdrom /mnt
 Untar VMware Tools into a temporary directory:
# tar –C /tmp –zxf /mnt/VMwareTools-9.4.0-1280544.tar.gz
 Run the install script and accept the defaults:
# /tmp/vmware-tools-distrib/vmware-install.pl
 Follow the prompts to configure and install VMware tools.
 The installer will automatically load the NIC drivers, create a new initrd, and unmount the CD.
 Reboot the VM.
Initial configuration tasks
Complete the following steps to provide the functionality that Oracle Database requires. We performed all of
these tasks as root.
1. Disable firewall services. In the command line (as root), type:
# service iptables stop
# chkconfig iptables off
# service ip6tables stop
# chkconfig ip6tables off
2. Set SELinux:
# vi /etc/selinux/config
SELINUX=permissive
3. Modify /etc/hosts to include the IP address of the internal IP and the hostname.
4. Edit 90-nproc.conf:
# vim /etc/security/limits.d/90-nproc.conf
Change this:
* soft nproc 1024
To this:
* - nproc 16384
5. Install 12c RPM packages, resolve package dependencies, and modify kernel parameters:
# yum install oracle-rdbms-server-12cR1-preinstall –y
6. Install automatic system tuning for database storage through yum:
# yum install tuned
# chkconfig tuned on
# tuned-adm profile enterprise-storage
7. Using yum, install the following prerequisite packages for Oracle Database:
# yum install elfutils-libelf-devel
# yum install xhost
# yum install unixODBC
# yum install unixODBC-devel
# yum install oracleasm-support oracleasmlib oracleasm
8. Create the oracle user account and groups and password:
# groupadd -g 1003 oper
# groupadd -g 1004 asmadmin
# groupadd -g 1005 asmdba
A Principled Technologies test report 32DBaaS with VMware vCAC, EMC XtremIO, and Cisco UCS
# groupadd -g 1006 asmoper
# usermod -G dba,oper,asmadmin,asmdba,asmoper oracle
# passwd oracle
9. Create the /u01 directory for Oracle inventory and software and give it to the oracle user:
# mkdir -p /u01/app/oracle/product/12.1.0/grid_1
# mkdir -p /u01/app/oracle/product/12.1.0/dbhome_1
# chown -R oracle:oinstall /u01
# chmod -R 775 /u01
10. Edit bash profiles to set up user environments:
# vim /home/oracle/.bash_profile
# Oracle Settings
export TMP=/tmp
export TMPDIR=$TMP
export ORACLE_HOSTNAME=localhost.localdomain
export ORACLE_BASE=/u01/app/oracle
export GRID_HOME=$ORACLE_BASE/product/12.1.0/grid_1
export DB_HOME=$ORACLE_BASE/product/12.1.0/dbhome_1
export ORACLE_HOME=$DB_HOME
export ORACLE_SID=orcl
export ORACLE_TERM=xterm
export BASE_PATH=/usr/sbin:$PATH
export PATH=$ORACLE_HOME/bin:$BASE_PATH
export LD_LIBRARY_PATH=$ORACLE_HOME/lib:/lib:/usr/lib
export CLASSPATH=$ORACLE_HOME/JRE:$ORACLE_HOME/jlib:$ORACLE_HOME/rdbms/jlib
alias grid_env='. /home/oracle/grid_env'
alias db_env='. /home/oracle/db_env'
# vim /home/oracle/grid_env
export ORACLE_SID=+ASM1
export ORACLE_HOME=$GRID_HOME
export PATH=$ORACLE_HOME/bin:$BASE_PATH
export LD_LIBRARY_PATH=$ORACLE_HOME/lib:/lib:/usr/lib
export CLASSPATH=$ORACLE_HOME/JRE:$ORACLE_HOME/jlib:$ORACLE_HOME/rdbms/jlib
# vim /home/oracle/db_env
export ORACLE_SID=orcl
export ORACLE_HOME=$DB_HOME
export PATH=$ORACLE_HOME/bin:$BASE_PATH
export LD_LIBRARY_PATH=$ORACLE_HOME/lib:/lib:/usr/lib
export CLASSPATH=$ORACLE_HOME/JRE:$ORACLE_HOME/jlib:$ORACLE_HOME/rdbms/jlib
Adding the four data and four log drives to the VM and modifying the vmfx file
1. Power off the VM.
A Principled Technologies test report 33DBaaS with VMware vCAC, EMC XtremIO, and Cisco UCS
2. Right-click the VM in the vSphere Web Client, and choose Edit Settings…
3. Click on the VM Options tab, and expand the Advanced menu option.
4. Choose Edit Configuration…
5. Click Add Row, and enter disk.EnableUUID in the parameter field and TRUE in the value field.
6. Go back to the Virtual Hardware tab.
7. Click the drop-down menu for New device, and choose New Hard Disk.
8. Name the Hard Disk and choose the size that you want it to be.
9. Repeat steps all remaining drives.
10. Click OK.
11. Power the VM back on.
Switching the default OS kernel to RedHat
1. Edit the GRUB config file:
# vi /boot/grub/grub.conf
There should be three lines that begin with title, with the last one being the Red Hat kernel.
2. Set the default parameter to 2, and save the file.
3. Reboot to verify the proper kernel is booted.
Configuring disks for ASM
1. For each of the nine shared disks, create a GPT label, and create one partition. For example, see the following
shell script:
for disk in sdb sdc sdd sde sdf sdg sdh sdi sdj; do
parted /dev/$disk mklabel gpt
parted /dev/$disk mkpart primary "1 -1"
done
2. If desired, label the disk’s partition with its Oracle function. For example:
parted /dev/sdb name 1 CRS
parted /dev/sdc name 1 DATA1
parted /dev/sdd name 1 DATA2
parted /dev/sde name 1 DATA3
parted /dev/sdf name 1 DATA4
parted /dev/sdg name 1 LOG1
parted /dev/sdh name 1 LOG2
parted /dev/sdh name 1 LOG3
parted /dev/sdi name 1 LOG4
3. Initialize Oracle ASM on each server by executing the following commands as root on each node.
oracleasm init
oracleasm configure -e -u grid -g oinstall -s y -x sda
4. Label each shared disk-partition with an appropriate ASM name. For example, following the OS partition names
created above, execute the following commands on one system:
oracleasm createdisk CRS /dev/sdb1
oracleasm createdisk DATA1 /dev/sdc1
oracleasm createdisk DATA2/dev/sdd1
oracleasm createdisk DATA3 /dev/sde1
oracleasm createdisk DATA4 /dev/sdf1
oracleasm createdisk LOG1 /dev/sdg1
oracleasm createdisk LOG2 /dev/sdh1
oracleasm createdisk LOG3 /dev/sdi1
oracleasm createdisk LOG4 /dev/sdj1
A Principled Technologies test report 34DBaaS with VMware vCAC, EMC XtremIO, and Cisco UCS
5. On each server, scan the disks to make the disks immediately available to Oracle ASM.
oracleasm scandisks
oracleasm listdisks
Installing Oracle Grid Infrastructure 12c
1. Log in as the oracle user.
2. Unzip linuxamd64_12c_grid_1of2.zip and linuxamd64_12c_grid_2of2.zip
3. Open a terminal to the unzipped database directory.
4. Type grid_env to set the Oracle grid environment.
5. To start the installer, type./runInstaller
6. At the software Updates screen, select Skip updates.
7. In the Select Installation Option screen, select Install and Configure Grid Infrastructure for a Standalone Server,
and click Next.
8. Choose the language, and click Next.
9. In the Create ASM Disk Group screen, choose the Disk Group Name, change redundancy to External.
10. Select the four disks that you are planning to use for the database, and click Next.
11. In the Specify ASM Password screen, choose Use same password for these accounts, write the passwords for the
ASM users, and click Next.
12. Leave the default Operating System Groups, and click Next.
13. Leave the default installation, and click Next.
14. Leave the default inventory location, and click Next.
15. Under Root script execution select Automatically run configuration scripts and enter root credentials.
16. In the Prerequisite Checks screen, make sure that there are no errors.
17. In the Summary screen, verify that everything is correct, and click Finish to install Oracle Grid Infrastructure.
18. At one point during the installation, the installation prompts you to execute two configuration scripts as root.
Follow the instructions to run the scripts.
19. At the Finish screen, click Close.
20. To run the ASM Configuration Assistant, type asmca.
21. In the ASM Configuration Assistant, click Create.
22. In the Create Disk Group window, name the new disk group log, choose redundancy External (None), select the
four disks for redo logs.
23. Click Advanced Options, and type 12.1.0.0.0 in ASM Compatibility and Database Compatibility. Click OK.
24. Right-click the DATA drive, and choose Edit Attributes. Make sure both ASM and Database Compatibility fields
list 12.1.0.0.0, and click OK.
25. Exit the ASM Configuration Assistant.
Installing Oracle Database 12c
1. Unzip linuxamd64_12c_database_1_of_2.zip and linuxamd64_12c_database_2_of_2.zip.
2. Open a terminal to the unzipped database directory.
3. Type db_env to set the Oracle database environment.
4. Run ./runInstaller.sh.
5. Wait for the GUI installer loads.
6. On the Configure Security Updates screen, enter the credentials for My Oracle Support. If you do not have an
account, uncheck the box I wish to receive security updates via My Oracle Support, and click Next.
A Principled Technologies test report 35DBaaS with VMware vCAC, EMC XtremIO, and Cisco UCS
7. At the warning, click Yes.
8. On the Download Software Updates screen, enter the desired update option, and click Next.
9. On the Select Installation Option screen, select Install database software only, and click Next.
10. On the Grid Installation Options screen, select Single instance database installation, and click Next.
11. On the Select Product Languages screen, leave the default setting of English, and click Next.
12. On the Select Database Edition screen, select Enterprise Edition, and click Next.
13. On the Specify Installation Location, leave the defaults, and click Next.
14. On the Create Inventory screen, leave the default settings, and click Next.
15. On the Privileged Operating System groups screen, keep the defaults, and click Next.
16. Allow the prerequisite checker to complete.
17. On the Summary screen, click Install.
18. Once the Execute Configuration scripts prompt appears, ssh into the server as root, and run the following
command:
# /home/oracle/app/oracle/product/12.1.0/dbhome_1/root.sh
19. Return to the prompt, and click OK.
20. Once the installer completes, click Close.
Creating and the database
1. Using Putty with X11 forwarding enabled, SSH to the VM.
2. Type dbca, and press enter to open the Database configuration assistant.
3. At the Database Operation screen select Create Database, and click Next.
4. Under Creation Mode select Advanced Mode, and click Next.
5. At the Select Template screen select General Purpose or Transaction Processing. Click Next
6. Enter a Global database name and the appropriate SID.
7. At the Management Options screen select Configure Enterprise Manager (EM) Database Express. Click Next.
8. At the Database Credentials screen select Use the Same Administrative Password for All Accounts. Enter a
password, and click Next.
9. At the Network Configuration screen click Next.
10. At the Storage Configuration screen select Automatic Storage Management, and select +DATA as the Database
11. At the Database Options screen click Next.
12. At the Initialization Parameters screen click use Automatic Memory Management.
13. At the Creation Options select Create Database, and click Next.
14. At the summary screen click Finish.
15. Close the Database Configuration Assistant.
16. In a Web browser, browse to https://vm.ip.address:5500/em to open the database manager.
17. Log in as system with the password you specified.
18. Go to StorageTablespaces.
19. Click Create.
20. Enter tpcctab as the Name, and check the Set As Default box. Click OK.
21. Go to StorageRedo Log Groups.
22. Click ActionsSwitch file… until you get one of the groups to go inactive.
23. Highlight the inactive group, and click ActionsDrop group.
A Principled Technologies test report 36DBaaS with VMware vCAC, EMC XtremIO, and Cisco UCS
24. Click Add Group, name it, type +logs/orcl/onlinelog/redo1.log and click the + button.
25. Type the size of the log file into the size field, and click Add.
26. Repeat steps 19 – 22 until all default logs are dropped, and three new ones exist.
27. Back in the Putty windows, type sqlplus / as sysdba to connect to the database.
28. Add the tpcc user, and grant all privileges to it:
a. # CREATE USER tpcc IDENTIFIED BY tpcc;
b. # GRANT ALL PRIVILEGES TO tpcc;
Generating HammerDB data
1. Download the HammerDB install from hammerora.sourceforge.net/download.html.
2. Using Putty with X11 forwarding enabled, SSH to the VM.
3. Navigate to the directory where the file is located.
4. Change the permissions:
# chmod u+x HammerDB-2.16-Linux-x86-64-Install
5. Run the installer:
# ./HammerDB-2.16-Linux-x86-64-Install
The installation GUI will launch.
6. Choose English, and click OK.
7. Click Yes on the install prompt.
8. Click Next.
9. Leave the default installation destination, and click Next.
10. Click Next.
11. Check Launch HammerDB, and click Finish.
12. If you receive a missing library error, install the library with the yum command:
# yum install libXScrnSaver-1.2.2-2.el6.x86_64
13. In the HammerDB UI, click OptionsBenchmark, and check Oracle and TPC-H. Click OK.
14. Click OK again to confirm the benchmark choice.
15. Expand TPC-C and Schema Build.
16. Double-click Options to open the Build Options menu.
17. For Oracle Service Name, enter the name of the database.
18. Enter the password for the System user.
19. Leave the rest of the fields as default.
20. Choose the number of warehouses for the database size, and click OK.
21. In the Virtual User Options, check Show Output. Click OK.
22. To start the database generation, double-click Build.
Installing the vCAC guest agent
1. Download the agent installer for REHL 6 from your vCAC appliance (https://vcac-
hostname.domain.name:5480/installation)
2. Copy the gugent-6.0.1-71.x86_64.rpm file to your VM.
3. Navigate to the file where the rpm file is stored, and install the agent:
# rpm –i gugent-6.0.1-71.x86_64.rpm
4. Configure the guest path to the IaaS server:
A Principled Technologies test report 37DBaaS with VMware vCAC, EMC XtremIO, and Cisco UCS
# /usr/share/gugent/installgugent.sh –iaas.domain.name:443 ssl
Running the tests
We started our OLTP VMs in the background to run continuously. We then logged into the vCAC Web console
and selected the blueprint related to the scenario we were testing. We requested the provision, then waited until the
Requests tab showed the provision was successful. Using the Events log in vSphere, we used the time stamps from when
the provision was first requested to when the VM was completed to determine the time required for the provision. For
scenarios with multiple VMs, we used the first and last VMs created to determine the time for the entire provision. We
compared the times to the Recent Events tab in vCAC to ensure that the time elapsed was the same. We used vSphere
to track times because vSphere offered granularity in seconds.
A Principled Technologies test report 38DBaaS with VMware vCAC, EMC XtremIO, and Cisco UCS
ABOUT PRINCIPLED TECHNOLOGIES
Principled Technologies, Inc.
1007 Slater Road, Suite 300
Durham, NC, 27703
www.principledtechnologies.com
We provide industry-leading technology assessment and fact-based
marketing services. We bring to every assignment extensive experience
with and expertise in all aspects of technology testing and analysis, from
researching new technologies, to developing new methodologies, to
testing with existing and new tools.
When the assessment is complete, we know how to present the results to
a broad range of target audiences. We provide our clients with the
materials they need, from market-focused data to use in their own
collateral to custom sales aids, such as test reports, performance
assessments, and white papers. Every document reflects the results of
our trusted independent analysis.
We provide customized services that focus on our clients’ individual
requirements. Whether the technology involves hardware, software, Web
sites, or services, we offer the experience, expertise, and tools to help our
clients assess how it will fare against its competition, its performance, its
market readiness, and its quality and reliability.
Our founders, Mark L. Van Name and Bill Catchings, have worked
together in technology assessment for over 20 years. As journalists, they
published over a thousand articles on a wide array of technology subjects.
They created and led the Ziff-Davis Benchmark Operation, which
developed such industry-standard benchmarks as Ziff Davis Media’s
Winstone and WebBench. They founded and led eTesting Labs, and after
the acquisition of that company by Lionbridge Technologies were the
head and CTO of VeriTest.
Principled Technologies is a registered trademark of Principled Technologies, Inc.
All other product names are the trademarks of their respective owners.
Disclaimer of Warranties; Limitation of Liability:
PRINCIPLED TECHNOLOGIES, INC. HAS MADE REASONABLE EFFORTS TO ENSURE THE ACCURACY AND VALIDITY OF ITS TESTING, HOWEVER,
PRINCIPLED TECHNOLOGIES, INC. SPECIFICALLY DISCLAIMS ANY WARRANTY, EXPRESSED OR IMPLIED, RELATING TO THE TEST RESULTS AND
ANALYSIS, THEIR ACCURACY, COMPLETENESS OR QUALITY, INCLUDING ANY IMPLIED WARRANTY OF FITNESS FOR ANY PARTICULAR PURPOSE.
ALL PERSONS OR ENTITIES RELYING ON THE RESULTS OF ANY TESTING DO SO AT THEIR OWN RISK, AND AGREE THAT PRINCIPLED
TECHNOLOGIES, INC., ITS EMPLOYEES AND ITS SUBCONTRACTORS SHALL HAVE NO LIABILITY WHATSOEVER FROM ANY CLAIM OF LOSS OR
DAMAGE ON ACCOUNT OF ANY ALLEGED ERROR OR DEFECT IN ANY TESTING PROCEDURE OR RESULT.
IN NO EVENT SHALL PRINCIPLED TECHNOLOGIES, INC. BE LIABLE FOR INDIRECT, SPECIAL, INCIDENTAL, OR CONSEQUENTIAL DAMAGES IN
CONNECTION WITH ITS TESTING, EVEN IF ADVISED OF THE POSSIBILITY OF SUCH DAMAGES. IN NO EVENT SHALL PRINCIPLED TECHNOLOGIES,
INC.’S LIABILITY, INCLUDING FOR DIRECT DAMAGES, EXCEED THE AMOUNTS PAID IN CONNECTION WITH PRINCIPLED TECHNOLOGIES, INC.’S
TESTING. CUSTOMER’S SOLE AND EXCLUSIVE REMEDIES ARE AS SET FORTH HEREIN.

Más contenido relacionado

La actualidad más candente

La actualidad más candente (20)

Use VMware vSAN HCI Mesh to manage your vSAN storage resources and share them...
Use VMware vSAN HCI Mesh to manage your vSAN storage resources and share them...Use VMware vSAN HCI Mesh to manage your vSAN storage resources and share them...
Use VMware vSAN HCI Mesh to manage your vSAN storage resources and share them...
 
Boost your work with hardware from Intel
Boost your work with hardware from IntelBoost your work with hardware from Intel
Boost your work with hardware from Intel
 
Ensure greater uptime and boost VMware vSAN cluster performance with the Del...
Ensure greater uptime and boost VMware vSAN cluster  performance with the Del...Ensure greater uptime and boost VMware vSAN cluster  performance with the Del...
Ensure greater uptime and boost VMware vSAN cluster performance with the Del...
 
Symantec NetBackup 7.6 benchmark comparison: Data protection in a large-scale...
Symantec NetBackup 7.6 benchmark comparison: Data protection in a large-scale...Symantec NetBackup 7.6 benchmark comparison: Data protection in a large-scale...
Symantec NetBackup 7.6 benchmark comparison: Data protection in a large-scale...
 
SQL Server 2016 database performance on the Dell EMC PowerEdge FC630 QLogic 1...
SQL Server 2016 database performance on the Dell EMC PowerEdge FC630 QLogic 1...SQL Server 2016 database performance on the Dell EMC PowerEdge FC630 QLogic 1...
SQL Server 2016 database performance on the Dell EMC PowerEdge FC630 QLogic 1...
 
Pod density comparison: VMware vSphere with Tanzu vs. a bare-metal approach ...
 Pod density comparison: VMware vSphere with Tanzu vs. a bare-metal approach ... Pod density comparison: VMware vSphere with Tanzu vs. a bare-metal approach ...
Pod density comparison: VMware vSphere with Tanzu vs. a bare-metal approach ...
 
Compared to a similarly sized solution from a scale-out vendor, the Dell EMC ...
Compared to a similarly sized solution from a scale-out vendor, the Dell EMC ...Compared to a similarly sized solution from a scale-out vendor, the Dell EMC ...
Compared to a similarly sized solution from a scale-out vendor, the Dell EMC ...
 
Power edge mx7000_sds_performance_1018
Power edge mx7000_sds_performance_1018Power edge mx7000_sds_performance_1018
Power edge mx7000_sds_performance_1018
 
Business-critical applications on VMware vSphere 6, VMware Virtual SAN, and V...
Business-critical applications on VMware vSphere 6, VMware Virtual SAN, and V...Business-critical applications on VMware vSphere 6, VMware Virtual SAN, and V...
Business-critical applications on VMware vSphere 6, VMware Virtual SAN, and V...
 
3 key wins: Dell EMC PowerEdge MX with OpenManage Enterprise over Cisco UCS a...
3 key wins: Dell EMC PowerEdge MX with OpenManage Enterprise over Cisco UCS a...3 key wins: Dell EMC PowerEdge MX with OpenManage Enterprise over Cisco UCS a...
3 key wins: Dell EMC PowerEdge MX with OpenManage Enterprise over Cisco UCS a...
 
Use VMware vSAN HCI Mesh to manage your vSAN storage resources and share them...
Use VMware vSAN HCI Mesh to manage your vSAN storage resources and share them...Use VMware vSAN HCI Mesh to manage your vSAN storage resources and share them...
Use VMware vSAN HCI Mesh to manage your vSAN storage resources and share them...
 
Migrate VMs faster with a new Dell EMC PowerEdge MX solution
Migrate VMs faster with a new Dell EMC PowerEdge MX solutionMigrate VMs faster with a new Dell EMC PowerEdge MX solution
Migrate VMs faster with a new Dell EMC PowerEdge MX solution
 
Virtual Design Master Challenge 1 - Akmal
Virtual Design Master Challenge 1  - AkmalVirtual Design Master Challenge 1  - Akmal
Virtual Design Master Challenge 1 - Akmal
 
Run compute-intensive Apache Hadoop big data workloads faster with Dell EMC P...
Run compute-intensive Apache Hadoop big data workloads faster with Dell EMC P...Run compute-intensive Apache Hadoop big data workloads faster with Dell EMC P...
Run compute-intensive Apache Hadoop big data workloads faster with Dell EMC P...
 
Using VMTurbo to boost performance
Using VMTurbo to boost performanceUsing VMTurbo to boost performance
Using VMTurbo to boost performance
 
Vsphere 4-partner-training180
Vsphere 4-partner-training180Vsphere 4-partner-training180
Vsphere 4-partner-training180
 
Update your private cloud with 14th generation Dell EMC PowerEdge FC640 serve...
Update your private cloud with 14th generation Dell EMC PowerEdge FC640 serve...Update your private cloud with 14th generation Dell EMC PowerEdge FC640 serve...
Update your private cloud with 14th generation Dell EMC PowerEdge FC640 serve...
 
Virtualized database performance with Dell PowerEdge PCIe Express Flash SSDs
Virtualized database performance with Dell PowerEdge PCIe Express Flash SSDsVirtualized database performance with Dell PowerEdge PCIe Express Flash SSDs
Virtualized database performance with Dell PowerEdge PCIe Express Flash SSDs
 
Performance of three Intel-based SMB servers running Web, email, and database...
Performance of three Intel-based SMB servers running Web, email, and database...Performance of three Intel-based SMB servers running Web, email, and database...
Performance of three Intel-based SMB servers running Web, email, and database...
 
Get the most out of your storage with the Dell EMC Unity XT 880F All-Flash ar...
Get the most out of your storage with the Dell EMC Unity XT 880F All-Flash ar...Get the most out of your storage with the Dell EMC Unity XT 880F All-Flash ar...
Get the most out of your storage with the Dell EMC Unity XT 880F All-Flash ar...
 

Similar a DBaaS with VMware vCAC, EMC XtremIO, and Cisco UCS

Oracle Cloud DBA - OCP 2021 [1Z0-1093-21].pdf
Oracle Cloud DBA - OCP 2021 [1Z0-1093-21].pdfOracle Cloud DBA - OCP 2021 [1Z0-1093-21].pdf
Oracle Cloud DBA - OCP 2021 [1Z0-1093-21].pdf
MohamedHusseinEid
 
Build your private cloud with paa s using linuxz cover story enterprise tech ...
Build your private cloud with paa s using linuxz cover story enterprise tech ...Build your private cloud with paa s using linuxz cover story enterprise tech ...
Build your private cloud with paa s using linuxz cover story enterprise tech ...
Elena Nanos
 
Virtual Solution for Microsoft SQL Server
Virtual Solution for Microsoft SQL ServerVirtual Solution for Microsoft SQL Server
Virtual Solution for Microsoft SQL Server
webhostingguy
 
Virtual Solution for Microsoft SQL Server
Virtual Solution for Microsoft SQL ServerVirtual Solution for Microsoft SQL Server
Virtual Solution for Microsoft SQL Server
webhostingguy
 
Cio Breakfast Roundtable 05142009 Final Virtualization
Cio Breakfast Roundtable 05142009 Final VirtualizationCio Breakfast Roundtable 05142009 Final Virtualization
Cio Breakfast Roundtable 05142009 Final Virtualization
guestc900809
 
ovm3-server-pool-459310
ovm3-server-pool-459310ovm3-server-pool-459310
ovm3-server-pool-459310
Enoch Antwi
 
V sphere 5 roadshow final
V sphere 5 roadshow finalV sphere 5 roadshow final
V sphere 5 roadshow final
bluechipper
 

Similar a DBaaS with VMware vCAC, EMC XtremIO, and Cisco UCS (20)

VMworld 2013: Maximize Database Performance in Your Software-Defined Data Center
VMworld 2013: Maximize Database Performance in Your Software-Defined Data CenterVMworld 2013: Maximize Database Performance in Your Software-Defined Data Center
VMworld 2013: Maximize Database Performance in Your Software-Defined Data Center
 
Database performance comparison of VMware vCloud Air, Amazon Web Services, an...
Database performance comparison of VMware vCloud Air, Amazon Web Services, an...Database performance comparison of VMware vCloud Air, Amazon Web Services, an...
Database performance comparison of VMware vCloud Air, Amazon Web Services, an...
 
Denver SQL Saturday The Next Frontier
Denver SQL Saturday The Next FrontierDenver SQL Saturday The Next Frontier
Denver SQL Saturday The Next Frontier
 
Get higher performance for your MySQL databases with Dell APEX Private Cloud
Get higher performance for your MySQL databases with Dell APEX Private CloudGet higher performance for your MySQL databases with Dell APEX Private Cloud
Get higher performance for your MySQL databases with Dell APEX Private Cloud
 
Oracle Cloud DBA - OCP 2021 [1Z0-1093-21].pdf
Oracle Cloud DBA - OCP 2021 [1Z0-1093-21].pdfOracle Cloud DBA - OCP 2021 [1Z0-1093-21].pdf
Oracle Cloud DBA - OCP 2021 [1Z0-1093-21].pdf
 
Catalogic ECX: Snapshot and Replication Automation for Pure Storage
Catalogic ECX: Snapshot and Replication Automation for Pure StorageCatalogic ECX: Snapshot and Replication Automation for Pure Storage
Catalogic ECX: Snapshot and Replication Automation for Pure Storage
 
CPU performance comparison of two cloud solutions: VMware vCloud Hybrid Servi...
CPU performance comparison of two cloud solutions: VMware vCloud Hybrid Servi...CPU performance comparison of two cloud solutions: VMware vCloud Hybrid Servi...
CPU performance comparison of two cloud solutions: VMware vCloud Hybrid Servi...
 
Build your private cloud with paa s using linuxz cover story enterprise tech ...
Build your private cloud with paa s using linuxz cover story enterprise tech ...Build your private cloud with paa s using linuxz cover story enterprise tech ...
Build your private cloud with paa s using linuxz cover story enterprise tech ...
 
Copy Data Management for the DBA
Copy Data Management for the DBACopy Data Management for the DBA
Copy Data Management for the DBA
 
Virtual Solution for Microsoft SQL Server
Virtual Solution for Microsoft SQL ServerVirtual Solution for Microsoft SQL Server
Virtual Solution for Microsoft SQL Server
 
Virtual Solution for Microsoft SQL Server
Virtual Solution for Microsoft SQL ServerVirtual Solution for Microsoft SQL Server
Virtual Solution for Microsoft SQL Server
 
Comprehensive and Simplified Management for VMware vSphere Environments - now...
Comprehensive and Simplified Management for VMware vSphere Environments - now...Comprehensive and Simplified Management for VMware vSphere Environments - now...
Comprehensive and Simplified Management for VMware vSphere Environments - now...
 
Oracle Virtualization Best Practices
Oracle Virtualization Best PracticesOracle Virtualization Best Practices
Oracle Virtualization Best Practices
 
Case Study: Developing a Vblock System-based Private Cloud Platform with Pupp...
Case Study: Developing a Vblock System-based Private Cloud Platform with Pupp...Case Study: Developing a Vblock System-based Private Cloud Platform with Pupp...
Case Study: Developing a Vblock System-based Private Cloud Platform with Pupp...
 
SQL Saturday San Diego
SQL Saturday San DiegoSQL Saturday San Diego
SQL Saturday San Diego
 
Cio Breakfast Roundtable 05142009 Final Virtualization
Cio Breakfast Roundtable 05142009 Final VirtualizationCio Breakfast Roundtable 05142009 Final Virtualization
Cio Breakfast Roundtable 05142009 Final Virtualization
 
Scaling Oracle 12c database performance with EMC XtremIO storage in a Databas...
Scaling Oracle 12c database performance with EMC XtremIO storage in a Databas...Scaling Oracle 12c database performance with EMC XtremIO storage in a Databas...
Scaling Oracle 12c database performance with EMC XtremIO storage in a Databas...
 
VMworld 2013: Software-Defined Storage: The VCDX Way
VMworld 2013: Software-Defined Storage: The VCDX Way VMworld 2013: Software-Defined Storage: The VCDX Way
VMworld 2013: Software-Defined Storage: The VCDX Way
 
ovm3-server-pool-459310
ovm3-server-pool-459310ovm3-server-pool-459310
ovm3-server-pool-459310
 
V sphere 5 roadshow final
V sphere 5 roadshow finalV sphere 5 roadshow final
V sphere 5 roadshow final
 

Más de Principled Technologies

Improve performance and gain room to grow by easily migrating to a modern Ope...
Improve performance and gain room to grow by easily migrating to a modern Ope...Improve performance and gain room to grow by easily migrating to a modern Ope...
Improve performance and gain room to grow by easily migrating to a modern Ope...
Principled Technologies
 
Increase security, sustainability, and efficiency with robust Dell server man...
Increase security, sustainability, and efficiency with robust Dell server man...Increase security, sustainability, and efficiency with robust Dell server man...
Increase security, sustainability, and efficiency with robust Dell server man...
Principled Technologies
 

Más de Principled Technologies (20)

Dell APEX Cloud Platform for Red Hat OpenShift: An easily deployable and powe...
Dell APEX Cloud Platform for Red Hat OpenShift: An easily deployable and powe...Dell APEX Cloud Platform for Red Hat OpenShift: An easily deployable and powe...
Dell APEX Cloud Platform for Red Hat OpenShift: An easily deployable and powe...
 
Upgrade your cloud infrastructure with Dell PowerEdge R760 servers and VMware...
Upgrade your cloud infrastructure with Dell PowerEdge R760 servers and VMware...Upgrade your cloud infrastructure with Dell PowerEdge R760 servers and VMware...
Upgrade your cloud infrastructure with Dell PowerEdge R760 servers and VMware...
 
Upgrade your cloud infrastructure with Dell PowerEdge R760 servers and VMware...
Upgrade your cloud infrastructure with Dell PowerEdge R760 servers and VMware...Upgrade your cloud infrastructure with Dell PowerEdge R760 servers and VMware...
Upgrade your cloud infrastructure with Dell PowerEdge R760 servers and VMware...
 
Realize 2.1X the performance with 20% less power with AMD EPYC processor-back...
Realize 2.1X the performance with 20% less power with AMD EPYC processor-back...Realize 2.1X the performance with 20% less power with AMD EPYC processor-back...
Realize 2.1X the performance with 20% less power with AMD EPYC processor-back...
 
Improve performance and gain room to grow by easily migrating to a modern Ope...
Improve performance and gain room to grow by easily migrating to a modern Ope...Improve performance and gain room to grow by easily migrating to a modern Ope...
Improve performance and gain room to grow by easily migrating to a modern Ope...
 
Boost PC performance: How more available memory can improve productivity
Boost PC performance: How more available memory can improve productivityBoost PC performance: How more available memory can improve productivity
Boost PC performance: How more available memory can improve productivity
 
Deploy with confidence: VMware Cloud Foundation 5.1 on next gen Dell PowerEdg...
Deploy with confidence: VMware Cloud Foundation 5.1 on next gen Dell PowerEdg...Deploy with confidence: VMware Cloud Foundation 5.1 on next gen Dell PowerEdg...
Deploy with confidence: VMware Cloud Foundation 5.1 on next gen Dell PowerEdg...
 
Upgrade your cloud infrastructure with Dell PowerEdge R760 servers and VMware...
Upgrade your cloud infrastructure with Dell PowerEdge R760 servers and VMware...Upgrade your cloud infrastructure with Dell PowerEdge R760 servers and VMware...
Upgrade your cloud infrastructure with Dell PowerEdge R760 servers and VMware...
 
A comparison of security features in Dell, HP, and Lenovo PC systems
A comparison of security features in Dell, HP, and Lenovo PC systemsA comparison of security features in Dell, HP, and Lenovo PC systems
A comparison of security features in Dell, HP, and Lenovo PC systems
 
Increase security, sustainability, and efficiency with robust Dell server man...
Increase security, sustainability, and efficiency with robust Dell server man...Increase security, sustainability, and efficiency with robust Dell server man...
Increase security, sustainability, and efficiency with robust Dell server man...
 
Increase security, sustainability, and efficiency with robust Dell server man...
Increase security, sustainability, and efficiency with robust Dell server man...Increase security, sustainability, and efficiency with robust Dell server man...
Increase security, sustainability, and efficiency with robust Dell server man...
 
Scale up your storage with higher-performing Dell APEX Block Storage for AWS ...
Scale up your storage with higher-performing Dell APEX Block Storage for AWS ...Scale up your storage with higher-performing Dell APEX Block Storage for AWS ...
Scale up your storage with higher-performing Dell APEX Block Storage for AWS ...
 
Scale up your storage with higher-performing Dell APEX Block Storage for AWS
Scale up your storage with higher-performing Dell APEX Block Storage for AWSScale up your storage with higher-performing Dell APEX Block Storage for AWS
Scale up your storage with higher-performing Dell APEX Block Storage for AWS
 
Get in and stay in the productivity zone with the HP Z2 G9 Tower Workstation
Get in and stay in the productivity zone with the HP Z2 G9 Tower WorkstationGet in and stay in the productivity zone with the HP Z2 G9 Tower Workstation
Get in and stay in the productivity zone with the HP Z2 G9 Tower Workstation
 
Open up new possibilities with higher transactional database performance from...
Open up new possibilities with higher transactional database performance from...Open up new possibilities with higher transactional database performance from...
Open up new possibilities with higher transactional database performance from...
 
Improving database performance and value with an easy migration to Azure Data...
Improving database performance and value with an easy migration to Azure Data...Improving database performance and value with an easy migration to Azure Data...
Improving database performance and value with an easy migration to Azure Data...
 
Realize better value and performance migrating from Azure Database for Postgr...
Realize better value and performance migrating from Azure Database for Postgr...Realize better value and performance migrating from Azure Database for Postgr...
Realize better value and performance migrating from Azure Database for Postgr...
 
Realize better value and performance migrating from Azure Database for Postgr...
Realize better value and performance migrating from Azure Database for Postgr...Realize better value and performance migrating from Azure Database for Postgr...
Realize better value and performance migrating from Azure Database for Postgr...
 
Set up students and teachers to excel now and in the future with Intel proces...
Set up students and teachers to excel now and in the future with Intel proces...Set up students and teachers to excel now and in the future with Intel proces...
Set up students and teachers to excel now and in the future with Intel proces...
 
Finding the path to AI success with the Dell AI portfolio - Summary
Finding the path to AI success with the Dell AI portfolio - SummaryFinding the path to AI success with the Dell AI portfolio - Summary
Finding the path to AI success with the Dell AI portfolio - Summary
 

Último

+971581248768>> SAFE AND ORIGINAL ABORTION PILLS FOR SALE IN DUBAI AND ABUDHA...
+971581248768>> SAFE AND ORIGINAL ABORTION PILLS FOR SALE IN DUBAI AND ABUDHA...+971581248768>> SAFE AND ORIGINAL ABORTION PILLS FOR SALE IN DUBAI AND ABUDHA...
+971581248768>> SAFE AND ORIGINAL ABORTION PILLS FOR SALE IN DUBAI AND ABUDHA...
?#DUbAI#??##{{(☎️+971_581248768%)**%*]'#abortion pills for sale in dubai@
 
Cloud Frontiers: A Deep Dive into Serverless Spatial Data and FME
Cloud Frontiers:  A Deep Dive into Serverless Spatial Data and FMECloud Frontiers:  A Deep Dive into Serverless Spatial Data and FME
Cloud Frontiers: A Deep Dive into Serverless Spatial Data and FME
Safe Software
 

Último (20)

Polkadot JAM Slides - Token2049 - By Dr. Gavin Wood
Polkadot JAM Slides - Token2049 - By Dr. Gavin WoodPolkadot JAM Slides - Token2049 - By Dr. Gavin Wood
Polkadot JAM Slides - Token2049 - By Dr. Gavin Wood
 
From Event to Action: Accelerate Your Decision Making with Real-Time Automation
From Event to Action: Accelerate Your Decision Making with Real-Time AutomationFrom Event to Action: Accelerate Your Decision Making with Real-Time Automation
From Event to Action: Accelerate Your Decision Making with Real-Time Automation
 
Top 10 Most Downloaded Games on Play Store in 2024
Top 10 Most Downloaded Games on Play Store in 2024Top 10 Most Downloaded Games on Play Store in 2024
Top 10 Most Downloaded Games on Play Store in 2024
 
+971581248768>> SAFE AND ORIGINAL ABORTION PILLS FOR SALE IN DUBAI AND ABUDHA...
+971581248768>> SAFE AND ORIGINAL ABORTION PILLS FOR SALE IN DUBAI AND ABUDHA...+971581248768>> SAFE AND ORIGINAL ABORTION PILLS FOR SALE IN DUBAI AND ABUDHA...
+971581248768>> SAFE AND ORIGINAL ABORTION PILLS FOR SALE IN DUBAI AND ABUDHA...
 
Tata AIG General Insurance Company - Insurer Innovation Award 2024
Tata AIG General Insurance Company - Insurer Innovation Award 2024Tata AIG General Insurance Company - Insurer Innovation Award 2024
Tata AIG General Insurance Company - Insurer Innovation Award 2024
 
Boost Fertility New Invention Ups Success Rates.pdf
Boost Fertility New Invention Ups Success Rates.pdfBoost Fertility New Invention Ups Success Rates.pdf
Boost Fertility New Invention Ups Success Rates.pdf
 
Cloud Frontiers: A Deep Dive into Serverless Spatial Data and FME
Cloud Frontiers:  A Deep Dive into Serverless Spatial Data and FMECloud Frontiers:  A Deep Dive into Serverless Spatial Data and FME
Cloud Frontiers: A Deep Dive into Serverless Spatial Data and FME
 
A Year of the Servo Reboot: Where Are We Now?
A Year of the Servo Reboot: Where Are We Now?A Year of the Servo Reboot: Where Are We Now?
A Year of the Servo Reboot: Where Are We Now?
 
Data Cloud, More than a CDP by Matt Robison
Data Cloud, More than a CDP by Matt RobisonData Cloud, More than a CDP by Matt Robison
Data Cloud, More than a CDP by Matt Robison
 
TrustArc Webinar - Stay Ahead of US State Data Privacy Law Developments
TrustArc Webinar - Stay Ahead of US State Data Privacy Law DevelopmentsTrustArc Webinar - Stay Ahead of US State Data Privacy Law Developments
TrustArc Webinar - Stay Ahead of US State Data Privacy Law Developments
 
Workshop - Best of Both Worlds_ Combine KG and Vector search for enhanced R...
Workshop - Best of Both Worlds_ Combine  KG and Vector search for  enhanced R...Workshop - Best of Both Worlds_ Combine  KG and Vector search for  enhanced R...
Workshop - Best of Both Worlds_ Combine KG and Vector search for enhanced R...
 
The 7 Things I Know About Cyber Security After 25 Years | April 2024
The 7 Things I Know About Cyber Security After 25 Years | April 2024The 7 Things I Know About Cyber Security After 25 Years | April 2024
The 7 Things I Know About Cyber Security After 25 Years | April 2024
 
HTML Injection Attacks: Impact and Mitigation Strategies
HTML Injection Attacks: Impact and Mitigation StrategiesHTML Injection Attacks: Impact and Mitigation Strategies
HTML Injection Attacks: Impact and Mitigation Strategies
 
Apidays Singapore 2024 - Building Digital Trust in a Digital Economy by Veron...
Apidays Singapore 2024 - Building Digital Trust in a Digital Economy by Veron...Apidays Singapore 2024 - Building Digital Trust in a Digital Economy by Veron...
Apidays Singapore 2024 - Building Digital Trust in a Digital Economy by Veron...
 
Apidays New York 2024 - The Good, the Bad and the Governed by David O'Neill, ...
Apidays New York 2024 - The Good, the Bad and the Governed by David O'Neill, ...Apidays New York 2024 - The Good, the Bad and the Governed by David O'Neill, ...
Apidays New York 2024 - The Good, the Bad and the Governed by David O'Neill, ...
 
ProductAnonymous-April2024-WinProductDiscovery-MelissaKlemke
ProductAnonymous-April2024-WinProductDiscovery-MelissaKlemkeProductAnonymous-April2024-WinProductDiscovery-MelissaKlemke
ProductAnonymous-April2024-WinProductDiscovery-MelissaKlemke
 
Understanding Discord NSFW Servers A Guide for Responsible Users.pdf
Understanding Discord NSFW Servers A Guide for Responsible Users.pdfUnderstanding Discord NSFW Servers A Guide for Responsible Users.pdf
Understanding Discord NSFW Servers A Guide for Responsible Users.pdf
 
TrustArc Webinar - Unlock the Power of AI-Driven Data Discovery
TrustArc Webinar - Unlock the Power of AI-Driven Data DiscoveryTrustArc Webinar - Unlock the Power of AI-Driven Data Discovery
TrustArc Webinar - Unlock the Power of AI-Driven Data Discovery
 
Scaling API-first – The story of a global engineering organization
Scaling API-first – The story of a global engineering organizationScaling API-first – The story of a global engineering organization
Scaling API-first – The story of a global engineering organization
 
Apidays New York 2024 - Scaling API-first by Ian Reasor and Radu Cotescu, Adobe
Apidays New York 2024 - Scaling API-first by Ian Reasor and Radu Cotescu, AdobeApidays New York 2024 - Scaling API-first by Ian Reasor and Radu Cotescu, Adobe
Apidays New York 2024 - Scaling API-first by Ian Reasor and Radu Cotescu, Adobe
 

DBaaS with VMware vCAC, EMC XtremIO, and Cisco UCS

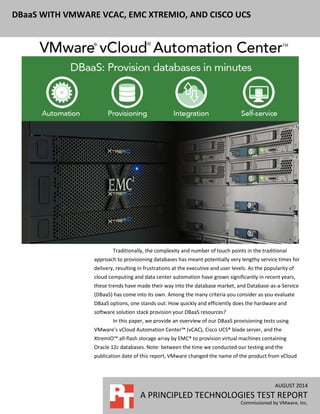
  • 1. AUGUST 2014 A PRINCIPLED TECHNOLOGIES TEST REPORT Commissioned by VMware, Inc. DBaaS WITH VMWARE VCAC, EMC XTREMIO, AND CISCO UCS Traditionally, the complexity and number of touch points in the traditional approach to provisioning databases has meant potentially very lengthy service times for delivery, resulting in frustrations at the executive and user levels. As the popularity of cloud computing and data center automation have grown significantly in recent years, these trends have made their way into the database market, and Database-as-a-Service (DBaaS) has come into its own. Among the many criteria you consider as you evaluate DBaaS options, one stands out: How quickly and efficiently does the hardware and software solution stack provision your DBaaS resources? In this paper, we provide an overview of our DBaaS provisioning tests using VMware’s vCloud Automation Center™ (vCAC), Cisco UCS® blade server, and the XtremIO™ all-flash storage array by EMC® to provision virtual machines containing Oracle 12c databases. Note: between the time we conducted our testing and the publication date of this report, VMware changed the name of the product from vCloud
  • 2. A Principled Technologies test report 2DBaaS with VMware vCAC, EMC XtremIO, and Cisco UCS Automation Center™ to vRealize Automation, which is part of the vRealize Suite Cloud Management Platform. In the Principled Technologies labs, we used vCAC to provision database VMs in an environment with four Cisco UCS B200 M3 servers and an EMC XtremIO storage array. We tested three provisioning scenarios:  A single large VM with 1 TB of virtual disks containing an Oracle 12c database size of 408 GB  Multiple VMs (17) of virtual disk sizes ranging from 50 GB to 1 TB, containing Oracle 12c databases ranging in size from 30 GB to 408 GB  A single VM provisioned 50 times with 50 GB of virtual disks and an Oracle 12c database size of 30 GB In each scenario, we ran an OLTP workload concurrently in the DBaaS infrastructure while the provisioning scenarios executed, simulating a typical Oracle production environment. Across these scenarios, we found vCloud Automation Center was able to quickly provision VMs in a variety of complex environments. Using VMware vCloud Automation Center to provide a DBaaS platform for your customers has the potential to reduce administrative overhead, improve responsiveness and service quality, and free your IT staff time to innovate and improve processes, while customers provision database environments quickly. THE PUSH FOR DBaaS In the past, the traditional manual methods of provisioning databases to both physical and virtual environments have proved to be time consuming, error prone, and frustrating. When a group within an enterprise submitted a VM provisioning request to IT, they could wait days or even weeks for review and for IT to carry out their request depending on the policies and procedures of the organization. Each VM would have to be created from scratch, or from base templates, and manually configured according to the needs of the request. The time spent on reviewing requirements, design and approval, equipment procurement, manual build, testing, and finally deploying, was time lost to the user and to the business. Not only were application owners frustrated, but the CIO or CFO taking a high-level business view would question why all the investments in IT had not generated a more agile and faster-time-to-market organization. Additionally, by definition, the manually executed steps not only took longer, but also were more prone to human error than if they had been automated. IT staff could overlook or ignore organization policies and procedures and make mistakes in configuration details. Even simple typos could delay a project.
  • 3. A Principled Technologies test report 3DBaaS with VMware vCAC, EMC XtremIO, and Cisco UCS To increase automation, deliver database applications faster, and showcase a catalog of services, many IT organizations are researching DBaaS solutions. The benefits to automation can include:  Integrated deployment of best practices  Automation workflow that can be updated over time  Consistent delivery times and quality of services deployment  Fast provisioning of complex databases and applications  Unified management of the DBaaS platform Now that public cloud service providers can deliver functioning VMs within minutes, internal enterprise customers expect comparable response time. Automatic provisioning of database VMs through VMware vCloud Automation Center makes these increased expectations realistic. Using vCAC, customers can use a self-service option to request VMs. This removes burden from IT staff, as they no longer need to manually provision VMs. They can devote their time to more strategic tasks and the company gains agility. Because automatic provisioning can reduce errors, service levels and reliability can also improve. In this study, we detail our experience using vCloud Automation Center to execute three VM-provisioning scenarios. We found that vCAC provided DBaaS VMs in a matter of minutes in all our scenarios. In the next sections, we describe each scenario in depth and present our findings. See Appendix A for system configuration details, and Appendix B and Appendix C for detailed testing steps. vCAC TEMPLATES Template overview vCAC uses vSphere® VM templates to create blueprints used for provisioning. A blueprint allows IT to publish a VM template with a user-friendly name, optional picture, and options to change details such as CPU, memory, and disk space. These blueprints are published to a self-service catalog that leverages Active Directory services to limit who can order VMs from each catalog. IT can also require that any new requests be left pending DBA or IT approval before being acted upon. When users submit a catalog request, vCAC leverages the VM template, much the same way a user would to create a VM, though with automation. Template sizing in our tests Our VMs comprised multiple virtual disks: one for the operating system, four for Oracle database files, and four for Oracle log files. In this report, we refer to our VMs by name by the sum of the data virtual disks storing the Oracle database. In other words,
  • 4. A Principled Technologies test report 4DBaaS with VMware vCAC, EMC XtremIO, and Cisco UCS our 50GB VM used four virtual disks for Oracle database data files, each approximately 13 GB in size, totaling 50 GB. The 50GB VM also used another virtual disk file for its operating system, along with four virtual disks for its log files. For specific LUN and virtual disk layout details, see the Our storage configuration section. Therefore, the provisioned sizes of the VMs are larger than the names we use suggest. As most environments and administrators would, we allowed for extra data growth space within each VM. Figure 1 shows the exact size and configuration of each of our VMs. We report the size from the dba_segments view in Oracle. VM OS virtual disk Log virtual disks Data virtual disks Approximate size of database files w/in the VM Total size – all virtual disks 1 TB 25 GB 4 × 5 GB 4 × 250 GB 407.97 GB 1,045 GB 300 GB 25 GB 4 × 2 GB 4 × 75 GB 254.62 GB 333 GB 100 GB 25 GB 4 × 1 GB 4 × 25 GB 80.87 GB 129 GB 50 GB 25 GB 4 × 1 GB 4 × 13 GB 30.45 GB 81 GB Figure 1: The configuration and sizing of the VM templates used in our scenarios as reported by running SELECT SUM (bytes) / 1024 / 1024 / 1024 AS GB FROM dba_segments; in sqlplus. RESULTS OF OUR TESTING Results summary In Figure 2, we present a summary of our findings in the three VM-provisioning scenarios. vCAC provisioned the single 1TB VM in just over six minutes, the 17 VMs of varying sizes in just under 26 minutes, and finally the 50 VMs, each 50GB in dataset size, were provisioned in less than 40 minutes. In all tests, the virtual machines ran Oracle Enterprise Linux® release 6.5 with the Red Hat® compatible kernel, and Oracle 12c (12.1.0.1.0) Enterprise Edition was installed. In the following sections, we review the specific VM template sizing and definitions, and then we review the findings from each scenario in greater detail. Scenario Total elapsed scenario time (mm:ss) 1TB VM scenario 06:13 Mixed VM size scenario 25:57 50GB VM scenario 39:25 Figure 2: Final results for the median run of each scenario.
  • 5. A Principled Technologies test report 5DBaaS with VMware vCAC, EMC XtremIO, and Cisco UCS The three VM provisioning scenarios Scenario 1 – Provisioning a single large VM In any environment, there can be many copies of a production database to support activities such as testing of patches, reports, customizations, integrations, and development activities. The goal of this single large 1TB-VM provisioning test was to simulate an application owner requesting a single large VM, and to measure the provisioning time of the 1TB VM. We prepared a vCAC blueprint containing the 1TB-VM template. Within the constructs of vCAC, blueprints define the resources for the VM to be provisioned and can be configured for VMs, vApps, physical, or cloud machines. We separated the virtual disks into disks containing log and database data and in the blueprint, we designated specific LUNs on the XtremIO array, much as a database administrator would do manually, or perhaps as a service provider would wish to do for performance reasons. Using the vCAC Service Catalog, we requested the provisioning of the single large VM using the published blueprint. Figure 3 shows the vCAC Service Catalog with blueprints for users to choose from, making it easy to provision the VM they need. Figure 3: The vCAC Service Catalog. We then timed how long it took vCAC to complete the provisioning. Our timing results measure the entire process from the click to order the VM to when the VM is ready to accept requests. During the provisioning process, we ran an OLTP workload on eight existing VMs, with two VMs per server in the cluster. In our tests, it took only 6 minutes, 13 seconds to complete the provisioning process and to present a 1TB database VM to the user (see Figure 4).
  • 6. A Principled Technologies test report 6DBaaS with VMware vCAC, EMC XtremIO, and Cisco UCS VM size Total time (mm:ss) 1 TB 06:13 Figure 4: Time the vCAC needed to provision a 1TB VM. Scenario 2 – Provisioning multiple VMs of mixed sizes In many businesses, VM provisioning requests can come from several employees or clients in a short span of time. To show that vCAC could handle such a situation, we used the 1TB-VM from our previous scenario, as well as 10 VMs with 50GB database disks, four VMs with 100GB database disks, and two VMs with 300GB database disks – for a total of 17 VMs and approximately 2.5 TB. We requested these VMs as close to simultaneously as the user interface would allow to simulate a peak provisioning request. To design this scenario, as a one-time task we created four blueprints, one for each VM size, to provision the VMs. We then did the following for the test: 1) We logged into vCAC and navigated to the catalog of published blueprints. 2) A single person executed four requests, back to back, as each blueprint request had to be executed on its own. We had only the necessary click time between each request, resulting in an almost-concurrent execution of the four requests. For each request, we edited the number of VMs to be provisioned for that blueprint. Therefore, while we requested 17 VMs, we performed four separate requests within vCAC. 3) We then timed how long it took vCAC to complete the provisioning. Again, during the provisioning process, we ran an OLTP workload on eight existing VMs, with two VMs per server in the cluster. In our tests, it took vCAC 25 minutes, 57 seconds to complete the provisioning process for our mixed-size set and have the VMs up and running. The total elapsed time measures from the click-to-order request of the first blueprint, to the last VM in the scenario coming online. Because we provisioned different numbers and sizes of VMs in this scenario, each size VM had a different average completion time, which we show in Figure 5. 1TB (1x) 300GB (2x) 100GB (4x) 50GB (10x) 579 427.5 212.8 167.7 Figure 5: Average completion times for the VMs. Taking the total size for all 17 VMs, and the total time from the first request to the last VM provision, the DBaaS stack was able to provision one VM every 91.6 seconds on average. Each group and size of VMs had different completion times, as we specify in the table and chart below. Figures 6 and 7 show the time vCAC and vSphere took to clone each individual VM in the scenario.
  • 7. A Principled Technologies test report 7DBaaS with VMware vCAC, EMC XtremIO, and Cisco UCS VM size Total time (mm:ss) 1TB 0:09:39 300GB_1 0:08:14 300GB_2 0:06:01 100GB_1 0:02:46 100GB_2 0:04:31 100GB_3 0:02:45 100GB_4 0:04:09 50GB_1 0:03:39 50GB_2 0:03:09 50GB_3 0:03:18 50GB_4 0:02:14 50GB_5 0:02:00 50GB_6 0:03:03 50GB_7 0:03:23 50GB_8 0:02:49 50GB_9 0:02:54 50GB_10 0:01:28 Figure 6: Time the vCAC needed to provision VMs in the multiple-VM scenario. Figure 7: The time to clone each individual VM in the multiple request scenario. 0:00 0:05 0:10 0:15 0:20 0:25 0:30 1 2 1 2 3 4 1 2 3 4 5 6 7 8 9 10 1TB300GB100GB50GB Time Stamp (h:mm) VMsize Mixed VM size provisioning test times
  • 8. A Principled Technologies test report 8DBaaS with VMware vCAC, EMC XtremIO, and Cisco UCS Scenario 3 – Provisioning of a single VM 50 times At times, one or more internal customers need to provision a large number of identical VMs simultaneously. Alternatively, an IT department may schedule several database VM provisions over the weekend to prepare for the coming week’s work. The vCAC scheduling options let it perform provisioning tasks with little to no supervision on a regular schedule. To test vCAC’s ability to meet these needs we used the 50GB blueprint from the above scenario and did the following: 1) We logged into vCAC and navigated to the catalog of published blueprints. 2) A single person executed one 50-VM request of the 50GB blueprint. Therefore, in this scenario, the 50 VMs were provisioned using just one request and a few clicks. 3) We then timed how long it took vCAC to complete the provisioning. Again, during the provisioning process, we ran an OLTP workload on eight existing VMs, with two VMs per server in the cluster. In our tests, it took just 39 minutes, 25 seconds to complete the provisioning of 50 VMs, providing the company with a new VM, on average, every 47 seconds. This 50- VM request was executed by a single person. We ran all three scenarios three times, deleting all cloned VMs between runs. We report the median run based on the total time to complete the scenario. Figures 8 and 9 show our results. VM size Total time (mm:ss) 50GB_1 0:03:02 50GB_2 0:03:12 50GB_3 0:02:48 50GB_4 0:03:03 50GB_5 0:01:45 50GB_6 0:02:49 50GB_7 0:02:51 50GB_8 0:02:48 50GB_9 0:01:43 50GB_10 0:02:57 50GB_11 0:02:47 50GB_12 0:02:47 50GB_13 0:02:47 50GB_14 0:02:58 50GB_15 0:02:47 50GB_16 0:02:48 50GB_17 0:01:45
  • 9. A Principled Technologies test report 9DBaaS with VMware vCAC, EMC XtremIO, and Cisco UCS VM size Total time (mm:ss) 50GB_18 0:03:08 50GB_19 0:02:48 50GB_20 0:01:45 50GB_21 0:02:46 50GB_22 0:03:07 50GB_23 0:02:47 50GB_24 0:02:58 50GB_25 0:02:17 50GB_26 0:01:36 50GB_27 0:01:43 50GB_28 0:01:44 50GB_29 0:02:47 50GB_30 0:02:47 50GB_31 0:02:47 50GB_32 0:02:57 50GB_33 0:02:47 50GB_34 0:02:49 50GB_35 0:02:49 50GB_36 0:02:47 50GB_37 0:01:43 50GB_38 0:02:56 50GB_39 0:02:46 50GB_40 0:03:07 50GB_41 0:02:46 50GB_42 0:02:52 50GB_43 0:02:45 50GB_44 0:02:51 50GB_45 0:02:45 50GB_46 0:02:51 50GB_47 0:02:46 50GB_48 0:01:44 50GB_49 0:01:58 50GB_50 0:01:42 Figure 8: Time the vCAC needed to provision VMs in the 50 VM scenario.
  • 10. A Principled Technologies test report 10DBaaS with VMware vCAC, EMC XtremIO, and Cisco UCS Figure 9: The time to clone each individual VM in the 50 VM scenario. OTHER TEST DETAILS Background storage activity As it is unlikely that real-world business would clone VMs on completely idle storage, we created a background workload to simulate typical transactional application behavior on the array during the VM provisioning test scenarios. We created eight VMs, two per each of the four Cisco® blade servers, with Oracle 12c databases. Using the HammerDB utility, we created a 30GB TPC-C database, and ran a constant TPC-C-based workload on each of the eight workload VMs while the provisioning test scenarios took place. Each of these VMs ran with 150 HammerDB users and used keying time and think time from within HammerDB. Our storage configuration We created multiple LUNs on the XtremIO array, and aligned these LUNs with the virtual disks used on the VMs (see Figure 10). Each VM comprised a virtual disk for the operating system, four virtual disks for database data files, and four virtual disks for database log files. The underlying XtremIO LUNs aligned with this approach for the VMs’ virtual disks. In addition to these nine LUNs, we created two additional LUNs to hold the VM templates and the background activity VMs. See Appendix C for detailed steps to configure the storage. 0:00 0:05 0:10 0:15 0:20 0:25 0:30 0:35 0:40 1 5 10 15 20 25 30 35 40 45 50 Timestamp (h:mm) VMs 50 GB Median Run
  • 11. A Principled Technologies test report 11DBaaS with VMware vCAC, EMC XtremIO, and Cisco UCS Figure 10: The VM virtual disk layout and XtremIO LUN mapping. We sized each LUN to ensure that it could hold the necessary virtual disks for each scenario. The background activity LUN was 921 GB, the VM template LUN was 1.59 TB, the operating system LUN was 2.09 TB, the four data LUNs were 660 GB each, and the four log LUNs were 55 GB each. VMware vSphere settings vCAC takes advantage of vSphere’s Storage APIs for Array Integration (VAAI) for communication between the Cisco blade hosts and the XtremIO array. VAAI allows the storage to take over certain functions, which reduces the stress on the hosts and accelerates operations. According to VMware, “The goal of VAAI is to help storage vendors provide hardware assistance to speed up VMware I/O operations that are more efficiently accomplished in the storage hardware.”1 We ensured that VMware vSphere Storage APIs (VAAI) was enabled, and ran vSphere with otherwise default settings. We ran with default VMware vSphere settings after ensuring that VAAI was enabled. We decided to keep default settings after experimentation with the MaxHWTransferSize setting showed no performance increase for our environment. 1 www.vmware.com/files/pdf/techpaper/VMware-vSphere-Storage-API-Array-Integration.pdf
  • 12. A Principled Technologies test report 12DBaaS with VMware vCAC, EMC XtremIO, and Cisco UCS THE PRODUCTS WE TESTED About VMware vCloud Automation Center According to VMware, “VMware vCloud Automation Center (now referred to as vRealize Automation) empowers IT to accelerate the delivery and ongoing management of personalized, business-relevant infrastructure, application and custom services while improving overall IT efficiency.” Figure 11 illustrates how vCAC fits into the VMware software stack and how it presents VMs to the end user. Figure 11: The vCloud Automation Center software stack. vCloud Automation Center allows enterprises to deliver a self-service experience that allows users to provision VMs from a unified IT service catalog, with the ability to deploy across infrastructures based on products from multiple vendors. Although not in the scope of our testing, vCAC provides functionality for workflow and review. Reviewing VM requests can be important for many reasons, such as validating company standards or policies, or verifying that another database has not already been provisioned for the same reason. Also, because many companies can have hundreds of projects underway, some DBA teams schedule weekend refreshes of databases. In this way, developers and others can start work Monday morning using the newly created databases. vCAC
  • 13. A Principled Technologies test report 13DBaaS with VMware vCAC, EMC XtremIO, and Cisco UCS supports this scheduling of workflows. If you are interested about scheduling workflows, please read the vCAC Extensibility Guide2 . VCAC is available as a standalone product (in three editions) or as part of VMware vCloud® Suite. To learn more, visit www.vmware.com/products/vcloud-automation-center/. About the EMC XtremIO 100% Flash Scale-Out Enterprise storage array XtremIO is an all-flash scale-out enterprise storage array designed to substantially boost I/O performance. According to EMC “XtremIO delivers new levels of real-world performance, administrative ease, and advanced data services for applications.” (See Figure 12.) Figure 12: XtremIO Storage Management Application. In this study, one 10TB X-Brick supported the vCAC provisioning of multiple virtualized Oracle databases. The multiple sets of tests showed provisioning time was fast, ranging from 373 seconds for a large 1TB VM, to just 47 seconds on average for smaller 50GB VMs. According to EMC specifications, the XtremIO 5TB, 10TB, and 20TB X-Bricks are populated by either 400GB or 800GB eMLC solid-state drives (SSDs). The Starter X-Brick has 13 400GB SSDs for a capacity of 5.2 TB and can be dynamically expanded online up to 10 TB. The 10TB and 20TB X-Bricks have 25 SSDs per system with capacities of 400 GB and 800 GB, respectively. With the current qualified six X-Brick clusters orderable today, that allows for up to 120 TB of physical capacity.3 2 pubs.vmware.com/vCAC-61/topic/com.vmware.ICbase/PDF/vcloud-automation-center-61-extensibility.pdf 3 xtremio.com/capacity
  • 14. A Principled Technologies test report 14DBaaS with VMware vCAC, EMC XtremIO, and Cisco UCS As Figure 13 shows, the provisioning and LUN mapping process on XtremIO involves just a few clicks. Figure 13: XtremIO Storage Management Application – provisioning LUNs. For features, XtremIO includes inline data deduplication4 , compression5 , and snapshots as part of its standard offering. Inline data deduplication and compression can potentially translate into significant space savings across databases and applications. Snapshots in XtremIO are designed by EMC to be very space efficient and to enable the instant availability of copies of a database.6 Business-critical databases and applications typically require a high degree of availability and integration with virtualized solutions. XtremIO’s N-way active-active controller architecture is created to be extremely reliable and use redundancy wherever possible.7 XtremIO Data Protection (XDP) uses N+2 protection on every X-Brick, and seeks to provide protection against multiple SSD failures.8 XtremIO integrates with VMware by providing a Virtual Storage Integrator (VSI) and VAAI plug-ins at no charge. Using EMC protection technologies like RecoverPoint, VPLEX, or Data Domain alongside XtremIO offers integrations with these protection solutions, extending the availability of your data. The performance, space saving technologies, and built-in data protection and integration with other EMC protection technologies can give your business a powerful option for virtualization storage. To learn more visit www.emc.com/XtremIO and for the latest technical papers visit: www.emc.com/everythingoracle. 4 xtremio.com/data-reduction 5 Compression was available in Q3 2014 but was not included in this testing 6 xtremio.com/snapshot 7 xtremio.com/high-availability 8 xtremio.com/data-protection-2
  • 15. A Principled Technologies test report 15DBaaS with VMware vCAC, EMC XtremIO, and Cisco UCS Storage deduplication Deduplication refers to the ability of the XtremIO array to automatically remove redundant data as it enters the storage, before writing it to the flash drives. XtremIO offers inline and always-on deduplication, which allows the data deduplication to be performed in the application I/O path. EMC has designed the deduplication engine to remove latency overhead, performance impacts, and post-processing operations, meaning that for an Oracle DBA all these benefits could come alongside space-efficient database copy capabilities. XtremIO reports the deduplication and overall efficiency of the entire storage array, and after our test scenarios, we saw an efficiency of 5.59 to 1, as seen in Figure 14. We also had VM templates and the background activity VMs stored on the array, so the efficiency rate could vary based on your specific situation. Figure 14: Deduplication statistics from the XtremIO array console after our VM provisioning scenarios. EMC designed XtremIO inline deduplication to save DBAs space without performance penalties, and to reduce resource-consuming background processes that could hurt performance. 9 This testing was done without compression.
  • 16. A Principled Technologies test report 16DBaaS with VMware vCAC, EMC XtremIO, and Cisco UCS About the Cisco UCS B200 M3 Blade Server The Cisco UCS B200 M3 Blade Server is an enterprise-class blade server powered by the new Intel® Xeon® processor E5-2600 series to deliver high performance and outstanding I/O throughput for your applications. Supporting up to 384 GB of RAM with 24 DIMM slots, the Cisco UCS M200 M3 has expansive memory capabilities with Cisco Extended Memory Technology to support your heavy workloads. The B200 M3 blade will support a configuration of up to 768 GB when 32GB DIMMs are available later this year. According to Cisco, in addition to performance benefits, Cisco UCS “has the architectural advantage of not having to power and cool switches in each blade chassis. Having a larger power budget available for blades enables Cisco to design uncompromised expandability and capabilities in its blade servers…”10 thus saving enterprises power costs while offering competitive performance. The Cisco Nexus 5548UP switch offers unified ports that support Ethernet connections as well as Fibre Channel and Fibre Channel over Ethernet connections. The flexibility of the switch and its ports provide a unified networking system for both LAN and storage connections. With 32 ports, support for any Ethernet-based transport, and storage traffic including iSCSI, NAS, FC, RoE, and IBoE, the Nexus 5548UP switch provides excellent consolidation, scalability, and support for evolving technologies all while maintaining a small footprint in your datacenter.11 To learn more, see Appendix A for more detailed hardware specifications, or visit www.cisco.com/en/US/products/ps12288/index.html. IN CONCLUSION VMware vCloud Automation Center, which has been renamed vRealize Automation as part of the vRealize Cloud Management Platform, automates the process of provisioning database virtual machines, and is designed by VMware to help IT without sacrificing control, security, or flexibility. Automating time-consuming processes has the potential to enable growth, improve service quality, and free IT resources for innovation and process improvement. As businesses continue to evolve and grow, DBAs and IT departments must be able to keep up with demand. Quick and easy access to self-service portals, a streamlined provisioning process that incorporates IT best practices and security policies, and fast delivery of VMs all attribute to avoiding delays and providing for increasing demands. DBAs and IT retain control of the content, upgrades, provisioning, and accessibility of the database VMs while still able to quickly provide virtualized environments to meet the needs of their business. 10 www.cisco.com/c/en/us/products/servers-unified-computing/ucs-b200-m3-blade-server/index.html 11 www.cisco.com/c/en/us/products/switches/nexus-5548up-switch/index.html
  • 17. A Principled Technologies test report 17DBaaS with VMware vCAC, EMC XtremIO, and Cisco UCS In our tests, we found that vCAC was able to provide DBaaS and quickly provision database VMs when completing three provisioning scenarios: provisioning a single large VM containing an Oracle database, provisioning multiple VMs of varying sizes, and mass provisioning a single VM 50 times. For the 1TB database provisioning test it only took 373 seconds from the time of order to the availability of using the database. The second and third tests delivered similar results in that virtualized Oracle databases were provisioned every 47 to 92 seconds. All of these timings were captured while an active OLTP database load was running on eight VMs also on the XtremIO array, bringing the results closer to what customers might experience using the same infrastructure. Finally, the vCAC console using the blueprint approach made the provisioning process simple and easy by automating a more complex manual process. By using an automated provisioning solution such as VMware vCloud® Automation Center™ (vCAC), your company can save time, gain agility, and can be an excellent platform for providing database as a service (DBaaS) by allowing users to quickly deploy database VMs at their discretion.
  • 18. A Principled Technologies test report 18DBaaS with VMware vCAC, EMC XtremIO, and Cisco UCS APPENDIX A – SYSTEM CONFIGURATION INFORMATION Figure 15 provides detailed configuration information for the XtremIO storage array. Storage array EMC XtremIO  Number of storage shelves 1 × 24 disks enclosure Number of storage controllers 2 Controller OS XtremIO OS 2.4.1-11 Disk model number 24 × Hitachi® HUSML404 Disk size (GB) 400 Disk type SAS SSD Figure 15: Detailed configuration information for the storage array. Figure 16 provides detailed configuration information for the test systems. System 4x Cisco UCS B200 M3 server General Number of processor packages 2 Number of cores per processor 8 Number of hardware threads per core 2 System power management policy Default CPU Vendor Intel Name Xeon Model number E5-2680 Stepping 7 Socket type LGA2011 Core frequency (GHz) 2.7 Bus frequency 8.00 GT/s L1 cache 32 KB + 32 KB L2 cache 256 KB per core L3 cache 20 MB Platform Vendor and model number Cisco UCS B200 M3 Motherboard model number Cisco FCH1607GV4 BIOS name and version Cisco B200M3.2.1.1a.0.111220131105 BIOS settings Default Memory modules Total RAM in system (GB) 320 Vendor and model number 16 × Cisco UCS-MR-1X162RY-A16, 8 × Cisco UCS-MR- 1X082RY-A Type PC3-12800 Speed (MHz) 1,600 Speed running in the system (MHz) 1,333 Size (GB) (16×) 16, (8×) 8 Number of RAM module(s) 24 (16 + 8)
  • 19. A Principled Technologies test report 19DBaaS with VMware vCAC, EMC XtremIO, and Cisco UCS System 4x Cisco UCS B200 M3 server Chip organization Double-sided Rank Dual Hypervisor Name VMware vSphere 5.5.0 Build number 1331820 Language English RAID controller Vendor and model number LSI® MegaRAID® SAS 2004 Firmware version 20.10.1-0100 Hard drives Vendor and model number Seagate® A03-D146GC2 Number of drives 2 Size (GB) 146 RPM 15,000 Type SAS Converged I/O adapters Vendor and model number Cisco UCSB-MLOM-40G-01, Cisco UCS-VIC-M82-8P Type mLOM, Mezzanine Virtual machine operating system Name Oracle Enterprise Linux Release 6.5 Kernel 2.6.32-431.el6.x86_64 Language English Database software Oracle Database 12c Build 12.1.0.1.0 Database benchmarks Benchmark 1 HammerDB v2.15 Figure 16: Configuration information for the systems used in our tests. Figure 17 provides the firmware information for the Cisco hardware we used in our tests. UCS 5108 chassis Firmware version UCS Manager 2.2(1d) UCS 2208XP IO Module 1 & 2 2.2(1d) UCS 6248UP Fabric Interconnect 1 & 2 5.2(3)N2(2.21d) UCS B200 M3 blades Firmware version BIOS B200M3.2.2.1a.0.111220131105 CIMC Controller 2.2(1d) UCS VIC 1240 2.2(1d) Figure 17: Firmware information for the Cisco hardware used in our tests.
  • 20. A Principled Technologies test report 20DBaaS with VMware vCAC, EMC XtremIO, and Cisco UCS APPENDIX B – WHAT WE TESTED Hardware and software In our test bed, we configured the Cisco UCS 5108 Blade Server chassis with two cables coming from each FEX (four in total), going into two UCS 6248UP Fabric Interconnects (FIs). We then cabled each FI via two 10Gb Ethernet ports to two Cisco Nexus™ 5548UP switches, with two Ethernet links from each FI connected to each switch, resulting in a fully redundant infrastructure. We aggregated each set of two Ethernet ports into a port channel to ensure maximum bandwidth. For our Fibre connections, we cabled the EMC XtremIO directly to the two FIs via two Fibre cables each. Figure 18 illustrates our test bed. Figure 18: The test bed we used, with details on how the components were connected. We then configured four Cisco UCS B200 M3 blade servers with VMware vSphere 5.5. On a separate rack server, we configured a VMware vCenter server, connected it to the UCS chassis network, and created a cluster in the VMware vSphere Web Console using the four blade servers. We created two vSphere vSwitches on each blade server: the first for VM management and Oracle Application connections and the second for vMotion traffic. The management and Oracle Application vSwitches used two uplink ports.
  • 21. A Principled Technologies test report 21DBaaS with VMware vCAC, EMC XtremIO, and Cisco UCS Virtual machines We created four different sizes of VMs to serve as templates for the various cloning scenarios within vCAC. Each VM consisted of nine VMDKs: one 25GB drive for the OS, four equal sized VMDKs spread across four LUNs on the XtremIO array for data, and four equal sized VMDKs spread across four LUNs on the XtremIO array for Logs. The 1TB VM had 250GB data VMDKs, 5GB log VMDKs, and a 500GB Oracle database. The 300GB VM had 75GB data VMDKs, 2GB log VMDKs, and a 250GB Oracle database. The 100GB VM had 25GB data VMDKs, 1GB log VMDKs, and an 85GB Oracle database. The 50GB VM had 13GB data VMDKs, 1GB log VMDKs, and a 40GB Oracle database. We created a template from each of these VMs, and built vCAC blueprints to allow users to request clones based on the templates. Test tools HammerDB is an open-source benchmark tool that tests the database performance of many leading databases, including Oracle Database, Microsoft® SQL Server®, PostgreSQL®, MySQL™, and more. The benchmark includes two built-in workloads derived from industry-standard benchmarks: a transactional (TPC-C-like) workload and a data warehouse (TPC-H-like) workload. For more information about HammerDB, visit hammerora.sourceforge.net. In order to simulate a real work environment, we had eight VMs, two per server node, running a light database workload on the cluster. Our aim was not to saturate the hardware stack, but to create some activity to better highlight vCAC’s ability to improve provisioning time in a real-world environment. We used HammerDB on 30GB databases to exercise the storage during the provisioning tests. Storage layout Physical and virtual storage In our labs, we configured the EMC XtremIO array according to best practices. We coordinated with EMC XtremIO engineers on management access, cabling, tiering, and monitoring. We allocated high-performance storage volumes for the vSphere VMDKs. From the EMC XtremIO management console, we created four 660GB volumes for the data VMDKs, four 55GB volumes for the log VMDKs, one 2.1TB volume for the OS VMDKs, one 920GB volume for the HammerDB VMs, and one 1.6TB volume to hold the VM templates.
  • 22. A Principled Technologies test report 22DBaaS with VMware vCAC, EMC XtremIO, and Cisco UCS APPENDIX C – HOW WE TESTED Installing VMware vSphere 5.5 (ESXi) on the Cisco UCS B200 M3 blades 1. Insert the disk, and boot from disk. 2. On the Welcome screen, press Enter. 3. On the End User License Agreement (EULA) screen, press F11. 4. On the Select a Disk to Install or Upgrade Screen, select the relevant volume on which to install ESXi, and press Enter. 5. On the Please Select a Keyboard Layout screen, press Enter. 6. On the Enter a Root Password Screen, assign a root password and confirm it by entering it again. Press Enter to continue. 7. On the Confirm Install Screen, press F11 to install. 8. On the Installation complete screen, press Enter to reboot. 9. Repeat steps 1-8 for each B200 M3 blade. Configuring ESXi after Installation 1. On the ESXi 5.5 screen, press F2, enter the root password, and press Enter. 2. On the System Customization screen, select Troubleshooting Options, and press Enter. 3. On the Troubleshooting Mode Options screen, select enable ESXi Shell, and press Enter. 4. Select Enable SSH, press Enter, and press ESC. 5. On the System Customization screen, select Configure Management Network. 6. On the Configure Management Network screen, select IP Configuration. 7. On the IP Configuration screen, select set static IP, enter an IP address, subnet mask, and default gateway, and press Enter. 8. On the Configure Management Network screen, press Esc. When asked to apply the changes, type Y. 9. Repeat steps 1-8 for each B200 M3 blade. For our vCenter management server, we deployed the vCenter Appliance on a separate ESXi host and configured it for our environment. Configuring the EMC XtremIO array We worked directly with EMC engineers to install and cable the physical hardware, and to upgrade the array to the latest firmware and software. Below are the steps we took after initial configuration of the storage array to create and connect our test LUNs. 1. Log in to the XtremIO Storage Management Application. 2. Once the GUI loads, click Configuration at the top of the screen. 3. Under Initiator Groups, click Add. 4. Enter a name for the new Initiator Group (e.g. Host1), and click Add. 5. Enter a name for the new initiator. 6. If the hosts are connected properly, the Fibre initiators will be listed under Initiator Port Address. Select the first initiator for the first host, and click OK. 7. Repeat steps 4-6 for the second Fibre port. 8. Click Finish to add the new host.
  • 23. A Principled Technologies test report 23DBaaS with VMware vCAC, EMC XtremIO, and Cisco UCS 9. Repeat steps 3-8 for the remaining three hosts. 10. Under Volumes, click Add. 11. Enter a name and capacity for the new volume. 12. Accept defaults, and click Finish. 13. Repeat steps 11 and 12 for each desired LUN. Preparing the prerequisite environment We created and stored all management VMs on a separate server and local storage, leaving the Cisco blades and XtremIO array for the provisioned VMs, templates, and background activity VMs. Creating the VM DNS and NTP 1. In the VMware vSphere client, under Basic Tasks, select Create a new virtual machine. 2. Choose Custom, and click Next. 3. Assign the name AD to the virtual machine, and click Next. 4. Select the management host, and click Next. 5. Select the appropriate storage, and click Next. 6. Choose Virtual Machine Version 10, and click Next. 7. Choose Windows®, choose Microsoft Windows Server® 2008 R2 (64-bit), and click Next. 8. For CPUs, select one virtual processor socket, and two cores per virtual socket, and click Next. 9. Choose 4 GB RAM, and click Next. 10. Click 1 for the number of NICs, select VMXNET3, connect to the private network, and click Next. 11. Leave the default virtual storage controller, and click Next. 12. Choose to create a new virtual disk, and click Next. 13. Make the OS virtual disk size 40 GB, choose thick-provisioned lazy zeroed, specify external storage, and click Next. 14. Keep the default virtual device node (0:0), and click Next. 15. Click Finish. 16. Start the VM. Installing the Microsoft Windows Server 2008 R2 operating system on the VM 1. Open a virtual machine console on AD01. 2. Choose the language, time and currency, and keyboard input. Click Next. 3. Click Install Now. 4. Choose Windows Server 2008 R2 Enterprise (Full Installation), and click Next. 5. Accept the license terms, and click Next. 6. Click Custom. 7. Click the Disk, and click Drive options (advanced). 8. Click NewApplyFormat, and click Next. 9. After the installation completes, click OK to set the administrator password. 10. Enter the administrator password twice, and click OK. 11. Install VMware Tools. For more information, see kb.vmware.com/selfservice/microsites/search.do?language=en_US&cmd=displayKC&externalId=340. 12. Reboot the server. 13. Connect the machine to the Internet, and install all available Windows updates. Restart as necessary.
  • 24. A Principled Technologies test report 24DBaaS with VMware vCAC, EMC XtremIO, and Cisco UCS 14. Enable remote desktop access. 15. Change the hostname to AD, and reboot when the installation prompts you. 16. Set up networking for the data network: a. Click StartControl Panel, right-click Network Connections, and choose Open. b. Right-click the VM traffic NIC, and choose Properties. c. Uncheck TCP/IP (v6). d. Select TCP/IP (v4), and choose Properties. e. Set the IP address. Installing Active Directory and DNS services on AD 1. Click StartRun, type dcpromo, and click OK. 2. At the Active Directory Domain Services Installation Wizard welcome screen, check the Use advanced mode installation option, and click Next. 3. In the Choose a Deployment Configuration dialog box, select Create a new domain in a new forest, and click Next. 4. At the FQDN page, type vdi.com, and click Next. 5. At the NetBIOS name prompt, leave the name VDI, and click Next. 6. At the Forest Functionality level, select Windows Server 2008 R2, and click Next. 7. At the additional Domain Controller Options, leave DNS server selected, and click Next. 8. At the System Folder Location screen leave the default options, and click Next. 9. Assign a Directory Services Restore Mode Administrator account password, and click Next. 10. At the Summary screen, review your selections, and click Next. 11. Once Active Directory Domain Services finishes installing, click Finish, and restart the system. 12. Click StartRun, and type dnsmgmt.msc 13. Create a reverse lookup zone for AD. Configuring the Windows time service on AD01 To ensure reliable time, we pointed our Active Directory server to a physical NTP server. 1. Open a command prompt. 2. Type the following: W32tm /config /syncfromflags:manual /manualpeerlist:"<ip address of a NTP server>" W32tm /config /reliable:yes W32tm /config /update W32tm /resync Net stop w32time Net start w32time Setting up vCAC Setting up the vCenter Server appliance 1. Install the vCenter appliance: a. Open a vSphere client session. Connect to your management host. b. In the vSphere client, select FileDeploy OVF Template. c. Browse to the location of the vCenter Server Appliance .ovf file, and click Open.
  • 25. A Principled Technologies test report 25DBaaS with VMware vCAC, EMC XtremIO, and Cisco UCS d. In the OVF Template Details page, click Next. e. In Name and Location, enter vCenter Server for the name, and click Next. f. Select the management storage, and click Next. g. Select a disk format, and click Next. h. Check the box for Power on after deployment, and click Finish. 2. Configure the vCenter appliance: a. Right-click the new vCenter, and select Open Console. b. Note the instructions and the address to use for configuration. c. Open a Web browser to the address listed in the console. d. Log in with root and the password vmware. e. Check the box to accept the license agreement, and click Next. f. Select the radio button for Configure with default settings, and click Next. g. Click Start. Setup will complete and a new database will be configured automatically. h. Click the Admin Tab. i. Enter vmware in the current administrator password section. ii. Enter a new password into both password fields. iii. Click Change Password. Setting up the vCAC Identity Appliance Deploying the vCAC Identity Appliance 1. In the vSphere Web client, right click the management host, and choose Deploy OVF template… 2. Choose Local file, and browse to the OVA file. Click Next. 3. Review the details, and click Next. 4. Accept the EULA, and click Next. 5. Select the datacenter where your host is stored, and click Next. 6. Select the correct storage, and click Next. 7. Select your VM network, and click Next. 8. Enter a password and confirm it. 9. Expand Network Properties, and assign IPs to the DNS, Address and netmask fields. Click Next. 10. Click Finish to deploy the VM. 11. In the domain controller, add a DNS entry for the Identity appliance. Configuring the vCAC Identity VM 1. Power on the Identity VM. 2. Using the IP you assigned in the deployment section, browse to https://IPofappliance:5480/ 3. Log in as root with the password you assigned. 4. Go to the Admin tab, and click Time Settings. 5. In the dropdown menu choose Use Time Server, and enter the IP of your AD server. Click Save Settings. 6. Go to the System tab, click Time Zone, and choose your time zone from the dropdown menu. Click Save Settings. 7. Go to the SSO tab, and type in the Password you want to apply to the admin user. Click Apply. 8. Click Host Settings, and add :7444 to the host name. Click Apply. 9. Click SSL, and choose Generate Self Signed Certificate from the dropdown menu. 10. Fill out the Organization and Organizational Unit fields, and click Replace Certificate. 11. Click on Active Directory.
  • 26. A Principled Technologies test report 26DBaaS with VMware vCAC, EMC XtremIO, and Cisco UCS 12. Fill in the Domain Name, Domain User, and Password fields. Click Join AD Domain. Setting up the vCAC Appliance Deploying the vCAC Applicance 1. In the vSphere Web client, right click the management host, and choose Deploy OVF template… 2. Choose Local file, and browse to the OVA file. Click Next. 3. Review the details, and click Next. 4. Accept the EULA, and click Next. 5. Select the datacenter where your host is stored, and click Next. 6. Select the correct storage, and click Next. 7. Select your VM network, and click Next. 8. Enter a password and confirm it. 9. Expand Network Properties, and assign IPs to the DNS, Address, and Netmask fields. Click Next. 10. Click Finish to deploy the VM. 11. In the domain controller, add a DNS entry for the appliance. Configuring the vCAC VM 1. Power on the vCAC VM. 2. Using the IP you assigned in the deployment section, browse to https://IPofappliance:5480/ 3. Log in as root with the password you assigned. 4. Go to the Admin tab, and click Time Settings. 5. In the dropdown menu, choose Use Time Server, and enter the IP of your AD server. Click Save Settings. 6. Go to the System tab, click Time Zone, and choose your time zone from the dropdown menu. Click Save Settings. 7. Go to the vCAC Settings tab, click Resolve Host Name, and click Save Settings once the hostname is resolved. 8. Click SSL, and choose Generate Self Signed Certificate from the dropdown menu. 9. Fill out the Organization and Organizational Unit fields, and click Replace Certificate. 10. Click on the SSO tab, and enter the FQDN of the Identity Appliance in the SSO Host and Port box (FQDN:port). 11. Enter the default administrator user and password in the boxes (administrator@vsphere.local). 12. Click Save. 13. Click on Licensing, enter the license key, and click Submit Key. 14. To confirm that all is working, open a Web browser and browse to https://FQDNofvCAC/shell-ui-app 15. Log in with administrator@vsphere.local and the proper password. 16. You can close the Web page once you’ve confirmed it is working. Setting up the IaaS VM Installing Windows Server 2008 R2 on the IaaS VM 1. Boot the server, and insert the Windows Server 2008 R2 SP1 installation DVD in the DVD-ROM drive. 2. At the Language Selection screen, click Next. 3. Click Install Now. 4. Select Windows Server 2008 R2 Enterprise (Full Installation), and click Next. 5. Click the I accept the license terms check box, and click Next. 6. Click Custom. 7. Click Next. 8. At the User’s password must be changed before logging on warning screen, click OK.
  • 27. A Principled Technologies test report 27DBaaS with VMware vCAC, EMC XtremIO, and Cisco UCS 9. Enter the desired password for the administrator in both fields, and click the arrow to continue. 10. At the Your password has been changed screen, click OK. 11. Connect the machine to the Internet, and install all available Windows updates. Restart as necessary. 12. Enable remote desktop access. 13. Change the hostname, and reboot when prompted. Installing SQL Server 2008 R2 1. Run the SQL Server 2008 R2 setup. 2. Click InstallationNew installation or add features to an existing installation. 3. On the Setup Support Rules screen, click OK. 4. Enter the product key or specify a free edition, and click Next. 5. Check the box for I accept the license terms, and click Next. 6. Click Install to install the setup support files. 7. On the Setup Support Rules screen, and click Next. 8. Choose SQL Server Feature Installation, and click Next. 9. Select the Database Engine Services, Full-Text Search, Client tools Backwards Compatibility, Management Tools Basic and Complete, and click Next twice. 10. Accept instance configuration defaults, and click Next. 11. Accept defaults for disk space requirements, and click Next. 12. Leave Server Configuration defaults, and click Next. 13. Select Mixed Mode, and enter a password for the SA account. Click Add Current User, and click Next. 14. Accept defaults for error reporting, and click Next. 15. Review installation configuration rules check, and click Next. 16. To begin installation, click Install. 17. Click OK when prompted to reboot. 18. At completion screen, click Close. 19. Open the SQL Server Configuration Manager, and expand SQL Server Network Configuration. 20. Verify that TCP/IP is enabled, and close the manager. 21. Reboot the server. 22. Install the SP1 and SP2 SQL updates. Installing pre-reqs on the IaaS VM 1. Download and install .NET 4.5 framework (only 4.5 as 4.5.1 and 4.5.2 will cause errors). 2. Download the pre-req automation script from blogs.vmware.com/vsphere/2013/12/vmware-vcloud- automation-center-6-pre-req-automation-script.html, and extract it. 3. Hit the Windows key, type powershell, and right-click the Windows Powershell result. 4. Click Run as Administrator. 5. Type Set-ExecutionPolicy Unrestricted, and hit Enter. 6. Confirm the setting by typing Y, and hitting Enter. 7. Type R to run once, and hit Enter. 8. Navigate to the unzipped directory you downloaded, and type .vCAC6-PreReq-Automation.ps.1 to run the script. 9. When the script finishes, restart the VM.
  • 28. A Principled Technologies test report 28DBaaS with VMware vCAC, EMC XtremIO, and Cisco UCS Installing IaaS on the VM 1. Open a browser, and navigate to https://vcacvmhostname.domain.name:5480/installer/ 2. Click the setup.exe hyperlink to download the IaaS installation file. 3. Right-click setup__vcac.hostname@5480.exe and choose Run as Administrator. 4. Click Next on the Welcome screen. 5. Accept the EULA, and click Next. 6. Enter root as the user and the relevant password, and click Next. 7. Choose Complete Install, and click Next. 8. All prerequisites should have passed the check, so click Next. 9. Enter the domain administrator username and password. 10. Create a Passphrase and confirm it, and click Next. 11. Leave defaults, and click Next. 12. Leave the default server, and click Load for SSO Default Tenant (should auto-populate to vsphere.local). 13. Click Download to receive the certificate, and check Accept Certificate. 14. Enter the domain administrator username and Password, accept the default IaaS server, and click Next. 15. Click Install. 16. Click Finish. Configuring IaaS Tenants 1. Open a browser window and go to https://vcac-appliance-hostname.domain.local/shell-ui-app 2. Log in with adminsitrator@vsphere.local and the SSO password. 3. In the Tenants box, click on vsphere.local (we had trouble with IE at this step, and had to download Firefox). 4. Go to the Identity stores tab, and click the green + button. 5. Enter the name of the Identity store. 6. Choose Active Directory from the dropdown box. 7. Enter the URL to the Identity store (i.e. ldap://activedirectoryserver.domain.local:389) 8. Enter the domain. 9. Enter the domain administrator’s distinguished name (i.e. CN=Administrator, CN=Users, DC=domain, DC=local) 10. Type the user password. 11. Enter the Group search base distinguished name (i.e. DC=domain, DC=local), and click Add. 12. Go to the Administrator tab, and assign administrator rights to both Tenant Administrator roles and Infrastructure roles. 13. Click Update to finish. 14. Log out of the website, and log back in with the domain administrator instead of the vsphere.local admin as before. 15. You should successfully log into a new screen with Home, Inbox, Administration, and Infrastructure tabs. 16. Go to InfrastructureAdministrationLicensing, and enter your license. Creating and configuring the vSphere Endpoint 1. Log in to the vCAC appliance site with your domain administrator credentials (you should already be logged in if coming directly from the previous section). 2. Go to InfrastructureEndpointsCredentials, and click New Credentials.
  • 29. A Principled Technologies test report 29DBaaS with VMware vCAC, EMC XtremIO, and Cisco UCS 3. Enter an identifying name for the new user, enter the domain administrator (e.g. administrator@domain.local), and the password. 4. Click the green checkmark to save. 5. Click on Endpoints. 6. In the dropdown menu for New Endpoint, choose VirtualvSphere (vCenter). 7. Type in vCenter for the name, and enter the RUL to the vCenter sdk (e.g. https://vcenter.domain.local/sdk). 8. Enter the vSphere administrator credentials, and click OK. Creating a Fabric Group 1. Go to InfrastructureGroupsFabric Groups, and click New Fabric Group. 2. Enter a name and description. 3. Add the domain administrator from the dropdown menu. 4. Select the compute resources by ticking the checkbox, and click OK. Configuring the machine prefix 1. Since our Fabric Group is set to the same administrator we are logged in as, log out and back in to update the server. 2. Go to InfrastructureBlueprintsMachine Prefixes, and click Add a New Machine Prefix. 3. Enter a prefix name without including spaces. 4. Enter the ending number for the maximum number of VMs (3 = three digits, or 999 maximum VMs) and a starting number (usually 1). 5. Click the green checkmark to save. Creating a Business Group 1. Go to InfrastructureGroupsBusiness Groups, and click Add a New Business Group. 2. Name the group such as IT or Sales. 3. Click the … button, and choose the prefix we just created. 4. Add the domain administrator as the email recipient. 5. Click OK. Creating a reservation 1. Navigate to InfrastructureReservationsReservation, and click on New ReservationVirtualvSphere. 2. Select a compute resource. 3. The name and tenant should auto-populate. 4. Enter a priority of 1. 5. Click on the Resources tab. 6. Specify the amount of RAM to reserve. 7. Choose which datastores the reserve can access, and set a priority for each datastore (can share the same priority). 8. Click on the Network tab. 9. Select the networks that you want to have available for users when they provision their VMs, and click OK. Creating a Blueprint 1. Navigate to InfrastructureBlueprintsBlueprints. 2. Click New BlueprintVirtualvSphere. 3. Enter a name for the blueprint, choose the prefix you created, and enter a number of archive days.
  • 30. A Principled Technologies test report 30DBaaS with VMware vCAC, EMC XtremIO, and Cisco UCS 4. On the Build Information tab chose the Clone action in the dropdown menu, and choose the relevant template. 5. Add any properties needed, such as to define where each VMDK should reside on the storage, and click OK. 6. Mouse over the new blueprint, click Publish, and click OK. 7. Navigate to AdministrationCatalog ManagementCatalog Items. 8. Click on the new Blueprint, set the status to Active, and choose the Service you created in the dropdown menu. Click OK. 9. Check the catalog tab to ensure that the blueprint is available. Creating the VMs We created four different sized VMs using the same process listed below, but with different sized drives. Oracle Linux 6.5 and Oracle Database 12c We configured each VM with Oracle Linux 6.5 and Oracle Database 12c. For our OLTP VMs, we used a basic install of Oracle Database 12c and used the local file system for database files: one disk for data and a second disk for redo logs. For our OLAP VMs, we first installed Oracle Grid Infrastructure and utilized Oracle Automatic Storage Management to create three four-disk ASM groups for data, redo logs, and temp table spaces. We then installed and configured Oracle Database 12c utilizing these ASM disk groups for our database files. Installing Oracle Linux 6.5 1. Insert the Oracle Linux 6.5 DVD into the server, and boot to it. 2. Select Install or upgrade an existing system. 3. If you are unsure of the fidelity of the installation disk, select OK to test the installation media; otherwise, select Skip. 4. In the opening splash screen, select Next. 5. Choose the language you wish to use, and click Next. 6. Select the keyboard layout, and click Next. 7. Select Basic Storage Devices, and click Next. 8. Select Fresh Installation, and click Next. 9. Insert the hostname, and select Configure Network. 10. In the Network Connections menu, configure network connections. 10. After configuring the network connections, click Close. 11. Click Next. 12. Select the nearest city in your time zone, and click Next. 13. Enter the root password, and click Next. 14. Select Use All Space, and click Next. 15. When the installation prompts you to confirm that you are writing changes to the disk, select Write changes to disk. 16. Select Software Basic Server, and click Next. Oracle Linux installation begins. 17. When the installation completes, select Reboot to restart the server. Installing VMware Tools 1. Install guest tools or agents. 2. (VMware only) Install VMware Tools on the guest:  Right-click the VM in the Web Client, and select Install/Upgrade VMware Tools.  Log on to the guest as root.
  • 31. A Principled Technologies test report 31DBaaS with VMware vCAC, EMC XtremIO, and Cisco UCS  Mount the CD ROM device: # mount /dev/cdrom /mnt  Untar VMware Tools into a temporary directory: # tar –C /tmp –zxf /mnt/VMwareTools-9.4.0-1280544.tar.gz  Run the install script and accept the defaults: # /tmp/vmware-tools-distrib/vmware-install.pl  Follow the prompts to configure and install VMware tools.  The installer will automatically load the NIC drivers, create a new initrd, and unmount the CD.  Reboot the VM. Initial configuration tasks Complete the following steps to provide the functionality that Oracle Database requires. We performed all of these tasks as root. 1. Disable firewall services. In the command line (as root), type: # service iptables stop # chkconfig iptables off # service ip6tables stop # chkconfig ip6tables off 2. Set SELinux: # vi /etc/selinux/config SELINUX=permissive 3. Modify /etc/hosts to include the IP address of the internal IP and the hostname. 4. Edit 90-nproc.conf: # vim /etc/security/limits.d/90-nproc.conf Change this: * soft nproc 1024 To this: * - nproc 16384 5. Install 12c RPM packages, resolve package dependencies, and modify kernel parameters: # yum install oracle-rdbms-server-12cR1-preinstall –y 6. Install automatic system tuning for database storage through yum: # yum install tuned # chkconfig tuned on # tuned-adm profile enterprise-storage 7. Using yum, install the following prerequisite packages for Oracle Database: # yum install elfutils-libelf-devel # yum install xhost # yum install unixODBC # yum install unixODBC-devel # yum install oracleasm-support oracleasmlib oracleasm 8. Create the oracle user account and groups and password: # groupadd -g 1003 oper # groupadd -g 1004 asmadmin # groupadd -g 1005 asmdba
  • 32. A Principled Technologies test report 32DBaaS with VMware vCAC, EMC XtremIO, and Cisco UCS # groupadd -g 1006 asmoper # usermod -G dba,oper,asmadmin,asmdba,asmoper oracle # passwd oracle 9. Create the /u01 directory for Oracle inventory and software and give it to the oracle user: # mkdir -p /u01/app/oracle/product/12.1.0/grid_1 # mkdir -p /u01/app/oracle/product/12.1.0/dbhome_1 # chown -R oracle:oinstall /u01 # chmod -R 775 /u01 10. Edit bash profiles to set up user environments: # vim /home/oracle/.bash_profile # Oracle Settings export TMP=/tmp export TMPDIR=$TMP export ORACLE_HOSTNAME=localhost.localdomain export ORACLE_BASE=/u01/app/oracle export GRID_HOME=$ORACLE_BASE/product/12.1.0/grid_1 export DB_HOME=$ORACLE_BASE/product/12.1.0/dbhome_1 export ORACLE_HOME=$DB_HOME export ORACLE_SID=orcl export ORACLE_TERM=xterm export BASE_PATH=/usr/sbin:$PATH export PATH=$ORACLE_HOME/bin:$BASE_PATH export LD_LIBRARY_PATH=$ORACLE_HOME/lib:/lib:/usr/lib export CLASSPATH=$ORACLE_HOME/JRE:$ORACLE_HOME/jlib:$ORACLE_HOME/rdbms/jlib alias grid_env='. /home/oracle/grid_env' alias db_env='. /home/oracle/db_env' # vim /home/oracle/grid_env export ORACLE_SID=+ASM1 export ORACLE_HOME=$GRID_HOME export PATH=$ORACLE_HOME/bin:$BASE_PATH export LD_LIBRARY_PATH=$ORACLE_HOME/lib:/lib:/usr/lib export CLASSPATH=$ORACLE_HOME/JRE:$ORACLE_HOME/jlib:$ORACLE_HOME/rdbms/jlib # vim /home/oracle/db_env export ORACLE_SID=orcl export ORACLE_HOME=$DB_HOME export PATH=$ORACLE_HOME/bin:$BASE_PATH export LD_LIBRARY_PATH=$ORACLE_HOME/lib:/lib:/usr/lib export CLASSPATH=$ORACLE_HOME/JRE:$ORACLE_HOME/jlib:$ORACLE_HOME/rdbms/jlib Adding the four data and four log drives to the VM and modifying the vmfx file 1. Power off the VM.
  • 33. A Principled Technologies test report 33DBaaS with VMware vCAC, EMC XtremIO, and Cisco UCS 2. Right-click the VM in the vSphere Web Client, and choose Edit Settings… 3. Click on the VM Options tab, and expand the Advanced menu option. 4. Choose Edit Configuration… 5. Click Add Row, and enter disk.EnableUUID in the parameter field and TRUE in the value field. 6. Go back to the Virtual Hardware tab. 7. Click the drop-down menu for New device, and choose New Hard Disk. 8. Name the Hard Disk and choose the size that you want it to be. 9. Repeat steps all remaining drives. 10. Click OK. 11. Power the VM back on. Switching the default OS kernel to RedHat 1. Edit the GRUB config file: # vi /boot/grub/grub.conf There should be three lines that begin with title, with the last one being the Red Hat kernel. 2. Set the default parameter to 2, and save the file. 3. Reboot to verify the proper kernel is booted. Configuring disks for ASM 1. For each of the nine shared disks, create a GPT label, and create one partition. For example, see the following shell script: for disk in sdb sdc sdd sde sdf sdg sdh sdi sdj; do parted /dev/$disk mklabel gpt parted /dev/$disk mkpart primary "1 -1" done 2. If desired, label the disk’s partition with its Oracle function. For example: parted /dev/sdb name 1 CRS parted /dev/sdc name 1 DATA1 parted /dev/sdd name 1 DATA2 parted /dev/sde name 1 DATA3 parted /dev/sdf name 1 DATA4 parted /dev/sdg name 1 LOG1 parted /dev/sdh name 1 LOG2 parted /dev/sdh name 1 LOG3 parted /dev/sdi name 1 LOG4 3. Initialize Oracle ASM on each server by executing the following commands as root on each node. oracleasm init oracleasm configure -e -u grid -g oinstall -s y -x sda 4. Label each shared disk-partition with an appropriate ASM name. For example, following the OS partition names created above, execute the following commands on one system: oracleasm createdisk CRS /dev/sdb1 oracleasm createdisk DATA1 /dev/sdc1 oracleasm createdisk DATA2/dev/sdd1 oracleasm createdisk DATA3 /dev/sde1 oracleasm createdisk DATA4 /dev/sdf1 oracleasm createdisk LOG1 /dev/sdg1 oracleasm createdisk LOG2 /dev/sdh1 oracleasm createdisk LOG3 /dev/sdi1 oracleasm createdisk LOG4 /dev/sdj1
  • 34. A Principled Technologies test report 34DBaaS with VMware vCAC, EMC XtremIO, and Cisco UCS 5. On each server, scan the disks to make the disks immediately available to Oracle ASM. oracleasm scandisks oracleasm listdisks Installing Oracle Grid Infrastructure 12c 1. Log in as the oracle user. 2. Unzip linuxamd64_12c_grid_1of2.zip and linuxamd64_12c_grid_2of2.zip 3. Open a terminal to the unzipped database directory. 4. Type grid_env to set the Oracle grid environment. 5. To start the installer, type./runInstaller 6. At the software Updates screen, select Skip updates. 7. In the Select Installation Option screen, select Install and Configure Grid Infrastructure for a Standalone Server, and click Next. 8. Choose the language, and click Next. 9. In the Create ASM Disk Group screen, choose the Disk Group Name, change redundancy to External. 10. Select the four disks that you are planning to use for the database, and click Next. 11. In the Specify ASM Password screen, choose Use same password for these accounts, write the passwords for the ASM users, and click Next. 12. Leave the default Operating System Groups, and click Next. 13. Leave the default installation, and click Next. 14. Leave the default inventory location, and click Next. 15. Under Root script execution select Automatically run configuration scripts and enter root credentials. 16. In the Prerequisite Checks screen, make sure that there are no errors. 17. In the Summary screen, verify that everything is correct, and click Finish to install Oracle Grid Infrastructure. 18. At one point during the installation, the installation prompts you to execute two configuration scripts as root. Follow the instructions to run the scripts. 19. At the Finish screen, click Close. 20. To run the ASM Configuration Assistant, type asmca. 21. In the ASM Configuration Assistant, click Create. 22. In the Create Disk Group window, name the new disk group log, choose redundancy External (None), select the four disks for redo logs. 23. Click Advanced Options, and type 12.1.0.0.0 in ASM Compatibility and Database Compatibility. Click OK. 24. Right-click the DATA drive, and choose Edit Attributes. Make sure both ASM and Database Compatibility fields list 12.1.0.0.0, and click OK. 25. Exit the ASM Configuration Assistant. Installing Oracle Database 12c 1. Unzip linuxamd64_12c_database_1_of_2.zip and linuxamd64_12c_database_2_of_2.zip. 2. Open a terminal to the unzipped database directory. 3. Type db_env to set the Oracle database environment. 4. Run ./runInstaller.sh. 5. Wait for the GUI installer loads. 6. On the Configure Security Updates screen, enter the credentials for My Oracle Support. If you do not have an account, uncheck the box I wish to receive security updates via My Oracle Support, and click Next.
  • 35. A Principled Technologies test report 35DBaaS with VMware vCAC, EMC XtremIO, and Cisco UCS 7. At the warning, click Yes. 8. On the Download Software Updates screen, enter the desired update option, and click Next. 9. On the Select Installation Option screen, select Install database software only, and click Next. 10. On the Grid Installation Options screen, select Single instance database installation, and click Next. 11. On the Select Product Languages screen, leave the default setting of English, and click Next. 12. On the Select Database Edition screen, select Enterprise Edition, and click Next. 13. On the Specify Installation Location, leave the defaults, and click Next. 14. On the Create Inventory screen, leave the default settings, and click Next. 15. On the Privileged Operating System groups screen, keep the defaults, and click Next. 16. Allow the prerequisite checker to complete. 17. On the Summary screen, click Install. 18. Once the Execute Configuration scripts prompt appears, ssh into the server as root, and run the following command: # /home/oracle/app/oracle/product/12.1.0/dbhome_1/root.sh 19. Return to the prompt, and click OK. 20. Once the installer completes, click Close. Creating and the database 1. Using Putty with X11 forwarding enabled, SSH to the VM. 2. Type dbca, and press enter to open the Database configuration assistant. 3. At the Database Operation screen select Create Database, and click Next. 4. Under Creation Mode select Advanced Mode, and click Next. 5. At the Select Template screen select General Purpose or Transaction Processing. Click Next 6. Enter a Global database name and the appropriate SID. 7. At the Management Options screen select Configure Enterprise Manager (EM) Database Express. Click Next. 8. At the Database Credentials screen select Use the Same Administrative Password for All Accounts. Enter a password, and click Next. 9. At the Network Configuration screen click Next. 10. At the Storage Configuration screen select Automatic Storage Management, and select +DATA as the Database 11. At the Database Options screen click Next. 12. At the Initialization Parameters screen click use Automatic Memory Management. 13. At the Creation Options select Create Database, and click Next. 14. At the summary screen click Finish. 15. Close the Database Configuration Assistant. 16. In a Web browser, browse to https://vm.ip.address:5500/em to open the database manager. 17. Log in as system with the password you specified. 18. Go to StorageTablespaces. 19. Click Create. 20. Enter tpcctab as the Name, and check the Set As Default box. Click OK. 21. Go to StorageRedo Log Groups. 22. Click ActionsSwitch file… until you get one of the groups to go inactive. 23. Highlight the inactive group, and click ActionsDrop group.
  • 36. A Principled Technologies test report 36DBaaS with VMware vCAC, EMC XtremIO, and Cisco UCS 24. Click Add Group, name it, type +logs/orcl/onlinelog/redo1.log and click the + button. 25. Type the size of the log file into the size field, and click Add. 26. Repeat steps 19 – 22 until all default logs are dropped, and three new ones exist. 27. Back in the Putty windows, type sqlplus / as sysdba to connect to the database. 28. Add the tpcc user, and grant all privileges to it: a. # CREATE USER tpcc IDENTIFIED BY tpcc; b. # GRANT ALL PRIVILEGES TO tpcc; Generating HammerDB data 1. Download the HammerDB install from hammerora.sourceforge.net/download.html. 2. Using Putty with X11 forwarding enabled, SSH to the VM. 3. Navigate to the directory where the file is located. 4. Change the permissions: # chmod u+x HammerDB-2.16-Linux-x86-64-Install 5. Run the installer: # ./HammerDB-2.16-Linux-x86-64-Install The installation GUI will launch. 6. Choose English, and click OK. 7. Click Yes on the install prompt. 8. Click Next. 9. Leave the default installation destination, and click Next. 10. Click Next. 11. Check Launch HammerDB, and click Finish. 12. If you receive a missing library error, install the library with the yum command: # yum install libXScrnSaver-1.2.2-2.el6.x86_64 13. In the HammerDB UI, click OptionsBenchmark, and check Oracle and TPC-H. Click OK. 14. Click OK again to confirm the benchmark choice. 15. Expand TPC-C and Schema Build. 16. Double-click Options to open the Build Options menu. 17. For Oracle Service Name, enter the name of the database. 18. Enter the password for the System user. 19. Leave the rest of the fields as default. 20. Choose the number of warehouses for the database size, and click OK. 21. In the Virtual User Options, check Show Output. Click OK. 22. To start the database generation, double-click Build. Installing the vCAC guest agent 1. Download the agent installer for REHL 6 from your vCAC appliance (https://vcac- hostname.domain.name:5480/installation) 2. Copy the gugent-6.0.1-71.x86_64.rpm file to your VM. 3. Navigate to the file where the rpm file is stored, and install the agent: # rpm –i gugent-6.0.1-71.x86_64.rpm 4. Configure the guest path to the IaaS server:
  • 37. A Principled Technologies test report 37DBaaS with VMware vCAC, EMC XtremIO, and Cisco UCS # /usr/share/gugent/installgugent.sh –iaas.domain.name:443 ssl Running the tests We started our OLTP VMs in the background to run continuously. We then logged into the vCAC Web console and selected the blueprint related to the scenario we were testing. We requested the provision, then waited until the Requests tab showed the provision was successful. Using the Events log in vSphere, we used the time stamps from when the provision was first requested to when the VM was completed to determine the time required for the provision. For scenarios with multiple VMs, we used the first and last VMs created to determine the time for the entire provision. We compared the times to the Recent Events tab in vCAC to ensure that the time elapsed was the same. We used vSphere to track times because vSphere offered granularity in seconds.
  • 38. A Principled Technologies test report 38DBaaS with VMware vCAC, EMC XtremIO, and Cisco UCS ABOUT PRINCIPLED TECHNOLOGIES Principled Technologies, Inc. 1007 Slater Road, Suite 300 Durham, NC, 27703 www.principledtechnologies.com We provide industry-leading technology assessment and fact-based marketing services. We bring to every assignment extensive experience with and expertise in all aspects of technology testing and analysis, from researching new technologies, to developing new methodologies, to testing with existing and new tools. When the assessment is complete, we know how to present the results to a broad range of target audiences. We provide our clients with the materials they need, from market-focused data to use in their own collateral to custom sales aids, such as test reports, performance assessments, and white papers. Every document reflects the results of our trusted independent analysis. We provide customized services that focus on our clients’ individual requirements. Whether the technology involves hardware, software, Web sites, or services, we offer the experience, expertise, and tools to help our clients assess how it will fare against its competition, its performance, its market readiness, and its quality and reliability. Our founders, Mark L. Van Name and Bill Catchings, have worked together in technology assessment for over 20 years. As journalists, they published over a thousand articles on a wide array of technology subjects. They created and led the Ziff-Davis Benchmark Operation, which developed such industry-standard benchmarks as Ziff Davis Media’s Winstone and WebBench. They founded and led eTesting Labs, and after the acquisition of that company by Lionbridge Technologies were the head and CTO of VeriTest. Principled Technologies is a registered trademark of Principled Technologies, Inc. All other product names are the trademarks of their respective owners. Disclaimer of Warranties; Limitation of Liability: PRINCIPLED TECHNOLOGIES, INC. HAS MADE REASONABLE EFFORTS TO ENSURE THE ACCURACY AND VALIDITY OF ITS TESTING, HOWEVER, PRINCIPLED TECHNOLOGIES, INC. SPECIFICALLY DISCLAIMS ANY WARRANTY, EXPRESSED OR IMPLIED, RELATING TO THE TEST RESULTS AND ANALYSIS, THEIR ACCURACY, COMPLETENESS OR QUALITY, INCLUDING ANY IMPLIED WARRANTY OF FITNESS FOR ANY PARTICULAR PURPOSE. ALL PERSONS OR ENTITIES RELYING ON THE RESULTS OF ANY TESTING DO SO AT THEIR OWN RISK, AND AGREE THAT PRINCIPLED TECHNOLOGIES, INC., ITS EMPLOYEES AND ITS SUBCONTRACTORS SHALL HAVE NO LIABILITY WHATSOEVER FROM ANY CLAIM OF LOSS OR DAMAGE ON ACCOUNT OF ANY ALLEGED ERROR OR DEFECT IN ANY TESTING PROCEDURE OR RESULT. IN NO EVENT SHALL PRINCIPLED TECHNOLOGIES, INC. BE LIABLE FOR INDIRECT, SPECIAL, INCIDENTAL, OR CONSEQUENTIAL DAMAGES IN CONNECTION WITH ITS TESTING, EVEN IF ADVISED OF THE POSSIBILITY OF SUCH DAMAGES. IN NO EVENT SHALL PRINCIPLED TECHNOLOGIES, INC.’S LIABILITY, INCLUDING FOR DIRECT DAMAGES, EXCEED THE AMOUNTS PAID IN CONNECTION WITH PRINCIPLED TECHNOLOGIES, INC.’S TESTING. CUSTOMER’S SOLE AND EXCLUSIVE REMEDIES ARE AS SET FORTH HEREIN.