
Recomendados
Recomendados
Más contenido relacionado
Similar a ExecQDocs
Similar a ExecQDocs (20)
Último
Último (20)
ExecQDocs
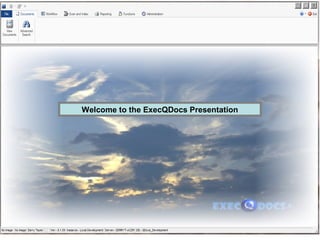
- 1. Welcome to the ExecQDocs Presentation
- 2. ExecQDocs is a Workflow enabled Document Management System (EDMS)
- 3. ExecQDocs handles the following types of documents • Paper documents (Scanning) • Documents that are already in an electronic format (pdf, word, excel, emails etc.) • Data that needs be turned into a electronic documents (creating pdf’s)
- 4. ExecQDocs will also enable you to create Workflows to manage the processes in your business
- 5. The following presentation will take you through a practical example of managing your documents and integrating these documents into a workflow
- 6. The Example relates to a typical Sales Invoice • We will manage the documents around the Sales Invoice • To demonstrate the Workflow we will assume that a Credit Note has been requested against this invoice, this we will do by an approval process.
- 7. The following highlighted documents will be captured into the library
- 8. Each document has it’s own Indexing/Search keys defined by the Librarian when setting up the document library
- 9. OK lets pull the Invoice into the library by searching on the Invoice No
- 10. We will run a Cold Scan on the invoice which will generate the document into the library
- 11. You will notice that the document has a watermark embedded onto it, it will also have been secured with a 128 encryption key
- 12. We scan the POD document and put it into the library. When putting it into the library it will prompt for the Indexing/Search keys, this can be automated by doing barcode recognition or OCR recognition
- 13. We now search for all documents linked to invoice 375315 (you can now) • Email • Print • Export to Excel • View Audit trails
- 14. Right that’s a quick overview of document management, there’s lots of other really great features available but this should give you a general overview. We’ll now move onto Workflow
- 15. Let’s assume that the customer has requested a credit against this invoice. This credit would have to be approved so let’s run thru the Credit Note Approval process.
- 16. A workflow consists of 3 basic setups The steps that need to be followed (in this case to process the credit note in this case). • The 1st step will be to (Prepare the Application for Credit). • The 2nd step is to (Send this for Approval). • The 3rd step if it’s approved is to (Send for Processing). • There is a 4th step which is to (Re-invoice if necessary).
- 17. The people responsible for doing the work in each of the steps
- 18. The information and documents that need to be captured in each of the steps.
- 19. There’s a huge amount of flexibility built into setting up the workflow to cater for specific needs but we won’t go into details here, I’ll just highlight a couple of important points. • Time limits setup against each step • Escalation procedures if these time limits are exceeded. • Business rules can be defined against all information entered (e.g. if a Credit for a certain value is being requested only allow a certain person or persons to approve etc.) • Specify which documents are mandatory before allowing the workflow to move to the next step.
- 20. Ok lets start this Credit Note Process that we’ve defined
- 21. The capture form for “preparing the application for credit” is invoked, notice how lookups can be setup against fields to help with data capture.
- 22. Right lets attach any correspondence that we may have for this credit note. • An email from the customer requesting the credit. • An excel spreadsheet with a recon that we prepared.
- 23. All you need do is save the email, no specific name or where this should be saved, QDocs will handle that all for you. This is how you can work with any document that’s already in an electronic format.
- 24. It will automatically populate all the index fields that it can from the information that has already been captured in the process. We’ll do the same thing with our excel recon.
- 25. As you can see it has attached the documents from the library to this process.
- 26. We now forward the process to the relevant person that needs to approve the Credit Note
- 27. The person that you forwarded the process to will receive an email informing them of the credit note they need to approve. All they need do is to select the attachment, which will automatically open the process for approval
- 28. Notice it’s automatically attached all the documents that are required, and when the person approves the credit note it has requested an electronic password
- 29. As the user has approved the credit note, we will forward it to the processing department to process the credit note
- 30. The user has the option of viewing all their outstanding work by looking at their workflow inbox, and selecting the process to work on
- 31. Lastly the processing user either processes the credit note or we can do some automation • The workflow can pass information to another application to do certain work (e.g. Process the credit note) • After that, the credit note document can be pulled into the workflow • Lastly we’ll create a email to the customer attaching the credit note informing them that the credit note has been processed
- 32. Right the process has been completed. The process will always stay available to you for audit purposes, we’ll demonstrate this now.
- 33. You can search for the process by doing a normal document search, you can search on any of the data that was captured in the process
- 34. It will show you all the data that was in the process, you can also view the audit trail of the process
- 35. The summary audit trail will give you the lifecycle of the process. • The steps that were followed • Who did the work in these steps • The time it took for the steps to be completed • Drill down to the see the detail of the data in each step
- 36. The snapshot will show the data as it came into the step and the data as it left the step
- 37. We’ve finally come to the end of the presentation. I hope we’ve been able to present the salient features of ExecQDocs the workflow enabled Document Management System