The document discusses additive manufacturing (AM), also known as 3D printing. It describes AM as a process of joining materials layer by layer to make objects from 3D model data, unlike subtractive manufacturing which removes material. The key steps in AM are developing a 3D CAD model, converting it to an AM file format, slicing it into layers, and building the part layer by layer using an AM device. Common AM techniques include stereolithography, fused deposition modeling, and selective laser sintering.
2. 1.1 INTRODUCTION TO ADDITIVE MANUFACTURING
Additive manufacturing (AM) is the process of joining materials to make objects
from Computer Aided Design (CAD) model data, usually layer upon layer, as
opposed to subtractive manufacturing methods .
Additive manufacturing is also called as 3D printing, additive fabrication, or
freeform fabrication. These new techniques, while still evolving, are projected to
exert a profound impact on manufacturing. They can give industry new design
flexibility, reduce energy use, and shorten time to market.
The current steps in AM are developing a 3-D model using a computer
modeling software and converting the model into a standard AM file format,
changing the size, location, or other properties of the model using AM
software, then building the part in layers using the AM device.
3. DEFINITION
Additive Manufacturing (AM) refers to a process by which
digital 3D design data is used to build up a component in
layers by depositing material.
The term AM encompasses many technologies including
subsets like 3D Printing, Rapid Prototyping (RP), Direct Digital
Manufacturing (DDM), layered manufacturing and additive
fabrication.
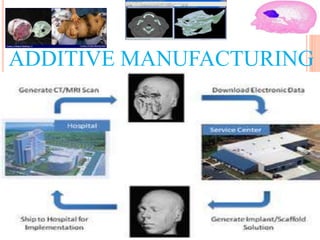
AM application is limitless. Early use of AM in the form of Rapid
Prototyping focused on preproduction visualization models.
More recently, AM is being used to fabricate end-use products
in aircraft, dental restorations, medical implants, automobiles,
and even fashion products.
14. Latin term, "pro et contra", is the origin of the 'pros and cons' terms which means for
or against. Pros do mean for, or in favor of, while cons is for against. Generally,
pros and cons is taken as a method of decision making but do have other
meanings also.
Pros and Cons of AM
21. Generation of Geometrical Layer Information on Single
Layers
To produce three-dimensional models by layer-oriented
additive manufacturing processes, the 3D CAD solid must be
mathematically split into the same layers as those produced
physically by the AM machine. This process is known as
"slicing."
There are two basic methods of doing this:
1) Triangulation, which leads to the STL format.
2) Direct cutting in the CAD system, which leads to the CL
(SLI) format.
22. STL format
STL is a file format native to the stereo lithography CAD software.
It is widely used for rapid prototyping, 3D printing and
computer-aided manufacturing.
The main purpose of the STL file format is to encode the
surface geometry of a 3D object.
It encodes this information using a simple concept called
"tessellation".
Tessellation
Tessellation is the process of tiling a surface with one or more
geometric shapes such that there are no overlaps or gaps.
Tessellation can involve simple geometric shapes or very complicated
(and imaginative) shapes.
24. 1. Liquid Based Additive Manufacturing Systems Building
material is in the liquid state.
The following AM Systems fall into this category:
1) Stereo lithography Apparatus(SLA)
2) Poly Jet 3D printing
3) Multi jet Printing(MJP)
4) Solid Object Ultra voilet-Laser Printer(SOUP)
5) Rapid Freeze Prototyping
2. Solid Based Additive Manufacturing Systems
Building material is in the Solid state (except powder).
The solid form can include the shape in the forms of
wire, rolls, laminates and pellets.
I The following AM Systems fall into this category:
1) Fused deposition modeling (FDM)
2) Selective Deposition Lamination (SDL)
3) Laminated Object Manufacturing (LOM)
4) Ultrasonic Consolidation
25. Powder Based Additive Manufacturing Systems
Building material is Powder(grain like form).
All Powder Based AM Systems employ the joining/binding
method.
The following AM Systems fall into this category:
1) Selective Laser Sintering(SLS)
2) ColorJet Printing(CJP)
3) Laser Engineered Net Shaping (LENS)
4) Electron Beam Melting(EBM) etc.
26. Liquid-Based
Liquid-based RP systems have the initial form of its material in liquid
state. Through a process commonly known as curing, the liquid is
converted into the solid state.
The following RP systems fall into this category:
(1) 3D Systems’ Stereolithography Apparatus (SLA)
(2) Cubital’s Solid Ground Curing (SGC)
(3) Sony’s Solid Creation System (SCS)
(4) CMET’s Solid Object Ultraviolet-Laser Printer (SOUP)
(5) Autostrade’s E-Darts
(6) Teijin Seiki’s Soliform System.
(7) Meiko’s Rapid Prototyping System for the Jewelry Industry
Three methods are possible under the “Photo-curing” method.
The single laser beam method is most widely used and include all the above
RP systems with the exception of (2), (11), (13) and (14). Cubital (2) and
Light Sculpting (11) use the masked lamp method,
While the two laser beam method is still not commercialized.
27. Except for powder, solid-based RP systems are meant to encompass
all forms of material in the solid state. In this context, the solid form
can include the shape in the form of a wire, a roll, laminates and
pellets.
The following RP systems fall into this definition:
(1) Cubic Technologies’ Laminated Object Manufacturing (LOM)
(2) Stratasys’ Fused Deposition Modeling (FDM)
(3) Kira Corporation’s Paper Lamination Technology (PLT)
(4) 3D Systems’ Multi-Jet Modeling System (MJM)
(5) Solidscape’s ModelMaker and PatternMaster
(6) Beijing Yinhua’s Slicing Solid Manufacturing (SSM), Melted
Extrusion Modeling (MEM) and Multi-Functional RPM Systems (M-
RPM)
Solid-Based
Two methods are possible for solid-based RP systems.
RP systems (1), (3) & (4) belong to the Cutting and Glueing/Joining method,
While the Melting and Solidifying/Fusing method used RP systems (2), (5) & (6),
28. The following RP systems fall into this definition:
(1) 3D Systems' Selective Laser Sintering (SLS)
(2) EOS’s EOSINT Systems
(3) Z Corporation’s Three-Dimensional Printing (3DP)
(4) Optomec’s Laser Engineered Net Shaping (LENS)
(5) Soligen’s Direct Shell Production Casting (DSPC)
(6) Fraunhofer’s Multi phase Jet Solidification (MJS)
(7) Acram’s Electron Beam Melting (EBM)
(8) Aeromet Corporation’s Lasform Technology
Powder-Based
In a strict sense, powder is by-and-large in the solid state. However,
it is intentionally created as a category outside the solid-based RP
systems to mean powder in grain-like form.
All the above RP systems employ the Joining/Binding method. The
method of joining/binding differs for the above systems in that some
employ a laser while others use a binder/glue to achieve the joining
effect.
29. Table 1 – The Seven AM Process Categories by ASTM F42
30. RAPID PROTOTYPING PROCESS
1. Create a CAD model of the design .
2. Convert the CAD model to STL format (STANDARD
TRIANGULATION LANGUAGE).
3. Slice the STL file into thin cross-sectional layers.
4. Construct the model one layer atop another.
5. Clean and finish the model.
31.
32. RAPID PROTOTYPING PROCESS
STEP 1: CAD Model Creation
First, the object to be built is modeled using a Computer-Aided Design
(CAD) software package.
Solid modelers, such as Pro/ENGINEER, tend to represent 3-D objects
more accurately than wire-frame modelers such as AutoCAD, and will
therefore yield better results.
This process is identical for all of the RP build techniques.
STEP 2: CONVERSION TO STL FORMAT
The second step, therefore, is to convert the CAD file into STL format.
This format represents a three-dimensional surface as an assembly of
planar triangles.
To establish consistency, the STL format has been adopted as the
standard of the rapid prototyping industry.
33.
34.
35. The standard data interface between CAD software and the
machines is the STL file format.
• An STL file approximates the shape of a part or assembly
using triangular facets.
•Smaller facets produce a higher quality surface.
•SLC: Slice format, CLI: Common Layer Interface
36. RAPID PROTOTYPING PROCESS
STEP 3: SLICE THE STL FILE
In the third step, a pre-processing program prepares the STL file to be
built.
The pre-processing software slices the STL model into a number of layers
from 0.01 mm to 0.7 mm thick, depending on the build technique.
The program may also generate an auxiliary structure to support the
model during the build. Supports are useful for delicate features such as
overhangs, internal cavities, and thin-walled sections.
STEP 4: LAYER BY LAYER CONSTRUCTION
The fourth step is the actual construction of the part.
RP machines build one layer at a time from polymers, paper, or powdered
metal.
Most machines are fairly autonomous, needing little human intervention.
37. RAPID PROTOTYPING PROCESS
STEP 5: CLEAN AND FINISH
The final step is post-processing. This involves removing the prototype
from the machine and detaching any supports.
Some photosensitive materials need to be fully cured before use.
Prototypes may also require minor cleaning and surface treatment.
Sanding, sealing, and/or painting the model will improve its appearance
and durability.
40. Stereo lithography
One of the most important additive manufacturing
technologies currently available.
The first ever commercial RP systems were resin-based
systems commonly called stereo lithography or SLA.
The resin is a liquid photosensitive polymer that cures or
hardens Stereo lithography when exposed to ultraviolet
radiation.
This technique involves the curing or solidification of a liquid
photosensitive polymer through the use of the irradiation light
source.
The source supplies the energy that is needed to induce a
chemical reaction (curing reaction), bonding large no of small
molecules and forming a highly cross-linked polymer
44. Prototyping or model making is one of the important steps to finalize a product
design. It helps in conceptualization of a design. Before the start of full production a
prototype is usually fabricated and tested.
The term rapid prototyping (RP) refers to a class of technologies that can
automatically construct physical models from Computer-Aided Design (CAD) data.
Rapid prototyping is the automatic construction of physical objects using solid
freeform fabrication and are used to produce model and prototype parts.
Rapid prototyping takes virtual designs, transforms them into cross sections, still
virtual, and then create each cross section in physical space, one after the next until the
model is finished.
In product development, time pressure has been a major factor in determining and
direction of the development and success of new methodologies & techniques for
enhancing its performance.
INTRODUCTION
45. Rapid prototyping technology is a group of manufacturing processes that enable
the direct physical realization of 3D computer models. This technology converts
the 3D computer data provided by a dedicated STL file format to physical model
, layer by layer with a high degree of accuracy.
The standard data interface b/w CAD software and the machine is the STL file
format.
A STL file approximates the shape of a part or assembly using triangular facets ,
that tiny facets produces a higher quality surfaces.
The machine reads data from a CAD drawing and lays down successive layer of
liquid, powder or sheet material and this way builds up the model from a series
of cross sections.
These layer, which correspond to the virtual cross section in the CAD model, are
joined together or fused automatically to create the final shape.
46. Rapid Prototyping (RP)
Rapid Prototyping (RP) can be defined as a group of
techniques used to quickly fabricate a scale model of a part
or assembly using three-dimensional computer aided
design (CAD) data.
A family of unique fabrication processes developed to make
engineering prototypes in minimum lead time based on a CAD model
of the item.
The traditional method is machining (time consuming)
RP allows a part to be made in hours or days rather than weeks,
given that a computer model of the part has been generated on a
CAD system
47. Why Rapid Prototyping
Because product designers would like to have a physical model of a
new part or product design rather than just a computer model or line
drawing
Creating a prototype is an integral step in design
A virtual prototype may not be sufficient for the designer to
visualize the part adequately
Using RP to make the prototype, the designer can visually examine
and physically feel the part and assess its merits and shortcomings.
48. Needs For Prototyping:
The extreme usage of complicated shapes and
availability of limited resources led the way to
development of things field of manufacturing
methodology.
•To increase effective communication.
•To decrease development time.
•To decrease costly mistakes.
•To minimize sustaining engineering changes.
•To extend product lifetime by adding necessary
features and eliminating redundant features early in the
design.
•Takes less time to design and manufacture.
•Meets customer demand.
• Creating a prototype is an integral step in design.
49. A virtual prototype may not be sufficient for the
designers to visualize the part adequately.
Using RP to make the prototype, the designers can
visually examine and physical feel the part and asses
the merits and demerits.
Rapid Prototyping decreases development time by
allowing corrections to a product to be made early in
the process.
The trends in manufacturing industries continue to
emphasize the following:
Increasing number of variants of products.
Increasing product complexity.
50. HISTORY DEVELOPMENT OF RP SYSTEM
Development
•Manual Prototyping by craftsman
•1970 prototyping in CAD , virtual environment
•1980, Rapid Prototyping (RP) by layer-by-layer material
deposition. CAD/CAM
FUNDAMENTALS OF RAPID PROTOTYPING
Common to all the different techniques of RP is the basic approach
they adopted.
A model or component is modeled on a Computer-Aided Design/
Computer-Aided Manufacturing (CAD/CAM) system. The model
which represents the physical part to be built must be represented as
closed surfaces which unambiguously define an enclosed volume.
51. STL” (Standard triangulation language ) file format which
originates from 3D Systems. The STL file format approximate
surfaces of the model by polygons. Highly curved surfaces must
employ many polygons, which means that STL files for curved parts
can be very large.
Ex: IGES (Initial Graphics Exchange Specifications) data.
A computer program analyzes a STL file that defines the model to
be fabricated and “slices” the model into cross sections. The cross
sections are systematically recreated through the solidification of
either liquids or powders and then combined to form a 3D model.
53. Input
Input refers to the electronic information required to describe the physical
object with 3D data.
There are two possible starting points a computer model or a physical
model.
The computer model created by a CAD system can be either a surface
model or a solid model.
On the other hand, 3D data from the physical model is not at all
straightforward. It requires data acquisition through a method known as
reverse engineering.
In reverse engineering, a wide range of equipment can be used, such as
CMM (coordinate measuring machine) or a laser digitizer, to capture data
points of the physical model and “reconstruct” it in a CAD system.
54. Method
While they are currently more than 20 vendors for RP systems,
the method employed by each vendor can be generally classified
into the following categories: photo-curing, cutting and
glueing/joining, melting and solidifying/fusing and
joining/binding.
Photo-curing can be further divided into categories of single laser
beam, double laser beams and masked lamp.
Material
The initial state of material can come in either solid, liquid or
powder state.
In solid state, it can come in various forms such as pellets, wire
or laminates.
The current range materials include paper, nylon, wax, resins,
metals and ceramics.
55. Most of the RP parts are finished or touched up before they are used
for their intended applications.
Applications can be grouped into (1) Design (2) Engineering, Analysis,
and Planning and (3) Tooling and Manufacturing. A wide range of
industries can benefit from RP and these include, but are not limited to,
aerospace, automotive, biomedical, consumer, electrical and electronics
products.
Applications
56. THREE PHASES OF DEVELOPMENT LEADING TO RAPID
PROTOTYPING
First Phase: Manual Prototyping
Prototyping had began as early as humans began to develop
tools to help them live. However, prototyping as applied to products
in what is considered to be the first phase of prototype development
began several centuries ago. In this early phase, prototypes typically
are not very sophisticated and fabrication of prototypes takes on
average about four weeks, depending on the level of complexity and
representativeness
Example: Prototypes tend to be craft-based.
59. Second Phase: Soft or Virtual Prototyping
The early 1980s saw the evolution of the second phase of prototyping — Soft or
Virtual Prototyping. Virtual prototyping takes on a new meaning as more
computer tools become available — computer models can now be stressed,
tested, analyzed and modified as if they were physical prototypes.
For example, analysis of stress and strain can be accurately predicted on the
product because of the ability to specify exact material attributes and properties.
60. Third Phase: Rapid Prototyping
Rapid Prototyping of physical parts, or otherwise known as solid freeform
fabrication or desktop manufacturing or layer manufacturing technology,
represents the third phase in the evolution of prototyping.
The invention of this series of rapid prototyping methodologies is described
as a “watershed event” because of the tremendous time savings, especially for
complicated models. Though the parts (individual components) are relatively
three times as complex as parts made in 1970s, the time required to make such a
part now averages only three weeks . Since 1988, more than twenty different
rapid prototyping techniques have emerged.
63. Methods of Prototyping:
There are two main methods of prototyping, which are derived from similar
approaches in sculpture.
•Subtractive prototyping
•Additive prototyping
Subtractive process:. In this technique the machine starts out with a block of
plastic and uses a delicate cutting tool to carve away material, layer by layer to
match the digital object. They may start with a block, sheet, or tube of raw material
and then, by drilling, cutting, lathing or by grinding; the material is removed,
yielding the desired object or product. This is similar to a computer-controlled lathe.
This is earlier and less efficient.
Additive process: The desired object is built from bottom to top in very thin layers.
Whereas subtractive techniques require hard-earned craft skills for the complicated
and unique setups that vary with each job, additive techniques require no special
knowledge on the part of the prototype fabricator.
64. Rapid prototyping is an additive process .
Today's additive technologies offer advantages in many applications compared
to classical subtractive fabrication methods such as milling or turning, they are:
Objects can be formed with any geometric complexity or intricacy without
the need for elaborate machine setup or final assembly;
Rapid prototyping systems reduce the construction of complex objects to a
manageable, straightforward, and relatively fast process.
65.
66.
67.
68. Advantages during development ... No tooling costs
•Short production times
•Comparatively low unit prices
•Constructional simplification: e.g. instead of housing, lid and
screws, 1 complete sintered unit can be made
•Test- and functional products can be produced in small batches
•Formal- and functional variants possible
69. Engineering Analysis and Planning
Existence of part allows certain engineering analysis and planning
activities to be accomplished that would be more difficult without the
physical entity
Comparison of different shapes and styles to determine aesthetic
appeal
Wind tunnel testing of streamline shapes
Stress analysis of physical model
Fabrication of pre-production parts for process planning and tool
design
Design benefits of RP:
Reduced lead times to produce prototypes
Improved ability to visualize part geometry
Early detection of design errors
Increased capability to compute mass properties
70. Problems with Rapid Prototyping
Part accuracy:
Staircase appearance for a sloping part surface due to
layering .
Shrinkage and distortion of RP parts.
Limited variety of materials in RP
Mechanical performance of the fabricated parts is limited by
the materials that must be used in the RP process
71. ... production ...
No tooling costs for small- and medium-sized batches
Low tooling costs for larger batches
Product customization possible without additional costs
... and the production of spare parts.
No tooling management necessary
Spare parts need no longer be kept but produced as required
Unlimited subsequent delivery
Builds complex 3D geometrical shapes
Is automated based on CAD models
Uses a generic fabrication machine that does not require part
specific tooling
Requires a minimum of or no human intervention
Produces accurate prototypes in a short time at a minimum cost
73. STEREOLITHOGRAPHY PROCESS
Stereolithography (SLA), the first Rapid Prototyping
process, was developed by 3D Systems of Valencia,
California, USA, founded in 1986.
RP process for fabricating a solid plastic part out of
a photosensitive liquid polymer using a directed laser
beam to solidify the polymer
Part fabrication is accomplished as a series of layers -
each layer is added onto the previous layer to gradually
build the 3-D geometry
The first addition RP technology - introduced 1988 by
3D Systems Inc. based on the work of Charles Hull
More installations than any other RP method .
74. The SLA process is based fundamentally on the following
principles
Parts are built from a photo-curable liquid resin that cures when
exposed to a laser beam (basically, undergoing the photo polymerization
process) which scans across the surface of the resin.
The building is done layer by layer, each layer being scanned by the
optical scanning system and controlled by an elevation mechanism
which lowers at the completion of each layer.
Stereolithography (SL) is an additive manufacturing technology for
producing models, prototypes, patterns, and in some cases, production parts.
UV laser and liquid photo curable resin .
Laser cures resin .
75. CONTINUED….
A vat of photosensitive resin contains a vertically-moving platform.
The part under construction is supported by the platform that moves downward by a
layer thickness (typically about 0.1 mm / 0.004 inches) for each layer.
A laser beam traces out the shape of each layer and hardens the photosensitive resin.
can be used as master patterns for injection molding, thermoforming, blow
molding, and also in various metal casting processes
80. SLA 250/50HR SLA 3500 SLA5000 SLA7000
Lasertype, HeCd,325nm, Solid state Solid state Solid state
wavelength, 6mW Nd:YVO4 frequency frequency
power 354.7nm tripled tripled
160mW Nd:YVO4 Nd:YVO4
354.7nm 354.7nm
216mW 800mW
Layer thickness 0.0625-0.1 0.05-0.1 0.05-0.1 0.0254-0.127
Mm
Beam diameter 0.06-00.08 0.20-0.30 0.20-0.30 0.23-0.28 to
mm 0.685-0.838
Drawing speed 635 mm/s 3.45 m/s Up to 5.0 m/s 2.54-9.52 m/s
Max part weight, 9.1 56.8 68.04 68.04
Kg
Elevator 0.0025 0.00177,+/- 0.00177,+/- 0.001,+/-
resolutionand 0.005 0.013 0.001
repeatability mm
Vat capacity,L 32.2 99.3 253.6 253.6
Department of Mechanical Engineering, DBIT, Bengaluru. Page 10
PROCESS PARAMETERS
81. Max build 250 x 250 x 250 350 x 350 x 508 x 508 x 508 x 508 x
envelop ,mm 400 584 600
Operating system MS-DOS WINDOWS WINDOWS WINDOWS
NT NT NT
Weight kg 461 1100 1363 1455
PROCESS PARAMETERS
1. UV LASER BEAM.
2. PHOTO CURABLE LIQUID RESIN.
3. LASER SCANNING.
4. ELEVATORS.
5. PHOTO POLYMERIZATION PROCESS.
82. Advantages:
Possibility of manufacturing parts which are impossible
to be produced conventionally in a single process.
Can be fully automated and no supervision is required.
High Resolution.
No geometric limitations.
Good accuracy (approximately + 0.005 inches)
Superior surface finish
Able to use a wide range of materials
Compatible with several color changing materials
Widely available
83. Disadvantages:
Necessity to have a support structure.
Require labor for post processing and cleaning.
Liquid materials tend to be messy .
Parts produced may require a post-curing operation in a
separate oven.
Few materials compatible .
Warpage and shrinkage issues .
Require supports .
Resin is expensive.
Resins and solvents can be environmentally hazardous.
84. APPLICATION
(1) Models for conceptualization, packaging and presentation.
(2) Prototypes for design, analysis, verification and functional
testing.
(3) Parts for prototype tooling and low volume production tooling.
(4) Patterns for investment casting, sand casting and molding.
(5) Tools for fixture and tooling design, and production tooling.
86. Selective Laser Sintering (SLS®, registered trademark by DTM™ of
Austin, Texas, USA) is a process that was patented in 1989 by Carl
Deckard, a University of Texas graduate student.
With the financial support from the BF Goodrich Company, and based on
the technology that was developed and patented at the University of Texas at
Austin, the company shipped its first commercial machine in 1992.
DTM had worldwide exclusive license to commercialize the SLS®
technology until they were bought over by 3D Systems in August 2001. 3D
Systems’ head office address is 26081 Avenue Hall, Valencia, CA91355,
USA
87. SLS PRINCIPLES
(1) Parts are built by sintering when a CO2 laser beam hits a thin layer of
powdered material. The interaction of the laser beam with the powder
raises the temperature to the point of melting, resulting in particle
bonding, fusing the particles to themselves and the previous layer to form
a solid.
(2) The building of the part is done layer by layer. Each layer of the
building process contains the cross-sections of one or many parts. The
next layer is then built directly on top of the sintered layer after an
additional layer of powder is deposited via a roller mechanism on top of
the previously formed layer.
88. Sinter Bonding
particles in each successive layer are fused to each other and to
the previous layer by raising their temperature with the laser beam
to above the glass-transition temperature.
The glass-transition temperature is the temperature at which
the material begins to soften from a solid to a jelly-like condition.
As a result, the particles begin to soften and deform owing to
their weight and cause the surfaces in contact with other
particles.
One major advantage of sintering over melting and fusing is
that it joins powder particles into a solid part without going into
the liquid phase, thus avoiding the distortions caused by the flow
of molten material during fusing.
This high laser power requirement can be reduced by using
auxiliary heaters at the powder bed to raise the powder
temperature to just below the sintering temperature during the
sintering process. However an inert gas environment is needed
to prevent oxidation or explosion of the fine powder particles.
89.
90.
91. SLS PROCESS
The SLS® process creates three-dimensional objects, layer by layer,
from CAD-data generated in a CAD software using powdered materials
with heat generated by a CO2 laser within the Vanguard TM system.
CAD data files in the STL file format are first transferred to the
Vanguard TM system where they are sliced.
(1) A thin layer of heat-fusible powder is deposited onto the part building
chamber.
(2) The bottom-most cross-sectional slice of the CAD part under
fabrication is selectively “drawn” (or scanned) on the layer of powder
by a heat-generating CO2 laser. The interaction of the laser beam with
the powder elevates the temperature to the point of melting, fusing the
powder particles to form a solid mass. The intensity of the laser beam is
modulated to melt the powder only in areas defined by the part’s
geometry. Surrounding powder remain a loose compact and serve as
supports.
92. (3) When the cross-section is completely drawn, an additional layer of
powder is deposited via a roller mechanism on top of the previously
scanned layer. This prepares the next layer for scanning.
(4) Steps 2 and 3 are repeated, with each layer fusing to the layer below it.
Successive layers of powder are deposited and the process is repeated until
the part is completed.
93. MATERIALS OF SLS PROCESS
Polyamide. Trade named “DuraFormTM”, this material is used to
create rigid and rugged plastic parts for functional engineering
environments.
This composite material improves the resistance to heat and
chemicals.
Thermoplastic elastomer. Flexible, rubber-like parts can be
prototyped using the SLS. Trade named, “SOMOS® 201”,
It is able to resist abrasion and provides good part stability.
The material is impermeable to water and ideal for sports shoe
applications and engineering seals.
Polycarbonate. An industry-standard engineering thermoplastic.
These are suitable for creating concept and functional models
and prototypes, investment casting patterns for metal prototypes
and cast tooling (with the Rapid CastingTM process), masters for
duplication processes, and sand casting patterns
94. Nylon. Another industry-standard engineering thermoplastic. This
material is suitable for creating models and prototypes that can
withstand and perform in demanding environment.
It is durable, resistant to heat and chemicals, and is excellent when fine detail is
required
Metal. This is a material where polymer coated stainless steel
powder is infiltrated with bronze. Trade named “Laser Form ST-100”,
material is excellent for producing core inserts and preproduction tools for
injection molding prototype polymer parts.
Ceramics. Trade named “SandFormTM Zr” and “SandformTM Si”,
these use zircon and silica coated with phenolic binder to produce
complex sand cores and molds for prototype sand castings of metal
parts
95. PROCESS PARAMETER
LASER RELATED PARAMETERS ( Laser power, spot
size, pulse duration, pulse frequency)
SCAN RELATED PARAMETERS (scan speed, scan
spacing, scan pattern)
POWER RELATED PARAMETERS ( particle size, shape
and distribution, powder bed density, layer thickness,
material properties )
TEMPARATURE RELATED PARAMETERS ( power bed
temperature, power feeder temperature, temperature
uniformity )
99. ADVANTAGES
Advanced software support.
No post-curing required.
Little post-processing required.
No part supports required.
Wide range of processing materials.
Good part stability.
Parts and/or assemblies that move and work that have
a good surface finish and feature details.
Selective laser sintering (SLS) gives the capability of
flexible snaps and living hinges as well as high stress
and heat tolerance.
Wide variety of materials such as flexible and rigid
plastics, electrometric materials, fully dense metals and
casting patterns.
Inexpensive materials.
Safe materials.
Supports not needed.
Reduced distortion from stresses.
Produce parts simultaneously.
100. DISADVANTAGES
Large physical size of the unit.
High power consumption.
Poor surface finish.
Rough surface finish ("stair step effect")
Porosity of parts
The first layers may require a base anchor to
reduce thermal effects (e.g. curl)
Part density may vary
Material changes require cleaning of machine
101. APPLICATION
concept modelers.
Functional models and working prototypes.
wax casting pattern.
Polycarbonate pattern.
Metal tools.
Rover Applies SLS Process in Tooling for Injection
Molding.
Reebok Uses SLS Process for Developing Sports
Shoes.
Boeing Uses Prototyping to Maximize Return on
Investment.
102. STRATASYS’ FUSED DEPOSITION
MODELING (FDM)
Stratasys Inc. was founded in 1989 and has developed most of
the company’s products based on the Fused Deposition Modeling
(FDM) technology.
The technology was first developed by Scott Cramp in 1988 and
the patent was awarded in the U.S. in 1992.
FDM uses the extrusion process to build 3D models.
Stratasys introduced its first rapid prototyping machine, the 3D
modeler® in early 1992 and started shipping the units later that
year.
103. PRINCIPLES
The principle of the FDM is based on surface
chemistry, thermal energy, and layer
manufacturing technology.
The material in filament(spool) form is melted in a
specially designed head, which extrudes on the
model.
As it is extruded, it is cooled and thus solidifies to
form the model.
The model is built layer by layer, like the other RP
systems. Parameters which affect performance and
functionalities of the system are material column
strength, material flexural modulus, material
viscosity, positioning accuracy, road widths,
deposition speed, volumetric flow rate, tip diameter,
envelope temperature, and part geometry.
106. process
RP process in which a long filament of wax or polymer is
extruded onto existing part surface from a work head to
complete each new layer .
Work head is controlled in the x-y plane during each
layer and then moves up by a distance equal to one layer
in the z-direction.
Extruded is solidified and cold welded to the cooler
part surface in about 0.1 s .
Part is fabricated from the base up, using a layer-by-
layer procedure.
A plastic filament or metal wire is unwound from a coil
and supplies material to an extrusion nozzle which can
turn on and off the flow.
The nozzle is heated to melt the material and can be
moved in both horizontal and vertical directions by a
numerically controlled mechanism
107. The model or part is produced by extruding small
beads of thermoplastic material to form layers as the
material hardens immediately after extrusion from the
nozzle.
In this technique, filaments of heated thermoplastic
are extruded from a tip that moves in the x-y plane.
Like a baker decorating a cake, the controlled
extrusion head deposits very thin beads of material onto
the build platform to form the first layer.
The platform is maintained at a lower temperature, so
that the thermoplastic quickly hardens.
After the platform lowers, the extrusion head deposits a
second layer upon the first. Supports are built along the
way, fastened to the part either with a second, weaker
material or with a perforated junction.
The fused disposition modeling process uses plastic
filament that is 1/16” in diameter and stored on a
coil.
108.
109. PROCESS PARAMETERS
FDM 2000 FDM 3000 FDM 8000 Quantum
Build size mm 254 x 254 x 254 254 x 254 x 406 457 x 457 x 609 600 x 500 x 600
Accuracy mm +/- 0.127 +/- 0.127 +/- 0.127-0.254 +/- 0.127
Size mm 660x 914 x 1067 660 x 1067 x 1486 x 1905 x 2235 x 1981 x
914 1003 1118
Weight Kg 160 160 392 1134
Power 220-240 VAC 208-240 VAC 220-240 VAC 208-240 VAC
requirements
50/60 Hz 10A 50/60 Hz 10A 50/60 Hz 10A 50/60 Hz 10A
single phase single phase single phase single phase
Materials ABS (white) ABS (white) ABS ABS
Investment Investment
casting wax casting wax
Elastomer Elastomer
Layer width 0.254 to 2.54 0.254 to 2.54 0.254 to 2.54 0.38 to 0.51
mm mm mm
Layer thickness 0.05 to 0.762 0.05 to 0.762 0.05 to 0.762 0.18 to 0.25 mm
mm mm mm
110. CON’TD..
Liquifier temperature.
Chamber temparature.
Stand off distance.
Filament feed rate.
Nozzle diameter.
Deposition type.
Layer thickness.
Scanning speed of the laser.
Row width.
111. MATERIALS
Acrylonitrile butadiene styrene (ABS) polymer, the
FDM technology can also be used with poly
carbonates, polycaprolactone, polyphenyl sulfones
and waxes.
112. ADVANTAGES
True desktop manufacturing system that can be run in office
environment.
There is no worry of exposure to toxic fume and chemicals.
The process is clean, simple, easy to operate and Fast
building for bottle like structure or hollow parts
Material is supplied in spool form which is easy to handle
and can be changed in minute
Materials used are very cost effective, typical parts cost
under US$20
A good variety of material is available including colour ABS
and Medical ABS, investment casting wax and elastomer
Mid-range performance/cost RP system and is the
bestselling RP system in 1995
It does not need laser systems, uses relatively inexpensive
binders, and is easy to change materials.
113. DISADVANTAGE
Accuracy is relatively low and is difficult
To build parts with complicated details
Poor strength in vertical direction
Slow for building a mass part
The main difficulties are in controlling temperature
within the growing part, the need to provide support
structures for the growing model
The accuracy which is limited to the nozzle
diameter.