SlideShare una empresa de Scribd logo
1 de 36
First, we will be making lined pockets. Remember, you have two pocket pieces, two
linings, and you’ve fused an interfacing strip to the wrong side of the pocket pieces.
Handling your pocket pieces carefully, stitch the top edge of the lining and the top edge
of the pocket together, right-sides together, and leaving a backstitched gap in the middle
of this seam. Like so – the right-hand pocket serving as an example of the finished part of
this step:
Next, take the pocket to the ironing board and press the seam allowance toward the lining
(below left). Then, fold the lining and the pocket together, right-sides together (below
right)
Now, stitch around the edge of the pocket at the 3/8″ seam allowance. This is self-
explanatory (if you can’t make a perfect 3/8″ seam allowance, practice first! The shirt
needs a lot of accuracy to look good!). Steam press those pockets and let them dry before
proceeding:
Trim the seam allowances as so (showing bottom corners of the pockets):
Now, we are ready to turn the pockets through that gap we left in the top:
Turn your pockets and gently press out the corners with something pokey but not too
sharp. No, I do not have a bone folder or any tool for this – yet. I use… well… I hate to
tell you as someone will be upset I’m doing it wrong. But yes, I use the end of my
scissors. I’m really careful about it though! I promise:
A gentle steam-press, and the near-finished pockets:
Now all that remains is to slip-stitch, whip-stitch, or ladder-stitch the opening between
the lining and the facing closed!
Below: all stitched up, with pretty invisible stitchery if I do say so:
And now… get ready to set aside this sew-a-long to practice. IT’S TIME TO MAKE A
BUTTONHOLE! Two, in fact. In the shirt pockets.
Now it’s time to set the pockets aside and work on the sleeve placket.
Shirt Sleeve With Cuff§ Laying both the overlap and underlap right-sides to the WRONG
side of the sleeve. Notice also how I’ve clipped the overlap, and folded under ALL seam
allowances (I used 1/4″ but you can use 3/8″ if you like) except for the seam allowances
abutting the slash mark and those at the sleeve’s raw edge. I’ve also edged the plackets
lower than the sleeves; I’ll trim them after my first two seams:
Now – two lines of stitching, making sure to back stitch at all ends:
Slashing. Slash right up to the same distance as the stitching lines:
You can now trim up the ends of these placket pieces and trim the top folded edges too. I
clip the underlap and overlap seam allowances right at the top of the two seams parallel
to the slash. Shown below, the clipped underlap seam allowance. I haven’t yet clipped the
overlap seam allowance in this picture:
Now: fold over the underlap to the right-side of the sleeve so the folded over edge covers
up the first stitching line, then topstitch. I elected to use a regular stitch for this. We’ll
soon be using a topstitch seam for most of topstitching during construction, but not here:
Folding the overlap to the right-side…
Pressing and/or pinning: Make sure that the entire placket facing lies parallel to the grain.
Shown before pinning:
Pinned, and now stitched (again – follow instructions as per the above pdf). As you near
the place where the overlap and underlap will join, make sure to straighten that underlap
underneath the overlap. If you get it wrong, you can carefully take out the seam, re-steam
and re-pin, and try again. It’s a little tricky:
You can start stitching at the raw-edge as in my example, or you can start at the crossover
on the cap of the placket. There are control advantages to either. Again, just make sure
that cap is pinned securely as it will try to shift while you’re stitching.
Above – the finished overlaps. And below – the underside / wrong side of the sleeve
placket:
TIME FOR PLEATS!
Sleeve pleats.
Easy enough. Fold as per pattern instructions and using notches then stitch 1/4″ from the
raw edge to secure.
Press the pleats, and the placket as well:
Sleeve, near finished! Again – there are more than one way to make a sleeve placket so if
this is different, cool beans. This method is pretty reliable though and it’s what I use when
I’m not feeling too fancy.
Now, on to the back pleat on the shirt body back. Here, remember, we cut out the piece so
that Fold the top pleat so that you are folding symmetrically along the plaid. Here’s the
pleat after it’s been folded and sewn 1/4″ from the raw edge – the yellow thread is the
thread-marked pleat.
ts fine. Carefully remove the marking thread and carefully press. Then lay it out and
compare it to the size of the seam it abuts – that of the bias yoke
time to join up the yokes. No jokes. (titter!) Here also is a great example of a camera
angle giving you the wrong impression: my inner yoke (remember, the one cut on grain§,
not on the bias) is about 1/4″ a little smaller than the outer yoke (shown upside down in
the below photo), but the size difference here looks huge here. The SECOND picture
below more accurately represents how well the two pieces compared:
and I should also point out – even with 1/4″ difference, because of my flannel’s fairly
loose weave, it was very easy to carefully stretch the inner yoke so that it matched the
outer yoke and the shirt body. Everything came together fine. Small imperfections in
cutting often work out without additional trimming.
Pinning the outer yoke to sew 3/8″…
After this seam is complete, pin the inner yoke to the inside of the shirt, and sew RIGHT
along that first seam. Shown here – both yokes attached. You can’t see the inner yoke at
all as it is under the two layers.
Now – finger -pressing, then gently steam pressing, both yokes up, and pinning them for
temporary security. We aren’t topstitching yet – I’m going to address that in the next post,
when we apply the pockets (remember our pockets?).
And here, after flipping over the yoke and back piece, is the inner yoke:
Now, we are going to join our yokes together at the shoulder. First pin the outer yoke to
the front body, right sides together:
Stitch that seam with a construction stitch, clip the corners, and grade the seam:
Clip the seam allowance closest to the body, not the public side of the garment – the shirt
body seam allowance (note I used pinking sheers to grade):
Press this seam up toward the yoke. Next, fold over the seam allowance of the inner yoke.
I like to add a little Steam A Seam Lite tape here, to affix it to the outer yoke / shirt body
seam allowance. As shown:
Now – topstitch! If you carefully folded and pressed and/or fused that second seam
allowance, your inner seam should look pretty good:
… and here is how the top stitching stitch looks:
And now – go ahead and open up those pocket buttonholes, if they’re dried. I use my
seam-ripper – carefully. There are several ways to open a buttonhole§ and the way I’m
showing you is kind of RECKLESS and BAD-ASS but to be honest, creating thousands
of buttonholes
So now! We are done with today’s session. Next session we will be doing a bit of double-
threaded top stitching for applying the pockets, making the front placket (including our
last bit of interfacing), and putting the collar and collar stand together.

Más contenido relacionado

La actualidad más candente

How to turn a sweater into a sweater dress
How to turn a sweater into a sweater dressHow to turn a sweater into a sweater dress
How to turn a sweater into a sweater dress
guestba1678
 
Manipulating fabric - The Art of Manipulating Fabric
Manipulating fabric - The Art of Manipulating FabricManipulating fabric - The Art of Manipulating Fabric
Manipulating fabric - The Art of Manipulating Fabric
https://www.facebook.com/garmentspace
 
How To Make A Drawstring Bag
How To Make A Drawstring BagHow To Make A Drawstring Bag
How To Make A Drawstring Bag
kootoyoo
 
The colette sewing handbook (gnv64)
The colette sewing handbook  (gnv64)The colette sewing handbook  (gnv64)
The colette sewing handbook (gnv64)
Trang Nguyen Minh
 

La actualidad más candente (20)

Parts and Assembly of a Shirt
Parts and Assembly of a ShirtParts and Assembly of a Shirt
Parts and Assembly of a Shirt
 
Chain chomp-plush-sewing-pattern
Chain chomp-plush-sewing-patternChain chomp-plush-sewing-pattern
Chain chomp-plush-sewing-pattern
 
15 dress-pretty-project-womens-e book
15 dress-pretty-project-womens-e book15 dress-pretty-project-womens-e book
15 dress-pretty-project-womens-e book
 
PLEATS......
 PLEATS...... PLEATS......
PLEATS......
 
Babies sewing intructions
Babies sewing intructionsBabies sewing intructions
Babies sewing intructions
 
Kriti Tolani ,Fashion Design ,Dezyne E'cole College
 Kriti Tolani ,Fashion Design ,Dezyne E'cole College Kriti Tolani ,Fashion Design ,Dezyne E'cole College
Kriti Tolani ,Fashion Design ,Dezyne E'cole College
 
How to turn a sweater into a sweater dress
How to turn a sweater into a sweater dressHow to turn a sweater into a sweater dress
How to turn a sweater into a sweater dress
 
How To Make A Classroom Chair Cover
How To Make A Classroom  Chair CoverHow To Make A Classroom  Chair Cover
How To Make A Classroom Chair Cover
 
Flapping bird
Flapping birdFlapping bird
Flapping bird
 
Manipulating fabric - The Art of Manipulating Fabric
Manipulating fabric - The Art of Manipulating FabricManipulating fabric - The Art of Manipulating Fabric
Manipulating fabric - The Art of Manipulating Fabric
 
Pattern magic-pdf
Pattern magic-pdfPattern magic-pdf
Pattern magic-pdf
 
The dressmaker-s-handbook-of-couture-sewing-techniques-gnv64
The dressmaker-s-handbook-of-couture-sewing-techniques-gnv64The dressmaker-s-handbook-of-couture-sewing-techniques-gnv64
The dressmaker-s-handbook-of-couture-sewing-techniques-gnv64
 
How to make your own fashion clothes
How to make your own fashion clothesHow to make your own fashion clothes
How to make your own fashion clothes
 
How to make a faux hand bound notebook cover
How to make a faux hand bound notebook coverHow to make a faux hand bound notebook cover
How to make a faux hand bound notebook cover
 
How To Make A Drawstring Bag
How To Make A Drawstring BagHow To Make A Drawstring Bag
How To Make A Drawstring Bag
 
Fabric Sewing Techniques
Fabric Sewing TechniquesFabric Sewing Techniques
Fabric Sewing Techniques
 
Qa embroidery v2
Qa embroidery v2Qa embroidery v2
Qa embroidery v2
 
Garment Design & Construction 1 - Waistline Finishes
Garment Design & Construction 1 - Waistline FinishesGarment Design & Construction 1 - Waistline Finishes
Garment Design & Construction 1 - Waistline Finishes
 
The colette sewing handbook (gnv64)
The colette sewing handbook  (gnv64)The colette sewing handbook  (gnv64)
The colette sewing handbook (gnv64)
 
Fabric
FabricFabric
Fabric
 

Destacado

Mad Keen T-Shirt Range
Mad Keen T-Shirt RangeMad Keen T-Shirt Range
Mad Keen T-Shirt Range
Elizabeth Ames
 
Ksm garment cluster final presentation
Ksm garment cluster final presentationKsm garment cluster final presentation
Ksm garment cluster final presentation
Victor Nyamwange
 
Flow chart and breif description of garments manufacturing
Flow chart and breif description of garments manufacturingFlow chart and breif description of garments manufacturing
Flow chart and breif description of garments manufacturing
Sajawal Anwaar
 

Destacado (20)

Mad Keen T-Shirt Range
Mad Keen T-Shirt RangeMad Keen T-Shirt Range
Mad Keen T-Shirt Range
 
Kisses 2
Kisses 2Kisses 2
Kisses 2
 
USPA Womenswear S/S 2015
USPA Womenswear S/S 2015USPA Womenswear S/S 2015
USPA Womenswear S/S 2015
 
Q Menswear RTW F/W 2015
Q Menswear RTW F/W 2015Q Menswear RTW F/W 2015
Q Menswear RTW F/W 2015
 
Tech pack for Shirt Dress
Tech pack for Shirt DressTech pack for Shirt Dress
Tech pack for Shirt Dress
 
stitch
stitchstitch
stitch
 
Using Illustrator Fashion Templates by www.ChildrensFashionDesign.com
Using Illustrator Fashion Templates by www.ChildrensFashionDesign.comUsing Illustrator Fashion Templates by www.ChildrensFashionDesign.com
Using Illustrator Fashion Templates by www.ChildrensFashionDesign.com
 
Common terms in garmetns industry
Common terms in garmetns industryCommon terms in garmetns industry
Common terms in garmetns industry
 
Constraints of Marker Planning
Constraints of Marker PlanningConstraints of Marker Planning
Constraints of Marker Planning
 
Spec sheet by pratik solanki
Spec sheet by pratik solankiSpec sheet by pratik solanki
Spec sheet by pratik solanki
 
Ksm garment cluster final presentation
Ksm garment cluster final presentationKsm garment cluster final presentation
Ksm garment cluster final presentation
 
Garment Development Presentation
Garment Development PresentationGarment Development Presentation
Garment Development Presentation
 
U.S. Polo Assn. Business Shirt Presentation
U.S. Polo Assn. Business Shirt PresentationU.S. Polo Assn. Business Shirt Presentation
U.S. Polo Assn. Business Shirt Presentation
 
Fabric spreading
Fabric spreadingFabric spreading
Fabric spreading
 
Seam And its Classification with seam problem
Seam And its Classification with seam problemSeam And its Classification with seam problem
Seam And its Classification with seam problem
 
Textile Standards and Specifications by Violet Davis-Maurice
Textile Standards and Specifications by Violet Davis-MauriceTextile Standards and Specifications by Violet Davis-Maurice
Textile Standards and Specifications by Violet Davis-Maurice
 
Cuttingequipment
CuttingequipmentCuttingequipment
Cuttingequipment
 
Flow chart and breif description of garments manufacturing
Flow chart and breif description of garments manufacturingFlow chart and breif description of garments manufacturing
Flow chart and breif description of garments manufacturing
 
Basic Hand stitches used for Embroideries
Basic Hand stitches used for EmbroideriesBasic Hand stitches used for Embroideries
Basic Hand stitches used for Embroideries
 
Feed mechanism by pratik solanki
Feed mechanism by pratik solankiFeed mechanism by pratik solanki
Feed mechanism by pratik solanki
 

Similar a Shirt stitching

Ndp 2010 tips for beret, belt and hemlines
Ndp 2010   tips for beret, belt and hemlinesNdp 2010   tips for beret, belt and hemlines
Ndp 2010 tips for beret, belt and hemlines
yunrongheartz
 
How To Make a Soap Saver Shower Mitt
How To Make a Soap Saver Shower MittHow To Make a Soap Saver Shower Mitt
How To Make a Soap Saver Shower Mitt
kootoyoo
 
How To Make A Shoulder Bag From A Pillowcase
How To Make A Shoulder Bag From A PillowcaseHow To Make A Shoulder Bag From A Pillowcase
How To Make A Shoulder Bag From A Pillowcase
kootoyoo
 
Hand Sewing Stitches PPT with videos.pdf
Hand Sewing Stitches PPT with videos.pdfHand Sewing Stitches PPT with videos.pdf
Hand Sewing Stitches PPT with videos.pdf
jmarce1
 
珠包稿Eveningbag
珠包稿Eveningbag珠包稿Eveningbag
珠包稿Eveningbag
Angel
 
simple project tote for yarny types
simple project tote for yarny typessimple project tote for yarny types
simple project tote for yarny types
kootoyoo
 
bag pattern_pleated
bag pattern_pleatedbag pattern_pleated
bag pattern_pleated
teafunky
 
how to make an heirloom shrug
how to make an heirloom shrughow to make an heirloom shrug
how to make an heirloom shrug
kootoyoo
 

Similar a Shirt stitching (20)

Ndp 2010 tips for beret, belt and hemlines
Ndp 2010   tips for beret, belt and hemlinesNdp 2010   tips for beret, belt and hemlines
Ndp 2010 tips for beret, belt and hemlines
 
COLLARS
COLLARSCOLLARS
COLLARS
 
How To Make a Soap Saver Shower Mitt
How To Make a Soap Saver Shower MittHow To Make a Soap Saver Shower Mitt
How To Make a Soap Saver Shower Mitt
 
Sweater Dress Slide Show
Sweater Dress Slide ShowSweater Dress Slide Show
Sweater Dress Slide Show
 
NECKLINE FINISHES
NECKLINE FINISHESNECKLINE FINISHES
NECKLINE FINISHES
 
How To Make A Shoulder Bag From A Pillowcase
How To Make A Shoulder Bag From A PillowcaseHow To Make A Shoulder Bag From A Pillowcase
How To Make A Shoulder Bag From A Pillowcase
 
How to Fold Tank Tops : Folding Guidelines Step by Step
How to Fold Tank Tops : Folding Guidelines Step by StepHow to Fold Tank Tops : Folding Guidelines Step by Step
How to Fold Tank Tops : Folding Guidelines Step by Step
 
Hand Sewing Stitches PPT with videos.pdf
Hand Sewing Stitches PPT with videos.pdfHand Sewing Stitches PPT with videos.pdf
Hand Sewing Stitches PPT with videos.pdf
 
Bdft ii, d&pm, unit-i, draping
Bdft ii, d&pm, unit-i, drapingBdft ii, d&pm, unit-i, draping
Bdft ii, d&pm, unit-i, draping
 
sleeves and collars.pptx
sleeves and collars.pptxsleeves and collars.pptx
sleeves and collars.pptx
 
我真的很(((愛、愛、愛)))你們。這是一個溫暖的手作~上樓珠珠包圖稿
我真的很(((愛、愛、愛)))你們。這是一個溫暖的手作~上樓珠珠包圖稿 我真的很(((愛、愛、愛)))你們。這是一個溫暖的手作~上樓珠珠包圖稿
我真的很(((愛、愛、愛)))你們。這是一個溫暖的手作~上樓珠珠包圖稿
 
珠包稿Eveningbag
珠包稿Eveningbag珠包稿Eveningbag
珠包稿Eveningbag
 
Shirt plackets
Shirt plackets Shirt plackets
Shirt plackets
 
Scrub Cap For Long Hair Printable Pattern and DIY Tutorial
Scrub Cap For Long Hair Printable Pattern and DIY TutorialScrub Cap For Long Hair Printable Pattern and DIY Tutorial
Scrub Cap For Long Hair Printable Pattern and DIY Tutorial
 
simple project tote for yarny types
simple project tote for yarny typessimple project tote for yarny types
simple project tote for yarny types
 
bag pattern_pleated
bag pattern_pleatedbag pattern_pleated
bag pattern_pleated
 
Hand stitches
Hand stitchesHand stitches
Hand stitches
 
Sapatinho
SapatinhoSapatinho
Sapatinho
 
how to make an heirloom shrug
how to make an heirloom shrughow to make an heirloom shrug
how to make an heirloom shrug
 
Bolsa qua drada
Bolsa qua dradaBolsa qua drada
Bolsa qua drada
 

Shirt stitching

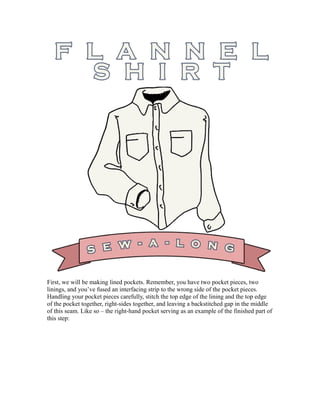
  • 1. First, we will be making lined pockets. Remember, you have two pocket pieces, two linings, and you’ve fused an interfacing strip to the wrong side of the pocket pieces. Handling your pocket pieces carefully, stitch the top edge of the lining and the top edge of the pocket together, right-sides together, and leaving a backstitched gap in the middle of this seam. Like so – the right-hand pocket serving as an example of the finished part of this step:
  • 2. Next, take the pocket to the ironing board and press the seam allowance toward the lining (below left). Then, fold the lining and the pocket together, right-sides together (below right)
  • 3. Now, stitch around the edge of the pocket at the 3/8″ seam allowance. This is self- explanatory (if you can’t make a perfect 3/8″ seam allowance, practice first! The shirt needs a lot of accuracy to look good!). Steam press those pockets and let them dry before proceeding:
  • 4. Trim the seam allowances as so (showing bottom corners of the pockets):
  • 5. Now, we are ready to turn the pockets through that gap we left in the top:
  • 6. Turn your pockets and gently press out the corners with something pokey but not too sharp. No, I do not have a bone folder or any tool for this – yet. I use… well… I hate to tell you as someone will be upset I’m doing it wrong. But yes, I use the end of my scissors. I’m really careful about it though! I promise:
  • 7. A gentle steam-press, and the near-finished pockets:
  • 8. Now all that remains is to slip-stitch, whip-stitch, or ladder-stitch the opening between the lining and the facing closed!
  • 9. Below: all stitched up, with pretty invisible stitchery if I do say so:
  • 10. And now… get ready to set aside this sew-a-long to practice. IT’S TIME TO MAKE A BUTTONHOLE! Two, in fact. In the shirt pockets.
  • 11. Now it’s time to set the pockets aside and work on the sleeve placket. Shirt Sleeve With Cuff§ Laying both the overlap and underlap right-sides to the WRONG side of the sleeve. Notice also how I’ve clipped the overlap, and folded under ALL seam allowances (I used 1/4″ but you can use 3/8″ if you like) except for the seam allowances abutting the slash mark and those at the sleeve’s raw edge. I’ve also edged the plackets lower than the sleeves; I’ll trim them after my first two seams:
  • 12. Now – two lines of stitching, making sure to back stitch at all ends:
  • 13. Slashing. Slash right up to the same distance as the stitching lines:
  • 14. You can now trim up the ends of these placket pieces and trim the top folded edges too. I clip the underlap and overlap seam allowances right at the top of the two seams parallel to the slash. Shown below, the clipped underlap seam allowance. I haven’t yet clipped the overlap seam allowance in this picture:
  • 15. Now: fold over the underlap to the right-side of the sleeve so the folded over edge covers up the first stitching line, then topstitch. I elected to use a regular stitch for this. We’ll soon be using a topstitch seam for most of topstitching during construction, but not here:
  • 16. Folding the overlap to the right-side…
  • 17. Pressing and/or pinning: Make sure that the entire placket facing lies parallel to the grain. Shown before pinning:
  • 18. Pinned, and now stitched (again – follow instructions as per the above pdf). As you near the place where the overlap and underlap will join, make sure to straighten that underlap underneath the overlap. If you get it wrong, you can carefully take out the seam, re-steam and re-pin, and try again. It’s a little tricky:
  • 19. You can start stitching at the raw-edge as in my example, or you can start at the crossover on the cap of the placket. There are control advantages to either. Again, just make sure that cap is pinned securely as it will try to shift while you’re stitching.
  • 20. Above – the finished overlaps. And below – the underside / wrong side of the sleeve placket:
  • 21. TIME FOR PLEATS! Sleeve pleats. Easy enough. Fold as per pattern instructions and using notches then stitch 1/4″ from the raw edge to secure.
  • 22. Press the pleats, and the placket as well:
  • 23. Sleeve, near finished! Again – there are more than one way to make a sleeve placket so if this is different, cool beans. This method is pretty reliable though and it’s what I use when I’m not feeling too fancy. Now, on to the back pleat on the shirt body back. Here, remember, we cut out the piece so that Fold the top pleat so that you are folding symmetrically along the plaid. Here’s the pleat after it’s been folded and sewn 1/4″ from the raw edge – the yellow thread is the thread-marked pleat.
  • 24.
  • 25. ts fine. Carefully remove the marking thread and carefully press. Then lay it out and compare it to the size of the seam it abuts – that of the bias yoke time to join up the yokes. No jokes. (titter!) Here also is a great example of a camera angle giving you the wrong impression: my inner yoke (remember, the one cut on grain§, not on the bias) is about 1/4″ a little smaller than the outer yoke (shown upside down in the below photo), but the size difference here looks huge here. The SECOND picture below more accurately represents how well the two pieces compared: and I should also point out – even with 1/4″ difference, because of my flannel’s fairly loose weave, it was very easy to carefully stretch the inner yoke so that it matched the outer yoke and the shirt body. Everything came together fine. Small imperfections in cutting often work out without additional trimming. Pinning the outer yoke to sew 3/8″…
  • 26. After this seam is complete, pin the inner yoke to the inside of the shirt, and sew RIGHT along that first seam. Shown here – both yokes attached. You can’t see the inner yoke at all as it is under the two layers.
  • 27. Now – finger -pressing, then gently steam pressing, both yokes up, and pinning them for temporary security. We aren’t topstitching yet – I’m going to address that in the next post, when we apply the pockets (remember our pockets?).
  • 28. And here, after flipping over the yoke and back piece, is the inner yoke:
  • 29. Now, we are going to join our yokes together at the shoulder. First pin the outer yoke to the front body, right sides together:
  • 30. Stitch that seam with a construction stitch, clip the corners, and grade the seam:
  • 31. Clip the seam allowance closest to the body, not the public side of the garment – the shirt body seam allowance (note I used pinking sheers to grade):
  • 32. Press this seam up toward the yoke. Next, fold over the seam allowance of the inner yoke. I like to add a little Steam A Seam Lite tape here, to affix it to the outer yoke / shirt body seam allowance. As shown:
  • 33. Now – topstitch! If you carefully folded and pressed and/or fused that second seam allowance, your inner seam should look pretty good:
  • 34. … and here is how the top stitching stitch looks:
  • 35. And now – go ahead and open up those pocket buttonholes, if they’re dried. I use my seam-ripper – carefully. There are several ways to open a buttonhole§ and the way I’m showing you is kind of RECKLESS and BAD-ASS but to be honest, creating thousands of buttonholes
  • 36. So now! We are done with today’s session. Next session we will be doing a bit of double- threaded top stitching for applying the pockets, making the front placket (including our last bit of interfacing), and putting the collar and collar stand together.