
Recomendados
Más contenido relacionado
La actualidad más candente
La actualidad más candente (20)
Similar a Setting up a vscode development environment for mbed 5 application using the gcc tool chain on windows
Similar a Setting up a vscode development environment for mbed 5 application using the gcc tool chain on windows (20)
Último
Último (20)
Setting up a vscode development environment for mbed 5 application using the gcc tool chain on windows
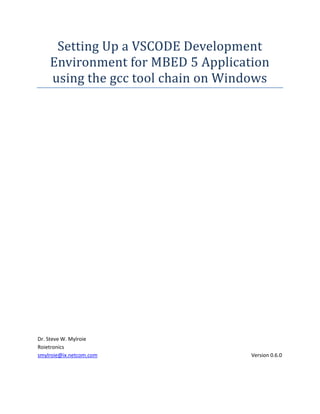
- 1. Setting Up a VSCODE Development Environment for MBED 5 Application using the gcc tool chain on Windows Dr. Steve W. Mylroie Roietronics smylroie@ix.netcom.com Version 0.6.0
- 2. 2 Copyright 2018 Steve Mylroie (DBA Roietronics) Licensed under the Apache License, Version 2.0 (the "License"); you may not use this file except in compliance with the License. You may obtain a copy of the License at http://www.apache.org/licenses/LICENSE-2.0 Unless required by applicable law or agreed to in writing, software distributed under the License is distributed on an "AS IS" BASIS, WITHOUT WARRANTIES OR CONDITIONS OF ANY KIND, either express or implied. See the License for the specific language governing permissions and limitations under the License.
- 3. 3 Contents Introduction ..................................................................................................................................................5 Installing the needed applications................................................................................................................5 Creating A Test Environment........................................................................................................................8 Configuring and Verifying the Build Environment......................................................................................11 Configuring the Build Environment.........................................................................................................11 Verifying the Build Environment.............................................................................................................15 Verifying the Debugging Environment........................................................................................................16 For Boards using the CMSIS_DAP Link Interface and pyocd-gdbserver .................................................17 For Boards using Serial JTAG Link Interfaces other than CMSIS_DAP ....................................................18 End to End Verification ...............................................................................................................................19 Working with Projects having support for export to vscode-gccc-arm......................................................22 Working with Projects which don’t support export to vscode-gcc-arm.....................................................22 Creating a new Project using VSCODE ........................................................................................................25 Troubleshooting..........................................................................................................................................25 Builds.......................................................................................................................................................25 Using Make .........................................................................................................................................25 Using mbed compile ...........................................................................................................................25 Debug Connections.................................................................................................................................25 Using PyOcd ........................................................................................................................................25 Using OpenOCD...................................................................................................................................25 Interfacing with Code Repositories.............................................................................................................25 GitHub and Git based Repositories.........................................................................................................25 Updating..............................................................................................................................................25 Reverting.............................................................................................................................................25 Publishing............................................................................................................................................25 MBED User and other Mercurial Based Repositories.............................................................................25 Updating..............................................................................................................................................26 Reverting.............................................................................................................................................26 Publishing............................................................................................................................................26 Appendix .....................................................................................................................................................26 Batch Scripts............................................................................................................................................26
- 4. 4 make.bat .................................................................................................................................................26 mbed.bat.................................................................................................................................................26 MyStart.bat.............................................................................................................................................26 Supported Boards ...................................................................................................................................26 pyocd-gdbserver .................................................................................................................................26 OpenOCD ............................................................................................................................................26 Converting Release Build Makefiles to Debug Build MakeFiles..............................................................26 Reinstalling the MBED Windows CMSIS_DAP Serial Link Port Driver.....................................................27 VSCODE –MBED System Architecture.........................................................................................................28
- 5. 5 Introduction The ARM MBED 5.0 IoT Device Platform provides the operating system, cloud services, tools and developer ecosystem to make the creation and deployment of commercial, standards-based IoT solutions possible at scale. The platform provide a single unified open source development environment and Real Time operating system covering hardware products from over 70 chip, microcontroller, board, sensor and module vendors. A key component of this platform is a powerful web based online IDE; however due to web latency issues this IDE is lacking support for one critical feature, interactive debugging. VSCODE on the other hand is a modern, platform independent, open source, highly extensible language agnostic local editor, with advanced features such as IntelliSense, Auto Completion, and integrated documentation similar to those found in modern IDEs such as Visual Studio, Eclipse and Atom. In addition it can link up with various open source and proprietary on chip debugging (OCD) servers via the GNU Tools ARM Embedded arm-none-eabi-gdb debugger to provide interactive debugging support for MBED created application which have been loaded onto and running on one of the many microcontrollers supported by the ARM MBED 5.0 platform. By Integrating a local VSCODE environment with the online MBED environment IOT and Microcontroller developers can have access to the best features of both worlds. The ARM MBED development teams have embarked on an effort to provide integration between the online MBED development environment and a local VSCODE development environment. This effort is currently in a very early stage and the setup process is much more involved and difficult that those associated with the kind of setup processes windows user have come to expect. In addition instruction of setting up and configuring the environment are scattered across a number of posts on the MBED forms In addition comments posted to MBED indicated that many MBED users on Windows have been unsuccessful in getting a working environment setup and have given up the effort. I am therefore creating this tutorial based my trail and errors experiences in the creation of integrated online MBED IDE and local VSCODE development environments on both Windows 7 and Windows 10 platforms. My hope being to allow others to avoid the pit falls and traps I stumbled through and enjoy the benefits of a working integrated online MBED – local VSCODE with interactive on chip debugging on a Windows platform. Installing the needed applications The integrated VSCODE/MBED environment requires components from number of open source projects in addition to VSCODE and as stated in the introduction there currently is no single unified setup application. User must visit multiple web sites and perform multiple installations.
- 6. 6 Needed components include: 1. VSCODE 2. Microsoft C/C++ Extensions for VSCODE 3. MBED command line interface package (CLI) 4. Python 2.7 5. The GNU TOOLS ARM Embedded package 6. Git client 7. Mercurial client 8. A Windows compatible version of the UNIX/LINIX make utility 9. If the serial JTAG interface to the target microcontroller board uses the CMSIS_DAP protocol a PyOCD-gdbserver package 10. If the serial JTAG interface to the target microcontroller uses a protocol other than CMSIS_DAP e.g. STLink SeggerLink, JLink, etc; an OpenOCD package. User will need to consult the microcontroller and/or board vendors documentation in order determine the protocol used with a specific board/Microcontroller combination. For example boards with STM microcontrollers use STLink, and the Nordic NRF development boards use SeggerLink The specific link protocol supported by the packages can be found on the package project’s web sites While between the two packages support large number of board/Microcontrollers can be found, not every existing Microcontroller/Board combination is supported. The existence of support for a particular Microcontroller/Board combination can be determined from the project’s web sites or after a package is installed via techniques described in the Troubleshooting Debug Connections section of this document. Adding support additional board/Microcontroller combinations to one of these interface server packages is a rather involved project. Detailed procedures and requirements can be found on the project’s web sites. If a board/Microcontroller combination is not support one would probably want to discontinue this effort unless they can convince one of the contributors to one of these projects to add the combination to the supported the set. VSCODE can be down loaded from this URL and comes with a standard Windows installer. VSCODE Download Once VSCODE is installed install the Microsoft C/C++ extension for VSCODE package using its extension management interface
- 7. 7 1. Select the extension management view by clicking on its icon in the right hand side tool bar Click here 2. Select the Microsoft C/C++ extensions from the list of installable extensions and click on its install button. If the extension does appear in the list enter C/C++ in the search text box to search the market place for it. Note: The VSCODE-MBED extension version 0.2.0 in the market place on works on MAC OS. 3. Click the extensions reload button to activate the extension Click Her e
- 8. 8 Click Here The Windows installer for the MBED CLI will also install Python2.7, The GNU TOOLS ARM Embedded package Git client, Mercurial client and PyOCD package. Download the Windows MBED CLI installer from here Install requires admin privilege Depending on other installed USB driver, the Serial Post driver may fail to install, failure to install driver has not created problems unless one will be using the pyOCD-gdbserver for to provide debugging access to their selected board. A Windows compatible version of the Unix/Linux make utility can be found here make One just needs the ninaries Zip file. Download and unzip into a convenient directory. PyOCD-g is installed by the MBED installer and the project Web site is here The OpenOCD web sitesite does not provide any precompiled binaries or install packages A compiled binary package for Windows with an installer is available for download here Creating A Test Environment To create a stable test environment to use while setting up your local VSCODE-MBED download the mbed-os-example-blinky sample application from the MBED development web site. This action requires a three step process. If one already has registered for a MBED developer account (FREE) one can step to step 2. If one has and MBED developer account and has already loader the mbed-os-example-blinky project in to their MBED web workspace they should skip to step 3. 1. Create a MBED user account Go to the MBED developer web site click the login/signup item on the menu bar and
- 9. 9 follow the displayed instruction for creation an new user account. 2. Load the mbed-os-example-blinky project into your MBED web workspace Select the documentation item from MBED developer web site’s menu bar and then tutorials from the next page. Expand the right hand side menu tree until your reach the Blinky page and click on the Import into Mbed IDE button. 3. Export the project to your local system Click the compiler item on the MBED developer’s web site’s home page to switch to your workspace page. Locate entry for the mbed-os-example-blinky in the project list and right click on it and then select the export Program from the Popup Menu.
- 10. 10
- 11. 11 In the popup dialog box select your board as the Export Target and Vscode_gcc_arm as the export tool chain and click the export button. A custom make file will be created and bundled into a zip file along with the source files and the need template and control files. The zip will then be passed to your browser’s file download subsystem. Using your browser’s file download controls save the zip file to a directory on your local system. Terminate the browser session, switch to your local system and expand the zip file using your favorite tool. Once you have complete the setup process and verified the functionality of the local integrated VScode MBED system you will be using the same process to import other projects in to your local system. Configuring and Verifying the Build Environment Configuring the Build Environment In order debug a MBED application using the Vscode-mbed CLI on a local system, one must first build the application locally. In this section you will configure and verify the functionality of the build environment using the mbed-os-example-blinky application you downloaded in the previous section.
- 12. 12 You will need to have a working build environment before you can setup the debugging environment. If your encounter problems in this section the Trouble Shooting Builds section has a number of hints for solving the problems. When one exports a MBED project from the MBED web environment create a custom UNIX/LINUX style makefile for the Target Board and adds it to the downloaded zip file. The tools directory from mbed=os library are not included in the downloaded file. One therefore needs to use a UNIX style make utility and the gcc tools to build the executable to load unto the target board. This task could be accomplish by specifying make.exe in the VSCODE TASK configuration JSON file if the correct paths to the make utility and the gcc tools have been configured in the users Global Windows environmental PATH variable. I however would recommend that instead of trying to use the correctly modify your user global PATH variable to invoking a batch file which set up a local version of the PATH variable which references on the directories with the make utility and the gcc build tools and then invokes the make utility executable. A sample make file (make.bat) can be found in the appendices of this document. There are three Jason files which configure VSCODE’s action for your project (launch.json, task.json and setting.json) these file should be in a .vscode subdirectory in the VSCODE project. The mbed export sometimes put them in the project top level directory. You will need to fix this issue before proceeding. To fix create a .vscode directory subdirectory and move the three files into it. (Note: When using the window’s File Explorer’s Make New Directory or Rename Directory commands to create a directory whose name start with a . one must append a . character to the end of the name e.g. to create a .vscode directory enter .vscode. as the directory name.) The following steps configure your VSCODE environment to permit the building of MBED applications in locally using the gcc tool chain. 1. Start a VSCODE session 2. Select open folder from the drop down menu opened by clicking on the menu bar file tab
- 13. 13 3. In the File Open dialog box which appears select the top level directory into which you unpacked the downloaded zip file and click the select Folder Button
- 14. 14 Editing make.bat 4. Select new file from the File tabs drop down menu and copy the text of the sample make.bat file from this appendix of this document into the file editor window. Replace the angle bracket set with the full path to the bin directory with the make utility executable and second angle bracket set with the full path to the bin directory with the arm-none-c++ executable. On my system <GnuWin32 Make install directory path> => C:Program Files (x86)GnuWin32 <GNU Tools ARM Embedded install path> => C:Program Files (x86)GNU Tools ARM Embedded6 2017-q2-update Click the dot above the file editor window to close and save the file as make.bat
- 15. 15 Click the dot close and saved the file Editing .vscodetasks Click on the triangle next .vscode in the file list panel to expose the directories file list and then click on the tasks.json file to open it in the editor view Scroll down to the line starting with “windows”: and change make.exe to make.bat Then click on the x next to the file name at the of the editor panel to close and save the file changes. Verifying the Build Environment Select Run Build Task from the menu bars task tab A console log window will open in a panel at the bottom of the window and messages from make will start scrolling through it.
- 16. 16 If when the display stops scrolling the display looks like this you have working build environment If the display ends with lines like this don’t panic make.exe[1]: Nothing to be done for `all'. make is just say it can’t find anything which require rebuilding in the application However if the message is ending lines contain a line make.exe[2] you have build errors you need to fix before proceeding. Verifying the Debugging Environment The VSCODE-MBED debugging system uses a three process chain. 1. VSCODE communicates with a GNU gdb debugging server via a pipe. 2. The gdb server connects to a On Chip Debugging (OCD) server via TCP/IP 3. The OCD server in turn interacts with the code running on the chip via a serial JTAG link An overview of the system can be found here VSCODE –MBED System Architecture Two different OCD servers (a PyOCD-gdbserver or an OpenOCD server) depending on the board/processor combination and JTAG link being used. The PyOCD-gdbserver can auto detect the attached board/microcontroller and auto configure itself; however it only supports the MBED cmsis-DAP protocol and a limited set of board/microcontroller families. See the appendix for a list of support microcontroller families and pyocd-gdbserver supported boards. A MBED export to VSCODE configures the environment for use with Pyocd-gdbserver by default.
- 17. 17 The OpenOCD server is more flexible supporting more board/microcontroller combinations and multiple JTag link protocols including many vendor specific implementations. For example one must use OpenOCD to debug a STM microcontroller since there controller only work with the STM SLINK protocol. OpenOCD does not support auto detection and a user must select and provide a link to a proper configuration files as command line arguments to the server. The Launch.json file in the project’s .vscode directory sets up the debugging environment For Boards using the CMSIS_DAP Link Interface and pyocd-gdbserver A MBED export provides an launched.jason file preconfigured to use the pyocd-gdbserver; however two modification to it are required. Open the launch.jason file in the VSCODE editor and scroll down to the Windows section 1. Check that the highlighted subdirectory field in the path for the gdbserver matches the path for the gdbserver installed on your system. This field is linked to the GNU package‘s version and the one in the preconfigured down loaded launch.jason file is for a very old version. 2. Replace make.exe with make.bat pre line i.e. the same make.bat file you used verify the build environment. The pyocd-gdbserver only works with boards using the CMSIS_DAP serial jtag and boot protocols. To determine if your board is using the CMSIS_DAP protocols connect your board’s USB programing link to one of your computer’s USB port and observe the name assigned to the board mount point in File Explorer. If the name is DAPLINK you can used pyocd-gdbserver to debug code running on your board otherwise you will need to use the OpenOCD sever to debug code running on your board.
- 18. 18 If you are using one of the NXP FRDM boards and it mounts with a name other than DAPLINK your board either has outdated or alternate vendor boot loader firmware. See the following link for information for instruction on how to install the proper boot loader firmware on to the board. https://os.mbed.com/blog/entry/DAPLink-bootloader-update/ For other boards you will need to consult the MBED forums or the board vendors Web sites. The pyocd-gdbserver also requires a working copy of the MBED serial link driver software be installed on your computer. If the MBED serial link driver software failed to install when you did the mbed-cli install, you found your board was not mounting as DAPLINK, you have updated your bootloader firmware and you board now mount as DAPLINK. Used the procedure outlined in Appendix to install the missing MBED serial link driver. If the driver still does not install you will need to use the OpenOCD server instead of the pyocd=gdbserver. The next section deals with verifying configuration required in order to use the OpenOCD server so skip to the End to End verification section if using the pyocd=gdbserver For Boards using Serial JTAG Link Interfaces other than CMSIS_DAP If the board you are using doesn’t use the MBED cmsis-dap JTAG link or is not on the list of boards supported by PyOCD=gdbserver you will need to use the OpenOCD server. Four changes to the MBED supplied launch.jason file in the .vscode directory will be required. Since the OpenOCD does auto-detect boards types, you will need to locate a proper configuration file before editing launch.jason. A large number of these files with .cfg extension can be found in the .scriptsboard subdirectory of your OpenOCD installation. i.e. C:Program FilesOpenOCDscriptsboard on my system Many of the configuration files cover several boards in the same family for example st_nucleo_f4.cfg covers a st_nucleo_F411RE, a st_nucleo_F446RE and other boards in the st_nucleo_F4XXXX family. Open the MBED supplied launch.jason file in the VSCODE editor and 1. Find the line "serverStarted": "GDB server started", and replace it with "serverStarted": "target halted due to debug-request, current mode: Thread", (Exact text required since line is used to detect suggest full server start up) 2. Scroll down to the windows section and make following changes a. Change PreLanuchTask to make.bat b. Verify highlighted subdirectory in the gdb server path matches the install path on your system c. Change the debugServerPath to the full path to the OpenOCD executable d. Add a debugServerArgs line with the following text
- 19. 19 e. Replace the st_nucelo_f4.cfg with the name of the cfg file for your board (note: the and “ characters need to be escaped with a character and paths with spaces need to be enclosed in escaped “) 3. Save and close the file End to End Verification You now ready for a debugging session ================================================================================== Note: On some recent downloads from MBED, I have found that the MBED exporter was creating a custom Makefile for a release build instead of a debug build. A release build does not create a symbol table file. If a symbol table file is not available VSCODE cannot highlight current source line when single stepping or display the content of variables. The following procedure can be used to determine is the Makefile will generate a release or a debug build. Open the Makefile in VSCODE and search for the term –DTARGE_RELEASE (Crtl+f –DTARGE_RELEASE) if the term is found the file is a Makefile for a release build. If a search for the term –DTARGET_DEBUG finds a match you have a Makefile for a debug build. See Appendix for a hack which can be used to turn a release Makefile into a debug Makefile ===================================================================================== Open main.cpp in the VSCODE editor windows and right click to the left of line 8 and set a break point. A red do will appear to the right of the line Switch to debug mode by clicking on the debug icon on the right hand toolbar
- 20. 20 Then click then click green arrow to right of the word DEBUG on the top menu If a line like this appears at the top of your screen you have a problem with lanch.jason file If the Debug Console window is not open click select it as the output window to show more details and then consult the trouble shooting sections of this document If the debug session successfully stated and you using pyocd-gdbserver you should see the following display in the debug console window Click Here Click Here
- 21. 21 If the debug session successfully stated and you using OpenOCD you should see the following display in the debug console window The red dot will change to an orange arrow you are halted at the break point. Click the green arrow on the popup tool bar the program will cycle back to the break point and led will be on Click the green arrow again and the led will turn off Click the red square on the toolbar to exit
- 22. 22 Congratulation you have configured a working VSCODE-MBED environment see the follow section for instruction on how to bring in your programs. Working with Projects having support for export to vscode-gcc-arm When using the MBED export option MBED makes a snapshot of your on line environment, adds a custom make file and three VSCODE control files, bundles everything up in a zip file which it downloads to your machine. The process then is 1. Open the project in the online environment 2. Select Export 3. Specify the target board and vscode_gcc_arm as the tool chain from the popup dialog box’s drop down menus. 4. Unpack the zip file 5. The need make.bat and vscode json control files will be the same as the one used with the mbed-os-example-blinky project so just copy those four files from that project to your new project replacing the ones generated by MBED 6. Determine whether MBED created a release or debug build Makefile and convert a release build Makefile to debug build Makefile 7. Open the top level project folder in VCODE and start debugging The MBED export process does not include in repository information or the mbed-os tools subdirectory in the download package; therefore if you want to change the board or a library revision you must make the changes in the online environment and do a new export. Also you will not be able to commit or publish any changes you make to the code to the online repositories. To save any code changes you will need to copy them back to the online environment using the online editor and then commit and publish them from the online environment. If you want the ability to switch boards and revisions or commit changes from the local environment you will need to use the import based procedures described in the next session instead of the export based procedure. Working with Projects which don’t support export to vscode-gcc-arm For some boards the MBED export options tool chain list does not include vscode_gcc_arm or in other cases for example the MULTI_TECH mDot and xDot boards the export process just crashes. In these cases one must use the more complex import process instead of the MBED export process.
- 23. 23 One also needs use the import process instead of the export process if one wants to interact with the MBED repositories (github for mbed-os and /or Mercurial based user repositories and/or changes boards without doing a new export. The following procedure is used to import a project on to the local system from MBED 1. Open the project in online MBED 2. Copy the projects repository URL from the online window 3. Open a command window on the local machine 4. Change directory to the location where you want to place the project folder 5. Enter the command mbed import <copied URL> in the command window note: right clicking in a command window will bring up a dialog allow pasting from the clipboard This process will take a while since both the github mbed-os repository and the users Mercurial repository are being cloned to the local machine 6. Change directory to the project root directory 7. Enter the following command mbed config ARM_GCC_PATH “<full path to gcc compilers>”. replace <…> with path to gcc compilers on your system. Quotes required if path contains space characters 8. Enter the command mbed config TARGET <mbed board name> where <…> is the MBED name for the board. For example MTS_MDOT_F411RE for the MULTI TECH mDOT
- 24. 24 9. Create .vcode subdirectory in your project directory 10. Copy the 3 json vscode control files from the .vscode subdirectory of blinky project your used to verify your setup 11. Create a mbed.bat file in the top level project directory 12. Copy content of the mbed.bat script section of this document 13. Replace the < path> item in the scrip with the paths for python 2.7 and the gcc arm embed tools on your system 14. Edit the tasks.jason and launch.jason file in the project’s .vscode subdirectory replacing make.bat with mbed.bat 15. Open the project folder in VSCODE and proceed as you would for an exported project Your project tree will contain local clones of both the mbed-os github repository and the user Mercurial repository and a full set of the MBED python scripts. The arguments in the mbed.bat file insure you always create debug builds and never create a release build. Since one ends up with a full clone for the mbed-os library project from gethub, One can switch boards by opening the .mbed file in the projects root folder and editing the TARGET=XXXX line and recompiling.
- 25. 25 Creating a new Project using VSCODE Troubleshooting Builds Using Make Using mbed compile Debug Connections Using PyOcd Using OpenOCD Open console window and run the MyStart.bat script from that windows OpenOCD will display lots of diagnostic info Interfacing with Code Repositories GitHub and Git based Repositories VSCODE has a building git client by default. Committing Updating Reverting Publishing MBED User and other Mercurial Based Repositories To work with Mercurial repositories you will need to add a VSCODE Mercurial Client (HG) Extention.
- 26. 26 Committing Updating Reverting Publishing Appendix Batch Scripts make.bat set PATH=<GnuWin32 Make install directory path>bin;<GNU Tools ARM Embedded install path>bin make.exe mbed.bat set PATH=<Python27 install directory path>scripts;<GNU Tools ARM Embedded install path>bin mbed.exe compile -t gcc_arm --build .BUILD --profile .mbed-ostoolsprofilesdebug.json MyStart.bat pushd "C:Program FilesOpenOCD0.10.0-5-20171110-1117" dir .binopenocd.exe –d -s .scripts -f boardst_nucleo_f4.cfg -c init -c "reset init" popd Supported Boards pyocd-gdbserver kl25z, kl26z, lpc824, k82f25615, lpc11xx_32, kinetis, lpc800, lpc4088qsb, maxwsnenv, kl05z, k64f, lpc1768, lpc4088, lpc4330, max32600mb, k66f18, w7500, ke18f16, k22f, lpc4088dm, ke15z7, kv11z7, nrf51, nrf52, kv10z7, k20d50m, kl46z, stm32f103r, kl27z4, kw40z4, cortex_m, lpc11u24, stm32f051, kl02z, ncs36510, kl28z, kl43z4, kw01z4 OpenOCD Converting Release Build Makefiles to Debug Build MakeFiles 1. Open the Makefile in VSCODE 2. Search for the term –DTARGET_RELEASE and replace with –DTARGET_DEBUG (you should find two occurrences – one in C_FLAGS and one in CXX_FLAGS 3. Search for the term eabi-gcc you should find three occurrences
- 27. 27 4. In the line that start with AS search for the term ‘–Os’ and replace with the following text '-O0' '-g3' '-DMBED_DEBUG' '-DMBED_TRAP_ERRORS_ENABLED=1' 5. Make the same change to the line that starts with CC 6. Search for the term eabi-g++ and then for the term ‘–Os’ on that line and replace that term with '-O0' '-g3' '-DMBED_DEBUG' '-DMBED_TRAP_ERRORS_ENABLED=1' 7. Save and close the Makefile Reinstalling the MBED Windows CMSIS_DAP Serial Link Port Driver
- 28. VSCODE –MBED System Architecture Debug Edit Build PyOCD-gnu-server VSCODEGdb-debug Board Type 1 OpenOCD server TargetPyOCD-gnu- server Target Board Type 2 mbed GNU Build Tools Make mbed Tools Python Scrips_ GNU Build Tools