E Vision Institucional 2011
•Descargar como PPTX, PDF•
0 recomendaciones•306 vistas

A e-Vision® é uma empresa de consultoria em e-commerce fundada por Solange Oliveira, especialista em e-commerce. A empresa oferece serviços como consultoria, projetos, treinamentos e selo de qualidade para lojas virtuais, com foco em pequenas e médias empresas.

Recomendados
Más contenido relacionado
La actualidad más candente
La actualidad más candente (13)
Similar a E Vision Institucional 2011
Similar a E Vision Institucional 2011 (20)
Más de Solange Oliveira
Más de Solange Oliveira (12)
E Vision Institucional 2011
- 1. e-Vision® e-Commerce Consulting Institucional
- 2. Quem somos nós A e-Vision® nasceu da experiência de seus consultores trabalhando em e-commerces por toda América Latina. Enquanto o mundo pensava no bug do milênio em 1.999 nós já engatinhávamos no Brasil com essa “coisa” nova que era o comércio virtual. Os anos passaram e o e-commerce nacional vem se profissionalizando porém uma lacuna no mercado de consultoria para e-commerces foi identificada: O pequeno e médio negócio. e-Vision®,Porque ninguém nasceu grande! e-Vision® e-Commerce Consulting, oct 2010
- 3. Nossos Serviços A e-Vision® oferece serviços nas áreas de consultoria, e-commerce, Mídias Sociais e Projetos personalizados. Nossos profissionais estão comprometidos a tornarem-se o padrão de excelência do mercado de consultorias digitais. Nossos projetos cobrem todo o globo , exatamente como tem que ser uma empresa digital. Temos clientes em San Francisco/CA, Buenos Aires e Brasil. e-Vision®, Porque ninguém nasceu Grande! e-Vision® e-Commerce Consulting, oct 2010
- 4. Nossa filosofia de trabalho tem como base a transparência. O cliente sabe quanto vai pagar, o que vai receber, quanto tempo vai levar, tudo isso antes da consultoria começar e, terá uma consultoria de nível internacional para seu negócio. Transparência não é parte do nosso negócio, é nossa filosofia de vida. 3/15/2011 Nossa Filosofia e-Vision® e-Commerce Consulting, oct 2010
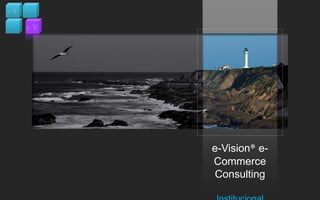
- 5. Nossa filosofia de trabalho tem como base a transparência. O cliente sabe quanto vai pagar, o que vai receber, quanto tempo vai levar, tudo isso antes da consultoria começar e, terá uma consultoria de nível internacional para seu negócio. Transparência não é parte do nosso negócio, é nossa filosofia de vida. 3/15/2011 Nosso Simbolo: O Farol e-Vision® e-Commerce Consulting, oct 2010
- 6. Nossa empresa atua para dar força, qualidade e status para o e-Commerce no Brasil. Nesse sentido nos sentimos compelidos a contribuir em várias áreas do conhecimento e da prestação de serviços. Hoje a eVision ®atua em 4 frentes: 3/15/2011 Divisões da e-Vision® e-Vision® e-Commerce Consulting, oct 2010
- 7. Divisões da e-Vision® Consultoria 5 estrelas em todas as áreas do conhecimento em e-commerce Recrutamento ESPECIFICAMENTE para e-commerce ( os melhores profissionais do Brasil estão em nossa rede) Cursos e treinamentos no formato Do your self Rede Social exclusiva para profissionais do e-commerce com o objetivo de divulgar/contratar profissionais 5 estrelas para tarefas pontuais (<16 horas de duração ), 3/15/2011 e-Vision® e-Commerce Consulting, oct 2010
- 8. 3/15/2011 Nosso Simbolo: O Farol Um farol é uma estrutura elevada, habitualmente uma torre, dotada de um potente aparelho óptico , cujo facho de luz é visível a longas distâncias, orienta e guia embarcações em mares desconhecidos. É essa nossa forma de ver o trabalho que realizamos na e-Vision®:orientação! E guia para uma travessia tranquila e confiante. Nosso novo site será inaugurado em 28/2/11 e terá uma área de imagens dos faróis do mundo inteiro e suas curiosidades. e-Vision® e-Commerce Consulting, oct 2010
- 9. Vendemos conhecimento e experiência; Vendemos expertise em varejo digital; Vendemos inteligência de internet; Use nossa capacidade de criar e administrar universos digitais. 3/15/2011 O que nós vendemos? e-Vision® e-Commerce Consulting, oct 2010
- 10. Nossos Produtos Palestras Orientação plataforma Selo “e-commerce Girl aprovou” Diagnóstico ( mapa erros) Plano de Negócio Analise Mercado Plano de Mídia Administração Mídias Sociais Consultoria on-line Consultoria de Projeto : Loja Virtual e-Vision® e-Commerce Consulting, oct 2010
- 11. e-Vision AM®Análise de Mercado Você é empreendedor, já percebeu que o futuro do varejo é o e-commerce, mas não sabe qual tipo de negócio virtual tem as suas características? O e-Vision AM®, é um book com analises atualizadas sobre o mercado de e-commerce no Brasil. Nele você encontrará negócios que mais tem em comum com a sua personalidade, história profissional e anseios ( retorno financeiro esperado, perenidade do negócio, projeções para datas especiais. ENTREGÁVEL: Um book e-Vision AM®impresso e sua versão em mídia, com no mínimo 30 páginas de análise profissional e quantificada de orientação, idéias e inovação sobre e-commerce. DELIVERY: 10 dias Analise Mercado 3/15/2011 e-Vision® e-Commerce Consulting, oct 2010
- 12. e-Vision BP® Plano de Negócio Nenhum negócio, seja virtual ou não deve começar sem um bom plano de negócio. O e-Vision BP®Plano de Negócio garante que você conhecerá seus concorrentes intimamente, saberá quais são seus pontos fracos e fortes, terá na ponta do lápis o quanto irá gastar no projeto da sua loja virtual e em quanto tempo o seu investimento retornará (Payback). ENTREGÁVEL : Um book e-Vision BP®impresso e sua versão em mídia com: Definição do negócio, cenário futuro, mercado, análise S.W.O.T. (oportunidades, ameaças, pontos fortes e pontos fracos), fatores críticos de sucesso, infra estrutura necessária,recursos humanos e tecnológicos, o mercado, analise dos concorrentes, etc) O mais completo e atualizado Plano de Negócio para e-commerce do mercado. DELIVERY :20 dias ( após relatório levantamento de dados) Plano de Negócio 3/15/2011 e-Vision® e-Commerce Consulting, oct 2010
- 13. e-Vision MP®Plano de Mídia Ainda que sua loja virtual seja a mais interessante e inovadora dos últimos tempos, ela ainda vai precisar dizer para o mundo digital que ela existe e que esta aguardando todo mundo para mostrar o quanto ela é inovadora e com bons preços. É ai que entram as estratégias de Web Marketing. O e-Vision MP® Plano de Mídia Digital direciona as ações de marketing on-line necessárias para o seu site aparecer e crescer. ENTREGÁVEL: Um book e-Vision MP®impresso e sua versão em mídia com: Mídias em Sites especializados e/ou portais, Links Patrocinados, programa de Parcerias ( affiliates ), email marketing, Midia em Redes sociais. DELIVERY: 15 dias ( após relatório levantamento de dados) Plano de Mídia 3/15/2011 e-Vision® e-Commerce Consulting, oct 2010
- 14. e-Vision PIN® Orientação Plataforma Escolher a melhor plataforma, a que atende melhor seus interesses , nível de customização, projeção de crescimento, alinhamento com o número de produtos, meios de pagamento e formas de faturamento pode ser o fator de sucesso ou fracasso da sua loja virtual. O e-Vision PIN®Orientação Plataforma, indica qual plataforma se adapta mais ao seu projeto de e-commerce. ENTREGÁVEL: Um book e-Vision PIN®impresso e sua versão em mídia com: Opções de plataforma para o seu perfil de negócio, descrição detalhada de com linguagem pratica sobre os itens da plataforma, contatos. DELIVERY: 5 dias ( após relatório levantamento de dados) Orientação plataforma 3/15/2011 e-Vision® e-Commerce Consulting, oct 2010
- 15. e-Vision EM® Diagnóstico : Mapa de Erros Sua loja virtual já esta no ar, os produtos são ótimos e o preço imbatível, mas as vendas decepcionam? O que pode esta ocorrendo? O e-Vision EM®Diagnósticos: Mapa de Erros, faz um mapeamento de todos os processos da sua loja virtual indicando especificamente onde você esta cometendo erros, pequenas ações podem salvar sua loja virtual. ENTREGÁVEL: Um book e-Vision EM®impresso e sua versão em mídia com: Analise dos processos da Loja Virtual, Mapa de erros, ações e direcionamentos para correção dos problemas. DELIVERY: 15 dias ( após relatório levantamento de dados) Diagnóstico ( mapa erros) 3/15/2011 e-Vision® e-Commerce Consulting, oct 2010
- 16. e-Vision TS® Palestras Dirigidas Nosso corpo de profissionais ministra palestras no Brasil e América Latina. A experiência e a intimidade com as inovações em e-commerce garantem palestras interessantes , motivadoras e técnicas. O e-Vision TS® Palestras Dirigidas: Como montar um Plano de Mídia em 5 passos. Inovação a chave de sucesso de um e-commerce E-mail Marketing: sucesso em 10 passos. ENTREGÁVEL: Palestras de 120 minutos com certificado de participação. DELIVERY: Sujeito a disponibilidade da agenda dos palestrantes : consulte e-Vision Palestras 3/15/2011 e-Vision® e-Commerce Consulting, oct 2010
- 17. e-Vision MSM®Administração Mídias Sociais Social Media é alavancar uma marca, produto ou serviço utilizando as conexões interpessoais existentes em redes sociais, criando novas conexões. Por que investir em Mídias Sociais? O e-Vision MSM® administra sua ação em redes sociais, com conteúdo que vai direto ao seu público e com medicação de resultados. ENTREGÁVEL: Serviço mensal de criação de perfis em redes sociais, criação de ações de relacionamento, produção de conteúdos, planejamento e calendário de ações, relatórios mensais de metas/resultados. DELIVERY: Sujeito a assinatura do contrato e pagamento da primeira mensalidade. Administração Mídias Sociais 3/15/2011 e-Vision® e-Commerce Consulting, oct 2010
- 18. e-Vision CB® Selo “e-commerce Girl Aprovou!” Certificações de experts são comuns fora do Brasil, para ter o e-Vision CB ®“e-commerce Girl aprovou!” sua loja virtual terá os processos técnicos e comerciais auditados e só receberá o selo se estiver conforme com nosso Manual e Melhores Práticas em e-commerce. ENTREGÁVEL: Um book e-Vision CB®impresso e mídia, com todos os dados da auditoria e um file embeedpara usar o selo no sua loja virtual , atestando que “e-Commerce Girl aprovou!” DELIVERY: Sujeito a assinatura do contrato e pagamento da primeira mensalidade. Selo “e-commerce Girl aprovou” 3/15/2011 e-Vision® e-Commerce Consulting, oct 2010
- 19. 3/15/2011 e-Vision PC® Consultoria de Projeto para Loja virtual Projetos de e-commerce precisam metodologia e processos como qualquer projeto de T.I.É por isso que oferecemos serviços de consultoria de projetos para Lojas Virtuais. ENTREGÁVEL: Depois de levantamento de dados, é emitida uma proposta com detalhes do projeto! DELIVERY: Sujeito a aceite da proposta e assinatura do contrato, entrega será conforme e-Vision PC® Cronograma que é parte da proposta e do projeto. Consultoria de Projeto : Loja Virtual e-Vision® e-Commerce Consulting, oct 2010
- 20. 3/15/2011 e-Vision on-lineC® Consultoria on-line Dúvidas, orientações e indicações podem ser adquiridas através de nossa loja virtual. e-Vision on-lineC® é uma inovadora forma de transmitir conhecimento para o seu projeto. Entre em nossa loja virtual e “bilhete” uma consultoria, com hora marcada e email de confirmação . Nunca foi tão fácil e rápido obter respostas para aquelas dúvidas de ultima hora. O que você recebe? Consultoria on-line através de video-chat. Quando vou receber?No momento que quiser o conforma sua agenda. Sujeito a confirmação de pagamento pela operadora do cartão de crédito. Consultoria on-line e-Vision® e-Commerce Consulting, oct 2010
- 21. 3/15/2011 Nossa Loja Virtual Todos nossos produtos podem ser adquiridos pela Loja Virtual. Uma questão de transparência em relação aos preços praticados. e-Vision® e-Commerce Consulting, oct 2010
- 22. 3/15/2011 Sócio Fundador Solange Oliveira é especialista em e-commerce, trabalha em tecnologia há 20 anos e já dirigiu os melhores e maiores e-commerces da America Latina. É mais conhecida como E-commerce Girl tendo mais de 3.000 seguidores do twitter, escreve um blog de sucesso que foi premiado como um dos 10 melhores blogs brasileiros em Tecnologia em 2009 e 2010. Trabalha em consultoria para e-commerce e é conselheira de Lojas Virtuais no Brasil e América Latina. Desenvolveu carreira inicialmente em Tecnologia, tendo como formação Matemática e Processamento de Dados, com Pós Graduação em Administração de Negócios e um MBA em Digital Business. Autora do Livro “ De camelô a Joalheiro todos podem e devem vender ON-LINE” Solange Oliveira ministra aulas na EcommerceSchool e no MBA da Anhembi Morumbi de Mídia Digital e Inovação em e-commerce Suas palestras tem fila de espera de seis meses. www.ecommercegirl.com Solange.oliveira@e-visionconsulting.com.br @ecommerce_girl solange_Oliveira solange Oliveira e-Vision® e-Commerce Consulting, oct 2010
- 23. Nota de Confidencialidade Este documento contém informações confidenciais, de propriedade da e-Vision® e-Commerce Consulting e destina-se exclusivamente para o uso do cliente para a qual foi produzida. Nenhuma parte do seu conteúdo pode ser utilizada, copiada, divulgada ou transmitida para qualquer pessoa ou instituição, através de qualquer modo de divulgação sem autorização prévia, por escrito, da e-Vision® e-Commerce Consulting. Qualquer software descrito neste documento é provido de licença e só deve ser utilizado ou copiado em concordância com os termos da mesma. Nenhuma responsabilidade é assumida para o uso ou segurança do software de equipamento que não seja fornecido pela e-Vision® e-Commerce Consulting ou por seus parceiros. e-Vision® e-Commerce Consulting, oct 2010
- 24. E-Commerce Parceria Colaborativa Consultoria Selo Qualidade Projetos Contatos e-Vision®e-Commerce Consulting Solange Oliveira E-Commerce expert 55 11 4272 0844 55 11 7046 3868 Solange.oliveira@e-visionconsulting.com.br www.e-visionconsulting.com.br
Notas del editor
- To reproduce the picture effects on this slide, do the following:On the Home tab, in the Slides group, click Layout and then click Blank. On the Insert tab, in the Illustrations group, click Picture. In the Insert Picture dialog box, select a picture, and then click Insert. Select the picture. Under Picture Tools, on the Format tab, in the bottom right corner of the Size group, click the Size and Position dialog box launcher. In the Size and Position dialog box, on the Size tab, resize or crop the picture as needed so that under Size and rotate, the Height box is set to 3.58” and the Width box is set to 8”. Resize the picture under Size and rotate by entering values into the Height and Width boxes. Crop the picture under Crop from by entering values into the Left, Right, Top, and Bottom boxes. Under Picture Tools, on the Format tab, in the Adjust group, click Recolor, and then under Dark Variations click Text color 2 Dark (first option from the left). Under Picture Tools, on the Format tab, in the Picture Styles group, click Picture Effects, point to Shadow, and then under Inner click Inside Diagonal Top Left (first row, first option from the left).Drag the picture so that it is positioned above the middle of the slide. On the Home tab, in the Clipboard group, click the arrow next to Paste, and then click Duplicate.Press and hold CTRL and select both pictures on the slide. On the Home tab, in the Drawing group, click Arrange, point to Align, and then do the following:Click Align to Slide.Click Align Center. Click Align Selected Objects. Click Align Middle. Click the slide background area to cancel the selection of both pictures. Select the duplicate (top) picture. Under Picture Tools, on the Format tab, in the bottom right corner of the Size group, click the Size and Position dialog box launcher. In the Size and Position dialog box, on the Size tab, under Crop from,enter valuesinto the Left and Right boxes so that under Size and rotate, and the Width box is set to 2.33”. (Note: For best results, crop the duplicate picture to tightly focus on a single element in the original picture.)Under Picture Tools, on the Format tab, in the Adjust group, click Recolor, and then under No Recolor click No Recolor. On the Home tab, in the Drawing group, click Shapes, and then under Rectangles click Rectangle (first option from the left). On the slide, drag to draw a rectangle. Select the rectangle. Under Drawing Tools, on the Format tab, in the Size group, do the following:In the Shape Height box, enter 7.5”.In the Shape Width box, enter 2.33”.Under Drawing Tools, on the Format tab, in the Shape Styles group, click the arrow next to Shape Fill, point to Gradient, and then click More Gradients. In the Format Shape dialog box, click Fill in the left pane, select Gradient fill in the Fill pane, and then do the following:In the Type list, select Linear.Click the button next to Direction, and then click Linear Down (first row, second option from the left).Under Gradient stops, click Add or Remove until two stops appear in the drop-down list.Also under Gradient stops, customize the gradient stops that you added as follows:Select Stop 1 from the list, and then do the following:In the Stop position box, enter 0%.Click the button next to Color, then under Theme Colors click White, Background 1 (first row, first option from the left).In the Transparency box, enter 55%.Select Stop 2 from the list, and then do the following: In the Stop position box, enter 100%.Click the button next to Color, and then under Theme Colors click White, Background 1 (first row, first option from the left).In the Transparency box, enter 100%.On the slide, drag the rectangle to cover the duplicate picture. Select the rectangle. On the Home tab, in the Drawing group, click Arrange, and then do the following:Point to Align, and then click Align to Slide.Point to Align, and then click Align Middle. Click Send Backward. On the Home tab, in the Drawing group, click Shapes, and then under Rectangles click Rectangle (first option from the left). On the slide, drag to draw another rectangle. Select the rectangle. Under Drawing Tools, on the Format tab, in the Size group, do the following:In the Shape Height box, enter 4”.In the Shape Width box, enter 2.67”.Under Drawing Tools, on the Format tab, in the Shape Styles group, click the arrow next to Shape Fill, point to Gradient, and then click More Gradients. In the Format Shape dialog box, click Fill in the left pane. In the Fill pane, select No fill. Also in the Format Shape dialog box, click Line Color in the left pane, select Solid line in the Line Color pane, and then do the following:Click the button next to Color, and then under Theme Colors click White, Background 1 (first row, first option from the left). In the Transparency box, enter 70%.Also in the Format Shape dialog box, click Line Style in the left pane, and then do the following in the Line Style pane:In the Width box, enter 0.75 pt. Click the button next to Dash type, and then click Square Dot (third option from the top).Drag the dotted rectangle on top of the small, full-color picture. Press and hold SHIFT and select the dotted rectangle, the small picture, and the large picture on the slide. On the Home tab, in the Drawing group, click Arrange, point to Align, and then do the following:Click Align Selected Objects. Click Align Middle. On the Insert tab, in the Text group, click Text Box, and then on the slide, drag to draw the text box.Enter text in the text box, select the text, and then on the Home tab, in the Font group, select Gill Sans MT Condensedfrom the Font list, select 24 from the Font Size list, click the button next to Font Color, and then under Theme Colors click White, Background 1 (first row, first option from the left).On the Home tab, in the Paragraph group, click Center to center the text within the text box.On the slide, drag the text box below the dotted rectangle.To reproduce the background effects on this slide, do the following:Right-click the slide background area, and then click Format Background. In the Format Background dialog box, click Fill in the left pane, and then select Solid fill in the Fill pane. Also in the Fill pane, click the button next to Color, and then under Theme Colors click Black, Text 1, Lighter 15% (fifth row, second option from the left).To reproduce the animation effects on this slide, do the following:To view the area beyond the slide, on the View tab, click Zoom, and then in the Zoom dialog box, in the Percent box, enter 70%. (Note: Make sure that Fit is not selected in the Zoom dialog box.)On the Animations tab, in the Animations group, click Custom Animation. On the slide, select the dotted rectangle. In the Custom Animation task pane, click Add Effect, point to Motion Paths, point to Draw Custom Path, and then click Freeform. Press and hold SHIFT to conform the path to a straight, horizontal line, and then do the following on the slide:Click the center of the dotted rectangle to create the first motion-path point.Click approximately ½” beyond the right edge of the rectangle to create the second motion-path point. Double-click approximately 2” beyond the left edge of the slide to create the third and final motion-path point. On the slide, right-click the freeform motion path, and then click Reverse Path Direction. On the slide, select the freeform motion path. In the Custom Animation task pane, under Modify: Custom Path, in the Start list, select With Previous. On the slide, select the gradient-filled rectangle. In the Custom Animation task pane, do the following:Click Add Effect, point to Entrance, and then click More Effects. In the Add Entrance Effect dialog box, under Subtle, click Fade, and then click OK. Under Modify: Fade, in the Start list, select With Previous.Under Modify: Fade, in the Speed list, select Very Fast.Click Add Effect, point to Motion Paths, and then click Down.Under Modify: Down, in the Start list, select With Previous. Under Modify: Down, in the Speed list, select Medium. On the slide, right-click the down motion path and click ReversePathDirection.On the slide, select the smaller, full-color picture. In the Custom Animation task pane, do the following:Click Add Effect, point to Entrance, and then click More Effects. In the Add Entrance Effect dialog box, under Subtle, click Fade, and then click OK. Under Modify: Fade, in the Start list, select With Previous.Under Modify: Fade, in the Speed list, select Very Fast.Right-click the picture fade effect in the pane, and then click Timing. In the Fade dialog box, on the Timing tab, in the Delay box, enter 1.5.On the slide, select the text box. In the Custom Animation task pane, do the following:Click Add Effect, point to Entrance, and then click More Effects. In the Add Entrance Effect dialog box, under Moderate, click Descend, and then click OK. Under Modify: Descend, in the Start list, select With Previous. Under Modify:Descend, in the Speed list, select Fast.
- Custom animation effects: picture changes during motion path(Advanced)To reproduce the first picture effect on this slide, do the following:On the Home tab, in the Slides group, click Layout and then click Blank. On the Insert tab, in the Illustrations group, click Picture. In the Insert Picture dialog box, select a picture, and then click Insert. Under Picture Tools, on the Format tab, in the bottom right corner of the Size group, click the Size and Position dialog box launcher. In the Size and Position dialog box, on the Size tab, resize or crop the picture as needed so that under Size and rotate, the Height box is set to 2” and the Width box is set to 2”. Resize the picture under Size and rotate by entering values into the Height and Width boxes. Crop the picture under Crop from by entering values into the Left, Right, Top, and Bottom boxes. Under Picture Tools, on the Format tab, in the bottom right corner of the Picture Styles group, click the Format Shape dialog box launcher. In the Format Shape dialog box, click Line Color in the left pane. In the Line Color pane, select Solid line, click the button next to Color, and then under Theme Colors click White, Background 1 (first row, first option from the left).Also in the Format Shape dialog box, click Line Style in the left pane, and then in the Line Style pane, in the Width box, enter 1.5 pt. Also in the Format Shape dialog box, click Shadow in the left pane. In the Shadow pane, click the button next to Presets, and then under Outer click Offset Center (second row, second option from the left). On the Animations tab, in the Animations group, click Custom Animation. On the slide, select the picture. In the Custom Animation task pane, click Add Effect, point to Entrance, and then click More Effects. In the Add Entrance Effect dialog box, under Subtle, click Fade, and then click OK. Also in the Custom Animation task pane, select the first animation effect (fade effect for the picture), and then under Modify: Fade do the following:In the Start list, select With Previous. In the Speed list, select Fast. Also in the Custom Animation task pane, click Add Effect, point to Motion Paths, and then click Right. Also in the Custom Animation task pane, select the second animation effect (motion path for the picture), and then under Modify: Right, in the Start list, select With Previous. Also in the Custom Animation task pane, click the arrow to the right of the second animation effect, and then click Timing. In the Right dialog box, on the Timing tab, in the Speed box, enter 10seconds.On the slide, select the motion path. Press and hold SHIFT to constrain the path to a straight, horizontal line, and then drag the right adjustment handle to the right, stopping approximately 1.5” left of the right edge of the slide. (Note: On the View tab, in the Show/Hide group, select Ruler to measure approximately where the endpoint is on the slide.)To reproduce the other pictures on this slide, do the following:Select the picture. On the Home tab, in the Clipboard group, click the arrow under Paste, and then click Duplicate. Repeat this process for a total of four duplicate pictures. Select a duplicate picture. Under Picture Tools, on the Format tab, in the Adjust group, click Change Picture. In the Insert Picture dialog box, select a new picture, and then click Insert. Under Picture Tools, on the Format tab, in the bottom right corner of the Size group, click the Size and Position dialog box launcher. In the Size and Position dialog box, on the Size tab, resize or crop the picture as needed so that under Size and rotate, the Height box is set to 2” and the Width box is set to 2”. Resize the picture under Size and rotate by entering values into the Height and Width boxes. Crop the picture under Crop from by entering values into the Left, Right, Top, and Bottom boxes. Repeat steps 2-4 for the other duplicate pictures. To reproduce the other animation effects on this slide, do the following:In the Custom Animation task pane, select the third animation effect (fade effect for the second picture). Click the arrow to the right of the selected effect, and then click Timing. In the Fade dialog box, on the Timing tab, in the Delay box, enter 2.5. Also in the Custom Animation task pane, select the fifth animation effect (fade effect for the third picture). Click the arrow to the right of the selected effect, and then click Timing. In the Fade dialog box, on the Timing tab, in the Delay box, enter 5. Also in the Custom Animation task pane, select the seventh animation effect (fade effect for the fourth picture). Click the arrow to the right of the selected effect, and then click Timing. In the Fade dialog box, on the Timing tab, in the Delay box, enter 7.5. On the slide, press and hold SHIFT and select all four pictures. On the Home tab, in the Drawing group, click Arrange, point to Align, and then do the following:Click Align Selected Objects.Click Align Center. Click Align Middle. Drag the pictures into the top left corner of the slide. To reproduce the background effects on this slide, do the following:On the Home tab, in the Drawing group, click Shapes, and then under Rectangles click Rectangle (first option from the left). On the slide, drag to draw a rectangle. Select the rectangle. Under Drawing Tools, on the Format tab, in the Size group, do the following:In the Shape Height box, enter 3.42”.In the Shape Width box, enter 10”.Under DrawingTools, on the Format tab, in the bottom right corner of the Shape Styles group, click the Format Shape dialog box launcher. In the Format Shape dialog box, click Line Color in the left pane, and then select No line in the Line Color pane. Also in the Format Shape dialog box, click Fill in the left pane, select Gradient fill in the Fill pane, and then do the following:In the Type list, select Linear.Click the button next to Direction, and then click Linear Down (first row, second option from the left).Under Gradient stops, click Add or Remove until two stops appear in the drop-down list.Also under Gradient stops, customize the gradient stops that you added as follows:Select Stop 1 from the list, and then do the following:In the Stop position box, enter 1%. Click the button next to Color, click More Colors, and then in the Colors dialog box, on the Custom tab, enter values for Red: 94, Green: 156, Blue: 198.In the Transparency box, enter 60%.Select Stop 2 from the list, and then do the following: In the Stop position box, enter 100%.Click the button next to Color, click More Colors, and then in the Colors dialog box, on the Custom tab, enter values for Red: 94, Green: 156, Blue: 198.In the Transparency box, enter 90%.On the slide, drag the rectangle vertically to position it just above the middle of the slide. On the Home tab, in the Drawing group, click Arrange, and then do the following:Point to Align, and then click Align to Slide.Point to Align, and then click Align Center.Click Send to Back. Right-click the slide background area, and then click Format Background. In the Format Background dialog box, click Fill in the left pane, select Gradient fill in the Fill pane, and then do the following:In the Type list, select Linear.Click the button next to Direction, and then click Linear Down (first row, second option from the left)In the Angle box, enter 90⁰.Under Gradient stops, click Add or Remove until two stops appear in the drop-down list.Also under Gradient stops, customize the gradient stops that you added as follows:Select Stop 1 from the list, and then do the following:In the Stop position box, enter 70%.Click the button next to Color, and then click White, Background 1, Darker 5% (second row, first option from the left).Select Stop 2 from the list, and then do the following: In the Stop position box, enter 100%.Click the button next to Color, and then click White, Background 1, Darker 25% (fourth row, first option from the left).
- Custom animation effects: duplicate picture with varied brightness to full color(Advanced)Tip: For the effects on this slide, use a picture with a “portrait” (vertical) orientation. To reproduce the text effects on this slide, do the following:On the Home tab, in the Slides group, click Layout, and then click Blank. On the Insert tab, in the Text group, click Text Box, and then on the slide, drag to draw the text box.Enter text in the text box, and then select the text. On the Home tab, in the Font group, select Georgia from the Font list, enter 34 in the Font Size box, click Italic, click the arrow next to Font Color, and then under Theme Colors click Aqua, Accent 5, Darker 25% (fifth row, ninth option from the left).Drag the text box into the upper half of the slide, slightly left of the center.To reproduce the first picture with animation effects on this slide, do the following:On the Insert tab, in the Illustrations group, click Picture. In the Insert Picture dialog box, select a picture and then click Insert. On the slide, select the picture. Under Picture Tools, on the Format tab, in the bottom right corner of the Size group, click the Size and Position dialog box launcher. In the Size and Position dialog box, on the Size tab, resize or crop the picture as needed so that under Size and rotate, the Height box is set to 3.81” and the Width box is set to 2.54”. Resize the picture under Size and rotate by entering values into the Height and Width boxes. Crop the picture under Crop from by entering values into the Left, Right, Top, and Bottom boxes. Drag the picture into the into the top left corner of the slide. (Note: Align the left edge of the picture with the left edge of the slide, and leave a small margin between the top edge of the picture and the top edge of the slide.)Select the picture. Under PictureTools, on the Format tab, in the bottom right corner of the Picture Styles group, click the Format Shape dialog box launcher.In the Format Picture dialog box, in the left pane, click Picture, and then do the following in the Picture pane: Click the button next to Recolor, and then select the recolor option that works best with the picture. (Note: The first picture in the example above is set to No Recolor.)In the Brightness box, enter 50%. (Note: You may want to adjust the brightness settings for the picture you have chosen.)On the Animations tab, in the Animations group, click CustomAnimation.On the slide, select the picture, and then do the following in the Custom Animation task pane:Click Add Effect, point to Entrance, and then click MoreEffects. In the Add Entrance Effect dialog box,under Basic, click Fly In, and then click OK.Under Modify: Fly In, in the Start list, select With Previous. Under Modify: Fly In,in the Direction list, select From Left.Under Modify: Fly In,in the Speed list, select Fast.Click Add Effect, point to Entrance, and then click MoreEffects. In the Add Entrance Effect dialog box,under Subtle, click Expand, and then click OK.Under Modify: Expand, in the Start list, select With Previous.Under Modify: Expand, in the Speed list, select Fast.To reproduce the second picture with animation effects on this slide, do the following:On the slide, select the picture. On the Home tab, in the Clipboard group, click the arrow under Paste, and then click Duplicate.Drag the second picture until the left side slightly overlaps the right side of the first picture.Select the second picture. Under PictureTools, on the Format tab, in the bottom right corner of the Picture Styles group, click the Format Shape dialog box launcher.In the Format Picture dialog box, in the left pane, click Picture. In the Picture pane, in the Brightness box, enter 40%. (Note: You may want to adjust the brightness settings for the picture you have chosen.)Press and hold CTRL, and then select the third and fourth animation effects (fly-in and expand effects for the second picture) in the CustomAnimation task pane. Click the arrow to the right of one of the animation effects, and then click Timing. In the Effect Options dialog box, on the Timing tab, in the Delay box, enter 0.2, and then click OK.To reproduce the third picture with animation effects on this slide, do the following:On the slide, select the second picture. On the Home tab, in the Clipboard group, click the arrow under Paste, and then click Duplicate.Drag the third picture until its left side slightly overlaps the right side of the second picture.Select the third picture. Under PictureTools, on the Format tab, in the bottom right corner of the Picture Styles group, click the Format Shape dialog box launcher.In the Format Picture dialog box, in the left pane, click Picture. In the Picture pane, in the Brightness box, enter 20%. (Note: You may want to adjust the brightness settings for the picture you have chosen.)Press and hold CTRL, and then select the fifth and sixth animation effects (fly-in and expand effects for the third picture) in the CustomAnimation task pane. Click the arrow to the right of one of the animation effects, and then click Timing. In the Effect Options dialog box, on the Timing tab, in the Delay box, enter 0.4, and then click OK.To reproduce the fourth picture with animation effects on this slide, do the following:On the slide, select the third picture. On the Home tab, in the Clipboard group, click the arrow under Paste, and then click Duplicate.Drag the fourth picture until its left side slightly overlaps the right side of the third picture.Select the fourth picture. Under PictureTools, on the Format tab, in the bottom right corner of the Picture Styles group, click the Format Shape dialog box launcher.In the Format Picture dialog box, in the left pane, click Picture. In the Picture pane, in the Brightness box, enter 0%. Press and hold CTRL, and then select the seventh and eighth animation effects (fly-in and expand effects for the fourth picture) in the CustomAnimation pane. Click the arrow to the right of one of the animation effects, and then click Timing. In the Effect Options dialog box, on the Timing tab, in the Delay box, enter 0.6, and then click OK.To reproduce the fifth picture with animation effects on this slide, do the following:On the slide, select the fourth picture. On the Home tab, in the Clipboard group, click the arrow under Paste, and then click Duplicate.Drag the fifth picture until its left side slightly overlaps the right side of the fourth picture.Select the fifth picture. Under PictureTools, on the Format tab, in the bottom right corner of the Picture Styles group, click the Format Shape dialog box launcher.In the Format Picture dialog box, in the left pane, click Picture. In the Picture pane, click the button next to Recolor, and then under No Recolor click No Recolor. Press and hold CTRL, and then select the ninth and 10th animation effects (fly-in and expand effects for the fifth picture) in the CustomAnimation task pane. Click the arrow to the right of one of the selected animation effects, and then click Timing. In the Effect Options dialog box, on the Timing tab, in the Delay box, enter 0.8, and then click OK.To reproduce the animation effects for the text box on this slide, do the following:On the Home tab, in the Editing group, click Select, and then click Selection Pane.In the Selection and Visibility pane, select the text box, and then do the following in the CustomAnimation task pane:Click Add Effect, point to Entrance, and then click MoreEffects. In the Add Entrance Effect dialog box,under Subtle, click Fade, and then click OK.Under Modify: Fade, in the Start list, select With Previous. Under Modify: Fade, in the Speed list, select Very Fast.In the Selection and Visibility pane, press and hold CTRL, and then select the first, second, third, and fourth pictures. In the CustomAnimation task pane do the following:Click Add Effect, point to Exit, and then click MoreEffects. In the Add Exit Effect dialog box,under Moderate, click Stretchy, and then click OK.Under Modify: Stretchy, in the Start list, select With Previous. Under Modify: Stretchy, in the Speed list, select Fast.Also in the Custom Animation task pane, select the 12th animation effect (first stretchy effect for the text box). Click the arrow to the right of the animation effect, and then click Timing. In the Stretchy dialog box, on the Timing tab, in the Delay box, enter 1.4, and then click OK.Also in the Custom Animation task pane, select the 13th animation effect (second stretchy effect for the text box). Click the arrow to the right of the animation effect, and then click Timing. In the Stretchy dialog box, on the Timing tab, in the Delay box, enter 1.6, and then click OK.Also in the Custom Animation task pane, select the 14th animation effect (third stretchy effect for the text box). Click the arrow to the right of the animation effect, and then click Timing. In the Stretchy dialog box, on the Timing tab, in the Delay box, enter 1.8, and then click OK.Also in the Custom Animation task pane, select the 15th animation effect (fourth stretchy effect for the text box). Click the arrow to the right of the animation effect, and then click Timing. In the Stretchy dialog box, on the Timing tab, in the Delay box, enter 2.0, and then click OK.To reproduce the background effects on this slide, do the following:Right-click the slide background area, and then click Format Background. In the Format Background dialog box, click Fill in the left pane, select Gradient fill in the right pane, and then do the following:In the Type list, select Radial.Click the button next to Direction, and then click From Center (third option from the left).Under Gradient stops, click Add or Remove until three stops appear in the drop-down list.Also under Gradient stops, customize the gradient stops as follows:Select Stop 1 from the list, and then do the following:In the Stop position box, enter 0%.Click the button next to Color, and then under Theme Colors click White, Background 1, Darker 5% (second row, first option from the left). Select Stop 2 from the list, and then do the following: In the Stop position box, enter 34%.Click the button next to Color, and then under Theme Colors click White, Background 1, Darker 15% (third row, first option from the left). Select Stop 3 from the list, and then do the following: In the Stop position box, enter 100%.Click the button next to Color, and then under Theme Colors click White, Background 1, Darker 50% (sixth row, first option from the left).
- Custom animation effects: picture changes during motion path(Advanced)To reproduce the first picture effect on this slide, do the following:On the Home tab, in the Slides group, click Layout and then click Blank. On the Insert tab, in the Illustrations group, click Picture. In the Insert Picture dialog box, select a picture, and then click Insert. Under Picture Tools, on the Format tab, in the bottom right corner of the Size group, click the Size and Position dialog box launcher. In the Size and Position dialog box, on the Size tab, resize or crop the picture as needed so that under Size and rotate, the Height box is set to 2” and the Width box is set to 2”. Resize the picture under Size and rotate by entering values into the Height and Width boxes. Crop the picture under Crop from by entering values into the Left, Right, Top, and Bottom boxes. Under Picture Tools, on the Format tab, in the bottom right corner of the Picture Styles group, click the Format Shape dialog box launcher. In the Format Shape dialog box, click Line Color in the left pane. In the Line Color pane, select Solid line, click the button next to Color, and then under Theme Colors click White, Background 1 (first row, first option from the left).Also in the Format Shape dialog box, click Line Style in the left pane, and then in the Line Style pane, in the Width box, enter 1.5 pt. Also in the Format Shape dialog box, click Shadow in the left pane. In the Shadow pane, click the button next to Presets, and then under Outer click Offset Center (second row, second option from the left). On the Animations tab, in the Animations group, click Custom Animation. On the slide, select the picture. In the Custom Animation task pane, click Add Effect, point to Entrance, and then click More Effects. In the Add Entrance Effect dialog box, under Subtle, click Fade, and then click OK. Also in the Custom Animation task pane, select the first animation effect (fade effect for the picture), and then under Modify: Fade do the following:In the Start list, select With Previous. In the Speed list, select Fast. Also in the Custom Animation task pane, click Add Effect, point to Motion Paths, and then click Right. Also in the Custom Animation task pane, select the second animation effect (motion path for the picture), and then under Modify: Right, in the Start list, select With Previous. Also in the Custom Animation task pane, click the arrow to the right of the second animation effect, and then click Timing. In the Right dialog box, on the Timing tab, in the Speed box, enter 10seconds.On the slide, select the motion path. Press and hold SHIFT to constrain the path to a straight, horizontal line, and then drag the right adjustment handle to the right, stopping approximately 1.5” left of the right edge of the slide. (Note: On the View tab, in the Show/Hide group, select Ruler to measure approximately where the endpoint is on the slide.)To reproduce the other pictures on this slide, do the following:Select the picture. On the Home tab, in the Clipboard group, click the arrow under Paste, and then click Duplicate. Repeat this process for a total of four duplicate pictures. Select a duplicate picture. Under Picture Tools, on the Format tab, in the Adjust group, click Change Picture. In the Insert Picture dialog box, select a new picture, and then click Insert. Under Picture Tools, on the Format tab, in the bottom right corner of the Size group, click the Size and Position dialog box launcher. In the Size and Position dialog box, on the Size tab, resize or crop the picture as needed so that under Size and rotate, the Height box is set to 2” and the Width box is set to 2”. Resize the picture under Size and rotate by entering values into the Height and Width boxes. Crop the picture under Crop from by entering values into the Left, Right, Top, and Bottom boxes. Repeat steps 2-4 for the other duplicate pictures. To reproduce the other animation effects on this slide, do the following:In the Custom Animation task pane, select the third animation effect (fade effect for the second picture). Click the arrow to the right of the selected effect, and then click Timing. In the Fade dialog box, on the Timing tab, in the Delay box, enter 2.5. Also in the Custom Animation task pane, select the fifth animation effect (fade effect for the third picture). Click the arrow to the right of the selected effect, and then click Timing. In the Fade dialog box, on the Timing tab, in the Delay box, enter 5. Also in the Custom Animation task pane, select the seventh animation effect (fade effect for the fourth picture). Click the arrow to the right of the selected effect, and then click Timing. In the Fade dialog box, on the Timing tab, in the Delay box, enter 7.5. On the slide, press and hold SHIFT and select all four pictures. On the Home tab, in the Drawing group, click Arrange, point to Align, and then do the following:Click Align Selected Objects.Click Align Center. Click Align Middle. Drag the pictures into the top left corner of the slide. To reproduce the background effects on this slide, do the following:On the Home tab, in the Drawing group, click Shapes, and then under Rectangles click Rectangle (first option from the left). On the slide, drag to draw a rectangle. Select the rectangle. Under Drawing Tools, on the Format tab, in the Size group, do the following:In the Shape Height box, enter 3.42”.In the Shape Width box, enter 10”.Under DrawingTools, on the Format tab, in the bottom right corner of the Shape Styles group, click the Format Shape dialog box launcher. In the Format Shape dialog box, click Line Color in the left pane, and then select No line in the Line Color pane. Also in the Format Shape dialog box, click Fill in the left pane, select Gradient fill in the Fill pane, and then do the following:In the Type list, select Linear.Click the button next to Direction, and then click Linear Down (first row, second option from the left).Under Gradient stops, click Add or Remove until two stops appear in the drop-down list.Also under Gradient stops, customize the gradient stops that you added as follows:Select Stop 1 from the list, and then do the following:In the Stop position box, enter 1%. Click the button next to Color, click More Colors, and then in the Colors dialog box, on the Custom tab, enter values for Red: 94, Green: 156, Blue: 198.In the Transparency box, enter 60%.Select Stop 2 from the list, and then do the following: In the Stop position box, enter 100%.Click the button next to Color, click More Colors, and then in the Colors dialog box, on the Custom tab, enter values for Red: 94, Green: 156, Blue: 198.In the Transparency box, enter 90%.On the slide, drag the rectangle vertically to position it just above the middle of the slide. On the Home tab, in the Drawing group, click Arrange, and then do the following:Point to Align, and then click Align to Slide.Point to Align, and then click Align Center.Click Send to Back. Right-click the slide background area, and then click Format Background. In the Format Background dialog box, click Fill in the left pane, select Gradient fill in the Fill pane, and then do the following:In the Type list, select Linear.Click the button next to Direction, and then click Linear Down (first row, second option from the left)In the Angle box, enter 90⁰.Under Gradient stops, click Add or Remove until two stops appear in the drop-down list.Also under Gradient stops, customize the gradient stops that you added as follows:Select Stop 1 from the list, and then do the following:In the Stop position box, enter 70%.Click the button next to Color, and then click White, Background 1, Darker 5% (second row, first option from the left).Select Stop 2 from the list, and then do the following: In the Stop position box, enter 100%.Click the button next to Color, and then click White, Background 1, Darker 25% (fourth row, first option from the left).
- Custom animation effects: motion path text and change color(Intermediate)To reproduce the picture on this slide, do the following:On the Home tab, in the Slides group, click Layout, and then click Blank.On the Insert tab, in the Illustrations group, click Picture. In the Insert Picture dialog box, select a picture, and then click Insert.On the slide, select the picture. Under Picture Tools, on the Format tab, in the bottom right corner of the Size group, click the Size and Position dialog box launcher. In the Size and Position dialog box, on the Size tab, resize or crop the picture as needed so that under Size and rotate, the Height box is set to 3” and the Width box is set to 10”. Resize the picture under Size and rotate by entering values into the Height and Width boxes. Crop the picture under Crop from by entering values into the Left, Right, Top, and Bottom boxes. Select the picture. On the Home tab, in the Drawing group, click the arrow under Arrange, point to Align, and do the following:Click Align to Slide.Click AlignCenter.Click Align Top.To reproduce the text effects on this slide, do the following:On the Insert tab, in the Text group, click Text Box, and then on the slide, drag to draw the text box. Enter text in the text box and select the text. On the Home tab, in the Font group, do the following:In the Font list, select Century Gothic.In the Font Size box, enter 30. Click Bold.Click the arrow next to FontColor, click More Colors, and then in the Colors dialog box, on the Custom tab, enter values for Red: 80, Green: 129, Blue: 226. On the Home tab, in the Paragraph group, click Align Text Left to align the text left in the text box.Drag the text box below the picture, in the middle of the left side of the slide.To reproduce the animation effects for the first text box on this slide, do the following:On the Animations tab, in the Animations group, click Custom Animation.On the slide, select the text box. In the CustomAnimation task pane, do the following:Click AddEffect, point to Entrance, and then click More Effects.In the Add Entrance Effect dialog box, under Subtle, click Fade. Select the animation effect (fade effect for the first text box). Under Modify: Fade, do the following:In the Start list, select With Previous. In the Speed list, select Medium.On the slide, select the text box. In the CustomAnimation task pane, do the following:Click AddEffect, point to Motion Paths, and then click Right. Select the second animation effect (right motion path for the first text box). Under Modify: Right, do the following:In the Start list, select With Previous. In the Speed list, select Medium.On the slide, select the text box. In the CustomAnimation task pane, do the following:Click AddEffect, point to Emphasis, and then click More Effects.In the Add Emphasis Effect dialog box, under Basic, click Change Font Color. Select the third animation effect (change font color effect for the first text box). Under Modify: Change Font Color, do the following:In the Start list, select After Previous. In the Font Color list, select White (first option from the left).In the Speed list, select Fast.On the slide, select the motion path for the text box. Point to the endpoint (red arrow) until the cursor becomes a two-headed arrow, press and hold SHIFT, and then drag the endpoint to lengthen the motion path about 4”. (Note: It will help to use the ruler to measure the path. On the View tab, in the Show/Hide group, select Ruler.) Right-click the motion path, and then click Reverse Path Direction. To reproduce the other animated text boxes on this slide, do the following:On the slide, select the text box. On the Home tab, in the Clipboard group, click the arrow under Paste, and then click Duplicate. Drag the second text box below and to the right of the first text box.Click in the second text box, and then edit the text. Select the text in the second text box. On the Home tab, in the Font group, do the following:In the Font Size list, select 24.Click Bold to unbold the text.Click Italic. On the slide, select the motion path for the second text box. Point to the starting point (green arrow) until the cursor becomes a two-headed arrow. Press and hold SHIFT, and then drag the starting point to the left of the second text box, until the length of the path is about 4”. Select the first text box. On the Home tab, in the Clipboard group, click the arrow under Paste, and then click Duplicate. On the slide, Drag the third text box until it is below and to the left of the second text box, and to the right of the first text box.Click in the third text box, and then edit the text.Select the text in the third text box. On the Home tab, in the Font group, in the Font Size list, select 24.In the Custom Animation task pane, select the sixth animation effect (change font color effect for the second text box). Under Modify: Change Font Color, in the Speed list, select Fast. On the slide, press and hold CTRL, and then select all three text boxes. In the CustomAnimation task pane, do the following:Click AddEffect, point to Exit, and then click More Effects.In the Add Exit Effect dialog box, under Moderate, click Stretchy. Select the 10th, 11th, and 12th animation effects (stretchy effects for the text boxes). Under Modify: Stretchy, do the following:In the Start list, select With Previous. In the Speed list, select Medium.Select the 10th animation effect (stretchy effect for the first text box), and then drag it until it is ninth in the list of effects. Select the 12th animation effect (stretchy effect for the third text box), and then under Modify: Exit, in the Start list, select After Previous.To reproduce the background effects on this slide, do the following: Right-click the slide background area, and then click Format Background. In the Format Background dialog box, click Fill in the left pane, select Gradient fill in the Fill pane, and then do the following:In the Type list, select Linear.Click the button next to Direction, and then click Linear Up (second row, second option from the left).Under Gradient stops, click Add or Remove until four stops appear in the drop-down list.Also under Gradient stops, customize the gradient stops that you added as follows:Select Stop 1 from the list, and then do the following:In the Stop position box, enter 0%.Click the button next to Color, and then under Theme Colors click Black, Text 1, Lighter 25% (fourth row, second option from the left).Select Stop 2 from the list, and then do the following: In the Stop position box, enter 20%.Click the button next to Color, and then under Theme Colors click Black, Text 1 (first row, second option from the left).Select Stop 3 from the list, and then do the following: In the Stop position box, enter 80%.Click the button next to Color, and then under Theme Colors click Black, Text 1 (first row, second option from the left).Select Stop 4 from the list, and then do the following: In the Stop position box, enter 100%.Click the button next to Color, and then under Theme Colors click Black, Text 1, Lighter 25% (fourth row, second option from the left).
- Timeline graphic with pictures(Intermediate)To reproduce the picture effects on this slide, do the following:On the Home tab, in the Slides group, click Layout, and then click Blank.On the Insert tab, in the Illustrations group, click Picture. In the Insert Picture dialog box, select a picture and then click Insert. Select the picture. Under Picture Tools, on the Format tab, in the bottom right corner of the Size group, click the Size and Position dialog box launcher.In the Size and Position dialog box, on the Size tab, resize or crop the picture as needed so that under Size and rotate, the Height box is set to 2.65” and the Width box is set to 9”. Resize the picture under Size and rotate by entering values into the Height and Width boxes. Crop the picture under Crop from by entering values into the Left, Right, Top, and Bottom boxes. Under Picture Tools, in the Format tab, in the Picture Styles group, click Picture Shape, and then under Rectangles click Round Same Side Corner Rectangle (eighth option from the left).Drag the top yellow diamond adjustment handle slightly to the right to decrease the amount of rounding on the corners. Under Picture Tools, in the Format tab, in the Picture Styles group, click Picture Effects, point to Shadow, and then under Inner click Inside Center (second row, second option from the left).To reproduce the timeline effects on this slide, do the following:On the Home tab, in the Drawing group, click Shapes, and then under Rectangles click Rectangle (first option from the left). On the slide, drag to draw a rectangle.Select the rectangle. Under Drawing Tools, on the Format tab, in the Size group, do the following:In the Shape Height box, enter 0.73”.In the Shape Width box, enter 9”.On the Home tab, in the bottom right corner of the Drawing group, click the Format Shape dialog box launcher. In the Format Shape dialog box, click Fill in the left pane, select Solid fill in the Fill pane, and then do the following:Click the button next to Color, and then under Theme Colors click Black, Text 1, Lighter 35% (third row, second option from the left).In the Transparency box, enter 20%.Also in the Format Shape dialog box, click Line Color in the left pane, and then in the right pane, select No line. Also in the Format Shape dialog box, click Shadow in the left pane. In the right pane, click the button next to Presets, and then under Inner click Inside Center (second row, second option from the left). Drag the rectangle onto the bottom of the picture. Press and hold SHIFT and select the rectangle and the picture. On the Home tab, in the Drawing group, click Arrange, point to Align, and then do the following: Click Align Selected Objects. Click Align Center.Click Align Top.Click Align to Slide.Click Align Center. To reproduce the month labels for the timeline, do the following:On the Insert tab, in the Text group, click Text Box, and then on the slide, drag to draw the text box.Enter text in the text box (in this example the text is “JAN”), select the text, and then on the Home tab, in the Font group, select Gil Sans MT Condensed from the Font list, select 18 from the Font Size list, click the arrow next to Font Color, and then under Theme Colors click White, Background 1, Darker 35% (fifth row, first option from the left).On the Home tab, in the Paragraph group, click Center to center the text in the text box. Select the text box. On the Home tab, in the Clipboard group, click the arrow under Paste, and then click Duplicate. Repeat the process until there is a total of six text boxes. On the slide, drag the text boxes onto the rectangle to form a timeline. On the Home tab, in the Editing group, click Select, and then click Selection Pane. In the Selection and Visibility pane, press and hold CTRL and select all six text boxes and the rectangle.On the Home tab, in the Drawing group, click Arrange, point to Align, and then do the following:Click Align Selected Objects.Click Align Middle. In the Selection and Visibility pane, press and hold CTRL and cancel the selection of the rectangle, keeping the text boxes selected. On the Home tab, in the Drawing group, click Arrange, point to Align, and then do the following:Click Align to Slide.Click Distribute Horizontally. To change the text in the duplicate text boxes, click in each text box and edit the text.To change the color of the second text box from the left, select the text box, and then on the Home tab, in the Font group, click the arrow next to Font Color, and then under Theme Colors click White, Background 1 (first row, first option from the left). To reproduce the vertical line with text effects on this slide, do the following:On the Home tab, in the Drawing group, click Shapes, and then under Lines click Line (first option from the left).Press and hold SHIFT, and then drag on the slide to draw a straight, vertical line. Select the line. Under Drawing Tools, on the Format tab, in the Size group, in the Shape Width box, enter 1.2”.On the Home tab, in the bottom right corner of the Drawing group, click the Format Shape dialog box launcher. In the Format Shape dialog box, click Line Color in the left pane, and then do the following in the right pane:Select Solid line.Click the button next to Color, and then under Theme Colors click White, Background 1, Darker 25% (fourth row, first option from the left).Also in the Format Shape dialog box, click Line Style in the left pane, and then do the following in the right pane:In the Width box, enter 0.75 pt.Under Arrow Settings, click the button next to Begin type, and then click Oval Arrow (second row, third option from the left).Click the button next to Begin size, and then click Arrow L Size 1 (first row, first option from the left).Click the button next to End type, and then enter Oval Arrow (second row, third option from the left).Click the button next to End size, and then enter Arrow R Size 1 (first row, first option from the left).On the Home tab, in the Clipboard group, click the arrow under Paste, and then click Duplicate. Select the duplicate line. Under Drawing Tools, on the Format tab, in the Size group, in the Shape Width box, enter 2.6”.Press and hold SHIFT and select both lines. On the Home tab, in the Drawing group, click Arrange, and then do the following:Point to Align, and then click Align Selected Objects.Point to Align, and then click Align Center.Drag both lines together on the slide to position them under one of the timeline month labels. Press and hold SHIFT and select both lines and the text box they are under. On the Home tab, in the Drawing group, click Arrange, and then do the following:Click Align Selected Objects.Click Align Center.On the Insert tab, in the Text group, click Text Box, and then on the slide, drag to draw the text box.Enter text in the text box, select the text, and then on the Home tab, in the Font group, select Gill Sans MT from the Font list, select 20 from the Font Size list, and then click the arrow next to Font Color and click White, Background 1 (first row, first option from the left).On the Home tab, in the Paragraph group, click Align Text Left to align the text left in the text box. On the slide, drag the text box to position it to the right of the vertical line. To reproduce the background on this slide, do the following:Right-click the slide background area, and then click Format Background. In the Format Background dialog box, click Fill in the left pane, select Gradient fill in the Fill pane, and then do the following:In the Type list, select Linear.Click the button next to Direction, and then click Linear Down (first row, second option from the left).Under Gradient stops, click Add or Remove until two stops appear in the drop-down list.Also under Gradient stops, customize the gradient stops that you added as follows:Select Stop 1 from the list, and then do the following:In the Stop position box, enter 50%.Click the button next to Color, and then under Theme Colors click Black, Text 1 (first row, second option from the left).Select Stop 2 from the list, and then do the following:In the Stop position box, enter 99%.Click the button next to Color, and then under Theme Colors click Black, Text 1, Lighter 35% (third row, second option from the left).