SlideShare una empresa de Scribd logo
1 de 30
Descargar para leer sin conexión
PageMaker was one of the first desktop publishing programs,
introduced in 1985 by Aldus Corporation, initially for the then-
new Apple Macintosh and in 1987 for PCs running Windows
1.0.
It can be defined as an application generally used to create
documents and prepare publications i.e. Resume’s, Letters,
Letter heads, Business Card etc.
INTRODUCTIONTOADOBEPAGEMAKER
...by Spark V. Ovadje LCS
Page 1
Starting Adobe PageMaker
.
! From the File Menu choose New.
! The Document Setup dialogue box allows you to
specify publication page characteristics including:
paper size, orientation, margins and printing options.
! Click OK to use the default settings.
Start> All Programs> Adobe> PageMaker7.0> Adobe PageMaker 7.0
Page 2
The Publication Window
! PageMaker opens a Publication Window which
contains an empty page centered on the pasteboard.
! The Pasteboard is workspace that stores items for
later use.
– Items on the pasteboard are visible from any
page, but do not print.
! At the center of the pasteboard is the Publication
Page.
! The Horizontal Ruler and Vertical Ruler aid you in
aligning text and graphics on the page.
! Page Icons (bottom left corner of the publication
window) indicate the master pages as well as the
number of pages in the publication.
! The icons in the Toolbox represent the tools that you
may use to create or edit objects and view a
publication.
! Margins appear as dotted or pink lines.
! The Colors and Styles Palettes are used to add,
delete, and edit colors and styles.
! The Control Palette lets you make precise changes to
text and graphics.
Page 3
The Publication Window...
Toolbox
Page Icons
Vertical Ruler
Horizontal Ruler
Pasteboard
Publication Page
Control Palette Colors and Styles
Palette
Page 4
The Toolbox Tools
! Pointer Tool is used to select, move and resize
text, objects and graphics.
! Rotating Tool is used to select and rotate text
blocks and graphics.
! Line Tool is used to draw straight lines in any
direction.
! Rectangle Tool is used to draw squares.
! Ellipse Tool is used to draw circles.
! Polygon Tool is used to draw basic polygons.
! Hand Tool is used to scroll the page.
! Text Tool is used to type, select and edit text.
! Cropping Tool is used to trim graphics.
! Constrained-Line Tool is used to draw lines at
multiples of 45 degrees.
! Zoom Tool is used to magnify or reduce a
specific area of the publication page.
Page 5
Using Frames
! PageMaker 6.5 includes special objects called Frame
Tools.
– A frame can hold content - either text or graphics-
or serve as a placeholder for content.
– Frames are used as placeholders for content in
structured documents such as newspapers and
newsletters.
Frame Tools
Page 6
Introducing Palettes
! PageMaker includes several palettes for the purpose
of helping you save time.
– Fromthe Window menu, choose the appropriate
Show or Hide command.
! You may show or hide all palettes by
pressing the Tab key. To hide all palettes
excluding the Tools palette, press Shift + Tab
keys.
! To move a palette, drag it’s title bar to a
convenient location on your desktop.
Colors and Styles Palette
Page 7
Drawing Objects
! To Draw an Object:
– Select a Drawing Tool from the toolbox.
– On the publication page, Click, Hold and Drag
the Crossbar to draw the object.
– When finished, Release the mouse button.
Page 8
Selecting an Object
! You must use the Pointer Tool to select objects. You
may select a single object, or multiple objects and
modify them all at once.
! Three Ways to Select Objects:
– To select a single object, choose the Pointer
Tool from the toolbox and Click on the object.
– To add objects to a selection, press the Shift key
as you Click other objects.
– To select several objects at once, Click, Hold
and Drag the Pointer Tool around multiple
objects.
– When an item is selected, a Bounding Box
(consisting of 8 Handles) surrounds the item.
Page 9
Moving, Resizing and Deleting Objects
! Moving an Object:
– Select the Pointer Tool from the toolbox.
– Click on the object to select it.
– Click, Hold and Drag (inside the Bounding Box)
the object to a new location.
! Resizing an Object or Graphic:
– Select the Pointer Tool from the toolbox.
– Click on the object to select it.
– Click on one of the Bounding Box Handles
surrounding the object.
– Drag the Two Way Arrow in or out to resize the
object.
! Deleting an Object:
– Select the Pointer Tool from the toolbox.
– Click on the object to select it.
– Pressthe Backspace key or the Delete key.
Page 10
Drawing Unique Objects
! Creating a Sunburst Using the Polygon Tool:
– Select the Polygon Tool from the toolbox.
– Draw a polygon.
– With the polygon selected, go to the Element
Menu and choose Polygon Settings.
– You may change the Number of Sides and Star
Inset options while viewing the Preview.
– When finished, Click OK.
Page 11
Drawing Unique Objects...
! Rounded Corners with the Rectangle Tool:
– Select the Rectangle Tool from the toolbox.
– Draw a rectangle.
– With the rectangle selected, go to the Element
Menu and choose Rounded Corners.
– Make the appropriate selection.
– Click OK.
Page 12
Editing Objects
! Changing an Objects Line Attribute:
– Select the Pointer Tool from the toolbox.
– Select the object.
– Fromthe Element Menu choose Stroke.
– Select the appropriate option.
Page 13
Editing Objects...
! Giving an Object a Fill:
– Select the Pointer Tool from the toolbox.
– Select the object.
– Fromthe Element Menu choose Fill.
– Select the appropriate option.
! Changing the Color of Lines and Fill:
– Select the Pointer Tool from the toolbox.
– Select the object.
– Fromthe Element Menu choose Fill and Stroke.
– Select the appropriate option.
Page 14
Viewing Pages
! The Zoom Tool may be used to magnify or reduce a
specific area of the publication page.
– Select the Zoom Tool from the toolbox.
– Position the magnifying glass in the center of the
area to be magnified.
– Click to zoom.
! Press the Ctrl key and Click to decrease the
magnification of an area.
! Viewing the Pages with PageMaker’s Preset Views:
– Fromthe View Menu, select the appropriate
option.
! To change the part of the page or pasteboard that
displays at the current view or magnification level, you
may also scroll within the window using the Hand Tool
or scroll bars.
Page 15
Typing Text
! Typing Text:
– Select the Zoom Tool from the toolbox.
– Zoom into an area of white space on the
Publication Page.
– Select the Text Tool from the toolbox.
– Click the I-beam where you would like to insert
text.
! This creates a text block the width of the
page.
– Type: You’ve probably heard the expression
“life’s not a dress rehearsal.” Unfortunately, many
of us unconsciously act as if it were. Like an
actor or actress just going through the motions in
order to conserve our creative energy and focus
for opening night, we hold back…None of us can
be expected to perform every minute of our lives.
But a lot of us might tap into the power,
excitement, and glory of Real Life more frequently
if we cast ourselves as the leading role in our own
lives. ~ Sarah Ban Breathnach
! You may view the boundaries of the text block by
choosing the Pointer Tool from the toolbox and
clicking anywhere on the text.
! Editing Text in Layout View:
– Select the Text Tool from the toolbox.
– Click inside the text to edit.
Page 16
Select Text with the Text Tool
! Selecting Text with the Text Tool:
– Select the Text Tool from the toolbox.
– To select a word, double click on the word.
– To select an entire paragraph, triple click on the
paragraph.
– To select a range of text, click, hold and drag the
I-beam over the text that you would like to select.
– To select an entire text block, click in the text
block, from the Edit Menu choose Select All.
– To deselect text, click an insertion point anywhere
in the text or select any tool from the toolbox.
Page 17
Creating a Story
! Creating a Story in Story Mode:
– Fromthe Edit Menu choose Edit Story.
– Once you are in story mode, from the Story
Menu choose New Story.
– Type: How happy are you right now? Do you
even know? Most people know what makes their
parents, partners, or children happy. But when it
comes to an awareness about the little, specific
things in life that bring a smile to our faces and
contentment to our own hearts, we often come up
short. ~ Sarah Ban Breathnach
– When finished typing, from the Story Menu
choose Close Story.
– Choose Place, to place the story onto the
publication page.
Page 18
Editing a Story
! Editing a Story in Story Mode:
– Select the Pointer Tool from the toolbox.
– Select the text by clicking on the text block.
– Fromthe Edit Menu choose Edit Story.
– Edit the text as you would using a word
processing program. Type: Let us each grasp a
new idea this year. Let us grasp the awareness
of what it is that makes us truly happy. Let us
consider our personal preferences and learn how
to recognize, then embrace, moments of
happiness that are uniquely our own.
! Check Spelling in Story Mode:
– Place the cursor at the top of the page.
– Fromthe Utilities Menu choose Spelling.
– Choose Start to start the spell check feature.
! If the spell check finds a misspelled word, it
will suggest the correct spelling or look for
alternate spellings.
– To exit the story mode, from the Story Menu
choose Close Story.
Page 19
Placing Text and Graphics
! When you have text or graphics to place on a page,
PageMaker displays a loaded text/graphic icon. When
you click the icon, text and graphics are placed onto
the publication page.
– Text flows into a defined area that you create on
a page.
– Graphics may be resized, moved and cropped.
! Placing a Graphic:
– From the File Menu choose Place.
– Specify the graphic file, that you would like to
place onto the publication page, by double
clicking on it.
– After PageMaker imports the graphic file, the
mouse pointer becomes a loaded graphic icon.
– Position the cursor anywhere on the page and
Click to place the graphic.
– You may resize, move and crop the graphic
on the publication page.
Page 20
Placing Text...
! You may Designate the Flow of Text in One of
Three Ways:
– Automatically - PageMaker adds pages until all
of the text is placed.
– By Column - One column at a time
– By Defined Space - You define the space on the
page by clicking, holding and dragging.
! Placing a Text File:
– Fromthe File Menu choose Place.
– Specify the text file, that you would like to place
onto the publication page, by double clicking on it.
– When the mouse pointer becomes a loaded text
icon, you may Click to place the text.
Page 21
Understanding Text Blocks
! All text in PageMaker is contained in Text Blocks.
When you click text with the Pointer Tool, the text
block’s border is displayed.
– A text block can be moved and resized.
! A Corner Handle indicates the point at which you may
Click, Hold and Drag to resize the text block.
! An Empty Windowshade Handle at the top of the text
block indicates the beginning of a story.
! An Empty Windowshade Handle at the bottom of the
text block indicates the end of a story.
! A Red Down Arrow indicates that there is more text
to be placed on the publication page.
! A Plus (+) Sign indicates that text from the same story
is contained in another text block.
Page 22
Drawn Objects, Frames and Text Blocks
! PageMaker’s drawn objects can have a fill and stroke,
have eight (8) selection handles, and cannot contain
content other than fill colors or patterns.
! Frames can be any shape, can have fill and stroke
attributes and have eight (8) selection handles.
– Frames can contain content - either text or
graphics.
– A story can flow to the previous or next frame.
– Frames act as placeholders for content and are
marked with a non-printing “X” if empty.
! Text Blocks do not have fill or stroke attributes, must
be rectangular, and have four (4) selection handles.
– A story can flow to the previous or next text block.
Drawn Object
Frame
Page 23
Adding Pages to the Publication
! Adding Pages to the Publication:
– Go to the place where you would like to insert
pages.
– Fromthe Layout Menu choose Insert Pages.
– Type the number of pages that you would like to
add.
– Click Insert.
! Two Ways to Move from Page to Page:
– Click a Page Icon along the bottom left corner of
the Publication Window.
– Fromthe Layout Menu choose Go to Page and
select a page number.
Page 24
Deleting Pages
! To Delete Pages from the Publication:
– Fromthe Layout Menu choose Remove Pages.
– Type the range of pages that you would like to
remove.
– Click OK.
Page 25
Aligning and Grouping Objects
! You may align objects in relation to one another, and
then evenly distribute the spaces between the objects.
! To Align and Distribute Objects
– Select multiple objects that you would like to
align.
– Fromthe Element Menu choose Align Objects.
– Select the appropriate options and Click OK.
! You may combine several objects into a “group,” so
that objects can be treated as a single unit.
! Grouping Multiple Objects
– Select multiple objects that you would like to
group.
– Fromthe Element Menu choose Group.
Page 26
Correcting Mistakes
! To Undo Your last Editing Action:
– Fromthe Edit Menu choose Undo.
– In this example we will Undo the deleted pages.
Save Your Work Often!
Page 27
Using the Online “Help”
! To Use the Online Help Feature:
– Fromthe Help Menu choose Help Topics.
– Scroll down through the list and Click to select
the topic that you would like help with.
Page 28
Adding Content To A Frame
! To import text or graphics into a frame
– Select the Pointer Tool from the toolbox.
– Click on the frame to select it.
– Fromthe File Menu choose Place.
– Select the file that you want to place inside the
frame and Click OK.
! If you don’t want the frame border to appear,
select the frame with the Pointer Tool. From
the Element Menu choose Stroke and then
None.
Page 29
Control Content Within A Frame
! Control How Content is Positioned Within a Frame
– Fromthe Element Menu choose Frame and then
Frame Options.

Más contenido relacionado

La actualidad más candente

Introduction to word processing
Introduction to word processingIntroduction to word processing
Introduction to word processingIddrisu Issah
 
All about shortcut keys
All about shortcut keysAll about shortcut keys
All about shortcut keysNilabh Verma
 
Microsoft Office Word 2016
Microsoft Office Word 2016Microsoft Office Word 2016
Microsoft Office Word 2016Wesley Nyandika
 
Ms Word 2010 Training In Ambala ! Batra Computer Centre
Ms Word 2010 Training In Ambala ! Batra Computer CentreMs Word 2010 Training In Ambala ! Batra Computer Centre
Ms Word 2010 Training In Ambala ! Batra Computer Centrejatin batra
 
Introduction to Corel Draw
Introduction to Corel DrawIntroduction to Corel Draw
Introduction to Corel DrawANUSUYA T K
 
Ms word 2010
Ms word 2010Ms word 2010
Ms word 201047ishu
 
Introduction to CorelDRAW
Introduction to CorelDRAWIntroduction to CorelDRAW
Introduction to CorelDRAWSanthiNivas
 
Formatting and editing skills (1)
Formatting and editing skills (1)Formatting and editing skills (1)
Formatting and editing skills (1)Tammy Carter
 
Introduction to-word-2016
Introduction to-word-2016Introduction to-word-2016
Introduction to-word-2016Damilola Mosaku
 
Write down the steps of create a New Page in Page Maker use the following opt...
Write down the steps of create a New Page in Page Maker use the following opt...Write down the steps of create a New Page in Page Maker use the following opt...
Write down the steps of create a New Page in Page Maker use the following opt...Shobhit Jain
 
Word Processing
Word ProcessingWord Processing
Word Processinghamid126
 

La actualidad más candente (20)

Page maker
Page makerPage maker
Page maker
 
MS Word
MS WordMS Word
MS Word
 
Introduction to word processing
Introduction to word processingIntroduction to word processing
Introduction to word processing
 
All about shortcut keys
All about shortcut keysAll about shortcut keys
All about shortcut keys
 
Pagemaker
PagemakerPagemaker
Pagemaker
 
Microsoft Office Word 2016
Microsoft Office Word 2016Microsoft Office Word 2016
Microsoft Office Word 2016
 
Ms Word 2010 Training In Ambala ! Batra Computer Centre
Ms Word 2010 Training In Ambala ! Batra Computer CentreMs Word 2010 Training In Ambala ! Batra Computer Centre
Ms Word 2010 Training In Ambala ! Batra Computer Centre
 
Notepad
NotepadNotepad
Notepad
 
Microsoft Word
Microsoft WordMicrosoft Word
Microsoft Word
 
Libre Office Impress Lesson 1
Libre Office Impress Lesson 1Libre Office Impress Lesson 1
Libre Office Impress Lesson 1
 
Word 2016
Word 2016Word 2016
Word 2016
 
Introduction to Corel Draw
Introduction to Corel DrawIntroduction to Corel Draw
Introduction to Corel Draw
 
Ms word 2010
Ms word 2010Ms word 2010
Ms word 2010
 
Introduction to CorelDRAW
Introduction to CorelDRAWIntroduction to CorelDRAW
Introduction to CorelDRAW
 
Microsoft word
Microsoft wordMicrosoft word
Microsoft word
 
Formatting and editing skills (1)
Formatting and editing skills (1)Formatting and editing skills (1)
Formatting and editing skills (1)
 
Introduction to-word-2016
Introduction to-word-2016Introduction to-word-2016
Introduction to-word-2016
 
Write down the steps of create a New Page in Page Maker use the following opt...
Write down the steps of create a New Page in Page Maker use the following opt...Write down the steps of create a New Page in Page Maker use the following opt...
Write down the steps of create a New Page in Page Maker use the following opt...
 
Word Processing
Word ProcessingWord Processing
Word Processing
 
Word pad
Word padWord pad
Word pad
 

Destacado

Pagemaker Lesson
Pagemaker LessonPagemaker Lesson
Pagemaker Lessonguest3f8ca8
 
PageMaker - R.D.sivakumar
PageMaker - R.D.sivakumarPageMaker - R.D.sivakumar
PageMaker - R.D.sivakumarSivakumar R D .
 
Pagemaker hindi notes
Pagemaker hindi notesPagemaker hindi notes
Pagemaker hindi notesBadal Rajput
 
Desktop publishing (power point)
Desktop publishing (power point)Desktop publishing (power point)
Desktop publishing (power point)kuromi12
 
Adding value to your course offer: sponsored language study
Adding value to your course offer: sponsored language studyAdding value to your course offer: sponsored language study
Adding value to your course offer: sponsored language studySHU Learning & Teaching
 
computer training centre in ambala cantt
computer training centre in ambala canttcomputer training centre in ambala cantt
computer training centre in ambala canttjatin batra
 
Hands-on Introduction to the C Programming Language
Hands-on Introduction to the C Programming LanguageHands-on Introduction to the C Programming Language
Hands-on Introduction to the C Programming LanguageVincenzo De Florio
 
Mca i-fundamental of computer-u-1-computer hardware system
Mca  i-fundamental of  computer-u-1-computer hardware systemMca  i-fundamental of  computer-u-1-computer hardware system
Mca i-fundamental of computer-u-1-computer hardware systemRai University
 
Image Editing With Photoshop Cs
Image Editing With Photoshop CsImage Editing With Photoshop Cs
Image Editing With Photoshop Csbrighteyes
 
Robotics workshop PPT
Robotics  workshop PPTRobotics  workshop PPT
Robotics workshop PPTavikdhupar
 

Destacado (18)

Pagemaker Lesson
Pagemaker LessonPagemaker Lesson
Pagemaker Lesson
 
PageMaker - R.D.sivakumar
PageMaker - R.D.sivakumarPageMaker - R.D.sivakumar
PageMaker - R.D.sivakumar
 
Page maker
Page makerPage maker
Page maker
 
CA - Pagemaker
CA - PagemakerCA - Pagemaker
CA - Pagemaker
 
Pagemaker hindi notes
Pagemaker hindi notesPagemaker hindi notes
Pagemaker hindi notes
 
Desktop publishing (power point)
Desktop publishing (power point)Desktop publishing (power point)
Desktop publishing (power point)
 
Adding value to your course offer: sponsored language study
Adding value to your course offer: sponsored language studyAdding value to your course offer: sponsored language study
Adding value to your course offer: sponsored language study
 
computer training centre in ambala cantt
computer training centre in ambala canttcomputer training centre in ambala cantt
computer training centre in ambala cantt
 
IT BOOK
IT BOOKIT BOOK
IT BOOK
 
Hands-on Introduction to the C Programming Language
Hands-on Introduction to the C Programming LanguageHands-on Introduction to the C Programming Language
Hands-on Introduction to the C Programming Language
 
Computer Literacy Beginers
Computer Literacy BeginersComputer Literacy Beginers
Computer Literacy Beginers
 
Teamwork Works!
Teamwork Works!Teamwork Works!
Teamwork Works!
 
Soc mobyear2
Soc mobyear2Soc mobyear2
Soc mobyear2
 
CProgrammingTutorial
CProgrammingTutorialCProgrammingTutorial
CProgrammingTutorial
 
Mca i-fundamental of computer-u-1-computer hardware system
Mca  i-fundamental of  computer-u-1-computer hardware systemMca  i-fundamental of  computer-u-1-computer hardware system
Mca i-fundamental of computer-u-1-computer hardware system
 
Li fi
Li fiLi fi
Li fi
 
Image Editing With Photoshop Cs
Image Editing With Photoshop CsImage Editing With Photoshop Cs
Image Editing With Photoshop Cs
 
Robotics workshop PPT
Robotics  workshop PPTRobotics  workshop PPT
Robotics workshop PPT
 

Similar a Pagemaker handout by Engr. Spark Ovadje

Adobe illustrator cs6
Adobe illustrator cs6Adobe illustrator cs6
Adobe illustrator cs6ilaazmil2
 
Adobe illustrator cs6
Adobe illustrator cs6Adobe illustrator cs6
Adobe illustrator cs6Ila Azmil
 
Adobe illustrator cs6
Adobe illustrator cs6Adobe illustrator cs6
Adobe illustrator cs6Ila Azmil
 
How to create a flipchart in activ inspire
How to create a flipchart in activ inspireHow to create a flipchart in activ inspire
How to create a flipchart in activ inspireLara Daniel
 
Grade 4 computer module 4th quarter even no. pages
Grade 4   computer module 4th quarter even no. pagesGrade 4   computer module 4th quarter even no. pages
Grade 4 computer module 4th quarter even no. pagesAndreacordero30
 
Grade 4 computer module 4th quarter even no. pages
Grade 4   computer module 4th quarter even no. pagesGrade 4   computer module 4th quarter even no. pages
Grade 4 computer module 4th quarter even no. pagesAndreaCordero34
 
Passports in-microsoft-power point
Passports in-microsoft-power pointPassports in-microsoft-power point
Passports in-microsoft-power pointm55mick
 
Notability user guide v4.3
Notability user guide v4.3Notability user guide v4.3
Notability user guide v4.3Jennifer Bell
 
Adobe illustrator cs4 tutorial
Adobe illustrator cs4 tutorial Adobe illustrator cs4 tutorial
Adobe illustrator cs4 tutorial Agung Yuwono
 
SGIS Training Introduction
SGIS Training IntroductionSGIS Training Introduction
SGIS Training IntroductionWill Kirkwood
 
Mobi kwik,learner workspace guide
Mobi kwik,learner workspace guideMobi kwik,learner workspace guide
Mobi kwik,learner workspace guideWilliam McIntosh
 
TUTorial By chad neuman in InDesign,Tutorial AT Vishal Dawdy .docx
TUTorial By chad neuman in InDesign,Tutorial AT Vishal Dawdy .docxTUTorial By chad neuman in InDesign,Tutorial AT Vishal Dawdy .docx
TUTorial By chad neuman in InDesign,Tutorial AT Vishal Dawdy .docxwillcoxjanay
 

Similar a Pagemaker handout by Engr. Spark Ovadje (20)

Adobe illustrator cs6
Adobe illustrator cs6Adobe illustrator cs6
Adobe illustrator cs6
 
Adobe illustrator cs6
Adobe illustrator cs6Adobe illustrator cs6
Adobe illustrator cs6
 
Adobe illustrator cs6
Adobe illustrator cs6Adobe illustrator cs6
Adobe illustrator cs6
 
How to create a flipchart in activ inspire
How to create a flipchart in activ inspireHow to create a flipchart in activ inspire
How to create a flipchart in activ inspire
 
d_ltr_print
d_ltr_printd_ltr_print
d_ltr_print
 
d_ltr_print
d_ltr_printd_ltr_print
d_ltr_print
 
Grade 4 computer module 4th quarter even no. pages
Grade 4   computer module 4th quarter even no. pagesGrade 4   computer module 4th quarter even no. pages
Grade 4 computer module 4th quarter even no. pages
 
Grade 4 computer module 4th quarter even no. pages
Grade 4   computer module 4th quarter even no. pagesGrade 4   computer module 4th quarter even no. pages
Grade 4 computer module 4th quarter even no. pages
 
Passports in-microsoft-power point
Passports in-microsoft-power pointPassports in-microsoft-power point
Passports in-microsoft-power point
 
(Sept.5)
(Sept.5)(Sept.5)
(Sept.5)
 
dr_1
dr_1dr_1
dr_1
 
dr_1
dr_1dr_1
dr_1
 
Problem solving
Problem solvingProblem solving
Problem solving
 
Notability user guide v4.3
Notability user guide v4.3Notability user guide v4.3
Notability user guide v4.3
 
IndesignFlyer
IndesignFlyerIndesignFlyer
IndesignFlyer
 
Adobe illustrator cs4 tutorial
Adobe illustrator cs4 tutorial Adobe illustrator cs4 tutorial
Adobe illustrator cs4 tutorial
 
SGIS Training Introduction
SGIS Training IntroductionSGIS Training Introduction
SGIS Training Introduction
 
Mobi kwik,learner workspace guide
Mobi kwik,learner workspace guideMobi kwik,learner workspace guide
Mobi kwik,learner workspace guide
 
TUTorial By chad neuman in InDesign,Tutorial AT Vishal Dawdy .docx
TUTorial By chad neuman in InDesign,Tutorial AT Vishal Dawdy .docxTUTorial By chad neuman in InDesign,Tutorial AT Vishal Dawdy .docx
TUTorial By chad neuman in InDesign,Tutorial AT Vishal Dawdy .docx
 
Using illustrator for posters by hmftj
Using illustrator for posters by hmftj Using illustrator for posters by hmftj
Using illustrator for posters by hmftj
 

Más de Coach Spark Ovadje

COACH SPARK OVADJE- Building A Sales Lead.pptx
COACH SPARK  OVADJE- Building A Sales Lead.pptxCOACH SPARK  OVADJE- Building A Sales Lead.pptx
COACH SPARK OVADJE- Building A Sales Lead.pptxCoach Spark Ovadje
 
HOW TO ADOPT A SALES MINDSET- Coach Spark Ovadje.pptx
HOW TO ADOPT A SALES MINDSET- Coach Spark Ovadje.pptxHOW TO ADOPT A SALES MINDSET- Coach Spark Ovadje.pptx
HOW TO ADOPT A SALES MINDSET- Coach Spark Ovadje.pptxCoach Spark Ovadje
 
Wealth Creation and Money Culture with Coach Spark Ovadje.pdf
Wealth Creation and Money Culture with Coach Spark Ovadje.pdfWealth Creation and Money Culture with Coach Spark Ovadje.pdf
Wealth Creation and Money Culture with Coach Spark Ovadje.pdfCoach Spark Ovadje
 
Powerpoint 2007 tutoria by humble spark microsoft e-learningl
Powerpoint 2007 tutoria   by humble spark microsoft e-learninglPowerpoint 2007 tutoria   by humble spark microsoft e-learningl
Powerpoint 2007 tutoria by humble spark microsoft e-learninglCoach Spark Ovadje
 
Excel tutorial by Sir Spark Microsoft Xcel
Excel tutorial by Sir Spark Microsoft XcelExcel tutorial by Sir Spark Microsoft Xcel
Excel tutorial by Sir Spark Microsoft XcelCoach Spark Ovadje
 
Computer apprediation __ms_word
Computer apprediation __ms_wordComputer apprediation __ms_word
Computer apprediation __ms_wordCoach Spark Ovadje
 
Free Computer Training - Computer Literacy
Free Computer Training - Computer LiteracyFree Computer Training - Computer Literacy
Free Computer Training - Computer LiteracyCoach Spark Ovadje
 
Lecture on Computer Introduction
Lecture on Computer IntroductionLecture on Computer Introduction
Lecture on Computer IntroductionCoach Spark Ovadje
 
Bible Teaching_Spiritual Checkup by Engr. Spark Victory Ovadje
Bible Teaching_Spiritual Checkup by Engr. Spark Victory OvadjeBible Teaching_Spiritual Checkup by Engr. Spark Victory Ovadje
Bible Teaching_Spiritual Checkup by Engr. Spark Victory OvadjeCoach Spark Ovadje
 

Más de Coach Spark Ovadje (10)

COACH SPARK OVADJE- Building A Sales Lead.pptx
COACH SPARK  OVADJE- Building A Sales Lead.pptxCOACH SPARK  OVADJE- Building A Sales Lead.pptx
COACH SPARK OVADJE- Building A Sales Lead.pptx
 
HOW TO ADOPT A SALES MINDSET- Coach Spark Ovadje.pptx
HOW TO ADOPT A SALES MINDSET- Coach Spark Ovadje.pptxHOW TO ADOPT A SALES MINDSET- Coach Spark Ovadje.pptx
HOW TO ADOPT A SALES MINDSET- Coach Spark Ovadje.pptx
 
Wealth Creation and Money Culture with Coach Spark Ovadje.pdf
Wealth Creation and Money Culture with Coach Spark Ovadje.pdfWealth Creation and Money Culture with Coach Spark Ovadje.pdf
Wealth Creation and Money Culture with Coach Spark Ovadje.pdf
 
Powerpoint 2007 tutoria by humble spark microsoft e-learningl
Powerpoint 2007 tutoria   by humble spark microsoft e-learninglPowerpoint 2007 tutoria   by humble spark microsoft e-learningl
Powerpoint 2007 tutoria by humble spark microsoft e-learningl
 
Excel tutorial by Sir Spark Microsoft Xcel
Excel tutorial by Sir Spark Microsoft XcelExcel tutorial by Sir Spark Microsoft Xcel
Excel tutorial by Sir Spark Microsoft Xcel
 
Computer apprediation __ms_word
Computer apprediation __ms_wordComputer apprediation __ms_word
Computer apprediation __ms_word
 
Free Computer Training - Computer Literacy
Free Computer Training - Computer LiteracyFree Computer Training - Computer Literacy
Free Computer Training - Computer Literacy
 
ENGR. SPARK OVADJE
ENGR. SPARK OVADJEENGR. SPARK OVADJE
ENGR. SPARK OVADJE
 
Lecture on Computer Introduction
Lecture on Computer IntroductionLecture on Computer Introduction
Lecture on Computer Introduction
 
Bible Teaching_Spiritual Checkup by Engr. Spark Victory Ovadje
Bible Teaching_Spiritual Checkup by Engr. Spark Victory OvadjeBible Teaching_Spiritual Checkup by Engr. Spark Victory Ovadje
Bible Teaching_Spiritual Checkup by Engr. Spark Victory Ovadje
 

Último

SOCIAL AND HISTORICAL CONTEXT - LFTVD.pptx
SOCIAL AND HISTORICAL CONTEXT - LFTVD.pptxSOCIAL AND HISTORICAL CONTEXT - LFTVD.pptx
SOCIAL AND HISTORICAL CONTEXT - LFTVD.pptxiammrhaywood
 
Student login on Anyboli platform.helpin
Student login on Anyboli platform.helpinStudent login on Anyboli platform.helpin
Student login on Anyboli platform.helpinRaunakKeshri1
 
mini mental status format.docx
mini    mental       status     format.docxmini    mental       status     format.docx
mini mental status format.docxPoojaSen20
 
Kisan Call Centre - To harness potential of ICT in Agriculture by answer farm...
Kisan Call Centre - To harness potential of ICT in Agriculture by answer farm...Kisan Call Centre - To harness potential of ICT in Agriculture by answer farm...
Kisan Call Centre - To harness potential of ICT in Agriculture by answer farm...Krashi Coaching
 
The byproduct of sericulture in different industries.pptx
The byproduct of sericulture in different industries.pptxThe byproduct of sericulture in different industries.pptx
The byproduct of sericulture in different industries.pptxShobhayan Kirtania
 
Nutritional Needs Presentation - HLTH 104
Nutritional Needs Presentation - HLTH 104Nutritional Needs Presentation - HLTH 104
Nutritional Needs Presentation - HLTH 104misteraugie
 
Software Engineering Methodologies (overview)
Software Engineering Methodologies (overview)Software Engineering Methodologies (overview)
Software Engineering Methodologies (overview)eniolaolutunde
 
Measures of Central Tendency: Mean, Median and Mode
Measures of Central Tendency: Mean, Median and ModeMeasures of Central Tendency: Mean, Median and Mode
Measures of Central Tendency: Mean, Median and ModeThiyagu K
 
The basics of sentences session 2pptx copy.pptx
The basics of sentences session 2pptx copy.pptxThe basics of sentences session 2pptx copy.pptx
The basics of sentences session 2pptx copy.pptxheathfieldcps1
 
BASLIQ CURRENT LOOKBOOK LOOKBOOK(1) (1).pdf
BASLIQ CURRENT LOOKBOOK  LOOKBOOK(1) (1).pdfBASLIQ CURRENT LOOKBOOK  LOOKBOOK(1) (1).pdf
BASLIQ CURRENT LOOKBOOK LOOKBOOK(1) (1).pdfSoniaTolstoy
 
Paris 2024 Olympic Geographies - an activity
Paris 2024 Olympic Geographies - an activityParis 2024 Olympic Geographies - an activity
Paris 2024 Olympic Geographies - an activityGeoBlogs
 
Web & Social Media Analytics Previous Year Question Paper.pdf
Web & Social Media Analytics Previous Year Question Paper.pdfWeb & Social Media Analytics Previous Year Question Paper.pdf
Web & Social Media Analytics Previous Year Question Paper.pdfJayanti Pande
 
JAPAN: ORGANISATION OF PMDA, PHARMACEUTICAL LAWS & REGULATIONS, TYPES OF REGI...
JAPAN: ORGANISATION OF PMDA, PHARMACEUTICAL LAWS & REGULATIONS, TYPES OF REGI...JAPAN: ORGANISATION OF PMDA, PHARMACEUTICAL LAWS & REGULATIONS, TYPES OF REGI...
JAPAN: ORGANISATION OF PMDA, PHARMACEUTICAL LAWS & REGULATIONS, TYPES OF REGI...anjaliyadav012327
 
9548086042 for call girls in Indira Nagar with room service
9548086042  for call girls in Indira Nagar  with room service9548086042  for call girls in Indira Nagar  with room service
9548086042 for call girls in Indira Nagar with room servicediscovermytutordmt
 
social pharmacy d-pharm 1st year by Pragati K. Mahajan
social pharmacy d-pharm 1st year by Pragati K. Mahajansocial pharmacy d-pharm 1st year by Pragati K. Mahajan
social pharmacy d-pharm 1st year by Pragati K. Mahajanpragatimahajan3
 
APM Welcome, APM North West Network Conference, Synergies Across Sectors
APM Welcome, APM North West Network Conference, Synergies Across SectorsAPM Welcome, APM North West Network Conference, Synergies Across Sectors
APM Welcome, APM North West Network Conference, Synergies Across SectorsAssociation for Project Management
 
Interactive Powerpoint_How to Master effective communication
Interactive Powerpoint_How to Master effective communicationInteractive Powerpoint_How to Master effective communication
Interactive Powerpoint_How to Master effective communicationnomboosow
 
Ecosystem Interactions Class Discussion Presentation in Blue Green Lined Styl...
Ecosystem Interactions Class Discussion Presentation in Blue Green Lined Styl...Ecosystem Interactions Class Discussion Presentation in Blue Green Lined Styl...
Ecosystem Interactions Class Discussion Presentation in Blue Green Lined Styl...fonyou31
 

Último (20)

SOCIAL AND HISTORICAL CONTEXT - LFTVD.pptx
SOCIAL AND HISTORICAL CONTEXT - LFTVD.pptxSOCIAL AND HISTORICAL CONTEXT - LFTVD.pptx
SOCIAL AND HISTORICAL CONTEXT - LFTVD.pptx
 
Student login on Anyboli platform.helpin
Student login on Anyboli platform.helpinStudent login on Anyboli platform.helpin
Student login on Anyboli platform.helpin
 
mini mental status format.docx
mini    mental       status     format.docxmini    mental       status     format.docx
mini mental status format.docx
 
Kisan Call Centre - To harness potential of ICT in Agriculture by answer farm...
Kisan Call Centre - To harness potential of ICT in Agriculture by answer farm...Kisan Call Centre - To harness potential of ICT in Agriculture by answer farm...
Kisan Call Centre - To harness potential of ICT in Agriculture by answer farm...
 
The byproduct of sericulture in different industries.pptx
The byproduct of sericulture in different industries.pptxThe byproduct of sericulture in different industries.pptx
The byproduct of sericulture in different industries.pptx
 
Nutritional Needs Presentation - HLTH 104
Nutritional Needs Presentation - HLTH 104Nutritional Needs Presentation - HLTH 104
Nutritional Needs Presentation - HLTH 104
 
Software Engineering Methodologies (overview)
Software Engineering Methodologies (overview)Software Engineering Methodologies (overview)
Software Engineering Methodologies (overview)
 
Measures of Central Tendency: Mean, Median and Mode
Measures of Central Tendency: Mean, Median and ModeMeasures of Central Tendency: Mean, Median and Mode
Measures of Central Tendency: Mean, Median and Mode
 
The basics of sentences session 2pptx copy.pptx
The basics of sentences session 2pptx copy.pptxThe basics of sentences session 2pptx copy.pptx
The basics of sentences session 2pptx copy.pptx
 
BASLIQ CURRENT LOOKBOOK LOOKBOOK(1) (1).pdf
BASLIQ CURRENT LOOKBOOK  LOOKBOOK(1) (1).pdfBASLIQ CURRENT LOOKBOOK  LOOKBOOK(1) (1).pdf
BASLIQ CURRENT LOOKBOOK LOOKBOOK(1) (1).pdf
 
Paris 2024 Olympic Geographies - an activity
Paris 2024 Olympic Geographies - an activityParis 2024 Olympic Geographies - an activity
Paris 2024 Olympic Geographies - an activity
 
Web & Social Media Analytics Previous Year Question Paper.pdf
Web & Social Media Analytics Previous Year Question Paper.pdfWeb & Social Media Analytics Previous Year Question Paper.pdf
Web & Social Media Analytics Previous Year Question Paper.pdf
 
INDIA QUIZ 2024 RLAC DELHI UNIVERSITY.pptx
INDIA QUIZ 2024 RLAC DELHI UNIVERSITY.pptxINDIA QUIZ 2024 RLAC DELHI UNIVERSITY.pptx
INDIA QUIZ 2024 RLAC DELHI UNIVERSITY.pptx
 
JAPAN: ORGANISATION OF PMDA, PHARMACEUTICAL LAWS & REGULATIONS, TYPES OF REGI...
JAPAN: ORGANISATION OF PMDA, PHARMACEUTICAL LAWS & REGULATIONS, TYPES OF REGI...JAPAN: ORGANISATION OF PMDA, PHARMACEUTICAL LAWS & REGULATIONS, TYPES OF REGI...
JAPAN: ORGANISATION OF PMDA, PHARMACEUTICAL LAWS & REGULATIONS, TYPES OF REGI...
 
9548086042 for call girls in Indira Nagar with room service
9548086042  for call girls in Indira Nagar  with room service9548086042  for call girls in Indira Nagar  with room service
9548086042 for call girls in Indira Nagar with room service
 
social pharmacy d-pharm 1st year by Pragati K. Mahajan
social pharmacy d-pharm 1st year by Pragati K. Mahajansocial pharmacy d-pharm 1st year by Pragati K. Mahajan
social pharmacy d-pharm 1st year by Pragati K. Mahajan
 
APM Welcome, APM North West Network Conference, Synergies Across Sectors
APM Welcome, APM North West Network Conference, Synergies Across SectorsAPM Welcome, APM North West Network Conference, Synergies Across Sectors
APM Welcome, APM North West Network Conference, Synergies Across Sectors
 
Mattingly "AI & Prompt Design: The Basics of Prompt Design"
Mattingly "AI & Prompt Design: The Basics of Prompt Design"Mattingly "AI & Prompt Design: The Basics of Prompt Design"
Mattingly "AI & Prompt Design: The Basics of Prompt Design"
 
Interactive Powerpoint_How to Master effective communication
Interactive Powerpoint_How to Master effective communicationInteractive Powerpoint_How to Master effective communication
Interactive Powerpoint_How to Master effective communication
 
Ecosystem Interactions Class Discussion Presentation in Blue Green Lined Styl...
Ecosystem Interactions Class Discussion Presentation in Blue Green Lined Styl...Ecosystem Interactions Class Discussion Presentation in Blue Green Lined Styl...
Ecosystem Interactions Class Discussion Presentation in Blue Green Lined Styl...
 

Pagemaker handout by Engr. Spark Ovadje

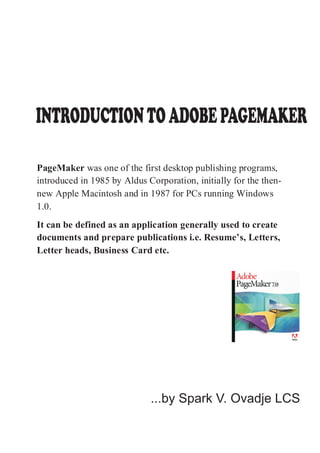
  • 1. PageMaker was one of the first desktop publishing programs, introduced in 1985 by Aldus Corporation, initially for the then- new Apple Macintosh and in 1987 for PCs running Windows 1.0. It can be defined as an application generally used to create documents and prepare publications i.e. Resume’s, Letters, Letter heads, Business Card etc. INTRODUCTIONTOADOBEPAGEMAKER ...by Spark V. Ovadje LCS
  • 2. Page 1 Starting Adobe PageMaker . ! From the File Menu choose New. ! The Document Setup dialogue box allows you to specify publication page characteristics including: paper size, orientation, margins and printing options. ! Click OK to use the default settings. Start> All Programs> Adobe> PageMaker7.0> Adobe PageMaker 7.0
  • 3. Page 2 The Publication Window ! PageMaker opens a Publication Window which contains an empty page centered on the pasteboard. ! The Pasteboard is workspace that stores items for later use. – Items on the pasteboard are visible from any page, but do not print. ! At the center of the pasteboard is the Publication Page. ! The Horizontal Ruler and Vertical Ruler aid you in aligning text and graphics on the page. ! Page Icons (bottom left corner of the publication window) indicate the master pages as well as the number of pages in the publication. ! The icons in the Toolbox represent the tools that you may use to create or edit objects and view a publication. ! Margins appear as dotted or pink lines. ! The Colors and Styles Palettes are used to add, delete, and edit colors and styles. ! The Control Palette lets you make precise changes to text and graphics.
  • 4. Page 3 The Publication Window... Toolbox Page Icons Vertical Ruler Horizontal Ruler Pasteboard Publication Page Control Palette Colors and Styles Palette
  • 5. Page 4 The Toolbox Tools ! Pointer Tool is used to select, move and resize text, objects and graphics. ! Rotating Tool is used to select and rotate text blocks and graphics. ! Line Tool is used to draw straight lines in any direction. ! Rectangle Tool is used to draw squares. ! Ellipse Tool is used to draw circles. ! Polygon Tool is used to draw basic polygons. ! Hand Tool is used to scroll the page. ! Text Tool is used to type, select and edit text. ! Cropping Tool is used to trim graphics. ! Constrained-Line Tool is used to draw lines at multiples of 45 degrees. ! Zoom Tool is used to magnify or reduce a specific area of the publication page.
  • 6. Page 5 Using Frames ! PageMaker 6.5 includes special objects called Frame Tools. – A frame can hold content - either text or graphics- or serve as a placeholder for content. – Frames are used as placeholders for content in structured documents such as newspapers and newsletters. Frame Tools
  • 7. Page 6 Introducing Palettes ! PageMaker includes several palettes for the purpose of helping you save time. – Fromthe Window menu, choose the appropriate Show or Hide command. ! You may show or hide all palettes by pressing the Tab key. To hide all palettes excluding the Tools palette, press Shift + Tab keys. ! To move a palette, drag it’s title bar to a convenient location on your desktop. Colors and Styles Palette
  • 8. Page 7 Drawing Objects ! To Draw an Object: – Select a Drawing Tool from the toolbox. – On the publication page, Click, Hold and Drag the Crossbar to draw the object. – When finished, Release the mouse button.
  • 9. Page 8 Selecting an Object ! You must use the Pointer Tool to select objects. You may select a single object, or multiple objects and modify them all at once. ! Three Ways to Select Objects: – To select a single object, choose the Pointer Tool from the toolbox and Click on the object. – To add objects to a selection, press the Shift key as you Click other objects. – To select several objects at once, Click, Hold and Drag the Pointer Tool around multiple objects. – When an item is selected, a Bounding Box (consisting of 8 Handles) surrounds the item.
  • 10. Page 9 Moving, Resizing and Deleting Objects ! Moving an Object: – Select the Pointer Tool from the toolbox. – Click on the object to select it. – Click, Hold and Drag (inside the Bounding Box) the object to a new location. ! Resizing an Object or Graphic: – Select the Pointer Tool from the toolbox. – Click on the object to select it. – Click on one of the Bounding Box Handles surrounding the object. – Drag the Two Way Arrow in or out to resize the object. ! Deleting an Object: – Select the Pointer Tool from the toolbox. – Click on the object to select it. – Pressthe Backspace key or the Delete key.
  • 11. Page 10 Drawing Unique Objects ! Creating a Sunburst Using the Polygon Tool: – Select the Polygon Tool from the toolbox. – Draw a polygon. – With the polygon selected, go to the Element Menu and choose Polygon Settings. – You may change the Number of Sides and Star Inset options while viewing the Preview. – When finished, Click OK.
  • 12. Page 11 Drawing Unique Objects... ! Rounded Corners with the Rectangle Tool: – Select the Rectangle Tool from the toolbox. – Draw a rectangle. – With the rectangle selected, go to the Element Menu and choose Rounded Corners. – Make the appropriate selection. – Click OK.
  • 13. Page 12 Editing Objects ! Changing an Objects Line Attribute: – Select the Pointer Tool from the toolbox. – Select the object. – Fromthe Element Menu choose Stroke. – Select the appropriate option.
  • 14. Page 13 Editing Objects... ! Giving an Object a Fill: – Select the Pointer Tool from the toolbox. – Select the object. – Fromthe Element Menu choose Fill. – Select the appropriate option. ! Changing the Color of Lines and Fill: – Select the Pointer Tool from the toolbox. – Select the object. – Fromthe Element Menu choose Fill and Stroke. – Select the appropriate option.
  • 15. Page 14 Viewing Pages ! The Zoom Tool may be used to magnify or reduce a specific area of the publication page. – Select the Zoom Tool from the toolbox. – Position the magnifying glass in the center of the area to be magnified. – Click to zoom. ! Press the Ctrl key and Click to decrease the magnification of an area. ! Viewing the Pages with PageMaker’s Preset Views: – Fromthe View Menu, select the appropriate option. ! To change the part of the page or pasteboard that displays at the current view or magnification level, you may also scroll within the window using the Hand Tool or scroll bars.
  • 16. Page 15 Typing Text ! Typing Text: – Select the Zoom Tool from the toolbox. – Zoom into an area of white space on the Publication Page. – Select the Text Tool from the toolbox. – Click the I-beam where you would like to insert text. ! This creates a text block the width of the page. – Type: You’ve probably heard the expression “life’s not a dress rehearsal.” Unfortunately, many of us unconsciously act as if it were. Like an actor or actress just going through the motions in order to conserve our creative energy and focus for opening night, we hold back…None of us can be expected to perform every minute of our lives. But a lot of us might tap into the power, excitement, and glory of Real Life more frequently if we cast ourselves as the leading role in our own lives. ~ Sarah Ban Breathnach ! You may view the boundaries of the text block by choosing the Pointer Tool from the toolbox and clicking anywhere on the text. ! Editing Text in Layout View: – Select the Text Tool from the toolbox. – Click inside the text to edit.
  • 17. Page 16 Select Text with the Text Tool ! Selecting Text with the Text Tool: – Select the Text Tool from the toolbox. – To select a word, double click on the word. – To select an entire paragraph, triple click on the paragraph. – To select a range of text, click, hold and drag the I-beam over the text that you would like to select. – To select an entire text block, click in the text block, from the Edit Menu choose Select All. – To deselect text, click an insertion point anywhere in the text or select any tool from the toolbox.
  • 18. Page 17 Creating a Story ! Creating a Story in Story Mode: – Fromthe Edit Menu choose Edit Story. – Once you are in story mode, from the Story Menu choose New Story. – Type: How happy are you right now? Do you even know? Most people know what makes their parents, partners, or children happy. But when it comes to an awareness about the little, specific things in life that bring a smile to our faces and contentment to our own hearts, we often come up short. ~ Sarah Ban Breathnach – When finished typing, from the Story Menu choose Close Story. – Choose Place, to place the story onto the publication page.
  • 19. Page 18 Editing a Story ! Editing a Story in Story Mode: – Select the Pointer Tool from the toolbox. – Select the text by clicking on the text block. – Fromthe Edit Menu choose Edit Story. – Edit the text as you would using a word processing program. Type: Let us each grasp a new idea this year. Let us grasp the awareness of what it is that makes us truly happy. Let us consider our personal preferences and learn how to recognize, then embrace, moments of happiness that are uniquely our own. ! Check Spelling in Story Mode: – Place the cursor at the top of the page. – Fromthe Utilities Menu choose Spelling. – Choose Start to start the spell check feature. ! If the spell check finds a misspelled word, it will suggest the correct spelling or look for alternate spellings. – To exit the story mode, from the Story Menu choose Close Story.
  • 20. Page 19 Placing Text and Graphics ! When you have text or graphics to place on a page, PageMaker displays a loaded text/graphic icon. When you click the icon, text and graphics are placed onto the publication page. – Text flows into a defined area that you create on a page. – Graphics may be resized, moved and cropped. ! Placing a Graphic: – From the File Menu choose Place. – Specify the graphic file, that you would like to place onto the publication page, by double clicking on it. – After PageMaker imports the graphic file, the mouse pointer becomes a loaded graphic icon. – Position the cursor anywhere on the page and Click to place the graphic. – You may resize, move and crop the graphic on the publication page.
  • 21. Page 20 Placing Text... ! You may Designate the Flow of Text in One of Three Ways: – Automatically - PageMaker adds pages until all of the text is placed. – By Column - One column at a time – By Defined Space - You define the space on the page by clicking, holding and dragging. ! Placing a Text File: – Fromthe File Menu choose Place. – Specify the text file, that you would like to place onto the publication page, by double clicking on it. – When the mouse pointer becomes a loaded text icon, you may Click to place the text.
  • 22. Page 21 Understanding Text Blocks ! All text in PageMaker is contained in Text Blocks. When you click text with the Pointer Tool, the text block’s border is displayed. – A text block can be moved and resized. ! A Corner Handle indicates the point at which you may Click, Hold and Drag to resize the text block. ! An Empty Windowshade Handle at the top of the text block indicates the beginning of a story. ! An Empty Windowshade Handle at the bottom of the text block indicates the end of a story. ! A Red Down Arrow indicates that there is more text to be placed on the publication page. ! A Plus (+) Sign indicates that text from the same story is contained in another text block.
  • 23. Page 22 Drawn Objects, Frames and Text Blocks ! PageMaker’s drawn objects can have a fill and stroke, have eight (8) selection handles, and cannot contain content other than fill colors or patterns. ! Frames can be any shape, can have fill and stroke attributes and have eight (8) selection handles. – Frames can contain content - either text or graphics. – A story can flow to the previous or next frame. – Frames act as placeholders for content and are marked with a non-printing “X” if empty. ! Text Blocks do not have fill or stroke attributes, must be rectangular, and have four (4) selection handles. – A story can flow to the previous or next text block. Drawn Object Frame
  • 24. Page 23 Adding Pages to the Publication ! Adding Pages to the Publication: – Go to the place where you would like to insert pages. – Fromthe Layout Menu choose Insert Pages. – Type the number of pages that you would like to add. – Click Insert. ! Two Ways to Move from Page to Page: – Click a Page Icon along the bottom left corner of the Publication Window. – Fromthe Layout Menu choose Go to Page and select a page number.
  • 25. Page 24 Deleting Pages ! To Delete Pages from the Publication: – Fromthe Layout Menu choose Remove Pages. – Type the range of pages that you would like to remove. – Click OK.
  • 26. Page 25 Aligning and Grouping Objects ! You may align objects in relation to one another, and then evenly distribute the spaces between the objects. ! To Align and Distribute Objects – Select multiple objects that you would like to align. – Fromthe Element Menu choose Align Objects. – Select the appropriate options and Click OK. ! You may combine several objects into a “group,” so that objects can be treated as a single unit. ! Grouping Multiple Objects – Select multiple objects that you would like to group. – Fromthe Element Menu choose Group.
  • 27. Page 26 Correcting Mistakes ! To Undo Your last Editing Action: – Fromthe Edit Menu choose Undo. – In this example we will Undo the deleted pages. Save Your Work Often!
  • 28. Page 27 Using the Online “Help” ! To Use the Online Help Feature: – Fromthe Help Menu choose Help Topics. – Scroll down through the list and Click to select the topic that you would like help with.
  • 29. Page 28 Adding Content To A Frame ! To import text or graphics into a frame – Select the Pointer Tool from the toolbox. – Click on the frame to select it. – Fromthe File Menu choose Place. – Select the file that you want to place inside the frame and Click OK. ! If you don’t want the frame border to appear, select the frame with the Pointer Tool. From the Element Menu choose Stroke and then None.
  • 30. Page 29 Control Content Within A Frame ! Control How Content is Positioned Within a Frame – Fromthe Element Menu choose Frame and then Frame Options.