Chatbots Workshop SF JS Meetup May 2018
•Descargar como PPTX, PDF•
0 recomendaciones•298 vistas

chatbots

Recomendados
Recomendados
Más contenido relacionado
La actualidad más candente
La actualidad más candente (20)
Similar a Chatbots Workshop SF JS Meetup May 2018
Similar a Chatbots Workshop SF JS Meetup May 2018 (20)
Más de Tessa Mero
Más de Tessa Mero (20)
Último
Último (20)
Chatbots Workshop SF JS Meetup May 2018
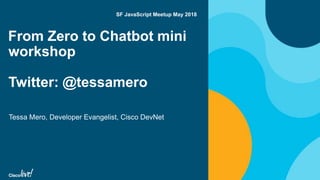
- 1. From Zero to Chatbot mini workshop Twitter: @tessamero Tessa Mero, Developer Evangelist, Cisco DevNet SF JavaScript Meetup May 2018
- 2. • What are Chat Bots? • What are the Benefits? • Integrations vs Bots • Getting Started with a Collaboration API • Create a Chat Bot • Using Deployment Services • Creating a Webhook • Testing Your Bot! Agenda
- 3. © 2018 Cisco and/or its affiliates. All rights reserved. Cisco Public What You Will Need: • Cisco Spark API Account: https://developer.webex.com/ • Create Heroku Account: https://heroku.com • JSON Viewer (optional): http://tiny.cc/json-viewer • Github Account: https://github.com • Heroku Alternative (local tunnels): Localtunnel.me or ngrok.com
- 4. © 2018 Cisco and/or its affiliates. All rights reserved. Cisco Public Objective
- 5. What are Chat Bots?
- 6. © 2018 Cisco and/or its affiliates. All rights reserved. Cisco Public Clippy!
- 7. © 2018 Cisco and/or its affiliates. All rights reserved. Cisco Public
- 8. © 2018 Cisco and/or its affiliates. All rights reserved. Cisco Public
- 9. © 2018 Cisco and/or its affiliates. All rights reserved. Cisco Public
- 10. © 2018 Cisco and/or its affiliates. All rights reserved. Cisco Public
- 11. What are the Benefits?
- 12. © 2018 Cisco and/or its affiliates. All rights reserved. Cisco Public
- 13. © 2018 Cisco and/or its affiliates. All rights reserved. Cisco Public
- 14. © 2018 Cisco and/or its affiliates. All rights reserved. Cisco Public
- 16. © 2018 Cisco and/or its affiliates. All rights reserved. Cisco Public 16Presentation ID An integration acts as YOU and can see and do the things you can do.
- 17. © 2018 Cisco and/or its affiliates. All rights reserved. Cisco Public
- 18. © 2018 Cisco and/or its affiliates. All rights reserved. Cisco Public
- 19. © 2018 Cisco and/or its affiliates. All rights reserved. Cisco Public 19Presentation ID A bot appears as another member of the room, but can only see messages that mention it.
- 20. Getting Started with a Collaboration API – Webex Teams API
- 21. © 2018 Cisco and/or its affiliates. All rights reserved. Cisco Public
- 22. © 2018 Cisco and/or its affiliates. All rights reserved. Cisco Public Create a Free Account • Create an account at https://teams.webex.com and Login • Login to https://developer.webex.com 22Presentation ID
- 23. Creating a Chat Bot
- 24. © 2018 Cisco and/or its affiliates. All rights reserved. Cisco Public Click on “My Webex Teams Apps”
- 25. © 2018 Cisco and/or its affiliates. All rights reserved. Cisco Public Click on ”+”
- 26. © 2018 Cisco and/or its affiliates. All rights reserved. Cisco Public Select ”Create a Bot”
- 27. © 2018 Cisco and/or its affiliates. All rights reserved. Cisco Public
- 28. © 2018 Cisco and/or its affiliates. All rights reserved. Cisco Public Copy API Access Token (Not the Bot ID!)
- 29. © 2018 Cisco and/or its affiliates. All rights reserved. Cisco Public Add Bot to Chat on teams.webex.com
- 30. Deploy a Bot on Heroku
- 31. © 2018 Cisco and/or its affiliates. All rights reserved. Cisco Public First - Fork the Github Repo https://github.com/CiscoDevNet/botkit-template
- 32. © 2018 Cisco and/or its affiliates. All rights reserved. Cisco Public
- 33. © 2018 Cisco and/or its affiliates. All rights reserved. Cisco Public Create New App
- 34. © 2018 Cisco and/or its affiliates. All rights reserved. Cisco Public Create App Unique Name
- 35. © 2018 Cisco and/or its affiliates. All rights reserved. Cisco Public Deployment method: Select GitHub
- 36. © 2018 Cisco and/or its affiliates. All rights reserved. Cisco Public Authorize GitHub
- 37. © 2018 Cisco and/or its affiliates. All rights reserved. Cisco Public Search for botkit-template repo in your GitHub – Connect!
- 38. © 2018 Cisco and/or its affiliates. All rights reserved. Cisco Public Select “redis” branch – Deploy Branch
- 39. © 2018 Cisco and/or its affiliates. All rights reserved. Cisco Public Successfully Deployed – Click View
- 40. © 2018 Cisco and/or its affiliates. All rights reserved. Cisco Public Application error
- 41. © 2018 Cisco and/or its affiliates. All rights reserved. Cisco Public View Error Logs
- 42. © 2018 Cisco and/or its affiliates. All rights reserved. Cisco Public View Errors (missing Spark token)
- 43. © 2018 Cisco and/or its affiliates. All rights reserved. Cisco Public Go to Settings -> Reveal Config Vars
- 44. © 2018 Cisco and/or its affiliates. All rights reserved. Cisco Public Settings -> Reveal Config Variables -> Config Variables
- 45. © 2018 Cisco and/or its affiliates. All rights reserved. Cisco Public Open App (Check if it is working)
- 47. © 2018 Cisco and/or its affiliates. All rights reserved. Cisco Public Webhook Documentation – developer.webex.com
- 48. © 2018 Cisco and/or its affiliates. All rights reserved. Cisco Public Turn on Test Mode -> Create Webex Webhook
- 49. © 2018 Cisco and/or its affiliates. All rights reserved. Cisco Public 200 Success! • Click “Run” • See a “200/success” displayed – webhook assigned to unique identifier • Fired off every time a new message is added to a room your bot is a member of 49Presentation ID
- 50. Test Your Webex Teams Bot
- 51. © 2018 Cisco and/or its affiliates. All rights reserved. Cisco Public Test Bots Response – type storage
- 52. Thank you
Notas del editor
- This will be the final of what we will see. The objective is to answer the bots question and the bot will store the information.
- Bot assistance preinstalled in Windows versions from 1997 to 2003.
- Talk about Siri as a bot
- Amazon echo as a bot
- Amazon Alexa integrating with the Tesla Model S. Make commands to make other things do things. Jason Geocke from Cisco doing this integration.
- Chat bots are becoming more popular and will become the future of technology. * Use Case: Customer service interactions. The bot is an AI to grab information and package it and put it in front of a human to finish the interaction.
- “I’ve analyzed the Silicon Valley Bot Startup trend and created a handy venn diagram to help explain it” Bots are designed to solve a problem you have in your work flow or business.
- You can create or use existing plugins to extend your chat bot to do things. Such as the SmartSheet (which is a competitor of google spreadsheets), to send notifications when there is a change in your spreadsheet. It also lists the commands you can make to trigger activities.
- In our company Spark Chats, we have a room with a MemeBot that one of my colleagues created. You type a few words, followed by the name of the meme to trigger it, and the bot will create a meme. (There’s an API for retrieving meme images and overlaying the text).
- For example, the Out of Office Assistant integration. It lists the requests you can do with it.
- In the Spark API scope, you can see the different levels of access that your integration can require. You can find all of this in the API documentation. We also have a collection of POSTMAN calls. Just ask us later for more information.
- In this way, it’s its own entity, which is an authentication on your account.
- Go to developer.webex.com and click on Sign Up on the far right top corner.
- Log in at “Webex for Developers at developer.webex.com” and open the "My Webex Teams Apps" menu.
- Click on the “+” sign to create a new bot.
- You can choose between creating an integration with another API or to create a new bot. Select the right side, create a bot ************* You will access the “New Bot” creation form below. Fill in a name, a unique email identifier, and specify a publicly accessible image URL with a minimal resolution of 512x512 pixels. Feel free to pick this image example for the sake of this lab. (http://bit.ly/SparkBot-512x512) Note that you will not be authorized to pick the email "my-awesome-bot@sparkbot.io" as it is already reserved. Make sure to replace future mentions to the bot email you have chosen.
- Click “Add Bot” to get your Cisco Spark Bot created. Your Bot's access token is displayed at the bottom below the Description. Note that a Cisco Spark Bot access token lasts 100 years. If you ever loose or reveal it, you can come back to this Bot details page and regenerate an access token. The previously issued token will be automatically deprecated.
- Your bot can now be added to any Cisco Spark Room by specifying its email: my-awesome-bot@sparkbot.io in our example. Go to your Cisco Spark client, and create a new room with your Bot as a participant.
- Go into your Spark app. You can now add your bot to the chat. Even though you can chat with your bot, you won’t see it answer... as we haven’t connected it yet to any custom code logic. We’ll work on this in the next steps.
- Before you go any further, first log into your github account and fork the botkit-template repo from the CiscoDevNet github account. That way you can connect your Heroku app to the forked version of it.
- For the sake of this lab, we will clone an existing code sample, and leverage the Heroku platform to deploy our own version of a Cisco Spark bot. Sign up at Heroku.com
- To create a new app, click on the “New” dropdown on the top right corner, and click on Create new app. Don’t worry about the pipline as we won’t be adding any on this sample. Pipelines allow you to connect multiple apps together and promote code.
- Give a unique name like when you created a bot username. To make it easy since I make so many testing apps, I like to match the app name to my bot name, but for your instance that’s not really necessary.
- You have 4 optiosn for a deployment method. Click on GitHub and connect to GitHub.
- Click on Authorize Heroku.
- Search for botkit-template in your repository list and click on “Search” after typing in the exact name.
- Go to the manual deployment section and choose the Redis branch. The 'Redis branch' offers the possibility to persist user preferences to a Redis distributed cache, which is a proposed "to go further" activity.
- After you deploy your application, you will want to view your app. If you are seeing a page that isn’t working, you are on the right track. So how do we check errors?
- even though your deployment was a success, if you click the View link, you'll hit an application error. Looks like we are missing the Cisco Spark API access token and the Webhook target URL of our bot.
- On the top right corner of the page, you can find a “More” drop down. Click on that to find “View Logs”
- You will notice you are missing your spark token so your application can find the location of your bot.
- You will notice you are missing your spark token so your application can find the location of your bot.
- Go to your Settings tab and click on Reveal Config Variables. Then here you can create variables. Your PUBLIC_URL of your application and your ACCESS_TOKEN for your bot token. You will have to manually type in the config variable and the value.
- Click on Open App on the top right corner. Check to make sure everything is showing correctly. So you shouldn’t see anything under “bot” as you need to create a webhook event next. You will know if your bot is going to work if your bot name is recognized.
- In this section, we will create REST Webhooks so that our bot starts receiving traffic from Cisco Spark.
- Open the list of Webhooks supported by Cisco Spark, and look for the event entries needed by your bot: Messages / Created: a new message got posted into a room Memberships / Created: someone joined a room that you are in Click on the Webhooks entry in the API Reference section on the left, and select the “Post” method. This will drive you to the Create a Webhook form. Fill in the fields as shown in the screenshot: Authorization header: change the access token to your bot’s, and do NOT remove the "Bearer " prefix, targetUrl: paste the public URL of your bot on Cloud9, resource and event: make sure to fill in the “messages” and “created” values, as it is only default placeholders you see in the form, last fields “Secret” and “Filter” are optional. Leave them blank.
- Then click “Run” and check the response in the right panel. As your Cisco Spark API call completes successfully, you will see a green “200/success” displayed, and your Webhook will be assigned a unique identifier (check the “id” field). This webhook is fired every time a new message is added to a Cisco Spark room your bot is a member of. Now, let's create our second Webhook, in order to receive an event every time our bot is added to a room. On the same form, modify the value of the "resource" field: replace “messages” with “memberships”. Click “Run” again, and check your second Webhook got successfully created, with the “200 / success” message. Then click “Run” and check the response in the right panel. As your Cisco Spark API call completes successfully, you will see a green “200/success” displayed, and your Webhook will be assigned a unique identifier (check the “id” field). This webhook is fired every time a new message is added to a Cisco Spark room your bot is a member of.
- In this section, we will create REST Webhooks so that our bot starts receiving traffic from Cisco Spark.
- Reach to the Webex Teams room you created in step 1. Enter storage Check your bot's response!