Thunderbike triumph tiger 955i crashbars fitting instructions
•
0 recomendaciones•897 vistas


Recomendados
Recomendados
Más contenido relacionado
Más de Thunderbike Engineering Ltd
Más de Thunderbike Engineering Ltd (10)
Último
Último (20)
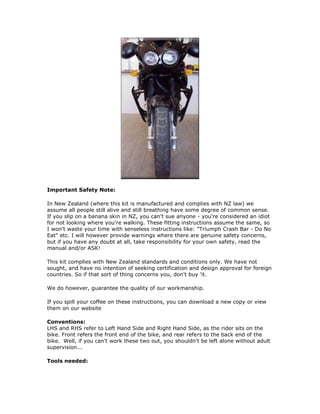
Thunderbike triumph tiger 955i crashbars fitting instructions
- 1. Important Safety Note: In New Zealand (where this kit is manufactured and complies with NZ law) we assume all people still alive and still breathing have some degree of common sense. If you slip on a banana skin in NZ, you can't sue anyone - you're considered an idiot for not looking where you're walking. These fitting instructions assume the same, so I won't waste your time with senseless instructions like: "Triumph Crash Bar - Do No Eat" etc. I will however provide warnings where there are genuine safety concerns, but if you have any doubt at all, take responsibility for your own safety, read the manual and/or ASK! This kit complies with New Zealand standards and conditions only. We have not sought, and have no intention of seeking certification and design approval for foreign countries. So if that sort of thing concerns you, don't buy 'it. We do however, guarantee the quality of our workmanship. If you spill your coffee on these instructions, you can download a new copy or view them on our website Conventions: LHS and RHS refer to Left Hand Side and Right Hand Side, as the rider sits on the bike. Front refers the front end of the bike, and rear refers to the back end of the bike. Well, if you can't work these two out, you shouldn't be left alone without adult supervision... Tools needed:
- 2. A Metric spanner/socket set, (specifically a 17mm and 19mm combination spanner and matching sockets) A T55 Torx bit and driver for the top engine/crash bar mount bolts, and a T40 to remove the stock lower crankcase bolts. A wife or partner/friend to bring more tea/coffee/smokes or yell at when you skin your knuckles. Righto Let's get started. Light a cigarette or make yourself a cup of coffee/tea/chamomile, (or all four), and sit down and read this through before you start. No beer. This is a Beer Free Zone for the next hour (they should take only an hour to fit if you're doing it right). You should be holding one pair of crash bars, 2 x 3mm thick M8 washers, used above the bottom mounting plate (1 per bolt) and 4 x M8 x 130 socket head bolts. Remember you are dealing with thread tapped into aluminum - the rule of thumb with aluminum is that if you can't run a bolt into a thread at least four turns with your fingers, you are forcing it. Stripped threads can result. Take care, go slowly, and if in doubt, call on a professional for help. We strongly suggest you fit the crash bars when your engine is cool, not hot, to avoid burns from hot components. Step One: Fit one side at a time. If you undo the engine mounts on both sides, the engine will drop. So one side at a time is the best. The right hand side is easier than the left, if only because you don't have to fiddle with the coolant hose. So we suggest you fit the right hand side first. The pics below show the fitting of the RHS. The only difference between the two sides is that on the left you have the coolant hose to deal with, and a stock spacer to remove on the top rear LHS mounting. Firstly, remove the two top engine mounting bolts - the front one supports the radiator, and you'll need a T55 Torx bit and driver.
- 3. Then remove the two lower crankcase bolts - you'll need a T40 Torx bit and driver for this job. (This pic shows the LHS lower crank case bolts) The crash bar is now ready for fitting. To make the job easier we suggest you pre- assemble the bolts and washer on the lower mounting. You'll need your Silicone Sealant now. Smear a thin film of Silicone Sealant on the upper and lower surface of the lower crash bar mount around the bolt holes. Offer the crash bars up to the right hand side of engine. Fit the top mount and bolts first. On the RHS insert the front bolt/washer into the bar before fitting to the bike. Do up the bottom mount bolts (the ones supplied in the kit) lightly, so the bars are fitted loosely to the bike. The bars should still be loose and able to be wiggled on the bottom bolts. Push the bars up to the two top mounting points and loosely fit the top front mounting. Move to the rear top mounting point. If you have an alignment problem, loosen the aluminum top bolt and this will enable you to slide the bolt through easily.
- 4. Loosen the mounting if you need to and slide the mounting bolt through. OK, all the mounting bolts are now loosely fitted, right? Now it's time to torque them up. Progressively tighten the bolts until they are snugged down. Torque the two lower bolts to 28 Nm and the two top bolts to 80 Nm. Don't mix them up! Torque the bottom first Snug the lower bolts down, then torque them to 28 Nm. (push the hose away with your thumb) Torque the top bolts to 80 Nm. OK, that should be it. Before proceeding to the next side, stop for a second and think the job right through, and read the notes over again. Is everything tight?
- 5. Last Step: Thanks for purchasing your crash bars from Thunderbike. Hope you never need them!
- 6. NOTES ON FITTING CRASHBARS TO 955 TIGER Left side 2 x 130mm bolt Right side will need 2 X thick m8 washer 2 x m8 X 130mm bolt Use these extra washers only if needed i.e if there is a gap for the thick washers to fill, if not you do not need them. Use the longer bolts always as there is a slight risk of damaging the crankcase thread if the original 116 mm bolts are over torqued. Please use this instruction in conjunction with the full fitting instructions on the Thunderbike website page for these crash bars! 2/46A Muritai street, Tahunanui, Nelson Phone:+64 (0)3 548 5787 parts@thunderbike.co.nz www.thunderbike.co.nz