Sample ART101 Lesson @ IguanaPaint.com
•
1 recomendación•275 vistas

IguanaPaint.com offers serious art lessons for grades 6-12. Classes include a lesson, demonstrations, personal critiques, assignments, videos, social networking with peers, and more. This is a sample lesson for ART101 at IguanaPaint.com. For more info, visit www.iguanapaint.com. :)

Recomendados
Más contenido relacionado
La actualidad más candente
La actualidad más candente (20)
Destacado
Similar a Sample ART101 Lesson @ IguanaPaint.com
Similar a Sample ART101 Lesson @ IguanaPaint.com (20)
Último
Último (20)
Sample ART101 Lesson @ IguanaPaint.com
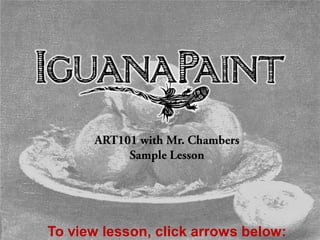
- 1. ART101 with Mr. Chambers Sample Lesson To view lesson, click arrows below:
- 2. Welcome to IguanaPaint.com! What follows is a slide presentation for a class that Tim Chambers teaches at IguanaPaint.com. Each weekly class consists of a lesson, assignment, and personal review of students’ assignments from the previous lesson. Some classes also include an instructional video and/or other media that facilitate learning. The weekly slide presentations allow students to view at their own pace step-by- step demonstrations of the week’s assignment, be inspired and learn from the work of master artists, and receive a clear guideline for the next assignment. Students also receive a glimpse inside the studios of professional artists, as well as plenty of encouragement along the way. If you have questions about IguanaPaint, please don’t hesitate to contact us at info@iguanapaint.com, or visit us at www.iguanapaint.com.
- 3. Welcome! Mr. Chambers’ art class will begin in a few moments. Until then, enjoy the whiteboard and chat! Cecilia Beaux- Ernesta (with Nurse) 1884
- 4. Studio Notes Welcome back to ART101! Critique This week we’re going to have fun with butter. Here’s today’s agenda: • Stop by my studio. • Critique your drawings. • For our lesson we’ll discuss butter, planes. Don’t you mean ‘better planes? Blue Pluto Museum of Art has a nice exhibit for us of a variety of subjects. • • And of course, you’ll receive your assignment- AS6: Lookin’ Butter! Lesson Museum Walk Remember: if you have a question, 1) type it in the chat Assignment window, 2)raise your hand. Chat-n-ding!
- 5. Here’s an oil painting demo for a book I wrote Studio Notes (How to Paint Portraits, published by Walter Foster Publishers). I’ll show you a few of the steps. This is the lay-in, done on toned canvas.
- 6. After drawing in the portrait with vine charcoal, I Studio Notes then begin to put down colors in different places to get my color scheme. I used a palette knife because it’s easy to clean and keep the colors pure.
- 7. After I get my colors working together, I then Studio Notes begin to cover the different areas on the canvas with paint, comparing one value, one color to all the others, especially to the ones adjacent to it.
- 8. I continue to develop the colors to the completion Studio Notes of the painting. This is Carter with his friend, George.
- 9. Critique Critique cri·tique kriˈtēk • noun Def: A detailed analysis and assessment of something. Are you all enjoying the critiques? (chat it) like? (chat it) Didn’t like? We can learn much from each other’s critiques. When we view another student’s work, we have a ‘fresh eye’ that can help each other see our own work more objectively. I like that you’re offering words of encouragement to one another. Very nice.
- 10. Weekly humor… maybe he should take this class? By the way….I invite you to send me your favorite comics to share in class. (Include the author and title of the strip.)
- 11. More humor By the way….I invite you to send me your favorite comics to share in class. (Include the author and title of the strip.)
- 12. Lesson GENESIS 1:1In the beginning God created the heavens and the earth. 2 Now the earth was formless and empty, darkness was over the surface of the deep, and the Spirit of God was hovering over the waters. 3 And God said, “Let there be light,” and there was light. Without light, we could not see. Without light, we could not see form.
- 13. GENESIS 1:1In the beginning God created the heavens and the earth. 2 Now the earth was formless and empty, darkness was over the surface of the deep, and the Spirit of God was hovering over the waters. 3 And God said, “Let there be light,” and there was light. Without light, we could not see. Without light, we could not see form. When we paint or draw, we are recording the effect of light upon form.
- 14. GENESIS 1:1In the beginning God created the heavens and the earth. 2 Now the earth was formless and empty, darkness was over the surface of the deep, and the Spirit of God was hovering over the waters. 3 And God said, “Let there be light,” and there was light. Without light, we could not see. Without light, we could not see form. When we paint or draw, we are recording the effect of light upon form. We’re creating a 3-dimensional impression on a 2-dimensional surface.
- 15. GENESIS 1:1In the beginning God created the heavens and the earth. 2 Now the earth was formless and empty, darkness was over the surface of the deep, and the Spirit of God was hovering over the waters. 3 And God said, “Let there be light,” and there was light. Without light, we could not see. Without light, we could not see form. When we paint or draw, we are recording the effect of light upon form. We’re creating a 3-dimensional impression on a 2-dimensional surface. …Today’s lesson will give you another tool to pull this off. Remember this one rule…
- 16. Lesson planes A change in plane equates to a change in value. * *most of the time
- 17. You do know what planes are, right? Actually, maybe not. Since this is an art class (and not an aerospace class), let me clarify the kinds of planes I’m talking about…
- 18. planes Planes are the sides of an object. Sometimes they’re flat, sometimes not. For our purpose, we’ll focus on the planes of blocks.
- 19. planes Wood blocks can really help you learn to draw. We’ll be making good use of them this semester. We’ll start by identifying the top planes.
- 20. planes Almost always, a change in plane means a change in value, sometimes in very subtle ways. Notice the difference in value between the top and front planes.
- 21. planes See how the different planes give the sense of form to our objects?
- 22. planes Cast shadows are planes as well. Alrighty then- let’s put this into practice. Our ‘block’ will be a stick of butter. I’ll walk you through this week’s assignment…
- 23. Assignment: lookin’ BUTTER
- 24. AS6: lookin’ butter! Assignment Goals: to identify planes and their changes in value from one another. Materials needed: 4H & 6B pencils, sharpener, sketchbook/paper, stick of butter with wrapper. AS6 Guidelines: Follow the step-by-step examples I gave you. Review the lesson via the recording or the slide pdf on the Previous Recordings page. 1. Set up a still-life consisting of your stick of a freshly unwrapped (not melted!) stick of butter resting on a table. Rotate the butter/wrapper until the shading looks pleasing to you. 2. Draw, keeping in mind: 1. Sketch your lay-in lightly with your 4H pencil 2. Shade slowly, patiently, comparing the value of each plane 3. Show me the difference between the horizontal & vertical planes, the butter, wrapper, and table top 3. Review. Step away from your drawing, then come back and see if there's anything that jumps out to you as being 'off'. Get someone else’s opinion, too. 4. Shoot/Scan and edit your six sketches, all on one page as described on the Photographing your Assignments in the FAQ section on the class webpage. Before submitting your image, edit it so it looks as good as your drawing. You can use www.picmonkey.com to edit it. 5. Save your edited image, naming it exactly as “FirstName-LastName,AS6” (e.g. “Tim- Chambers,AS6”) 6. Upload to the AS6 Gallery by Sunday at 11 PM EST.
- 25. SETUP For this project, you’ll need the following items: sketchbook, 4H, HB, and 6B pencils, pencil sharpener (and a dish to hold shavings), kneaded eraser, and of course, a stick of butter (chilled, with wrapper).
- 26. SETUP First thing I do is get my still-life and workspace set up. I’ve set up the butter in front of me, and there’s a window to my right casting a nice side light upon it. I think this will look better in a horizontal format, so I turn my sketchbook sideways.
- 27. Lay-in Things get exciting now! We get to begin our drawing. I did adjust the butter a little bit for a more pleasing ‘look’. By the way, every artist can have a different opinion of what ‘looks’ best. Using a 4H pencil, I lightly sketch the outline of my subject.
- 28. Lay-in I continue to sketch out the drawing. Because I’m working lightly, I don’t worry about erasing my mistakes, as they’ll be covered up as I keep shading.
- 29. Lay-in I keep drawing the stick of butter, estimating (guessing!) how long I should make it. Go ahead and put something down. You can’t know it’s right (or wrong!) until you draw it.
- 30. Lay-in I keep drawing the different edges of the butter. Now I’m putting in the horizontal (top and bottom) of the closer end of the butter.
- 31. Lay-in Now I double-check the angles of all the edges. I redraw some of the edges of the wrapper. I want it to look as much like what I’m drawing (what I’m looking at) as possible. in
- 32. Lay-in Once I am happy with the drawing, I use my kneaded eraser and by PRESSING it on the paper (not rubbing it!), I ‘pick up’ the darker lines and lighten my drawing before shading. Press, don’t rub!
- 33. block-in Okay- time to begin shading. I’m thinking PLANES! I’m also asking myself “What’s the lightest and darkest parts of my still- life?” I decide that the cast shadow from the butter is probably the easiest shape to start with, so I block that in.
- 34. block-in Next, I shade the shadow under the wrapper on the left side, since it too is one of the darker values in this still-life. I think of the shadow as a big shape, and shade lightly.
- 35. block-in After my main shadow shapes are in, then I lightly shade the background behind the wrapper, so that the wrapper starts to stand out. I’m still using my 4H pencil.
- 36. block-in I shade the halftone around the butter. My goal is to make the butter stand out without outlining it. I’ll be switching to the softer (darker) 6B pencil now.
- 37. block-in Now that I’ve got the whole drawing covered with some pencil, I begin to really focus in on comparing values, knowing that a change in plane = a change in value.
- 38. block-in You can see close-up the patient build up of many fine lines of pencil. Holding the pencil opposite the pointed end helps keep my strokes consistent and light, even with the 6B pencil.
- 39. block-in Remember the hundreds of lines in my drawing of the white sphere (ball)? Same thing here- LOTS of lines patiently building up the shading. Notice the dark shadow under the butter.
- 40. block-in I’m switching to my 6B pencil now so I can start getting some rich darks. LOTS of lines, all drawn GENTLY, PATIENTLY.
- 41. block-in I’m switching to my 6B pencil now so I can start getting some rich darks. LOTS of lines, all drawn GENTLY, PATIENTLY.
- 42. finish This close-up shows how I continue to build up the lines. Also, it’s okay to rotate your drawing if it helps you get a better angle.
- 43. finish My eyes keep scanning across the still-life, comparing the value of one plane to another. As soon as I notice something different in my drawing, I adjust it to look more like the still-life.
- 44. finish Keep a sharp point on your pencil to draw fine lines, such as around the edges.
- 45. finish As I move towards finishing my drawing, I use my kneaded eraser to ‘clean up’ some edges. Rolling the eraser to a point gives you nice control of what you lighten.
- 46. finish To shade very lightly, I hold the pencil at the opposite end of the point, and low (almost parallel) to the paper, and shade with very little pressure on the pencil. I turned the paper to make it easier.
- 47. finish I carefully work up to the edges of the wrapper. Notice that some edges are really well defined (crisp) and others are not (soft). To achieve a 3D look, try to show these differences in your drawing.
- 48. finish I check the lights. The wrapper has crinkles in it, and I need to show those to make the wrapper look like waxed paper. The crinkles are crisply defined.
- 49. finish Before I finish, I compare the values of the different planes, to see if they’re in the right relationship to one another. Once they are, I check the edges (crisp vs. soft). After that? I sign my drawing and I’m done!
- 50. finish
- 51. To create the illusion of form (for that is what we’re doing- we’re making a 3-dimensional object like a 3-dimensional object on a 2-dimensional surface; a writer does the same thing with her books), we need to record what the light tells us about the form. Let’s review the different elements of light and shade upon an object. light source highlight shadow halftone reflected light cast shadow
- 52. A few drawing tips: • Use an H pencil for your initial sketch (your lay-in) so that your sketch is light, not staining the paper. • Use a 6B for shading, and plan ahead to save your darkest shades for where it’s needed. • Hold the pencil at the opposite end from the drawing tip for more control. • Ask yourself “Where are my darkest and lightest shades in what I’m drawing?” • Patiently build up your shades. • You can go back over your pencil to lighten your drawing with your kneaded eraser. Just remember to press, don’t rub, it on the paper. Also roll a point on it for precision erasing. • Use your value scale to get good values! John Singer Sargent- Mrs. Richard D Sears, 1916
- 53. “'Not by might, nor by power, but by my Spirit,' says the Lord Almighty.” ~ Zechariah 4:6
- 54. “'Not by might, nor by power, but by my Spirit,' says the Lord Almighty.” ~ Zechariah 4:6 “What mankind wants is not talent, it is purpose; not the power to achieve, but the will to labor.” ~Edward G. Bulwer- Lytton
- 55. “'Not by might, nor by power, but by my Spirit,' says the Lord Almighty.” ~ Zechariah 4:6 “What mankind wants is not talent, it is purpose; not the power to achieve, but the will to labor.” ~Edward G. Bulwer- Lytton “The spirit is willing, but the body is weak.” ~Matthew 26:41
- 56. “'Not by might, nor by power, but by my Spirit,' says the Lord Almighty.” ~ Zechariah 4:6 “What mankind wants is not talent, it is purpose; not the power to achieve, but the will to labor.” ~Edward G. Bulwer- Lytton “The spirit is willing, but the body is weak.” ~Matthew 26:41 “Be strong and courageous! Don't be afraid or discouraged because of [fill in the blank], for there is a power far greater on our side!” ~2 Chronicles 32:7
- 57. Museum walk Blue Pluto Museum of Art, aka BPMA (pronounced “Bip-ma”). It has the largest collection of any fictional museum I know of, and membership is free. That’s a good thing, and I’m sure your parents will appreciate that, too. Its walls are LOADED with paintings. Very cool. I love the place. Shall we step on in? It’s cold out here (snows a lot there).
- 58. Edward Hopper, The Lighthouse at Two Lights, 1929
- 59. Claude Monet- Snow at Argenteuil
- 60. William Merritt Chase, Still-life with Fish
- 62. M.C. Escher, Mono Con Globe, 1935
- 63. Edgar Degas- Tänzerin, 1888
- 64. Edgar Degas- Tänzerin, charcoal study, 1888
- 66. Rembrandt in a Heavy Fur Cap, 1631
- 67. Assignment: lookin’ BUTTER
- 68. AS6: lookin’ butter! Assignment Goals: to identify planes and their changes in value from one another. Materials needed: 4H & 6B pencils, sharpener, sketchbook/paper, stick of butter with wrapper. AS6 Guidelines: Follow the step-by-step examples I gave you. Review the lesson via the recording or the slide pdf on the Previous Recordings page. 1. Set up a still-life consisting of your stick of a freshly unwrapped (not melted!) stick of butter resting on a table. Rotate the butter/wrapper until the shading looks pleasing to you. 2. Draw, keeping in mind: 1. Sketch your lay-in lightly with your 4H pencil 2. Shade slowly, patiently, comparing the value of each plane 3. Show me the difference between the horizontal & vertical planes, the butter, wrapper, and table top 3. Review. Step away from your drawing, then come back and see if there's anything that jumps out to you as being 'off'. Get someone else’s opinion, too. 4. Shoot/Scan and edit your six sketches, all on one page as described on the Photographing your Assignments in the FAQ section on the class webpage. Before submitting your image, edit it so it looks as good as your drawing. You can use www.picmonkey.com to edit it. 5. Save your edited image, naming it exactly as “FirstName-LastName,AS6” (e.g. “Tim- Chambers,AS6”) 6. Upload to the AS6 Gallery by Sunday at 11 PM EST.
- 69. Any questions before we end class today? If so, chat ‘em now! Thanks for a good class. Remember to exit the classroom within a few minutes. See you next week. Have fun on your assignment! Mr. Chambers
- 71. Thank you for visiting and previewing a class here at IguanaPaint.com! You can find out more information about the creative arts course available at www.iguanapaint.com. If you have questions about IguanaPaint, please don’t hesitate to contact us at info@iguanapaint.com. Wanna paint? I do! IguanaPaint.com!