
Recomendados
Más contenido relacionado
La actualidad más candente
La actualidad más candente (20)
Destacado
Similar a Projects dashboardpp
Similar a Projects dashboardpp (20)
Último
Último (20)
Projects dashboardpp
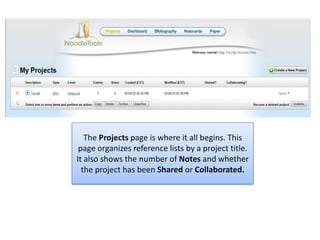
- 1. The Projects page is where it all begins. This page organizes reference lists by a project title. It also shows the number of Notes and whether the project has been Shared or Collaborated.
- 2. A closer look shows the user that there is 1 Entry and 0 Notes
- 3. You may also choose to Copy, Delete, Archive, or Unarchive a project. Just click the box next to the project and select an action.
- 4. Under Options you may choose to Copy, Rename, Change Style, Change Level, Delete or Archive. What is Change Style?
- 5. Lets say your professor wants you to use MLA instead of APA. Just click to convert. Remember to check your citations after converting to another style since citation elements vary between styles.
- 6. To review and add citations to a list you have already created click the project title to open.
- 7. You will be directed to the Dashboard. Here you can add more information to your project. Lets take a closer look.
- 8. To better organize your project you can insert a research question. Click the Research Question: field to type in your research question.
- 9. Next type in a thesis statement. This will keep you on track when conducting your research.
- 10. Clicking on the project history shows you when the project was edited and which citation was added to the project. The History Log is useful when working in groups.
- 11. Public view lets your share your project with other students. By clicking on the link…
- 12. You can create a URL that allows viewers to copy the citations into his/her own account
- 13. Or, you can create a URL that allows the viewer to copy the entire project.
- 14. Copy and Paste the URL into an email to share with your group members. By clicking on the link the viewer is taken to your Reference List.
- 15. Any Questions? Just Ask!