Saving Heirloom Tomato Seeds
•Descargar como PPTX, PDF•
2 recomendaciones•476 vistas

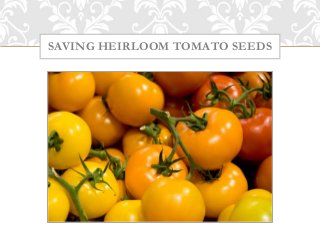
Saving heirloom tomato seeds is easy. Just follow this step-by-step presentation and you'll have jars of tomato seeds for long-term storage!

Recomendados
Más contenido relacionado
Más de Daniel Harris
Más de Daniel Harris (6)
Último
Último (10)
Saving Heirloom Tomato Seeds
- 1. SAVING HEIRLOOM TOMATO SEEDS
- 2. Want to have a continuous supply of heirloom tomatoes at home? Well, you can do so simply by saving heirloom tomato seeds from your harvests!
- 3. Learn how to preserve and store your heirloom tomato seeds now by following the instructions in this presentation.
- 4. GUIDELINES FOR SELECTING THE RIGHT TOMATOES Before you can start saving your heirloom tomato seeds, you need to pick the right tomatoes first. When selecting your tomatoes, choose: 1. Open-Pollinated Tomatoes They're natural and pesticide-free. 2. Fully Ripe Tomatoes They contain more seeds. 3. Your Freshest & Best-Tasting Tomatoes This way, the seeds you save will also grow like them.
- 5. After selecting your tomatoes, you can now proceed to saving heirloom tomato seeds for long-term storage. Here are the 10 Easy Steps:
- 6. STEP 1. PREPARE THE TOMATOES Prepare open-pollinated, ripe and great-tasting tomatoes as previously mentioned. They are perfect for saving heirloom tomato seeds.
- 7. STEP 2. SLICE THE TOMATOES ACROSS THE EQUATOR Always slice in this method so that the seeds will easily show.
- 8. STEP 3. SCRAPE THE TOMATO SEEDS INTO A GLASS JAR Take out the seeds and the gel and put them into a glass jar. Don’t worry about separating them yet. Label the jars so you won’t confuse the different varieties you have.
- 9. STEP 4. IMMERSE THE SEEDS AND GEL IN WATER Now submerge them in water that's about one inch deep. This encourages mold growth that will separate the seeds from the gel.
- 10. STEP 5. WAIT FOR MOLD GROWTH This usually happens within 3-5 days. White mold will appear on the surface of the tomato solution and it helps get rid of the gel layer on the heirloom seeds.
- 11. STEP 6. DRAIN THE WATER AND THE FLOATING SEEDS Once the mold appears, go ahead and drain the water and the floating seeds. Just be careful not to include the sunken seeds because they’re the good ones.
- 12. STEP 7. CLEAN THE SEEDS Put the remaining seeds in a mesh strainer and rinse them under running water to remove the gel. They don’t have to be perfectly clean, so no need to press hard on them.
- 13. STEP 8. DRY THE SEEDS Spread the seeds on a paper plate and wait for them to dry. Once they’re dry enough, they will easily come off the plate and then you can finally store them.
- 14. STEP 9. STORE THE SEEDS IN GLASS JARS The most recommended storage method is putting the seeds in ziplock bags and then keeping them inside tightly-sealed glass jars. This prevents moisture from affecting the seeds. Sunlight and heat are also very bad for the seeds, so the best area to keep them is in the fridge.
- 15. STEP 10. ORGANIZE YOUR HEIRLOOM SEED COLLECTION Lastly, organize your seeds by labeling them properly. Write down the seed variety, storage date and other pertinent information. It's also good to store together the seeds that were harvested during the same season since they’ll most likely have the same shelf life.
- 16. So those are the 10 easy steps to saving heirloom tomato seeds properly. Just follow the directions and you’ll have a valuable tomato seed collection in no time!