
Recomendados
Más contenido relacionado
Similar a Working with chocolate molds
Similar a Working with chocolate molds (20)
Más de dan widmann
Más de dan widmann (20)
Último
Último (20)
Working with chocolate molds
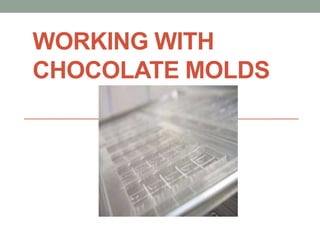
- 2. Preparing Molds 1. Start with polycarbon chocolate molds, professional ones not the ones at the craft store 2. The mold must be CLEAN. Wash before using if necessary (80 degrees). Buff with a lint free towel 3. Place in a warm place until needed. If they are two piece mold for example Easter bunnies, clip them securely together with the clips provided
- 3. Filling Chocolate Molds 4. Temper chocolate, invert mold so cavities are facing up. 5. Fill all the way up with tempered chocolate. Using the handle of a bench scrapper rap all sides of the mold to bring bubbles to the top and pop 6. If you are making chocolate bars run your bench scraper flush with the top of the mold, if need be and don’t pour out excess. Place in either a cooling cabinet or refrigerator until set
- 4. Filling Chocolate Molds 7. If you are making two piece molds-Invert mold, pour excess chocolate back into the bowl of tempered chocolate. 8. Use your bench scraper to clean off the mold of excess chocolate. 9. Invert mold right side up onto a parchment lined sheet pan and place in either a cooling cabinet or refrigerator. Allow this to set, but not completely.
- 5. Finishing Up 10. Repeat Steps 5, 7 8. This second pouring will allow the mold to seal itself 11. If chocolate was, tempered correctly and the pralines made correctly the will pop right out of the molds
- 6. Adding color to molds • Do Steps 1-4. You add tempered colored cocoa butter into the molds. It can be painted on with a brush (86 degrees) or finger paint the molds using a clean glove (89 degrees). A very thin layer is all that is needed. Multiple colors can be used, just allow the first color to set of briefly before adding the next. This won’t take long since the layer of color is so thin • Hint- colors will stand out better if you do Step 5 with a thin layer tempered white chocolate behind them. Fill, tap and dump quickly to achieve this You let this set and repeat Step 5 with a layer of tempered dark chocolate, fill tap and dump quickly. You can also color white chocolate. You must use color that especially made for coloring chocolate. These are fat soluble or fat based. Water based colors will cause your chocolate to seize • Continue on with Steps 6-11
- 7. Summary • The 11 steps in order • Temperature and condition of molds • Temperature(s) of TEMPERED colored cocoa butter