

Recomendados
Más contenido relacionado
La actualidad más candente
La actualidad más candente (20)
Similar a Laying stepping stones
Similar a Laying stepping stones (20)
Más de Zulaiha Amaria
Más de Zulaiha Amaria (20)
Último
Último (20)
Laying stepping stones
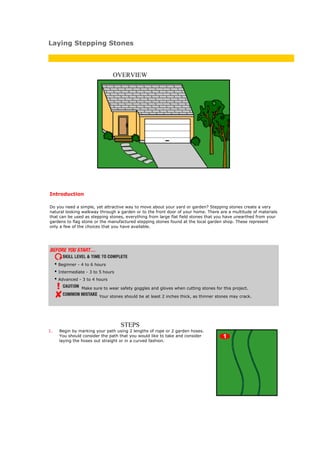
- 1. Laying Stepping Stones OVERVIEW Introduction Do you need a simple, yet attractive way to move about your yard or garden? Stepping stones create a very natural looking walkway through a garden or to the front door of your home. There are a multitude of materials that can be used as stepping stones, everything from large flat field stones that you have unearthed from your gardens to flag stone or the manufactured stepping stones found at the local garden shop. These represent only a few of the choices that you have available. • Beginner - 4 to 6 hours • Intermediate - 3 to 5 hours • Advanced - 3 to 4 hours Make sure to wear safety goggles and gloves when cutting stones for this project. Your stones should be at least 2 inches thick, as thinner stones may crack. STEPS 1. Begin by marking your path using 2 lengths of rope or 2 garden hoses. You should consider the path that you would like to take and consider laying the hoses out straight or in a curved fashion.
- 2. 2. Position the stones on the ground so that you can adjust the pattern and distance between stones before digging the holes. Keep in mind that a natural stride is about 18 inches so you will want to place the stones so that each stone is 18 inches from the center of the next. 3. Leave the stones in place and dig straight down with the trowel or flat spaded shovel to outline each stone in the earth below each. 4. Then remove the stone and dig out the sod and earth within the outline so that the stone will sit about an inch above the ground once you have poured an inch of sand into the hole. You will need to consider the thickness of each stone in this step. 5. Pour about an inch of sand into the hole and level the bottom of the hole, so that the stone will lay flat. 6. Place the stone into the hole.
- 3. 7. Use the level to make sure the stone is relatively level. Push on the stone to make sure it does not rock. You can add or remove sand to accommodate for oddly shaped stones at this point. 8. Once the stone is level, fill in the area around the stone with soil and tamp it firmly. 9. Make sure that the stones are about the same height by laying a board across a few stones and using the level. 10. Once you have completed the walk sweep each stone so that each is clean. 11. Over time you will find that the stones will settle. You can adjust the height or the level of the stones by simply lifting the stone and filling in the hole with some sand or soil. SHOP LIST
- 4. Materials List Your choice of stepping stones Sand Tools List Tape measure 2 lengths of rope or garden hose Trowel or narrow flat spaded shovel Level 5 foot 2x4