
Recomendados
Más contenido relacionado
La actualidad más candente
La actualidad más candente (20)
Similar a Db exercises
Similar a Db exercises (20)
Último
Último (20)
Db exercises
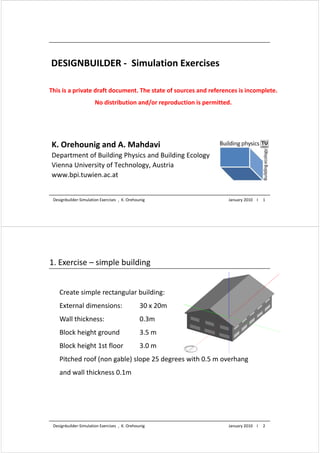
- 1. DESIGNBUILDER ‐ Simulation Exercises DESIGNBUILDER ‐ Simulation Exercises This is a private draft document. The state of sources and references is incomplete. Thi i i d f d Th f d f i i l No distribution and/or reproduction is permitted. K. Orehounig and A. Mahdavi Department of Building Physics and Building Ecology Vienna University of Technology, Austria Vi U i it f T h l A ti www.bpi.tuwien.ac.at Designbuilder‐Simulation Exercises , K. Orehounig January 2010 I 1 1. Exercise simple building 1. Exercise – simple building Create simple rectangular building: External dimensions: 30 x 20m Wall thickness: 0.3m Block height ground 3.5 m Block height 1st floor 3.0 m Pitched roof (non gable) slope 25 degrees with 0.5 m overhang and wall thickness 0.1m Designbuilder‐Simulation Exercises , K. Orehounig January 2010 I 2
- 2. 1. Exercise simple building 1. Exercise – simple building • Check wall thickness set correctly • Internal zone floor dimensions should be 19.4 x 29.4m • Internal area = 570.36m²‐check in Navigator (below) Designbuilder‐Simulation Exercises , K. Orehounig January 2010 I 3 2. Exercise Drag face 2. Exercise – Drag face Before face is After face has been dragged dragged Designbuilder‐Simulation Exercises , K. Orehounig January 2010 I 4
- 3. 2. Exercise Drag face 2. Exercise – Drag face •D Draw a block 20m x 20m and 6m high bl k 20 20 d 6 hi h •Starting at the south west corner add a block that is 3m high and extends 12m along the south wall of the original block and stands out from that block by 6m • Now use the Drag face tool to pull the smaller block out to a distance of 10m Designbuilder‐Simulation Exercises , K. Orehounig January 2010 I 5 3. Exercise cutting tool 3. Exercise – cutting tool Using cutting and protractor tools to create a mono pitch roof Using cutting and protractor tools to create a mono pitch roof Designbuilder‐Simulation Exercises , K. Orehounig January 2010 I 6
- 4. 3. Exercise cutting tool 3. Exercise – cutting tool Using cutting and protractor tools to create a mono pitch roof: • Continuing from Exercise 2, use the drag face tool to increase the height of the larger block by 2m • Turn on the protractor and set the increment to 5° • Use the Cut Block tool to cut the block across the south face at 5 degrees starting at a height of 5m from the south west corner • Delete smaller cut block to leave a mono‐pitched sloping roof Designbuilder‐Simulation Exercises , K. Orehounig January 2010 I 7 4. Exercise horizontal extruded block 4. Exercise – horizontal extruded block Using a horizontal extruded block to create a roof Designbuilder‐Simulation Exercises , K. Orehounig January 2010 I 8
- 5. 4. Exercise horizontal extruded block 4. Exercise – horizontal extruded block Using a horizontally extruded block to create a roof h ll d d bl k f • Draw a simple block 10m x 20m and 3.5m high • Add Add a gable end roof with the geometry shown below bl d f ith th t h b l • Ridge is 2.5m above eaves and 7m from left hand corner • Suggest use construction line (in blue) to locate ridge Suggest use construction line (in blue) to locate ridge position Designbuilder‐Simulation Exercises , K. Orehounig January 2010 I 9 5. Exercise Outline blocks 5. Exercise – Outline blocks Using Outline blocks to create complex geometry Source: Introductory Training course, Paul Carey, DesignBuilder-Simulation-Training, London 2009 – DesignbuilderTM Designbuilder‐Simulation Exercises , K. Orehounig January 2010 I 10
- 6. 5. Exercise Outline blocks 5. Exercise – Outline blocks Using Outline blocks to create complex geometry Using Outline blocks to create complex geometry • From Exercise 4, switch on increment snap • Add dormer window outline block in middle of steeper Add dormer window outline block in middle of steeper sloping slope roof –align vertical face with wall below • 3 m wide, vertical wall height 1m and sloping roof at 30° 3 m wide, vertical wall height 1m and sloping roof at 30 Designbuilder‐Simulation Exercises , K. Orehounig January 2010 I 11 5a. Exercise cutting plane 5a. Exercise – cutting plane • Cut outline block using roof as cutting plane (cutting method = Select Cut outline block using roof as cutting plane (cutting method = Select plane) • Convert dormer outline block to building block using wall thickness Convert dormer outline block to building block using wall thickness 0.1m Designbuilder‐Simulation Exercises , K. Orehounig January 2010 I 12
- 7. 5b. Exercise windows and holes 5b. Exercise – windows and holes • Add a window (approximately 2 m x 0.4m) (start at x=0.4 m, y=0.5m) • Cut a hole in the sloping roof • merge the dormer zone with the main roofspace zone (use ‘Merge zones connected by holes’ Model option) Designbuilder‐Simulation Exercises , K. Orehounig January 2010 I 13 6. Exercise component blocks 6. Exercise – component blocks Setting ground adjacencies using component blocks Designbuilder‐Simulation Exercises , K. Orehounig January 2010 I 14
- 8. 6. Exercise component blocks 6. Exercise – component blocks Using ground component blocks to set ground adjacency • Create a two storey building with flat roof 15m x 20m with default block heights. Use Block wall thickness of 0.3m. • Add gable roof with 30º slope 0.5m overlap • The ground rises along the south wall from floor level at the west corner to 1.75m at the east corner • Use a ground component block to set the adjacency for the south wall. Designbuilder‐Simulation Exercises , K. Orehounig January 2010 I 15 6. Exercise component blocks 6. Exercise – component blocks Setting ground adjacency using component block • Note how the ground component block has modified the layout of the default façade • Go down to the surface level and check that the surface next to the ground component block has been split into 2 adjacencies Designbuilder‐Simulation Exercises , K. Orehounig January 2010 I 16
- 9. 7. Exercise Adiabatic component blocks 7. Exercise – Adiabatic component blocks Designbuilder‐Simulation Exercises , K. Orehounig January 2010 I 17 7. Exercise Adiabatic component blocks 7. Exercise – Adiabatic component blocks • Using adiabatic component blocks to represent other spaces at similar conditions • Add 4m high, 6m wide adiabatic block to middle of North facade • Using standard component blocks for shading and reflections •Add standard block in front of West face Designbuilder‐Simulation Exercises , K. Orehounig January 2010 I 18
- 10. 8. Exercise Assigning activities & zoning 8. Exercise – Assigning activities & zoning • Standard block should be removed again • Using the top floor block add a 2m wide corridor down the middle of the block • Insert partitions to create 4 cellular offices along west wall Designbuilder‐Simulation Exercises , K. Orehounig January 2010 I 19 8. Exercise Zoning the building 8. Exercise – Zoning the building Designbuilder‐Simulation Exercises , K. Orehounig January 2010 I 20
- 11. 8. Exercise Renaming Blocks and Zones 8. Exercise – Renaming Blocks and Zones Designbuilder‐Simulation Exercises , K. Orehounig January 2010 I 21 9. Exercise constructions 9. Exercise ‐ constructions Add an unconditioned pitched roof (specify space as semi‐exterior unconditioned) Create a new external wall construction and apply it to second floor and roof blocks: • Outer layer –lightweight metallic cladding 2 mm thick (look under metals) l l h h ll l dd h k (l k d l) • Insulation polyurethane board diffusion tight, 100mm thick •I Inner layer ‐concrete block with 1800 kg/m³ density, l t bl k ith 1800 k / ³ d it 100mm thick Designbuilder‐Simulation Exercises , K. Orehounig January 2010 I 22
- 12. 9. Exercise constructions 9. Exercise ‐ constructions Designbuilder‐Simulation Exercises , K. Orehounig January 2010 I 23 10a. Exercise defining openings 10a. Exercise – defining openings • Change default glazing to the whole building to Dbl LoE(e2=0 1) Clr Change default glazing to the whole building to Dbl LoE(e2=0.1) Clr 6mm/13mm Air • Change all top floor openings to be 20% glazed, 1.6m height and 1.0m sill Change all top floor openings to be 20% glazed, 1.6m height and 1.0m sill height (block level change). p g g, g • Alter all top floor West wall windows to have 40% glazing, 2m high with a sill height of 1m. • South wall ground floor has no glazing • North wall has a door (1 m x2 m) • Visualize to check correct positioning Designbuilder‐Simulation Exercises , K. Orehounig January 2010 I 24
- 13. 10b. Exercise copy of openings 10b. Exercise – copy of openings • At building level remove all ground floor West wall windows g g • Copy windows from West wall top floor to ground floor • Visualize to check correct positioning Designbuilder‐Simulation Exercises , K. Orehounig January 2010 I 25 11. Exercise Heating Design Calculations 11. Exercise ‐ Heating Design Calculations •From Exercise 10 model From Exercise 10 model •Set Location to London (Gatwick Airport) •Run Heating Design Calculation, using System sizing design margin of 1.8 g y g g g •View Detailed and Summary results Designbuilder‐Simulation Exercises , K. Orehounig January 2010 I 26
- 14. 12. Exercise Cooling Design Calculations 12. Exercise ‐ Cooling Design Calculations • Starting from Exercise 11 model Starting from Exercise 11 model • Switch on Cooling in cellular offices • Run Cooling Design Calculation, using System sizing design margin of 1.2 •View Detailed and Summary results Designbuilder‐Simulation Exercises , K. Orehounig January 2010 I 27 13. Exercise Simulation 13. Exercise – Simulation • We go back to our model and simulate We go back to our model and simulate • Monthly and Annual (for 365 days) • Daily y • Hourly • View results Designbuilder‐Simulation Exercises , K. Orehounig January 2010 I 28
- 15. 14a. Exercise 14a. Exercise – Shading • Create a volume with floor plan dimensions 20x10 Single Zone (height 3,5m) (h i h 3 5 ) • Run cooling design simulations •L k tD t I t Look at Data: „Internal gains“ l i “ • Lock axes, select „graph and table“ • Export it as report topic Export it as report topic Designbuilder‐Simulation Exercises , K. Orehounig January 2010 I 29 14b. Exercise 14b. Exercise ‐ Shading • Go back to the edit screen • A b ildi l l At building level go to the „opening tab“ and open the shading h i b“ d h h di header switch to „window shading“ • choose the following settings: h th f ll i tti • and perform cooling design simulations again and perform cooling design simulations again • export it again as a report topic Designbuilder‐Simulation Exercises , K. Orehounig January 2010 I 30
- 16. 14c. Exercise 14c. Exercise ‐ Shading • Go back to the edit screen • now choose instead of „scheduled“ control type „solar“ h i d f h d l d“ l l “ • and perform cooling design simulations again • export it again as a report topic export it again as a report topic Designbuilder‐Simulation Exercises , K. Orehounig January 2010 I 31 14d. Exercise 14d. Exercise ‐ Shading • Go back to your model • switch off „window shading“ and switch on „local shading“ i h ff i d h di “ d i h l l h di “ • select „overhang and sidefins (1m projection)“ • run cooling design simulations again li d i i l ti i • export it again as a report topic Designbuilder‐Simulation Exercises , K. Orehounig January 2010 I 32
- 17. 14e. Exercise 14e. Exercise ‐ Shading • Go back to your model • turn all shading options off ll h di i ff • on the layout tab draw a large component block in front of t bl k i f t f south‐facing windows. (1m away from the building, (1m away from the building and 20m high) • Construction tab at Building level Construction tab at Building level Transmittance can be changed from 0 (opaque) to 1 (maximum transmittance) Designbuilder‐Simulation Exercises , K. Orehounig January 2010 I 33 15a. Exercise Timing Typical workday/Schedules 15a. Exercise – Timing ‐ Typical workday/Schedules Typical workday: ∙ Create a new project using London Gatwick location and the Default 20x10 Single Zone template. ∙ On the Model options dialog: set the timing option to Typical workday. ∙ At building level on the Activity tab, template: Office_OpenOff, Office Equipment change the On time to 8:00 and Off time to 20:00. ∙ Now run a Cooling design calculation ∙ Use default calculation options, select just 4 Internal gains results and look at results Use default calculation options select just 4‐Internal gains results and look at results for Computer + Equip. Designbuilder‐Simulation Exercises , K. Orehounig January 2010 I 34
- 18. 15a. Exercise Timing Typical workday/Schedules 15a. Exercise – Timing ‐ Typical workday/Schedules ∙ Notice that the maximum heat gain is the 15 W/m2 requested x floor area of 182.7m2 = 2.74 kW. The data displayed on the graphs is for solar time, i.e. with no modification for daylight saving. So at midday the sun has maximum altitude. Also data is displayed for the previous 30 minutes in Cooling design results (or previous 1 hour when viewing hourly previous 1 hour when viewing hourly simulation results). Designbuilder‐Simulation Exercises , K. Orehounig January 2010 I 35 15a. Exercise Timing Typical workday/Schedules 15a. Exercise – Timing ‐ Typical workday/Schedules Computer + Equip results at 7:30 actually represent the heat gain to the t ll t th h t i t th space over the time 7:00‐7:30 solar time or 8:00‐8:30 local clock time. Times are solar times Schedules are defined in local time Designbuilder‐Simulation Exercises , K. Orehounig January 2010 I 36
- 19. 15b Exercise: 7/12 Schedules 15b Exercise: 7/12 Schedules • On the Model options dialog set the Timing option back to Schedules. • Go to the Activity tab, building level. • Create a new schedule to control the Office equipment. • Cli k Click on the Office equipment Schedule to open the list of schedules in the th Offi i tS h d l t th li t f h d l i th Data panel on the right then click on the + Add new item toolbar icon to create a new schedule. create a new schedule • Give the new schedule a name e.g. “Occupancy schedule”. • Leave the type as 7/12 Schedule Leave the Design days data too (This data Leave the type as 7/12 Schedule. Leave the Design days data too. (This data describes how the schedule should behave if you use the (default)) Designbuilder‐Simulation Exercises , K. Orehounig January 2010 I 37 15b Exercise: 7/12 Schedules 15b Exercise: 7/12 Schedules • Profiles are selected for cells in the grid by first selecting the cells to be defined then by clicking on the Edit selected cells link on the right. • So first click on the Month cell in the top left to select all cells, i.e. all weekdays in all months. kd i ll th • Then click on Edit selected cells to open a list of existing profiles. Select the profile of existing profiles Select the profile 8:30 ‐ 16:00 and press OK • select all weekdays and set them to select all weekdays and set them to the profile 8:30‐16:00 • now set the weekends to be switched off now set the weekends to be switched off. • Perform Cooling design calculations ( (SummerDesignDay) g y) Designbuilder‐Simulation Exercises , K. Orehounig January 2010 I 38
- 20. 15b. Exercise: 7/12 Schedules 15b. Exercise: 7/12 Schedules • Press OK to create the Schedule. • select this new schedule. • Run another Cooling design calculation Equipment stops at 15:30 (this is 16:30 local time, and time Equipment starts at 8:00 corresponds to 16:00-16:30 (this is 9:00 local time, and corresponds to 8:30-9:00 Designbuilder‐Simulation Exercises , K. Orehounig January 2010 I 39 16a. Exercise 16a. Exercise ‐ HVAC • Ensure Simple HVAC and Schedule natural ventilation model options are selected. • Select „Delhi“ as a location • Window shading using “High reflectivity slats” “inside” and 4‐Solar control with a 150 W/m² setpoint, T5 fluorescent lights, no daylight control. • At the Activity tab set the heating setpoint to 20°C and the cooling setpoint to 26°C. Designbuilder‐Simulation Exercises , K. Orehounig January 2010 I 40
- 21. 16a. Exercise 16a. Exercise ‐ HVAC •At Building level go to the HVAC tab and load the “Packaged direct expansion HVAC template“ • Set the Mechanical ventilation Outside air definition method to 1‐By Zone. (This means that the Outside air ac/h rate entered on the slider below will be used directly. Other options will be explored in the next Example.) • Set the Mechanical ventilation Outside air delivery to be 2 ac/h. / • Leave the Mechanical ventilation Operation schedule to be Office_OpenOff_Occ. Offi O Off O Designbuilder‐Simulation Exercises , K. Orehounig January 2010 I 41 16a. Exercise 16a. Exercise ‐ HVAC • Go to the simulation tab: select hourly and daily results for the full year „annual simulations“ Designbuilder‐Simulation Exercises , K. Orehounig January 2010 I 42
- 22. 16a. Exercise 16a. Exercise ‐ HVAC Daily results Cooling loads, no heating available Designbuilder‐Simulation Exercises , K. Orehounig January 2010 I 43 16a. Exercise 16a. Exercise ‐ HVAC Change to „Hourly results“ For 7 days Air temperature minimum 26°C weekend Ach coupled with occupancy Designbuilder‐Simulation Exercises , K. Orehounig January 2010 I 44
- 23. 16b. Exercise 16b. Exercise ‐ HVAC • Change the weather at the location tab to a colder climate “London Gatwick ARPT” •At building level on the “HVAC tab” set the Mechanical ventilation Outside air definition method to be 2‐Min fresh air per person. (This means that the d fi iti th d t b 2 Mi f h i (Thi th t th maximum mechanical ventilation fresh air is calculated from the occupancy of the zone and the minimum fresh air requirement per person. Both these are the zone and the minimum fresh air requirement per person Both these are defined by the activity. • Go to the Activity tab” note that the “occupancy density” is set as 0.11 Go to the „Activity tab note that the occupancy density is set as 0 11 people/m2. Under “Environmental Control” > “Minimum Fresh Air Header Note the Fresh air requirement per person is set to 10 l/s per Header”. Note the Fresh air requirement per person is set to 10 l/s per person. The Mech vent per area data would also be used if we had selected 4‐ Min fresh air (Sum per person + per area) option. ( p p p ) p Designbuilder‐Simulation Exercises , K. Orehounig January 2010 I 45 16b. Exercise 16b. Exercise ‐ HVAC • Change the “Heating set back” to 16°C. This will be the set point whenever g p the Heating Operation Schedule has a value of 0.5. • Go back to the HVAC tab and single‐click on the Heating Operation Schedule. The schedule Office_OpenOff_Heat should be selected. The data for the schedule is displayed in the Data report panel in the bottom right of the screen. You will see the schedule has values of 0.5 between 7pm and 6am and a value of 1 between 6am and 7pm. Weekends and holidays have 0.5. This means that the heating system will use setback temperature (16°C) during the night and at weekends and holidays. Designbuilder‐Simulation Exercises , K. Orehounig January 2010 I 46
- 24. 16b. Exercise 16b. Exercise ‐ HVAC • Likewise for cooling, the main cooling setpoint of 26°C applies during the occupied period. For AllOtherDays (i.e. Cooling design days) a value of zero p p y ( g g y) is used, that is heating is not required for cooling design. • Run the simulations for the “Winter design week” Air temperature minimum at night? Designbuilder‐Simulation Exercises , K. Orehounig January 2010 I 47 References: • P Carey 2009 Introductory Training course DesignBuilder Simulation P. Carey, 2009. Introductory Training course, DesignBuilder‐Simulation‐ Training, London 2009 – DesignBuilderTM 2009. • DesignBuilder 2009 Simulation + CFD Training Guide Simulation Training DesignBuilder 2009. Simulation + CFD Training Guide, Simulation Training Manual, DesignBuilderTM 2009. Designbuilder‐Simulation Exercises , K. Orehounig January 2010 I 48