
Recomendados
Más contenido relacionado
Similar a 07
Similar a 07 (20)
Último
Último (20)
07
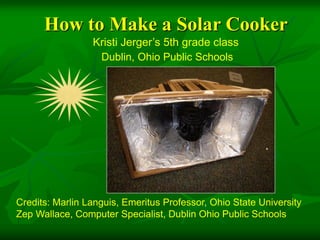
- 1. How to Make a Solar Cooker Kristi Jerger’s 5th grade class Dublin, Ohio Public Schools Credits: Marlin Languis, Emeritus Professor, Ohio State University Zep Wallace, Computer Specialist, Dublin Ohio Public Schools
- 2. Table of Contents A. Introduction B. Design C. Construction D. Assembly E. Test and use
- 3. A. Introduction We studied about renewable and nonrenewable energy and we learned two big ideas: 1.We should try to conserve and save the nonrenewable energy resources we have. 2. We should learn how to switch to renewable energy resources. The sun’s energy is really powerful. Solar energy is renewable and it’s free. We can use it to make electricity, to heat buildings and to cook. Millions of people can’t find enough wood to cook, so using solar cookers is a good idea. We designed one made mostly from scrap materials and it works pretty well; we wrote the plans with photos, so you can make it easily. We hope you like it as much as we do.
- 4. B. Design: Focus and Concentrate Solar Energy • All sides slope in about 30 degrees. • The aluminum foil is to focus and concentrate the sun’s energy. • The sun’s energy is reflected off the foil and is focused to the center. • That is where you need to put your food.
- 5. Design: Trap Solar Energy We tried a model solar cooker. We decided you need a clear lid to trap the solar energy; the lid keeps the heat from the sun from getting out.
- 6. Use Inexpensive or Recycled Materials • You can find cardboard or refrigerator boxes at an appliance store. • You can buy clear plastic bags at a dry cleaner, saran wrap or cooking bags at a grocery store or window covering at a hardware store. • Look for mylar blankets or buy wide aluminum foil at a grocery store.
- 7. Tools and Safety •You will also need tools and supplies: scissors, masking tape, two sided tape, rubber cement and rubber bands. •Wear goggles for safety. •Have adults help if you use tools like saws or utility knives.
- 8. C. Construction Pattern 1. Make This Piece Sides: Make one
- 9. Pattern 2: Make These Pieces Top and bottom: Make two of these pieces
- 10. More About the Top and Bottom • Be sure you cut both pieces exactly the same size. • Be sure to cut in the notches at least an inch deep. • You don’t make any creases in these pieces. 10
- 11. Pattern 3: Make This Piece Make One:The frame is 2” wide. You should use double-thick cardboard because you’re going to put a lot of rubber 16” bands on it, so it might bend if you don’t.
- 12. Pattern Summary • One big piece • Two trapezoid pieces • One lid frame • Use goggles and ask an adult to help cut these pieces with a utility knife or saw
- 13. Creases • Take your main piece and make creases in these places: • It is important to have creases because you need to fold it.
- 14. Glue the Foil •Next you put foil on all three pieces. •Make the foil an inch bigger on all sides. •Spread rubber cement over all the pieces. •Tape the extra foil to the back.
- 15. Avoid Wrinkles and Scratches on the Foil • Use your fingers to lightly push on the foil to smooth out wrinkles. • Try to make it like a mirror. That way the sun’s energy doesn’t hit any wrinkles and reflect away from the food.
- 16. Construct the lid rectangle Get your long cardbord strip to make the rectangle lid. Measure each side and cut a square notch in each corner so it will fold into a nice square angle.
- 17. Construct the Lid • Fold the strip into a rectangle. •Put books in the corners to keep the lid square. •Cover the lid with clear plastic a little bigger than the lid. •Use double-sided tape to fasten the plastic on the frame.
- 18. D. Assembly: Using Rubber Bands • We designed our solar cooker so you can assemble it and take it apart easily with rubber bands; but you can use string or twist ties instead. • Make a loop with two rubber bands about size #64 like this. • Make 3 sets of looped rubber bands.
- 19. Put the Box Together • Set the folded side piece between the top and bottom pieces. • Stretch one rubber band loop at the back. • Stretch the other two rubber band loops at the sides.
- 20. Attach the Lid Hook a rubber band over each corner of the lid. Then stretch it back to the slot on the side of the solar cooker. Yeah, you are done!!
- 21. E. Test and Use Your Solar Cooker • Make a container to cook food. Paint a small jar or can with flat black paint. Black will absorb the sun’s energy. • Set your solar cooker outside to face the sun directly. Prop it up with stones, books or a wire brace made from a coat hanger bent in the middle. • Put the container inside with about 2 inches of water and a cooking thermometer. • Measure the temperature before you start. • Measure again every 5 or 10 minutes and record the results
- 22. Test solar heating • Time Temperature-Degrees F. • Start 80 • + 10 minutes 115 • + 20 minutes 160
- 23. Cook with Your Solar Cooker Try these ideas: 1. Cook rice 2. Bake cornbread 3. Make baked potatoes 4. Make hard-boiled eggs