Unit 3 Emotional Intelligence and Spiritual Intelligence.pdf
notes about Arduino
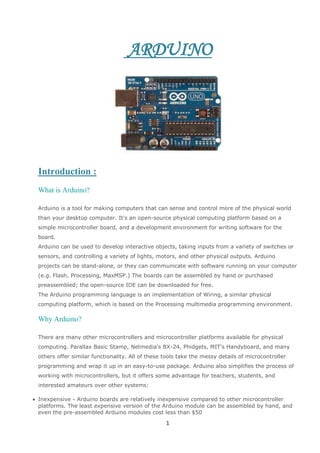
1. ARDUINO
Introduction :
What is Arduino?
Arduino is a tool for making computers that can sense and control more of the physical world
than your desktop computer. It's an open-source physical computing platform based on a
simple microcontroller board, and a development environment for writing software for the
board.
Arduino can be used to develop interactive objects, taking inputs from a variety of switches or
sensors, and controlling a variety of lights, motors, and other physical outputs. Arduino
projects can be stand-alone, or they can communicate with software running on your computer
(e.g. Flash, Processing, MaxMSP.) The boards can be assembled by hand or purchased
preassembled; the open-source IDE can be downloaded for free.
The Arduino programming language is an implementation of Wiring, a similar physical
computing platform, which is based on the Processing multimedia programming environment.
Why Arduino?
There are many other microcontrollers and microcontroller platforms available for physical
computing. Parallax Basic Stamp, Netmedia's BX-24, Phidgets, MIT's Handyboard, and many
others offer similar functionality. All of these tools take the messy details of microcontroller
programming and wrap it up in an easy-to-use package. Arduino also simplifies the process of
working with microcontrollers, but it offers some advantage for teachers, students, and
interested amateurs over other systems:
Inexpensive - Arduino boards are relatively inexpensive compared to other microcontroller
platforms. The least expensive version of the Arduino module can be assembled by hand, and
even the pre-assembled Arduino modules cost less than $50
1
2. Cross-platform - The Arduino software runs on Windows, Macintosh OSX, and Linux operating
systems. Most microcontroller systems are limited to Windows.
Simple, clear programming environment - The Arduino programming environment is easy-touse for beginners, yet flexible enough for advanced users to take advantage of as well. For
teachers, it's conveniently based on the Processing programming environment, so students
learning to program in that environment will be familiar with the look and feel of Arduino
Open source and extensible software- The Arduino software is published as open source tools,
available for extension by experienced programmers. The language can be expanded through
C++ libraries, and people wanting to understand the technical details can make the leap from
Arduino to the AVR C programming language on which it's based. Similarly, you can add AVR-C
code directly into your Arduino programs if you want to.
Open source and extensible hardware - The Arduino is based on
Atmel's ATMEGA8 and ATMEGA168 microcontrollers. The plans for the modules are published
under a Creative Commons license, so experienced circuit designers can make their own
version of the module, extending it and improving it. Even relatively inexperienced users can
build the breadboard version of the module in order to understand how it works and save
money.
Getting Started Arduino on Windows
The following explains how to connect your Arduino board to the computer and upload your first sketch.
1 | Get an Arduino board and USB cable
In this tutorial, we assume you're using an Arduino Uno, Arduino Duemilanove, Nano, Arduino Mega 2560 ,
or Diecimila. If you have another board, read the corresponding page in this getting started guide.
You also need a standard USB cable (A plug to B plug): the kind you would connect to a USB printer, for example.
(For the Arduino Nano, you'll need an A to Mini-B cable instead.)
2 | Download the Arduino environment
Get the latest version from the download page.
When the download finishes, unzip the downloaded file. Make sure to preserve the folder structure. Double-click the
folder to open it. There should be a few files and sub-folders inside.
3 | Connect the board
2
3. The Arduino Uno, Mega, Duemilanove and Arduino Nano automatically draw power from either the USB connection
to the computer or an external power supply. If you're using an Arduino Diecimila, you'll need to make sure that the
board is configured to draw power from the USB connection. The power source is selected with a jumper, a small piece
of plastic that fits onto two of the three pins between the USB and power jacks. Check that it's on the two pins closest to
the USB port.
Connect the Arduino board to your computer using the USB cable. The green power LED (labelled PWR) should go on.
4 | Install the drivers
Installing drivers for the Arduino Uno or Arduino Mega 2560 with Windows7, Vista, or XP:
Plug in your board and wait for Windows to begin it's driver installation process. After a few moments, the process will
fail, despite its best efforts
Click on the Start Menu, and open up the Control Panel.
While in the Control Panel, navigate to System and Security. Next, click on System. Once the System window is up,
open the Device Manager.
Look under Ports (COM & LPT). You should see an open port named "Arduino UNO (COMxx)"
Right click on the "Arduino UNO (COmxx)" port and choose the "Update Driver Software" option.
Next, choose the "Browse my computer for Driver software" option.
Finally, navigate to and select the driver file named "arduino.inf", located in the "Drivers" folder of the Arduino
Software download (not the "FTDI USB Drivers" sub-directory). If you are using an old version of the IDE (1.0.3 or
older), choose the Uno's driver file named "Arduino UNO.inf"
Windows will finish up the driver installation from there.
See also: step-by-step screenshots for installing the Uno under Windows XP.
Installing drivers for the Arduino Duemilanove, Nano, or Diecimila with Windows7, Vista, or XP:
When you connect the board, Windows should initiate the driver installation process (if you haven't used the computer
with an Arduino board before).
On Windows Vista, the driver should be automatically downloaded and installed. (Really, it works!)
On Windows XP, the Add New Hardware wizard will open:
When asked Can Windows connect to Windows Update to search for software? select No, not this time. Click next.
Select Install from a list or specified location (Advanced) and click next.
Make sure that Search for the best driver in these locations is checked; uncheck Search removable media; check Include
this location in the search and browse to the drivers/FTDI USB Drivers directory of the Arduino distribution. (The latest
version of the drivers can be found on the FTDI website.) Click next.
The wizard will search for the driver and then tell you that a "USB Serial Converter" was found. Click finish.
The new hardware wizard will appear again. Go through the same steps and select the same options and location to
search. This time, a "USB Serial Port" will be found.You can check that the drivers have been installed by opening the
Windows Device Mananger (in the Hardware tab of System control panel). Look for a "USB Serial Port" in the Ports
section; that's the Arduino board.
5 | Launch the Arduino application
Double-click the Arduino application. (Note: if the Arduino software loads in the wrong language, you can change it in
the preferences dialog. See the environment page for details.)
6 | Open the blink example
3
4. Open the LED blink example sketch: File > Examples > 1.Basics > Blink.
7 | Select your board
You'll need to select the entry in the Tools > Board menu that corresponds to your Arduino.
4
5. Selecting an Arduino Uno
For Duemilanove Arduino boards with an ATmega328 (check the text on the chip on the board), select Arduino
Duemilanove or Nano w/ ATmega328. Previously, Arduino boards came with an ATmega168; for those, select Arduino
Diecimila, Duemilanove, or Nano w/ ATmega168. (Details of the board menu entries are available on the environment
page.)
8 | Select your serial port
Select the serial device of the Arduino board from the Tools | Serial Port menu. This is likely to be COM3 or higher
(COM1and COM2 are usually reserved for hardware serial ports). To find out, you can disconnect your Arduino board
and re-open the menu; the entry that disappears should be the Arduino board. Reconnect the board and select that serial
port.
9 | Upload the program
Now, simply click the "Upload" button in the environment. Wait a few seconds - you should see the RX and TX leds on
the board flashing. If the upload is successful, the message "Done uploading." will appear in the status bar. (Note: If you
have an Arduino Mini, NG, or other board, you'll need to physically present the reset button on the board immediately
before pressing the upload button.)
A few seconds after the upload finishes, you should see the pin 13 (L) LED on the board start to blink (in orange). If it
does, congratulations! You've gotten Arduino up-and-running.
Boards
The board selection has two effects: it sets the parameters (e.g. CPU speed and baud rate) used when compiling and
uploading sketches; and sets and the file and fuse settings used by the burn bootloader command. Some of the board
definitions differ only in the latter, so even if you've been uploading successfully with a particular selection you'll want
to check it before burning the bootloader.
Arduino Uno
An ATmega328 running at 16 MHz with auto-reset, using the optiboot bootloader (115200 baud, 0.5 KB).
Arduino Duemilanove w/ ATmega328
An ATmega328 running at 16 MHz with auto-reset.
Arduino Diecimila or Duemilanove w/ ATmega168
An ATmega168 running at 16 MHz with auto-reset. Compilation and upload is equivalent to Arduino NG or older
w/ ATmega168, but the bootloader burned has a faster timeout (and blinks the pin 13 LED only once on reset).
Arduino Nano w/ ATmega328
An ATmega328 running at 16 MHz with auto-reset. Has eight analog inputs.
Arduino Nano w/ ATmega168
An ATmega168 running at 16 MHz with auto-reset. Compilation and upload is equivalent to Arduino NG or older
w/ ATmega168, but the bootloader burned has a faster timeout (and blinks the pin 13 LED only once on reset). Has
eight analog inputs.
5
6. Arduino Mega 2560 or Mega ADK
An ATmega2560 running at 16 MHz with auto-reset, using an stk500v2 bootloader.
Arduino Mega (ATmega1280)
An ATmega1280 running at 16 MHz with auto-reset.
Arduino Leonardo
An ATmega32u4 running at 16 MHz with auto-reset.
Arduino Mini w/ ATmega328
An ATmega328 running at 16 MHz with auto-reset, using the optiboot bootloader (115200 baud, 0.5 KB). Has eight
analog inputs.
Arduino Mini w/ ATmega168
Equivalent to Arduino NG or older w/ ATmega168 (i.e. an ATmega168 running at 16 MHz without auto-reset).
Arduino Ethernet
Equivalent to Arduino UNO with an Ethernet shield.
Arduino Fio
An ATmega328 running at 8 MHz with auto-reset. Equivalent to Arduino Pro or Pro Mini (3.3V, 8 MHz)
w/ ATmega328.
Arduino BT w/ ATmega328
ATmega328 running at 16 MHz The bootloader burned (4 KB) includes codes to initialize the on-board Bluetooth
module.
Arduino BT w/ ATmega168
ATmega168 running at 16 MHz The bootloader burned includes codes to initialize the on-board Bluetooth module.
LilyPad Arduino w/ ATmega328
An ATmega328 running at 8 MHz (3.3V) with auto-reset. Equivalent to Arduino Pro or Pro Mini (3.3V, 8 MHz)
w/ ATmega328.
LilyPad Arduino w/ ATmega168
An ATmega168 running at 8 MHz Compilation and upload is equivalent to the Arduino Pro or Pro Mini (8 MHz)
w/ ATmega168. The bootloader burned, however, has a slower timeout (and blinks the pin 13 LED three times on reset)
because the original versions of the LilyPad didn't support auto-reset. They also didn't include an external clock, so the
burn bootloader command configures the fuses of ATmega168 for an internal 8 MHz clock.
6
7. If you have a recent version of the LilyPad, (w/ a 6-pin programming header), you'll want to select Arduino Pro or Pro
Mini (8MHz) w/ ATmega168 before burning the bootloader.
Arduino Pro or Pro Mini (5V, 16 MHz) w/ ATmega328
An ATmega328 running at 16 MHz with auto-reset. Equivalent to Arduino Duemilanove or Nano w/ ATmega328.
Arduino Pro or Pro Mini (5V, 16 MHz) w/ ATmega168
An ATmega168 running at 16 MHz with auto-reset. Equivalent to Arduino Diecimila, Duemilanove, or Nano
w/ ATmega168.
Arduino Pro or Pro Mini (3.3V, 8 MHz) w/ ATmega328
An ATmega328 running at 8 MHz (3.3V) with auto-reset. Equivalent to LilyPad Arduino w/ ATmega328.
Arduino Pro or Pro Mini (3.3V, 8 MHz) w/ ATmega168
An ATmega168 running at 8 MHz (3.3V) with auto-reset.
Arduino NG or older w/ ATmega168
An ATmega168 running at 16 MHz without auto-reset. Compilation and upload is equivalent to Arduino Diecimila or
Duemilanove w/ ATmega168, but the bootloader burned has a slower timeout (and blinks the pin 13 LED three times
on reset).
Arduino NG or older w/ ATmega8
An ATmega8 running at 16 MHz without auto-reset.
ECG-EMG Arduino Shield (Bio-feedback Sensor)
This is ECG/EMG shield which allow Arduino like boards to capture both Electrocardiography and
Electromyography signals. The shield opens new possibilities to experiment with bio feedback.
When used as ECG (Electrocardiograph) you can monitor your heartbeat activity and regularity over period of
time as detected by electrodes attached to skin.
When used as EMG (electromyography ) you can monitor and evaluate the electrical activity produced by
skeletal muscles. The signals can be analyzed to detect medical abnormalities, activation level, gesture position
and biomechanics of human and animal movement.
By: Hesham Mohammed Elsherbieny
Biomedical Engineering department, Cairo University
7