PiFlash: Linux utility to flash SD cards for Raspberry Pi computers
•
1 recomendación•535 vistas

Presentation by Ian Kluft at Silicon Valley Perl (SVPerl) on Feb 7, 2019 on "PiFlash: Linux utility to flash SD cards for Raspberry Pi computers". This tool is for use on Linux systems in place of manual procedures to write SD cards to boot a Raspberry Pi board. Safety features for newcomers include checking the destination device and refusing to erase any device that isn't an SD card. Handy automation for experience users includes automatically extracting the OS image from a tar/zip archive and uncompressing it to the SD card in one step.

Recomendados
Recomendados
Más contenido relacionado
La actualidad más candente
La actualidad más candente (20)
Similar a PiFlash: Linux utility to flash SD cards for Raspberry Pi computers
Similar a PiFlash: Linux utility to flash SD cards for Raspberry Pi computers (20)
Más de Ian Kluft
Más de Ian Kluft (13)
Último
Último (20)
PiFlash: Linux utility to flash SD cards for Raspberry Pi computers
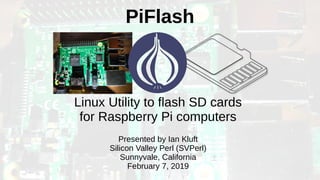
- 1. PiFlash Linux Utility to flash SD cards for Raspberry Pi computers Presented by Ian Kluft Silicon Valley Perl (SVPerl) Sunnyvale, California February 7, 2019
- 2. What is PiFlash? ● Linux utility to write SD cards for Raspberry Pi ● I originally wrote piflash in Dec 2016 for myself ● Presented to SVPerl in Feb 2017 ● Part of OpenSource.com article in Mar 2017 ● Source code on GitHub – github.com/ikluft/piflash ● Installable as Perl module from CPAN – metacpan.org/pod/PiFlash ● This is an update on PiFlash
- 3. The main ideas behind PiFlash ● For new users – Safety: it will make sure it’s only writing to an SD card – Prevents accidental erasure of disks you wanted to keep ● For experts – Automatically detects input file format to unpack/decompress image from zip, tar, gz, xz files – More automation coming with plugin support
- 4. What does PiFlash mean? ● SD (“secure digital” standard) cards are non-volatile meaning they don’t lose their content when powered down ● The chip technology is called “flash memory” ● Writing to a flash memory is shortened to “flashing” it ● PiFlash writes a bootable OS (usually Linux) for a Raspberry Pi to an SD card
- 5. What is a Raspberry Pi? ● Credit card sized single board computer ● Intended for education – Inexpensive so kids can learn programming more easily ● Popular among do-it-yourself project builders, or “Makers” ● ARM processor, 64-bit ARMv8 in current Raspberry Pi 3
- 6. History of the Raspberry Pi ● Started by UK CompSci professor Eben Upton ● College freshman didn’t have experience playing with computers ● Needed an inexpensive computer for kids to learn ● Raspberry Pi released 2012 ● Low cost: US$25 without Ethernet, $35 with net ● Original expected demand was 10,000 units total ● 10 millionth shipped in 2016 ● Developed by non-profit Raspberry Pi Foundation ● Licensed to manufacturers
- 7. Popularity soars with Maker Community ● A “Maker” is generally anyone who builds things ● Anyone can be a Maker – you too ● Raspberry Pi instantly became wildly popular with Makers as a cheap embedded computer ● Best when you need the power of Linux – It may be overkill when simpler electronics will work ● Hardware video acceleration made it good for displaying video on HDMI ● GPIO (general purpose I/O) pins can be optionally used for electronics interfacing ● Networking makes RasPi devices able to remote sense or control ● For analog/digital electronic projects, Arduino is popular competing project board
- 8. Based on ARM processor ● This is different if you’re used to Intel x86 computers ● ARM is a “microcontroller” aimed at low-power devices ● Most phones & embedded computers use ARM today ● Raspberry Pi originally used 32-bit ARM6 – limited OS support mostly Debian Linux, OpenElec ● RasPi 2 & 3 are 64-bit ARM8 – wider OS support: more Linux distros, FreeBSD, Win10 IoT ● binaries must be compiled for ARM – can’t use x86 binaries – Debian Linux → Raspbian – Ubuntu & Fedora: ARM spins – FreeBSD → RaspBSD – Windows 10 → Win10 IoT
- 9. Raspberry Pi Models Model: RasPi 1 RasPi 1+ RasPi 2 RasPi Zero RasPi 3 RasPi ZeroW Raspi 3+ Introduced 2012 2014 2015 2015 2016 2017 2018 Availability discontinued current model Processor ARM6 32bit ARM6 32bit ARM8* 64bit ARM6 32bit ARM8 64bit ARM6 32bit ARM8 64bit CPU speed 700MHz 700MHz 900MHz 1GHz 1.2GHz 1GHz 1.4GHz memory 256MB 512MB 1GB 512MB 1GB 1GB 1GB USB2 ports 1 on A 2 on B 4 4 1 4 1 4 Flash boot SD MicroSDHC * RasPi 2 before v1.2 was 64bit ARM7 CPU, upgraded to ARM8 same as RasPi 3
- 10. Downloadable System Boot Images ● NOOBS – “New Out of the Box System” by Raspberry Pi Foundation – For beginners, contains multiple OS images that it can install for you – Bigger image because it includes lots of OS’s ● Raspbian – Debian Linux for Raspberry Pi – Official RasPi reference system – Works on all RasPi models ● Ubuntu & Fedora – Both support RasPi 2 & 3 on ARM versions ● RaspBSD – FreeBSD configured for RasPi 2 & 3 ● Kodi, OSMC & LibreElec – Entertainment system distros based on Linux kernel – Work on all RasPi models – Beware untrusted plugins: recent malware problems ● Microsoft Windows 10 IoT Core – RasPi 3 only – Not free - requires software license
- 11. Types of Projects ● Desktop – Conventional computer ● RasPi 3 powerful enough for low-end desktop replacement – USB keyboard & mouse ● Or TV remote for entertainment – HDMI monitor ● Composite video available, not common – Network – Ethernet or WiFi ● WiFi built in on RasPi 3 ● USB WiFi common on others ● Headless – No keyboard, mouse or monitor – Software developed on desktop – Network common but optional – “Internet of Things” (IoT) device – Applications: ● Sensing/measurement/control ● Robots ● Drone autopilot (requires FAA registration) ● Docker container platform ● Security camera with facial recognition ● Etc
- 12. How to set up a Raspberry Pi ● Download OS from raspberrypi.org/downloads/ ● Flash SD card with boot system image – More on that coming up ● Connect cables, monitor & network ● Apply power via microUSB power input – 1A for RasPi 1, 2A for RasPi 2, 2.4A for RasPi 3 – Maybe more for your specific project needs – Mysterious malfunctions may result from insufficient power ● Boot and configure whatever system it is Docs from raspberrypi.org
- 13. Flashing an SD card for Raspberry Pi ● Raspberry Pi needs SD card to boot – RasPi 1 uses bigger SD card – All others use smaller MicroSD – RasPi 3 also has USB & network boot procedures ● not for beginners ● 8GB SD card minimum recommended – Cheapest SD cards are currently 16-32GB ● Get the right boot image for your system – If you have a RasPi 1/1+/Zero/ZeroW, there’s usually a separate image for ARM6 ● RaspberryPi.org has SD flash tools for Windows & Mac – Instructions for Windows – Instructions for MacOS ● Linux instructions provide no tools – Biggest point is to identify the correct device – You don’t want to accidentally erase another disk on your system – You can use PiFlash for Linux ● In all cases… – Flashing gigabytes of data will require at least some minutes of wait, maybe many – Be patient once you start – Let it finish
- 14. Installing PiFlash ● From CPAN – Follow instructions for local Perl modules if needed – “cpan PiFlash” ● Also on GitHub – Download or git-clone from github.com/ikluft/piflash – “dzil install” ● Requires Dist::Zilla to build from Git source
- 15. PiFlash usage ● PiFlash is a command-line utility usage: piflash [--verbose] [--resize] input-file output-device piflash [--verbose] --SDsearch piflash --version
- 16. PiFlash usage: --version ● Prints the current version $ piflash --version 0.1.0
- 17. PiFlash usage: --SDsearch ● Search available block devices for SD cards ● Any devices listed are the only ones PiFlash will write to – Avoids destroying a disk you wanted to keep! ● Example shows USB and PCI based drivers: $ piflash --sdsearch SD cards found: /dev/sdb /dev/mmcblk0
- 18. PiFlash usage: writing to an SD ● Simplest form is input file and output device $ piflash --resize 2018-11-13-raspbian-stretch-lite.zip /dev/sdb requested to flash 2018-11-13-raspbian-stretch-lite.zip to /dev/sdb output device /dev/sdb will be erased [sudo] password for user: verify sudo access flashing 2018-11-13-raspbian-stretch-lite.zip / 2018-11-13-raspbian-stretch-lite.img -> /dev/sdb … done - it is safe to remove the SD card
- 19. PiFlash usage: --resize ● Add –resize to command line to resize the root filesystem to fill the entire SD card ● Only works with boot images that have a Linux ext2/3/4 root filesystem – Not always necessary – some OS’s will do this on first boot – Works for Raspbian, Ubuntu, Fedora – Doesn’t work on NOOBS, RaspBSD, Kodi, RISCOS, Windows
- 20. Internals of PiFlash ● You don’t need to know this to use PiFlash – But we at SVPerl want to hear about Perl ● Lowest-level “State” class stores all parameters from – Command line – Operating system configuration – Input file – Output device – It’s all the info needed for support requests – --verbose parameter dumps the State ● Contains a fork/exec wrapper to capture status or output of commands it launches – Eliminating qx() made perlcritic happy at the -4 level ● Maintains list of command locations rather than use $PATH – just being careful since it needs root privs ● “lsblk” command inspects output device so we can tell if it’s an SD card – Differences tested on PCI and USB SD readers – That’s expected to cover most cases – If a device isn’t detected, I’d like to see the verbose output so I can add it ● Main() is exception-catching wrapper
- 21. Modules in PiFlash package ● PiFlash.pm – main(), package version ● Command.pm – command launching wrapper and logging ● Hook.pm – callback hooks ● Inspector.pm – collects data on system, input file and output device ● MediaWriter.pm – flashes the SD card from input file ● State.pm – middleware data storage layer
- 22. Features in development ● These are chances for you to get involved if anything sounds interesting ● Plugin modules via Module::Pluggable – Any module named under PiFlash::Plugin hierarchy can be enabled from command line with –plugin – i.e. PiFlash::Plugin::ModuleName
- 23. Features in development: Hooks ● Callback hooks via PiFlash::Hook ● Code including plugins can register callbacks – At start – After installation – With mounted boot/root filesystem for system customization
- 24. Possible customizations via plugins ● These can be done before 1st boot by mounting boot and root filesystems and running callback hooks to modify them ● System configuration – Kernel driver command line settings – CPU overclocking – Camera – Audio/Video – Network: wired and/or wireless ● Security – Change user name/password – Set SSH key and authorized remote keys
- 25. Caveats for customization ● Raspberry Pi runs ARM binaries – 32 bit ARMv6 for Pi 1, 1B, Zero & Zero W – 64 bit ARMv8 for Pi 2, 3 & 3+ ● Installation of software packages are probably not the same as the system running PiFlash – X86 binaries won’t work on RasPi – Similar to all embedded systems development
- 26. Any questions?