Configuration In Tally .ERP 9
•Descargar como PPTX, PDF•
18 recomendaciones•161,725 vistas

Few Guideline Provided to student for Better learning In Tally .ERP 9

Recomendados
Más contenido relacionado
La actualidad más candente
La actualidad más candente (20)
Similar a Configuration In Tally .ERP 9
Similar a Configuration In Tally .ERP 9 (20)
Último
Último (20)
Configuration In Tally .ERP 9
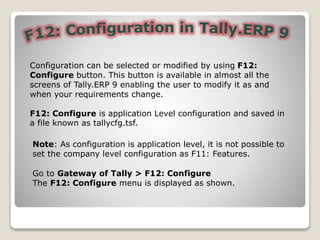
- 1. Configuration can be selected or modified by using F12: Configure button. This button is available in almost all the screens of Tally.ERP 9 enabling the user to modify it as and when your requirements change. F12: Configure is application Level configuration and saved in a file known as tallycfg.tsf. Go to Gateway of Tally > F12: Configure The F12: Configure menu is displayed as shown. Note: As configuration is application level, it is not possible to set the company level configuration as F11: Features.
- 2. The menu consists of the following options. •General •Numeric Symbols •Accts / Inventory Info. •Voucher Entry •Invoice / Orders Entry •Payroll Configuration •Printing •E-Mailing •Data Configuration •Message Centre •Product & Features •Advanced Configuration •Licensing
- 3. You can configure Country Details, Style of Names, Style of Dates, Configuration of Numbers in the General configuration screen. Go to Gateway of Tally > F12: Configuration Menu > General
- 5. Voucher Configuration (F12)in Tally 9.0 Go to Gateway of Tally > F12: Configure > Voucher Entry By default, the above configuration options are displayed in the Voucher Entry configuration screen, which can be changed as per requirements. Note: Depending upon the Company Features, options get added in Voucher Entry configuration. For instance, if you enable Allow Multi Currency option in F11 : Accounting Features, Show Forex Gain/Loss as on Voucher Date option gets added in voucher entry configuration. Accounting Vouchers Skip Date field in Creation Mode (faster entry!) By default, the Cursor skips the Date field during Voucher creation. If you do not want to skip the date field then set thi option to No. Use Single Entry Mode for Pymt/Rcpt/Contra By default, Tally.ERP 9 displays single entry mode for payment/receipt/contra entry. I you want to display it in double entry mode, then set this option to No. Show Table of Bill details for selection By default, Tally.ERP 9 displays Pending Bills list of a ledger account in the voucher entry screen. If you set it to No, the pending bills list will not be displayed.
- 6. Use Payment / Receipt as contra By enabling this option, you can enter contra in payment as well as receipt voucher. Use Cr/Dr instead of To/By during Entry By enabling this option, you can change To/By to Cr/Dr in the Voucher Entry screen. Warn on Negative Cash Balance By Default, Tally.ERP 9 displays a Negative Cash balance warning Message. If you set it to No, this error message will not be displayed. Pre-Allocate Bills for Payment/Receipt By enabling this option, you can pre-allocate the bills before specifying the Ledger amount. Allow Cash Accounts in Journal By enabling this option, you can select cash and also bank account in Journal. Allow Expenses / Fixed Assets in Purchase Voucher By enabling this option, you can select the expenses and also Fixed Asset ledger in Purchase Voucher Entry. Allow income accounts in Sales Voucher By enabling this option, you can select the income ledger in sales voucher entry. Show inventory Details By default, Tally.ERP 9 displays inventory details in the voucher entry screen. If you set it to No, the inventory details will not be displayed.
- 7. Show Bill-wise Details By default, Bill-wise details of a ledger account are displayed in the Voucher entry screen. If you set it to No, Bill wise details will not be displayed. Expand into Multiple Lines This is a sub-option of the Show bill-wise Details option. When you enter credit days in the Bill-wise Details screen, Tally.ERP 9 displays the due date below the credit days. By default, it displays both credit days and Due date in the voucher entry screen. If you set it to No, it will display only credit days. Show ledger current balance By default, Tally.ERP 9 displays the ledger current balance up to last voucher entry date. If you set it to No, the ledger current balance will not be displayed. Show balance as on voucher date By default, Tally.ERP 9 displays the ledger current balance up to Last voucher entry date. If you set it to Yes, it will display the ledger balance up to current voucher entry date.
- 8. Inventory Vouchers Use Reference number in Stock Journal By enabling this option, you can add the voucher reference field in stock journal also. Warn on Negative stock balance By default, Tally.ERP 9 displays a warning message for negative stock balance. If you set it to No, the error message will not be displayed. Honor Expiry Dates usage for Batches By default, Tally.ERP 9 displays expiry batches in the List of Active batches during Voucher Entry. If you set it to No, expiry batches will not be displayed in the List of Active batches. Show Balances as on Voucher Date By default, Tally.ERP 9 displays the Stock Item balance up to the Last voucher entry date. If you set it to Yes, it will display the Stock Item balance up to current voucher entry date. Show Godown-wise Details This option is used only in the case of Rejection in and Rejection out vouchers. By default, Tally.ERP 9 displays the Godown details in Rejection in/out vouchers. If you set it to No, the godown details will not be displayed in Rejection in/out vouchers. Show Batch-Wise Details This option is used to display batch information pertaining to Stock Items during Voucher Entry. If you set it to No, the Batch-Wise details will not be displayed.
- 9. Use Accounting Terminology of: This option displays the List of Countries. For setting the accounting terminology, select India/SAARC or International from the List of countries. Style of Names Default appearance of Names in Reports: This option displays the List of Name Styles for Ledgers. By default, the name style of a Ledger is Name Only. You can change the name style by selecting from the List. Default appearance of Stock item Names in Reports: This option displays Name style for stock items. By default, the stock item name style is Name Only. You can change name style by selecting from the List. Style of Dates Style of Short Date: This option displays Style of Dates. By default, date format is dd-mm-yy. You can change the date format by selecting a format from the List. Separate Used in Short Date: You can specify the separator for Date. By Default, hyphen (‘-‘) is the separator. Configuration of Numbers Decimal character to use: You can specify a character for the decimal point.
- 10. Thousands separator to use: You can specify a character for the thousand separator. Put sign before currency or unit symbol: If the option is set it to Yes, a Negative sign will be placed before the currency symbol, e.g. (-)$20. If the option is set it to No, a Negative sign will be placed after the currency symbol, e.g. $(-)20. Show numbers in Millions (and not Lakhs): This option is used for showing numbers in Millions. If you set this option to Yes, the number will be displayed in Millions. If you set this option to No, the number will be displayed in Lakhs. Note: If you change any configuration under Style of Dates and Configuration of numbers, you need to restart the application for those changes to take effect. Table Configuration Use Common Table for Stock Items If this option is set to Yes, Tally.ERP 9 will display only the Stock Item Name in the List of Stock Items during voucher entry. Use 'Reducing List' for Tables If this option is set to Yes, Tally.ERP 9 allows you to reduce the List for Tables to the extent of the matching keywords entered by user and select the required details from the reduced List of Tables based on the full or partial search keywords provided like Company name, Ledger name, Item name etc.
- 11. Apply for All Columns If this option is set to Yes, Tally.ERP 9 allows you to make search and reduce the List of Tables based on all columns displayed in the List of Table. If the option is set it to No, it will search only in the first column of the table. Note: The option Apply for all Columns is a sub- option and is displayed only when the option Use ‘Reducing List’ for Tables is enabled.
- 12. • Table Configuration screen can also be invoked by pressing Ctrl + Alt + F12 from Gateway of Tally • Show tables with Masters only in Current Language • If this option is set to Yes, Tally.ERP 9 displays all the Masters in the language selected under L: Language configuration. • If this option is set to No, Tally.ERP 9 will display the default list of Masters in English and in any of the Indian languages selected in the L: Language configuration.
- 13. By default, this option set to No. Import/Export Options Ignore errors & continue during data import By default, this option is set to No. If you set this option to Yes , data will get imported even if errors are reported. Note: This is applicable only incase of XML format import. Overwrite vouchers during import By default, this option is set to No. If you set this option to Yes , Tally.ERP 9 overwrite the existing vouchers while importing data instead of duplicating the same. Export Base Currency Symbol along with Amount This facilitates the export of the currency symbol along with the amount into XML format. Other Options Show Monthly reports with Graphs By default this option is set to Yes. The reports are configured to display the Graphs in accordance with the numeric information. The graphs will not be displayed in the reports if this option is set to No.
- 14. Use separate Menu for Final A/c Statements By default, this option is set to No. If you set this option to Yes, a separate Menu Final Accounts will be displayed in Gateway of Tally. Under this menu, Balance Sheet, Profit & Loss A/c, Cash Flow, Funds Flow and Ratio analysis options are available. Tally alert using beeps If this option is set to Yes, an audio alert will be turned on and Tally.ERP 9 will gives a beep sound whenever a transaction has been saved or abandoned. Always show Info Panel If this option is set to Yes, Tally.ERP 9 will always display the Information Panel in all the screens or reports, but the user can hide the Info Panel using the [x] close button based on his requirement.
- 15. Numeric Symbols This enables you to set the number styles. The default styles and symbols are specified. However, you have the option of changing them in the respective fields according to your preference. For example, change negative sign from (-) to (+). Go to Gateway of Tally > F12: Configure > Numeric Symbols
- 17. Here you can configure the details you want in the masters over and above those provided by fault. You can access the F12: Configure screen from Accounts Masters and Inventory Masters when required. The fields pertaining to both Accounting and Inventory Info. can be configured here. Go to Gateway of Tally > F12: Configure > Accts/Inventory Info.
- 18. • Master Configuration Allow Aliases along with Names :- Set this option to Yes to enter the Alias names in the Master. Allow Language Aliases along with Names :- Set this option to Yes to enter the Alias names in any of the Indic Languages in the Master. • Accounts Masters Allow Advanced Entries in Masters :- Set this option to Yes, to enter some of the advanced information in the Ledger and Group Master. This information will be reflected in the reports. • Use Addresses for Ledger Accounts Set this option to Yes to enter the Mailing Details in the ledger master. It is useful for a Customer ledger, a Part ledgers or Bank Accounts. Mailing Details like Name, Address, State, PIN Code and PAN / Income Tax No. is entered in this section. NOTE:- These details will appear in the printed reports.
- 19. Use Contact Details for Ledger Accounts Set this option to Yes to specify the details of Contact person (if any) in the ledger creation screen. You can specify the details like the Name of the Contact Person, Telephone Number, Fax Number and the E-Mail Id. Add Notes to Ledger Accounts Set this option to Yes and a new field to enter Notes appears in the Ledger master. This field allows you to enter any additional information about the ledger. ◦ Note: The Contact Details for the ledgers appear only if Use Addresses for Ledger Accounts is set to Yes. Inventory Masters Allow Advanced entries in Masters:- Set this option to Yes to specify the behaviour of the Stock Item, in the Stock Item Master. For further details, please refer the section Stock Items.
- 20. • Use Remarks for Stock Items Set this option to Yes to enter your remarks or comments about the stock Item. • Use Part Numbers for Stock Items Set this option to Yes, to enter the Part Numbers of the Stock Item. • Use Description for Stock Items Set this option to Yes to enter any Description of the Stock Item in the Stock Item Master. Use Alternate Units for Stock Items Set this option to Yes to define an Alternate Unit for the Stock Item. • Allow Std. Rates for Stock Items Set this option to Yes, to specify the Standard Purchase Cost and Standard Sales Price of the Stock Item.
- 21. • Specify Default Ledger Allocation for Invoicing Set this option to Yes, to Set or Modify Default Ledgers for Invoicing for the Stock Item. This allows you to allocate default Sales/Purchase Ledgers which will be credited when a Stock Item is invoiced. • Use Addresses for Godowns Set this option to Yes, to enter the godown address in the Godown Master. • Allow Component list details (Bill of Materials) Set this option to Yes, to define the Components (BOM) for the Stock Item. For further details, refer to the section Bill of Material.
- 22. s option allows you to configure the vouchers entries in Tally.ERP 9, both the Accounting and Inventory Vouchers can be configured from this menu for additional information. Go to Gateway of Tally > F12: Configure > Voucher Entry
- 24. Accounting Vouchers Skip Date field in Creation Mode (faster entry!) By default, the Cursor skips the Date field during Voucher creation. If you do not want to skip the date field then set this option to No. Use Single Entry Mode for Pymt/Rcpt/Contra By default, Tally.ERP 9 displays single entry mode for payment/receipt/contra entry. If you want to display it in double entry mode, then set this option to No. Use Payment / Receipt as contra By enabling this option, you can enter contra in payment as well as receipt voucher. Use Cr/Dr instead of To/By during Entry By enabling this option, you can change To/By to Cr/Dr in the Voucher Entry screen. Use Cheque Printing for Contra By enabling this option, you can print the Cheques from Contra Voucher itself while making the inter bank transfers and Cash withdrawals. The Cheque printing option will appear the for the Bank which is Credited. Warn on Negative Cash Balance By Default, Tally.ERP 9 displays a Negative Cash balance warning Message. If you set it to No, this error message will not be displayed.
- 25. Pre-Allocate Bills for Payment/Receipt By enabling this option, you can pre-allocate the bills before specifying the Ledger amount. Allow Cash Accounts in Journal By enabling this option, you can select cash and also bank account in Journal. Allow Expenses / Fixed Assets in Purchase Voucher By enabling this option, you can select the expenses and also Fixed Asset ledger in Purchase Voucher Entry. Allow income accounts in Sales Voucher By enabling this option, you can select the income ledger in sales voucher entry. Show inventory Details By default, Tally.ERP 9 displays inventory details in the voucher entry screen. If you set it to No, the inventory details will not be displayed. Show Table of Bill details for selection By default, Tally.ERP 9 displays Pending Bills list of a ledger account in the voucher entry screen. If you set it to No, the pending bills list will not be displayed. Show Bill-wise Details By default, Bill-wise details of a ledger account are displayed in the Voucher entry screen. If you set it to No, Bill wise details will not be displayed.
- 26. Expand into Multiple Lines This is a sub-option of the Show bill-wise Details option. When you enter credit days in the Bill-wise Details screen, Tally.ERP 9 displays the due date below the credit days. By default, it displays both credit days and Due date in the voucher entry screen. If you set it to No, it will display only credit days. Show ledger current balance By default, Tally.ERP 9 displays the ledger current balance up to last voucher entry date. If you set it to No, the ledger current balance will not be displayed. Show balance as on voucher date By default, Tally.ERP 9 displays the ledger current balance up to Last voucher entry date. If you set it to Yes, it will display the ledger balance up to current voucher entry date. Show Forex Gain/Loss as on voucher Date By default, Tally.ERP 9 displays the Forex Gain/Loss balance up to the Last voucher entry date. If you set it to Yes, it will display the Forex Gain/Loss balance up to current voucher entry date. Inventory Vouchers Use Reference number in Stock Journal By enabling this option, you can add the voucher reference field in stock journal also. Show Compound Unit of Item based on Rate By enabling this option, you will be allowed to show the compound unit of item based on the unit provided in the Rate Per column. Example: Compound Unit created as Kgs of 1000 grms. When the Quantity is typed as 12-250, the Quantity will be displayed as 12-250 kgs and unit in Rate per as Kgs. Enable the option Show Compound Unit of Itembased on Rate, and type the required Unit in Rate Per column to change the compound unit of the Item, i.e., if grms is typed in Rate Per column, the Quantity will automatically change to 12,250 grms.
- 27. Show Full Details of Compound Unit Enabling this option will display full details of compound unit in the Quantity field. If Kgs is typed in Rate Per field, the Quantity field will display as 12 Kgs.250 grms. Warn on Negative stock balance By default, Tally.ERP 9 displays a warning message for negative stock balance. If you set it to No, the error message will not be displayed. Honor Expiry Dates usage for Batches By default, Tally.ERP 9 displays expiry batches in the List of Active batches during Voucher Entry. If you set it to No, expiry batches will not be displayed in the List of Active batches. Show Balances as on Voucher Date By default, Tally.ERP 9 displays the Stock Item balance up to the Last voucher entry date. If you set it to Yes, it will display the Stock Item balance up to current voucher entry date. Show Godown-wise Details This option is used only in the case of Rejection in and Rejection out vouchers. By default, Tally.ERP 9 displays the Godown details in Rejection in/out vouchers. If you set it to No, the godown details will not be displayed in Rejection in/out vouchers. Show Batch-Wise Details This option is used to display batch information pertaining to Stock Items during Voucher Entry. If you set it to No, the Batch-Wise details will not be displayed.
- 28. Invoice / Orders Entry
- 29. General Options Accept Supplementary Details By default, this option is set to YES. Tally.ERP 9 displays an additional screen to feed in the delivery note details, order details, Terms of payment, party address details, etc., after selecting the required Party ledger account. Print Default Name & Address of Party By default, Print Default Name & Address of Party is not visible in the Invoice Entry configuration Screen. This option is available only if Accept Supplementary Details in F12 Configure is set to No. On setting this option to Yes, Tally.ERP 9 Prints the Party Ledger’s Mailing Name and address details given in the Ledger master – in the Invoice. On setting this option to No – the invoice printout will display only the Party Ledger’s Name without address details. Allow separate Buyer and Consignee Names By default, this option is set to No. If set to Yes – Tally.ERP 9 provides an option to enter consignee Name and address in the Supplementary details screen. Allow modification of ALL fields during entry Default order/delivery note entries appearing in the invoice can be changed during invoice entry. Set this to Yes to permit modification of all fields. Use Common Ledger A/c for Item Allocation By default, this option is set to Yes. This automates the updation process of the Sales and Purchase accounts for all the items selected in the invoice. In case this option is Set to No – Tally.ERP 9 prompts for sales or purchase accounting allocations after every item.
- 30. Use Defaults for Bill Allocations By default, this option is set to Yes. In this case, Tally.ERP 9 automatically takes the invoice number as the bill reference name and the credit period given in the Party ledger master as the credit period – both as part of the bill-wise details. This enables faster data entry. Note: In a purchase invoice, Tally.ERP 9 automatically takes the invoice reference number as Bill reference. If invoice reference number is empty then it will take invoice number as Bill reference. However, if this option is set to No – Tally.ERP 9 prompts the user for bill-wise details at the end of the entry. Use Additional Description(s) for Item name By default, this option is set to No. If it is set to Yes – Tally.ERP 9 automatically allows you to specify description for each item selected in the invoice. Use Additional Descriptions(s) for Ledger name By default, this option is set to No. If it is set to Yes – Tally.ERP 9 automatically allows you to specify the description for each Ledger selected in the Accounting invoice entries. Note: This options are provided to specify any additional description for sales ledger selected in the Accounting Invoice mode not in the Item invoice mode. Consolidate Stock Items with same rates By default, this option is set to No. If you want to consolidate the stock items having same rates in Invoice/Challans, set this option to Yes.
- 31. Exporter’s Options Specify Export Shipping Details By default, this option is set to No. If set to Yes, Tally.ERP 9 provides an option to enter export details for the invoice in the Supplementary details screen. You can enter the following details: Place of Receipt Vessel / Flight No. (the transport used to send the goods) Port of Loading (from where the goods are despatched) Port of Discharge (where the goods will be finally offloaded) Country To (to which country the goods are being sent) Specify Marks & Nos. / Container No. By default, this option is set to No. If set to Yes – Tally.ERP 9 allows you to specify Marks details for every item selected in the invoice.