Obat Penggugur Kandungan Di Apotik Kimia Farma (087776558899)
Gionee P5 Mini Manual / User Guide
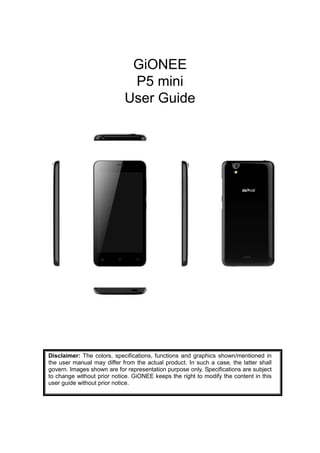
1. GiONEE
P5 mini
User Guide
Disclaimer: The colors, specifications, functions and graphics shown/mentioned in
the user manual may differ from the actual product. In such a case, the latter shall
govern. Images shown are for representation purpose only. Specifications are subject
to change without prior notice. GiONEE keeps the right to modify the content in this
user guide without prior notice.
2. 1. For your safety ...............................................................................................................1
2. Learn about the phone ..................................................................................................2
Overview .........................................................................................................................2
Function Keys ................................................................................................................2
3. Before using ...................................................................................................................2
Insert Micro SIM and SD cards .....................................................................................3
Charge the Battery.........................................................................................................3
4. Getting started................................................................................................................4
Basic Function ...............................................................................................................4
Home screen...................................................................................................................4
Touch screen ..................................................................................................................6
5. Communication..............................................................................................................7
Make a call ......................................................................................................................7
Ongoing call....................................................................................................................7
Incoming call ..................................................................................................................8
Send a Message .............................................................................................................8
6. Multimedia.......................................................................................................................9
Camera ............................................................................................................................9
Gallery ...........................................................................................................................10
Music .............................................................................................................................10
7. Connection....................................................................................................................11
Airplane mode ..............................................................................................................11
Mobile Networks...........................................................................................................11
WLAN.............................................................................................................................12
Bluetooth.......................................................................................................................12
USB................................................................................................................................12
8. Advanced Features......................................................................................................13
Super screenshot.........................................................................................................13
Extreme mode ..............................................................................................................15
Chameleon....................................................................................................................15
Face Unlock ..................................................................................................................16
Mobile Security.............................................................................................................17
AmiClone.......................................................................................................................17
Child Mode....................................................................................................................18
9. Operation ......................................................................................................................19
Smart gestures.............................................................................................................19
10.Health and safety........................................................................................................20
SAR Compliance ..........................................................................................................20
SAR Recommendations ..............................................................................................21
E-Waste .........................................................................................................................21
Operating Temperature................................................................................................22
11. FAQ .............................................................................................................................22
3. 1
1. For your safety
Please read this manual before using the cell phone to ensure safe and proper use.
SWITCH OFF IN HOSPITALS
Please abide by relevant provisions or regulations. Please turn off your mobile phone near medical
equipment.
SWITCH OFF WHEN REFUELING
Don’t use the phone at a refueling point. Don’t use near fuel or chemicals.
MICRO SIM CARDS AND SD CARD ARE PORTABLE
Keep your phone, phone parts and accessories out of children’s reach.
BATTERY
Please do not destroy or damage the battery, it can be dangerous and cause fire.
Please do not throw battery in fire to avoid hazard.
When battery cannot be used, please dispose in safe environment.
Do not try to dismantle the battery.
If the battery or the charger is broken or old, please stop using them, and replace with certified genuine
battery
USE QUALITY EQUIPMENT
Use authorized equipment to avoid danger
ROAD SAFETY COMES FIRST
Give full attention while driving, Park before using your phone. Please follow traffic rules of local city
town.
INTERFERENCE
All wireless devices may be susceptible to cause interference, which could affect performance.
SWITCH OFF IN AIRCRAFT
Wireless devices can cause interference in aircraft. It’s not only dangerous but also illegal to use mobile
phone in an aircraft.
4. 2
2. Learn about the phone
Overview
Function Keys
Keys Icon Function
Power key
a) Press to turn on/off the screen.
b) Press and Hold to power off the phone or reboot.
Volume key Press to adjust the volume of device.
Recent task key
Tap to open the list of recently used apps.
Shake the phone to clean all of recently used apps.
Home key
Tap to return to Home screen.
Long press to access Google™ search.
Back key Tap to return to the previous screen.
3. Before using
The phone is a Dual SIM mobile that allows you to use two mobile networks.
5. 3
Insert Micro SIM and SD cards
1. Switch off the mobile phone. Then remove the cover as shown in the figure.
Note: Please start from the bottom left while removing the cover, and flip it up at the
bottom.
2. Remove the battery and insert the Micro SIM and SD cards to the card slots correctly.
① ②
3. Put back the battery and cover.
Note:
Micro SIM card and SD card don’t support hot plugging.
Do not remove the cards while the device is transferring data. Doing so may cause
data to be lost or damage to the cards and device.
The Micro SIM card and SD card are small parts. Please keep away from Children to
avoid swallowing the card by accident.
Do not touch the metal surface of Micro SIM and SD cards and keep them away from
electromagnetic field to avoid damaged data.
Charge the Battery
Charge the battery before using it. Connect the USB cable to the USB power adaptor, and
then plug the end of the USB cable into the USB Port.
6. 4
4. Getting started
Basic Function
Turn on the phone
Press and hold the power key for a while to turn on the phone.
Turn off the phone
Long press the power key until a menu shows. Choose “Power off’’ to turn off the
phone.
Restart the phone
Long press the power key until a menu shows. Choose “Reboot’’ to restart the phone.
Lock the screen
Option 1: Press the power key to turn off the screen and lock it
Option 2: In the Home screen, double tap the screen to lock it.
Option 3: The screen will auto lock if you don't use the phone for a while.
Unlock the screen
Press the power key, and then slide to top for unlocking.
Home screen
The Home screen is your starting point to access all the features on your phone. It
displays application icons, widgets, and other features. You can customize the Home
screen with different wallpaper and display the items you want.
7. 5
Status Bar
At the top of the screen, it displays the time, signal, battery information, and icons for
notifications that you’ve received.
Notification Center
Swipe down from the top edge to see more detail of the new notification, such as
messaging, missed call, Wi-Fi network available. Tap the notification and drag to left
or right to delete it.
Control Center
Swipe up from the bottom edge. In the control center, it’s a quick access to Torch,
Fake call, Calculator, and Camera. You can also adjust the brightness and turn on /
off Airplane mode, Wi-Fi, Data connection, Bluetooth, Location, Rotate screen,
Vibrate, Sound, Extreme mode, and Super screenshots.
8. 6
Desktop Menu
Slide to top on the touch screen to open the desktop menu. You can change the
Launcher Theme & Wallpaper, edit desktop. It’s a quick access to Desktop Settings,
System Settings and Search.
Move an application
Touch & hold the icon you want to move. Drag the icon to move or cross at the edge
of the screen to move into another screen.
Uninstall an application
Touch & hold the icon you want to uninstall. On the top / bottom of the icon will appear
“Uninstall”. Tap it to uninstall.
Creating a folder
Drag an icon on the top of another one to create a folder. Open the folder and then
touch & hold the folder name to rename it.
Touch screen
The way to control mobile phone is using your finger on touch icons, buttons, menu items,
the onscreen keyboard, and other items on the touch screen.
Touch: To act on items on the screen, such as application and settings icons, to type
letters and symbols using the onscreen keyboard, or to press onscreen buttons, you
simply touch them with your finger.
Touch & hold: Touch & hold an item on the screen by touching it and not lifting your
finger until an action occurs.
Drag: Touch & hold an item for a moment and then, without lifting your finger, move
your finger on the screen until you reach the target position. You can drag items on the
Home screen to reposition them and you can drag to open the Notification Center.
Swipe or slide: To swipe or slide, quickly move your finger across the surface of the
screen, without pausing when you first touch (so you don’t drag an item instead). For
9. 7
example, you slide the screen up or down to scroll a list, and in the same way
Calendar views you can swipe quickly across the screen to change the range of time
visible.
Pinch: In some applications (Such as Maps and Gallery) you can zoom in and out by
placing finger and thumb on the screen at same time and pinching them out together
(to zoom out) or spreading them apart (to zoom in).
Rotate the screen: On most screens, the orientation of the screen rotates with the
phone as you turn it from upright to its side and back again. You can turn this feature
on and off.
5. Communication
Make a call
Touch the phone icon on the Home screen.
Enter the phone number you want to dial.
Touch the phone icon to dial the number that you entered.
Ongoing call
Touch to open contacts
Touch to make an audio call.
Touch to open advanced option.
End the current call
Get contacts information
Make a phone record
Make another call
Mute the line
Number keyboard
Take a note
Speaker
Hold on the line
10. 8
Incoming call
Note:
You can make an emergency call without SIM cards if the locations are available for
the network service. But you should not rely on it for emergencies. It’s also depends
on the local mobile network operator. For more information, please contact with
operator.
Send a Message
You can use this phone to exchange text messages and multimedia messages with your
friends on their mobile phones. The messages come to and from the same contact or
phone number will be visible into a single conversation, so you can see your entire
message history with a person conveniently.
Enter text
Tap the text field to see onscreen keyboard.
Tap the keys on the keyboard to type; the characters you’ve entered appear in a strip
above the keyboard. With suggestions for the word you are typing to the right.
Use the Delete key to erase characters to the left of the cursor.
When you’re finished typing, Press Back to close the keyboard.
Drag the phone icon on
right to answer the call.
Drag the phone icon on left
to reject the call.
Drag the phone icon to down to reject the call and
send a message to caller.
Tap to enter a blank and long press to voice input
Delete
Number & symbol Keyboard
Tap to lower case.
Touch into another line
Choose an input language and keyboard mode
Emoji Keyboard
Options
Search
11. 9
6. Multimedia
Camera
Camera is a combination of camera and camcorder that you use to shoot and share
pictures and videos. Tap the image on the camera screen where should focus on. You can
also change camera setting like transfer front and rear camera, adjust the exposure on
this screen.
Take a photo
Normal Mode - Take a photo.
Face Beauty Mode - DIY your face with Smoother, Whitening, Slimming, Enlarger.
Drag the slider to adjust it.
Filter Mode - Multiple filters can select from Normal, LOMO, Hazy, Halos, Time, Food,
Beauty, Sweet, Vintage, and B&W.
HDR Mode - High-Dynamic Range mode will improve the light and the shadow effect
at the same time. For Rear camera only.
Touch to enter the Camera Settings.Touch to enter the Mode
setting.
Touch to set flash to On, Off or Auto. Touch to transfer between rear camera and front camera.
Touch to take a picture or shoot a video.
Touch to enter Gallery
Touch to transfer between camera
and video recorder.
Touch the screen to focus on it.
Pinch or spread the screen to
zoom in or zoom out.
12. 10
Panorama Mode - Press camera button and move the phone on one direction slowly.
For Rear camera only.
PicNote Mode - Intelligent crop and optimize the text photo once shooting. For Rear
camera only.
Scan Mode - Put the QR/Bar code in the box for scanning.
GIF Mode - Click and continuous shooting 20 photos, GIF will be generated.
Shoot a Video
Tap video icon to switch it for video capturing mode.
Adjust the quality and other settings if you wish or leave them on automatic mode.
Point the lens to frame the scene where you want to start.
Touch the Start Video icon. Camera starts shooting the video.
Touch Stop video icon to stop shooting. An image from your most recent video is
displayed as a thumbnail at the bottom left
Gallery
Touch the Gallery icon in the Launcher to view albums of your pictures and videos which
you’ve taken from camera. You may share the pictures and videos with your friends by
Messaging, Email, Bluetooth and so on.
You can also encrypt the private photos.
To View files: Gallery-->Pinch out and enter private album
To encrypted files: File Explorer --> File --> Phone storage --> Pictures --> More
--> Show hidden files --> .Gallery Safe --> si.
Music
You can use Music player to organize and listen to music and other audio files that you
transfer to your phone from your computer.
13. 11
7. Connection
Your phone can connect to a variety of networks and devices, including mobile networks
for voice and data transmission, WLAN data networks, and Bluetooth devices, such as
headsets. You can also connect your phone to a computer, to transfer files from your
phone storage, and share your phone’s mobile data connection via USB or as a portable
WLAN hotspot.
Airplane mode
Option1: Settings-->Airplane mode to turn it on
Option2: Swipe up from the bottom edge to open control center--> tap Airplane mode
Some locations like Airplane may require you to turn off your phone’s Cellular network,
WLAN, and Bluetooth wireless connections. You can turn off all these wireless
connections at once by placing your phone on Airplane mode.
Mobile Networks
When you assemble your phone with a SIM card from your wireless service provider, your
phone is configured to use your provider’s mobile networks for voice calls and for
transmitting data.
Settings-->Mobile Networks-->Network operators
The name of the wireless service provider you’re currently registered with is selected in
the list.
Touch to Change play mode
of Repeat One, Shuffle, or
Repeat List.
Add to my favorites
or New Playlist.
Settings Menu
Share music by Bluetooth,
Email, Messaging and so on.
Slide to right for current listSlide to left for lyrics file.
Previous song Next song
Play/ Pause
14. 12
WLAN
WLAN is a wireless networking technology that can provide internet access at distance of
up to 100 meters, depending on the WLAN router and your surroundings. You can
configure the WLAN as follow:
Settings-->WLAN, check WLAN to turn it on.
Enter WLAN. The phone scans for available WLAN networks and displays the names
of those it finds. Secured networks are indicated with a Lock icon. The phone will auto
login to the network if you have previously connected.
Touch a network to connect to it.
If the network is open, you are prompted to confirm that you want to connect to that
network by touching connect. If the network is secured, you’re prompted to enter a
password or other credentials.
Bluetooth
Bluetooth is a short-range wireless communications technology that devices can use to
exchange information over a distance of about 10 meters. The most common Bluetooth
devices are headphones for making calls or listening to music, hands-free kits for cars,
and other portable device, including laptops and cell phones.
To send a file
Settings--> Bluetooth, check Bluetooth to turn it on.
Enter File Explorer to select a file, Select More--> SHARE--> Bluetooth.
Touch Scan for devices, the phone will scan for and display the names of all
available Bluetooth devices in range.
Touch the names of the other device in the list to pair them. After pairing the file will
be sent.
To receive a file
Settings--> Bluetooth, check Bluetooth to turn it on. Ensure your Bluetooth has been
connected within visibility time.
You can receive files from the devices which are paired with yours. The file you received
will be saved to the “Bluetooth” folder in the File Explorer.
To connect to a Handsfree device
Turn on the Handsfree device, make it in a searchable state;
Settings-->Bluetooth, Select “Search for devices”;
After searching for the Handsfree device,Select it in the list to pair.
After pairing, you can use the Handsfree device to listen to music, video and receive
call.
USB
You can connect the phone to your computer with a USB cable to transfer music, pictures,
and other files.
15. 13
Turn on USB connection
1. Connect the phone to your computer with a USB cable.
2. Open the notification center and tap Connected as a media device to access files
on this device.
3. Other USB options can be chosen.
Charging, connected as a USB for charging.
View photos, connected as a camera to browse photos on PC only.
Note:
Do not disconnect the USB cable from the phone when you are transferring files.
Doing so may cause data loss or phone damage.
8. Advanced Features
Super screenshot
In the control center, tap to access Super screenshots. Super screenshots includes
Normal screenshots, Long screenshots and Part screenshots. To view on: File Explorer
--> Phone Storage / SD card --> Screenshots
Normal screenshots
Capture 1 page in screenshots.
Long screenshots
Capture 10 pages at most in screenshots. It’s easy for you to save conversations in
commutation tools, articles in website and so on.
17. 15
Extreme mode
Extreme mode lets mobile phone enter the minimalist desktop to extend standby time. But
only phone, contacts, messaging and clock can be used during this time.
Access to extreme mode
1) Home screen-->Control center-->Tap Extreme mode
2) Home screen-->System Manager-->Power Manager -->Tap Extreme power
saving mode
3) Settings--> Power management -->Power Manager-->Select Extreme power
saving mode
Chameleon
Tap to exit the extreme
mode
18. 16
With Chameleon, you can pick color with front or rear camera. Click anywhere or drag the
color point to pick your favorite to design the colors of phone background.
Color Preview
Face Unlock
1) Look at your phone and adjust your face inside the dots to set up.
Tap to restore the
system default colors.
Tap to transfer between
front and rear camera.
Introduction
Tap to preview the pick
color.
Pick colors
19. 17
2) Turn on the screen and show your face on front camera when you want to unlock.
Mobile Security
If you lost your phone unfortunately, you could control it by remote. A security password
and close friend’s phone number must be necessary.
Lock the phone
Send a message with “lockphone*security password” to the lost phone to lock the device
thoroughly.
Unlock the phone
Enter the security password for unlocking when you get your lost phone back.
Once SIM card is been changed in your lost phone, the new SIM card number will be auto
sent to your close friend’s phone immediately.
AmiClone
Amiclone allows data migration from old smartphone to a new one. Connect each other to
transfer contacts, messages, pictures, music, videos and Apps.
Settings --> Advanced settings --> Backup & reset --> AmiClone
20. 18
1) Set up a connection with two smartphones.
2) Select the files which you want to transfer in the old one.
3) Receive successfully in the new one.
Child Mode
It’s an exclusive place for children. As a parent, you can manage the applications and set
up the daily time with a password.
21. 19
9. Operation
Smart gestures
Settings-->Advanced settings--> Smart gestures to turn it on.
The smart gestures system supports a variety of experience and control, through gesture
can be more convenient operation, some of the smart gesture functions will not work while
flip cover is closed.
Pause alarm
Settings--> Advanced settings--> Smart gestures -->Select Pause alarm
Flip back the phone to pause the on-going alarm.
① ②
Smart vibration remind
Settings--> Advanced settings--> Smart gestures -->Select Smart vibration remind
Phone vibrate to remind the unread message or missed call notification in sleep mode.
① ②
Add Applications for setting up.
Extend use time.
Exit
ExitSetting Setting
22. 20
Smart bright screen
Settings--> Advanced settings--> Smart gestures-->Select Smart bright screen
When front camera detects you are viewing screen, the screen can be maintained
normally. Enable this function, the status bar will display this icon .
The following scenario, the function maybe failed:
-User doesn’t face on the screen
-The light is too strong or too dark
-Front camera is used by other applications
Double click wake
Settings--> Advanced settings --> Smart gestures -->Select Double click wake
In sleep screen, quick double tapping can wake up the mobile phone.
① ②
10. Health and safety
Please read these simple guidelines. Not following them may be dangerous or illegal.
SAR Compliance
Your phone is designed not to exceed the limits of emission of radio waves recommended
by international guidelines.
SAR (specific absorption rate) is the measurement of body-absorbed RF quantity when
23. 21
the phone is in use. SAR value is ascertained according to the highest RF level generated
during laboratory tests.
The SAR value of the phone may depend on factors such as proximity to the network
tower, use of accessories and other enhancements.
The true SAR level during normal phone usage will be much lower than this level.
The highest SAR value of this device at the head and body are 0.288 W/kg and
0.455W/kg. Respectively averaged over 1.5cm gap of human tissue.
SAR Recommendations
Use a wireless handsfree system (headphone, headset) with a low power Bluetooth
emitter.
Please keep your calls short and use SMS whenever more convenient. This advice
applies especially to children, adolescents and pregnant women
Make sure the cell phone has a low SAR.
Prefer to use your cell phone when the signal quality is good.
People having active medical implants should preferably keep the cell phone at least 15
cm away from the implant.
Maintain a preferable distance of 15 mm from the device.
Safe Driving
Do not use the phone while driving. When you have to use the phone, please use the
personal hands-free kit.
Please do not put the phone onto any passenger seat or any place from which it may fall
down in case of vehicular collision or emergency braking.
During Flight
Flight is influenced by interference caused by the phone. It is illegal to use a phone on the
airplane. Please turn off your phone during a flight.
In Hospitals
Your Phone’s radio waves may interfere with the functioning of inadequately shielded
medical devices. Consult a physician or the manufacturer of the medical device to
determine whether they are adequately shielded from external Radio Frequency. Switch
off your device when regulations posted instruct you to do so.
To avoid potential interference with implanted medical devices such as a pacemaker or
cardioverter defibrillator:
Always keep your phone at least 15.3 centimeters (6 inches) from the medical device.
Do not carry the wireless device in a breast pocket.
Turn off the phone if there is any reason to suspect that interference is taking place.
Follow the manufacturer directions for the implanted medical device.
If you have any questions about using your wireless device with an implanted medical
device, consult your health care provider.
Unsafe Areas
Please turn off your phone when you are close to a gas station or in the vicinity of any
place where fuel and chemical preparations, or any other dangerous goods are stored.
E-Waste
24. 22
INFORMATION UNDER E-WASTE (MANAGEMENT AND HANDLING) RULES, 2011
For disposal of e-waste, please call our helpline no: 1800 208 1166 or visit our website:
http://gionee.co.in/social/
1. Do’s for disposal of product
a) Always drop your used electronic products, batteries, and packaging materials after
the end of their life in nearest collection point or collection center
b) Separate the packaging material according to responsible waste disposal options and
sorting for recycling.
c) The battery can easily be removed from the product for recycling.
2. Don’t for disposal of equipment
a) Never dump E-waste in garbage bins or municipal solid waste stream.
b) Do not dispose of your product as unsorted municipal waste.
c) Do not throw used batteries into household waste.
d) Do not dispose damaged or leaking Lithium Ion (Li-Ion) battery with normal
household waste.
3. Information on the consequences of improper handling, accidental breakage damage
and improper recycling of the end of life product.
a) If batteries are not properly disposed of, it can cause harm to human health or the
environment.
b) Placing of batteries or devices on or in heating devices, such as microwave ovens,
stoves, or radiators and improper disposal of batteries may lead to explosion.
If the battery terminals are in contact with metal objects, it may cause a fire.
Operating Temperature
The cell phone operating temperature is between 0º and 35º C (32º to 95º F). Low- or
high-temperature conditions might cause the cell phone to change its performance.
When using the cell phone, it is normal for it to get warm. The exterior of the cell phone
functions as a cooling surface that transfers heat from its inside to the cooler air outside.
11. FAQ
S.No. FAQ Answers
1
How to Add or
Remove account in
Android™?
Settings -> Advanced Settings -> Add Accounts
a) To add an Account: Add Credential to add account
b) To remove an Account: Select account that you need to
remove->Option->Remove account
25. 23
2
How to Factory
Reset Android
phone?
Settings -> Advanced Settings ->Backup & reset -> Factory
data reset ->Confirm restore
From there, Select Format Phone storage for best result.
Note: Reset Factory default will remove all user data; Make
sure to take a backup of your data in PC or on Gmail™.
3
In what scenario
does the user have
to factory reset
Android phone?
In the following scenarios user needs to reset his phone.
a) Phone not responding
b) Phone automatically Restarting
c) Erratic behavior of phone
d) Bad Battery backup or charging issues
e) Apps not working
f) Deleted any pre-installed apps by mistake
g) Erased customer data & settings
h) To remove an account.
Note: If the problem persists, please visit your nearest
Service Center.
4
How to connect
device via portable
hotspot?
Please follow the listed steps.
a) Plug in your USB cable and connect it to PC.
b) Settings -> More -> Tethering & Portable hotspot->
Select USB tethering.
Let it install all the drivers first and after that you will be
connected to Internet automatically. Drivers can be
downloaded from our Website: http://gionee.co.in
5
How to connect
your device as
USB mass
storage?
Please follow the listed steps.
a) Plug in USB cable and connect it to PC.
b) Select File copy.
Let all the drivers install first and then your Device will be
connected as a USB Mass Storage. Drivers can be
downloaded from our website http://gionee.co.in.
6
How to add Data
Account or APN
settings?
All GiONEE Smart phones come with Pre-loaded Internet
Settings. User needs to insert SIM and turn the Data
Connectivity On. The phone will automatically detect
settings.
7
How to do Data
account or APN
setting if user has
edited or erased
pre-installed data
settings?
There are two ways to resolve it.
a) Do Reset Factory Default Setting.
b) Settings-> Mobile Networks->Access Point Names->
Add new APN / Reset to default.
8
How to select Data
mode (Auto or
GSM or WCDMA)?
Settings->Mobile Networks->Preferred Networks Type->
Select Mode as per your need from 3G/2G (Auto), 3G only
or 2G only.
26. 24
9
How to reboot or
reset to factory
settings?
Power off the phone->Press and Hold Volume up and
Power key-> Select the option based on your requirement.
10
How to install
applications that
are not
downloaded on
Google Play™
store?
To install applications directly, do following.
Settings -> Security ->DEVICE ADMINISTRATION->
Select unknown sources.
11
How to backup
contacts and SMS?
(a) For Contact Backup
(i) User can take backup on Gmail
(ii) Contact-> More->Import/Export -> Select Source &
Destination point to take back-up.
(b) For SMS Backup
(i) User can take backup on Gmail
(ii) Messaging -> More-> Import/Export SMS-> Import SMS
Backup from storage or Export SMS to storage.
On a device running Android User can take backup of
Contacts, SMS, Call log, Calendar with following steps.
Settings -> Advanced settings -> Backup & reset ->System
Backup and restore -> Backup to storage
12
Why the actual
capacity may differ
from the one
mentioned on
product label?
A certain portion of capacity of ROM may be used for
system files and maintenance, thus actual capacity may
differ from that indicated on the product label.
COPYRIGHT
All rights reserved. Reproduction, transfer, distribution or storage of part or all of the
contents in this document in any form without the prior written permission of GiONEE is
strictly prohibited.
Android, Google, Google Play, the Google Play logo and other marks are trademarks of Google Inc.