How to make a website header for free
•Descargar como PPTX, PDF•
1 recomendación•2,024 vistas

Take advantage of free online tools to help you create awesome looking graphics and images for your online projects, powerpoint slides and other materials. This tool is free, and the tutorial shows you just some of the effects that it offers. There's no excuse NOT to make content for your website or blog! If you like the information or find it useful, please forward to someone who you think may like it too! Sharing is Caring after all :-) P.S. I am not affiliated with the tool on this how to - I just like the quick and easy way it works - and I use it regularly! P.P.S. Who needs photoshop anyhow? Thanks for viewing, Robin.

Recomendados
Más contenido relacionado
Último
Último (15)
Destacado
Destacado (20)
How to make a website header for free
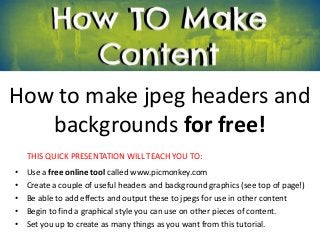
- 1. How to make jpeg headers and backgrounds for free! THIS QUICK PRESENTATION WILL TEACH YOU TO: • Use a free online tool called www.picmonkey.com • Create a couple of useful headers and background graphics (see top of page!) • Be able to add effects and output these to jpegs for use in other content • Begin to find a graphical style you can use on other pieces of content. • Set you up to create as many things as you want from this tutorial.
- 2. Build your skills at: www.howtomakecontent.com Search online for the picmonkey website. www.picmonkey.com* *It’s free to use, and I am not in any way affiliated to this program, I just like to use free stuff that works easily!
- 3. Build your skills at: www.howtomakecontent.com Click on the edit a Photo option.
- 4. Build your skills at: www.howtomakecontent.com I choose to upload the white rectangle I created earlier. This opens the file with a blank canvas similar to what you start with in photoshop and other image editing programs. P.S. You can download (rightclick>save picture as) the white rectangle I used at: http://howtomakecontent.files.wordpress.com/2013/04/howtomakecontentheader_blank_1.jpg?w=900
- 5. Build your skills at: www.howtomakecontent.com Try adding some texture from the effects panel.
- 6. Build your skills at: www.howtomakecontent.com I choose to use the paint effect – which is free!
- 7. Build your skills at: www.howtomakecontent.com Now add more effects to make it individual ...
- 8. Build your skills at: www.howtomakecontent.com I choose to use the dark edges – which I like the look of I mess around with the brush sizes and the fade too.
- 9. Build your skills at: www.howtomakecontent.com I notice it looks a bit ‘horror’ background in red so I add in the warhol effect which I like better!
- 10. Build your skills at: www.howtomakecontent.com I am happy with this, so I hit the save button (to save it out as another jpeg) and name add the word ‘bluegreen’ in the title.
- 11. Build your skills at: www.howtomakecontent.com I save this with the James bond setting of Pierce – as the mid sized quality setting is only 16 kb more than the lower setting. So the file size is not massive when my website or blog loads up.
- 12. Build your skills at: www.howtomakecontent.com Now, if you only wanted a background image this is great. But I also want to make this image with text over it. So I can use it in other places such as on powerpoint presentations or PDFs I create. That way, I am building up a similar visual branding element across some different types of content. To begin adding text – you create the background for the text then - click on the text section!
- 13. Build your skills at: www.howtomakecontent.com I add in some text and make it bigger and move it around with the formatting box. I like the colour on the background too.
- 14. Build your skills at: www.howtomakecontent.com I want my text to look more ‘stand out’ so I add in another text layer and re-create a black version of my words. With this still selected I can right click once and I then have the option to move this backwards until it sits behind the white text. This helps make the text more eye-catching when I use the image at different sizes
- 15. Build your skills at: www.howtomakecontent.com This time - I make sure to save two versions. One at high settings for better quality (which I can use in print), and the second at a medium - or low size - to have a small file size version which will work better on the web (it takes less time to download on the screen).
- 16. Build your skills at: www.howtomakecontent.com Now I am ready to use these pieces I just made in any content I create! Within a short space of time (and for no money) I have created: • A background header for my website or blog • 2 text versions of the header, and title, to use in any A4 word documents and powerpoint presentations. I can use the smaller resolution version for places where a smaller file size is better - like within an email or PDF ebook for example. N.B. I can print at a decent quality (A4 size) using the higher resolution image within word documents and power-point presentations - which are not as limited by file sizes. Also, I can resize the original white or coloured background so I can make a set of buttons or images which have the same effects I created on the background. Try this for yourself using this online resource and see what you can create for your content needs. It’s simple to use and free! For more online resources and FREE content making advice... ...Please Visit - www.howtomakecontent.com P.S. If you liked this - please be kind and pass it forward (thanks)