SlideShare una empresa de Scribd logo
1 de 32
Descargar para leer sin conexión
Microsoft PowerPoint
Instructor:
Dr. A. S. M. Latiful Hoque
Associate Professor
Department of CSE
BUET
Bangladesh University of Engineering and Technology (BUET)
Dhaka 1000
2
Introduction
Presenting ideas in a clear and concise manner is important when sharing information
with others. For this reason Microsoft® PowerPoint® has become an indispensable tool
for sharing and presenting different ideas. Originally, PowerPoint was used primarily for
giving live slide presentations in front of groups of people; now it enables you to give
Internet-based presentations that can transcend barriers of time and space. PowerPoint
has many useful features that enable you to create presentations for your colleagues or
boss or whoever, to view, and you don’t need to know HTML or any other programming.
PowerPoint is presentation software that enables visual organization and communication
of concepts. You can customize your presentations with sound, animation, charts,
graphics, narration, and video.
Before you start using PowerPoint 2002, you should become familiar with its features.
The following illustration shows a slide in the TriPane view with the task pane showing.
Notations:
The symbol  is used throughout this tutorial to refer to the drop-down menu bars at the
top of the screen. (For example, Format  Font means: “Pull down the Format menu,
and select Font.”) You can get more detailed instructions from the official help files,
which can be found by pressing F1 in PowerPoint.
Slide Sorter
Pane
View Buttons
Status Bar
Slide Pane
Menu Bar
Toolbars
Window Sizing
Buttons
Notes Pane
Task Pane
3
Finding and opening PowerPoint
All computers with Microsoft Office (Word, Excel, etc.) should have PowerPoint already
installed. For Windows XP users, click on , then on Programs or Show All
Programs. Click on the icon . (If you don’t see it, it may be
hidden in the Microsoft Office folder).
Now you should see a screen like this one (minus the yellow arrows):
Many of the instructions in this chapter assume you are displaying the so-called “Task
Pane” (menu of options) on the right-hand side of the screen. If you do not see it, click
on View  Task Pane.
Older versions of PowerPoint: The task pane may be under View  Toolbars  Task Pane, or there
may not be one at all. If this is the case, you can still do almost everything described in this chapter, since
most of the task-pane menus will pop up in windows in the middle of your screen instead.
You should also have the Drawing toolbar running along the bottom of your screen (the
first button on the left says Draw). If you don’t see it, go to View  Toolbars 
Drawing, and embed it in the screen by dragging it to the bottom of your screen and
releasing it there. This toolbar is not necessary, but it provides shortcuts for many
task pane
drawing toolbar
4
a box for a picture
common actions. (As in Microsoft Word, it is possible to configure various toolbars to
get shortcuts to virtually all the actions I describe below).
Choosing the format of your slides
In the task pane on the right side of the screen, click on Create a New Presentation. (In
Microsoft PowerPoint 2002, you do not need to do this step. In even older versions, use
the command File New). You should now see several options. If this is your first
time using PowerPoint, choose Blank Presentation.
A brief note on the other formatting options: First of all, do not choose AutoContent Wizard. It is
designed for corporate presentations and is guaranteed to come up with some inappropriate “autocontent”
for you. Secondly, Existing Presentation allows you to open an old PowerPoint presentation as a new file,
which is good if you want to use the same basic format as a previous lecture. Finally, Design Templates
are pre-set designs that can be frustrating to edit or get rid of, which is why I have decided to steer clear of
them in this chapter. With a bit of effort, they can be customised much like any slide – some basics are
explained in the Background section below. If you are comfortable with PowerPoint, you may also find
the “Colour schemes” in the Design Template view useful.
If you click on Blank Presentation, you will then see a list of possible formats for your
slides. (In much older versions you may have to use Format  Slide Layout). For the
first lecture slide, you will probably want a basic layout with just a title (like the first
choice on the top left under Text Layouts). If you have an image to include as well, you
could choose a simple template in the Content Layouts section. Here are two that work
well as opening slides:
You can choose different formats for later slides, and adapt existing formats at any time,
so don’t worry if there isn’t one that is perfect for you.
Saving your presentation
Go ahead and save your presentation now. It’s the same command as in other Microsoft
programs: Ctrl-S or File  Save.
If you plan to use any external files other than images – e.g. graphs, music, or videos –
you should create a new folder now and save your presentation in it. Before you add any
external files, copy them into this folder first. (This makes it much easier to move your
presentation to other drives or computers later).
boxes for text
5
Undoing a mistake
This is also the same as in Word: either Ctrl-Z or Edit  Undo. You can also redo
something with Ctrl-Y or Edit  Redo.
Changing the background
If you created a Blank Presentation, all your slides will have a plain white background by
default. Boring or minimalist…you decide. If you want to change it, do it now.
Technically you can edit your default background at any time, but it can get messy to
change it after you’ve already created a lot of slides. (For example, if you’ve typed all
your notes in black font and you change to a black background, you’ll have to reformat
your font too).
If you are using a design template instead of a blank presentation: You probably don’t have a plain
white background. You can still change the background on any slide(s) in your presentation using these
instructions, but depending on your template, you may have to check the Omit background graphics from
master box (hidden by the drop-down menu in the picture below) to get rid of the template’s extra graphics.
To edit your background, go to Format  Background. After you choose a
background from the options below, clicking on Apply to All will make your new
background the default for all present and future slides in your presentation. Clicking on
Apply will change only the slide you have open.
If you’re still on your first slide, I
recommend choosing a subtle, basic, neutral
background and clicking the Apply to All
button. If you want a special background for
some slides (e.g. a series of photos or
paintings), you can always change those
slides individually later, by using these same
instructions but clicking on Apply.
Solid colour
To get a solid colour as your background, just
click on the little down arrow under the
Background Fill box, and you will get a few
colours to choose from. If you don’t like
these choices, click on More Colours and you
can pick from a virtually unlimited selection.
Neutral or muted colours usually look best. Remember your text doesn’t have to be black,
The Background pop-up window.
6
so it is fine to choose a dark colour. In fact, dark colours with white fonts show up better
in most lecture halls.
Gradient
To get to this option, click on Fill Effects (pictured above – it’s under the colour choices
on the pull-down menu). Gradients give a professional shading effect to solid colours.
The default gradient settings are extreme (e.g. all white at the top and all black at the
bottom), which makes it difficult to place readable font on the slide. You can correct this
issue by choosing two colours that are similar, or by choosing one colour and playing
with the dark-light spectrum under the colour chooser to make the gradient more subtle.
There are also some preset gradients, but most of them use distractingly bright colours.
Texture
Click on Fill Effects, and then choose the Textures tab. Here you can choose from a wide
variety of preset textures. A lot of the textures are loud enough to detract from your text,
so it’s usually best to use these sparingly on individual slides, rather than as the
background for a whole presentation.
Pattern
Click on Fill Effects, and then choose the Patterns tab. Patterns are similar to gradients –
you choose two colours, then the kind of pattern you want. The default patterns (white
and blue) are annoying. Try picking two colours that are almost the same, e.g. two
similar shades of blue. To get more colour options, click on More Colours under the
colour-choosing tabs.
Picture
This allows you to use your own image as the
background. Click on Fill Effects, and then
choose the Picture tab. Click on Select Picture
and find an image on your computer. Check the
Lock Picture Aspect Ratio box (bottom left) if you
do not want your picture to be distorted. Picture-
backgrounds are great for the first slide of your
show, where you just want a title, or for a part of
your lecture where you just want to show images
with very little text.
Pictures can also make interesting backgrounds for the body of your lecture if you are
willing to do some work in image-editing software. You will need to fix the contrast and
brightness of the picture to make it very faint and muted, so you can write text on top of it.
Changing a coloured picture to black-and-white can also make it less distracting. Here is
JFK and the Cuban Missile CrisisJFK and the Cuban Missile CrisisJFK and the Cuban Missile Crisis
(1960(1960(1960---1963)1963)1963)
An example of a title slide with an
image as the background
7
a sample image (of a protest march in DC) washed out to make an appropriate
PowerPoint background:
What to do if one object on your slide is hidden behind another
When you are working with text and images, sometimes one object will get stuck behind
another, preventing you from moving or editing the one underneath. To fix this problem,
right-click on the top object. In the menu that appears, go to Order  Send to Back.
Now you should be able to access the object that was behind it.
Working with text
Typing and formatting font
The only way to get text on a PowerPoint slide is to type in a text box. You may already
have an empty text box (technically called a “Placeholder” if you didn’t draw it yourself)
on your slide. It should look something like this:
Simply click somewhere inside the box and type whatever you want. You can change the
font, size, style, colour, alignment, etc. just as you would in Word: either by playing with
the font drop-down boxes at the top of the screen, or through Format  Font. (Your
font size may automatically shrink to fit in the box. It is possible to change this setting if
you find it too annoying. See Troubleshoot Adding Text in the PowerPoint Help file).
Moving an existing text box
If you want to move a text box, just click anywhere on its edge (except the white circles)
and drag it to where you want it on the slide.
8
Resizing an existing text box
Click on any of those circles around the edge and drag the text box into the size that you
want. Holding down the Shift key while dragging one of the corner circles will lock the
aspect ratio on your text box. Resizing a text box may cause the text inside to shrink or
realign itself.
Creating a new text box
Regardless of what your slide template looks like, you can always add a new text box.
Go to Insert  Text Box  Horizontal, or click on in the drawing toolbar. You
will then be given a special cursor. Click with it anywhere on the slide and you will get a
small text box. Drag the corners of this box to the width that you want and start typing.
You must type something in the box before clicking anywhere else on the slide, or the
text box will vanish, never to return. (You may notice a small green circle above the top
of the box. This allows you to rotate the text box, should you ever want your words on a
slant).
Deleting a text box
To get rid of any text box (empty or not), just click and release anywhere on its edge, and
then hit the Delete key.
Adding a border or fill to a text box (and other advanced options)
The default text box outlines will be invisible in a slideshow, so don’t worry if a text box
overhangs the edge of the slide or overlaps with something else. However, should you
want a visible border on a text box, double-click the text box on its edge. A window
should pop up. Choose a size and colour of outline under the Colours and Lines tab.
You can also fill your text boxes with a solid colour from this menu (very useful over
noisy backgrounds like pictures). There are plenty of other advanced options available in
this window, such as controlling the margins inside and outside the text box. (There are
also shortcuts to several of the above options in the Drawing toolbar).
Bullets and numbering
Bulleted lists are useful for the body of a lecture. As a general rule, you shouldn’t have
more than 5 bullet points on a single slide, and you should keep your text relatively large
(usually at least 20 pt., but it depends on the font and the size of the classroom). To
create a bulleted list, select the line(s) you want and go to Format  Bullets and
9
Numbering, then click on the set-up you
prefer. This also works for getting rid of
an unwanted bulleted list. (PowerPoint
has the annoying Microsoft habit of
autoformatting the heck out of
everything whether you like it or not).
As in Word, Enter + Tab will give your
bulleted list a hierarchy, like this (or the
one pictured above):
 Point 1
o Sub-point 1
o Sub-point 2
 Sub-sub-point
1
 Point 2
Enter + Shift-Tab will back you up one indentation, so you can add your next main point.
Working with images
Images can include scanned slides, maps, photographs, and historical documents.
PowerPoint accepts many image formats including JPG, BMP, and GIF. It is also
supposed to accept PCT files as long as you rename them to end in .pct.
Working with images is much like working with text. Many slide templates have one or
more preset image boxes (“Placeholders”), which look something like this:
Inserting an image
If you already have an image box on your slide, just click on the picture icon ( )
inside the box. PowerPoint will then prompt you to choose an image from your computer.
Select it and click Insert. You can also insert ClipArt with the ClipArt icon ( or ,
10
depending on your version of PowerPoint). ClipArt is a database of mostly cartoony
images that comes free with Microsoft Office. Microsoft has more free images available
for download at http://office.microsoft.com/clipart.
You can insert an image even without an image box. Simply go to Insert  Picture 
From File (or ClipArt). Locate the picture you want and click Insert. You also have
shortcuts to these options on your drawing toolbar (they use the same two icons pictured
above).
Moving an image
Click once anywhere on it and drag
it to wherever you want.
Resizing an image
Drag on the white circles around its
edges. If you drag a corner, the
picture will grow or shrink without
changing shape. Dragging one of the side-circles will distort the original image. As with
text boxes, the small green circle above the picture allows you to rotate it.
If you want an image to fill the whole slide, you can resize it, or you can just set it as the
background for that individual slide. See Background section above.
Deleting an image or empty image box
Just click once on the image to select it, and hit the Delete key. You will be left with an
empty image box, so you can either insert something new into it or delete that by clicking
once on its edge and hitting Delete.
Advanced options
Double-click on the picture. Under the Colours and Lines tab, you can add a border to
your image just like to a text box (see Working with text section). Under the Picture tab,
you can compress an image (make it smaller so that it will load faster – great for TIFF
format images). Depending on its format, you may also be able to change it to black &
white, wash it out, and adjust its brightness or contrast. For some bizarre reason, you
cannot do this to background pictures.
You can get a few more options (including cropping) from the Picture toolbar. Right-
click on the image and choose Show Picture Toolbar.
Slide with a combination of images and text boxes
11
Formatting templates (making changes to all your slides at
once)
Every slideshow has a master slide which is the default template for all new slides. If
you made your background “apply to all” slides, you have already altered your master
slide. You can use this tool to edit it further. Go to View  Master  Slide Master,
and make changes to this slide like you would any other. For example, if you have set a
dark background, you can go here to make your text white instead of black by default.
Just select the text you want and go to Format  Font. However, keep in mind that
any changes you make to this template will be applied to every slide in your presentation.
After editing the master slide, check all your slides before continuing so you still have a
chance to undo your changes (Ctrl-Z).
Master slide view is very useful for people using pre-set design templates. If you really
hate something about your template, you can get rid of it here. (Maybe you chose the one
with the annoying red line across the centre of every slide?)
To return to your presentation, go to View  Normal.
Making a new slide
To insert a new slide with your default template, just hit Ctrl-M or Insert  New Slide.
There is also a button at the top right of the screen. On the right-hand side of
the screen, you should see all the layout options again, so you can choose a different one
if you want. Remember that if you don’t like any of those, you can easily delete, move,
insert, or resize text and image boxes, as well as changing the background (see above
sections).
Different ways to view your presentation while creating it
PowerPoint has several viewing modes. You should now be in the default mode, called
“Normal.” On the left-hand side of your screen, you should see all your slides in
thumbnail format. At the top of this column, there are some tabs that look like this:
12
. If you click on the Outline tab, you will see the text of your
slides instead of the thumbnail images. You can type directly in this outline view and
change the text in your slides.
If you want to change the order of your slides, go to View  Slide Sorter. You will
then see the thumbnails of all your slides laid out on the screen. You can easily change
their order by dragging them in this view. To return to normal mode, just go to View
 Normal.
Basic presentation rules
The following rules are applied for presentation with any software (including Power
point).
Rule 1: Use Arial font instead of Times New Roman; if the projector is week, some
letters in Times New Roman will be broken. For example,
Times New Roman
Arial font
13
Rule 2: Write few texts, if possible use figure; don’t let the audience divert attention
from you to text for reading line by line. It is also OK to use incomplete sentence by
omitting prepositions, conjunction and others. For example,
Equilateral triangle: The convex region in a
plane surrounded by three straight lines which
intersect each other and of equal length.
Equilateral triangle: Region surrounded by
three equal lines.
14
Rule 3: Contrast combination of background-foreground is important; also be contrast if
using texture.
Not a good combination
Still not a good combination
Better
15
Rule 4: Use reasonable font size, but usually larger size does not harm much.
Rule 5: Don’t’ try to dazzle the audience by using too much animation or too much
graphics. Convince them with key information.
Rule 6:
Text too small
Reasonable size
 For bullets, left justify
 It will keep text neat,
 and easy to follow
16
Rule 7:
 Centered graphics will leave little
room for text
 Place graphics off-center
 More room for text
 Better balance
 More pleasing to eye
 Attention goes to both
text and graphics
17
Rule 8: Don’t use all caps; it is very hard to read. If necessary, use bold font and/or make
italic to emphasize.
Rule 9: You can repeat previous slide or their gist a very few times to wake up the
audience.
THIS IS HARD TO READ
This is easy to read
Remember, we are using Arial font,
not the Times New Roman
18
Rule 10: keep every slide simple,
 Keep the slide simple
 Make bullet points easy to read
 Keep text easy to understand
 Use concise wording
 Bullet are focal points
 Explain verbally
 Use good spacing among bullets
 and remember, we already
mentioned using figures, large
fonts, and limited graphics and
animation
19
Rule 11: Plan very carefully what you can cover in the allotted time. You have a limited
time, and a conscientious session chair will ruthlessly cut you off if you attempt to exceed
that limit. You can also give slide number to make yourself and all others aware of your
progress.
Rule 12: Think of your talk as an advertisement -- your goal is to entice the audience into
wanting to read your paper. Motivate the problem; describe your overall approach and
your major results. If your work includes experiments, pick a representative graph or two.
Rule 13: It is strongly recommended that you practice your talk several times, especially
if you haven't given many similar talks in the past. Time your runs; get your friends to
listen and criticize.
Rule 14: Since we are not native English speaking, make an effort to speak slowly and
clearly enough for a large audience to understand you. Even if you are very good in
English speaking, do not show your speaking performance here; you will need to speak
loudly and clearly.
Rule 15: Position yourself carefully with respect to the screen -- be sure not to block the
audience's view. A common mistake for a new presenter is to point in the computer
screen, which can not be viewed by the audience. Use a good pointer or fingers and point
to the screen
Rule 16: During the question & answer session at the end of your talk, be sure that your
audience knows what question you are answering -- repeat a question if not everyone was
able to hear it or even request to repeat the quest if you yourself are not clear about it. It's
often a good idea to repeat questions regardless, to make sure you have them right and to
give yourself a moment to think.
Assignment 1
In this assignment you need to create a PowerPoint presentation about yourself. The
actual details are left up to you, but you might want to include such information as:
1. Your name and identity
2. Education
3. Work experiences
4. Career goals
5. Hobbies, family, travel, kids, pets, etc.
6. Favourite author or place
20
Adding AutoShapes
PowerPoint allows you to add many so-called “AutoShapes,” such as boxes, arrows,
circles, and quote bubbles. If you have the Drawing toolbar displayed, you already have
the AutoShape menu in the bottom left-hand corner of your screen. Otherwise, go to
Insert  Picture  AutoShapes. The AutoShape menu looks something like this:
From left to right, these buttons denote: Lines, Connectors, Basic Shapes, Block Arrows,
Flowcharts, Stars and Banners, Callouts, Action Buttons, and More AutoShapes.
Some of the more useful AutoShapes are:
Inserting an AutoShape
To insert any AutoShape, click your mouse on its section of the menu, then click on the
AutoShape you want. You will then get a special cursor like you did for text boxes. You
can then draw the shape anywhere you want on the slide. With some shapes, like curves,
you will have to double-click to finish the drawing.
Editing an AutoShape
After you have added the AutoShape, you can change it in several ways. Use the circles
around its edge to reshape, resize, or rotate it, like you would a text box or picture. If you
double-click on the AutoShape, you will get a menu which allows you to do things like
change the fill colour or add an outline. (Many of this menu’s options are also shortcuts
on the Drawing toolbar).
21
Adding text to an AutoShape
You can write text inside any
AutoShape. Some of them, like the
quote bubbles, give you a text cursor by
default. If you don’t see a cursor, select
the AutoShape by clicking it, and click
on any of the font formatting buttons at
the top of your screen:
Sometimes it is tricky to get the text centred properly in the shape. You can format this
text like any other font (select it and Format  Font). You can also fix some margin
and word-wrap settings by double-clicking the AutoShape and selecting the Text Box tab.
If all else fails, you can always draw your own text box on top of the AutoShape and
write in that instead (see Text Boxes section above).
Adding animations
You can use PowerPoint’s animation capabilities for many different purposes, the most
useful of which is probably setting items on your slide to appear at different times. For
example, you could make each bullet point appear as you discuss it, make an image
appear suddenly, or play an audio/video file when you are done reviewing the notes on
the slide.
How to animate a slide object
To get to the Animations menu, go to Slide Show  Custom Animation. Your task
pane (or pop-up menu in older versions) should now be displaying the animation options.
To animate something, you need to:
1. Select the slide item you want to animate by clicking on it once. (To animate text,
you can select the whole text box by clicking on its edge, or just part of the text
by dragging your cursor over it).
2. In the task pane, click on Add Effect. You will then get a drop-down menu that
looks like this:
Slide with an AutoShape (animated to appear on
command – see Animation section)
22
3. For your first animation, click on Entrance. Then find Appear (it may be in the
More Effects option) and click on it. Your item will now be invisible when you
first show the slide, and it will appear when you click your mouse anywhere on
the screen.
4. You are supposed to be able to preview what this will look like by clicking on
Play at the bottom right-hand corner of your screen, but this doesn’t always work.
If you want a better preview, click on the Slide Show button next to Play. To get
out of the slide show, hit the ESC key at any time.
You can add as many animations as you want to each slide. You can even have more
than one animation on a single item.
Changing or deleting existing animations
You can organise the order of the animations on a slide by dragging them up and down in
the task pane. Change any single animation by clicking on it once and then clicking
Change in the task pane. Delete animations from the task pane by clicking on them once
and hitting the Delete key (this gets rid of the animation, but not the original object).
Making two objects animate at the same time
If you want two of your animations to start at the same time (e.g. if you want a picture
and a line of text to appear together), select the second animation the task pane by
clicking on it. Then pull down the Start menu just above it to change On Click to With
Previous.
Adding audio
Warning: Sound and video files larger than 100 KB (i.e. anything but a short sound effect)
will be linked to your presentation rather than embedded in it. This means that you need to
copy your original media files whenever you burn the presentation to CD or even move it to a
different folder on your own computer. To avoid problems, I highly recommend copying
your chosen media file(s) to the folder containing your PowerPoint presentation before
inserting any audio or video. Then you can transfer this entire folder if you need to move or
copy the presentation. (If your files are relatively small, it is also possible to increase the 100
KB default up to 5 MB in Tools  Options).
23
Inserting an audio file
PowerPoint theoretically allows you to add audio files to your slides, but it can be tricky.
To insert a WMA (Windows Media Audio) sound file, just click on Insert  Movies
and Sounds  Sound from File. Then you can choose an audio file on your computer
and add it. You will be asked if you want your sound to start automatically or when
clicked. Unless you want it to start playing as soon as you open the slide, choose When
Clicked. You will then see a small graphic on your slide that looks like this: . If
you got this far, your sound will now play in your slide show when you click on this
picture!
It will stop playing either when the file ends, or when you go to the next slide. If you
want to be able to pause it, you’ll need to animate it (see below).
Why can’t I find and insert my audio files?
This being a Microsoft program, it makes your life difficult if you prefer non-Microsoft
audio formats (such as MPEG-4, the iTunes format). If you couldn’t find your file when
you tried to insert it, it’s probably because you can’t play it in PowerPoint. Assuming
you’re running Windows, check if your music software will convert sound files to WMA
format. (Mac users are probably not having this trouble, but they’ve got their own
problems – see below). If all else fails, you can insert unsupported sound files as
hyperlinks – see the Hyperlink section for details.
Differences between Macs and PCs
Mac versions of PowerPoint apparently accept some different audio formats from the PC
versions. This causes problems when Mac users need to run their slideshows on PCs. I
am guessing there’s not much you can do about this, except test your slideshow out on a
PC beforehand, and bring the original CD if you have it.
Inserting Sounds That Aren’t Already On Your Hard Drive
You may have noticed that the Insert  Movies and Sounds menu also allows you to
insert songs from a CD, or record your own sounds from a microphone (no, you can’t just
play a forbidden file format on your computer and record it with this tool…I tried). If
you choose the CD option, you’ll need to insert the original CD into your computer every
time you give the presentation, so for most situations it’s better to copy the song to your
hard drive instead (in WMA format!), and then insert it as a file. If you need to give your
slideshow on both Macs and PCs, this might be a good option though.
24
Animating Sounds to Play, Pause, and Stop
Sound files will start when you click them, restart if you click them again, and stop
playing only when you go to the next slide. If you don’t like this set-up, you can apply
animations to the speaker graphic (follow directions in Animations section for adding an
animation). This time, when you click on Add Effect in the animations task pane, you
will see an extra menu called Sound Actions. Here you can set your sound to start, pause,
and/or stop when you click anywhere on the slide. In other words, if you set the Play
animation, there is no need to click on the speaker graphic itself in your slide show. In
fact, you can even drag the graphic off the slide into the grey area around it. (You won’t
see it in the slide show, but it will still start playing when you click the slide).
Adding video
Supported video formats
PowerPoint accepts some kinds of video files and not others. PowerPoint 2003 for
Windows supports videos of the following file formats: ASX, WMX, M3U, WVX,
WAX, and WMA. It will also accept some predecessors of these formats, such as WMF.
If the file doesn’t show up when you’re trying to insert it, it is not supported. The Mac
version of PowerPoint accepts QuickTime videos (MOV, QT), but beware: if you try to
run your presentation on a PC, they won’t play. The reverse is also true for PC users who
try to run their presentations on Macs: your WMA files may not work. And computers
running old versions of PowerPoint might not support the same formats either. In other
words, if you’re moving a video slide show to another computer, try it out beforehand.
Inserting a video file
Assuming you have a video file that PowerPoint will accept, here is how to insert it:
1. Copy your chosen video file(s) into the same folder as your PowerPoint
presentation. (Not strictly necessary, but you’ll thank yourself later because this
makes it a lot easier to move or copy your presentation).
2. Go to Insert  Movies and Sounds  Movie from File, and locate your clip
(which should now be in the same folder as your slideshow). Click Insert.
Choose Automatically if you want your movie to play as soon as you open that
slide. Choose When Clicked if you want time to speak before you play it.
3. Your movie will now play in your slideshow! After it starts (either automatically
on when clicked, depending on which option you chose), you can click on it to
make it pause, and click it again to restart it. If you leave it alone, it will play
until it ends, or until you go to the next slide.
25
Advanced options (moving, resizing, full-screen projection)
You can drag your movie clip around and insert text boxes and images around it, as with
any other slide item. You can also resize movies just like pictures: drag on the white
circle in one of the corners. (Don’t drag on the side-circles; this will distort the video).
For full-screen projection, just enlarge your movie until it fills the slide. If you have
PowerPoint 2003, you can also right-click on the movie, choose Edit Movie Object, and
check Zoom to Full Screen.
In addition to the standard object animations, you can animate your movies to play, pause,
and stop. Follow the instructions for animating an audio file in the Audio section above.
What to do if you can’t insert your video files
Ideally you can use video editing software to convert your files to an acceptable format.
If you don’t have time for this, you can hyperlink to your unsupported videos from within
PowerPoint (see Hyperlink section below). This is messier, but better than nothing. As
long as the computer you use has a media player that supports your files, you will be able
to open them this way.
Adding hyperlinks to websites and files
PowerPoint allows you to link to several kinds of objects, including web pages (assuming
you have internet access in the room) and any file on your computer (including media
files that are not supported by PowerPoint).
Creating a hyperlink
You can set a hyperlink from any text box, image, or AutoShape in your slide. Select the
object by clicking on it once. Then type Ctrl-K (or go to Insert  Hyperlink). Now
you can link to a file on your hard drive, or type a web address in the Address bar at the
bottom.
You can also get an automatic hyperlink by drawing an Action Button from the
AutoShapes toolbar. (see AutoShapes section). These buttons allow you a few more
options, such as linking to another slide in the presentation.
All hyperlinks will play when you click on them in the slideshow.
26
Problems with hyperlinks
Be forewarned that hyperlinks are messy, slow, and potentially troublesome. They open
the linked program (e.g. iTunes, QuickTime, Internet Explorer) on top of your slideshow.
Depending on your computer setup, you may have to wade through some security
warnings about the dangers of opening hyperlinks. And if you give the presentation on a
different computer without the programs your hyperlinked files need, you’re out of luck.
Adding graphs, diagrams, and tables
You can use PowerPoint to create simple graphs, tables, and various charts/diagrams. Or,
if you are an Excel aficionado, you can import your own graphs, charts, and tables. (If
you have an image of a chart, graph or table rather than an Excel file, you should insert it
as an image. See the Working with images section).
Creating diagrams
PowerPoint can automatically create six different kinds of diagrams through Insert 
Diagram. Any diagram can be moved around, resized, and customised by adding text
and/or playing with the pop-up menu that appears when you create a diagram. Borders
and fill colours can be changed in the Drawing toolbar. For more information on how to
do these kinds of operations, see the Working with Text section above.
Creating tables
Go to Insert  Table and choose the number of rows and columns you want. Then just
type in the boxes. You can resize the table by dragging on the white circles around its
edges.
Animating diagrams
You can animate an entire diagram (see Animation section), but I don’t think it is
possible to animate different parts to appear separately.
27
Creating charts
Go to Insert  Chart and a simple chart will
appear on your slide. (It looks like a graph to
me, but PowerPoint has decided it is a chart).
Don’t worry if you don’t like it, because you
can change almost anything about it. A
window will pop up where you can enter your
own data, and add or delete columns or cells
(by typing in them or selecting them and
pressing Delete). If you right-click on
different parts of the chart itself, you will see
menus for customising those parts. Right-
clicking on a blank part of the chart will get
you to Chart Options, where you can
customise many things from a single menu.
Importing Excel files
If you have already created tables or charts
in Excel, you can easily insert them into
your PowerPoint presentation. To avoid
trouble later, you should first copy your
chosen Excel file(s) into the same folder as
your PowerPoint presentation. Then go to
Insert  Object and choose Create from File. Locate the file (it should now be in the
same folder as your presentation) and click OK. You will then see your Excel file on
your slide. You can resize it and move it like a text box (see Text Box section). If you
want to edit the chart, double-click anywhere on it, and you will then go to an in-depth
view where you can select parts of it and change them. (In fact, much of your main menu
bar takes on Excel editing options). To return to normal slide view, click anywhere
outside the chart.
Previewing your slideshow while working on it
You can preview your slideshow at any time by pressing F5. Click the mouse to move
through the slides. Press ESC at any time to exit.
A slide with a PowerPoint-created chart.
(The red arrow is an AutoShape and was
added separately).
A slide with a pie chart imported from Excel.
28
You can also start the preview from your current slide by pressing the button at the
bottom left-hand corner of the screen.
Making handouts, web pages, Word files and JPGs from your
finished slides
It is possible to convert your slides into Microsoft Word files (with or without images)
and HTML files. If you are a Mac OS user and/or own the full version of Adobe Acrobat,
you should be able to make your slideshows into PDF files as well, but this is not covered
here. You can also save individual slides or an entire show as JPG files. None of the
above options currently support audio, video, or animations.
Printing a handout directly from PowerPoint
Go to File  Print Preview. At the top left of your screen there should be a drop-down
menu where you can choose to print full-page slides or handouts with various numbers of
slides per page. You can also choose to just print the text of your slides (Outline View).
Click Print when you are ready.
Creating a Word document handout
This creates a lecture handout file which can be printed, emailed, or uploaded onto
WebCT. Go to File  Send To  Microsoft Office Word. You are given very
limited options here, but you can always edit the result just like any Word document. If
you want just the text from your slides, choose Outline Only. In this menu you have a
choice between Paste or Paste Link. Paste creates a Word document from your slide
show the way it is now. Paste Link does the same thing, but also maintains a link to your
PowerPoint presentation and automatically updates the Word file if you make changes to
the slideshow. If you choose Paste Link, you should save the Word file in the same
folder as your PowerPoint presentation and keep it there. If you move either file, the link
will no longer work.
Creating a web page
This creates a web page with your slide titles in a frame on the left-hand side. When you
click on one of these titles, its slide appears in the main part of the screen. This tool is
not that reliable (it tends to do wacky things like inexplicably change fonts), but it is still
the fastest way to share your slides on the internet. Go to File  Save As, and pull the
drop-down menu to Single File Web Page. (This saves all the necessary files as one
single file, which makes it simpler to upload or email). Type a title for your file and save
29
it. You can then open it in your web browser, and/or upload it to the internet (including
WebCT).
Creating JPG files from your slides
If you want to distribute a few slides to your students electronically or via WebCT, this is
a good option. Open the slide you wish to make into an image. Click on File  Save
As, and choose JPG from the drop-down menu. Type a title and hit Save. You will then
be asked if you want to save just the selected slide, or the entire presentation. (If you
choose to save the entire presentation, you will get a separate JPG file for each slide).
You can then open, edit, and distribute these files just like regular images.
Copying your slideshow onto a CD or memory stick
Resist the temptation to just drag and drop your PowerPoint file onto another drive,
unless you are absolutely sure you didn’t link any files to it (e.g. audio, video, Excel,
special fonts). If you copied your linked files into the folder with your slideshow as you
were creating it, you should be able to just drag and drop that entire folder. If you have a
newer version of PowerPoint, there are some tools that make copying it even easier.
In PowerPoint 2003
PowerPoint 2003 allows you to transfer everything with just a few clicks. Go to File
 Package for CD. If you are burning to a CD, insert the CD and click on Copy to CD.
If you are copying to a memory stick or floppy disk, insert it, choose Copy to Folder and
locate the appropriate drive. That’s it! All of your linked files should automatically be
included, regardless of whether or not you copied them all into the same folder. You also
get a copy of PowerPoint Viewer, which allows your slideshow to play even on
computers that do not have PowerPoint installed.
In PowerPoint 2002
In PowerPoint 2002, you should be able to use the command File  Pack and Go, but
be sure to check the boxes marked Include Linked Files and Embed TrueType Fonts.
You can download the PowerPoint viewer here if you haven’t already.
Warning: If you hyperlinked any files, you will need the software your computer uses to
play them. These programs won’t automatically get copied. So if you’re presenting on a
different computer, try to find out in advance if it has the software you need.
30
PowerPoint 2002 zips your files, so you will have to unzip them on the new computer.
This should happen automatically when you click on the folder. Important note: Pack
and Go apparently does not unpack properly on Mac OS or Linux, so if there is a chance
you might run your slideshow from a Mac, don’t use it! I don’t know whether or not
there is a problem switching from Mac to PC, but it’s probably best not to find out.
In any version of PowerPoint
If you have an even older version of PowerPoint or you want to run a PowerPoint 2002
presentation on another platform, you will have to rely on the copying-the-entire-folder
method. If you do not have the PowerPoint viewer (ppviewer.exe) already and might
have to present on a computer without PowerPoint, you can download the viewer for free
at: http://www.microsoft.com/downloads/details.aspx?FamilyId=428D5727-43AB-
4F24-90B7-A94784AF71A4&displaylang=en.
Projecting your slideshow in the presentation room
Finally! Well, almost… To show your slideshow to an audience, you will need a digital
projector.
Even though these instructions are relatively simple, every computer-projector
combination is different and it is very common for something to go wrong. Try it out in
advance if possible, and still leave yourself plenty of time to set up.
Advance preparations
1. In the projector case you will find a cable to connect your computer to the
projector. It will fit most computers, but try it out first. There should only be one
port on your computer that it could possibly connect with.
2. You might also need an extension cord.
3. If you are planning to play any media with sound, you will need a second cable to
link your computer’s headphone/speaker jack to the audio input on the projector.
This cable looks like a walkman headphone jack on both ends. If you check your
computer speakers, there might be one running between them which you can
detach. As a last resort, you could bring in your computer speakers and hook
those up to your computer instead.
4. Try to find out in advance (from friends, your computer manual, or online) which
key combination will get your computer screen to display from the projector.
Unfortunately it is not the same for all computers. When your screen temporarily
flashes black, and/or if some icons of monitors appear, you have probably found
the right combination. If your screen stays black, that’s still a good sign – just
keep pressing the same two keys until your display returns.
31
Setting up the presentation
1. Start with both projector and computer off. (If your computer is already turned on
you can try following these instructions anyway – sometimes it works).
2. Plug in the projector.
3. Attach your computer to the projector with the main cable, and the audio cable if
necessary.
4. Turn on the projector. It may take a while to warm up. You will not see your
slideshow yet, but you should see a blue screen projected onto the wall. If not,
check to make sure the power is on and the lens cap is off.
5. Turn on the computer. Your computer screen might go black for a few seconds,
but then you should see it displayed on the wall.
6. If you are using audio, play a sound file and check the volume. You should be
able to turn the projector volume up fairly high, even though the sound quality is
not great. Turn the volume up on your computer as well, if necessary. If you still
don’t hear anything at all, make sure the mute function is off on both projector
and computer, and that the audio input cord is pushed all the way into projector
and computer ports.
7. Open PowerPoint and your slideshow file. Press F5 to start your slideshow.
8. Yes, it is possible to get your slideshow to display on the wall and your lecture
notes (or whatever you want) to display on your computer screen. You need to
use dual monitor configuration for this. Like setting up a projector, it is often a
lot more complicated than it should be, and it varies by computer. You can find
instructions in the PowerPoint help files if you like, or through Google.
Desperate last-ditch attempts to make your show appear
1. Try other key combinations. Press all the F-keys in turn. Press the Fn-key with
each F-key. Something has to work!
2. Make sure the resolution of your computer matches that of the projector:
a. Look on the projector and see if you can find the resolution written on it.
It is probably either 1024x768 or 800x600. If you can’t find it, try these
instructions anyway.
b. On your computer, go to Control Panel  Display, then click on the
Settings tab.
c. Under Screen Resolution, move the slider to the correct resolution. If you
don’t know, try 1024x768 pixels. Click on Apply. If you still can’t get
your screen to display, try 800x600 pixels. Keep trying resolutions until
one works.
3. Sometimes there are different input sources on the projector. Find the input
button and cycle through these.
4. Turn everything off and turn it on again, starting with the projector. Good luck!
32
Running your presentation once the projector is set up
1. Open your PowerPoint file, then press F5 to start your show.
2. Move through your slideshow either by clicking on the mouse or by using the up
and down arrows on your keyboard. (Some projectors also come with a remote
control). A bunch of fancy commands for jumping around in your slideshow are
available at: http://office.microsoft.com/en-gb/assistance/HP051953031033.aspx.
3. If you need to go backwards, press the up arrow.
4. If you move your mouse pointer over the bottom left-hand corner of the screen,
you will see a menu with several advanced options. If you click on the pen icon,
you can get a “pen” that allows you to draw on your slides (in non-permanent ink).
5. To leave the slideshow at any time, hit ESC.
6. Congratulations, you’re done!
Assignment 2
In this assignment you are required to create a presentation on a match of FIFA World
Cup 2006. The audience is a group of people who want to know what happened in that
match- who won? By what margin of goals? Who are the goal scorers? Who played very
well? Who got cards? And so on…
You must use the following:
 Text description (very brief)
 Images of different players given to you.
 Animation

Más contenido relacionado

La actualidad más candente

Powerpoint tutorials
Powerpoint tutorials Powerpoint tutorials
Powerpoint tutorials
ePowerpoint
 
Power point activity 1
Power point activity 1Power point activity 1
Power point activity 1
RancieCastro
 
Effective PowerPoint Presentations
Effective PowerPoint PresentationsEffective PowerPoint Presentations
Effective PowerPoint Presentations
Samantha Blevins
 
Job Aid Makeover - Captivate
Job Aid Makeover - CaptivateJob Aid Makeover - Captivate
Job Aid Makeover - Captivate
S. Rose
 
Effective use of power point as a presentation tool
Effective use of power point as a presentation toolEffective use of power point as a presentation tool
Effective use of power point as a presentation tool
Kathlene Miel Casanova
 

La actualidad más candente (20)

Power Point Basics
Power Point BasicsPower Point Basics
Power Point Basics
 
My first power point
My first power pointMy first power point
My first power point
 
Introduction to ms power point Grade 9
Introduction to ms power point Grade 9Introduction to ms power point Grade 9
Introduction to ms power point Grade 9
 
Creating Power Point Presentations | www.sampleassignment.com
Creating Power Point Presentations | www.sampleassignment.comCreating Power Point Presentations | www.sampleassignment.com
Creating Power Point Presentations | www.sampleassignment.com
 
Powerpoint tutorials
Powerpoint tutorials Powerpoint tutorials
Powerpoint tutorials
 
Microsoft Office PowerPoint 2007 - Lesson 1
Microsoft Office PowerPoint 2007 - Lesson 1Microsoft Office PowerPoint 2007 - Lesson 1
Microsoft Office PowerPoint 2007 - Lesson 1
 
Power point activity 1
Power point activity 1Power point activity 1
Power point activity 1
 
11. pp beginner
11. pp beginner11. pp beginner
11. pp beginner
 
Effective PowerPoint Presentations
Effective PowerPoint PresentationsEffective PowerPoint Presentations
Effective PowerPoint Presentations
 
Job Aid Makeover - Captivate
Job Aid Makeover - CaptivateJob Aid Makeover - Captivate
Job Aid Makeover - Captivate
 
Make Visually Stunning PowerPoints - Training Handout
Make Visually Stunning PowerPoints - Training HandoutMake Visually Stunning PowerPoints - Training Handout
Make Visually Stunning PowerPoints - Training Handout
 
Image Editing for Beginners - Training Handout
Image Editing for Beginners - Training HandoutImage Editing for Beginners - Training Handout
Image Editing for Beginners - Training Handout
 
Presentation1
Presentation1Presentation1
Presentation1
 
Learning to Create a Power Point basics
Learning to Create a Power Point basicsLearning to Create a Power Point basics
Learning to Create a Power Point basics
 
Creating and editing a presentation with clipart 2
Creating and editing a presentation with clipart 2Creating and editing a presentation with clipart 2
Creating and editing a presentation with clipart 2
 
PowerPoint basics
PowerPoint basicsPowerPoint basics
PowerPoint basics
 
Introduction to powerpoint
Introduction to powerpointIntroduction to powerpoint
Introduction to powerpoint
 
U pog ppb
U pog ppbU pog ppb
U pog ppb
 
Powerpoint class activity
Powerpoint class activityPowerpoint class activity
Powerpoint class activity
 
Effective use of power point as a presentation tool
Effective use of power point as a presentation toolEffective use of power point as a presentation tool
Effective use of power point as a presentation tool
 

Similar a Rule for creating power point slide

Parsons tips and guidlins for ppt
Parsons tips and guidlins for pptParsons tips and guidlins for ppt
Parsons tips and guidlins for ppt
parsons03
 
Powerpoint 2007 tutorial
Powerpoint 2007 tutorialPowerpoint 2007 tutorial
Powerpoint 2007 tutorial
sumatipuri
 
Parsons tips and guidlins for ppt
Parsons tips and guidlins for pptParsons tips and guidlins for ppt
Parsons tips and guidlins for ppt
parsons03
 
Microsoft PowerPoint 2007 Tips & Tricks
Microsoft PowerPoint 2007 Tips & TricksMicrosoft PowerPoint 2007 Tips & Tricks
Microsoft PowerPoint 2007 Tips & Tricks
Jessica Haight-Angelo
 
Storyboard EDT 631
Storyboard EDT 631Storyboard EDT 631
Storyboard EDT 631
Diana Lynn
 
Attachments 2010 10_11
Attachments 2010 10_11Attachments 2010 10_11
Attachments 2010 10_11
khevs27
 

Similar a Rule for creating power point slide (20)

Powerpoint slide
Powerpoint slidePowerpoint slide
Powerpoint slide
 
Microsoft Powerpoint 2003
Microsoft Powerpoint 2003Microsoft Powerpoint 2003
Microsoft Powerpoint 2003
 
ID lecture-7.PPT
ID lecture-7.PPTID lecture-7.PPT
ID lecture-7.PPT
 
ID lecture-7 (1).PPT
ID lecture-7 (1).PPTID lecture-7 (1).PPT
ID lecture-7 (1).PPT
 
ID lecture-7.PPT
ID lecture-7.PPTID lecture-7.PPT
ID lecture-7.PPT
 
ppt introduction.ppt
ppt introduction.pptppt introduction.ppt
ppt introduction.ppt
 
Mid-Fi Prototyping with PowerPoint.PPT
Mid-Fi Prototyping with PowerPoint.PPTMid-Fi Prototyping with PowerPoint.PPT
Mid-Fi Prototyping with PowerPoint.PPT
 
Parsons tips and guidlins for ppt
Parsons tips and guidlins for pptParsons tips and guidlins for ppt
Parsons tips and guidlins for ppt
 
Powerpoint 2007 tutorial
Powerpoint 2007 tutorialPowerpoint 2007 tutorial
Powerpoint 2007 tutorial
 
11. powerpointhandout
11. powerpointhandout11. powerpointhandout
11. powerpointhandout
 
Parsons tips and guidlins for ppt
Parsons tips and guidlins for pptParsons tips and guidlins for ppt
Parsons tips and guidlins for ppt
 
Creating presentation in oo impress
Creating presentation in oo impressCreating presentation in oo impress
Creating presentation in oo impress
 
Microsoft PowerPoint 2007 Tips & Tricks
Microsoft PowerPoint 2007 Tips & TricksMicrosoft PowerPoint 2007 Tips & Tricks
Microsoft PowerPoint 2007 Tips & Tricks
 
Storyboard Final EDT 631
Storyboard Final EDT 631Storyboard Final EDT 631
Storyboard Final EDT 631
 
Storyboard EDT 631
Storyboard EDT 631Storyboard EDT 631
Storyboard EDT 631
 
Zekepowerpoint
ZekepowerpointZekepowerpoint
Zekepowerpoint
 
1stQtr-1stMeeting-travel
1stQtr-1stMeeting-travel1stQtr-1stMeeting-travel
1stQtr-1stMeeting-travel
 
Attachments 2010 10_11
Attachments 2010 10_11Attachments 2010 10_11
Attachments 2010 10_11
 
powerpoint10Basics.pdf
powerpoint10Basics.pdfpowerpoint10Basics.pdf
powerpoint10Basics.pdf
 
PowerPoint Ideas & Hacks: Images
PowerPoint Ideas & Hacks: ImagesPowerPoint Ideas & Hacks: Images
PowerPoint Ideas & Hacks: Images
 

Más de Md. Mashiur Rahman

Más de Md. Mashiur Rahman (20)

Advance DBMS
Advance DBMSAdvance DBMS
Advance DBMS
 
Final exam in advance dbms
Final exam in advance dbmsFinal exam in advance dbms
Final exam in advance dbms
 
Answer sheet of switching & routing
Answer sheet of switching & routingAnswer sheet of switching & routing
Answer sheet of switching & routing
 
Routing and switching question1
Routing and switching question1Routing and switching question1
Routing and switching question1
 
Lecture 1 networking & internetworking
Lecture 1 networking & internetworkingLecture 1 networking & internetworking
Lecture 1 networking & internetworking
 
Lec 7 query processing
Lec 7 query processingLec 7 query processing
Lec 7 query processing
 
Lec 1 indexing and hashing
Lec 1 indexing and hashing Lec 1 indexing and hashing
Lec 1 indexing and hashing
 
Cloud computing lecture 7
Cloud computing lecture 7Cloud computing lecture 7
Cloud computing lecture 7
 
Cloud computing lecture 1
Cloud computing lecture 1Cloud computing lecture 1
Cloud computing lecture 1
 
parallel Questions & answers
parallel Questions & answersparallel Questions & answers
parallel Questions & answers
 
Mis 8
Mis 8Mis 8
Mis 8
 
Mis 3
Mis 3Mis 3
Mis 3
 
Mis 1
Mis 1Mis 1
Mis 1
 
Mis 5
Mis 5Mis 5
Mis 5
 
Mis 2
Mis 2Mis 2
Mis 2
 
Mis 9
Mis 9Mis 9
Mis 9
 
Mis 6
Mis 6Mis 6
Mis 6
 
Mis 7
Mis 7Mis 7
Mis 7
 
Mis 4
Mis 4Mis 4
Mis 4
 
Computer network solution
Computer network solutionComputer network solution
Computer network solution
 

Último

Uncommon Grace The Autobiography of Isaac Folorunso
Uncommon Grace The Autobiography of Isaac FolorunsoUncommon Grace The Autobiography of Isaac Folorunso
Uncommon Grace The Autobiography of Isaac Folorunso
Kayode Fayemi
 
If this Giant Must Walk: A Manifesto for a New Nigeria
If this Giant Must Walk: A Manifesto for a New NigeriaIf this Giant Must Walk: A Manifesto for a New Nigeria
If this Giant Must Walk: A Manifesto for a New Nigeria
Kayode Fayemi
 
No Advance 8868886958 Chandigarh Call Girls , Indian Call Girls For Full Nigh...
No Advance 8868886958 Chandigarh Call Girls , Indian Call Girls For Full Nigh...No Advance 8868886958 Chandigarh Call Girls , Indian Call Girls For Full Nigh...
No Advance 8868886958 Chandigarh Call Girls , Indian Call Girls For Full Nigh...
Sheetaleventcompany
 
Bring back lost lover in USA, Canada ,Uk ,Australia ,London Lost Love Spell C...
Bring back lost lover in USA, Canada ,Uk ,Australia ,London Lost Love Spell C...Bring back lost lover in USA, Canada ,Uk ,Australia ,London Lost Love Spell C...
Bring back lost lover in USA, Canada ,Uk ,Australia ,London Lost Love Spell C...
amilabibi1
 

Último (20)

Introduction to Prompt Engineering (Focusing on ChatGPT)
Introduction to Prompt Engineering (Focusing on ChatGPT)Introduction to Prompt Engineering (Focusing on ChatGPT)
Introduction to Prompt Engineering (Focusing on ChatGPT)
 
My Presentation "In Your Hands" by Halle Bailey
My Presentation "In Your Hands" by Halle BaileyMy Presentation "In Your Hands" by Halle Bailey
My Presentation "In Your Hands" by Halle Bailey
 
Uncommon Grace The Autobiography of Isaac Folorunso
Uncommon Grace The Autobiography of Isaac FolorunsoUncommon Grace The Autobiography of Isaac Folorunso
Uncommon Grace The Autobiography of Isaac Folorunso
 
BDSM⚡Call Girls in Sector 97 Noida Escorts >༒8448380779 Escort Service
BDSM⚡Call Girls in Sector 97 Noida Escorts >༒8448380779 Escort ServiceBDSM⚡Call Girls in Sector 97 Noida Escorts >༒8448380779 Escort Service
BDSM⚡Call Girls in Sector 97 Noida Escorts >༒8448380779 Escort Service
 
If this Giant Must Walk: A Manifesto for a New Nigeria
If this Giant Must Walk: A Manifesto for a New NigeriaIf this Giant Must Walk: A Manifesto for a New Nigeria
If this Giant Must Walk: A Manifesto for a New Nigeria
 
SaaStr Workshop Wednesday w/ Lucas Price, Yardstick
SaaStr Workshop Wednesday w/ Lucas Price, YardstickSaaStr Workshop Wednesday w/ Lucas Price, Yardstick
SaaStr Workshop Wednesday w/ Lucas Price, Yardstick
 
Causes of poverty in France presentation.pptx
Causes of poverty in France presentation.pptxCauses of poverty in France presentation.pptx
Causes of poverty in France presentation.pptx
 
Dreaming Music Video Treatment _ Project & Portfolio III
Dreaming Music Video Treatment _ Project & Portfolio IIIDreaming Music Video Treatment _ Project & Portfolio III
Dreaming Music Video Treatment _ Project & Portfolio III
 
Sector 62, Noida Call girls :8448380779 Noida Escorts | 100% verified
Sector 62, Noida Call girls :8448380779 Noida Escorts | 100% verifiedSector 62, Noida Call girls :8448380779 Noida Escorts | 100% verified
Sector 62, Noida Call girls :8448380779 Noida Escorts | 100% verified
 
AWS Data Engineer Associate (DEA-C01) Exam Dumps 2024.pdf
AWS Data Engineer Associate (DEA-C01) Exam Dumps 2024.pdfAWS Data Engineer Associate (DEA-C01) Exam Dumps 2024.pdf
AWS Data Engineer Associate (DEA-C01) Exam Dumps 2024.pdf
 
No Advance 8868886958 Chandigarh Call Girls , Indian Call Girls For Full Nigh...
No Advance 8868886958 Chandigarh Call Girls , Indian Call Girls For Full Nigh...No Advance 8868886958 Chandigarh Call Girls , Indian Call Girls For Full Nigh...
No Advance 8868886958 Chandigarh Call Girls , Indian Call Girls For Full Nigh...
 
The workplace ecosystem of the future 24.4.2024 Fabritius_share ii.pdf
The workplace ecosystem of the future 24.4.2024 Fabritius_share ii.pdfThe workplace ecosystem of the future 24.4.2024 Fabritius_share ii.pdf
The workplace ecosystem of the future 24.4.2024 Fabritius_share ii.pdf
 
Report Writing Webinar Training
Report Writing Webinar TrainingReport Writing Webinar Training
Report Writing Webinar Training
 
Busty Desi⚡Call Girls in Sector 51 Noida Escorts >༒8448380779 Escort Service-...
Busty Desi⚡Call Girls in Sector 51 Noida Escorts >༒8448380779 Escort Service-...Busty Desi⚡Call Girls in Sector 51 Noida Escorts >༒8448380779 Escort Service-...
Busty Desi⚡Call Girls in Sector 51 Noida Escorts >༒8448380779 Escort Service-...
 
lONG QUESTION ANSWER PAKISTAN STUDIES10.
lONG QUESTION ANSWER PAKISTAN STUDIES10.lONG QUESTION ANSWER PAKISTAN STUDIES10.
lONG QUESTION ANSWER PAKISTAN STUDIES10.
 
Air breathing and respiratory adaptations in diver animals
Air breathing and respiratory adaptations in diver animalsAir breathing and respiratory adaptations in diver animals
Air breathing and respiratory adaptations in diver animals
 
ICT role in 21st century education and it's challenges.pdf
ICT role in 21st century education and it's challenges.pdfICT role in 21st century education and it's challenges.pdf
ICT role in 21st century education and it's challenges.pdf
 
Presentation on Engagement in Book Clubs
Presentation on Engagement in Book ClubsPresentation on Engagement in Book Clubs
Presentation on Engagement in Book Clubs
 
Bring back lost lover in USA, Canada ,Uk ,Australia ,London Lost Love Spell C...
Bring back lost lover in USA, Canada ,Uk ,Australia ,London Lost Love Spell C...Bring back lost lover in USA, Canada ,Uk ,Australia ,London Lost Love Spell C...
Bring back lost lover in USA, Canada ,Uk ,Australia ,London Lost Love Spell C...
 
Aesthetic Colaba Mumbai Cst Call girls 📞 7738631006 Grant road Call Girls ❤️-...
Aesthetic Colaba Mumbai Cst Call girls 📞 7738631006 Grant road Call Girls ❤️-...Aesthetic Colaba Mumbai Cst Call girls 📞 7738631006 Grant road Call Girls ❤️-...
Aesthetic Colaba Mumbai Cst Call girls 📞 7738631006 Grant road Call Girls ❤️-...
 

Rule for creating power point slide

  • 1. Microsoft PowerPoint Instructor: Dr. A. S. M. Latiful Hoque Associate Professor Department of CSE BUET Bangladesh University of Engineering and Technology (BUET) Dhaka 1000
  • 2. 2 Introduction Presenting ideas in a clear and concise manner is important when sharing information with others. For this reason Microsoft® PowerPoint® has become an indispensable tool for sharing and presenting different ideas. Originally, PowerPoint was used primarily for giving live slide presentations in front of groups of people; now it enables you to give Internet-based presentations that can transcend barriers of time and space. PowerPoint has many useful features that enable you to create presentations for your colleagues or boss or whoever, to view, and you don’t need to know HTML or any other programming. PowerPoint is presentation software that enables visual organization and communication of concepts. You can customize your presentations with sound, animation, charts, graphics, narration, and video. Before you start using PowerPoint 2002, you should become familiar with its features. The following illustration shows a slide in the TriPane view with the task pane showing. Notations: The symbol  is used throughout this tutorial to refer to the drop-down menu bars at the top of the screen. (For example, Format  Font means: “Pull down the Format menu, and select Font.”) You can get more detailed instructions from the official help files, which can be found by pressing F1 in PowerPoint. Slide Sorter Pane View Buttons Status Bar Slide Pane Menu Bar Toolbars Window Sizing Buttons Notes Pane Task Pane
  • 3. 3 Finding and opening PowerPoint All computers with Microsoft Office (Word, Excel, etc.) should have PowerPoint already installed. For Windows XP users, click on , then on Programs or Show All Programs. Click on the icon . (If you don’t see it, it may be hidden in the Microsoft Office folder). Now you should see a screen like this one (minus the yellow arrows): Many of the instructions in this chapter assume you are displaying the so-called “Task Pane” (menu of options) on the right-hand side of the screen. If you do not see it, click on View  Task Pane. Older versions of PowerPoint: The task pane may be under View  Toolbars  Task Pane, or there may not be one at all. If this is the case, you can still do almost everything described in this chapter, since most of the task-pane menus will pop up in windows in the middle of your screen instead. You should also have the Drawing toolbar running along the bottom of your screen (the first button on the left says Draw). If you don’t see it, go to View  Toolbars  Drawing, and embed it in the screen by dragging it to the bottom of your screen and releasing it there. This toolbar is not necessary, but it provides shortcuts for many task pane drawing toolbar
  • 4. 4 a box for a picture common actions. (As in Microsoft Word, it is possible to configure various toolbars to get shortcuts to virtually all the actions I describe below). Choosing the format of your slides In the task pane on the right side of the screen, click on Create a New Presentation. (In Microsoft PowerPoint 2002, you do not need to do this step. In even older versions, use the command File New). You should now see several options. If this is your first time using PowerPoint, choose Blank Presentation. A brief note on the other formatting options: First of all, do not choose AutoContent Wizard. It is designed for corporate presentations and is guaranteed to come up with some inappropriate “autocontent” for you. Secondly, Existing Presentation allows you to open an old PowerPoint presentation as a new file, which is good if you want to use the same basic format as a previous lecture. Finally, Design Templates are pre-set designs that can be frustrating to edit or get rid of, which is why I have decided to steer clear of them in this chapter. With a bit of effort, they can be customised much like any slide – some basics are explained in the Background section below. If you are comfortable with PowerPoint, you may also find the “Colour schemes” in the Design Template view useful. If you click on Blank Presentation, you will then see a list of possible formats for your slides. (In much older versions you may have to use Format  Slide Layout). For the first lecture slide, you will probably want a basic layout with just a title (like the first choice on the top left under Text Layouts). If you have an image to include as well, you could choose a simple template in the Content Layouts section. Here are two that work well as opening slides: You can choose different formats for later slides, and adapt existing formats at any time, so don’t worry if there isn’t one that is perfect for you. Saving your presentation Go ahead and save your presentation now. It’s the same command as in other Microsoft programs: Ctrl-S or File  Save. If you plan to use any external files other than images – e.g. graphs, music, or videos – you should create a new folder now and save your presentation in it. Before you add any external files, copy them into this folder first. (This makes it much easier to move your presentation to other drives or computers later). boxes for text
  • 5. 5 Undoing a mistake This is also the same as in Word: either Ctrl-Z or Edit  Undo. You can also redo something with Ctrl-Y or Edit  Redo. Changing the background If you created a Blank Presentation, all your slides will have a plain white background by default. Boring or minimalist…you decide. If you want to change it, do it now. Technically you can edit your default background at any time, but it can get messy to change it after you’ve already created a lot of slides. (For example, if you’ve typed all your notes in black font and you change to a black background, you’ll have to reformat your font too). If you are using a design template instead of a blank presentation: You probably don’t have a plain white background. You can still change the background on any slide(s) in your presentation using these instructions, but depending on your template, you may have to check the Omit background graphics from master box (hidden by the drop-down menu in the picture below) to get rid of the template’s extra graphics. To edit your background, go to Format  Background. After you choose a background from the options below, clicking on Apply to All will make your new background the default for all present and future slides in your presentation. Clicking on Apply will change only the slide you have open. If you’re still on your first slide, I recommend choosing a subtle, basic, neutral background and clicking the Apply to All button. If you want a special background for some slides (e.g. a series of photos or paintings), you can always change those slides individually later, by using these same instructions but clicking on Apply. Solid colour To get a solid colour as your background, just click on the little down arrow under the Background Fill box, and you will get a few colours to choose from. If you don’t like these choices, click on More Colours and you can pick from a virtually unlimited selection. Neutral or muted colours usually look best. Remember your text doesn’t have to be black, The Background pop-up window.
  • 6. 6 so it is fine to choose a dark colour. In fact, dark colours with white fonts show up better in most lecture halls. Gradient To get to this option, click on Fill Effects (pictured above – it’s under the colour choices on the pull-down menu). Gradients give a professional shading effect to solid colours. The default gradient settings are extreme (e.g. all white at the top and all black at the bottom), which makes it difficult to place readable font on the slide. You can correct this issue by choosing two colours that are similar, or by choosing one colour and playing with the dark-light spectrum under the colour chooser to make the gradient more subtle. There are also some preset gradients, but most of them use distractingly bright colours. Texture Click on Fill Effects, and then choose the Textures tab. Here you can choose from a wide variety of preset textures. A lot of the textures are loud enough to detract from your text, so it’s usually best to use these sparingly on individual slides, rather than as the background for a whole presentation. Pattern Click on Fill Effects, and then choose the Patterns tab. Patterns are similar to gradients – you choose two colours, then the kind of pattern you want. The default patterns (white and blue) are annoying. Try picking two colours that are almost the same, e.g. two similar shades of blue. To get more colour options, click on More Colours under the colour-choosing tabs. Picture This allows you to use your own image as the background. Click on Fill Effects, and then choose the Picture tab. Click on Select Picture and find an image on your computer. Check the Lock Picture Aspect Ratio box (bottom left) if you do not want your picture to be distorted. Picture- backgrounds are great for the first slide of your show, where you just want a title, or for a part of your lecture where you just want to show images with very little text. Pictures can also make interesting backgrounds for the body of your lecture if you are willing to do some work in image-editing software. You will need to fix the contrast and brightness of the picture to make it very faint and muted, so you can write text on top of it. Changing a coloured picture to black-and-white can also make it less distracting. Here is JFK and the Cuban Missile CrisisJFK and the Cuban Missile CrisisJFK and the Cuban Missile Crisis (1960(1960(1960---1963)1963)1963) An example of a title slide with an image as the background
  • 7. 7 a sample image (of a protest march in DC) washed out to make an appropriate PowerPoint background: What to do if one object on your slide is hidden behind another When you are working with text and images, sometimes one object will get stuck behind another, preventing you from moving or editing the one underneath. To fix this problem, right-click on the top object. In the menu that appears, go to Order  Send to Back. Now you should be able to access the object that was behind it. Working with text Typing and formatting font The only way to get text on a PowerPoint slide is to type in a text box. You may already have an empty text box (technically called a “Placeholder” if you didn’t draw it yourself) on your slide. It should look something like this: Simply click somewhere inside the box and type whatever you want. You can change the font, size, style, colour, alignment, etc. just as you would in Word: either by playing with the font drop-down boxes at the top of the screen, or through Format  Font. (Your font size may automatically shrink to fit in the box. It is possible to change this setting if you find it too annoying. See Troubleshoot Adding Text in the PowerPoint Help file). Moving an existing text box If you want to move a text box, just click anywhere on its edge (except the white circles) and drag it to where you want it on the slide.
  • 8. 8 Resizing an existing text box Click on any of those circles around the edge and drag the text box into the size that you want. Holding down the Shift key while dragging one of the corner circles will lock the aspect ratio on your text box. Resizing a text box may cause the text inside to shrink or realign itself. Creating a new text box Regardless of what your slide template looks like, you can always add a new text box. Go to Insert  Text Box  Horizontal, or click on in the drawing toolbar. You will then be given a special cursor. Click with it anywhere on the slide and you will get a small text box. Drag the corners of this box to the width that you want and start typing. You must type something in the box before clicking anywhere else on the slide, or the text box will vanish, never to return. (You may notice a small green circle above the top of the box. This allows you to rotate the text box, should you ever want your words on a slant). Deleting a text box To get rid of any text box (empty or not), just click and release anywhere on its edge, and then hit the Delete key. Adding a border or fill to a text box (and other advanced options) The default text box outlines will be invisible in a slideshow, so don’t worry if a text box overhangs the edge of the slide or overlaps with something else. However, should you want a visible border on a text box, double-click the text box on its edge. A window should pop up. Choose a size and colour of outline under the Colours and Lines tab. You can also fill your text boxes with a solid colour from this menu (very useful over noisy backgrounds like pictures). There are plenty of other advanced options available in this window, such as controlling the margins inside and outside the text box. (There are also shortcuts to several of the above options in the Drawing toolbar). Bullets and numbering Bulleted lists are useful for the body of a lecture. As a general rule, you shouldn’t have more than 5 bullet points on a single slide, and you should keep your text relatively large (usually at least 20 pt., but it depends on the font and the size of the classroom). To create a bulleted list, select the line(s) you want and go to Format  Bullets and
  • 9. 9 Numbering, then click on the set-up you prefer. This also works for getting rid of an unwanted bulleted list. (PowerPoint has the annoying Microsoft habit of autoformatting the heck out of everything whether you like it or not). As in Word, Enter + Tab will give your bulleted list a hierarchy, like this (or the one pictured above):  Point 1 o Sub-point 1 o Sub-point 2  Sub-sub-point 1  Point 2 Enter + Shift-Tab will back you up one indentation, so you can add your next main point. Working with images Images can include scanned slides, maps, photographs, and historical documents. PowerPoint accepts many image formats including JPG, BMP, and GIF. It is also supposed to accept PCT files as long as you rename them to end in .pct. Working with images is much like working with text. Many slide templates have one or more preset image boxes (“Placeholders”), which look something like this: Inserting an image If you already have an image box on your slide, just click on the picture icon ( ) inside the box. PowerPoint will then prompt you to choose an image from your computer. Select it and click Insert. You can also insert ClipArt with the ClipArt icon ( or ,
  • 10. 10 depending on your version of PowerPoint). ClipArt is a database of mostly cartoony images that comes free with Microsoft Office. Microsoft has more free images available for download at http://office.microsoft.com/clipart. You can insert an image even without an image box. Simply go to Insert  Picture  From File (or ClipArt). Locate the picture you want and click Insert. You also have shortcuts to these options on your drawing toolbar (they use the same two icons pictured above). Moving an image Click once anywhere on it and drag it to wherever you want. Resizing an image Drag on the white circles around its edges. If you drag a corner, the picture will grow or shrink without changing shape. Dragging one of the side-circles will distort the original image. As with text boxes, the small green circle above the picture allows you to rotate it. If you want an image to fill the whole slide, you can resize it, or you can just set it as the background for that individual slide. See Background section above. Deleting an image or empty image box Just click once on the image to select it, and hit the Delete key. You will be left with an empty image box, so you can either insert something new into it or delete that by clicking once on its edge and hitting Delete. Advanced options Double-click on the picture. Under the Colours and Lines tab, you can add a border to your image just like to a text box (see Working with text section). Under the Picture tab, you can compress an image (make it smaller so that it will load faster – great for TIFF format images). Depending on its format, you may also be able to change it to black & white, wash it out, and adjust its brightness or contrast. For some bizarre reason, you cannot do this to background pictures. You can get a few more options (including cropping) from the Picture toolbar. Right- click on the image and choose Show Picture Toolbar. Slide with a combination of images and text boxes
  • 11. 11 Formatting templates (making changes to all your slides at once) Every slideshow has a master slide which is the default template for all new slides. If you made your background “apply to all” slides, you have already altered your master slide. You can use this tool to edit it further. Go to View  Master  Slide Master, and make changes to this slide like you would any other. For example, if you have set a dark background, you can go here to make your text white instead of black by default. Just select the text you want and go to Format  Font. However, keep in mind that any changes you make to this template will be applied to every slide in your presentation. After editing the master slide, check all your slides before continuing so you still have a chance to undo your changes (Ctrl-Z). Master slide view is very useful for people using pre-set design templates. If you really hate something about your template, you can get rid of it here. (Maybe you chose the one with the annoying red line across the centre of every slide?) To return to your presentation, go to View  Normal. Making a new slide To insert a new slide with your default template, just hit Ctrl-M or Insert  New Slide. There is also a button at the top right of the screen. On the right-hand side of the screen, you should see all the layout options again, so you can choose a different one if you want. Remember that if you don’t like any of those, you can easily delete, move, insert, or resize text and image boxes, as well as changing the background (see above sections). Different ways to view your presentation while creating it PowerPoint has several viewing modes. You should now be in the default mode, called “Normal.” On the left-hand side of your screen, you should see all your slides in thumbnail format. At the top of this column, there are some tabs that look like this:
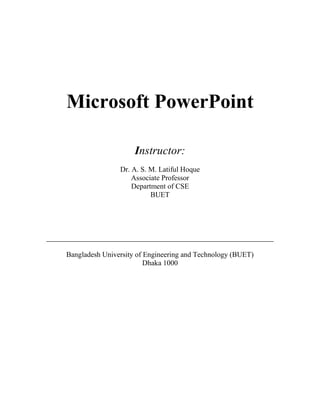
  • 12. 12 . If you click on the Outline tab, you will see the text of your slides instead of the thumbnail images. You can type directly in this outline view and change the text in your slides. If you want to change the order of your slides, go to View  Slide Sorter. You will then see the thumbnails of all your slides laid out on the screen. You can easily change their order by dragging them in this view. To return to normal mode, just go to View  Normal. Basic presentation rules The following rules are applied for presentation with any software (including Power point). Rule 1: Use Arial font instead of Times New Roman; if the projector is week, some letters in Times New Roman will be broken. For example, Times New Roman Arial font
  • 13. 13 Rule 2: Write few texts, if possible use figure; don’t let the audience divert attention from you to text for reading line by line. It is also OK to use incomplete sentence by omitting prepositions, conjunction and others. For example, Equilateral triangle: The convex region in a plane surrounded by three straight lines which intersect each other and of equal length. Equilateral triangle: Region surrounded by three equal lines.
  • 14. 14 Rule 3: Contrast combination of background-foreground is important; also be contrast if using texture. Not a good combination Still not a good combination Better
  • 15. 15 Rule 4: Use reasonable font size, but usually larger size does not harm much. Rule 5: Don’t’ try to dazzle the audience by using too much animation or too much graphics. Convince them with key information. Rule 6: Text too small Reasonable size  For bullets, left justify  It will keep text neat,  and easy to follow
  • 16. 16 Rule 7:  Centered graphics will leave little room for text  Place graphics off-center  More room for text  Better balance  More pleasing to eye  Attention goes to both text and graphics
  • 17. 17 Rule 8: Don’t use all caps; it is very hard to read. If necessary, use bold font and/or make italic to emphasize. Rule 9: You can repeat previous slide or their gist a very few times to wake up the audience. THIS IS HARD TO READ This is easy to read Remember, we are using Arial font, not the Times New Roman
  • 18. 18 Rule 10: keep every slide simple,  Keep the slide simple  Make bullet points easy to read  Keep text easy to understand  Use concise wording  Bullet are focal points  Explain verbally  Use good spacing among bullets  and remember, we already mentioned using figures, large fonts, and limited graphics and animation
  • 19. 19 Rule 11: Plan very carefully what you can cover in the allotted time. You have a limited time, and a conscientious session chair will ruthlessly cut you off if you attempt to exceed that limit. You can also give slide number to make yourself and all others aware of your progress. Rule 12: Think of your talk as an advertisement -- your goal is to entice the audience into wanting to read your paper. Motivate the problem; describe your overall approach and your major results. If your work includes experiments, pick a representative graph or two. Rule 13: It is strongly recommended that you practice your talk several times, especially if you haven't given many similar talks in the past. Time your runs; get your friends to listen and criticize. Rule 14: Since we are not native English speaking, make an effort to speak slowly and clearly enough for a large audience to understand you. Even if you are very good in English speaking, do not show your speaking performance here; you will need to speak loudly and clearly. Rule 15: Position yourself carefully with respect to the screen -- be sure not to block the audience's view. A common mistake for a new presenter is to point in the computer screen, which can not be viewed by the audience. Use a good pointer or fingers and point to the screen Rule 16: During the question & answer session at the end of your talk, be sure that your audience knows what question you are answering -- repeat a question if not everyone was able to hear it or even request to repeat the quest if you yourself are not clear about it. It's often a good idea to repeat questions regardless, to make sure you have them right and to give yourself a moment to think. Assignment 1 In this assignment you need to create a PowerPoint presentation about yourself. The actual details are left up to you, but you might want to include such information as: 1. Your name and identity 2. Education 3. Work experiences 4. Career goals 5. Hobbies, family, travel, kids, pets, etc. 6. Favourite author or place
  • 20. 20 Adding AutoShapes PowerPoint allows you to add many so-called “AutoShapes,” such as boxes, arrows, circles, and quote bubbles. If you have the Drawing toolbar displayed, you already have the AutoShape menu in the bottom left-hand corner of your screen. Otherwise, go to Insert  Picture  AutoShapes. The AutoShape menu looks something like this: From left to right, these buttons denote: Lines, Connectors, Basic Shapes, Block Arrows, Flowcharts, Stars and Banners, Callouts, Action Buttons, and More AutoShapes. Some of the more useful AutoShapes are: Inserting an AutoShape To insert any AutoShape, click your mouse on its section of the menu, then click on the AutoShape you want. You will then get a special cursor like you did for text boxes. You can then draw the shape anywhere you want on the slide. With some shapes, like curves, you will have to double-click to finish the drawing. Editing an AutoShape After you have added the AutoShape, you can change it in several ways. Use the circles around its edge to reshape, resize, or rotate it, like you would a text box or picture. If you double-click on the AutoShape, you will get a menu which allows you to do things like change the fill colour or add an outline. (Many of this menu’s options are also shortcuts on the Drawing toolbar).
  • 21. 21 Adding text to an AutoShape You can write text inside any AutoShape. Some of them, like the quote bubbles, give you a text cursor by default. If you don’t see a cursor, select the AutoShape by clicking it, and click on any of the font formatting buttons at the top of your screen: Sometimes it is tricky to get the text centred properly in the shape. You can format this text like any other font (select it and Format  Font). You can also fix some margin and word-wrap settings by double-clicking the AutoShape and selecting the Text Box tab. If all else fails, you can always draw your own text box on top of the AutoShape and write in that instead (see Text Boxes section above). Adding animations You can use PowerPoint’s animation capabilities for many different purposes, the most useful of which is probably setting items on your slide to appear at different times. For example, you could make each bullet point appear as you discuss it, make an image appear suddenly, or play an audio/video file when you are done reviewing the notes on the slide. How to animate a slide object To get to the Animations menu, go to Slide Show  Custom Animation. Your task pane (or pop-up menu in older versions) should now be displaying the animation options. To animate something, you need to: 1. Select the slide item you want to animate by clicking on it once. (To animate text, you can select the whole text box by clicking on its edge, or just part of the text by dragging your cursor over it). 2. In the task pane, click on Add Effect. You will then get a drop-down menu that looks like this: Slide with an AutoShape (animated to appear on command – see Animation section)
  • 22. 22 3. For your first animation, click on Entrance. Then find Appear (it may be in the More Effects option) and click on it. Your item will now be invisible when you first show the slide, and it will appear when you click your mouse anywhere on the screen. 4. You are supposed to be able to preview what this will look like by clicking on Play at the bottom right-hand corner of your screen, but this doesn’t always work. If you want a better preview, click on the Slide Show button next to Play. To get out of the slide show, hit the ESC key at any time. You can add as many animations as you want to each slide. You can even have more than one animation on a single item. Changing or deleting existing animations You can organise the order of the animations on a slide by dragging them up and down in the task pane. Change any single animation by clicking on it once and then clicking Change in the task pane. Delete animations from the task pane by clicking on them once and hitting the Delete key (this gets rid of the animation, but not the original object). Making two objects animate at the same time If you want two of your animations to start at the same time (e.g. if you want a picture and a line of text to appear together), select the second animation the task pane by clicking on it. Then pull down the Start menu just above it to change On Click to With Previous. Adding audio Warning: Sound and video files larger than 100 KB (i.e. anything but a short sound effect) will be linked to your presentation rather than embedded in it. This means that you need to copy your original media files whenever you burn the presentation to CD or even move it to a different folder on your own computer. To avoid problems, I highly recommend copying your chosen media file(s) to the folder containing your PowerPoint presentation before inserting any audio or video. Then you can transfer this entire folder if you need to move or copy the presentation. (If your files are relatively small, it is also possible to increase the 100 KB default up to 5 MB in Tools  Options).
  • 23. 23 Inserting an audio file PowerPoint theoretically allows you to add audio files to your slides, but it can be tricky. To insert a WMA (Windows Media Audio) sound file, just click on Insert  Movies and Sounds  Sound from File. Then you can choose an audio file on your computer and add it. You will be asked if you want your sound to start automatically or when clicked. Unless you want it to start playing as soon as you open the slide, choose When Clicked. You will then see a small graphic on your slide that looks like this: . If you got this far, your sound will now play in your slide show when you click on this picture! It will stop playing either when the file ends, or when you go to the next slide. If you want to be able to pause it, you’ll need to animate it (see below). Why can’t I find and insert my audio files? This being a Microsoft program, it makes your life difficult if you prefer non-Microsoft audio formats (such as MPEG-4, the iTunes format). If you couldn’t find your file when you tried to insert it, it’s probably because you can’t play it in PowerPoint. Assuming you’re running Windows, check if your music software will convert sound files to WMA format. (Mac users are probably not having this trouble, but they’ve got their own problems – see below). If all else fails, you can insert unsupported sound files as hyperlinks – see the Hyperlink section for details. Differences between Macs and PCs Mac versions of PowerPoint apparently accept some different audio formats from the PC versions. This causes problems when Mac users need to run their slideshows on PCs. I am guessing there’s not much you can do about this, except test your slideshow out on a PC beforehand, and bring the original CD if you have it. Inserting Sounds That Aren’t Already On Your Hard Drive You may have noticed that the Insert  Movies and Sounds menu also allows you to insert songs from a CD, or record your own sounds from a microphone (no, you can’t just play a forbidden file format on your computer and record it with this tool…I tried). If you choose the CD option, you’ll need to insert the original CD into your computer every time you give the presentation, so for most situations it’s better to copy the song to your hard drive instead (in WMA format!), and then insert it as a file. If you need to give your slideshow on both Macs and PCs, this might be a good option though.
  • 24. 24 Animating Sounds to Play, Pause, and Stop Sound files will start when you click them, restart if you click them again, and stop playing only when you go to the next slide. If you don’t like this set-up, you can apply animations to the speaker graphic (follow directions in Animations section for adding an animation). This time, when you click on Add Effect in the animations task pane, you will see an extra menu called Sound Actions. Here you can set your sound to start, pause, and/or stop when you click anywhere on the slide. In other words, if you set the Play animation, there is no need to click on the speaker graphic itself in your slide show. In fact, you can even drag the graphic off the slide into the grey area around it. (You won’t see it in the slide show, but it will still start playing when you click the slide). Adding video Supported video formats PowerPoint accepts some kinds of video files and not others. PowerPoint 2003 for Windows supports videos of the following file formats: ASX, WMX, M3U, WVX, WAX, and WMA. It will also accept some predecessors of these formats, such as WMF. If the file doesn’t show up when you’re trying to insert it, it is not supported. The Mac version of PowerPoint accepts QuickTime videos (MOV, QT), but beware: if you try to run your presentation on a PC, they won’t play. The reverse is also true for PC users who try to run their presentations on Macs: your WMA files may not work. And computers running old versions of PowerPoint might not support the same formats either. In other words, if you’re moving a video slide show to another computer, try it out beforehand. Inserting a video file Assuming you have a video file that PowerPoint will accept, here is how to insert it: 1. Copy your chosen video file(s) into the same folder as your PowerPoint presentation. (Not strictly necessary, but you’ll thank yourself later because this makes it a lot easier to move or copy your presentation). 2. Go to Insert  Movies and Sounds  Movie from File, and locate your clip (which should now be in the same folder as your slideshow). Click Insert. Choose Automatically if you want your movie to play as soon as you open that slide. Choose When Clicked if you want time to speak before you play it. 3. Your movie will now play in your slideshow! After it starts (either automatically on when clicked, depending on which option you chose), you can click on it to make it pause, and click it again to restart it. If you leave it alone, it will play until it ends, or until you go to the next slide.
  • 25. 25 Advanced options (moving, resizing, full-screen projection) You can drag your movie clip around and insert text boxes and images around it, as with any other slide item. You can also resize movies just like pictures: drag on the white circle in one of the corners. (Don’t drag on the side-circles; this will distort the video). For full-screen projection, just enlarge your movie until it fills the slide. If you have PowerPoint 2003, you can also right-click on the movie, choose Edit Movie Object, and check Zoom to Full Screen. In addition to the standard object animations, you can animate your movies to play, pause, and stop. Follow the instructions for animating an audio file in the Audio section above. What to do if you can’t insert your video files Ideally you can use video editing software to convert your files to an acceptable format. If you don’t have time for this, you can hyperlink to your unsupported videos from within PowerPoint (see Hyperlink section below). This is messier, but better than nothing. As long as the computer you use has a media player that supports your files, you will be able to open them this way. Adding hyperlinks to websites and files PowerPoint allows you to link to several kinds of objects, including web pages (assuming you have internet access in the room) and any file on your computer (including media files that are not supported by PowerPoint). Creating a hyperlink You can set a hyperlink from any text box, image, or AutoShape in your slide. Select the object by clicking on it once. Then type Ctrl-K (or go to Insert  Hyperlink). Now you can link to a file on your hard drive, or type a web address in the Address bar at the bottom. You can also get an automatic hyperlink by drawing an Action Button from the AutoShapes toolbar. (see AutoShapes section). These buttons allow you a few more options, such as linking to another slide in the presentation. All hyperlinks will play when you click on them in the slideshow.
  • 26. 26 Problems with hyperlinks Be forewarned that hyperlinks are messy, slow, and potentially troublesome. They open the linked program (e.g. iTunes, QuickTime, Internet Explorer) on top of your slideshow. Depending on your computer setup, you may have to wade through some security warnings about the dangers of opening hyperlinks. And if you give the presentation on a different computer without the programs your hyperlinked files need, you’re out of luck. Adding graphs, diagrams, and tables You can use PowerPoint to create simple graphs, tables, and various charts/diagrams. Or, if you are an Excel aficionado, you can import your own graphs, charts, and tables. (If you have an image of a chart, graph or table rather than an Excel file, you should insert it as an image. See the Working with images section). Creating diagrams PowerPoint can automatically create six different kinds of diagrams through Insert  Diagram. Any diagram can be moved around, resized, and customised by adding text and/or playing with the pop-up menu that appears when you create a diagram. Borders and fill colours can be changed in the Drawing toolbar. For more information on how to do these kinds of operations, see the Working with Text section above. Creating tables Go to Insert  Table and choose the number of rows and columns you want. Then just type in the boxes. You can resize the table by dragging on the white circles around its edges. Animating diagrams You can animate an entire diagram (see Animation section), but I don’t think it is possible to animate different parts to appear separately.
  • 27. 27 Creating charts Go to Insert  Chart and a simple chart will appear on your slide. (It looks like a graph to me, but PowerPoint has decided it is a chart). Don’t worry if you don’t like it, because you can change almost anything about it. A window will pop up where you can enter your own data, and add or delete columns or cells (by typing in them or selecting them and pressing Delete). If you right-click on different parts of the chart itself, you will see menus for customising those parts. Right- clicking on a blank part of the chart will get you to Chart Options, where you can customise many things from a single menu. Importing Excel files If you have already created tables or charts in Excel, you can easily insert them into your PowerPoint presentation. To avoid trouble later, you should first copy your chosen Excel file(s) into the same folder as your PowerPoint presentation. Then go to Insert  Object and choose Create from File. Locate the file (it should now be in the same folder as your presentation) and click OK. You will then see your Excel file on your slide. You can resize it and move it like a text box (see Text Box section). If you want to edit the chart, double-click anywhere on it, and you will then go to an in-depth view where you can select parts of it and change them. (In fact, much of your main menu bar takes on Excel editing options). To return to normal slide view, click anywhere outside the chart. Previewing your slideshow while working on it You can preview your slideshow at any time by pressing F5. Click the mouse to move through the slides. Press ESC at any time to exit. A slide with a PowerPoint-created chart. (The red arrow is an AutoShape and was added separately). A slide with a pie chart imported from Excel.
  • 28. 28 You can also start the preview from your current slide by pressing the button at the bottom left-hand corner of the screen. Making handouts, web pages, Word files and JPGs from your finished slides It is possible to convert your slides into Microsoft Word files (with or without images) and HTML files. If you are a Mac OS user and/or own the full version of Adobe Acrobat, you should be able to make your slideshows into PDF files as well, but this is not covered here. You can also save individual slides or an entire show as JPG files. None of the above options currently support audio, video, or animations. Printing a handout directly from PowerPoint Go to File  Print Preview. At the top left of your screen there should be a drop-down menu where you can choose to print full-page slides or handouts with various numbers of slides per page. You can also choose to just print the text of your slides (Outline View). Click Print when you are ready. Creating a Word document handout This creates a lecture handout file which can be printed, emailed, or uploaded onto WebCT. Go to File  Send To  Microsoft Office Word. You are given very limited options here, but you can always edit the result just like any Word document. If you want just the text from your slides, choose Outline Only. In this menu you have a choice between Paste or Paste Link. Paste creates a Word document from your slide show the way it is now. Paste Link does the same thing, but also maintains a link to your PowerPoint presentation and automatically updates the Word file if you make changes to the slideshow. If you choose Paste Link, you should save the Word file in the same folder as your PowerPoint presentation and keep it there. If you move either file, the link will no longer work. Creating a web page This creates a web page with your slide titles in a frame on the left-hand side. When you click on one of these titles, its slide appears in the main part of the screen. This tool is not that reliable (it tends to do wacky things like inexplicably change fonts), but it is still the fastest way to share your slides on the internet. Go to File  Save As, and pull the drop-down menu to Single File Web Page. (This saves all the necessary files as one single file, which makes it simpler to upload or email). Type a title for your file and save
  • 29. 29 it. You can then open it in your web browser, and/or upload it to the internet (including WebCT). Creating JPG files from your slides If you want to distribute a few slides to your students electronically or via WebCT, this is a good option. Open the slide you wish to make into an image. Click on File  Save As, and choose JPG from the drop-down menu. Type a title and hit Save. You will then be asked if you want to save just the selected slide, or the entire presentation. (If you choose to save the entire presentation, you will get a separate JPG file for each slide). You can then open, edit, and distribute these files just like regular images. Copying your slideshow onto a CD or memory stick Resist the temptation to just drag and drop your PowerPoint file onto another drive, unless you are absolutely sure you didn’t link any files to it (e.g. audio, video, Excel, special fonts). If you copied your linked files into the folder with your slideshow as you were creating it, you should be able to just drag and drop that entire folder. If you have a newer version of PowerPoint, there are some tools that make copying it even easier. In PowerPoint 2003 PowerPoint 2003 allows you to transfer everything with just a few clicks. Go to File  Package for CD. If you are burning to a CD, insert the CD and click on Copy to CD. If you are copying to a memory stick or floppy disk, insert it, choose Copy to Folder and locate the appropriate drive. That’s it! All of your linked files should automatically be included, regardless of whether or not you copied them all into the same folder. You also get a copy of PowerPoint Viewer, which allows your slideshow to play even on computers that do not have PowerPoint installed. In PowerPoint 2002 In PowerPoint 2002, you should be able to use the command File  Pack and Go, but be sure to check the boxes marked Include Linked Files and Embed TrueType Fonts. You can download the PowerPoint viewer here if you haven’t already. Warning: If you hyperlinked any files, you will need the software your computer uses to play them. These programs won’t automatically get copied. So if you’re presenting on a different computer, try to find out in advance if it has the software you need.
  • 30. 30 PowerPoint 2002 zips your files, so you will have to unzip them on the new computer. This should happen automatically when you click on the folder. Important note: Pack and Go apparently does not unpack properly on Mac OS or Linux, so if there is a chance you might run your slideshow from a Mac, don’t use it! I don’t know whether or not there is a problem switching from Mac to PC, but it’s probably best not to find out. In any version of PowerPoint If you have an even older version of PowerPoint or you want to run a PowerPoint 2002 presentation on another platform, you will have to rely on the copying-the-entire-folder method. If you do not have the PowerPoint viewer (ppviewer.exe) already and might have to present on a computer without PowerPoint, you can download the viewer for free at: http://www.microsoft.com/downloads/details.aspx?FamilyId=428D5727-43AB- 4F24-90B7-A94784AF71A4&displaylang=en. Projecting your slideshow in the presentation room Finally! Well, almost… To show your slideshow to an audience, you will need a digital projector. Even though these instructions are relatively simple, every computer-projector combination is different and it is very common for something to go wrong. Try it out in advance if possible, and still leave yourself plenty of time to set up. Advance preparations 1. In the projector case you will find a cable to connect your computer to the projector. It will fit most computers, but try it out first. There should only be one port on your computer that it could possibly connect with. 2. You might also need an extension cord. 3. If you are planning to play any media with sound, you will need a second cable to link your computer’s headphone/speaker jack to the audio input on the projector. This cable looks like a walkman headphone jack on both ends. If you check your computer speakers, there might be one running between them which you can detach. As a last resort, you could bring in your computer speakers and hook those up to your computer instead. 4. Try to find out in advance (from friends, your computer manual, or online) which key combination will get your computer screen to display from the projector. Unfortunately it is not the same for all computers. When your screen temporarily flashes black, and/or if some icons of monitors appear, you have probably found the right combination. If your screen stays black, that’s still a good sign – just keep pressing the same two keys until your display returns.
  • 31. 31 Setting up the presentation 1. Start with both projector and computer off. (If your computer is already turned on you can try following these instructions anyway – sometimes it works). 2. Plug in the projector. 3. Attach your computer to the projector with the main cable, and the audio cable if necessary. 4. Turn on the projector. It may take a while to warm up. You will not see your slideshow yet, but you should see a blue screen projected onto the wall. If not, check to make sure the power is on and the lens cap is off. 5. Turn on the computer. Your computer screen might go black for a few seconds, but then you should see it displayed on the wall. 6. If you are using audio, play a sound file and check the volume. You should be able to turn the projector volume up fairly high, even though the sound quality is not great. Turn the volume up on your computer as well, if necessary. If you still don’t hear anything at all, make sure the mute function is off on both projector and computer, and that the audio input cord is pushed all the way into projector and computer ports. 7. Open PowerPoint and your slideshow file. Press F5 to start your slideshow. 8. Yes, it is possible to get your slideshow to display on the wall and your lecture notes (or whatever you want) to display on your computer screen. You need to use dual monitor configuration for this. Like setting up a projector, it is often a lot more complicated than it should be, and it varies by computer. You can find instructions in the PowerPoint help files if you like, or through Google. Desperate last-ditch attempts to make your show appear 1. Try other key combinations. Press all the F-keys in turn. Press the Fn-key with each F-key. Something has to work! 2. Make sure the resolution of your computer matches that of the projector: a. Look on the projector and see if you can find the resolution written on it. It is probably either 1024x768 or 800x600. If you can’t find it, try these instructions anyway. b. On your computer, go to Control Panel  Display, then click on the Settings tab. c. Under Screen Resolution, move the slider to the correct resolution. If you don’t know, try 1024x768 pixels. Click on Apply. If you still can’t get your screen to display, try 800x600 pixels. Keep trying resolutions until one works. 3. Sometimes there are different input sources on the projector. Find the input button and cycle through these. 4. Turn everything off and turn it on again, starting with the projector. Good luck!
  • 32. 32 Running your presentation once the projector is set up 1. Open your PowerPoint file, then press F5 to start your show. 2. Move through your slideshow either by clicking on the mouse or by using the up and down arrows on your keyboard. (Some projectors also come with a remote control). A bunch of fancy commands for jumping around in your slideshow are available at: http://office.microsoft.com/en-gb/assistance/HP051953031033.aspx. 3. If you need to go backwards, press the up arrow. 4. If you move your mouse pointer over the bottom left-hand corner of the screen, you will see a menu with several advanced options. If you click on the pen icon, you can get a “pen” that allows you to draw on your slides (in non-permanent ink). 5. To leave the slideshow at any time, hit ESC. 6. Congratulations, you’re done! Assignment 2 In this assignment you are required to create a presentation on a match of FIFA World Cup 2006. The audience is a group of people who want to know what happened in that match- who won? By what margin of goals? Who are the goal scorers? Who played very well? Who got cards? And so on… You must use the following:  Text description (very brief)  Images of different players given to you.  Animation