Introduction To Raspberry Pi with Simple GPIO pin Control
•Descargar como PPTX, PDF•
8 recomendaciones•3,111 vistas

This slide includes Introduction to raspberry pi . Also it covers how to play with GPIO pins using Python language

Recomendados
Más contenido relacionado
La actualidad más candente
La actualidad más candente (20)
Similar a Introduction To Raspberry Pi with Simple GPIO pin Control
Similar a Introduction To Raspberry Pi with Simple GPIO pin Control (20)
Último
Último (20)
Introduction To Raspberry Pi with Simple GPIO pin Control
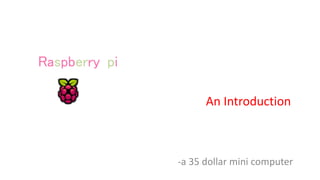
- 1. -a 35 dollar mini computer Raspberry-pi An Introduction
- 2. Who Am I ? I am Pradip Bhandari. Member of Robotics Club Final Year Student Electronics And Communication Engineering Familiar with Raspberry pi for more than two years I love Hardware and Software more than a girl Contact info : “masterpradipg”
- 3. Handling the RP -The Raspberry Pi was built to be used, but not abused. Every Printed Circuit Board (PCB) should be handled with care. -Handle the RP only by the edges of the board itself. Avoid touching or holding any of the components on the board. -Rough handling can cause solder points to fail and may result in short circuits, but be careful with the GPIO pins as well.
- 4. Agenda Introduction To Raspberry Pi Features How it differs from other Board? Applications Setting Up Hardware Connection Operating System choice Demo GPIO Simple GPIO Python Programming Demo
- 5. What is the Raspberry Pi? Small single-board computer, Credit card size and costs approximately £35 Developed by Raspberry pi foundation UK with the intention of promoting the teaching of basic computer science in schools It has all possible features of modern computers Model: Rpi 1 Model A, A+, Rpi 1 Model B, Rpi 1 Model B+(2012) and Rpi 2 model B(2015) Introduction
- 6. Raspberry Pi Features CPU 700MHz ARM1176-JZFS GPU Broadcom VideoCore IV @250 MHz Memory 512MB LPDDR2-800 2 built in USB hub Video HDMI, composite Audio HDMI, stereo analog Ethernet cable 5V Micro USB Fanless It does not include a built-in hard disk , but uses an SD card for booting and long-term storage. Features
- 7. Raspberry Pi
- 12. Raspberry Pi Micro USB Power HDMI ETHERNET 2xUSB 2.0 AUDIO
- 13. Raspberry Pi Micro USB Power HDMI ETHERNET 2xUSB 2.0 AUDIO VIDEO
- 14. Raspberry Pi Micro USB Power HDMI ETHERNET 2xUSB 2.0 AUDIO VIDEO GPIO
- 15. Raspberry Pi Micro USB Power HDMI ETHERNET 2xUSB 2.0 AUDIO VIDEO GPIO SD CARD
- 16. Raspberry Pi Micro USB Power HDMI ETHERNET 2xUSB 2.0 AUDIO VIDEO GPIO SD CARD Camera connector
- 17. Raspberry Pi Micro USB Power HDMI ETHERNET 2xUSB 2.0 AUDIO VIDEO GPIO SD CARD Screen Panel Connector (TFT touch Screen) Camera connector
- 18. Micro USB power port The micro USB power port is used to power the Raspberry Pi device. HDMI port The HDMI output is used to plug into a modern television or monitor. Ethernet port The Ethernet port is used to connect the Raspberry Pi to the internet or a local network. USB ports USB 2.0 ports are used to plug in a keyboard, mouse, web cam, external hubs etc. Audio output The audio output can be used to plug into an external amplifier or an audio docking station. GPIO headers The GPIO headers are used to connect the Raspberry Pi to other hardware devices. For example, they can be used to connect to LEDs, motors and other electronic components. video output The video output is used to connect to an older type television.
- 19. Ingredients 1 x SD Card - 4GB or above 1 x Monitor or TV with a HDMI cable 1 x Mouse 1 x Keyboard 1 x Ethernet LAN cable (optional - needed if you require a network connection) 1 x Micro USB power supply (many mobile phone chargers will work but it must supply 5V and have at least 700mA) Note: Some monitors do not have HDMI ports – in this situation you will need to have an adapter – you can get a HDMI to DVI or a HDMI to VGA.
- 20. Ingredients
- 21. How it differs from other Board Low power consumption PC takes 65-250W Laptop takes 15-60W Raspberry Pi 5v,700mA=3.5W Low cost Small in size
- 22. What Can You Do With It? Raspberry Pi is a flexible platform, there’s no single way to use it, Whether you just want to watch videos and surf the web, or you want to hack, learn, and make with the board for fun, utility, and experimentation General purpose computing • graphical desktop environment with a web browser • install a wide variety of free software like LibreOffice, Games, etc. Learning to program • Raspberry Pi is meant as an educational tool to encourage kids to experiment with computers, it comes preloaded with interpreters and compilers for many different programming languages • You can write programs for your Raspberry Pi in many different languages • programming languages like Python, C, Ruby, Java, Perl etc. Project platform • The Raspberry Pi differentiates itself from a regular computer not only in its price and size, but also because of its ability to integrate with electronics projects
- 23. Applications Home Automation System. Home Security System. HD surveillance Camera. Media Center. We can develop what we can think using GPIO.
- 24. Applications • Can be used for making super computers
- 25. Applications Raspberry Pi Medical Device Input Shield
- 26. Applications • Solar Raspberry Pi Power Pack
- 27. Applications • It can make your Old TV in to a smart TV. (You can play Videos, 3D Games, Music, Browse Internet and much more. • Raspberry Pi can Act as Full HD 1080p Media Player. • You can connect a Monitor, Keyboard and Mouse and use it as a normal computer. • Its Graphics Capabilities is better than Apple Products(2012).
- 28. Setting Up Hardware Connection Basic Setup Connect Monitor via HDMI or Video Out Connect Mouse and Keyboard Connect OS loaded Memory card Power it up
- 29. OS choices ● Raspbian wheezy(free, based on Debian ) ● ArchLinusArm ● PiDora(Fedora remix for pi
- 30. Loading OS in Memory Card A software called “Win32DiskImager” is needed Install and run it 1 2 3 1. Browse OS 2. Select Drive 3. Write it 4. After few minutes your memory card will be ready
- 31. DEMO When promoted for username and password enter default value as username: pi Password: raspberry Now we will be at Default console To start Graphical User interface(GUI) type command “startx” and press enter
- 32. • It is a generic pin on an Integrated circuit whose behavior, including wheather it is an input or output pin, can be controlled by user at the run time • GPIO pin have no special purpose defined, and go unused by default General Purpose I/p O/p(GPIO)
- 33. General purpose digital inputs/outputs • Outputs used to control external circuits – Switch leds on/off – Switch relays on/off – Actuate solenoid • Inputs used to monitor status – Read switch status – Alarm inputs
- 34. RPi General Purpose IO (GPIO) Pins • 17 GPIO pins brought out onto the P1 header • most have alternated functions • two pins for UART; two for I2C; six for SPI • All 17 pins can be GPIO (i.e., INPUT or OUTPUT) • all support interrupts • internal pull-ups & pull-downs for each pin • I2C pins have onboard pull-ups • using them for GPIO may not work • Pins are 3.3V not 5V like on the Arduino • They are connected directly to the Broadcom chip • Sending 5V to a pin may kill the Pi • Maximum permitted current draw from a 3.3V pin is 50mA Image credit: http://elinux.org/RPi_Low-level_peripherals
- 35. Simple LED connection Our actual connection: Led1: cathode to Ground anode to any GPIO Led2: cathode to Ground anode to any GPIO
- 36. Programming • By default, supporting Python as the educational language. • Any language which will compile for ARMv6 can be used with the Raspberry Pi, though; so you’re not limited to using Python.
- 37. Python • To program the GPIO ports in Python, we need to install a very useful Python 2 library called Rpi.GPIO. This module gives us a simple to use Python library that will let us control the GPIO pins. • To install RPi.GPIO, we first need to install the Python Development toolkit that RPi.GPIO requires. • To do this enter the following command into LXTerminal: sudo apt-get install python-dev • Then to install Rpi.GPIO itself type: sudo apt-get install python-rpi.gpio • We will probably be prompted to confirm by entering 'Y'.
- 38. Simple python program to blink LED import RPi.GPIO as GPIO #import python 2 GPIO library from time import sleep #import time library to use sleep GPIO.setmode(GPIO.BCM) #initializing BCM GPIO.setup(7,GPIO.OUT) #set up GPIO pin 7 to out GPIO.setup(8,GPIO.OUT) #set up GPIO pin 8 to out While 1: GPIO.output(7,0) #set GPIO pin 7 to level 0 GPIO.output(8,1) #set GPIO pin 8 to level 1 sleep(1) GPIO.output(7,1) #set GPIO pin 7 to level 1 GPIO.output(8,0) #set GPIO pin 8 to level 0 Sleep(1)
- 39. DEMO LED blinking using Python
- 40. ANY QUERIES ?