
Recomendados
Más contenido relacionado
La actualidad más candente
La actualidad más candente (20)
Destacado
Destacado (20)
Similar a Facial Proportions
Similar a Facial Proportions (20)
Más de mrsbauerart
Más de mrsbauerart (20)
Último
Último (20)
Facial Proportions
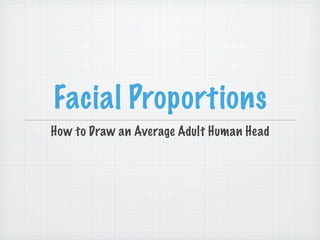
- 1. Facial Proportions How to Draw an Average Adult Human Head
- 2. General Rules The eyes are half way bet ween the top of the head and the chin. The bottom of the nose is half way bet ween the eyes and the chin. The mouth is half way bet ween the nose and the chin. The corners of the mouth line up with the centers of the eyes. The top of the ears line up with the center of the eyes. The bottom of the ears line up with the bottom of the nose.
- 3. Step 1 Using a pencil, start by drawing an oval on your sheet of paper. The oval should be the size you want the final face to be, or a bit smaller. Leave room at the top of the sheet for hair and at the bottom of the sheet for a neck and shoulders. The bottom of the oval should reflect the jaw line of your subject (i.e. is it square, rounded, pointy?).
- 4. Step 2 The next step is to make a very light pencil grid to help you locate facial features (you'll erase the grid when you're finished drawing).
- 5. Step 2a To start the grid, draw a light horizontal line at the top of the oval and another at the bottom of the oval.
- 6. Step 2a To start the grid, draw a light horizontal line at the top of the oval and another at the bottom of the oval. Then draw a horizontal line midway bet ween the first t wo lines to divide the oval in half. This is the line on which you draw the eyes, which are roughly the shape of a football.
- 7. Step 2b Draw a horizontal line midway bet ween the eye line and the bottom line. The bottom of the nose falls just above this line.
- 8. Step 2c Draw a horizontal line midway bet ween the nose line and the bottom line. This is the line on which you center the mouth (which is the general shape of an elongated, pointy football, with t wo bumps on the top and one on the bottom, and a subtle line across the middle).
- 9. Step 2d Next, draw some light vertical lines on each side of the oval.
- 10. Step 2d Next, draw some light vertical lines on each side of the oval. Draw four, equally-spaced vertical lines bet ween those t wo lines to divide the space into five equal parts.
- 11. Step 2d Next, draw some light vertical lines on each side of the oval. Draw four, equally-spaced vertical lines bet ween those t wo lines to divide the space into five equal parts.
- 12. Step 3 Sketch in the features. The eyes fall in columns 2 and 4. The distance bet ween the eyes is the same size as an eye. You should be able to fit 5 eyes across the head so use your pencil as a measuring guide. The distance bet ween the eyes is similar to the width of the bottom of the nose. The nose falls in column 3. The corners of the mouth line up with the centers of the eyes. Draw in the ears by aligning the tops with the center of the eyes and the bottoms with the bottom of the nose.
- 13. Eyes Add a shaded eyelid fold above the eye for depth. Add eyelashes to the top and bottom of the eye. The thicker the top eyelashes, the more feminine a face tends to look. You can add emphasis to the upper eyelid by making the line a bit thicker than the bottom of the eye. Using light strokes to mimic tiny hairs, pencil in the eyebrows. On a real face, the eyebrows are generally a finger's width above the eyes. The eyebrows on women tend to be more fine, shaped, and delicate; on men they tend to be slightly more bushy and erratic. The eyebrows generally extend a little past the corners of the eye.
- 14. Nose The nose is difficult to draw because there are very few lines to help describe its shape. Start by drawing what you can see, the inside and outside edges of the nostrils. Then try to define the areas of tone that defines the planes of the nose
- 15. Mouth The mouth is the second most expressive feature of the face (after the eyes). Begin by drawing the line that separates the t wo lips. It is not a straight line but has very subtle shape to it. The top lip has a characteristic bow to it that varies considerably from person to person. The bottom lip is usually larger than the top and more creased with vertical stretch lines.
- 16. Final Tips Once you've refined all the facial features and are happy with what you see, erase the pencil grid. Now you can add the neck, shoulders, and hair. In general, the shoulders should be wide enough to support three heads. For the hair on a life-size portrait, one or t wo inches of hair above the head looks most realistic. Add bangs or hair at the sides of the face if appropriate. Make the hair loose looking (think of wind blowing through the strands) so that it's more realistic. Add some subtle shading for the cheekbones. They are usually low, ending along the same line as the bottom of the nose.
- 17. Final Tips Most people have wrinkles of some degree at the far corners of the eyes (crow's feet) and at the corners of the mouth (laugh lines). Including a few subtle lines can add character and realism to your portrait. Sometimes ears are completely covered by hair. If they're not (or are partially covered), notice how much they stick out and their wiggly folds. Include earrings if you like and if appropriate. To finish off the drawing, shade in appropriate areas (e.g. hair, lips, around eyes, cheekbones, background) to add some contrast.
Notas del editor
- \n
- \n
- \n
- \n
- \n
- \n
- \n
- \n
- \n
- \n
- \n
- \n
- \n
- \n
- \n
- \n
- \n