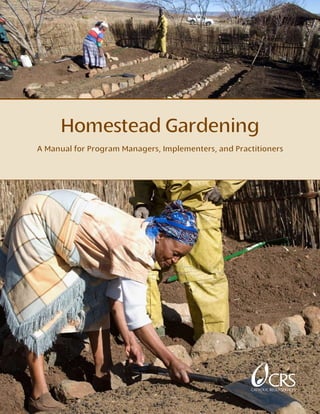
Homestead Gardening: A Manual for Program Managers, Implementers, and Practitioners

Homestead Gardening: A Manual for Program Managers, Implementers, and Practitioners ` For more information, Please see websites below: ` Organic Edible Schoolyards & Gardening with Children http://scribd.com/doc/239851214 ` Double Food Production from your School Garden with Organic Tech http://scribd.com/doc/239851079 ` Free School Gardening Art Posters http://scribd.com/doc/239851159` ` Companion Planting Increases Food Production from School Gardens http://scribd.com/doc/239851159 ` Healthy Foods Dramatically Improves Student Academic Success http://scribd.com/doc/239851348 ` City Chickens for your Organic School Garden http://scribd.com/doc/239850440 ` Simple Square Foot Gardening for Schools - Teacher Guide http://scribd.com/doc/239851110

Recomendados
Más contenido relacionado
La actualidad más candente
La actualidad más candente (20)
Destacado
Destacado (16)
Similar a Homestead Gardening: A Manual for Program Managers, Implementers, and Practitioners
Similar a Homestead Gardening: A Manual for Program Managers, Implementers, and Practitioners (20)
Más de School Vegetable Gardening - Victory Gardens
Más de School Vegetable Gardening - Victory Gardens (20)
Último
Último (20)
Homestead Gardening: A Manual for Program Managers, Implementers, and Practitioners
- 1. Homestead Gardening A Manual for Program Managers, Implementers, and Practitioners
- 2. Homestead Gardening A Manual for Program Managers, Implementers, and Practitioners
- 3. Catholic Relief Services 228 W. Lexington Street Baltimore, MD 21201 USA www.crs.org ©2008 Catholic Relief Services—United States Conference of Catholic Bishops. Written by Adam Weimer, food security program manager for CRS Lesotho, with contributions from CRS Lesotho management and staff. Special thanks to Motsoteng Mothunyane, Bartholomew Mofolisa, and Caritas Lesotho, whose efforts to refine and adapt the techniques described through implementation in the field and drafting of various training materials contributed to the writing of this manual. CRS would also like to acknowledge the contribution of C-SAFE Lesotho members, World Vision Lesotho and CARE for their contribution to the design and development of homestead gardening techniques. This manual was funded through the United Nations’ Food and Agriculture Organization (FAO) as a part of the 2007 Input Trade Fairs project. Methods and techniques described were developed over three years by CRS and members of the Consortium for Southern Africa Food Emergency (C-SAFE) in Lesotho. Implementation of Homestead gardening activities were conducted under Single-Year Assistance Programs (SYAP) with funding from the U.S. Agency for International Development from 2005 to 2008. Views and opinions expressed in this document represent those of the authors and not necessarily of C-SAFE Lesotho or the donor.
- 4. T Introduction . v Chapter 1 Getting Started . 7 Chapter 2 Keyhole Gardens . 11 Chapter 3 Trench Gardens . 19 Chapter 4 Potholing (Conservation Agriculture) . 23 Chapter 5 Soil Fertility . 29 Chapter 6 Pest Control . 35 Appendix A Seed Selection . 37 Appendix B OPV vs. Hybrid Seeds . 37 Appendix C Suggested Reading . 37
- 6. v I This manual is intended for use by food security, nutrition, and livelihood programmers and practitioners for improved household food production and income generation. It represents a compilation of techniques and lessons learned from homestead gardening programs successfully implemented through the Consortium for Southern Africa Food Emergency (C-SAFE) in Lesotho. Many of the techniques described have been developed over time in a variety of countries and programs, and have been adapted in semi-arid and mountain climates in the southern lowlands of Lesotho. The success of the methodology has prompted Catholic Relief Services (CRS), Caritas Lesotho, and other partners to apply homestead gardening activities in other programs, such as the Mountain Orphan and Vulnerable Children Empowerment (MOVE) project. This manual is not intended as a one-stop shop for improved farming practices, nor does it cover all the potential techniques used in homestead gardening. Rather, it is a compilation of best practices and successful activities implemented over a three-year period by C-SAFE Lesotho, the MOVE project, and various other food-security related projects implemented by CRS and Caritas Lesotho. Many of the techniques and methods described are based on the principles of permaculture and organic farming. However, while many of the methods are applicable or adaptable to a variety of settings, not all the techniques enclosed are appropriate for all projects and contexts. Programmers and practitioners should carefully consider the goals and objectives of their projects as well as the cultural, environmental, and climatic context of the area where homestead gardening activities will be implemented. Appendix D lists additional references and suggested reading on agriculture and homestead gardening techniques. As stated above, the manual is written for use by program managers, implementers, and practitioners. Each chapter attempts to set the stage for the reader to understand fundamental principles of homestead gardening in order to better understand how the techniques may be adapted to unique environmental challenges, climate conditions, and overall context in which the activities are implemented. Chapter 1 is intended to help homestead gardeners plan their gardens to maximize the use of space. Chapters 2 to 4 are detailed descriptions of specific techniques implemented under C-SAFE Lesotho, including keyhole gardens, trench gardens, and conservation agriculture. These chapters outline the materials and steps in preparing, planting, and maintaining these gardens. Chapters 5 and 6 describe other methods of sustainable gardening in resource-limited settings and of reducing dependence on expensive inputs such as fertilizers and pesticides. These chapters include information about soil fertility and pest management, for early detection and prevention of potential problems such as inadequate moisture or acidity. Each chapter includes helpful programming and gardening tips to improve the performance implementation of homestead gardens. These are designed to provide insight into some of the lessons learned from implementing homestead gardening activities in Lesotho and to suggest possible adaptations or replacement materials.
- 8. 7 CHaPter 1 GettinG started A homestead garden is intended to utilize the space around a house to grow vegetables and limited food crops. In Lesotho, fields for growing crops are typically located on the outskirts of a village or community. Competition for agricultural lands has forced many to establish fields on marginal lands far from the house. By focusing food crop production near the house, farmers are better able to manage crops and space for food production without having to travel long distances. Starting a homestead garden can be intimidating, especially for those without much gardening experience. Preparing fields and plots can take a lot of time and hard work, but, once established, homestead gardens can flourish with minimal labor or inputs. Planning a Homestead Garden Careful planning is important for a successful homestead garden. There are a number of factors to consider. 1. Space. The amount of space around a house will determine what techniques can be used and how many vegetables can be produced. However, even houses with small plots can build homestead gardens. With careful planning, a garden can maximize the efficient use of the space available by alternating rows of vegetables that need a lot of space with crops that do not. 2. Shade versus full sun. All plants need sunlight to grow, but too much sun and heat can dry out the soil and burn plants. Trees are good for adding shade to a garden, cooling hot summer temperatures and helping to prevent moisture evaporating from the soil, especially in dry areas. However, too much shade prevents sunlight from reaching the plants and obstructs the photosynthesis process that all plants need to grow, flower, and produce fruit. Some crops like some shade, while others prefer full sun. Seed packets usually provide instructions for planting the seeds and indicate how much sun is required for healthy growth. This information will help in organizing a homestead garden according to the amount of sun and shade required. 3. Trees and competition. While trees are good for shade and moisture retention, they require a lot of water and can rob the garden vegetables of vital moisture and nutrients.
- 9. Homestead Gardening: A Manual for Program Managers, Implementers, and Practitioners 8 4. Access to water. While the techniques used in homestead gardening are designed to enhance moisture retention in the soil, water is still a vital ingredient of any garden. Plants need to be watered regularly, especially in dry areas. Therefore, access to water must be considered when planning a homestead garden. 5. Household labor capacity. Building and maintaining a homestead garden requires a lot of work. A household’s labor capacity can be affected by the number of household members, chronic illness, age, and disabilities. While many of the techniques outlined in this manual save labor, not all will be appropriate for all households. Ultimately, it is up to the households to choose what is appropriate and reasonable for themselves. By planning ahead, farmers and gardeners can better utilize the limited space around a house and maximize the production of vegetables and other food crops. The layout of the garden is especially important. In Lesotho, CRS has encouraged homestead gardens with four major components: House 1. Two to three keyhole gardens to produce small leafy crops, such as spinach, and small root crops, such as carrots and onions. Keyhole Gardens 2. Minimum of four trench gardens for producing either small crops or larger crops such as tomatoes and green beans. 3. 30 m. by 30 m. conservation agriculture plots for small-scale production of maize, sorghum, or beans. 4. Compost pit for fertilizing soil. Figure 1.1 shows a typical layout for a homestead garden in CRS Lesotho food-security projects. The details of these techniques will be explained in later chapters. Down Slope Conservations Farming Plot–30m x 30m Trench Garden Compost Figure 1.1 Typical Homestead Garden Layout
- 10. Getting Started 9 Tips for Getting Started 1. Start small and expand gradually. Smaller gardens are easier to manage, especially for those without much experience. As a gardener gains experience they can gradually expand their garden. 2. Protect the garden with a stick enclosure to shelter it from wind, cold, and animals. 3. Keep soil covered with mulch or ground cover to protect against erosion and moisture loss. 4. Start collecting materials (manure, bones, weeds, ash, grass, urine) to make compost early, and continuously nourish the soil. 5. Where water is scarce or access is limited, use wastewater and harvest rainwater to irrigate. 6. Plant only a little at a time but plant often, to ensure continuous production. 7. Aim to feed the family first, then look for a market. With good water and crop management, one will be able to sell when it is dry and prices are high. 8. Be creative, and experiment with new techniques. 9. Try to work the garden daily. Make it a habit, even if just for a few minutes each day. Working in the garden helps to monitor the progress and identify problems early. 10. Ask Ministry of Agriculture officers and other extension workers for advice.
- 12. 11 CHaPter 2 KeyHole Gardens Originally developed by for use by the chronically ill, keyhole gardens have proven an effective way to grow vegetables year round in semi-arid climates because they nourish the soil and help it retain moisture. In Lesotho, C-SAFE has promoted keyhole gardens among populations vulnerable to hunger and food insecurity as a way to improve household resiliency to external shocks, such as drought. The raised beds, surrounded by stones, and built up of layers of organic material that serve the dual purpose of adding nutrients to the soil and retaining moisture, make the keyhole garden extremely productive even in the cold, dry winter months. As stated above, the keyhole garden was originally developed for use by the chronically ill. The original design was a relatively small, round garden with a low outer wall. A space was left in the middle of the keyhole garden to allow a person to sit or squat while they worked the garden around them. This proved an effective way to work the garden with minimal effort for people who were disabled or physically weak due to illness. Once built, the garden requires only limited maintenance and few additional inputs (such as fertilizer). In addition, the layer-based design helps the garden retain moisture, so it requires less water reduces the labor burden of collecting water for irrigation. Under C-SAFE in Lesotho, keyhole gardens were recognized for their potential productivity in dry, semi-arid climates with poor soil. However, the original design was too small to allow for growing enough produce to make a meaningful contribution to household food security. Furthermore, despite the moisture retaining properties of the design, households found it increasingly difficult to access water for irrigation during a severe drought. Therefore, the keyhole garden design was modified by expanding the size, adding more layers, building higher, and replacing the center space with a basket allowing for the effective use of gray water and ensuring that moisture reaches all layers. However, because the elderly and people living with HIV and AIDS make up a disproportionate share of the vulnerable, food insecure population, the keyhole garden retained its round shape, which allows the physically challenged to lean against the outer walls to reach the middle of the garden.
- 13. Homestead Gardening: A Manual for Program Managers, Implementers, and Practitioners 12 Benefits 1. Soil enrichment. Layers of organic materials break down over time to become humus, adding nutrients to the soil. In addition, the use of natural fertilizers, such as manure and compost, helps to feed the plants with vital nutrients. 2. Moisture retention in arid or semi-arid climate. Layers of organic material soak up and retain moisture, acting as a sponge. Greater retention means that the garden requires water less frequently and in smaller quantities. 3. Labor saving. Households affected by chronic illness and HIV, and households headed by children or the elderly, often have limited labor capacity. Keyhole gardens reduce the labor required to produce food for the household. The slow breakdown of organic material reduces the need for added inputs. In addition, the central basket allows for use of gray water left over from washing dishes or clothes and bathing, reducing the need to collect water for irrigation. The layer-based design also helps retain moisture, reducing the amount of water that needs to be collected to irrigate the garden. 4. Reducing dependence on external inputs. One of the keys to success is using locally available resources for construction and maintenance. All the materials used in the construction of the keyhole garden should be sourced from the community or surrounding area. Different livelihood zones may have different materials available. For example, access to stone may be difficult in urban settings, but old tires may be readily available to construct the outer wall. Likewise, cardboard and paper may be easily available to urban populations to build up the first layer but less readily available in isolated rural communities. Using locally available resources decreases the cost of constructing a keyhole garden and reduces dependence on outside materials that have to be purchased or transported long distances. 5. Year-round vegetable production. The stones lining the keyhole garden retain heat from the sun and keep the soil from freezing during winter months in Lesotho. Keeping the soil warm encourages root growth and, when combined with a cover at night, will help prevent frost from damaging the vegetables. Frost covers are removed during the day to allow the plants and soil to absorb sunlight and replaced at night to trap in heat.
- 14. 13 Constructing a Keyhole Garden Materials While keyhole gardens are relatively easy to construct and emphasize the use of locally available resources, they do require a lot of materials in construction. Below is a list of the materials needed: 1. Stones, medium to large in size, but nothing smaller than a fist 2. Spades 3. Thatching grass for the central basket 4. Agave aloe leaves or small tree branches 5. Manure—10 to 20 wheelbarrows (the more manure used, the more productive the garden will be) 6. Wood ash, 3 to 4 wheelbarrows 7. Soil, 10 to 20 wheelbarrows 8. String or rope, 10 meters. 9. 2 meter by 2 meter space to build the keyhole Steps in Construction 1. Collect stones, aloe leaves, manure, ash, and grass or leaves. 2. Lay out the space for the garden. Determine where the center of the garden should be. Use a spade to measure one meter in four directions from the center, and mark those points. Then draw a circle connecting the four points, which will be two meters (two spade lengths) in diameter (fig. 2.1). 3. Weave a simple basket of thatching grass 1 meter (one spade length) high and place it in the center of the circle. Form a frame around the basket with three or four large sticks, to hold it in place and prevent it from collapsing as layers of soil and organic material are added. 2 m Figure 2.1 Dimensions of the Keyhole Garden Keyhole Gardens Programming Tips: 1. Having participants collect materials prior to demonstrations or trainings will save time. 2. Some of the materials above can be replaced depending on what is available in targeted communities. Thatching grass can be replaced with reeds, palms, small bamboo, or aerated sacks.
- 15. Homestead Gardening: A Manual for Program Managers, Implementers, and Practitioners 14 4. Scratch the surface of the soil within the circle to loosen the surface. 5. Place stones around the edge of the circle. As you build up your layers of soil and organic material, you will add to the stone wall as you go, and keep the basket up right in the center of the garden. 6. Place the first layer of aloe leaves, branches, cardboard, or tin cans. 7. Add a layer of soil on top of the aloe, then add a thin layer of ash. 8. Add another thin layer of soil, then a thick layer of manure. 9. Add the top layer where the seeds will be sown, using a healthy mixture of soil and manure or compost (approximately a one-to-one ratio). 10. Slope the top layer slightly, like the roof of a house, to keep it from sinking toward the middle of the keyhole. Programming Note: 1. Additional layers such as dried grass and leaves can be added between the aloe and the ash to increase moisture retention. 2. Thin layers of soil (enough to cover the material used) should be used between every layer to help start the biodegrading process. How to Build and Use your Keyhole How to Build and Use your Keyhole Compost Basket: Throw kitchen rubbish such as vegetable waste, egg shells, etc. to add nutrients to soil. Water through the basket to allow nutrients from compost to filter through to soil. Soil and Manure Manure Soil Ash Soil Aloe/Tins/ Bones Figure 2.2 Keyhole Garden Layers
- 16. Keyhole Gardens 15 Companion Planting Companion planting is the preferred method of planting in any homestead garden. Companion planting is a concept similar to intercropping, whereby vegetables or crops are chosen for their complementary properties. Space, soil-nutrient needs, and pest management should be considered when choosing the crops to plant. Some varieties will take up a lot of space, water, and nutrients, creating too much competition. In a small garden, consider alternating rows of upward growing crops with shallow root systems, such as spinach, and Programming Tips: downward-growing root crops, such as carrots When choosing or advising on and beetroot, which have deeper roots and varieties to be cultivated in the smaller surface growth. keyhole gardens, programmers Other varieties complement each other by should carefully consider culture, the types of nutrients they consume and the climate conditions, and diets of the nutrients they return back into the soil. For targeted population. Experience example, intercropping beans and maize in a has shown that households may field is often considered a desirable practice not be used to certain varieties of because beans put nitrogen into the soil and vegetables, may not know how to maize requires a lot of nitrogen to grow. prepare them and may be skeptical Companion planting is also a way of controlling pests and reducing the risk of losing one’s of their benefits. Introducing new entire garden to an infestation. Insects that varieties that do not normally are attracted by certain plants may be repelled contribute to the typical diet of the by others. Alternating rows of different plants targeted population may require reduces the risk of pests spreading throughout additional training in nutrition your garden. Some plant varieties can be used and preparing the vegetables specifically for their pest-resistant properties. grown. Intercropping chilies, onions, or garlic will help to repel insects or keep them from spreading to other crops. It is preferable to grow a minimum of four types of crops, to promote a diversified diet and help to control pests. Alternating rows between the four, with root crops followed by leafy crops, uses space efficiently and reduces the strain on soil fertility. In addition, alternating rows helps to control pests, which may attack one type of plant but not the others.
- 17. Homestead Gardening: A Manual for Program Managers, Implementers, and Practitioners 16 Planting seeds in circular or curved rows helps keep the topsoil from running off when watering the garden. However, curved lines are generally preferred to make it easier to weed between the rows. As a general rule of thumb, rows should be spaced approximately 50 cm apart. The table below outlines some preferred crops for keyhole gardens. Generally smaller plants, such as carrots and spinach, are preferred over larger ones, such as tomatoes or cabbage, which require more space, water, and nutrients for healthy growth. Preferred Crops for Keyhole gardens Root Crops Leafy Crops Carrots Spinach Beet root Swiss chard Radish Lettuce Turnips Mustard Spinach Garlic Herbs Crops NOT Recommended for Keyhole Gardens Tomatoes Cabbage Peppers Egg Plant Chilies Maize Peas Beans Potatoes Squash Table 2.1 Crops for keyhole gardens Maintenance Irrigation and Watering. Despite the moisture-retaining properties of the keyhole garden, one must still water the garden on a daily basis in order to keep the layers and topsoil moist. Water can be applied to the top layer as in conventional gardening, while the layers beneath can be watered through the central basket. Kitchen scraps and manure should be placed inside the basket to help renew the nutrients in the soil. It is generally a preferred practice to use gray water from washing dishes and clothes or bathing to irrigate through the basket, in order to conserve water and reduce the labor burden of collecting extra water for irrigation. The thatching grass, reeds, or other materials used to construct the basket will help to filter off chemicals in soaps and detergents from the gray water. Weeding. Plants need to be thinned out after germination to allow for enough room for growth. Thinning out the rows and weeding unwanted plants, such as grasses that grow between rows, also helps to reduce competition for moisture and nutrients, allowing the crops to grow better. Basket. The basket degrades and rots over time. It will need to be replaced every one or two years to allow for watering the interior layers and to prevent the keyhole from collapsing. To replace the basket, remove the stones from the walkway and replace the basket. The old material can be pushed to the bottom, as the organic matter will also decay to become humus and add nutrients to the soil.
- 18. 17 Manure or compost application. Manure should be periodically added to the topsoil to renew the nutrients. It is time to add manure when the manure is no longer visible in the top layer. Compost can be added instead of manure, or used between the rows as mulch. In addition, the garden will sink over time as the layers of organic material decompose. Some soil should be added from time to time to maintain the level of the garden. Keyhole Planting Positions Crops should be planted in curves from the center or in a circle, parallel to the walls of the garden Figure 2.3 Keyhole Garden Planting Position Use mix cropping, alternating rows of Morroho and root vegetables such as carrots and beetroot Root Crops Leafy Crops Keyhole Gardens Key Hole Planting Positions
- 20. 19 CHaPter 3 trenCH Gardens Trench gardens use the same principles and techniques of a keyhole garden, but instead of building a raised bed the layers are dug into the ground, leaving only a small mound of topsoil raised above ground level. Trench gardens have the same moisture-retaining and soil-enrichment properties, but require fewer materials and allow for larger plants, such as tomatoes and eggplant. However, they require more space than a keyhole garden, and therefore may not be appropriate in urban areas or other areas where space is limited. Trench gardens have been used successfully under the C-SAFE program to increase household production of vegetables and enhance resiliency among food-insecure households. Under the program, households were encouraged to build four trench gardens, to maximize the potential benefit through sectional planting Programming Tips: and staggered harvests—household 1. Having participants collect materials members could consume vegetables prior to demonstrations or trainings from one trench while crops in the will save time. others were still unripe. While the program emphasized using trench 2. Some of the materials above can gardens for growing common be replaced depending on what is vegetables, such as spinach and carrots, available in targeted communities. the technique has proven effective for larger vegetable crops as well, such as green beans, tomatoes, and peppers.
- 21. Homestead Gardening: A Manual for Program Managers, Implementers, and Practitioners 20 Benefits of Trench Gardens 1. Soil enrichment. Layers of organic materials break down over time to become humus, adding nutrients to the soil. In addition, the use of natural fertilizers, such as manure and compost, helps to feed the plants with vital nutrients. 2. Moisture retention in arid or semi-arid climate. Layers of organic material soak up and retain moisture, acting as a sponge. Greater retention means that the garden requires water less frequently and in smaller quantities. 3. Reducing dependence on external inputs. One of the keys to success is using locally available resources for construction and maintenance. All the materials used in construction should be sourced from the community or surrounding area. Different areas may have different materials available. For example, access to stone may be difficult in urban settings, but substitutes may be readily available to construct the outer wall. Likewise, cardboard and paper may be easily available to urban populations to build up the first layer but less readily available in isolated rural communities. Using locally available resources decreases the cost of constructing a keyhole garden and reduces dependence on outside materials that have to be purchased or transported long distances. Constructing a Trench Garden Materials Like keyhole gardens, trench gardens are relatively easy to construct and emphasize the use of locally available resources, but they require fewer construction materials. Below is a list of the materials needed: 1. Stones to line the perimeter of the trench garden. Stones should be medium to large in size but nothing smaller than a fist. 2. Spades 3. Thatching grass for layers 4. Agave aloe leaves or small tree branches 5. Manure—10 to 20 wheelbarrows (the more manure used, the more productive the garden will be) 6. A 1 m. by 2 m. space for the garden
- 22. 21 Steps in Construction 1. Collect stones, aloe leaves, manure, and grass or leaves. 2. Use the spade to lay out 1 m. by 2 m. (one spade-length by two spade-lengths) space for the trench garden. 3. Dig a trench about 60 to 70 cm. deep (approximately as deep as the blade of the spade is long) in the 1 m. by 2 m space, putting the soil aside to use later. 4. Place a layer of aloe leaves, branches, cardboard, or tin cans. 5. Add a layer of soil on top of the aloe, then add dried grass or leaves. 6. Add another thin layer of soil, then a thick layer of manure. 8. Place the soil set aside from digging the trench on top of the layers, mixing in some manure or compost. Building your Trench Garden Building your Trench Garden Fill your trench with layers of materials and replace the soil on top 1 spade blade wide Soil Compost / Manure Grass Aloe / Tin Cans/ Card Board 2 Trench Gardens Dig the trench about one spade-blade deep x 5 spade lengths long, and 1 spade length wide 1 spade blade deep 1 Figure 3.1 Trench Garden Layers Programming Note: 1. Lining the trench garden with stones will help prevent erosion of the topsoil and retain heat for winter gardening. 2. The size of the trench garden according to needs. The length can vary from 2-5 meters but extending the garden beyond 5 meters long or 1 meter wide can make it difficult to manage. 3. Thin layers of soil (enough to cover the material used) should be used between every layer to help start the biodegrading process.
- 23. Homestead Gardening: A Manual for Program Managers, Implementers, and Practitioners 22 Companion Planting As mentioned in the last chapter, companion planting is the preferred method for any homestead garden. Careful planning of the trench garden will allow for efficient utilization of space while improving or maintaining soil fertility and controlling pests. See chapter 2 for more information. As with keyhole gardens, it is generally preferred to grow a minim of four crops, to promote diversified diets and help control pests. Rows should be spaced approximately 50 cm apart, to reduce competition for nutrients and moisture while allowing enough space for the plants to grow. Planting Planting Position Position 5 Meters (5 Spade lengths) 1 Meter (1 Spade length) Alternate root crops such as carrots and beet root with leafy crops such as spinach 50-60 cm By planting at least 4 varieties in your trench garden you can reduce the risk of pests and ensure a balanced diet for your family Figure 3.2 Trench Garden Planting Position
- 24. 23 Succession Planting Succession planting means planting a series of trench gardens at staggered intervals, so that you can harvest and consume vegetables from one trench garden while others continue to grow. A household with four trench gardens could plant one garden each week for four weeks. When growing crops such as spinach, the first trench garden will be ready to harvest as the fourth garden is being planted. The first garden can be replanted within a week of harvesting. The cycle of planting and harvesting can be continued year round. Succession Planting Succession Planting Week 1 Week 2 Week 4 Week 3 Alternate planting times between trench gardens to allow the farmer to harvest crops from one trench while the other crops are are growing Figure 3.3 Succession Planting
- 26. 25 CHaPter 4 PotHolinG (Conservation aGriCulture) Conservation agriculture is an approach to low-impact, sustainable farming rapidly gaining wide acceptance. As the world population and the corresponding demand for food continues to grow, competition for arable land is increasing. As a result, farmers— especially poor farmers—are increasingly forced to work marginalized land, cultivating crops on the side of mountains or in poor soil. Farming such areas can lead to soil erosion and declining soil fertility, increasing farmers’ vulnerability to climatic and environmental shocks. Conservation agriculture applies a variety of principles in order to prevent erosion and preserve nutrients in the soil, thereby maintaining or increasing the long-term productivity of marginal agricultural lands. One of the core concepts in conservation agriculture is minimum tillage. Common plowing practices are among the primary Benefits of Potholing contributors to soil erosion. These practices 1. Concentrates inputs in the potholes loosen top soil and deeper layers of soil, rather than spreading them making land susceptible to erosion by wind throughout the entire plot. and water. Minimum tillage disturbs the soil only as much as is absolutely necessary 2. Adds nutrients to the soil by to plant, which reduces erosion and soil increasing the amount of organic depletion. material present. “Potholing” applies the principle of minimum 3. Potholes can be reused for up to tillage by cultivating crops in individual holes three years without applying new designed specifically to enhance soil fertility inputs. while protecting top soil from erosion. 4. Traps water runoff, improving CRS Lesotho, as a member of C-SAFE, moisture retention and preventing promotes potholing to small-scale farmers soil erosion. (0.5 to 1 hectares) as a way to increase crop yields in areas with marginal soils prone 5. Uses locally available resources. to erosion and declining productivity. The method used by C-SAFE Lesotho was
- 27. Homestead Gardening: A Manual for Program Managers, Implementers, and Practitioners 26 adopted from the conservation agriculture techniques developed and employed by Growing Nations in Tebellong, Qacha’s Nek, Lesotho. Much of the material in this chapter comes from site visits to projects in Tebellong and is adapted from the Conservation Agriculture Manual developed by Growing Nations with support from FAO and WFP. Preparing Potholes While the potholing method is very labor intensive to start, in the long term it can be used as a labor-saving technique. After the first season, stocks can be removed and the potholes reused without additional inputs. The potholes are arranged to channel water across a field while maximizing the use of space. Similar to the other homestead gardening techniques mentioned in this manual, potholes are layered with organic material to add nutrients to the soil. Materials 1. Spade or hoe 2. String or twine, enough to stretch across the field or plot (medium spool) 3. Manure, compost or fertilizer—enough for 1 or 2 handfuls per pothole 4. Sticks for marking 5. Seed Steps in Preparing Potholes 1. Determine the space to be planted and estimate the number of holes to be dug. 2. Tie knots in the string every 75 cm (the length of a spade plus an added length of the blade) to mark where to dig the holes. 3. Use sticks to stretch the string across the field. 4. Using a spade or a hoe, dig square holes 30 cm by 10 cm and approximately 15 to 20 cm deep. Gardening Tip: 1. Make sure that the holes are positioned across the slop rather than parallel with the slope to avoid erosion. 2. If using chemical fertilizers, protect the seed from chemical burns by completely covering the fertilizer with a healthy layer of soil.
- 28. 27 5. Add one or two handfuls of manure or compost to each pothole. 6. Cover manure with soil. 7. Add appropriate amount of seed at the correct depth (see table 4.1). 8. Replace most of the top soil, leaving a small depression. 9. Use remaining soil to build small, crescent-shaped dikes (ridges) around the downhill side of the pothole to trap water. 10. Move to the next mark and continue the process until the first row is completed. 11. Once the first row is complete, use a spade or stick to move the string in order to mark the next row. The second row should be 75 cm from the first. Take care to stagger the holes from one row to the next, creating a zig zag pattern. 12. Continue the process until the field or plot is complete. Sowing PothSoolwesing Potholes 4. Cover lightly with soil making sure soil is loose and not clumped 3. Add Seed to correct depth Figure 4.1 Pothole layers 2. Add Soil 1. Add Compost, Manure or Fertilizer Potholing
- 29. Homestead Gardening: A Manual for Program Managers, Implementers, and Practitioners 28 Potholing LaPyoothuotling Layout ( ( ( ( ( ( ( ( ( ( ( Down Slope ( ( 75 cm 75 cm apart apart Figure 4.2 Layout of a pothole field
- 30. 29 Planting Potholes Potholing can be used for a variety of crops including maize, beans, sorghum, and wheat in various ways (see chart). Intercropping can be practiced by alternating rows with different crops i.e. alternating rows of maize and beans or pumpkin. Alternatively, companion planting can be practiced by mixing complimentary crops in the same pothole i.e. planting bean seed between maize in the same hole. Crop rotation is also considered a preferred practice in potholing. Alternating crops helps to renew the soil fertility and reduce susceptibility to pests. Winter cropping of peas or wheat may have the same effect in renewing the nutrients in the soil for summer cropping of maize and sorghum. Programming Tips: 1. Training in marketing will assist farmers to determine market trends and fluctuations in market prices enabling them to make better decisions about crops they grow and methods they employ. Combining market training with conservation agriculture may encourage crop rotation and intercropping as farmers begin to make decisions based on changes in price and market demand. 2. In food security projects, participants can be encouraged to plant a variety of crops through intercropping or companion planting in order to increase resiliency. Potholing Crop Number of seeds per hole Planting depth 3 (in dry conditions thin out to 2 per Maize hole when the plants are knee-high) 5 cm 10 (thin out to 6 per hole when the 5 cm Sorghum plants are knee-high) Beans, peas 5-8 (no thinning required) 3 cm Wheat 20 seeds (1 pinch) 3 cm 6 (then thin to 4 per hole when the 5 cm Sunflower plants are knee high) Table 4.1 Potholing Sowing
- 31. Homestead Gardening: A Manual for Program Managers, Implementers, and Practitioners 30 Harvesting and Maintenance Mulching. After harvest or weeding, crop stocks and weeds can be left in the field as mulch. Mulching helps to keep soil moist moisture by slowing evaporation while creating a protective shield against wind and water runoff. Much like compost, mulching adds nutrients to the soil as the organic material from the plant residues biodegrades. Weeding. Weeds growing between the rows compete with crops for nutrients and water. Weeds should be removed after planting and periodically throughout the growing season, leaving the dead weeds in the field as mulch. In addition, plants in the potholes should be thinned out when they are about knee high, to limit competition and allow more space for the remaining plants to mature. This is especially important during a drought or dry season. Ridges. These are essential to the design of the pothole and need to be maintained. Creating ridges around the potholes on the downhill side of the slope helps to trap water in the pothole and channel runoff into other potholes. Reuse. Potholes can be reused from season to season. After the first harvest, crop stocks can be left in the field as mulch. Replant potholes by loosening the topsoil and breaking up clumps to allow the new seed to grow. Additional compost or manure can be added as a top dressing, but underlayers do not need to be replaced for up to three years.
- 32. 31 CHaPter 5 soil fertility Sun, water, and soil are vital to the survival of all plant types. Healthy soils are a living and breathing element of the ecosystem. Soils are made up of minerals, decaying plant and animal matter, and living organisms, all vital contributors to the process through which plants grow, flower, and bear fruit. Soil fertility is determined by the amount of nutrients it contains. The nutrient content depends on a number of factors: 1. Composition of the soil 2. Amount of organic material present 3. Acidity 4. Moisture Common Soil Types The structure and composition of soil contribute to its fertility. Soil is made up of particles and minerals from the erosion of rocks and stones over millions of years. The particles are deposited by wind and water runoff to make up layers called strata. These strata vary in the structure of the soils they contain. Below are some basic structures. Clays. Clay in the soil helps retain moisture, but if the soil has too much clay it can prevent water from penetrating to the roots. Clay can also harden soil, inhibiting root growth. Sand. Sand is usually rich in nutrients left from the slow erosion of stone. Sandy soils allow for easy root growth and penetration of air. However, sandy soils do not retain moisture well, allowing water to slip between the particles. Humus. Over time, plants, animals, and microorganisms die and decay, adding organic matter to the soil. This decomposed organic matter, known as humus, provides nutrients and helps soil retain moisture. This organic matter is continuously recycled in nature as plants and vegetation die and decay, feeding new growth and keeping topsoils rich. Sandy Clays. Soils with almost equal proportion of sand and clay allow for adequate root penetration and hold moisture well. Loam. Soils with containing nearly equal proportions of sand and clay as well as abundant organic matter are ideal. These soils contain large amounts of nitrogen and other nutrients from biodegrading plant and animal materials, and share the properties of sandy clays mentioned above.
- 33. Homestead Gardening: A Manual for Program Managers, Implementers, and Practitioners 32 Identifying Common Problems Common Nutrient Deficiencies Soils deficient in nutrients can slow plant growth, flowering and fruit formation, and root development. Deficiencies can occur naturally, but they are often the result of overuse of agricultural land and can be cured with time. Proper crop rotation, intercropping, or companion planting can help to overcome some of these deficiencies naturally, limiting the need for chemical fertilizers. In severe cases, the land must be left fallow, allowing natural vegetation to grow and new deposits of sediment to form over time, replacing nutrients in the soil. Some common nutrient deficiencies are described in Table 5.1. Nutrient Required for Symptoms of Deficiencies in soil Organic Sources Nitrogen Healthy stem and leaf growth. Yellow or pale green leaves 1. Manure and compost 2. Legumes- beans and peas actually put nitrogen into the soil Phosphorus Root growth and fruit formation 1. Slow plant growth 2. Pink or red on edges of leaves 2. Acidity 1. Compost mixed with crushed bone, urine, blood, or feathers. 2. Egg shells Potassium 1. Promote flowering and fruit growth 2. Resist disease and pests 1. Leaves become brittle and dry 2. Fruits do not form adequately 1. Chicken manure 2. Wood ash 3. Crushed egg shells Table 5.1 Common Soil Nutrient Deficiencies Acidity High soil acidity levels can prevent some nutrients, such as phosphorus, from dissolving in water, which in turn prevents plants from absorbing those nutrients through their roots. Highly acidic soils can also burn seeds or plants, resulting in discoloration, stunted growth, or limited germination. High acidity is usually the result of overuse of chemical fertilizers, herbicides, and pesticides. Overuse can come from applying too much of a chemical at once, or from extensive use over time. The amount of rain can also affect soil acidity. Too much rain can wash carbon and other chemicals from the air, depositing them on the crops and soil. This is especially a problem in areas with heavy air pollution or heavy rains following a period of drought. A common solution to soil acidity is application of lime, gypsum, or potash. However, soil acidity can also be reduced by the use of such low-cost inputs as compost, animal blood, crushed bone, or urine.
- 34. Soil Fertility 33 Erosion Erosion is a natural process that can take place over thousands of years and is responsible for the depositing of sediments and the nutrients that contribute to soil fertility. However, unsustainable farming practices can accelerate the natural processes to the point where agricultural lands become unproductive. Wind and water erosion degrades land by clearing away topsoil, which is usually rich in organic matter as well as microorganisms, earthworms, and insects that help to put nutrients into the soil. Erosion of topsoil leaves underlying layers of soil exposed to sun, rain, and wind, which may harden them, preventing root penetration. In other cases, underlying sediments may be looser than the topsoil, and erode even more quickly. The lowland and foothill regions of Lesotho are testimony to this process. The landscape is scarred with rapidly deepening and widening Dongas, or gullies, leaving adjacent agricultural land unusable and idle. Some of the human induced causes of erosion are described below. Clearing of vegetation. Exposed soil is susceptible to wind and soil erosion. Keeping fields covered with natural vegetation or mulching between crop rows helps to protect topsoil from the scouring effects of wind and rain. Over plowing. The type of deep plowing practiced in Lesotho and other developing countries around the world contributes to erosion. This practice removes vegetation and roots that help to hold the soil together and protect the topsoil from exposure, and also loosens the topsoil, which makes it more susceptible to scouring by wind and water. Overgrazing. This happens when too many animals are grazing in the same location. Animals eat the grass and other vegetation, often tearing out roots and killing the protective cover for the soil. Without that cover, the topsoil is left exposed to the wind and rain that drive erosion. Soil Rehabilitation To a good farmer or gardener there are few soils that cannot be improved or rehabilitated. Even with severely damaged soils, fertility can be restored over time through hard work, and at limited expense. There are a number of natural methods to add nutrients, neutralize acidity, and protect the soil. Core principles of improving soil fertility 1. Minimize tillage. In addition to contributing to erosion, turning the soil exposes organic matter and nutrients to the air and sun, slowing the breakdown of organic material and the release of nutrients and changing the chemical makeup of the soil. Letting fields lie fallow for a time will also help to renew soil fertility. For more information on minimum tillage see chapter 5.
- 35. Homestead Gardening: A Manual for Program Managers, Implementers, and Practitioners 34 2. Add organic matter. The slow breakdown of plant material (grass, leaves, and manure) helps to add nutrients such as nitrogen to the soil. In addition to being rich in nutrients, organic matter in the soil helps it retain moisture and neutralizes acidity. Black or dark soil is usually rich in organic matter and very productive. 3. Protect soil from sun, wind, and rain. Too much sunlight can alter the chemical composition of soil. In a natural environment, topsoils are protected from the sunlight by trees, shrubs, grasses, and other vegetation. Heavy rains and winds can also carry away vital topsoil. Mulching and intercropping groundcover crops such as pumpkin help to protect the soil from sun and erosion. 4. Limit use of chemicals. As mentioned above, overuse of chemical fertilizers, herbicides, and pesticides is a major contributor to soil acidity. One can limit the need for these chemicals by applying organic matter, using intercropping and companion planting techniques, and through hard work. Composting Composting is a natural process in which microorganisms and Gardening Tip: earthworms convert organic matter from plants and animals 1. Avoid using bones into a rich plant food called humus. Humus when complete or scraps of meat looks like soil and is rich in vital nutrients such as carbon and in the compost to nitrogen. prevent attracting This composting process occurs in nature as dead leaves and animals and other other plant material combine with animal waste, soil, air, and pests including rats water to form a natural fertilizer that enriches top soils and and dogs. promotes plant growth. While this process occurs naturally in the environment, people can create their own compost using garden and kitchen waste. Compost can be created by heaping these materials in a pile or in a pit, to be added to one’s garden as the materials decay to form hummus. Composting is a cheap alternative to fertilizer that converts kitchen waste and other organic matter into nutrients for the soil Making compost is very easy. 1. Dig a hole 1 meter wide by 1 meter deep 2. Put kitchen waste such as left over food, vegetables, egg shells, etc into the hole regularly. 4. Leaves and other organic matter can also be used but avoid putting bones and meat in the compost to keep animals away 5. Water daily with wash water 6. Turn the compost regularly to keep allow air in 7. Once the material begins to look like soil it is ready for use in the garden
- 36. Soil Fertility 35 Manuring Manure is an excellent source of nutrients for soil. Manure from livestock and chickens, much like compost, is primarily concentrated, decayed plant matter. Nutrients from manure are easily dissolved and absorbed by the soil for transfer to plants. Manure should be completely dry and flaky before use. Dry manure will soak up water and help the soil retain moisture, while wet manure will attract flies and insects that may damage vegetables. Wet or moist manure also has a very high concentration of nutrients and may be too strong for most crops. To apply manure, dig it into the top layer of soil. Manure Tea Manure can also be mixed with water to form a liquid known as manure tea. As the manure dissolves in water, the water becomes rich in nutrients and microorganisms. This mixture contains a high concentration of nutrients and can be used to irrigate gardens or fields. Using manure tea instead of applying manure directly can help to control weeds, as seeds and other plant material are filtered off in the tea brewing process. To make manure tea: 1. Fill a large burlap, cloth, or aerated plastic sack (a maize meal bag) with manure from cattle, goats, or sheep. 2. Tie the sack to the centre of a large stick or pole. 3. Fill a large bucket or other container (50-gallon or 200-liter drums are ideal) with water. 4. Suspend the sack of manure in the water by placing the stick or pole across the top of the container. The manure will filter through the sack into the water like a tea bag. When the water becomes deep brown in color, the manure tea is ready for use in the garden. Manure tea has a high concentration of nutrients and is very strong. Like fertilizer, overuse can contribute to soil acidity and burn plants. Dilute manure tea with water (1:1 ratio) before applying. Crop Rotation Regular rotation of crops combined with cycles of leaving land fallow also help to rejuvenate the soil. As mentioned in previous sections, different crops use nutrients in different ways. For example, crops like beans and peas put nitrogen back into the soil, while maize is a heavy feeder of nitrogen. Rotating the type of crops planted seasonally will help to balance the nutrients in the soil. Allowing fields or plots to lie fallow helps the soils to “rest.” Over time, new deposits of soil and growth of natural vegetation renew nutrients in the soil. During fallow cycles, farmers may plant cover crops or fodder to protect the topsoil from erosion. Plowing this vegetation under later will increase the amount of organic matter in the soil, promoting the formation of hummus and attracting earthworms and microorganisms.
- 38. 37 CHaPter 6 Pest Control Through proper planning and crop management, farmers and gardeners can control the impact of pests on their crops and vegetables. While many farmers spend a lot of money on chemical pesticides, pests can also be controlled through low-cost, natural methods, using organic pesticides and home remedies. Whether using crop management techniques or pesticides, prevention is the key to effective pest control. Crop Management Strategies Proper crop management will help to prevent an infestation of insects and other pests from devastating the crops. A farmer can reduce the vulnerability to pests and disease by diversifying the crops grown in the same space or between seasons. Good crop management for pest control is also good soil management. Companion planting. This is a way of controlling pests and reducing the risk of losing an entire garden to one type of pest. Insects are attracted by certain plants but may be repelled by others. Sowing different types of plants in alternating rows reduces the risk of pests spreading throughout a garden. Some plants can be used specifically for their pest-resistant properties. Intercropping chilies, onions, or garlic with other vegetables in the garden will help to repel insects or keep them from spreading. Some nonfood plants, such as marigolds, have the same effect. Intercropping. Diversifying the types of plants grown in a garden can help to contain pests and reduce the chance of them spreading throughout the garden. Crop rotation. Monocropping can exhaust the nutrients in the soil, weakening plants’ natural immune systems and leaving them more susceptible to pests and disease. Alternating crops and periodically leaving the plot fallow will help to renew the soil and improve plant health resiliency. Weeding. If a garden is overgrown with weeds, insects can spread to other plants more easily. Weeds also compete with crops for nutrients and moisture, weakening the natural immune system of the crops and leaving them more susceptible to pests and disease. Keeping the garden clean. Clearing out fallen and rotting fruit will help to keep away animals and insects that may be harmful to crops. Also avoid throwing food scraps especially meat directly into the garden. Organic Pesticides Used in conjunction with good crop management practices, organic pesticides can help protect crops from insect infestations. The solutions described in Table 6.1 are effective against most harmful insects and worms including aphids, grasshoppers, and cutworm.
- 39. Homestead Gardening: A Manual for Program Managers, Implementers, and Practitioners 38 Remedy Materials Preparation Application Garlic and • Garlic cloves • Cut garlic into small • Add 5 tablespoons paraffin • Two tablespoons pieces of mixture into 10 mixture • • Onion • of paraffin • One liter of cold water liquid soap • • Onion • Mix garlic and paraffin into half a liter of water Add the remaining • water to the mixture Leave the mixture for • 24 hours to brew Chop onion and garlic • liters of water and stir thoroughly. Spray directly on to leaves and stems Repeat when necessary Spray directly on to and garlic • mixture • Cayenne • Garlic • Water • Cayenne pepper • Mix with 5 liters of water Stir and leave for 24 • hours • Chop garlic • leaves, stems and fruit. Apply to topsoil around affected crops. Repeat if insects return. Spray directly on Pepper Spray • • • Insect • (small packet of • crushed) Garlic (+/- 5 cloves) Water • Liquid Soap Garlic • Boil garlic and pepper with 3-5 liters of water for five minutes. • Add soap to make the solution stick to the plants Use just enough water • fruit or leaves (no need to dilute). Repeat if necessary Dilute with equal repellent • Chilies to blend all except amount of water. spray • • • • Table 6.1 Organic Pe Onion Cigarette buds • Water Liquid soap • sticides and home remedies liquid soap • Let stand for 24 hours in closed container • Strain and add a few drops of liquid soap • Spray directly on to leaves and stems. Apply to top soils around plants. Repeat when necessary
- 40. 39 A Physical Seed Health Genetic ✓ Are the seeds large and similar ✓ Is there diseased seed? ✓ Is all the seed the same in size and shape? type and variety? ✓ Is there a lot of broken seed? ✓ What is the germination ✓ Is the variety adopted rate? to local conditions? ✓ Are there seeds from other ✓ How many of the seedlings ✓ Is the variety pest plants mixed in? will survive? resistant? ✓ Is there a lot of small stones, ✓ Is the variety high leaves, and other material? yielding? A Hybrid OPV Pros Cons Pros Cons High yield Yield decreased with reuse Can reuse with same yield Lower yield Less susceptible to pests and disease Needs more water More drought resistant Susceptible to pests and disease A Mollison, B., and Slay, R.M. (1991). Introduction to permaculture. Harare, Zimbabwe: Fambidzanai Training Centre. Food and Agriculture Organization of the United Nations. (2001). Improving nutrition through home gardening: a training package for preparing field workers in Africa. Rome: FAO. Greenaway, K., Greenblott, K., and Kayrira, K. (2004). Food for Assets: Adapting programming to an HIV/AIDS context. Johanesburg: C-SAFE. Vukasin, H., Roos, L., Spicer, N., Davies, M. (1995). Production without destruction. Harare, Zimbabwe: Natural Farming Network. Growing Nations, FAO and WFP. (2005). Conservation agriculture using potholes: Hope for Lesotho’s farmers. Lesotho: Growing Nations, FAO and WFP.
- 41. CRS Lesotho Main North 1, Cathedral Area P.O. Box 11471 Maseru 100, Lesotho