Tennessee Rain Garden Manual
•
1 recomendación•1,120 vistas

Tennessee Rain Garden Manual ` For more information, Please see websites below: ` Organic Edible Schoolyards & Gardening with Children = http://scribd.com/doc/239851214 ~ ` Double Food Production from your School Garden with Organic Tech = http://scribd.com/doc/239851079 ~ ` Free School Gardening Art Posters = http://scribd.com/doc/239851159 ~ ` Increase Food Production with Companion Planting in your School Garden = http://scribd.com/doc/239851159 ~ ` Healthy Foods Dramatically Improves Student Academic Success = http://scribd.com/doc/239851348 ~ ` City Chickens for your Organic School Garden = http://scribd.com/doc/239850440 ~ ` Simple Square Foot Gardening for Schools - Teacher Guide = http://scribd.com/doc/239851110 ~

Recomendados
Más contenido relacionado
La actualidad más candente
La actualidad más candente (20)
Similar a Tennessee Rain Garden Manual
Similar a Tennessee Rain Garden Manual (18)
Más de School Vegetable Gardening - Victory Gardens
Más de School Vegetable Gardening - Victory Gardens (20)
Último
Último (20)
Tennessee Rain Garden Manual
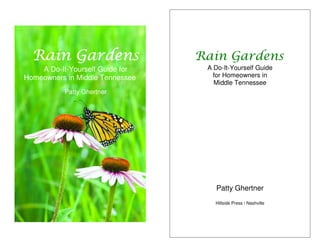
- 1. RRRRaaaaiiiinnnn GGGGaaaarrrrddddeeeennnnssss A Do-It-Yourself Guide for Homeowners in Middle Tennessee Patty Ghertner Rain Gardens A Do-It-Yourself Guide for Homeowners in Middle Tennessee Patty Ghertner Hillside Press / Nashville
- 2. For Steve, Ben and Ryan Copyright © 2009 by Patty Ghertner All Rights Reserved. This book is printed on 100% recycled paper. Unless otherwise noted, the illustrations were provided by the author. Cover photo Monarch Butterfly and Purple Coneflower by Zoran Ivanovic. Table of Contents Preface 1 Introduction 3 What is a rain garden? 4 How does a rain garden work? 5 Why are rain gardens important? 6 History of rain gardens 9 How do you create a rain garden? 11 Step 1: Study your yard 13 Step 2: Choose the location 16 Step 3: Understand your soil 17 What if your existing soil drains poorly? 19 Step 4: Determine the depth, size and shape 21 Step 5: Choose the plants 23 Why plant natives? 26 Step 6: Dig and plant! 27 Maintenance 30 Common Questions 31 References and resources 32 Appendix: Native plants for Rain Gardens in Middle Tennessee 34
- 3. Coreopsis Photo by Dina Trifonova 1 Preface Years ago, I read an inspiring book called Noah’s Garden by Sara Stein. The author opened my eyes to my responsibility as a gardener to protect our environment. Before then, I had considered myself somewhat removed from the complex web of life outside my door. Sara Stein’s message was that gardeners play a critical role in restoring ecology, even those who live in cities and towns with small yards. I was already an organic gardener, but I realized I should be doing so much more. I reduced the size of my lawn, replacing it with native, drought tolerant plants. With the help of my sons, I tackled the arduous task of removing exotic invasives from our woods. I composted everything I could. I grew more of my own vegetables and herbs. The list goes on and on. Although I felt my efforts were important, they seemed insignificant compared to our world’s huge environmental problems. 2 Then my friend Tiffany Wilmot invited me to attend a meeting at Ellington Agricultural Center to see several demonstration rain gardens. Before then I had read about the concept, but not in depth. That meeting prompted me to do more research. I found numerous scientific studies showing that rain gardens significantly reduce polluted stormwater run-off. The concept of rain gardens is so simple, yet so important in restoring our natural ecology. Many scientists believe fresh water will replace oil as the most critical natural resource in our near future. We can’t live without it. Our individual actions are vital in this challenge. Together we can make a difference. I firmly believe every homeowner should have a rain garden. I am forever grateful to Tiffany for planting that seed and that hope. My sincere thanks to Monette Rebecca of the Richland Creek Watershed Alliance for giving me the opportunity to teach rain garden workshops and for your enthusiasm and ideas. Thank you to Sari Barton, Ned Horton, Alys Venable and Anne Williams for your suggestions and feedback. Special thanks to Bill Schrieber at Print Net USA for your printing expertise. Thank you to the Rowlands, my wonderful neighbors for your good-natured tolerance of all my gardening experiments. To my kind and loving husband, thank you for your encouragement in this project and all my other endeavors, some crazier than others. To the rest of my family, thank you for your love and support. And most importantly, thank you to my sons Ben and Ryan, you inspire me and give me hope that your generation will be much better stewards of our precious earth. Patty Ghertner January, 2009 Be the change you want to see in the world. –Mahatma Ghandi.
- 4. 3 Introduction The concept of harvesting water is a very old one. Ancient civilizations built elaborate aqueducts and cisterns to capture precious fresh water for drinking and growing crops. In modern times, our appreciation of fresh water as a limited resource virtually disappeared. With the modern convenience of simply turning on a faucet to get all the fresh water we wanted, we had no motivation to conserve. Many homeowners decided that extensive irrigation was the only route to a beautiful, lush landscape. Water was cheap and easy. But now the general public has started to recognize the problem. More than ever in my lifetime, individuals are recognizing the critical importance of conserving fresh water. This new perspective has created much enthusiasm across the country about rain gardens. But many people still do not know what rain gardens are or confuse them with costly, high maintenance ponds or water gardens. Others think they are too big and too complicated for an individual homeowner to create in their own yard. My goal in this guide is to show you that creating a beautiful rain garden is an easy, rewarding, do-it- yourself project for anyone. Iris cristata ‘Alba’ Photo courtesy of Missouri Botanical Garden PlantFinder 4 What is a rain garden? A rain garden is simply a garden planted in a low spot in the landscape that is designed to catch rainwater runoff. These depressions in the landscape are also called bio-retention basins or swales, but I think rain garden sounds much more appealing. To create a rain garden, you direct rainwater from downspouts, driveways or other hard surfaces into a low area in your yard. If you do not have a low area, you dig one. Then you plant the area with plants suitable to the rain garden’s conditions, plants that will tolerate periods of flood and periods of drought. Rain garden capturing stormwater from a downspout. Illustration courtesy of Iowa Natural Resource Conservation Service
- 5. Illustration courtesy of Tamara Martin, Ecologist, Top Notch Urban Ecosystems 5 How does a rain garden work? Deep-rooted plants and soil high in organic matter absorb the rainwater and filter the pollutants. Plants and the millions of microbes in soil do an amazingly effective job of filtering pollutants. A two-year study by the University of Connecticut found that rain gardens trap and retain up to 99% of common pollutants.1 A residential rain garden should be designed so the water is completely absorbed into the soil within about twenty-four hours. Thus, rain gardens are quite different from ponds, bogs or wetlands. The rainwater slowly infiltrating the soil allows it to naturally replenish the underground water table, mimicking what happens in nature. Rain garden planted with deep-rooted plants to absorb and filter stormwater. 1 Michael Dietz and John Clausen, University of Connecticut, American Chemical Society Journal, Environmental Science and Technology, February 15, 2006. 6 Why are rain gardens important? Impervious surfaces such as roofs, pavement and compacted ground cause excessive amounts of polluted run-off, erosion and flash flooding. Rain gardens turn these problems into beautiful landscaping. The irony is that most of us have put our yards on life support. Stormwater is seen as a problem and a nuisance. We try to get it away from our houses and yards as quickly as possible with elaborate drainage systems. Then we spend tremendous amounts of money and energy on irrigation systems to maintain our lush green lawns and to water thirsty plants. “Someday we might look back with a curious nostalgia at the days when profligate homeowners wastefully sprayed their lawns with liquid gold to make the grass grow, just so they could then burn black gold to cut it down on the weekends. Our children and grandchildren will wonder why we were so dumb.”2 To illustrate the problem, imagine rain falling in a forest. Much of the rain is captured on the leaves of trees or trickles down the trunk to the ground. Rain that falls on the forest floor lands on vegetation or leaf litter and slowly soaks into the soil. Some of the rainwater evaporates back into the atmosphere through evaporation and transpiration. The remainder is absorbed by the soil and moves through the groundwater system to feed creeks and streams and underground aquifers. 2 Webber, Michael E., Catch 22: Water vs. Energy, Scientific American Earth3.0, November 14, 2008.
- 6. 7 Now, imagine rain falling in a city. Get ready for a fast ride. The rain falls on roofs and runs through downspouts. It falls on driveways, rushes out into the street and quickly down the storm sewer. It falls on closely cut lawns with shallow roots on compacted soils and only a small portion soaks into the ground. The fast rushing water causes erosion and flash flooding. And along the way, the rain picks up lots of pollutants. To make matters worse, the run-off is usually warmer than the natural groundwater. The stormwater makes its way through our creeks and streams to our rivers and lakes. The warm, polluted water upsets the complex natural ecosystems that keep our rivers and lakes healthy. It threatens wildlife and our drinking water quality.3 According to the EPA, on average 50% of the rain that falls on a city block washes down the stormwater system. In many areas of Nashville, 100% of the polluted stormwater washes down the storm drain. Politicians and government agencies are not the only ones who can tackle stormwater management and water quality issues. Individual, small-scale efforts can have a real impact. A rain garden project in Seattle, Washington is a prime example. A neighborhood street was lined with rain gardens. Two years of monitoring showed that this project reduced the total volume of stormwater leaving the street by 99 percent.4 3 Adapted from Schmidt, Rusty, Dan Shaw and David Dods, The Blue Thumb Guide to Raingardens. Waterdrop Innovations, LLC, 2007. 4 Seattle Street Edge Alternatives Project www.seattle.gov/UTIL/About_SPU/Drainage_&_Sewer_System/Natural_Drain age_Systems/Street_Edge_Alternatives/index.asp 8 Seattle Street Edge Alternatives Project Over 100 trees and 1,100 shrubs were planted in rain gardens along a residential street. Stormwater run-off was reduced by 99%. Photos used with permission © 2009, Seattle Public Utilities, City of Seattle, WA Before After A rain garden or a series of rain gardens for a 1,500 square foot house can capture over 900 gallons of polluted runoff from one inch of rain.5 Imagine how much stormwater run-off could be captured by a whole neighborhood with rain gardens. With average rainfall of about 47 inches per year in Nashville, thirty rain gardens could capture approximately 1,269,000 gallons of polluted stormwater in a year. Instead of threatening our drinking water quality and harming wildlife, over a million gallons of stormwater could be watering a neighborhood full of beautiful rain gardens. 5 Calculated as: 1,500 sq. ft. X 1/12 ft. of rain = 125 cubic ft. of water. A cubic foot contains approximately 7.5 gallons, so 125 cubic ft. X 7.5 927.5 gallons.
- 7. 9 History of rain gardens Stormwater specialists in Prince George’s County, Maryland developed the concept of rain gardens in 1990. The first project was a new subdivision of about two hundred homes. They applied the principles of bioretention and phytoremediation that had been used in wastewater treatment and brownfield restoration for many years. Each home in the development had a rain garden installed in their yard. They found this approach to be significantly more cost effective than the standard engineering approaches for managing stormwater. Their initial project saved them over $300,000.6 Since then, the concept of using rain gardens in residential settings has spread to communities across the United States. In places such as Seattle, Kansas City, Minnesota and Wisconsin, large community efforts are underway to encourage homeowners to create rain gardens. Some municipalities such as Minneapolis and Portland offer utility bill discounts for rain gardens. Rain garden in Burnsville, MN. Photo courtesy of Barr Engineering and City of Burnsville, MN: Fred Rozumalski, Landscape Architect and Kurt Leuthod, Civil Engineer 6 U.S. Environmental Protection Agency, Washington, D.C. Nonpoint Source News-Notes. August/September 1995. Issue #42. “Urban Runoff” 10 Rain gardens in Burnsville, MN. Photos courtesy of Barr Engineering and City of Burnsville, MN: Fred Rozumalski, Landscape Architect and Kurt Leuthod, Civil Engineer
- 8. Rain garden at Shaw Nature Preserve Photo courtesy of Missouri Botanical Garden 11 How do you create a rain garden? One size does not fit all. This is your garden, and beauty is in the eye of the beholder. Let your imagination be your guide. Everyone’s home and yard are unique, but most of us have similar run-off issues from our roof and driveway. Any steps you can take to reduce the polluted run-off from flowing into the storm system are beneficial. However, before you change the flow of rainwater around your home, remember to use common sense. Water flows down hill. Make sure that any changes you make are not going to flood your home or your neighbor’s home in a heavy rainstorm. In many neighborhoods in Nashville, downspouts are connected to underground pipes that lead directly into the storm drain. In this case, rain falls on the roof and flows directly into the storm system and into our creeks and rivers without the benefit of any filtering by plants or soil. In those situations, the easiest first step is to disconnect one or more downspouts from the underground pipes and allow the rain to flow into your existing garden or lawn. My favorite device for this situation is a plastic flexible downspout extension sold at hardware stores. These plastic pipes come in various colors to blend with your existing downspout. By using this flexible pipe, you can direct the rainwater away from your foundation and into your existing landscape. Depending on the topography of your yard, this step may be all it takes to prevent rainwater from your roof and hard surfaces flowing into the storm system. If so, you have effectively turned your whole yard into a rain garden. Congratulations. 12 However, most homeowners will need to take further steps to capture rainwater before it drains into the street or storm drains. In that case, the following pages give you guidance on creating an effective rain garden. Communities throughout the United States have been experimenting with residential rain gardens for about twenty years. Based on those experiences, a commonly recommended methodology has developed. I have adapted this approach to Middle Tennessee. Downspout leading directly into an underground pipe is replaced by a plastic flexible downspout extension available at hardware stores. The following pages describe the basic steps to create a rain garden: Step 1: Study your yard Step 2: Choose the location of your rain garden Step 3: Understand your soil Step 4: Determine the depth, size and shape of the rain garden Step 5: Choose the plants Step 6: Dig and plant!
- 9. Step #1: Study your yard 13 The best way to understand your yard is to watch how water flows from your roof, downspouts, and all the hard surfaces on your property when it is raining. If possible, get out there in a hard downpour. It is by far the best way. You may think you already know how water flows. However, you might be surprised at what you find. In my yard, I discovered that run-off from a downspout at the corner of our house was pooling water right next to the foundation. The area was also in desperate need of some aesthetic improvements. This was a perfect spot for a rain garden. Rain gardens are typically located in the sun because more plant choices are available and the sun promotes evaporation, but you can still have a wonderful rain garden in shade. I prefer shade gardens because I have found they are easier to maintain. Weeds love the sun. Shade gardens are also the most natural for our area, as our land was covered in deciduous forests before it was developed. Many native plants, shrubs and trees thrive in the shade or partial shade in Middle Tennessee. Before you choose the location of your rain garden, you should be aware of any stormwater rules or regulations that might apply to your situation (see the next page). Some areas in your yard are not well suited for a rain garden. The rain garden should be at least ten feet from your house to avoid seepage into the foundation. Do not locate the rain garden over buried utility lines or septic tanks. If you do not know where your utility lines are buried, it is important for you to have those lines marked. We now have a national “Call Before You Dig” service. You simply dial “811” from anywhere in the country and your call will be routed to your local utility companies who will send someone to your property to mark the underground lines. You should consider the location of the existing trees on your property and your neighbor’s property. Tree roots extend well beyond their branches. Some trees are much more at risk from root disturbance than others. If you must locate your rain garden near trees, avoid cutting more than about 10% of the root system. If you have many trees, you might want to create your rain garden slowly over a period of several years to minimize the shock to your existing trees. 14 If your house is located on a slope, you should not locate the rain garden on the uphill side of buildings (such as your neighbor’s house.) Also use caution locating a rain garden uphill from a retaining wall as the additional moisture might impair the wall. If your yard is on a steep slope, it will be more difficult to create your rain garden than a flat area. You will need to do a lot of excavating to create a level base for your rain garden. You might find it works better to create a series of small rain gardens like terraces, than to create one large rain garden. It may not seem common sense, but the ideal spot for a rain garden is not an area where rain already pools and the ground stays wet all the time. It is better to create a rain garden that captures the rainwater before it gets to that point. Remember, you are not creating a bog or pond. Thus, you should not direct more run-off from your roof or hard surfaces to a soggy area. However, you can improve absorption of a wet area by planting it with plants that thrive in moist soil. The native plants I have suggested in this guide are better suited for soil that drains after about twenty-four hours. The books and websites listed at the end of this guide have suggestions for plants that prefer moist soil. Run-off from the downspout was pooling next to the foundation. This was a perfect opportunity for a rain garden
- 10. 15 Stormwater Rules and Regulations: The Metro Nashville and Davidson County Stormwater Division encourages homeowners to create rain gardens. They have a very useful website, www.nashville.gov/stormwater/LIDResources.htm. As of December, 2008 no permits are required if the disturbed area of a homeowner’s project is less than 10,000 square feet. If you have a stream or creek that runs on your property, you should check whether it is “blue-line” stream protected by FEMA. If it is protected, federal regulations prohibit or restrict disturbing the land within a certain distance from the stream. You can look up your property on www.nashville.gov/mpc/property. If you have any questions, I encourage you to contact the Stormwater Division at 862-6038. If you live outside of Davidson County, you should check with your county’s stormwater department to see if any regulations apply to rain gardens. Also, the staff at your UT Agricultural Extension office are a valuable resource. Every Tennessee county has an extension office which should be listed in your phone book. Also, if you live in a neighborhood with a homeowners association, make sure to check any landscaping rules that dictate where you can or cannot create your rain garden. 16 Step #2: Choose the location To help you choose an ideal location, consider how the rain garden will fit into your existing landscape or future plans. Consider the views from the house, from the street, and from other areas in the landscape. Also, think about what style of garden you prefer. You might want the rain garden to be a mixed border, a hedge of shrubs, a butterfly garden, a formal garden, or a cottage garden. The possibilities are endless. Many examples of rain gardens on the web are kidney shaped islands in the middle of the lawn. For some landscapes, that design looks very nice. However, that is by no means the only way to create a rain garden. Sometimes looking at your landscape in a photo or in a two-dimensional drawing gives you a different perspective. You might find it helpful to do a diagram of your yard or take photos to help you choose the location. You should consider the path of the water from downspouts as part of your design. You can make the flow of rainwater into the rain garden an aesthetic feature. You might want to create a dry creek bed. You can also dig a small swale in A dry creek bed made with stone your lawn to direct carries the rainwater from the the flow of water. downspout to the rain garden area. Also consider where any overflow water will go. In a big rainstorm, you do not want the rain garden to overflow and flood your home or your neighbor’s home.
- 11. A small rain garden in the shade, planted with Christmas fern, Iris cristata, Jacob’s Ladder, and Soloman’s Seal. Caladiums and Impatiens are used around the edges. Step #3: Understand your soil 17 Once you have decided where you would like to put your rain garden, you should understand the soil in that location. If this area is currently lawn, the conditions might be quite different from other garden beds in your yard. The following questions are important in understanding your soil: How deep is the surface soil? If the surface layer of soil is shallow, you will be limited in the depth of your rain garden. When I try to dig a hole in some areas of my yard, I hit a hard layer of limestone about a foot below ground level. These areas are not ideal for a rain garden. What kind of soil do you have? If you have loamy, loose soil, rain will infiltrate easily. However, many areas in Middle Tennessee have heavy, clayey soils. If you have these conditions, your soil will not drain well and you will need to 18 amend it (refer to suggestions below). If you have these conditions, amending the soil will probably be the most physically challenging part of creating a rain garden. How much organic matter does your soil naturally have? The ideal rain garden soil is high in organic matter to facilitate absorption and filtering. Does your soil have adequate nutrients? If you are not sure, you should consider doing a soil test. I do not recommend adding fertilizer, even an organic fertilizer, unless your soil really needs it. Excess run-off of fertilizers is a serious threat to the health of our streams and rivers. Thus, the overuse of any fertilizers, organic or synthetic, should be avoided. Every county in Tennessee has a University of Tennessee agricultural extension office, which you can find listed in your phone book. The extension agents are a wonderful resource for any soil or gardening questions. They also offer low cost soil testing. If you live in Davidson County, you can contact: Agricultural Extension Service 800 Second Ave. North, Suite 3 Nashville, TN 37201-1083 Phone: (615) 862-5995 One of the best ways to understand how well your existing soil will support a rain garden is to do a simple infiltration test. An easy approach is to dig a hole about a foot deep in the area you have chosen for your rain garden and fill it to the top with water. Let it completely drain, then fill it to the top again with water. Check the test hole in twenty-four hours to make sure all the water has soaked into the soil. If it has, your existing soil should drain adequately for your rain garden. If you are interested in going a step further and measuring the rate of infiltration, you can mark the water level with a toothpick and then check how far the water level has dropped after a certain amount of time. For example, if the
- 12. water drops one inch after four hours, you can expect approximately six inches of water to soak into the soil in one day.7 If the water drops one inch after two hours, you can expect approximately twelve inches of water to soak into the soil in one day.8 Infiltration Test: Mark the water level with a toothpick. After about two hours, measure the drop in water level with a ruler. What if your existing soil drains poorly? 19 Do not be discouraged. You have several alternatives that will allow you to have a successful rain garden. Create a shallow rain garden. Initially, create a rain garden with a shallow depth and an overflow outlet, recognizing that the rain garden will not capture all of the run-off. Mulch around the plants in the rain garden with a two to three inch layer of shredded pine mulch or a product called “soil conditioner” which is typically about 50% compost and 50% shredded pine. This mulch will decompose more quickly than other mulches because of its fine particles. As it decomposes, it will be incorporated into the top layers of the soil by worms and soil microbes. Thus, it will need to be replenished after about a year. The plants and mulch will 7 1 inch ÷ 4 hours X 24 hours/day = 6 inches/day 8 1 inch ÷2 hours X 24 hours/day = 12 inches/day improve the soil’s infiltration rate over time. As the soil’s infiltration rate improves, you can adjust the overflow outlet to hold more water9. 20 Also, you might want to incorporate a rain barrel in this plan to reduce the amount of run-off from the roof flowing into the rain garden. You can attach a rain barrel to the downspout and then have the rain barrel’s overflow pipe run into the rain garden. Amend the soil with compost. You can amend the existing soil with lots of organic matter such as compost or well-composted manure. You will need to dig the depth of the rain garden to allow for the additional organic matter you will be adding. You should incorporate the organic matter by turning and mixing it into the top layer of the soil. Depending on the size of your rain garden, you might want to use a tiller for this step. If you do not own one, they are available for rent at hardware and rental stores. Better yet, if your neighbor owns one, maybe he or she will give you a hand with this step. Be aware that the more you disturb the soil, the more weed seeds you are likely to stir up. Thus, a two to three inch layer of mulch on top of the soil will be essential for suppressing weeds while your plants become established. 9 If purchasing compost or mulch in bags from a hardware store, you can determine the number of bags you will need by calculating the cubic area and dividing it by the amount in each bag. The bags are typically 1.5 cu. ft. each. For example, if you are going to create a 10’ wide by 10’ long rain garden and would like to add 3 inches of mulch (or ¼ ft), you are going to need about 17 bags, calculated as 10’ X 10’ = 100 sq. ft. X ¼ ft. = 25 cu. ft. ÷ 1.5 cu. ft. per bag = 16.67 bags. Alternatively, if you have access to a truck or a trailer, a very economical approach is to get a load of compost (which is composted leaves) or mulch (which is shredded bark) from Metro Public Works. Currently, the cost is approximately $30 per load. You can find out more information at www.nashville.gov/recycle/Centers/compost_center.htm. Photo by Sebastian Cole Shovel full of rich compost Photo by Sebastien Cote
- 13. 21 Remove the existing soil and replace it with a mixture of highly porous soil. If you decide to take this approach, I highly recommend you recruit some friends or neighbors to help you. It will reduce the risk that you will get overwhelmed and give up. Plus, you will have no better opportunity to build community with your neighbors than digging in the dirt together. You should dig the depth about a foot deeper than your final depth and remove the existing soil. Then replace the soil to your desired depth with a mixture of sharp sand (not white playground sand), topsoil and organic compost. A typical mixture would be about 40-60% sharp sand, 20-30% topsoil and 20-30% organic compost. Before you start digging, decide where you are going to put the soil you remove. You might use some of it to make a berm around three sides of the rain garden. You might have another area of your yard where you can use the soil. Or you might need to haul it away. Also, be very careful about the quality of the topsoil you use. You need to make sure you do not introduce an excessive amount of weed seeds. Step #4: Determine the depth, size and shape of the rain garden Depth - In general, residential rain gardens should be between four to twelve inches deep. The most common approach is a depth of about six inches. If your infiltration test showed that more than twelve inches will be absorbed within twenty-four hours, I would not recommend creating a residential rain garden with a depth any deeper than twelve inches. Deeper rain gardens might be a safety hazard for young children. Also, they might pose some technical hydrology issues that are better addressed by landscape architects and engineers. Size – Most residential rain gardens are between 100 and 300 square feet. The size of your rain garden might be limited by the available space in your yard or your budget. 22 Furthermore, you might have already determined the size based on aesthetic reasons. If so, you can skip the following calculations. To estimate the size of your rain garden, you should determine the expected amount of run-off and then calculate the area necessary to capture it.10 For example, if the section of roof draining into a downspout is twenty feet wide by thirty feet long, the drainage area is six hundred square feet. Drainage area: 20 ft. X 30 ft. = 600 sq. ft. Assuming one inch of rainfall per rainstorm, the short-cut formula for estimating the rain garden’s size is: Drainage area (in square feet) divided by the depth of the rain garden (in inches) equals the area of the rain garden (in square feet). For example, if you were planning to make your rain garden six inches deep, the recommended size would be 100 square feet. 600 sq. ft. drainage area ÷ 6 in. depth = 100 sq. ft. rain garden11 If you were planning to make your rain garden four inches deep, the recommended size would be 150 square feet. 600 sq. ft. drainage area ÷ 4 in. depth = 150 sq. ft. rain garden12 If your yard can’t accommodate a rain garden that large, any size is better than none at all. If size is limited, make sure you allow for an outflow area so the excess water in a big 10 Adapted from Christopher C. Obropta, Ph. D., P.E., “Raingardens: Stormwater Management in your Backyard”, www.water.rutgers.edu/Fact_Sheets/fs513.pdf and Schmidt, Rusty, Dan Shaw and David Dods, The Blue Thumb Guide to Raingardens. Waterdrop Innovations, LLC, 2007. 11 Also can be calculated as 600 sq. ft. X 1/12 ft. (1 inch) of rain = 50 cu. ft. of water ÷ 1/2 ft. (6 inch) depth = 100 sq. ft. rain garden. 12 Also can be calculated as 600 sq. ft. X 1/12 ft. (1 inch) of rain = 50 cu. ft. of water ÷ 1/3 ft. (4 inch) depth = 150 sq. ft. rain garden.
- 14. rainstorm will flow where you want it to flow, not where it will wash away your plants or flood your home. 23 These calculations use the assumption that most rainstorms in our area are one inch of rain or less. If you would like your rain garden to have the capacity to handle two inches of rain in one rainstorm, you would double the size. Shape - Now that you have determined the overall size, you should choose the shape of the rain garden. A rain garden measuring one hundred square feet could be many different dimensions and shapes. It could be rectangular, circular, triangular or a kidney shape. Let your imagination be your guide. Ideally, the garden should be situated so the length is perpendicular to the flow of water to encourage the rain to spread out evenly. Also, I have found a width of about five feet or less allows you to reach the center of the garden to weed without compacting the soil. If you choose to make your rain garden wider, you might incorporate some stepping stones into your design to minimize compaction. Step #5: Choose the plants Rain gardens can be planted with perennials, grasses, shrubs and trees. Although annuals are not typically recommended, I like the idea of using them along the edges of the rain garden for seasonal interest, especially in the first few years as your plants are getting establishing and filling in the area. Also, a few annuals mixed in with your other plants are a great way to tie the rain garden to the rest of your landscape. If you are a novice gardener, it always pays to do a little homework before you go to the garden center to purchase your plants. I have serious plantaholic tendencies, so I have found it very helpful to make a list of my plant choices before I go shopping. I have included a list of my favorite native Tennessee plants for rain gardens at the end of this guide. Many other plants will work as well. As you make your choice of plants, the following are some considerations: 24 • Climate Zone - Our zone is 6b or 7, but try to understand the effect of any microclimates in your yard. Some areas might be protected and stay warmer in winter. Some areas may be more prone to freezing or harsh winds. • Moisture requirements - Be careful to choose plants that will tolerate wet and dry conditions. In our area, plants that need moist soil will need lots of supplemental water to survive during our dry summers. I avoid those plants because the whole point of a rain garden is water conservation. However, as mentioned earlier, if you have an area in your yard that remains soggy all the time, plants that thrive in moist soil are an excellent choice to improve absorption in that area. • Sun exposure – It is not only important to determine the amount of sun but also whether the area gets morning or afternoon sun. Many plants will tolerate morning sun but will wilt in the intensity of the afternoon sun. My favorite sun exposure is either dappled sun under deciduous trees or morning sun and afternoon shade. If you are lucky enough to have those conditions, many plants will thrive in your garden. • Plant size – In planning your arrangement of plants, make sure to understand their mature height and width. You might not like to have gaps when you first put them in the ground, but you will be glad you planned ahead for their growth in future years. Overcrowded plants do not thrive and require continuous pruning to keep them in bounds. • Seasonal interest – I recommend selecting a variety of plants that will give you four seasons of interest, not just a big show in the spring or summer. We are fortunate in Middle Tennessee to have so many native plants with beautiful color in the fall. Also, by using a combination of different shapes and sizes, deciduous and evergreen, and interesting bark colorations, you can have a wonderful rain garden in the winter. • Aggressiveness – Some plants are more likely to spread and crowd out other plants. Be cautious that
- 15. 25 you do not choose plants that are too aggressive and will crowd out more behaved plants. For example, even though River Oats (Chasmanthium latifolium) is a beautiful native Tennessee plant, it may not be a good choice for your rain garden because it reseeds everywhere. I have River Oats in my garden, but I watch it carefully and pull any seedlings that pop up in places where I do not want them. • Diversity – A diverse mix of plants is better than a monoculture for several reasons. First of all, diversity will usually improve infiltration because the varying depths of roots will loosen the soil. Also, a diverse Monarch butterfly and Black-eyed Susans, Photo by Zoran Ivanovic planting of natives is advantageous for attracting all sorts of beneficial wildlife. Furthermore, a diverse group of plants will be less prone to disease. • Using Seeds - Typically, a rain garden is not planted with seeds because they will likely be washed away before they can become established. If you would like to try using seeds, you might allow the seeds to become established before directing rainwater into the rain garden. Another alternative would be to start some plants by seed in pots and then transplant them into the rain garden after they have grown. • Advice for beginning gardeners - Start small and limit your choices to several varieties of plants. Clusters of three to five plants of each type, planted in sweeps will usually look more pleasing to the eye than a big mix of individual plants or plants lined up in a row like soldiers. Also, take advantage of knowledgeable staff at reputable nurseries. 26 Why plant natives? Many wonderful books have been written about Tennessee’s native plants. Several of my favorite books are listed in the references section. Some of the many benefits of native plants are as follows: Naturally Adapted - They are adapted to our natural climate and soils. They tend to be drought tolerant (but not all Fiddleheads in the spring Photo by Miranda McMurray natives are drought tolerant), disease resistant and don’t require synthetic fertilizers to thrive. When you look for Tennessee native plants, be careful to choose plants that are native to the Middle Tennessee area and not necessarily those that originate from the mountains of East Tennessee. The soil and climate differ, so many plants that do well in East Tennessee will not do well here. Wildlife Benefit - Native plants attract native wildlife, including birds, butterflies, and beneficial insects and contribute to restoring our natural habitat. They benefit wildlife by providing nectar, berries, nuts and shelter. As mentioned already, having a diverse planting will attract a wide range of wildlife. Spirit of Place - Native plants contribute to a spirit of place, helping to keep our landscapes special and unique. I admit, sometimes I choose tropical plants for a container, but I want my garden to look like it naturally belongs in Tennessee. No Exotic Invasive Risk - Native plants do not carry the risk that some day they will become an invasive threat. Invasiveness is caused by high seed production, effective dispersal of the seeds and low predators. Many non-natives have the risk of becoming invasive due to these factors, even if they are not already identified as exotic invasives. I highly recommend that you become familiar with the plants that have been identified as exotic invasives for our area. You should be aware that these plants are often sold at
- 16. retail stores. The Tennessee Exotic Pest Plant Council has a helpful website, including a list of these plants categorized by their level of risk. Their website is given in the references section. Step #6: Dig and Plant! 27 Now that you have done all your planning, you are finally ready to dig. The first step is to mark the area of the garden with a garden hose or stakes and string. This will allow you to stand back and look at the area and make sure you are satisfied. Then you should remove any sod or weeds with a shovel, a sod cutter or by smothering the area.13 I recommend avoiding herbicides. Many scientists disagree about the safety of products such as glysophate (i.e. Roundup) but why take a risk that these chemicals will end up in our groundwater when you have other alternatives that you know are safe? The next step is to dig the area and amend the soil if necessary, as discussed under Step #3. You should excavate to a depth of about two to three inches deeper than the final depth to allow for a layer of mulch. You can use the soil you remove to create berms on three sides of your rain garden, use it in another part of your yard or haul it away. Ideally, the base of the rain garden should be level to allow the rainwater to spread out evenly. If your yard is on a slope, it may be helpful to use stakes and string to indicate a level base. If your yard is on a steep slope, you will have to do a lot of excavating to create a level base, removing soil from the uphill area and adding it to the downhill area. You might need to bring in 13 If you are willing to wait several months, newspaper and mulch can be used very effectively to smother sod. You should place four to six layers of newspaper on top of the sod, wet the newspaper, and cover it with about two to three inches of organic mulch. Depending on the amount of rain and the temperature, it will take about four to six months for the sod to completely die and the newspaper to decompose. Your patience will be rewarded with a wonderful layer of rich mulch. If the sod is Bermuda grass, you might even consider using cardboard covered with a two to three inch layer of organic mulch to smother it. If so, it will probably take a little longer to decompose. additional soil to build up the downhill area. You will also need to create firm berms, perhaps using an edging material such as stone to prevent erosion on the downhill side. As mentioned already, it may be preferable to create a series of several small rain gardens on a steep slope, rather than one large rain garden. 28 The sides of the rain garden should be gradually sloped. From a design standpoint, this will look more natural than sharp edges. Also, it will reduce the risk of your twisting your ankle when you are weeding or mowing your lawn around the rain garden. Volunteers and students at West End Middle School in Nashville, Tennessee. Many different edging choices will work. Rock or stone edging at the inflow area and at the outflow area (if required) will help prevent erosion of the soil and mulch. Groundcovers may also be used along the edge and can help connect the rain garden to the rest of the garden. If you have a Bermuda lawn next to the rain garden, a groundcover edging can be
- 17. very helpful in preventing the Bermuda from creeping into your rain garden. 29 Before you plant, fill the rain garden with water using a garden hose to check infiltration. It will be much easier to make changes to the soil or the depth of the garden before the plants have been planted. Allow the water to thoroughly soak into the soil before proceeding. I also recommend watering the plants in their containers before you plant them. This seems to reduce the shock to the roots when they are exposed to air during the planting process. The next step is to plant the plants. You should set out the plants in their containers before doing any digging to make sure you are satisfied with the layout. When digging holes for your plants, try to make the hole the same depth and twice as wide as the container. Loosen and spread out the roots in the planting hole and then fill the hole, firming the soil around the plant. Once you have planted all your plants, you should cover the area with a two to three inch thick layer of organic mulch. When mulching around plants, be careful not to smother the plants with mulch. It is best to leave a small amount of space around the base of the plant. If you put too much mulch against the base, you run the risk of causing the plant to rot. You should water the plants immediately. When you plant, sometimes air pockets remain around the roots. The roots need contact with soil to survive. By thoroughly watering your plants and checking that the soil is firm around the base of the plants, you will avoid those air pockets. Plan on watering every few days for the first couple of weeks unless it rains. For about the first year, make sure the plants are getting water approximately once a week, either through rainfall or through supplemental watering. If you are using plants listed in this guide, once they are established, they should not need additional water unless we have high heat and drought conditions in the summer. It may take shrubs and trees as much as three years to become well established. Remember, the goal is water conservation, so try not to over water your plants but watch them for signs of stress if we experience a drought. 30 Maintenance Compared to many other types of gardens, your rain garden should be very low maintenance. The key is to avoid bare ground and soil disturbance to minimize weeds. When you see weeds, try to pull them when they are small. To suppress weeds, add organic mulch as needed to maintain a two to three inch layer. Avoid stepping into the rain garden as much as possible to avoid compacting the soil. To keep the garden tidy, you can cut back dried stems of perennials in the fall. However, I prefer to cut them back in early spring to leave the seed heads through the winter to feed the birds and to provide cover. If you plant shrubs and trees that are recommended in this guide, they should need very little pruning. They thrive when allowed to grow naturally. You might need to prune a wayward branch occasionally. As mentioned already, once your plants are well established, they should not require supplemental watering, except during periods of high heat and drought. Periodically check the inflow and outflow areas of your rain garden after a rainstorm to make sure they are functioning as expected. Bee collecting nectar from Redbud tree Photo by Stefan Siems
- 18. 31 Common Questions Will the rain garden become a breeding ground for mosquitoes? No, a rain garden is designed to absorb rainwater within twenty-four hours. Mosquitoes do not have time to breed. Doesn’t a lawn absorb rainwater? Lawns do not allow rainwater to infiltrate as well as rain gardens because the soil is more compacted and the root systems are very shallow. Also, lawns are usually fertilized, sprayed with insecticides, mowed, and watered. Rain gardens are a much more ecological and sustainable approach. How much will a rain garden cost? If you supply the labor, the primary cost will be purchasing the plants, mulch and compost. If your budget is limited, create a small rain garden. I created a small rain garden in my yard for about $100. In the future, I am hopeful that homeowners will be allowed a discount on their water bill for rain gardens, as is done in other parts of the country. Nevertheless, the intangible benefits of a rain garden are priceless! ‘Annabelle’ Hydrangea planted with a mix of woodland perennials 32 If you have any questions or comments, please email me at patty.ghertner@ghertner.com. Also, I would be delighted for you to send me before and after pictures of your rain garden. References and resources for further reading: Watershed Organizations in Middle Tennessee Richland Creek Watershed Alliance www.richlandcreekwatershedalliance.org Cumberland River Compact www.cumberlandrivercompact.org Harpeth River Watershed Association www.harpethriver.org Books Armitage, Allan M., Armitage’s Native Plants for North American Gardens. Portland, OR: Timber Press, Inc., 2006. Burrell, C. Colston, Native Alternatives to Invasive Plants. New York: Brooklyn Botanic Garden, Inc., 2007. Dunnett, Nigel and Andy Clayden, Rain Gardens: Managing Water Sustainably in the Garden and Designed Landscape. Portland, OR: Timber Press, Inc., 2007. Hemenway, Toby, Gaia’s Garden: A Guide to Home-Scale Permaculture. White River Junction, VT: Chelsea Green Publishing Co., 2000. Hunter, Margie, Gardening with the Native Plants of Tennessee: The Spirit of Place. Knoxville: The University of Tennessee Press, 2002. Schmidt, Rusty, Dan Shaw and David Dods, The Blue Thumb Guide to Raingardens. Waterdrop Innovations, LLC, 2007. Stein, Sara, Noah’s Garden: Restoring the Ecology of Our Own Backyards. New York: Houghton Mifflin, 1993.
- 19. Steinberg, Ted, American Green: The Obsessive Quest for the Perfect Lawn. New York: W. W. Norton Company Ltd., 2006. Websites Kansas City’s 10,000 rain gardens project www.rainkc.com Missouri Botanical Garden plant information www.mobot.org/gardeninghelp/plantfinder/alpha.asp Rain Gardens of West Michigan www.raingardens.org Seattle Street Edge Alternatives Project www.seattle.gov/UTIL/About_SPU/Drainage__Sewer_Syste m/Natural_Drainage_Systems/Street_Edge_Alternatives/index. asp Tennessee Department of Agriculture www.state.tn.us/agriculture/sevenmile/rainwater.html with links to other sites of interest Tennessee Exotic Pest Plant Council information on exotic invasive plants www.tneppc.org Wisconsin Rain Garden Manual for Homeowners www.dnr.state.wi.us/org/water/wm/dsfm/shore/documents/rgm anual.pdf 33 34 Appendix: Native Plants for Rain Gardens in Middle Tennessee Perennials and Grasses Acquilegia canadensis Common Name: Columbine This native columbine has bell-like flowers of red and yellow or light pink and yellow, with delicate foliage. It blooms in the spring. It self-seeds in rich soil. Plant in partial shade. Asclepias tuberosa Common Name: Butterfly Weed Butterfly Weed has bright orange to yellow-orange flowers which bloom June through August. The flower clusters sit atop upright stems with narrow lance shaped foliage. It is one of the showiest native wildflowers. Mature plants may freely self-seed if seed pods are not removed prior to splitting open. Plant in full sun. Aster laevis Common Name: Smooth Aster Smooth Aster is an attractive and long-lived aster with smooth blue-green foliage. Abundant blue flowers appear in August and September. Plant in full sun to partial shade.
- 20. 35 Aster novae angliae and cultivars Common Name: New England Aster New England Aster has showy lavender to purple blooms that occur in August and September. To keep it compact, cut it back to about half its size in mid-summer. Many cultivars are available which are more compact than the species. Plant in full sun. Baptisia alba, B. australis, and B. tinctoria Common Name: False Indigo Baptisia has soft pea-shaped flowers of white, blue or yellow depending on the species and attractive shrub like foliage. This plant usually takes about three years to become well established, so be patient. It does not like to be moved, so carefully choose the site. Plant in full sun. Coreopsis lanceolata Common Name: Lanceleaf Coreopsis Lanceleaf Coreopsis has showy, deep-yellow flowers which bloom in May through July. It is a tough, drought-tolerant plant great for naturalizing. It readily self-seeds in rich soil, so deadhead spent flowers if reseeding is not desired. Plant in full sun. Coreopsis verticillata ‘Moonbeam’ Common Name: Moonbeam Coreopsis Moonbeam Coreopsis is a sun-loving plant with fernlike foliage and a profusion of creamy pastel yellow flowers which bloom in June through September. It is one of the most popular coreopsis cultivars. Plant in full sun. Echinacea purpurea Common Name: Purple Coneflower Purple Coneflower is one of my favorite perennials. It is very tough and drought tolerant. Many cultivars with different bloom color are available, which can be a bit confusing since the common name is “Purple” coneflower. It prefers full sun, but will tolerate partial shade. Elymus hystrix Common Name: Bottlebrush grass This fast-growing prairie grass forms loose upright tufts of narrow bladed leaves. The beautiful curving seed heads form on five foot tall stalks and resemble cultivated rye. This grass has more of a wild meadow look compared to other ornamental grasses like Panicum and will look tidier if it is surrounded by other plants that will give it support. Plant in part shade. Geranium maculatum Common Name: Spotted Cranesbill Spotted Cranesbill has pale pink to lilac upward facing flowers which bloom in April and May. The foliage is dark green with a mounding habit. It is a wonderful addition to the shady woodland garden and not to be confused with the annual geranium commonly sold in nurseries. Plant in partial shade. Heuchera americana and cultivars Common Name: Coral Bells This Coral Bell species is a clump-forming native, mostly grown for its attractive foliage. Tiny, greenish-white, bell-shaped flowers in open, airy panicles are borne on slender stems extending well above the mound of leaves in late spring to early summer. Many interesting cultivars are available. Plant in partial shade. 36
- 21. 37 Iris cristata Common Name: Dwarf Crested Iris This Iris is a low-growing, rapidly spreading plant that forms dense colonies in rich soil. It features pale blue, lilac or lavender iris flowers with gold crests on the falls. Flowers are borne on very short stems, often appearing nearly stemless. It has narrow, sword-shaped, yellowish-green to medium green leaves. Plant in partial shade to shade. Liatris spicata Common Name: Blazing Star This prairie native is a welcome addition to the mid-summer landscape with its tall, spiky flowers. Several different species and cultivars are available. One of the most readily available is 'Kobold' which is more compact than the species and will look attractive near the front of the border. Plant in full sun. Panicum virgatum ‘Heavy Metal’ Common Name: Heavy Metal Switch Grass Some of the taller switch grass cultivars can become floppy, but 'Heavy Metal' has upright, shorter steely blue-green foliage. The panicles have a pinkish hue and turn a beige color in winter. Plant in full sun. Panicum virgatum ‘Northwind’ Common Name: Northwind Switch Grass This switch grass cultivar has an upright, tall habit. It has olive-green to bluish-green foliage and narrow plumes of yellow flowers. The leaves and flower plumes turn a muted golden color in winter. Plant in full sun. Penstemon digitalis ‘Husker Red’ Common Name: ‘Husker Red’ Beard Tongue This Penstemon cultivar is a clump-forming perennial with white (sometimes with a pink blush) tubular flowers borne in panicles atop erect, rigid stems. Flowers bloom mid-spring to early summer. Leaves are maroon (hence the cultivar name). Plant in full sun. Phlox divaricata Common Name: Woodland Phlox Woodland phlox has loose clusters of slightly fragrant, tubular, violet blue flowers that bloom in spring. Its leaves are lance-shaped. In rich soil, it forms mats of foliage and spreads to form large colonies over time. In the heat of the summer, it may go dormant. Plant in shade. Polemonium reptans Common Name: Jacobs Ladder Jacob's ladder has light blue, bell-shaped flowers which appear in mid to late spring. The leaves with oval leaflets are arranged like the rungs of a ladder (hence the common name) and grow in a small mound. In the heat of the summer, it may go dormant. Plant in shade. Polygonatum biflorum Common Name: Soloman’s Seal Solomon's seal has small, bell-shaped, greenish yellow flowers (usually in pairs) that bloom in the spring and hang underneath the arching stems. Its flowers are followed by blue-black berries in autumn. Plant in shade. 38
- 22. 39 Polystichum acrostichoides Common Name: Christmas Fern Christmas fern grows in a fountain-like clump with leathery, lance-shaped fronds. Young fiddleheads appear in spring and are silvery and scaled. The foliage is semi-evergreen in Middle Tennessee. Plant in shade. Rudbeckia hirta Common Name: Black-eyed Susan Black-eyed Susan is an easy-to-grow, highly adaptable short-lived perennial or biannual native wildflower. It does best with regular moisture as do its cultivars such as 'Goldsturm' or 'Indian Summer’ but will survive drought. It will readily self-seed. Plant in full sun. Rudbeckia triloba Common Name: Brown-Eyed Susan Brown-eyed Susan has hundreds of small deep gold flowers that bloom atop several upright, branching stems for almost three months in late summer through fall. Brown-Eyed Susan is a short-lived perennial or biennial which spreads well from seed in loamy, moist soil. Plant in full sun. Schizachyrum scoparium Common Name: Little Bluestem Little Bluestem is a small, non-spreading, clump-forming grass with blue-green leaves that turn reddish orange in the fall. Fluffy silver seed heads are ornamental through winter. It is easy to establish and perfect in short- to mid-height prairie plantings. Plant in full sun. Schizachyrum scoparium ‘The Blues’ Common Name: ‘The Blues’ Little Bluestem ‘The Blues’ Little Bluestem has more intense grayish-blue summer foliage and deeper bronzy-red fall foliage than the species. It has a sturdy, 40 upright growth habit. Plant in full sun. Solidago speciosa Common Name: Goldenrod Goldenrod has tiny, bright yellow flowers in dense, erect clusters atop stiff reddish stems. It blooms in mid to late summer. Goldenrod is commonly blamed for causing allergy troubles that are usually caused by ragweed. Plant in full sun. Sporobolus heterolepis Common Name: Prairie Dropseed Prarie Dropseed is one of the most beautiful native grasses. It has very thin, emerald green leaves that form a dense arching tuft. Seed heads form in August and give off a distinct aroma. The graceful clumps turn yellow or deep orange in fall. Plant in full sun. Tiarella cordifolia Common Name: Foamflower Foamflower is clump-forming perennial which spreads rapidly by runners to form clumps of foliage. Leaves may have reddish variegation along the veins. Foliage is evergreen in mild winters, often turning reddish bronze in autumn and winter. Tiny, white flowers appear in spring on stems well above the foliage. Plant in shade.
- 23. 41 Shrubs Aesculus parviflora Common Name: Bottlebrush Buckeye Bottlebrush buckeye is one of the best summer-flowering shrubs for shady areas. It is a dense, multi-stemmed deciduous shrub with a mounding form. Spectacular bottlebrush shaped white flowers (hence the common name) bloom in mid-summer. Its foliage turns yellow in autumn. Plant in partial shade to shade. Aronia arutifolia ‘Brilliantissima’ Common Name: Red Chokeberry The ‘Brilliantissima’ cultivar is more compact than the species and has more attractive foliage and more brilliant red fall color. Clusters of white to pinkish flowers bloom in spring, followed by abundant glossy red fruits which ripen in late summer and persist into winter. Plant in full sun to partial shade. Calycanthus floridus Common Name: Sweetshrub Sweetshrub is a dense, rounded deciduous shrub with dark green leaves that turn yellow in the fall. It has distinctive fragrant, brown to reddish-brown flowers which bloom in May. It is best to purchase this plant when in flower because the quality and intensity of the fragrance can vary widely from plant to plant. Plant in full sun to partial shade. Hydrangea arborescens ‘Annabelle’ Common Name: ‘Annabelle’ Hydrangea 'Annabelle' is a smooth hydrangea cultivar which features much larger flowers than the species. It is a deciduous shrub with a rounded habit. Clusters of large white rounded flowers bloom in June through September. ‘Annabelle’ does well when planted in clusters of at least three plants to give the heavy blooms more support. Plant in partial shade to shade. Hydrangea quercifoila Common Name: Oakleaf Hydrangea Oakleaf hydrangea is a deciduous shrub with a broad, rounded habit. Cone shaped, long white flowers bloom in May through July, slowly turning pinkish with age. Oak shaped deep green leaves turn attractive shades of bronze, crimson or purple in autumn. Oakleaf Hydrangea’s interesting, exfoliating bark adds interest to the winter garden. Plant in partial shade to shade. Ilex glabra Common Name: Inkberry Inkberry is an evergreen, slow-growing shrub. Several cultivars are available with a more compact form than the species. The leaves are typically dark green and fade to olive green in winter. Whitish inconspicuous flowers appear in spring. Its black berries appear in early fall and persist through the winter to early spring unless eaten by birds. Plant in full sun to partial shade. Itea virginica Common Name: Virginia Sweetspire Virginia sweetspire is an erect, rounded, deciduous shrub. Fragrant, tiny white flowers borne in cylindrical, drooping blooms cover the shrub in early summer. Oval, dark green leaves (1-4 long) turn an attractive red in autumn. Plant in full sun to shade. 42
- 24. 43 Trees Amelanchier aborea Common Name: Downy Serviceberry Serviceberry is a small deciduous tree. It has showy, slightly fragrant, white flowers in drooping clusters that appear before the leaves emerge in early spring. Edible berries resemble blueberries in size and color and are often used in jams, jellies and pies, if you can pick them before the birds get them. Plant in full sun to partial shade. Cercis Canadensis Common Name: Eastern Redbud Redbuds are probably best known for growing on the edges of woods, but can make a very nice tree in the landscape. Their pinkish purple pea-like flowers bloom profusely on bare branches in spring. The heart shaped leaves turn an attractive yellow in fall. Plant in full sun to partial shade. Chionanthus virginicus Common Name: White Fringetree Fringetree is a deciduous shrub or small tree with a spreading, rounded habit. Its common name refers to the slightly fragrant, spring-blooming flowers which feature airy, drooping clusters of fringe-like, creamy white petals. The wide, spear-shaped leaves turn yellow in autumn. Plant in full sun to partial shade. Photos in this appendix courtesy of Missouri Botanical Garden PlantFinder www.mobot.org/gardeninghelp/plantfinder/alpha.asp. 44 Index of Common Names to Botanical Names Common Name Botanical Name Beardtongue 'Husker Red' Penstemon digitalis 'Husker Red' Black-eyed Susan Rudbeckia hirta Blazing Star Liatris spicata Bottlebrush Buckeye Aesculus parviflora Bottlebrush grass Elymus hystrix Brown-eyed Susan Rudbeckia triloba Butterfly weed Asclepias tuberosa Christmas Fern Polystichum acrostichoides Columbine Acquilegia canadensis Coral Bells Heuchera americana Coreopsis 'Moonbeam' Coreopsis verticillata 'Moonbeam' Dwarf crested iris Iris cristata Eastern Redbud Cercis canadensis False Indigo Baptisia species Foamflower Tiarella cordifolia and cultivars Goldenrod Solidago speciosa Hydrangea 'Annabelle' Hydrangea arborscens ‘Annabelle’ Inkberry Ilex glabra and cultivars Jacob’s Ladder Polemonium reptans Lanceleaf Coreopsis Coreopsis lanceolata Little Bluestem Schizachyrium scoparium Little Bluestem 'The Blues' S. scoparium 'The Blues' New England Aster Aster novae angliae Oakleaf Hydrangea Hydrangea quercifolia Prairie Dropseed Sporobolus heterolepsis Purple coneflower Echinacea purpurea Red Chokeberry ‘Brilliantissima’ Aronia arbutifolia ‘Briliantissima’ Serviceberry Amelanchier aborea Smooth Aster Aster laevis Soloman’s Seal Polygonatum biflorum Spotted cranesbill Geranium maculatum Sweetshrub Calycanthus floridus Switchgrass 'Heavy Metal' Panicum virgatum 'Heavy Metal' Switchgrass 'Northwind' Panicum virgatum 'Northwind' Virginia Sweetspire Itea virginica White Fringetree Chionanthus virginicus Woodland phlox Phlox divaricata
- 25. Native Plants for Rain Gardens in Middle Tennessee Shade Tolerance Height Bloom Color Bloom time Perrenials and Grasses Acquilegia canadensis partial shade 2-3 ft. light pink/yellow Apr-May Asclepias tuberosa sun 1-3 ft. yellow/orange Jun-Aug Aster laevis sun/partial shade 2-4 ft. purple Aug-Sept Aster novae angliae sun 3-6 ft. deep pink-purple Aug-Sept Baptisia species sun 2-4 ft. blue, white or yellow Apr-May Coreopsis lanceolata sun 1-2 ft. yellow May-Jul Coreopsis verticillata 'Moonbeam' sun 1.5-2 ft. creamy yellow Jun-Sept Echinacea purpurea sun/partial shade 2-5 ft. purplish pink Jun-Aug Elymus hystrix partial shade 2.5-3 ft. green to brown Sept Geranium maculatum partial shade 1.5-2 ft. pale pink or lilac Apr-May Heuchera americana partial shade 12-18 inch various May-Jun Iris cristata partial shade/shade 6-9 inch pale blue Apr Liatris spicata sun 1.5-2.5 ft. deep purple Jul-Aug Panicum virgatum 'Northwind' sun 4-6 ft. yellow Jul Panicum virgatum 'Heavy Metal' sun 3-5 ft. pink tinged Jul Penstemon digitalis 'Husker Red' sun 2-3 ft. white Apr-Jun Phlox divaricata shade 9-12 inch violet blue Apr-May Polemonium reptans shade 12-18 inch blue Apr-Jun Polygonatum biflorum shade 1-3 ft. greenish yellow Apr-May Polystichum acrostichoides shade 1-2 ft. semi-evergreen foliage Rudbeckia hirta sun 2-3 ft. yellow Jun-Sept Rudbeckia triloba sun 2-3 ft. gold Jul-Oct Schizachyrium scoparium 'The Blues'sun 2-4 ft. purplish bronze Aug Schizachyrium scoparium sun 2-4 ft. purplish bronze Aug Solidago speciosa sun 2-3 ft. yellow Jul-Sept Sporobolus heterolepsis sun 2-3 ft. pinkish brown Aug Tiarella cordifolia and cultivars shade 9-12 inch white or pink May 46 Shrubs Aesculus parviflora partial shade/shade 8-12 ft. white Jun-Jul Aronia arbutifolia 'Billiantissima' sun/partial shade 6-8 ft. white Apr Calycanthus floridus sun/partial shade 6-10 ft. brown Apr-Jul Hydrangea arborscens ‘Annabelle’ partial shade/shade 3-5 ft. white Jun-Sept Hydrangea quercifolia partial shade/shade 6-8 ft. white/pinkish May-Jul Ilex glabra and cultivars sun/partial shade 3-8 ft. white May-Jun Itea virginica sun/shade 3-5 ft. white Jun-Jul Trees Amelanchier aborea sun/partial shade 15-25 ft. white Mar-Apr Cercis canadensis sun/partial shade 20-30 ft. pink Apr Chionanthus virginicus sun/partial shade 12-20 ft. creamy white May-Jun
- 26. About the Author Patty Ghertner is a Master Gardener with over twenty years of gardening experience. She received her degree in accounting from the University of Texas in Austin and worked as a CPA and consultant. She recently started a new business, Hillside Gardens Fresh Herbs. She lives in Nashville, Tennessee with her husband and two sons. She shares her garden with her beloved dog and two cats, lots of birds and insects and too many deer.