SlideShare una empresa de Scribd logo
1 de 14
Descargar para leer sin conexión
ZIPP WHEEL INSTRUCTION MANUAL
Congratulations, you have just purchased the most technologically advanced bicycle
wheels on the planet. These wheels represent more than 18 years of continuous
research and development, coupled with real world experiences ranging from the
Tour de France to the Queen K Highway. Rest assured that your wheelset has been
carefully assembled by hand, beginning with the finest aerospace-grade carbon cloth
and aluminum bar stock, transformed into a lightweight, super-stiff racing wheelset. At
each step of the process all of the parts have been inspected and checked to assure
the highest quality, but we would like for you to look over the wheels to ensure that you
are completely satisfied with them.
Please inspect and save all packing materials that came with your wheels. If there is
any damage to the packaging or to the wheels it is imperative to document it now. If
there is a problem due to shipping, call us immediately at 1-800-447-8372.


                               USE AND CARE
Your Zipp wheels are engineered, designed, and manufactured to aerospace
specifications and tolerances, and therefore require some special attention and care.
QUICK RELEASE TENSION
Your hubs are tightened to 88 lb.*in. in the rear, and 50 lb.*in. in the front to provide
the lowest hub friction in the industry, despite being completely sealed from dirt and
moisture. The bearings and races are precision-aligned within 0.0002” at the specified
torque to allow for this. Your quick releases are capable of exerting well over 1000 lbs.
of force on the hub if over-tightened, which will slightly preload the bearings. This most
likely will not damage the hub or bearings, but it will erase all of the significant friction
reductions for which this hub was designed. We recommend applying the quick release
lever such that the lever leaves a slight imprint on your hand as you close it. If you have
any questions or concerns about the operation of the quick release lever, please consult
your bike shop or call us at the number listed above.
BRAKE PADS for TUBULAR WHEELSETS
Your tubular Zipp rims are molded with our proprietary Micro-Porous Silica Ceramic
Matrix brake surface. All of the resin and mold release agents that are applied to the
rims as they are made have been chemically etched out of the braking area to provide a
semi-abrasive, pure ceramic surface. This surface allows for up to 50% greater braking
torque than aluminum rims, and although aluminum loses some 40% of allowable
braking torque when wet, the Zipp surface loses less than 6%. Your Zipp wheels will
be significantly more responsive and stop significantly shorter in wet conditions than
any aluminum rims. We strongly recommend you ride them in the rain before racing
on them so as not to be surprised by this increase in performance. Though this surface
does not require special pads, we do NOT recommend Campagnolo brake pads.
These have a very low melting point, and might melt excessively under heavy braking,
leaving a residue on the rim which is very difficult to clean. For optimal performance,
Zipp Carbon/Carbon brake pads provide the ideal balance of feel and stopping power,
and help rims remain cool.
Zipp Carbon/Carbon brake pads are the only pads specific to both aluminum and silica/
ceramic brake surfaces. For better feel with a carbon-only rim, use Zipp pads. Some
riders prefer cork brake blocks. These are readily available from numerous sources
and offer excellent feel and longevity on Zipp rims. Cork pads tend to offer less total
stopping power, but also exhibit better modulation and wear characteristics than rubber
pads.
WARNING: Do not use Campagnolo pads, or any pad purporting to be for ceramic rims. Most
ceramic pads contain abrasives which can lead to excessively high brake temperatures and
possible rim damage.
NOTE: For cyclocross applications and cantilever brakes, we recommend using Kool-Stop
black pads.
BRAKE PADS for CLINCHER WHEELSETS
We recommend using Zipp Carbon/Carbon brake pads with any aluminum braking surface,
including our own clincher wheels. Standard brake pads will work, but might cause
premature wear to the braking surface due to the use of abrasives such as aluminum oxide
in the pads. As discussed with our tubular rims, we do not recommend using Campagnolo
pads. Good options include Dura-Ace and Kool-Stop black.
CARE AND CLEANING
Any cleaner that will not affect epoxy resins is acceptable for your rims. Acetone or
denatured alcohol work quite well on the rims but will ruin the decals, so be careful when
using. Armor All leaves a nice shine on the rim when finished, and is a quick and easy way
to make your wheels look new again. Goof Off or any product intended to remove latex
paint will also work well to remove tubular tire glue. Do not use any tools to install tubular
tires on or remove them from your carbon rims.
HUBS
Your hubs have been machined and assembled to standards previously seen only in aerospace
applications. They are sealed and can be cleaned with a soft brush, using soap and water,
or using a cleaner such as Simple Green. Removing dirt buildup from the spoke holes will
increase the life of the spoke, as well as the life of the hub. Occasionally you might remove
the cassette body from the hub and clean out the drive mechanism. It is not necessary to
remove the cassette cogs for this operation, but you can if you wish. This mechanism is
incredibly robust and well sealed, but removing road crud is always helpful.
To disassemble the rear hub, insert a 5mm Allen key in each end of the axle, and turn opposite
each other (standard right-hand threads). Unthread and remove the left-hand end cap. You
can now slide the freehub body and axle out of the main hub shell. Be sure NOT to lose the
small washer that fits between the freehub body and hub shell! You can now clean off the
pawls, pawl spring, and ratchet ring. Simply wipe them off or use a mild cleaner such as
diluted Simple Green.
The next step is to lubricate the pawls, pawls spring, and ratchet ring. To do so, use a
synthetic motor oil such as Mobil 1 10W-30. It is inexpensive and offers very good friction
and wear protection to the cassette drive mechanism; this will allow the hub to run more
smoothly and quietly. Apply 1-2 drops per pawl—enough to lightly coat them and ensure a
smooth action.
You should also put a light coating on the ratchet ring inside the hubshell. Grease can be used
in the ratchet and pawl area, but it must have an NLGI rating of 00, 0, or 1. Grease with higher
viscosity than this will keep the mechanism from functioning properly. Also, some oils with
tackifying additives, such as Phil Tenacious Oil, can gum up the mechanism and cause the
pawls to stick. Only use synthetic oils such as Mobil 1 (or very low viscosity synthetic greases
as mentioned above) for lubricating the cassette drive mechanism.


 Hub Overview
     Non-drive Endcap
                          Carbon Dust Cap

                                        Hubshell

                                                      0.25mm Spacer
                                                               Cassette Body
 Carbon Dust Cap
 Retainer Spring                                                                15mm Axle


                          Ratchet Ring
                          Apply Mobil 1 Oil Here


 Cassette Body Overview
          Phynox Pawl Spring


            61802
            Bearing


            Nitralloy Pawl                                     Vacuum Seal
            Apply Mobil 1 Oil Here and Keep Clean
To reassemble the hub, insert the axle/cassette body assembly into the hub shell, making sure
that the small washer is between the freehub body and hub body. You might find it helpful to
push the three pawls down with your fingers and rotate the cassette body counterclockwise
as it is inserted. Next, thread on the end cap, being sure not to cross thread it. Insert a 5mm
Allen key into the drive side (right), and a torque wrench with a 5mm bit into the non-drive
side (left). Hub assembly torque is 88 lb.*in. for the rear hub, and 50 lb.*in. for the front hub.
If you don’t have a torque wrench on hand, use a standard 5mm key and torque until the tool
leaves a slight impression in your hand. If the hex key begins to twist in the endcap or strip
the broach, you are using way too much torque!
Complete instructions for hub maintenance are posted on our website, www.zipp.com
Why do my hubs have play in them?
You might notice that your Zipp hubs feel as though there is some “play” in them while
the bike is unweighted (i.e. without a rider aboard or while in a work stand). This can
often be felt by pinching the tire between your fingers and gently pushing it side to
side.

 Races and Retainers
                                                 0.002” (0.05mm) displacement between
 Race Curvature slightly larger than             races when ball allowed to rock.
 ball diameter allows ball to rock
 within race.


                                           Rocking motion of ball


 Teflon Ball Retainer
 results in longer life
 and lower friction
 over traditional brass
 retainers.

 Radial bearings have a small amount of play due to the way the races and balls fit together.
Although this condition is highly undesirable in any hub with angular contact, or
cup-and-cone bearings, this is intentionally designed into our cartridge bearings.
This eliminates any side-loading of the bearings, reducing both friction and rolling
resistance. In addition, tightening the quick release on our hubs does NOT add any
additional friction to the system—the same cannot be said for cup-and-cone setups.
Our hubs load the bearings ONLY with the rider’s weight, ensuring the lowest possible
rolling resistance and thus the fastest possible ride. Although the play can feel
disconcerting while tuning up your bike in the repair stand, rest assured that this play
is eliminated as soon as you climb aboard your bike. See the Races and Retainers and
Race and Ball Curvature drawings for further explanation.


 Race and Ball Curvature
  Differential between race curvature and ball curvature


 This differential in shape allows the balls to touch the race at only one point of
 contact, reducing friction while allowing the bearings to handle side loads by
 achieving a slight angular contact.
ALUMINUM VALVE EXTENSIONS
Your wheel was supplied with a valve extension matched to the depth of the rim. If you
purchased clincher 303s you can avoid using the valve extension by purchasing tubes
with 60mm valve stems (vs. the standard 36mm). If you have 404s you should use
standard tubes or tubulars with the included valve extenders for optimum performance.
We also recommend pre-installing an extension onto your spare and inflating it to
ensure proper fit. This will save time and headaches out on the road.
We currently have four different lengths of valve extenders:
• 27mm/1.05” for 202 wheels
• 33mm/1.3” for 303 wheels
• 48mm/1.9” for 404/909 front/606 front wheels
• 74mm/2.9” for 808/999 front/606 rear wheels
VALVE EXTENSION INSTALLATION
Note: Install valve extension BEFORE mounting tire.
• Unscrew tire valve locknut as far as possible, and tighten in the fully open position.
• Stretch a wrap of Teflon plumber’s tape (available at a hardware store) around the end
of the valve so that the tape extends over both the narrow valve cap threads and the
wider valve body. Make sure that the tape does not stretch over the air opening at the
end of the valve. This provides an air seal between the valve and extension. Plumber’s
tape comes in several thicknesses. If thinner tape is used, more than one layer might be
needed to seal properly. Tape should be replaced each time the extension is removed.
• Screw the valve extension onto the end of the valve and tighten, using a 3mm Allen
key inserted into the end of the extension.
• Mount tire as usual and inflate with a “push-on” type pump head. Check for leaks. If a
CO2 inflator is to be used with the extension, it must have a “push-on” type head. Always
check valve, pump, and inflator compatibility before riding.
• Air can be released from the tire by inserting a piece of wire (a section of spoke works
well) into the end of the extension to depress the valve nut.
SPOKE TENSIONS
Your wheels have been trued and checked here by our professional wheel builders. All
standard Zipp wheel spokes are straight pull or oval stainless steel. CSC, Clydesdale,
and cyclocross wheels use j-bend stainless steel spokes. The spoke tension on our
carbon wheels is 100kg front/rear drive side and about 80kg rear non-drive. The wheels
are built radially on all standard front wheels and 2x/radial on rear wheels. Clydesdale
wheels are radial front and 2x/2x rear. CSC and cyclocross are 2x all around. We have
found higher spoke tensions seriously reduce ride quality and provide no improvement
in lateral stiffness. Before truing or adjusting spoke tension, apply a drop of lube (such
as Triflow) between the nipple and rim. This will reduce friction between the two
surfaces and lessen the chances of rounding off a nipple.
IMPORTANT: Only experienced mechanics should perform advanced wheel service!


                             CLINCHER RIMS
Our rims are sized at the larger end of the European ISO/E.T.R.T.O. standards for tire
fit, to ensure maximum confidence and safety when using the modern ultra-light high
performance clinchers. Your tires might be more difficult to install on our rims than on
some rims. However, we feel that any tightness at installation is more than made up for
by the improved high speed and high-pressure safety performance of the rims.
IMPORTANT: For tire pressure recommendations, see the Tire Pressure section of
these instructions.
RIM STRIP
You must use a thin plastic or thin fabric rim strip with these rims for proper performance.
Do not use Velox or a similarly thick cloth rim strip. We have used these for years,
and appreciate their solid performance, but the strip is too thick and too wide for our
rim, making tire installation and proper seating of the tire bead extremely difficult. You
will have a much easier time installing and removing tires if you use a thin rim strip.
We recommend using our own Zipp rim tape, which is a durable, yet thin, woven tape.
It has been designed specifically to work best with our clincher rims. It is also a good
idea to clean the inner rim surfaces with rubbing alcohol or acetone to ensure sufficient
adhesion of the rim tape to the rim.
TIRE PRESSURE
Volumes of data have been produced showing decreased tire performance at high
tire pressures, and our studies have been no different. We recommend 100–110
psi for all nylon-cased tires (such as Michelin, Continental, and Vittoria Ultra Speed),
and 110–125 psi for cotton and softer material-cased tires (such as Vittoria CX,
Vredestein, and Veloflex). Pressures above these will decrease tire grip and actually
increase rolling resistance on most road surfaces, as the tire generates more heat
conforming to the uneven road surface. The tire PSI rating on the sidewall of your
tire is the MAXIMUM SAFE PRESSURE, indicating the amount of air pressure sufficient
to damage or increase risk of tire failure. If you have questions about your tire’s
optimal pressure please call the tire manufacturer or contact its website for further
information.
Remember, increased tire pressure will cause the rider to experience more high-
frequency road vibration, possibly giving the feeling of going faster, but actually
sapping energy as the tire bounces over road imperfections instead of absorbing
them. Higher tire pressure significantly reduces grip and increases tire wear as well,
so if you are wearing through tires quickly or feeling skittish on less than perfect
roads, you might be running too much tire pressure. Therefore we rate our clincher
rims at 125 psi MAX.

                              TUBULAR RIMS
GLUING A TUBULAR: It’s not as tough as you think!
Despite what you might have heard, gluing a tubular or sew-up tire onto a rim is not
difficult. With practice, changing a flat with a tubular is also fast and easy. Like learning
to tie your shoe, it might seem mysterious at first, but the process can be reduced to
following a few simple procedures in a particular order.
Gluing a tubular is a task best learned by watching an experienced person. If you have
a friend or local bike shop repair person who is an old pro at this task, ask to watch
him. If you don’t have the benefit of an experienced mentor, these instructions outline
a conservative system that reduces gluing a tubular to a few simple steps. For best
results read the instructions fully, then plan your moves through each step, and lay out
all of your gluing supplies in advance.
You will be able to install a new tubular in under 20 minutes on a new rim, and even
more quickly on a previously used rim (not including drying time of the glue). In a race
situation, you should be able to change a stretched and pre-glued tubular in less than
two minutes. Practice is the key to an efficient tire change. It will take longer to read
these instructions than to actually install the tire! Remember that a lot of what you read
here assumes that this is a new wheel, so there are some extra steps that won’t be
needed after the first tire installation.
Your tire or glue might also come with instructions that modify the basic procedure
outlined here. Many tire manufacturers have posted instructions for mounting tires on
their websites. These are also good resources.
WHAT YOU WILL NEED:
• Tubular glue of your choice. Do not use 3M Fast Tack. Fast Tack is an automotive
adhesive that gained popularity a few years ago, but has the effect of softening the
base tape glue of many of today’s tires. The aggressive tack is prone to damage tires
on removal.
• Solvent, such as alcohol, acetone, or Goof Off. Goof Off is a latex paint remover
available in hardware or paint stores. It works very well for removing most glue.
• You might also need a file, emery cloth, or another means of scraping the base tape
protective layer of some tires. (Check to see if your tire has a layer of rubber over the
base tape. If it appears to be raw, un-coated cotton, you will not need the scraping
tools.)
• Good luck, and have fun!
1. STRETCH THE TIRE:
• The first, very important step: Always pre-stretch any tubular (including your spare tire!)
to save a lot of work later. You will NOT need glue for this step.
• There are two ways to stretch the tire: the proper way and the down and dirty way.
Use the proper way when you want the job done right and have the time. The down
and dirty way works too, but save it for an emergency when the tire must be ridden in
a short period of time.
• If you are using a valve extender, install it at this time. (See notes about how to do
this if you have any questions.)
• THE PROPER WAY: Stand the wheel on its edge so that the wheel is on the ground and
can lean against the front of your legs. Your feet should be about shoulder width apart.
The valve hole of the rim should be at the top of the wheel near your waist.
• Insert the valve into the valve hole.
• Bend over and, using both hands, begin stretching the tire onto the rim, working down
and away from the valve. Maintain a very firm even pressure as you work your way down
from the top of the wheel. Even pressure will ensure the valve does not twist in the rim.
Try to keep the tire centered on the rim. The farther you stretch the tire at this point, the
easier it will be to roll the last bit over onto the rim. As you reach the last few inches, lift
the rim up until it is horizontal. Rest the edge of the rim against your stomach or upper
thigh. The area of the valve hole will now be against your stomach or thigh with the as-yet
un-mounted portion of tire farthest away from you. Maintaining the pressure, roll the last
bit of tire onto the rim using your thumbs. Pinch the tire slightly together and “lift” the tire
over the edge of the rim. Do not use a tool to pry the last portion over the edge of the rim.
If you can’t get the tire to go on the rim, start over with more pressure at the beginning of
the process. After installation, blow up the tire to 130–140 psi, and leave it unglued on
the rim for a few hours, or overnight.
• THE DOWN AND DIRTY WAY: Use this only in an emergency, as it is possible to damage
the tire when this technique is performed too enthusiastically. Step on the tire with one
foot or hook the tire over your bent knee and pull upward with a steadily increasing firm
pressure. Be very careful not to pull so hard that you tear or snap threads on the tire
casing. A torn casing can lead to a bulge in the tire at that point. Work your way around
the tire repeating the process every 10–12 inches. Slip the tire on the rim as outlined
above to check for a good stretch.
2. AFTER STRETCHING, PREPARE THE TIRE FOR GLUING:
• The base tape (usually cotton) of many tubular tires will have a coating of latex. This
must be roughened slightly to ensure a good glue bond. This step does not apply to Zipp,
Continental, or any other tires that have no coating over the base tape.
• Remove the tire from the rim used in the stretching procedure outlined above.
• Roughen the latex coating using a file or similar item. You can also use emery cloth
wetted in alcohol or a similar solvent. Be careful—too much solvent might dissolve the
glue holding on the base tape.

                                              10
3. PREPARE THE RIM FOR GLUE:
• If the rim is new, wipe it down with alcohol or another solvent listed in these
instructions. Zipp Carbon rims are ready to go at this point and require no further
preparation. Traditional aluminum rims can be lightly sanded, and then cleaned again
with solvent.
• When installing a tire on a previously glued rim, you can usually apply just a single thin
uniform layer of new glue to the rim and tire. After 15 minutes, or when the glue becomes
tacky, mount the tire according to the method outlined in these instructions.
• Bad glue jobs or a large buildup of lumpy old glue can be scraped off, after using a
solvent to soften the old glue. (Alcohol, acetone, or a latex paint remover such as Goof
Off will work. All are available at hardware stores.) The Zipp carbon rim can be cleaned
with any solvent that will not harm epoxy.
4. GLUE THE RIM AND TIRE:
• There are many types of tubular glues available. All types work well when used
properly, so it’s just a matter of preference which glue you choose. The red types will
harden quite a bit as they dry. In addition, the red glues seem to hold more aggressively
and are perhaps best suited to track applications. Over a long period of time, red glues
become brittle and the tire must be re-glued. The white and clear types of glue will
harden less and will remain somewhat tacky. You will find it easier and quicker to
remove a flat with these types of glue. One possible drawback of clear or white glues
is that in rare instances, the residual solvents that keep them soft can cause the base
tape of the tire to separate over an extended period of time. Again, the bottom line is
that nearly all types of traditional tubular glue work well.
• We do NOT recommend using the 3M automotive glue Fast Tack for gluing tubulars.
If you are in a hurry and must use the wheel in a few hours, Fast Tack brand cement
(an automotive trim adhesive available in auto parts stores) can be used according to
the directions on the tube. Again, we do not recommend this procedure. Be aware the
Fast Tack will cause the base tape to separate from tires and might damage the tire or
rim on removal.
• Can you use TUFO tape? Yes and no—in other words, at your own risk. Some people
have used TUFO tape with our wheels without having any issues. There are two types:
regular and extreme, which is intended for warmer weather use and is VERY sticky.
In rare cases, removal of the extreme tape has actually pulled the carbon tire bed
away from the rim, ruining the rim. In these instances, it is our policy to offer crash
replacement pricing on a new rim, but we WILL NOT cover it under the manufacturer’s
warranty.
• You might want to use a small plastic bag over your finger to spread the glue. Acid
brushes are an economical and very functional method of spreading the glue as well. You
can buy them by the dozen at most hardware outlets. Latex gloves do not work, as most
glue types will stick to the latex and dissolve the material. (NOTE: Some professional
triathletes leave unglued (or with little glue) a small area, no more than an inch or two
in length, opposite the valve hole. In the event of a flat, this small area allows them to
begin removing the flat tire more easily. This is not generally recommended.)

                                            11
• First, coat the rim by putting a thin uniform layer of glue on the tire seating area of the
rim. Thin coats of glue work better than thicker ones. To apply the glue, lay a bead of
the cement around the center of the tire seat area of the rim, skipping over the spoke
holes if possible. Use the plastic bag over your finger or acid brush to spread the glue
evenly from edge to edge of the tire seating area all around the rim. Avoid getting glue
in the spoke holes as much as possible. Set the rim aside for a couple of hours to let
the glue dry.
• Most tires will turn inside out when inflated off of a rim. Inflate the tire until it turns
the base tape facing upward, and then place the tire on a flat surface to apply a layer
of glue.
• Spread a bead of glue onto the center of the tire base tape.
• Spread the glue evenly across the base tape. Set the tire aside for a couple of hours
to dry.
• Clean up any glue drips around the area with a solvent.
• Re-coat the rim and tire with a second thin layer of glue, using the same procedure
as before. Remember these need to be THIN coats of glue.
• Let the second layer dry for several hours until it’s only slightly tacky.
• After the glue on the rim and tire has dried, apply another thin layer to the rim only
and let it dry for about 15 minutes.

5. MOUNTING THE TIRE:
• Deflate the tire and mount it on the rim, as described in Step 1. Make sure to push
down firmly on the area around the valve before beginning to stretch the tire over the
rim. It will be easier to finish rolling the last bit of the tire onto the rim if you maintain a
firm pressure from the very beginning of the mounting process. Take care that the tire
is centered and that an even amount of base tape is sticking out on both sides around
the rim. At this point you can still move the tire around on the rim a bit by tugging and
pushing it into place.
• Pump up the tire to around 50 psi. Spin the wheel while looking for wobbles or twists
in the tire. An even amount of base tape should be visible on either side of the wheel.
You might find that the tread moves back and forth as the wheel spins, or that the tire
is off-center. Deflate the tire and push or twist it over where required. Re-inflate and
check again, repeating the process as needed.
• Carefully clean any excess glue on the rim sidewall with solvent. Keep the solvent
away from the tire!
• Pump up the tire to 120–130 psi, and let it sit overnight to bond firmly.
• Check the tire pressure before each ride. Check the glue bond occasionally. Remove
and re-glue the tire as needed, or at least once a season. Have fun!

                                              12
CHANGING A FLAT TUBULAR
1. Before riding, stretch and pre-glue a spare tire, as outlined elsewhere in these
instructions. Install a valve extension if needed.
2. When the glue is fully dry, fold the tire. There are a number of methods for doing this,
but essentially you want to fold the glued surfaces in on themselves so that the tire is a
convenient size. This is the spare tire you will carry with you.
3. The tire can be secured to the seat post or under the saddle with a toe strap, Velcro
strap, or electrical tape, or in a bag made to carry a tubular.
4. Psssstttttt… Okay, now you have a flat! Remove the wheel from the bike as usual.
5. Hold the wheel with the edge resting on your thighs or waist, and with the valve hole
close to your body. Starting on the side of the wheel farthest from your body, pinch, lift,
and roll the tire off of the rim. It sometimes helps to work loose a short section of tire
from the glue on one side, flip the wheel, and work the other side loose at the same
location. This is where practice pays off. Using good technique and gluing the tire
correctly in the first place are more important than hand strength. You can use a plastic
tire lever carefully to start the process if needed.
6. After you get a short section of the tire slightly off the rim, set the edge of the wheel
closest to the valve hole on the ground.
7. Using your body weight, continue to roll the flat tire off of the top of the rim by
pushing down towards the ground. After you get the tire about halfway off the rim, pick
up the wheel and strip the tire completely from the rim.
8. Unfold your spare and insert the valve into the valve hole.
9. Place the edge of the wheel back on the ground, with the valve hole at the top and
the wheel resting flat against your legs.
10. Bend over and, using both hands, begin stretching the tire onto the rim with a
very firm, even pressure while working your way down from the top of the wheel. The
farther you stretch the tire at this point, the easier it will be to roll the last bit over onto
the rim. As you reach the last few inches, lift the rim up until it is horizontal with the
edge of the rim against your stomach. The area of the valve hole will now be against
your stomach with the as-yet un-mounted portion of the tire farthest away from you.
Maintaining the pressure, roll the last bit of tire onto the rim using your thumbs. Do not
use a tool to pry the last portion over the edge of the rim.
11. Check to see that the tire is evenly mounted, pushing and pulling the tire into the
center where needed.
12. Blow up the tire using whatever method you prefer. Remount the wheel on the
bike.
13. Ride away! Have fun and have a great race.
14. After you return home, re-glue the new tire following the methods outlined in these
instructions.

                                              13
WARRANTY/RETURNS POLICY 
                NO-FAULT/CRASH REPLACEMENT POLICY
  Manufacturing problems are rare with Zipp products. However, below are some
  suggestions for solving any problem that you might encounter. Our warranty
  for all products is for one year against manufacturer’s defects. Eligibility for
  warranty is determined at the factory by the Zipp Returns personnel.
  If a manufacturing problem is determined, a proof of purchase date might be
  requested. If you have returned the product within the first year, our policy is to
  repair or replace the product at no charge. We do not offer refunds. Damaged
  products not covered under warranty due to accident, misuse, or just plain ol’ bad
  luck are eligible for our liberal No Fault/Crash Replacement program for up to five
  years from the date of purchase.


If you are experiencing a problem with a Zipp product:
(1) Review our maintenance tips. Go to our website, www.zipp.com, and click on the
Support button. You might find a simple solution to your problem there.
(2) Give us a call at 800-447-8372 (317-481-1120) (8am-5pm M-F EST). A
determination will be made whether or not to return the product to the factory for
inspection. If a return is required, you will be issued a Return Authorization Number
(RA#). It is imperative for you to put this RA# on your box, so it can be easily identified
when it arrives at our facility. Upon receipt and inspection, a warranty determination
will be made. We will perform the necessary repairs or make a replacement.

Should there be any cost to you, you will be notified prior to any repair being executed.
If you decide that you do not want us to repair or replace the product, you will need
to cover the cost of returning the product to you. If we do not receive a determination
from you after 90 days from the receipt of your product at the factory, then the product
becomes the property of Zipp/Compositech.

As riders ourselves, we know that accidents can happen. When your product is within
the warranty period, but is damaged either by yourself or in a typical biking accident,
such as a race, we have a No Fault/Crash Replacement Policy. This policy covers a
five-year period following the purchase date of your product. We will require you to
call and obtain a Return Authorization number (RA#) in this situation as well, and return
the product to us. You will then be able to purchase a brand new product for a reduced
price to replace your damaged product. We can quote the price to you when you call
or e-mail us.


                                            14
NOTE: When sending in an item under warranty, PLEASE remove all accessory items,
including tires, tubes, rim tape, cassettes, skewers, computer magnets, and so on.
If you fail to remove these items, we cannot be held responsible if they are lost or
damaged. THERE IS A $25 CHARGE PER WHEEL FOR TUBULAR TIRE REMOVAL!!!
OTHER TECHNICAL QUESTIONS ??
Have a question about our products? Go to our website at www.zipp.com and click on
Support.


  ZIPP Speed Weaponry
  1180 N. Main St.
  Speedway, IN 46224
  www.zipp.com

Más contenido relacionado

Similar a Wheel care Zipp 404

PPT ON DISC BREAK BY TARIQUE IIMT
PPT ON DISC BREAK BY TARIQUE IIMTPPT ON DISC BREAK BY TARIQUE IIMT
PPT ON DISC BREAK BY TARIQUE IIMTMdtarique Anwar
 
Sample Presentation
Sample PresentationSample Presentation
Sample Presentationteacherjon
 
Ceramic speed sport brochure 2015
Ceramic speed sport brochure 2015Ceramic speed sport brochure 2015
Ceramic speed sport brochure 2015Ceramic Speed
 
1997 lexus lx 450 (lx450) service repair manual
1997 lexus lx 450 (lx450) service repair manual1997 lexus lx 450 (lx450) service repair manual
1997 lexus lx 450 (lx450) service repair manualfjkskekdmmenm
 
1998 lexus lx 450 (lx450) service repair manual
1998 lexus lx 450 (lx450) service repair manual1998 lexus lx 450 (lx450) service repair manual
1998 lexus lx 450 (lx450) service repair manualfjjskekdmem
 
Honda vfr 400 nc30 checklist buyer guide
Honda vfr 400 nc30 checklist buyer guideHonda vfr 400 nc30 checklist buyer guide
Honda vfr 400 nc30 checklist buyer guideandonis-artist
 
Front brake repair
Front brake repairFront brake repair
Front brake repairCraig Kielb
 
Automotive Wheel Bearings & Wheel Hubs 101
Automotive Wheel Bearings & Wheel Hubs 101Automotive Wheel Bearings & Wheel Hubs 101
Automotive Wheel Bearings & Wheel Hubs 1011A Auto
 
Dheeraj yadav (B.Tech) Maruti suzuki gorakhpur
Dheeraj yadav (B.Tech) Maruti suzuki gorakhpurDheeraj yadav (B.Tech) Maruti suzuki gorakhpur
Dheeraj yadav (B.Tech) Maruti suzuki gorakhpurDarshan Singh Yadav
 
2006 ball bearing disc brake
2006 ball bearing disc brake2006 ball bearing disc brake
2006 ball bearing disc brakeAKILIPSI
 
Study of brakes
Study of brakesStudy of brakes
Study of brakesYash Shah
 
FORCE, Herramientas Frenos y transmision
FORCE, Herramientas Frenos y transmisionFORCE, Herramientas Frenos y transmision
FORCE, Herramientas Frenos y transmisiontienda911
 
Michelin and porsche
Michelin and porscheMichelin and porsche
Michelin and porscheNitin Yadav
 

Similar a Wheel care Zipp 404 (20)

Disc brakes
Disc brakesDisc brakes
Disc brakes
 
PPT ON DISC BREAK BY TARIQUE IIMT
PPT ON DISC BREAK BY TARIQUE IIMTPPT ON DISC BREAK BY TARIQUE IIMT
PPT ON DISC BREAK BY TARIQUE IIMT
 
Sample Presentation
Sample PresentationSample Presentation
Sample Presentation
 
Ceramic speed sport brochure 2015
Ceramic speed sport brochure 2015Ceramic speed sport brochure 2015
Ceramic speed sport brochure 2015
 
Drum brakes
Drum brakesDrum brakes
Drum brakes
 
1997 lexus lx 450 (lx450) service repair manual
1997 lexus lx 450 (lx450) service repair manual1997 lexus lx 450 (lx450) service repair manual
1997 lexus lx 450 (lx450) service repair manual
 
1998 lexus lx 450 (lx450) service repair manual
1998 lexus lx 450 (lx450) service repair manual1998 lexus lx 450 (lx450) service repair manual
1998 lexus lx 450 (lx450) service repair manual
 
Brake pads
Brake padsBrake pads
Brake pads
 
Chap77
Chap77Chap77
Chap77
 
Honda vfr 400 nc30 checklist buyer guide
Honda vfr 400 nc30 checklist buyer guideHonda vfr 400 nc30 checklist buyer guide
Honda vfr 400 nc30 checklist buyer guide
 
Chap76
Chap76Chap76
Chap76
 
Front brake repair
Front brake repairFront brake repair
Front brake repair
 
Automotive Wheel Bearings & Wheel Hubs 101
Automotive Wheel Bearings & Wheel Hubs 101Automotive Wheel Bearings & Wheel Hubs 101
Automotive Wheel Bearings & Wheel Hubs 101
 
Chap75
Chap75Chap75
Chap75
 
Dheeraj yadav (B.Tech) Maruti suzuki gorakhpur
Dheeraj yadav (B.Tech) Maruti suzuki gorakhpurDheeraj yadav (B.Tech) Maruti suzuki gorakhpur
Dheeraj yadav (B.Tech) Maruti suzuki gorakhpur
 
2006 ball bearing disc brake
2006 ball bearing disc brake2006 ball bearing disc brake
2006 ball bearing disc brake
 
Study of brakes
Study of brakesStudy of brakes
Study of brakes
 
FORCE, Herramientas Frenos y transmision
FORCE, Herramientas Frenos y transmisionFORCE, Herramientas Frenos y transmision
FORCE, Herramientas Frenos y transmision
 
Build your own turbine
Build your own turbineBuild your own turbine
Build your own turbine
 
Michelin and porsche
Michelin and porscheMichelin and porsche
Michelin and porsche
 

Último

Understanding the Pakistan Budgeting Process: Basics and Key Insights
Understanding the Pakistan Budgeting Process: Basics and Key InsightsUnderstanding the Pakistan Budgeting Process: Basics and Key Insights
Understanding the Pakistan Budgeting Process: Basics and Key Insightsseri bangash
 
Value Proposition canvas- Customer needs and pains
Value Proposition canvas- Customer needs and painsValue Proposition canvas- Customer needs and pains
Value Proposition canvas- Customer needs and painsP&CO
 
Call Girls In DLf Gurgaon ➥99902@11544 ( Best price)100% Genuine Escort In 24...
Call Girls In DLf Gurgaon ➥99902@11544 ( Best price)100% Genuine Escort In 24...Call Girls In DLf Gurgaon ➥99902@11544 ( Best price)100% Genuine Escort In 24...
Call Girls In DLf Gurgaon ➥99902@11544 ( Best price)100% Genuine Escort In 24...lizamodels9
 
Call Girls Jp Nagar Just Call 👗 7737669865 👗 Top Class Call Girl Service Bang...
Call Girls Jp Nagar Just Call 👗 7737669865 👗 Top Class Call Girl Service Bang...Call Girls Jp Nagar Just Call 👗 7737669865 👗 Top Class Call Girl Service Bang...
Call Girls Jp Nagar Just Call 👗 7737669865 👗 Top Class Call Girl Service Bang...amitlee9823
 
Best VIP Call Girls Noida Sector 40 Call Me: 8448380779
Best VIP Call Girls Noida Sector 40 Call Me: 8448380779Best VIP Call Girls Noida Sector 40 Call Me: 8448380779
Best VIP Call Girls Noida Sector 40 Call Me: 8448380779Delhi Call girls
 
Creating Low-Code Loan Applications using the Trisotech Mortgage Feature Set
Creating Low-Code Loan Applications using the Trisotech Mortgage Feature SetCreating Low-Code Loan Applications using the Trisotech Mortgage Feature Set
Creating Low-Code Loan Applications using the Trisotech Mortgage Feature SetDenis Gagné
 
Call Girls Pune Just Call 9907093804 Top Class Call Girl Service Available
Call Girls Pune Just Call 9907093804 Top Class Call Girl Service AvailableCall Girls Pune Just Call 9907093804 Top Class Call Girl Service Available
Call Girls Pune Just Call 9907093804 Top Class Call Girl Service AvailableDipal Arora
 
Insurers' journeys to build a mastery in the IoT usage
Insurers' journeys to build a mastery in the IoT usageInsurers' journeys to build a mastery in the IoT usage
Insurers' journeys to build a mastery in the IoT usageMatteo Carbone
 
Mondelez State of Snacking and Future Trends 2023
Mondelez State of Snacking and Future Trends 2023Mondelez State of Snacking and Future Trends 2023
Mondelez State of Snacking and Future Trends 2023Neil Kimberley
 
Progress Report - Oracle Database Analyst Summit
Progress  Report - Oracle Database Analyst SummitProgress  Report - Oracle Database Analyst Summit
Progress Report - Oracle Database Analyst SummitHolger Mueller
 
Cracking the Cultural Competence Code.pptx
Cracking the Cultural Competence Code.pptxCracking the Cultural Competence Code.pptx
Cracking the Cultural Competence Code.pptxWorkforce Group
 
B.COM Unit – 4 ( CORPORATE SOCIAL RESPONSIBILITY ( CSR ).pptx
B.COM Unit – 4 ( CORPORATE SOCIAL RESPONSIBILITY ( CSR ).pptxB.COM Unit – 4 ( CORPORATE SOCIAL RESPONSIBILITY ( CSR ).pptx
B.COM Unit – 4 ( CORPORATE SOCIAL RESPONSIBILITY ( CSR ).pptxpriyanshujha201
 
Famous Olympic Siblings from the 21st Century
Famous Olympic Siblings from the 21st CenturyFamous Olympic Siblings from the 21st Century
Famous Olympic Siblings from the 21st Centuryrwgiffor
 
Ensure the security of your HCL environment by applying the Zero Trust princi...
Ensure the security of your HCL environment by applying the Zero Trust princi...Ensure the security of your HCL environment by applying the Zero Trust princi...
Ensure the security of your HCL environment by applying the Zero Trust princi...Roland Driesen
 
VIP Call Girls Gandi Maisamma ( Hyderabad ) Phone 8250192130 | ₹5k To 25k Wit...
VIP Call Girls Gandi Maisamma ( Hyderabad ) Phone 8250192130 | ₹5k To 25k Wit...VIP Call Girls Gandi Maisamma ( Hyderabad ) Phone 8250192130 | ₹5k To 25k Wit...
VIP Call Girls Gandi Maisamma ( Hyderabad ) Phone 8250192130 | ₹5k To 25k Wit...Suhani Kapoor
 
Event mailer assignment progress report .pdf
Event mailer assignment progress report .pdfEvent mailer assignment progress report .pdf
Event mailer assignment progress report .pdftbatkhuu1
 
A DAY IN THE LIFE OF A SALESMAN / WOMAN
A DAY IN THE LIFE OF A  SALESMAN / WOMANA DAY IN THE LIFE OF A  SALESMAN / WOMAN
A DAY IN THE LIFE OF A SALESMAN / WOMANIlamathiKannappan
 
Call Girls in Gomti Nagar - 7388211116 - With room Service
Call Girls in Gomti Nagar - 7388211116  - With room ServiceCall Girls in Gomti Nagar - 7388211116  - With room Service
Call Girls in Gomti Nagar - 7388211116 - With room Servicediscovermytutordmt
 
9599632723 Top Call Girls in Delhi at your Door Step Available 24x7 Delhi
9599632723 Top Call Girls in Delhi at your Door Step Available 24x7 Delhi9599632723 Top Call Girls in Delhi at your Door Step Available 24x7 Delhi
9599632723 Top Call Girls in Delhi at your Door Step Available 24x7 DelhiCall Girls in Delhi
 

Último (20)

Understanding the Pakistan Budgeting Process: Basics and Key Insights
Understanding the Pakistan Budgeting Process: Basics and Key InsightsUnderstanding the Pakistan Budgeting Process: Basics and Key Insights
Understanding the Pakistan Budgeting Process: Basics and Key Insights
 
Value Proposition canvas- Customer needs and pains
Value Proposition canvas- Customer needs and painsValue Proposition canvas- Customer needs and pains
Value Proposition canvas- Customer needs and pains
 
Call Girls In DLf Gurgaon ➥99902@11544 ( Best price)100% Genuine Escort In 24...
Call Girls In DLf Gurgaon ➥99902@11544 ( Best price)100% Genuine Escort In 24...Call Girls In DLf Gurgaon ➥99902@11544 ( Best price)100% Genuine Escort In 24...
Call Girls In DLf Gurgaon ➥99902@11544 ( Best price)100% Genuine Escort In 24...
 
Call Girls Jp Nagar Just Call 👗 7737669865 👗 Top Class Call Girl Service Bang...
Call Girls Jp Nagar Just Call 👗 7737669865 👗 Top Class Call Girl Service Bang...Call Girls Jp Nagar Just Call 👗 7737669865 👗 Top Class Call Girl Service Bang...
Call Girls Jp Nagar Just Call 👗 7737669865 👗 Top Class Call Girl Service Bang...
 
VVVIP Call Girls In Greater Kailash ➡️ Delhi ➡️ 9999965857 🚀 No Advance 24HRS...
VVVIP Call Girls In Greater Kailash ➡️ Delhi ➡️ 9999965857 🚀 No Advance 24HRS...VVVIP Call Girls In Greater Kailash ➡️ Delhi ➡️ 9999965857 🚀 No Advance 24HRS...
VVVIP Call Girls In Greater Kailash ➡️ Delhi ➡️ 9999965857 🚀 No Advance 24HRS...
 
Best VIP Call Girls Noida Sector 40 Call Me: 8448380779
Best VIP Call Girls Noida Sector 40 Call Me: 8448380779Best VIP Call Girls Noida Sector 40 Call Me: 8448380779
Best VIP Call Girls Noida Sector 40 Call Me: 8448380779
 
Creating Low-Code Loan Applications using the Trisotech Mortgage Feature Set
Creating Low-Code Loan Applications using the Trisotech Mortgage Feature SetCreating Low-Code Loan Applications using the Trisotech Mortgage Feature Set
Creating Low-Code Loan Applications using the Trisotech Mortgage Feature Set
 
Call Girls Pune Just Call 9907093804 Top Class Call Girl Service Available
Call Girls Pune Just Call 9907093804 Top Class Call Girl Service AvailableCall Girls Pune Just Call 9907093804 Top Class Call Girl Service Available
Call Girls Pune Just Call 9907093804 Top Class Call Girl Service Available
 
Insurers' journeys to build a mastery in the IoT usage
Insurers' journeys to build a mastery in the IoT usageInsurers' journeys to build a mastery in the IoT usage
Insurers' journeys to build a mastery in the IoT usage
 
Mondelez State of Snacking and Future Trends 2023
Mondelez State of Snacking and Future Trends 2023Mondelez State of Snacking and Future Trends 2023
Mondelez State of Snacking and Future Trends 2023
 
Progress Report - Oracle Database Analyst Summit
Progress  Report - Oracle Database Analyst SummitProgress  Report - Oracle Database Analyst Summit
Progress Report - Oracle Database Analyst Summit
 
Cracking the Cultural Competence Code.pptx
Cracking the Cultural Competence Code.pptxCracking the Cultural Competence Code.pptx
Cracking the Cultural Competence Code.pptx
 
B.COM Unit – 4 ( CORPORATE SOCIAL RESPONSIBILITY ( CSR ).pptx
B.COM Unit – 4 ( CORPORATE SOCIAL RESPONSIBILITY ( CSR ).pptxB.COM Unit – 4 ( CORPORATE SOCIAL RESPONSIBILITY ( CSR ).pptx
B.COM Unit – 4 ( CORPORATE SOCIAL RESPONSIBILITY ( CSR ).pptx
 
Famous Olympic Siblings from the 21st Century
Famous Olympic Siblings from the 21st CenturyFamous Olympic Siblings from the 21st Century
Famous Olympic Siblings from the 21st Century
 
Ensure the security of your HCL environment by applying the Zero Trust princi...
Ensure the security of your HCL environment by applying the Zero Trust princi...Ensure the security of your HCL environment by applying the Zero Trust princi...
Ensure the security of your HCL environment by applying the Zero Trust princi...
 
VIP Call Girls Gandi Maisamma ( Hyderabad ) Phone 8250192130 | ₹5k To 25k Wit...
VIP Call Girls Gandi Maisamma ( Hyderabad ) Phone 8250192130 | ₹5k To 25k Wit...VIP Call Girls Gandi Maisamma ( Hyderabad ) Phone 8250192130 | ₹5k To 25k Wit...
VIP Call Girls Gandi Maisamma ( Hyderabad ) Phone 8250192130 | ₹5k To 25k Wit...
 
Event mailer assignment progress report .pdf
Event mailer assignment progress report .pdfEvent mailer assignment progress report .pdf
Event mailer assignment progress report .pdf
 
A DAY IN THE LIFE OF A SALESMAN / WOMAN
A DAY IN THE LIFE OF A  SALESMAN / WOMANA DAY IN THE LIFE OF A  SALESMAN / WOMAN
A DAY IN THE LIFE OF A SALESMAN / WOMAN
 
Call Girls in Gomti Nagar - 7388211116 - With room Service
Call Girls in Gomti Nagar - 7388211116  - With room ServiceCall Girls in Gomti Nagar - 7388211116  - With room Service
Call Girls in Gomti Nagar - 7388211116 - With room Service
 
9599632723 Top Call Girls in Delhi at your Door Step Available 24x7 Delhi
9599632723 Top Call Girls in Delhi at your Door Step Available 24x7 Delhi9599632723 Top Call Girls in Delhi at your Door Step Available 24x7 Delhi
9599632723 Top Call Girls in Delhi at your Door Step Available 24x7 Delhi
 

Wheel care Zipp 404

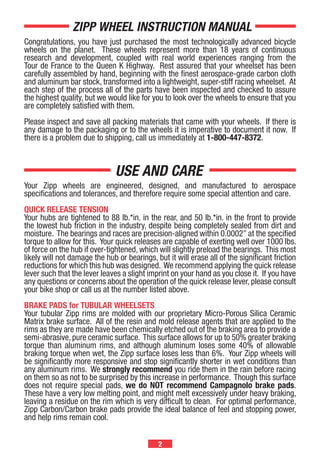
  • 1. ZIPP WHEEL INSTRUCTION MANUAL Congratulations, you have just purchased the most technologically advanced bicycle wheels on the planet. These wheels represent more than 18 years of continuous research and development, coupled with real world experiences ranging from the Tour de France to the Queen K Highway. Rest assured that your wheelset has been carefully assembled by hand, beginning with the finest aerospace-grade carbon cloth and aluminum bar stock, transformed into a lightweight, super-stiff racing wheelset. At each step of the process all of the parts have been inspected and checked to assure the highest quality, but we would like for you to look over the wheels to ensure that you are completely satisfied with them. Please inspect and save all packing materials that came with your wheels. If there is any damage to the packaging or to the wheels it is imperative to document it now. If there is a problem due to shipping, call us immediately at 1-800-447-8372. USE AND CARE Your Zipp wheels are engineered, designed, and manufactured to aerospace specifications and tolerances, and therefore require some special attention and care. QUICK RELEASE TENSION Your hubs are tightened to 88 lb.*in. in the rear, and 50 lb.*in. in the front to provide the lowest hub friction in the industry, despite being completely sealed from dirt and moisture. The bearings and races are precision-aligned within 0.0002” at the specified torque to allow for this. Your quick releases are capable of exerting well over 1000 lbs. of force on the hub if over-tightened, which will slightly preload the bearings. This most likely will not damage the hub or bearings, but it will erase all of the significant friction reductions for which this hub was designed. We recommend applying the quick release lever such that the lever leaves a slight imprint on your hand as you close it. If you have any questions or concerns about the operation of the quick release lever, please consult your bike shop or call us at the number listed above. BRAKE PADS for TUBULAR WHEELSETS Your tubular Zipp rims are molded with our proprietary Micro-Porous Silica Ceramic Matrix brake surface. All of the resin and mold release agents that are applied to the rims as they are made have been chemically etched out of the braking area to provide a semi-abrasive, pure ceramic surface. This surface allows for up to 50% greater braking torque than aluminum rims, and although aluminum loses some 40% of allowable braking torque when wet, the Zipp surface loses less than 6%. Your Zipp wheels will be significantly more responsive and stop significantly shorter in wet conditions than any aluminum rims. We strongly recommend you ride them in the rain before racing on them so as not to be surprised by this increase in performance. Though this surface does not require special pads, we do NOT recommend Campagnolo brake pads. These have a very low melting point, and might melt excessively under heavy braking, leaving a residue on the rim which is very difficult to clean. For optimal performance, Zipp Carbon/Carbon brake pads provide the ideal balance of feel and stopping power, and help rims remain cool.
  • 2. Zipp Carbon/Carbon brake pads are the only pads specific to both aluminum and silica/ ceramic brake surfaces. For better feel with a carbon-only rim, use Zipp pads. Some riders prefer cork brake blocks. These are readily available from numerous sources and offer excellent feel and longevity on Zipp rims. Cork pads tend to offer less total stopping power, but also exhibit better modulation and wear characteristics than rubber pads. WARNING: Do not use Campagnolo pads, or any pad purporting to be for ceramic rims. Most ceramic pads contain abrasives which can lead to excessively high brake temperatures and possible rim damage. NOTE: For cyclocross applications and cantilever brakes, we recommend using Kool-Stop black pads. BRAKE PADS for CLINCHER WHEELSETS We recommend using Zipp Carbon/Carbon brake pads with any aluminum braking surface, including our own clincher wheels. Standard brake pads will work, but might cause premature wear to the braking surface due to the use of abrasives such as aluminum oxide in the pads. As discussed with our tubular rims, we do not recommend using Campagnolo pads. Good options include Dura-Ace and Kool-Stop black. CARE AND CLEANING Any cleaner that will not affect epoxy resins is acceptable for your rims. Acetone or denatured alcohol work quite well on the rims but will ruin the decals, so be careful when using. Armor All leaves a nice shine on the rim when finished, and is a quick and easy way to make your wheels look new again. Goof Off or any product intended to remove latex paint will also work well to remove tubular tire glue. Do not use any tools to install tubular tires on or remove them from your carbon rims. HUBS Your hubs have been machined and assembled to standards previously seen only in aerospace applications. They are sealed and can be cleaned with a soft brush, using soap and water, or using a cleaner such as Simple Green. Removing dirt buildup from the spoke holes will increase the life of the spoke, as well as the life of the hub. Occasionally you might remove the cassette body from the hub and clean out the drive mechanism. It is not necessary to remove the cassette cogs for this operation, but you can if you wish. This mechanism is incredibly robust and well sealed, but removing road crud is always helpful. To disassemble the rear hub, insert a 5mm Allen key in each end of the axle, and turn opposite each other (standard right-hand threads). Unthread and remove the left-hand end cap. You can now slide the freehub body and axle out of the main hub shell. Be sure NOT to lose the small washer that fits between the freehub body and hub shell! You can now clean off the pawls, pawl spring, and ratchet ring. Simply wipe them off or use a mild cleaner such as diluted Simple Green. The next step is to lubricate the pawls, pawls spring, and ratchet ring. To do so, use a synthetic motor oil such as Mobil 1 10W-30. It is inexpensive and offers very good friction and wear protection to the cassette drive mechanism; this will allow the hub to run more smoothly and quietly. Apply 1-2 drops per pawl—enough to lightly coat them and ensure a smooth action.
  • 3. You should also put a light coating on the ratchet ring inside the hubshell. Grease can be used in the ratchet and pawl area, but it must have an NLGI rating of 00, 0, or 1. Grease with higher viscosity than this will keep the mechanism from functioning properly. Also, some oils with tackifying additives, such as Phil Tenacious Oil, can gum up the mechanism and cause the pawls to stick. Only use synthetic oils such as Mobil 1 (or very low viscosity synthetic greases as mentioned above) for lubricating the cassette drive mechanism. Hub Overview Non-drive Endcap Carbon Dust Cap Hubshell 0.25mm Spacer Cassette Body Carbon Dust Cap Retainer Spring 15mm Axle Ratchet Ring Apply Mobil 1 Oil Here Cassette Body Overview Phynox Pawl Spring 61802 Bearing Nitralloy Pawl Vacuum Seal Apply Mobil 1 Oil Here and Keep Clean
  • 4. To reassemble the hub, insert the axle/cassette body assembly into the hub shell, making sure that the small washer is between the freehub body and hub body. You might find it helpful to push the three pawls down with your fingers and rotate the cassette body counterclockwise as it is inserted. Next, thread on the end cap, being sure not to cross thread it. Insert a 5mm Allen key into the drive side (right), and a torque wrench with a 5mm bit into the non-drive side (left). Hub assembly torque is 88 lb.*in. for the rear hub, and 50 lb.*in. for the front hub. If you don’t have a torque wrench on hand, use a standard 5mm key and torque until the tool leaves a slight impression in your hand. If the hex key begins to twist in the endcap or strip the broach, you are using way too much torque! Complete instructions for hub maintenance are posted on our website, www.zipp.com Why do my hubs have play in them? You might notice that your Zipp hubs feel as though there is some “play” in them while the bike is unweighted (i.e. without a rider aboard or while in a work stand). This can often be felt by pinching the tire between your fingers and gently pushing it side to side. Races and Retainers 0.002” (0.05mm) displacement between Race Curvature slightly larger than races when ball allowed to rock. ball diameter allows ball to rock within race. Rocking motion of ball Teflon Ball Retainer results in longer life and lower friction over traditional brass retainers. Radial bearings have a small amount of play due to the way the races and balls fit together.
  • 5. Although this condition is highly undesirable in any hub with angular contact, or cup-and-cone bearings, this is intentionally designed into our cartridge bearings. This eliminates any side-loading of the bearings, reducing both friction and rolling resistance. In addition, tightening the quick release on our hubs does NOT add any additional friction to the system—the same cannot be said for cup-and-cone setups. Our hubs load the bearings ONLY with the rider’s weight, ensuring the lowest possible rolling resistance and thus the fastest possible ride. Although the play can feel disconcerting while tuning up your bike in the repair stand, rest assured that this play is eliminated as soon as you climb aboard your bike. See the Races and Retainers and Race and Ball Curvature drawings for further explanation. Race and Ball Curvature Differential between race curvature and ball curvature This differential in shape allows the balls to touch the race at only one point of contact, reducing friction while allowing the bearings to handle side loads by achieving a slight angular contact.
  • 6. ALUMINUM VALVE EXTENSIONS Your wheel was supplied with a valve extension matched to the depth of the rim. If you purchased clincher 303s you can avoid using the valve extension by purchasing tubes with 60mm valve stems (vs. the standard 36mm). If you have 404s you should use standard tubes or tubulars with the included valve extenders for optimum performance. We also recommend pre-installing an extension onto your spare and inflating it to ensure proper fit. This will save time and headaches out on the road. We currently have four different lengths of valve extenders: • 27mm/1.05” for 202 wheels • 33mm/1.3” for 303 wheels • 48mm/1.9” for 404/909 front/606 front wheels • 74mm/2.9” for 808/999 front/606 rear wheels VALVE EXTENSION INSTALLATION Note: Install valve extension BEFORE mounting tire. • Unscrew tire valve locknut as far as possible, and tighten in the fully open position. • Stretch a wrap of Teflon plumber’s tape (available at a hardware store) around the end of the valve so that the tape extends over both the narrow valve cap threads and the wider valve body. Make sure that the tape does not stretch over the air opening at the end of the valve. This provides an air seal between the valve and extension. Plumber’s tape comes in several thicknesses. If thinner tape is used, more than one layer might be needed to seal properly. Tape should be replaced each time the extension is removed. • Screw the valve extension onto the end of the valve and tighten, using a 3mm Allen key inserted into the end of the extension. • Mount tire as usual and inflate with a “push-on” type pump head. Check for leaks. If a CO2 inflator is to be used with the extension, it must have a “push-on” type head. Always check valve, pump, and inflator compatibility before riding. • Air can be released from the tire by inserting a piece of wire (a section of spoke works well) into the end of the extension to depress the valve nut.
  • 7. SPOKE TENSIONS Your wheels have been trued and checked here by our professional wheel builders. All standard Zipp wheel spokes are straight pull or oval stainless steel. CSC, Clydesdale, and cyclocross wheels use j-bend stainless steel spokes. The spoke tension on our carbon wheels is 100kg front/rear drive side and about 80kg rear non-drive. The wheels are built radially on all standard front wheels and 2x/radial on rear wheels. Clydesdale wheels are radial front and 2x/2x rear. CSC and cyclocross are 2x all around. We have found higher spoke tensions seriously reduce ride quality and provide no improvement in lateral stiffness. Before truing or adjusting spoke tension, apply a drop of lube (such as Triflow) between the nipple and rim. This will reduce friction between the two surfaces and lessen the chances of rounding off a nipple. IMPORTANT: Only experienced mechanics should perform advanced wheel service! CLINCHER RIMS Our rims are sized at the larger end of the European ISO/E.T.R.T.O. standards for tire fit, to ensure maximum confidence and safety when using the modern ultra-light high performance clinchers. Your tires might be more difficult to install on our rims than on some rims. However, we feel that any tightness at installation is more than made up for by the improved high speed and high-pressure safety performance of the rims. IMPORTANT: For tire pressure recommendations, see the Tire Pressure section of these instructions. RIM STRIP You must use a thin plastic or thin fabric rim strip with these rims for proper performance. Do not use Velox or a similarly thick cloth rim strip. We have used these for years, and appreciate their solid performance, but the strip is too thick and too wide for our rim, making tire installation and proper seating of the tire bead extremely difficult. You will have a much easier time installing and removing tires if you use a thin rim strip. We recommend using our own Zipp rim tape, which is a durable, yet thin, woven tape. It has been designed specifically to work best with our clincher rims. It is also a good idea to clean the inner rim surfaces with rubbing alcohol or acetone to ensure sufficient adhesion of the rim tape to the rim. TIRE PRESSURE Volumes of data have been produced showing decreased tire performance at high tire pressures, and our studies have been no different. We recommend 100–110 psi for all nylon-cased tires (such as Michelin, Continental, and Vittoria Ultra Speed), and 110–125 psi for cotton and softer material-cased tires (such as Vittoria CX, Vredestein, and Veloflex). Pressures above these will decrease tire grip and actually increase rolling resistance on most road surfaces, as the tire generates more heat conforming to the uneven road surface. The tire PSI rating on the sidewall of your tire is the MAXIMUM SAFE PRESSURE, indicating the amount of air pressure sufficient to damage or increase risk of tire failure. If you have questions about your tire’s optimal pressure please call the tire manufacturer or contact its website for further information.
  • 8. Remember, increased tire pressure will cause the rider to experience more high- frequency road vibration, possibly giving the feeling of going faster, but actually sapping energy as the tire bounces over road imperfections instead of absorbing them. Higher tire pressure significantly reduces grip and increases tire wear as well, so if you are wearing through tires quickly or feeling skittish on less than perfect roads, you might be running too much tire pressure. Therefore we rate our clincher rims at 125 psi MAX. TUBULAR RIMS GLUING A TUBULAR: It’s not as tough as you think! Despite what you might have heard, gluing a tubular or sew-up tire onto a rim is not difficult. With practice, changing a flat with a tubular is also fast and easy. Like learning to tie your shoe, it might seem mysterious at first, but the process can be reduced to following a few simple procedures in a particular order. Gluing a tubular is a task best learned by watching an experienced person. If you have a friend or local bike shop repair person who is an old pro at this task, ask to watch him. If you don’t have the benefit of an experienced mentor, these instructions outline a conservative system that reduces gluing a tubular to a few simple steps. For best results read the instructions fully, then plan your moves through each step, and lay out all of your gluing supplies in advance. You will be able to install a new tubular in under 20 minutes on a new rim, and even more quickly on a previously used rim (not including drying time of the glue). In a race situation, you should be able to change a stretched and pre-glued tubular in less than two minutes. Practice is the key to an efficient tire change. It will take longer to read these instructions than to actually install the tire! Remember that a lot of what you read here assumes that this is a new wheel, so there are some extra steps that won’t be needed after the first tire installation. Your tire or glue might also come with instructions that modify the basic procedure outlined here. Many tire manufacturers have posted instructions for mounting tires on their websites. These are also good resources. WHAT YOU WILL NEED: • Tubular glue of your choice. Do not use 3M Fast Tack. Fast Tack is an automotive adhesive that gained popularity a few years ago, but has the effect of softening the base tape glue of many of today’s tires. The aggressive tack is prone to damage tires on removal. • Solvent, such as alcohol, acetone, or Goof Off. Goof Off is a latex paint remover available in hardware or paint stores. It works very well for removing most glue. • You might also need a file, emery cloth, or another means of scraping the base tape protective layer of some tires. (Check to see if your tire has a layer of rubber over the base tape. If it appears to be raw, un-coated cotton, you will not need the scraping tools.) • Good luck, and have fun!
  • 9. 1. STRETCH THE TIRE: • The first, very important step: Always pre-stretch any tubular (including your spare tire!) to save a lot of work later. You will NOT need glue for this step. • There are two ways to stretch the tire: the proper way and the down and dirty way. Use the proper way when you want the job done right and have the time. The down and dirty way works too, but save it for an emergency when the tire must be ridden in a short period of time. • If you are using a valve extender, install it at this time. (See notes about how to do this if you have any questions.) • THE PROPER WAY: Stand the wheel on its edge so that the wheel is on the ground and can lean against the front of your legs. Your feet should be about shoulder width apart. The valve hole of the rim should be at the top of the wheel near your waist. • Insert the valve into the valve hole. • Bend over and, using both hands, begin stretching the tire onto the rim, working down and away from the valve. Maintain a very firm even pressure as you work your way down from the top of the wheel. Even pressure will ensure the valve does not twist in the rim. Try to keep the tire centered on the rim. The farther you stretch the tire at this point, the easier it will be to roll the last bit over onto the rim. As you reach the last few inches, lift the rim up until it is horizontal. Rest the edge of the rim against your stomach or upper thigh. The area of the valve hole will now be against your stomach or thigh with the as-yet un-mounted portion of tire farthest away from you. Maintaining the pressure, roll the last bit of tire onto the rim using your thumbs. Pinch the tire slightly together and “lift” the tire over the edge of the rim. Do not use a tool to pry the last portion over the edge of the rim. If you can’t get the tire to go on the rim, start over with more pressure at the beginning of the process. After installation, blow up the tire to 130–140 psi, and leave it unglued on the rim for a few hours, or overnight. • THE DOWN AND DIRTY WAY: Use this only in an emergency, as it is possible to damage the tire when this technique is performed too enthusiastically. Step on the tire with one foot or hook the tire over your bent knee and pull upward with a steadily increasing firm pressure. Be very careful not to pull so hard that you tear or snap threads on the tire casing. A torn casing can lead to a bulge in the tire at that point. Work your way around the tire repeating the process every 10–12 inches. Slip the tire on the rim as outlined above to check for a good stretch. 2. AFTER STRETCHING, PREPARE THE TIRE FOR GLUING: • The base tape (usually cotton) of many tubular tires will have a coating of latex. This must be roughened slightly to ensure a good glue bond. This step does not apply to Zipp, Continental, or any other tires that have no coating over the base tape. • Remove the tire from the rim used in the stretching procedure outlined above. • Roughen the latex coating using a file or similar item. You can also use emery cloth wetted in alcohol or a similar solvent. Be careful—too much solvent might dissolve the glue holding on the base tape. 10
  • 10. 3. PREPARE THE RIM FOR GLUE: • If the rim is new, wipe it down with alcohol or another solvent listed in these instructions. Zipp Carbon rims are ready to go at this point and require no further preparation. Traditional aluminum rims can be lightly sanded, and then cleaned again with solvent. • When installing a tire on a previously glued rim, you can usually apply just a single thin uniform layer of new glue to the rim and tire. After 15 minutes, or when the glue becomes tacky, mount the tire according to the method outlined in these instructions. • Bad glue jobs or a large buildup of lumpy old glue can be scraped off, after using a solvent to soften the old glue. (Alcohol, acetone, or a latex paint remover such as Goof Off will work. All are available at hardware stores.) The Zipp carbon rim can be cleaned with any solvent that will not harm epoxy. 4. GLUE THE RIM AND TIRE: • There are many types of tubular glues available. All types work well when used properly, so it’s just a matter of preference which glue you choose. The red types will harden quite a bit as they dry. In addition, the red glues seem to hold more aggressively and are perhaps best suited to track applications. Over a long period of time, red glues become brittle and the tire must be re-glued. The white and clear types of glue will harden less and will remain somewhat tacky. You will find it easier and quicker to remove a flat with these types of glue. One possible drawback of clear or white glues is that in rare instances, the residual solvents that keep them soft can cause the base tape of the tire to separate over an extended period of time. Again, the bottom line is that nearly all types of traditional tubular glue work well. • We do NOT recommend using the 3M automotive glue Fast Tack for gluing tubulars. If you are in a hurry and must use the wheel in a few hours, Fast Tack brand cement (an automotive trim adhesive available in auto parts stores) can be used according to the directions on the tube. Again, we do not recommend this procedure. Be aware the Fast Tack will cause the base tape to separate from tires and might damage the tire or rim on removal. • Can you use TUFO tape? Yes and no—in other words, at your own risk. Some people have used TUFO tape with our wheels without having any issues. There are two types: regular and extreme, which is intended for warmer weather use and is VERY sticky. In rare cases, removal of the extreme tape has actually pulled the carbon tire bed away from the rim, ruining the rim. In these instances, it is our policy to offer crash replacement pricing on a new rim, but we WILL NOT cover it under the manufacturer’s warranty. • You might want to use a small plastic bag over your finger to spread the glue. Acid brushes are an economical and very functional method of spreading the glue as well. You can buy them by the dozen at most hardware outlets. Latex gloves do not work, as most glue types will stick to the latex and dissolve the material. (NOTE: Some professional triathletes leave unglued (or with little glue) a small area, no more than an inch or two in length, opposite the valve hole. In the event of a flat, this small area allows them to begin removing the flat tire more easily. This is not generally recommended.) 11
  • 11. • First, coat the rim by putting a thin uniform layer of glue on the tire seating area of the rim. Thin coats of glue work better than thicker ones. To apply the glue, lay a bead of the cement around the center of the tire seat area of the rim, skipping over the spoke holes if possible. Use the plastic bag over your finger or acid brush to spread the glue evenly from edge to edge of the tire seating area all around the rim. Avoid getting glue in the spoke holes as much as possible. Set the rim aside for a couple of hours to let the glue dry. • Most tires will turn inside out when inflated off of a rim. Inflate the tire until it turns the base tape facing upward, and then place the tire on a flat surface to apply a layer of glue. • Spread a bead of glue onto the center of the tire base tape. • Spread the glue evenly across the base tape. Set the tire aside for a couple of hours to dry. • Clean up any glue drips around the area with a solvent. • Re-coat the rim and tire with a second thin layer of glue, using the same procedure as before. Remember these need to be THIN coats of glue. • Let the second layer dry for several hours until it’s only slightly tacky. • After the glue on the rim and tire has dried, apply another thin layer to the rim only and let it dry for about 15 minutes. 5. MOUNTING THE TIRE: • Deflate the tire and mount it on the rim, as described in Step 1. Make sure to push down firmly on the area around the valve before beginning to stretch the tire over the rim. It will be easier to finish rolling the last bit of the tire onto the rim if you maintain a firm pressure from the very beginning of the mounting process. Take care that the tire is centered and that an even amount of base tape is sticking out on both sides around the rim. At this point you can still move the tire around on the rim a bit by tugging and pushing it into place. • Pump up the tire to around 50 psi. Spin the wheel while looking for wobbles or twists in the tire. An even amount of base tape should be visible on either side of the wheel. You might find that the tread moves back and forth as the wheel spins, or that the tire is off-center. Deflate the tire and push or twist it over where required. Re-inflate and check again, repeating the process as needed. • Carefully clean any excess glue on the rim sidewall with solvent. Keep the solvent away from the tire! • Pump up the tire to 120–130 psi, and let it sit overnight to bond firmly. • Check the tire pressure before each ride. Check the glue bond occasionally. Remove and re-glue the tire as needed, or at least once a season. Have fun! 12
  • 12. CHANGING A FLAT TUBULAR 1. Before riding, stretch and pre-glue a spare tire, as outlined elsewhere in these instructions. Install a valve extension if needed. 2. When the glue is fully dry, fold the tire. There are a number of methods for doing this, but essentially you want to fold the glued surfaces in on themselves so that the tire is a convenient size. This is the spare tire you will carry with you. 3. The tire can be secured to the seat post or under the saddle with a toe strap, Velcro strap, or electrical tape, or in a bag made to carry a tubular. 4. Psssstttttt… Okay, now you have a flat! Remove the wheel from the bike as usual. 5. Hold the wheel with the edge resting on your thighs or waist, and with the valve hole close to your body. Starting on the side of the wheel farthest from your body, pinch, lift, and roll the tire off of the rim. It sometimes helps to work loose a short section of tire from the glue on one side, flip the wheel, and work the other side loose at the same location. This is where practice pays off. Using good technique and gluing the tire correctly in the first place are more important than hand strength. You can use a plastic tire lever carefully to start the process if needed. 6. After you get a short section of the tire slightly off the rim, set the edge of the wheel closest to the valve hole on the ground. 7. Using your body weight, continue to roll the flat tire off of the top of the rim by pushing down towards the ground. After you get the tire about halfway off the rim, pick up the wheel and strip the tire completely from the rim. 8. Unfold your spare and insert the valve into the valve hole. 9. Place the edge of the wheel back on the ground, with the valve hole at the top and the wheel resting flat against your legs. 10. Bend over and, using both hands, begin stretching the tire onto the rim with a very firm, even pressure while working your way down from the top of the wheel. The farther you stretch the tire at this point, the easier it will be to roll the last bit over onto the rim. As you reach the last few inches, lift the rim up until it is horizontal with the edge of the rim against your stomach. The area of the valve hole will now be against your stomach with the as-yet un-mounted portion of the tire farthest away from you. Maintaining the pressure, roll the last bit of tire onto the rim using your thumbs. Do not use a tool to pry the last portion over the edge of the rim. 11. Check to see that the tire is evenly mounted, pushing and pulling the tire into the center where needed. 12. Blow up the tire using whatever method you prefer. Remount the wheel on the bike. 13. Ride away! Have fun and have a great race. 14. After you return home, re-glue the new tire following the methods outlined in these instructions. 13
  • 13. WARRANTY/RETURNS POLICY NO-FAULT/CRASH REPLACEMENT POLICY Manufacturing problems are rare with Zipp products. However, below are some suggestions for solving any problem that you might encounter. Our warranty for all products is for one year against manufacturer’s defects. Eligibility for warranty is determined at the factory by the Zipp Returns personnel. If a manufacturing problem is determined, a proof of purchase date might be requested. If you have returned the product within the first year, our policy is to repair or replace the product at no charge. We do not offer refunds. Damaged products not covered under warranty due to accident, misuse, or just plain ol’ bad luck are eligible for our liberal No Fault/Crash Replacement program for up to five years from the date of purchase. If you are experiencing a problem with a Zipp product: (1) Review our maintenance tips. Go to our website, www.zipp.com, and click on the Support button. You might find a simple solution to your problem there. (2) Give us a call at 800-447-8372 (317-481-1120) (8am-5pm M-F EST). A determination will be made whether or not to return the product to the factory for inspection. If a return is required, you will be issued a Return Authorization Number (RA#). It is imperative for you to put this RA# on your box, so it can be easily identified when it arrives at our facility. Upon receipt and inspection, a warranty determination will be made. We will perform the necessary repairs or make a replacement. Should there be any cost to you, you will be notified prior to any repair being executed. If you decide that you do not want us to repair or replace the product, you will need to cover the cost of returning the product to you. If we do not receive a determination from you after 90 days from the receipt of your product at the factory, then the product becomes the property of Zipp/Compositech. As riders ourselves, we know that accidents can happen. When your product is within the warranty period, but is damaged either by yourself or in a typical biking accident, such as a race, we have a No Fault/Crash Replacement Policy. This policy covers a five-year period following the purchase date of your product. We will require you to call and obtain a Return Authorization number (RA#) in this situation as well, and return the product to us. You will then be able to purchase a brand new product for a reduced price to replace your damaged product. We can quote the price to you when you call or e-mail us. 14
  • 14. NOTE: When sending in an item under warranty, PLEASE remove all accessory items, including tires, tubes, rim tape, cassettes, skewers, computer magnets, and so on. If you fail to remove these items, we cannot be held responsible if they are lost or damaged. THERE IS A $25 CHARGE PER WHEEL FOR TUBULAR TIRE REMOVAL!!! OTHER TECHNICAL QUESTIONS ?? Have a question about our products? Go to our website at www.zipp.com and click on Support. ZIPP Speed Weaponry 1180 N. Main St. Speedway, IN 46224 www.zipp.com