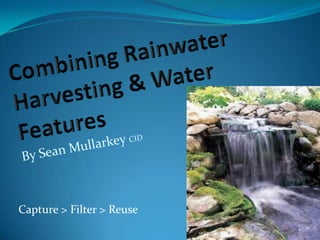
Combining Rainwater Harvesting with Water Features
Sean Mullarkey, Applied Water Technologies
Sustainable water features that captures, stores and utilizes rain water for more than looks. Harvested rainwater can be used
for watering plants, washing cars, topping off the pool and many other uses. Combining rainwater harvesting with a
decorative water feature provides habitat, healthy water and esthetics.
2. Combining Rainwater
Harvesting & Water Features
Why rainwater harvesting
Traditional harvesting methods
Rainwater harvesting calculations
System examples
2
3. Water
•There's a whole lot of water on
Earth! Something like
326,000,000,000,000,000,000
gallons (326 million trillion gallons)
•About 70 percent of the planet is
covered in ocean and the average
depth of the ocean is several
thousand feet
•About 2 percent of the planet's
water is fresh, but 1.6 percent of
that water is locked up in the polar
ice caps and glaciers. 0.4% or
0.004 for us
4. Water Challenges…
Supply & Demand
Limited supply of fresh water
Demand is out pacing supply
Storm water Run-off
11. Rainwater Collection!
Sources of Rain Water? “I wasn’t thinking the sky!”
Roofs
Least amount of pollutants
Elevation of gutter allows directing to tank without pump
Easy to pre-filter and provide first flush
Low cost of conversion
Pavement
Dirt and pollutants are more abundant
May need pumps to move water to storage area
Can be expensive to convert for collecting Rain, more cost
effective if done during construction
12. Don’t Let It Get Away!
Sources of Rain Water?
Landscape Areas
Detain or Retain?
Contour planting
Rain Gardens
Soil improvements
15. Collectable Water
A = (catchment area of building)
R = (inches of rain)
CF = 0.623 (conversion factor for 1” rainfall to gallons
of water/ sq ft.)
G = (total amount of collected rainwater)
A x R x CF = G
So if you have a roof that is 200’ x 300’=60,000 sq ft (A)
You have 1” of rainfall (R)
You would multiply 60,000 sq ft x 0.623= 37,380 gal of
water off that area in a 1” rain.
20. Using the Rain Water
Most Rainwater Harvesting Systems are best utilized
watering landscape plantings not turf because of the
limited size of storage units
If you have a large storage area such as a lake all
planted areas can be watered with the stored rainwater
Most systems will need some sort of pump to
distribute the water through a pipe net work
21. Amount of water needed per 100
Sq. Ft. per month
Jan Feb Mar Apr May Jun Jul Aug Sep Oct Nov Dec
Gal/ 27 49 95 157 230 275 284 257 183 122 52 27
100SF
29. The RainXchange™ Downspout Filter
Filters Rainwater Before Entering the Storage Basin
Grated lid and layer of gravel removes
large debris, such as leaves and twigs
Smaller particulates are captured in a
300 micron, easy to clean debris net
Molded hose-tail stub fits 3” or 4”
corrugated drain pipe
Designed to sit at the base of
the downspout.
35. Booster fitting kit
plumbed into
waterfeature supply
Harvested Water Accessed Through the Waterfeature
line
Supply Line
35
36. Overflow Management
Infiltration or Redirection is Required
Size of Infiltration
depends on site soil
characteristics and
potential overflow
quantity
36
700 gal. of storage here about 1 hr 10min for a garden hose.We admitted we were powerless over rainwater catchment—that our barrels had becomeunmanageable.
You can get larger tanks and cisterns increase water storage capacity, but now the issue becomes shipping inefficiencies. These big tanks are being delivered on large trucks and you’re spending a lot of money shipping air! These large tanks may also require a crane or large piece of equipment to set them in position so everything needs to be weighed when making a decision.Above ground systems do a good job of holding water but they fall short in addressing all of the issues associated with water management and they can take up valuable space on any property and create an eyesore in the landscape.
100 ordinance that if you have public water access you must disconnect your alternate water supply.
Often times we are only concerned about the part of the roof we can harvest water from, not all down spouts will be accessible to the collection system
As you can see from the previous slides, traditional rainwater harvesting is based more on function rather than aesthetics. The RainXchange™ shakes up this tradition and proves that rainwater harvesting doesn’t have to be ugly!
The first stage of the RainXchange system is capturing the water using the Downspout Filter. This filter is designed to sit buried at the base of the downspout extension and disguised using decorative stone & gravel. The main objective of the filter is to remove the large and small suspended debris from the rainwater before it is sent to the water storage basin. There are a number of other styles of downspout filters, also commonly called first flush devices. One of the design goals of any Aquascape filter is to try to incorporate the filters into their surroundings rather than be a focal point….
This is an example of a traditional first flush filter on the market. These styles of filters are installed into the gutters and eve’s of a building. These filters do not take aesthetics of the project into consideration, only the function. These systems often resemble a science lab rather than a rainwater filter.
The RainXchange™ Downspout Filter contains a couple different filter layers. The first is the grated lid, which gets covered with stone and decorative gravel. This first layer removes larger debris, such as leaves, twigs, seeds and other material that finds its way onto rooftops between rain events. The water then percolates down through the gravel and into a 300 micron debris net. The debris net removes small suspended particulates from the rainwater, such as dirt and small pieces of debris from the material the roof is constructed from. As the water passes through the debris net it rises up towards the top where it begins to travel out the front of the filter through the molded hose connection and into the drain pipe that takes the water by gravity to the water storage basin. The Downspout Filter is designed to include one or two small percolation holes towards the front of the unit. This allows the few gallons remaining in the filter after a rain event to slowly percolate out the bottom of the filter, preventing stagnant water from residing in the filter.
The Downspout Filter is connected to the water storage basin using corrugated drain pipe and utilizes gravity to move the water from the base of the downspout to the location of the water storage basin.
The size of the water storage basin is based on the sites water use requirements. The modular design of the AquaBlox water matrix tanks means there is no limit to the size of the water storage basin. 32galThe Basin is surrounded by liner to retain the water The tanks are made with 85% recycled plastics, can be built to support vehicular weight loads and best of all can be designed in a wide variety of configurations to fit the site. Blox H20 Loading for all of the engineers in the classTalk about features & benefits of Snorkel & CentipedePump is housed in the Snorkel & Centipede
Once people understand how to determine the size of the water storage basin the next question that typically comes up is how do you access the water? The pumps that operate the waterfeature circulation are designed for high flows at low pressures and low electrical operating costs. These pumps aren’t suitable for irrigation use through a garden hose or professional irrigation system. They simply won’t provide sufficient water under these applications. Therefore we use what is called a booster pump to increase the water pressure.
The next portion of the diagram shows an example of a small overflow infiltration trench, which is designed to promote the infiltration of excess water back into the deep ground water reserve. The infiltration trench can be built using the AquaBlox tanks wrapped in a permeable geotextile allowing the water to soak back into the ground. The size of the infiltration trench is dependent on the type of soil on the property. This is only one example of methods of handling overflow out of the RainXchange basin. Other methods include redirecting the overflow water over the surface of the property, such as through landscape planting beds, dry creek beds, etc. The goal is to try to keep the water on site allowing to soak into the ground rather than send it off to the storm sewer systems.
Following are several projects Aquascape has installed to provide you with a better understanding of the RainXchange™ System.
The first project is a commercial building that is going to utilize the RainXchange™ System to irrigate the surrounding landscape through a professional irrigation system. This project is unique in the fact that it is going to incorporate the water storage basin below a pervious paver patio system. The water from the decorative fountain will bubble over the top and then disappear into the joints between the pavers. This is a good example of how a subterranean water storage basin allows the property above ground to be used for other means. This is not possible when using large above ground tanks as shown earlier in the presentation.
The size of the basin is marked out, make sure that you dig approx. 6” more that the size of the finished basin, once this is done excavation can begin.The size of the excavation in this example is 10’ x 12’.
The entire basin and area beneath the patio is lined with an impermeable liner. This will redirect and collect any water that falls onto the patio into the 3,000 gallon basin. A special woven-geotextile is used directly on top of the AquaBlox. This woven geotextile will allow water to percolate through and provide a base for the paver foundation screening that is specified by the paver manufacture. As a simple rule you we recommend 1 gallon of storage for every square foot of pervious pavement.
This system is designed with 8” – 12” of CA 7 which is a DOT classification for ½” – 1” washed gravel with no fines, it’s then compacted and covered with a CA 16 which is DOT 3/8” chip again with no fines, this is to insure no clogging of the void space allowing for optimum water movement through the aggregate as well as a greater void space for more water storage.Once completed the paver joints are filled with 2 – 5 mm granite chips. The joints will need maintenance for long term functioning.
The Booster Pump for this application was located off to the side of the building. Irrigation controls are connected to the booster pump to drive the irrigation system.
The fountain rock is incorporated into the patio providing a decorative element to the setting, helping to aerate and filter the water stored below. This type of application is also very easy to picture in a residential setting with patio furniture, a fire pit, etc. creating a unique outdoor environment.
This project is located at the front entry of a residential home. The homeowner wanted to utilize the rainwater to irrigate the planting beds along the front of the house, as well as utilize the rain water for general outdoor use such as washing cars, driveway and front porch.
One of the site issues the client wanted to correct was the erosion occurring at the end of their downspout, even the smallest of rains would erode away the mulch and topsoil sending across the sidewalk, down the driveway and into the storm sewer which goes to the local retention pond where it will eventually need to be removed. The Downspout Filter will take care of this issue by pre-filtering the incoming water and directing into the storage basin.
The configuration of the AquaBlox® are placed into position and the size of the basin is marked out for excavation, make sure you mark the area about 6” wider all the way around the Aquablox this will make for an easier installation allowing room for adjustments.
The basin is excavated, lined and the Snorkel™ and Centipede™ filter are set into their recessed position. The patented Snorkel™ and Centipede™ filter are designed to house and provide easy access to the pump system. The filter protects the pumps from large debris and reduces pump maintenance. The filter is also designed to position the pump system in the lowest spot in the storage basin, allowing maximum water availability.
This application includes three basalt columns. The plumbing and valves for each column can be seen in the photo these are used to adjust the flow to the individual pieces. The corrugated drain pipe bringing rain water from the Downspout Filter is also visible where it discharges into the basin. All of the plumbing will be hidden beneath the landscape.Remember our philosophy as decorative water feature installers forces us to take the time to disguise and hide all of the mechanical components of the system.
The finished project. The clients now spend their evenings sitting on their front porch, having a drink and conversation with one another while enjoying the lifestyle a water feature brings to their landscape.