SlideShare una empresa de Scribd logo
1 de 67
Lesson 2:
Importing
Media
Apple Pro Training
Series
Final Cut Pro X
2nd Edition
Professor: Sam Edsall
Importing Media into FCP
• Final Cut Pro can import media from a variety of devices
and many media formats
• SD & HD video formats
• Still photos
• Various audio formats including Wav, AIF, MP3
Loading Content
• Select what you want to import
• Select how you want to import it
• Final Cut Pro works in the background to
organize, repair, and optimize media
Managing Content
Importing Media
into an Event
• Final Cut Pro collects imported
media into an Event
• Good habit to make a new Event
when you start a new video
editing project
• You can choose to copy your
video clips to your hard drive or
have it reference to it from
another storage device like your
Thumb drive
• Always better to copy
content to your hard drive
Loading Content
Import Media into a
New Event
If the Library is not visible, click the Library button beneath the
Event Browser.
In the Library, select the Macintosh HD icon for the new Event.
Choose File > New Event, or press Option-N.
The New Event
• The default Event name is the current date and highlighted
awaiting a new name
The Event
• Select the disk where the new Event will be created
• Select File > New Event
Making an Event
• Control-click (or right-clicking) the Event, and choose „Move Event
to Trash‟ or press Command Delete
Deleting an Event
Import Media into a
New Event
In the name field, enter
Fairly Legal, and
press Return.
Importing Content
• Import from the button
bar
• Select Import Media
from the Event Browser
• File > Import Media…
• Command I
• Control-click (or right-
click) the Event in the
Event Library
A couple of ways
Import Media into a
New Event
With Fairly Legal
selected in the Event
Browser, click the
Import Media button.
-- The Media Import
window opens
Import Dialogue Box
Sources
Favorites
Preview
Selected
Source
Selected
Clip
Import Media into a
New Event
Select the APTS FCP X
disk on the left
Navigate to FCPX Book
Files > Fairly Legal.
Press Command A to
select all the clips in this
folder
Select Import All
- A new dialogue box
appears…
Importing Options
• Menu of importing
options that
copy, organize, optimiz
e, analyze, and fix
media files as they‟re
imported
• After selecting the files
to import, Final Cut Pro
needs to confirm which
Event will store the
clips
Options
Import Options
Make sure „Add to existing
Event‟ is selected and Fairly
Legal is selected in the pop-
up menu.
In the Organizing
section, make sure that „Copy
files into Mac HD’s Projects‟
is selected.
Select „Create optimized
media’
To Copy or Not to Copy?
• When you copy files, the
original files are duplicated
to the Mac HD.
• When deselected, Final Cut
Pro only references to the
files for this Event where
the original files are stored
• Always copy – editing
is faster and more
responsive
That is the question
Import Folders as
Keyword Collections
• If your media is already
sorted into folders
before you import it into
FCP, you can keep it
that way
• Each folder and the
media inside them will
be imported as a
Keyword Collection
(Event sub-folder)
inside the Event
Sort it out
More Import Options
There are other options before
you import like analyzing your
video and audio.
- if you have the option to
optimize, do it.
- up to you if you want to
analyze for color and
audio
For now, only check „Create
optimized media‟ and press
„Import‟ on the bottom right.
How Copied Media
is Managed on your Disk
• Movies > Macintosh HD‟s projects and events
One big folder
• Right click and choose „Show Package Contents to see all the
events currently saved
Have a look inside
Check Out Your Media on
the Hard Drive
1. Click the Finder icon and navigate to Movies > Mac HD‟s projects
and events.
2. Right click and choose „Show Package Contents‟
3. Open Fairly Legal folder and the Original Media folder to see the
copied media.
Spring Cleaning?
• This is probably the reason
• Throw out Events you no longer need
Hard drive running out of space?
Keyword Collections
• Allows you to sort
similar clips into their
own collection in the
Event
• When you select a
Keyword Collection in
an Event, only the clips
tagged with that
keyword appear in the
Event Browser
Sorting it out
Keyword Collections
How Keyword
Collections
are Made
• If your media is already sorted into folders before
importing and you choose „Import folders as
Keyword Collections‟ option
Automatically
• Assign keywords to clips after you import them
• Like „interviews‟ „b-roll‟ „interior‟ „exterior‟ etc.
Manually
Make the FCPX Book
Files Folder a Favorite
Click the Import button.
Under Devices, select the
APTS FCP X drive.
From the File list, drag the
FCPX Book Files folder on
top of the Favorites category
on the left.
-when you see the +
sign, release.
Import Folders as
Keyword Collections
Select your new FCPX Book Files
favorite on the left.
In the Files folder, navigate to the
Zero to Hero folder.
Select the Interviews subfolder.
Import Folders as
Keyword Collections
With the Interviews folder
selected, click Import
Selected
1. Select „Create new
Event‟
2. Enter Zero to Hero in the
new Event field.
3. Create optimized media
4. Import folders as
keyword collections
5. Click Import.
Keyword Collections
• Blue Key icon in the
Event Library under the
Event
• Blue line across each
clip in the Event
Browser that has a Key
word attached to it
What you see
Import Another Folder as
a Keyword Collection
Control-click the Zero to Hero Event in the Event Library
and, from the shortcut menu, choose Import Files.
In the Import dialog, navigate to FCPX Book Files > Zero to
Hero > B-Roll, and select that folder.
Import Another Folder as
a Keyword Collection
Use the same settings as
last time by adding it to the
Zero to Hero Event, copy
files, and Import folders as
Keyword Collections and
Import.
Looking Around
• See all the clips in your
Event in the Event
Browser
Select an Event
• See only the clips in the
Event Browser that
share that keyword
Select a Keyword
Collection
Looking Around
Click on the Zero to Hero
Event to see all the files in
the Event.
Click on each keyword
collection to see the different
subset of clips within the
Event.
Analyzing and Correcting
Imported Clips
• FCP can recognize common problems such as
camera shake, color balance, shutter roll, audio
hum, and background noise
• Can also determine the type of shot
• Number of people
• Close-up, wide shot, long shot, etc.
• Auto-analysis can be performed during or after
import.
Auto Analysis
Analyzing and Correcting
Imported Clips
• Automatically finds errors in
color balance of each clip by
comparing the highlight and
the shadow areas
Analyze for Balance
Color
• Looks for the number of
people within a clip and
identifies the shot type or
shot framing as a keyword
Find People
Import with Auto
Analysis
In the Library, Control-click the Macintosh HD icon and
choose New Event.
Name the new Event I Think
Auto Analysis
Click the Import button.
In the FCPX Book Files folder select the “I Think” folder and
then select Import Selected..
Import Options
1. Add to existing event „I
Think‟
2. Create optimized media
3. Analyze for balance color
4. Find people
5. Consolidate find people
6. Create Smart Collections
7. Press Import
Creating Smart
Collections
• FCP will now sort of your
content into smart
collections based on what
you chose
What happened?
• Hold on – this takes some
time
• Folders will start to appear
in your Event Library
shortly
“I don’t see anything
yet”
Working in the
Background
• FCP analyzes and fixes the
imported clips as a
background task, allowing
you to continue working
• Process pauses if you move
your mouse and resumes
when there is no activity
Background tasks
• Click the Background Tasks
button in the Dashboard
above the Timeline, or press
Command-9
What’s happening
Blue vs. Purple Lines
• The clip is part of a
keyword collection
Blue line
• The clip was was
analyzed and in a
smart collection
Purple line
• Clip can have both and
be in both collection
folders
Blue and Purple?
The Analysis
• During
analysis, stabilizatio
n and color balance
effects are ready to
It is, but is
isn’t
Analysis
In the I Think Event, skim
through the extreme cu clip.
-- notice the yellowish tint
-- FCP analyzed the color
balance, but it‟s not
corrected (yet).
Analysis
Below the Viewer in the
toolbar, click the Inspector
button.
-- Inspector appears to the
right of the Viewer.
At the top of the
Inspector, click the Video
tab.
Enable the color balance
effect by selecting the box
next to Balance.
Transcoding
• Final Cut Pro can create media files optimized for
better performance during both editing and
rendering, and improved color quality for
compositing
• If your media is already optimized, the optimized
option will be dimmed out
What it is
Transcoding
• Transcodes video to Apple ProRes 422 codec
Create optimized media
• Transcodes video to Apple ProRes 422 (Proxy), a lower-
resolution and lower-quality format.
• Smaller data rates and file sizes
• Good for low memory or slower computers or large
projects
Create proxy media
Should I Optimize?
• Less lag (spinning pinwheel of death) and faster response
time
• Optimized HD footage is easier to edit with
Yes
• Transcoding takes time, (but it‟s usually worth it.)
• If you are editing SD footage, you normally don‟t need to.
No
Do I need Proxy Media?
• Large HD projects need lots of memory.
• If your computer is still slow using optimized media, it will
help to use proxy media for the time being
• Edit in proxy, but don‟t forget to switch back to original
media before you export
Yes
• If you have a fast processor and lots of memory
• Your optimized media in the timeline works fine without
delays
No
Working with Proxy
Media
• Select the option in the
dialogue box
When you import
• Select all your clips, right
click and choose Transcode
Media
• Create Proxy media and OK
After importing
Switching Back & Forth
• In the Media section
choose whether you wish
to view and edit in
Optimized/Original or
Proxy
• If you choose Proxy, any
clips that were not
transcoded will appear
offline (red) in the Event
Browser
Viewer Options Pop-
up Menu
Importing from a Camera
• Built-in iSight
• FireWire and USB
connected cameras
• Decks, hard drives, and
flash cards
Variety of sources
• Compatibility
check:http://help.apple.com/f
How about my
camera?
Importing from Tape
• Connect the VTR to your
computer with a Firewire
Connect via Firewire
• Select the VTR
• Cue the tape you want to
capture using the transport
controls below the preview
area
• Click the Import button to
capture that section of tape
Open the Import
Window
Importing from the
Finder
• Easy to do
• Set import options first
• Media management
• Keyword Collections
• Transcoding video
• Auto-analysis & Smart
Collections
• Done through the Import tab
of the Final Cut Pro
Preferences window.
Drag straight to an
Event
Importing from a Camera
In the Library, create a new
Event on Macintosh HD and
name it Camera Import.
Select the Event and in the
Event Browser, click the
Import Media button.
Deselect the “Close window
after starting import”
checkbox.
Importing from a Camera
Press Command H to hide FCP.
In the Finder, navigate to APTS > FCPX > FCPX Book Files
> Imports folder and double-click the 201107_Flowers.dmg
disk image file.
Importing from a Camera
Return to FCP and select the
camera mounted at the top
of the sidebar.
Click the Filmstrip view
- the clips from the simulated
SDHC card appear on the
bottom
Importing from a Camera
Skim through some
clips to check them
out.
Press the Command
key, then select Clip
7, Clip 11, and Clip 13.
Click the Import
Selected button.
Importing from a Camera
Choose to add these
clips to the existing
Camera Import Event.
Choose a Portion of a
Clip
In Clip #2, drag the pointer from the beginning of the clip
until the camera stops at the top of the flower.
In Clip #4, drag the pointer from the beginning of the clip
until the camera tilt-up has stopped.
Importing Portions
of a Clip
• If it‟s highlighted in yellow it
will be imported
Yellow
• If it‟s highlighted in black, the
selection is
remembered, but will not be
imported
Black
• Control click all the clip
selection you wish to import
Selecting your
selections
Grab all your Selections
Command-click within the
marked range in Clip #2 to
add it to the Clip #4 selection
for import.
Click the Imported Selected
button, check that these clips
will go to the Camera Import
Event, and Import.
Close the Import window.
Importing from the
Finder
Open the Final Cut Pro
Preferences window.
At the top of the Preferences
window, click the Import
button.
Select Copy files to Final
Cut Events folder, check
Optimize and deselect
everything else.
Importing from the
Finder
In the Library, create a
new Event on Macintosh
HD and name it Baja
Press Command H to
hide FCPX.
In the Finder
window, navigate to the
APTS > FCPX > FCPX
Book Files > Imports >
Baja Whales
Importing from the
Finder
Drag the Baja Whales
folder into the Baja
Event.
When the Event is
highlighted with a white
outline, and you see
the green plus sign on
the pointer, release the
pointer.
Importing from other
Applications
• Drag media files from the windows of supported
applications such as:
• Aperture, iPhoto, iTunes
• Simply drag the file from the application into an Event.
• Final Cut Pro Import preferences are in effect when
dragging files into Final Cut Pro.
Works the same way
Homework Assignment:
1. Create a new Event on
your Mac HD Library
and name it Delicious
Peace.
2. Import and copy all the
Delicious Peace clips
from the FCPX Book
Files folder.
Homework Assignment:
3. Open the I Think People
folder so all the smart
collections can be
seen.
4. Open the Zero to Hero
event so the two
Keyword Collections
can be seen.
5. Select the new Delicious
Peace Event so the
clips can be seen in the
Event Browser.
Homework Assignment:
5. Use the Grab utility in the
Applications / Utility
folder to take a snapshot
of your Library and
Events Browser.
6. Save the image to the
desktop and name it
(Your name) Week 4
HW.
- (your name) Week 4
Homework Assignment:
7. Send an email to me at SH-
Edsall@wiu.edu with the
picture attached.
8. Do not delete Delicious Peace, I
Think, or Zero to Hero
projects. We will use them
again in Lesson 3. If you don‟t
have these events yet in your
Library, complete this lesson
so you are ready for lesson3.
9. You can delete Baha. We are
done with that Event.
Shortcuts
• Create a new eventOption N
• Select all items in the current folder or
location
Command A
• Select a group of contiguous itemsShift click
• Select a group of non-contiguous itemsCommand click
• Open the Preferences windowCommand , (comma)
Shortcuts
• Open and close the Background Tasks
window
Command 9
• Open and close the InspectorCommand 4
• Close an active windowCommand W
• Import MediaCommand I
Lesson 2:
Importing
Media
Apple Pro Training
Series
Final Cut Pro X
2nd Edition
Professor: Sam Edsall

Más contenido relacionado

La actualidad más candente

iMovieTutorialSeminar_1_2012
iMovieTutorialSeminar_1_2012iMovieTutorialSeminar_1_2012
iMovieTutorialSeminar_1_2012
afavia
 
How to guide on premiere pro
How to guide on premiere proHow to guide on premiere pro
How to guide on premiere pro
Ed Ryding
 

La actualidad más candente (20)

Final Cut Pro X Weynand Certification Lesson 4
Final Cut Pro X Weynand Certification Lesson 4Final Cut Pro X Weynand Certification Lesson 4
Final Cut Pro X Weynand Certification Lesson 4
 
Final Cut Pro X Weynand Certification Lesson 7
Final Cut Pro X Weynand Certification Lesson 7Final Cut Pro X Weynand Certification Lesson 7
Final Cut Pro X Weynand Certification Lesson 7
 
Final Cut Pro X Weynand Certification Lesson 6
Final Cut Pro X Weynand Certification Lesson 6Final Cut Pro X Weynand Certification Lesson 6
Final Cut Pro X Weynand Certification Lesson 6
 
Final Cut Pro X Weynand Certification Lesson 10
Final Cut Pro X Weynand Certification Lesson 10Final Cut Pro X Weynand Certification Lesson 10
Final Cut Pro X Weynand Certification Lesson 10
 
Final Cut Pro X Weynand Certification Lesson 5
Final Cut Pro X Weynand Certification Lesson 5Final Cut Pro X Weynand Certification Lesson 5
Final Cut Pro X Weynand Certification Lesson 5
 
Final Cut Pro X Weynand Certification Lesson 11
Final Cut Pro X Weynand Certification Lesson 11Final Cut Pro X Weynand Certification Lesson 11
Final Cut Pro X Weynand Certification Lesson 11
 
Final Cut Pro X Weynand Certification Lesson 8
Final Cut Pro X Weynand Certification Lesson 8Final Cut Pro X Weynand Certification Lesson 8
Final Cut Pro X Weynand Certification Lesson 8
 
Final Cut Pro X Certification Lesson 1
Final Cut Pro X Certification Lesson 1Final Cut Pro X Certification Lesson 1
Final Cut Pro X Certification Lesson 1
 
Introduction to FINAL CUT PRO X Editing tips and techniques
Introduction to FINAL CUT PRO X Editing tips and techniquesIntroduction to FINAL CUT PRO X Editing tips and techniques
Introduction to FINAL CUT PRO X Editing tips and techniques
 
Day 4 editing
Day 4  editingDay 4  editing
Day 4 editing
 
Smoke 5 timeline effects
Smoke 5   timeline effectsSmoke 5   timeline effects
Smoke 5 timeline effects
 
iMovieTutorialSeminar_1_2012
iMovieTutorialSeminar_1_2012iMovieTutorialSeminar_1_2012
iMovieTutorialSeminar_1_2012
 
Video Coaching with iChat Orientation
Video Coaching with iChat OrientationVideo Coaching with iChat Orientation
Video Coaching with iChat Orientation
 
Basic adobe instructions
Basic adobe instructionsBasic adobe instructions
Basic adobe instructions
 
Final Cut Pro 7 Certification Lesson 1
Final Cut Pro 7 Certification Lesson 1Final Cut Pro 7 Certification Lesson 1
Final Cut Pro 7 Certification Lesson 1
 
Adobe beginners-guide
Adobe beginners-guideAdobe beginners-guide
Adobe beginners-guide
 
Final Cut Pro 7 Certification Lesson 7
Final Cut Pro 7 Certification Lesson 7Final Cut Pro 7 Certification Lesson 7
Final Cut Pro 7 Certification Lesson 7
 
Airmeet Tutorial
Airmeet TutorialAirmeet Tutorial
Airmeet Tutorial
 
Smoke 1 The Interface
Smoke 1   The InterfaceSmoke 1   The Interface
Smoke 1 The Interface
 
How to guide on premiere pro
How to guide on premiere proHow to guide on premiere pro
How to guide on premiere pro
 

Similar a Final Cut Pro X Weynand Certification Lesson 2

Us Projects That Pop Complete
Us Projects That Pop CompleteUs Projects That Pop Complete
Us Projects That Pop Complete
Kristin Hokanson
 
Movies At A Click Version 3
Movies At A Click Version 3Movies At A Click Version 3
Movies At A Click Version 3
Kristin Hokanson
 
Quick Start Guide.pdf
Quick Start Guide.pdfQuick Start Guide.pdf
Quick Start Guide.pdf
pa jo
 
Introduction to mac
Introduction to macIntroduction to mac
Introduction to mac
Sunny Shaikh
 
Antonio´s presentation
Antonio´s presentationAntonio´s presentation
Antonio´s presentation
Susana Paz
 

Similar a Final Cut Pro X Weynand Certification Lesson 2 (20)

Acrobat
AcrobatAcrobat
Acrobat
 
UCC Video Editing Workshop
UCC Video Editing WorkshopUCC Video Editing Workshop
UCC Video Editing Workshop
 
Adobe elements
Adobe elementsAdobe elements
Adobe elements
 
Us Projects That Pop Complete
Us Projects That Pop CompleteUs Projects That Pop Complete
Us Projects That Pop Complete
 
J creator4 5
J creator4 5J creator4 5
J creator4 5
 
Windows 7
Windows 7Windows 7
Windows 7
 
Topelite storm impatica_final_presentation (1)
Topelite storm impatica_final_presentation (1)Topelite storm impatica_final_presentation (1)
Topelite storm impatica_final_presentation (1)
 
Movies At A Click Version 3
Movies At A Click Version 3Movies At A Click Version 3
Movies At A Click Version 3
 
Presentation1
Presentation1Presentation1
Presentation1
 
FCP X Manual
FCP X ManualFCP X Manual
FCP X Manual
 
Windows 7: The Basics
Windows 7:  The BasicsWindows 7:  The Basics
Windows 7: The Basics
 
Making a web site in publisher
Making a web site in publisherMaking a web site in publisher
Making a web site in publisher
 
Quick Start Guide.pdf
Quick Start Guide.pdfQuick Start Guide.pdf
Quick Start Guide.pdf
 
Reimaging Your MacBook
Reimaging Your MacBookReimaging Your MacBook
Reimaging Your MacBook
 
Delete Duplicate Files in Windows Media Player
Delete Duplicate Files in Windows Media PlayerDelete Duplicate Files in Windows Media Player
Delete Duplicate Files in Windows Media Player
 
Downloading Audiobooks
Downloading AudiobooksDownloading Audiobooks
Downloading Audiobooks
 
Introduction to mac
Introduction to macIntroduction to mac
Introduction to mac
 
Antonio´s presentation
Antonio´s presentationAntonio´s presentation
Antonio´s presentation
 
Unit 2 introduction to windows 7
Unit 2    introduction to windows 7Unit 2    introduction to windows 7
Unit 2 introduction to windows 7
 
training materials.ppt
training materials.ppttraining materials.ppt
training materials.ppt
 

Más de Samuel Edsall

Education on the Move: Mobile Technologies, Online Platforms, and Pedagogy - ...
Education on the Move: Mobile Technologies, Online Platforms, and Pedagogy - ...Education on the Move: Mobile Technologies, Online Platforms, and Pedagogy - ...
Education on the Move: Mobile Technologies, Online Platforms, and Pedagogy - ...
Samuel Edsall
 

Más de Samuel Edsall (17)

Teaching in the Distracted Age: What Students Expect from Online Courses - P...
Teaching in the Distracted Age:  What Students Expect from Online Courses - P...Teaching in the Distracted Age:  What Students Expect from Online Courses - P...
Teaching in the Distracted Age: What Students Expect from Online Courses - P...
 
Securing Attention: How to Teach the Selfie Culture - Serena Carpenter
Securing Attention: How to Teach the Selfie Culture - Serena CarpenterSecuring Attention: How to Teach the Selfie Culture - Serena Carpenter
Securing Attention: How to Teach the Selfie Culture - Serena Carpenter
 
Digitizing the Classroom for the Online Environment - John Hebbeler
Digitizing the Classroom for the Online Environment  - John HebbelerDigitizing the Classroom for the Online Environment  - John Hebbeler
Digitizing the Classroom for the Online Environment - John Hebbeler
 
Applying Classroom Research to Improve Online Course Communication - Paul He...
Applying Classroom Research to Improve Online Course Communication -  Paul He...Applying Classroom Research to Improve Online Course Communication -  Paul He...
Applying Classroom Research to Improve Online Course Communication - Paul He...
 
NewTek Lightwave 3D: Keyframing in Lightwave
NewTek Lightwave 3D: Keyframing in LightwaveNewTek Lightwave 3D: Keyframing in Lightwave
NewTek Lightwave 3D: Keyframing in Lightwave
 
NewTek Lightwave 3D: Modifying Lightwave Objects
NewTek Lightwave 3D: Modifying Lightwave ObjectsNewTek Lightwave 3D: Modifying Lightwave Objects
NewTek Lightwave 3D: Modifying Lightwave Objects
 
NewTek Lightwave 3D: Working in 3D Space
NewTek Lightwave 3D:  Working in 3D SpaceNewTek Lightwave 3D:  Working in 3D Space
NewTek Lightwave 3D: Working in 3D Space
 
NewTek Lightwave 3D: Modeler II
NewTek Lightwave 3D: Modeler IINewTek Lightwave 3D: Modeler II
NewTek Lightwave 3D: Modeler II
 
NewTek Lightwave 3D - Modeler I
NewTek Lightwave 3D - Modeler INewTek Lightwave 3D - Modeler I
NewTek Lightwave 3D - Modeler I
 
NewTek Lightwave 3D: Learning the Layout
NewTek Lightwave 3D: Learning the LayoutNewTek Lightwave 3D: Learning the Layout
NewTek Lightwave 3D: Learning the Layout
 
Education on the Move: Mobile Technologies, Online Platforms, and Pedagogy - ...
Education on the Move: Mobile Technologies, Online Platforms, and Pedagogy - ...Education on the Move: Mobile Technologies, Online Platforms, and Pedagogy - ...
Education on the Move: Mobile Technologies, Online Platforms, and Pedagogy - ...
 
Social Media: Expanding Pedagogic Opportunities in Film and Television Produc...
Social Media: Expanding Pedagogic Opportunities in Film and Television Produc...Social Media: Expanding Pedagogic Opportunities in Film and Television Produc...
Social Media: Expanding Pedagogic Opportunities in Film and Television Produc...
 
Mobile Technologies as Course Research Tools - BEA 2014 Presentation by Dr. D...
Mobile Technologies as Course Research Tools - BEA 2014 Presentation by Dr. D...Mobile Technologies as Course Research Tools - BEA 2014 Presentation by Dr. D...
Mobile Technologies as Course Research Tools - BEA 2014 Presentation by Dr. D...
 
Video Project Grading Rubric - BEA 214 Presentation by Sam Edsall
Video Project Grading Rubric - BEA 214 Presentation by Sam EdsallVideo Project Grading Rubric - BEA 214 Presentation by Sam Edsall
Video Project Grading Rubric - BEA 214 Presentation by Sam Edsall
 
Smoke 4 advanced editing
Smoke 4   advanced editingSmoke 4   advanced editing
Smoke 4 advanced editing
 
Smoke 3 basic editing
Smoke 3   basic editingSmoke 3   basic editing
Smoke 3 basic editing
 
Smoke 2 marking clips
Smoke 2   marking clipsSmoke 2   marking clips
Smoke 2 marking clips
 

Último

1029-Danh muc Sach Giao Khoa khoi 6.pdf
1029-Danh muc Sach Giao Khoa khoi  6.pdf1029-Danh muc Sach Giao Khoa khoi  6.pdf
1029-Danh muc Sach Giao Khoa khoi 6.pdf
QucHHunhnh
 
Spellings Wk 3 English CAPS CARES Please Practise
Spellings Wk 3 English CAPS CARES Please PractiseSpellings Wk 3 English CAPS CARES Please Practise
Spellings Wk 3 English CAPS CARES Please Practise
AnaAcapella
 
Activity 01 - Artificial Culture (1).pdf
Activity 01 - Artificial Culture (1).pdfActivity 01 - Artificial Culture (1).pdf
Activity 01 - Artificial Culture (1).pdf
ciinovamais
 
The basics of sentences session 3pptx.pptx
The basics of sentences session 3pptx.pptxThe basics of sentences session 3pptx.pptx
The basics of sentences session 3pptx.pptx
heathfieldcps1
 
Jual Obat Aborsi Hongkong ( Asli No.1 ) 085657271886 Obat Penggugur Kandungan...
Jual Obat Aborsi Hongkong ( Asli No.1 ) 085657271886 Obat Penggugur Kandungan...Jual Obat Aborsi Hongkong ( Asli No.1 ) 085657271886 Obat Penggugur Kandungan...
Jual Obat Aborsi Hongkong ( Asli No.1 ) 085657271886 Obat Penggugur Kandungan...
ZurliaSoop
 

Último (20)

Mehran University Newsletter Vol-X, Issue-I, 2024
Mehran University Newsletter Vol-X, Issue-I, 2024Mehran University Newsletter Vol-X, Issue-I, 2024
Mehran University Newsletter Vol-X, Issue-I, 2024
 
Explore beautiful and ugly buildings. Mathematics helps us create beautiful d...
Explore beautiful and ugly buildings. Mathematics helps us create beautiful d...Explore beautiful and ugly buildings. Mathematics helps us create beautiful d...
Explore beautiful and ugly buildings. Mathematics helps us create beautiful d...
 
UGC NET Paper 1 Mathematical Reasoning & Aptitude.pdf
UGC NET Paper 1 Mathematical Reasoning & Aptitude.pdfUGC NET Paper 1 Mathematical Reasoning & Aptitude.pdf
UGC NET Paper 1 Mathematical Reasoning & Aptitude.pdf
 
Kodo Millet PPT made by Ghanshyam bairwa college of Agriculture kumher bhara...
Kodo Millet  PPT made by Ghanshyam bairwa college of Agriculture kumher bhara...Kodo Millet  PPT made by Ghanshyam bairwa college of Agriculture kumher bhara...
Kodo Millet PPT made by Ghanshyam bairwa college of Agriculture kumher bhara...
 
1029-Danh muc Sach Giao Khoa khoi 6.pdf
1029-Danh muc Sach Giao Khoa khoi  6.pdf1029-Danh muc Sach Giao Khoa khoi  6.pdf
1029-Danh muc Sach Giao Khoa khoi 6.pdf
 
Towards a code of practice for AI in AT.pptx
Towards a code of practice for AI in AT.pptxTowards a code of practice for AI in AT.pptx
Towards a code of practice for AI in AT.pptx
 
ICT role in 21st century education and it's challenges.
ICT role in 21st century education and it's challenges.ICT role in 21st century education and it's challenges.
ICT role in 21st century education and it's challenges.
 
Single or Multiple melodic lines structure
Single or Multiple melodic lines structureSingle or Multiple melodic lines structure
Single or Multiple melodic lines structure
 
Graduate Outcomes Presentation Slides - English
Graduate Outcomes Presentation Slides - EnglishGraduate Outcomes Presentation Slides - English
Graduate Outcomes Presentation Slides - English
 
How to Create and Manage Wizard in Odoo 17
How to Create and Manage Wizard in Odoo 17How to Create and Manage Wizard in Odoo 17
How to Create and Manage Wizard in Odoo 17
 
General Principles of Intellectual Property: Concepts of Intellectual Proper...
General Principles of Intellectual Property: Concepts of Intellectual  Proper...General Principles of Intellectual Property: Concepts of Intellectual  Proper...
General Principles of Intellectual Property: Concepts of Intellectual Proper...
 
Holdier Curriculum Vitae (April 2024).pdf
Holdier Curriculum Vitae (April 2024).pdfHoldier Curriculum Vitae (April 2024).pdf
Holdier Curriculum Vitae (April 2024).pdf
 
Spellings Wk 3 English CAPS CARES Please Practise
Spellings Wk 3 English CAPS CARES Please PractiseSpellings Wk 3 English CAPS CARES Please Practise
Spellings Wk 3 English CAPS CARES Please Practise
 
Unit-IV- Pharma. Marketing Channels.pptx
Unit-IV- Pharma. Marketing Channels.pptxUnit-IV- Pharma. Marketing Channels.pptx
Unit-IV- Pharma. Marketing Channels.pptx
 
Activity 01 - Artificial Culture (1).pdf
Activity 01 - Artificial Culture (1).pdfActivity 01 - Artificial Culture (1).pdf
Activity 01 - Artificial Culture (1).pdf
 
SKILL OF INTRODUCING THE LESSON MICRO SKILLS.pptx
SKILL OF INTRODUCING THE LESSON MICRO SKILLS.pptxSKILL OF INTRODUCING THE LESSON MICRO SKILLS.pptx
SKILL OF INTRODUCING THE LESSON MICRO SKILLS.pptx
 
HMCS Max Bernays Pre-Deployment Brief (May 2024).pptx
HMCS Max Bernays Pre-Deployment Brief (May 2024).pptxHMCS Max Bernays Pre-Deployment Brief (May 2024).pptx
HMCS Max Bernays Pre-Deployment Brief (May 2024).pptx
 
Sociology 101 Demonstration of Learning Exhibit
Sociology 101 Demonstration of Learning ExhibitSociology 101 Demonstration of Learning Exhibit
Sociology 101 Demonstration of Learning Exhibit
 
The basics of sentences session 3pptx.pptx
The basics of sentences session 3pptx.pptxThe basics of sentences session 3pptx.pptx
The basics of sentences session 3pptx.pptx
 
Jual Obat Aborsi Hongkong ( Asli No.1 ) 085657271886 Obat Penggugur Kandungan...
Jual Obat Aborsi Hongkong ( Asli No.1 ) 085657271886 Obat Penggugur Kandungan...Jual Obat Aborsi Hongkong ( Asli No.1 ) 085657271886 Obat Penggugur Kandungan...
Jual Obat Aborsi Hongkong ( Asli No.1 ) 085657271886 Obat Penggugur Kandungan...
 

Final Cut Pro X Weynand Certification Lesson 2

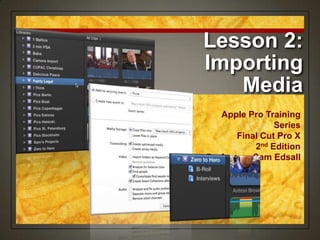
  • 1. Lesson 2: Importing Media Apple Pro Training Series Final Cut Pro X 2nd Edition Professor: Sam Edsall
  • 2. Importing Media into FCP • Final Cut Pro can import media from a variety of devices and many media formats • SD & HD video formats • Still photos • Various audio formats including Wav, AIF, MP3 Loading Content • Select what you want to import • Select how you want to import it • Final Cut Pro works in the background to organize, repair, and optimize media Managing Content
  • 3. Importing Media into an Event • Final Cut Pro collects imported media into an Event • Good habit to make a new Event when you start a new video editing project • You can choose to copy your video clips to your hard drive or have it reference to it from another storage device like your Thumb drive • Always better to copy content to your hard drive Loading Content
  • 4. Import Media into a New Event If the Library is not visible, click the Library button beneath the Event Browser. In the Library, select the Macintosh HD icon for the new Event. Choose File > New Event, or press Option-N.
  • 5. The New Event • The default Event name is the current date and highlighted awaiting a new name The Event • Select the disk where the new Event will be created • Select File > New Event Making an Event • Control-click (or right-clicking) the Event, and choose „Move Event to Trash‟ or press Command Delete Deleting an Event
  • 6. Import Media into a New Event In the name field, enter Fairly Legal, and press Return.
  • 7. Importing Content • Import from the button bar • Select Import Media from the Event Browser • File > Import Media… • Command I • Control-click (or right- click) the Event in the Event Library A couple of ways
  • 8. Import Media into a New Event With Fairly Legal selected in the Event Browser, click the Import Media button. -- The Media Import window opens
  • 10. Import Media into a New Event Select the APTS FCP X disk on the left Navigate to FCPX Book Files > Fairly Legal. Press Command A to select all the clips in this folder Select Import All - A new dialogue box appears…
  • 11. Importing Options • Menu of importing options that copy, organize, optimiz e, analyze, and fix media files as they‟re imported • After selecting the files to import, Final Cut Pro needs to confirm which Event will store the clips Options
  • 12. Import Options Make sure „Add to existing Event‟ is selected and Fairly Legal is selected in the pop- up menu. In the Organizing section, make sure that „Copy files into Mac HD’s Projects‟ is selected. Select „Create optimized media’
  • 13. To Copy or Not to Copy? • When you copy files, the original files are duplicated to the Mac HD. • When deselected, Final Cut Pro only references to the files for this Event where the original files are stored • Always copy – editing is faster and more responsive That is the question
  • 14. Import Folders as Keyword Collections • If your media is already sorted into folders before you import it into FCP, you can keep it that way • Each folder and the media inside them will be imported as a Keyword Collection (Event sub-folder) inside the Event Sort it out
  • 15. More Import Options There are other options before you import like analyzing your video and audio. - if you have the option to optimize, do it. - up to you if you want to analyze for color and audio For now, only check „Create optimized media‟ and press „Import‟ on the bottom right.
  • 16. How Copied Media is Managed on your Disk • Movies > Macintosh HD‟s projects and events One big folder • Right click and choose „Show Package Contents to see all the events currently saved Have a look inside
  • 17. Check Out Your Media on the Hard Drive 1. Click the Finder icon and navigate to Movies > Mac HD‟s projects and events. 2. Right click and choose „Show Package Contents‟ 3. Open Fairly Legal folder and the Original Media folder to see the copied media.
  • 18. Spring Cleaning? • This is probably the reason • Throw out Events you no longer need Hard drive running out of space?
  • 19. Keyword Collections • Allows you to sort similar clips into their own collection in the Event • When you select a Keyword Collection in an Event, only the clips tagged with that keyword appear in the Event Browser Sorting it out Keyword Collections
  • 20. How Keyword Collections are Made • If your media is already sorted into folders before importing and you choose „Import folders as Keyword Collections‟ option Automatically • Assign keywords to clips after you import them • Like „interviews‟ „b-roll‟ „interior‟ „exterior‟ etc. Manually
  • 21. Make the FCPX Book Files Folder a Favorite Click the Import button. Under Devices, select the APTS FCP X drive. From the File list, drag the FCPX Book Files folder on top of the Favorites category on the left. -when you see the + sign, release.
  • 22. Import Folders as Keyword Collections Select your new FCPX Book Files favorite on the left. In the Files folder, navigate to the Zero to Hero folder. Select the Interviews subfolder.
  • 23. Import Folders as Keyword Collections With the Interviews folder selected, click Import Selected 1. Select „Create new Event‟ 2. Enter Zero to Hero in the new Event field. 3. Create optimized media 4. Import folders as keyword collections 5. Click Import.
  • 24. Keyword Collections • Blue Key icon in the Event Library under the Event • Blue line across each clip in the Event Browser that has a Key word attached to it What you see
  • 25. Import Another Folder as a Keyword Collection Control-click the Zero to Hero Event in the Event Library and, from the shortcut menu, choose Import Files. In the Import dialog, navigate to FCPX Book Files > Zero to Hero > B-Roll, and select that folder.
  • 26. Import Another Folder as a Keyword Collection Use the same settings as last time by adding it to the Zero to Hero Event, copy files, and Import folders as Keyword Collections and Import.
  • 27. Looking Around • See all the clips in your Event in the Event Browser Select an Event • See only the clips in the Event Browser that share that keyword Select a Keyword Collection
  • 28. Looking Around Click on the Zero to Hero Event to see all the files in the Event. Click on each keyword collection to see the different subset of clips within the Event.
  • 29. Analyzing and Correcting Imported Clips • FCP can recognize common problems such as camera shake, color balance, shutter roll, audio hum, and background noise • Can also determine the type of shot • Number of people • Close-up, wide shot, long shot, etc. • Auto-analysis can be performed during or after import. Auto Analysis
  • 30. Analyzing and Correcting Imported Clips • Automatically finds errors in color balance of each clip by comparing the highlight and the shadow areas Analyze for Balance Color • Looks for the number of people within a clip and identifies the shot type or shot framing as a keyword Find People
  • 31. Import with Auto Analysis In the Library, Control-click the Macintosh HD icon and choose New Event. Name the new Event I Think
  • 32. Auto Analysis Click the Import button. In the FCPX Book Files folder select the “I Think” folder and then select Import Selected..
  • 33. Import Options 1. Add to existing event „I Think‟ 2. Create optimized media 3. Analyze for balance color 4. Find people 5. Consolidate find people 6. Create Smart Collections 7. Press Import
  • 34. Creating Smart Collections • FCP will now sort of your content into smart collections based on what you chose What happened? • Hold on – this takes some time • Folders will start to appear in your Event Library shortly “I don’t see anything yet”
  • 35. Working in the Background • FCP analyzes and fixes the imported clips as a background task, allowing you to continue working • Process pauses if you move your mouse and resumes when there is no activity Background tasks • Click the Background Tasks button in the Dashboard above the Timeline, or press Command-9 What’s happening
  • 36. Blue vs. Purple Lines • The clip is part of a keyword collection Blue line • The clip was was analyzed and in a smart collection Purple line • Clip can have both and be in both collection folders Blue and Purple?
  • 37. The Analysis • During analysis, stabilizatio n and color balance effects are ready to It is, but is isn’t
  • 38. Analysis In the I Think Event, skim through the extreme cu clip. -- notice the yellowish tint -- FCP analyzed the color balance, but it‟s not corrected (yet).
  • 39. Analysis Below the Viewer in the toolbar, click the Inspector button. -- Inspector appears to the right of the Viewer. At the top of the Inspector, click the Video tab. Enable the color balance effect by selecting the box next to Balance.
  • 40. Transcoding • Final Cut Pro can create media files optimized for better performance during both editing and rendering, and improved color quality for compositing • If your media is already optimized, the optimized option will be dimmed out What it is
  • 41. Transcoding • Transcodes video to Apple ProRes 422 codec Create optimized media • Transcodes video to Apple ProRes 422 (Proxy), a lower- resolution and lower-quality format. • Smaller data rates and file sizes • Good for low memory or slower computers or large projects Create proxy media
  • 42. Should I Optimize? • Less lag (spinning pinwheel of death) and faster response time • Optimized HD footage is easier to edit with Yes • Transcoding takes time, (but it‟s usually worth it.) • If you are editing SD footage, you normally don‟t need to. No
  • 43. Do I need Proxy Media? • Large HD projects need lots of memory. • If your computer is still slow using optimized media, it will help to use proxy media for the time being • Edit in proxy, but don‟t forget to switch back to original media before you export Yes • If you have a fast processor and lots of memory • Your optimized media in the timeline works fine without delays No
  • 44. Working with Proxy Media • Select the option in the dialogue box When you import • Select all your clips, right click and choose Transcode Media • Create Proxy media and OK After importing
  • 45. Switching Back & Forth • In the Media section choose whether you wish to view and edit in Optimized/Original or Proxy • If you choose Proxy, any clips that were not transcoded will appear offline (red) in the Event Browser Viewer Options Pop- up Menu
  • 46. Importing from a Camera • Built-in iSight • FireWire and USB connected cameras • Decks, hard drives, and flash cards Variety of sources • Compatibility check:http://help.apple.com/f How about my camera?
  • 47. Importing from Tape • Connect the VTR to your computer with a Firewire Connect via Firewire • Select the VTR • Cue the tape you want to capture using the transport controls below the preview area • Click the Import button to capture that section of tape Open the Import Window
  • 48. Importing from the Finder • Easy to do • Set import options first • Media management • Keyword Collections • Transcoding video • Auto-analysis & Smart Collections • Done through the Import tab of the Final Cut Pro Preferences window. Drag straight to an Event
  • 49. Importing from a Camera In the Library, create a new Event on Macintosh HD and name it Camera Import. Select the Event and in the Event Browser, click the Import Media button. Deselect the “Close window after starting import” checkbox.
  • 50. Importing from a Camera Press Command H to hide FCP. In the Finder, navigate to APTS > FCPX > FCPX Book Files > Imports folder and double-click the 201107_Flowers.dmg disk image file.
  • 51. Importing from a Camera Return to FCP and select the camera mounted at the top of the sidebar. Click the Filmstrip view - the clips from the simulated SDHC card appear on the bottom
  • 52. Importing from a Camera Skim through some clips to check them out. Press the Command key, then select Clip 7, Clip 11, and Clip 13. Click the Import Selected button.
  • 53. Importing from a Camera Choose to add these clips to the existing Camera Import Event.
  • 54. Choose a Portion of a Clip In Clip #2, drag the pointer from the beginning of the clip until the camera stops at the top of the flower. In Clip #4, drag the pointer from the beginning of the clip until the camera tilt-up has stopped.
  • 55. Importing Portions of a Clip • If it‟s highlighted in yellow it will be imported Yellow • If it‟s highlighted in black, the selection is remembered, but will not be imported Black • Control click all the clip selection you wish to import Selecting your selections
  • 56. Grab all your Selections Command-click within the marked range in Clip #2 to add it to the Clip #4 selection for import. Click the Imported Selected button, check that these clips will go to the Camera Import Event, and Import. Close the Import window.
  • 57. Importing from the Finder Open the Final Cut Pro Preferences window. At the top of the Preferences window, click the Import button. Select Copy files to Final Cut Events folder, check Optimize and deselect everything else.
  • 58. Importing from the Finder In the Library, create a new Event on Macintosh HD and name it Baja Press Command H to hide FCPX. In the Finder window, navigate to the APTS > FCPX > FCPX Book Files > Imports > Baja Whales
  • 59. Importing from the Finder Drag the Baja Whales folder into the Baja Event. When the Event is highlighted with a white outline, and you see the green plus sign on the pointer, release the pointer.
  • 60. Importing from other Applications • Drag media files from the windows of supported applications such as: • Aperture, iPhoto, iTunes • Simply drag the file from the application into an Event. • Final Cut Pro Import preferences are in effect when dragging files into Final Cut Pro. Works the same way
  • 61. Homework Assignment: 1. Create a new Event on your Mac HD Library and name it Delicious Peace. 2. Import and copy all the Delicious Peace clips from the FCPX Book Files folder.
  • 62. Homework Assignment: 3. Open the I Think People folder so all the smart collections can be seen. 4. Open the Zero to Hero event so the two Keyword Collections can be seen. 5. Select the new Delicious Peace Event so the clips can be seen in the Event Browser.
  • 63. Homework Assignment: 5. Use the Grab utility in the Applications / Utility folder to take a snapshot of your Library and Events Browser. 6. Save the image to the desktop and name it (Your name) Week 4 HW. - (your name) Week 4
  • 64. Homework Assignment: 7. Send an email to me at SH- Edsall@wiu.edu with the picture attached. 8. Do not delete Delicious Peace, I Think, or Zero to Hero projects. We will use them again in Lesson 3. If you don‟t have these events yet in your Library, complete this lesson so you are ready for lesson3. 9. You can delete Baha. We are done with that Event.
  • 65. Shortcuts • Create a new eventOption N • Select all items in the current folder or location Command A • Select a group of contiguous itemsShift click • Select a group of non-contiguous itemsCommand click • Open the Preferences windowCommand , (comma)
  • 66. Shortcuts • Open and close the Background Tasks window Command 9 • Open and close the InspectorCommand 4 • Close an active windowCommand W • Import MediaCommand I
  • 67. Lesson 2: Importing Media Apple Pro Training Series Final Cut Pro X 2nd Edition Professor: Sam Edsall