
Recomendados
Más contenido relacionado
La actualidad más candente
La actualidad más candente (20)
Similar a Demostration of injection
Similar a Demostration of injection (20)
Más de Sumit Kumar
Más de Sumit Kumar (15)
Último
Último (20)
Demostration of injection
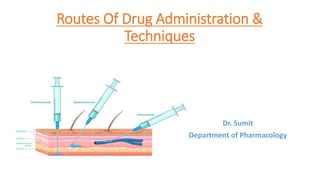
- 1. Routes Of Drug Administration & Techniques Dr. Sumit Department of Pharmacology
- 2. Principles of drug administration To provide safe drug administration, we should practice the “rights” of drug administration. They are: • The Right Client • The Right Drug • The Right Dose • The Right Time • The Right Route
- 3. Principle……. • The Right Documentation • The Client’s Right To Education • The Client’s Right To Refuse
- 4. Determinant of The route of administration
- 5. Determinant of The route of administration Physical and chemical properties of the drug (solid/ liquid/gas; solubility, stability, pH, irritancy). Site of desired action—localized and approachable or generalized and not approachable. Rapidity with which the response is desired (routine treatment or emergency). Accuracy of dosage required (i.v. and inhalational can provide fine tuning). Condition of the patient (unconscious, vomiting)
- 6. SUBCUTANEOUS ADMINISTRATION Site: Injection into the subcutaneous tissue under the skin Advantages: • Smooth but slower absorption for longer period compared to intravenous or intramuscular. • Depot injection or implants can also be made. Disadvantages: • Only small volume of drugs can be injected. • Irritant drug cannot be administered – may lead to sloughing and necrosis
- 7. Subcutaneous injection: Injection is made into subcutaneous tissue under the skin Material needed: • Syringe with the drug to be administered (without air), • Needle (gauss 25, short and thin), • Liquid disinfectant, • Cotton wool, • Adhesive tape.
- 8. Wash hands with soap and water. Reassure the patient and explain the procedure Uncover the area to be injected (upper arm, upper thigh, abdomen) Clean injection site skin Pinchfold of the skin Insert needle in the base of the skin-fold at an angle of 20 to 30 degrees
- 9. Clean up; dispose of waste safely, wash hands Check the patient’s reaction and give additional reassurance, if necessary Press sterile cotton wool onto the opening. Fix with adhesive tape Withdraw needle quickly Inject slowly (0.5-2 ml) Aspirate briefly, if blood appears: withdraw needle, replace it with a new one, if possible, and start again from point 4.
- 11. Intramuscular injection: Site: • Deltoid muscle. • Gluteal muscle • rectus femoris ( lateral surface of the thigh) Advantages: Absorption is more predictable, less variable and rapid compared to oral and subcutaneous route Depot injection can also be given by this route.
- 12. Intramuscular injection: Material Required: The drug is injected into one of the large skeletal muscles (e.g. upper and outer quadrant of gluteus maximus, deltoid, triceps) and in infants in anterolateral region of the thigh in middle third region • Syringe with the drug to be administered (without air), • needle (Gauss 22, long and medium thickness), • liquid disinfectant, • cotton wool, • adhesive tape.
- 13. Aspirate briefly, if blood appears withdraw needle. Replace it with a new one, if possible, and start again from point 4. Insert needle swiftly at the angle of 90 degrees (watch depth!) Tell the patient to relax the muscle Disinfect the skin Uncover the area to be injected (lateral upper quadrant major muscle, lateral side of upper leg, deltoid muscle) Reassure the patient and explain the procedure Wash hands
- 14. Clean up; dispose of waste safely, wash hands Check the patient’s reaction and give additional reassurance, if necessary Press sterile cotton wool onto the opening. Fix with adhesive tape Withdraw needle swiftly Inject slowly (less painful)
- 16. Vaccines given by I.M Route Hepatitis IPV polio Pneumococcal tetanus DPT
- 17. Contraindication to i.m injection Clotting disorder Hypovolemic shock Muscle atrophy and myopathy Local site infection, swelling, inflammation Site of birthmarks, mole, scar tissues
- 18. Intravenous injection: Material needed : • Syringe with the drug to be administered (without air), • Needle (gauss 20, long and medium thickness; on syringe), • Liquid disinfectant, • Cotton wool, • Adhesive tape, • Tourniquet.
- 19. Disinfect skin Wait for the vein to swell Apply tourniquet and look for a suitable vein Have the patient relax and support his arm below the vein to be used Uncover arm completely Reassure the patient and explain the procedure Wash hands
- 20. Aspirate. If blood appears hold the syringe steady, you are in the vein. If it does not come, try again Hold the syringe and needle steady Puncture the skin and move the needle slightly into the vein (3-5 mm) Insert the needle at an angle of around 35 degrees Stabilize the vein by pulling the skin taut in the longitudinal direction of the vein. Do this with the hand you are not going to use for inserting the needle.
- 21. Clean up; dispose of waste safely; wash hands Check the patient’s reactions and give additional reassurance, if necessary Withdraw needle swiftly. Press sterile cotton wool onto the opening. Secure with adhesive tape Inject (very) slowly. Check for pain, hematoma; if in doubt whether you are still in the vein aspirate again! Loosen tourniquet
- 23. Inhalations: Drug administered by nasal or oral respiratory route. Action is either on bronchial tree or systemic due to absorption through lungs. e.g. salbutamol &beclomethasone in bronchial asthma. Devices for Inhalation: • Pressurised metered dose inhaler, volumetric spacer device, Rotahaler and Nebulizer.
- 24. 1. Cough up as much sputum as possible. 2. Shake the aerosol before use. 3. Hold the aerosol as indicated in the manufacturer’s instruction ( usually upside down). 4. Place the lips tightly around the mouthpiece. 5. Tilt the head backward slightly. 6. Breath out slowly, emptying the lungs of as much air as possible. 7. Hold the breath for ten to fifteen seconds. 8. Breathe out through the nose. 9. Rinse the mouth with warm water
- 26. Eye drops: • They are aqueous or oily solutions for instilling into conjunctival sac. • They are used as anaesthetics, anti-infective or anti- inflammatory agents, miotics, mydriatrics, artificial tears • e.g. atropine sulphate (mydriatric), pilocarpine nitrate (miotic), timolol maleate.
- 27. Instil the prescribed number of drops (usually 1 or 2) in the gutter’. Bring the dropper as close to the ‘gutter’ as possible without touching it or the eye. Pull the lower eyelid down to make a ‘gutter’ Look upward. Do not touch the dropper opening. Wash your hands.
- 28. Eye-drops may cause a burning feeling but this should not last for more than a few minutes. If it does last longer, consult a doctor or pharmacist. If more than one kind of eye drop is used wait at least five minutes before instilling the next drops. Excess fluid can be removed with a tissue. Close the eye for about two minutes. Do not shut the eye too tight.
- 29. Remove excess fluid Keep the head straight. Instil the number of drops (usually 1 or 2) into the corner of the eye. Let the child lie on his back with head straight. The child’s eyes should be closed. Application of eye-drops in children:
- 30. Eye Ointment: They are semisolid preparations with a greasy base, to be applied in the eye. e.g. neomycin eye ointment, chloramphenicol eye ointment.
- 31. Apply the amount (usually 1 cm length) of ointment Bring the tip of the tube as close to the “gutter” as possible. Take the tube in one hand and pull down the lower eyelid with the other hand, to make a ‘gutter’. Tilt the head backwards a little. Do not touch anything with the tip of the tube. Wash your hands.
- 32. Clean the tip of the tube with other tissue. Remove excess ointment with a tissue. Close the eye for two minutes.
- 33. Ear drops: • They are aqueous or oily solutions instilled in the ear e.g. wax softeners, sodium bicarbonate
- 34. Use cotton wool to close the ear canal after applying the drops ONLY if the manufacturer explicitly recommends this. Wait for five minutes before turning to the other ear. Instil the amount (usually 4-5) of drops. Gently pull the lobe to expose the ear canal. Tilts head sideways or lie on one side with the ear upward. During cold weather, warm the ear drops by keeping them in the hand for several minutes.
- 35. Nasal drops: • They are aqueous solutions of drugs instilled into the nose with a dropper e.g. Xylometazoline, ephedrine etc.
- 36. Immediately afterward tilt head forward strongly (head between knees). Instil the number of drops prescribed (usually 3-4). Insert the dropper one centimetre into the nostril. Sit down and tilt head backward strongly or lie down with a pillow under the shoulders; keep head straight. Blow the nose.
- 37. Rinse the dropper with boiled water. Repeat the producer for the other nostril, if necessary. Sit up after a few seconds, the drops will then drip into the pharynx.
- 38. Aspirating from ampoules (glass, plastic): • Materials needed: Syringe of appropriate size, needle of required size, ampoule with required drug or solution, gauze. Technique: • Wash your hands with soap and water. • Put the needle on the syringe. • Remove the liquid from the neck of the ampoule by flicking it or swinging it fast in a downward spiralling movement. • File around the neck of the ampoule. • Protect your fingers with gauze if ampoule is made of glass. • Carefully break off the top of the ampoule (for a plastic ampoule twist the top). • Aspirate the fluid from the ampoule. • Remove any air from the syringe. • Clean up; dispose of working needle safely; wash your hands.
- 39. Aspirating from a vial: • Materials needed: Vial with required drug or solution, syringe of the appropriate size, needle of right size (im, sc, or iv) on syringe, disinfectant, gauze. Technique: • Wash your hands with soap and water. • Disinfect the top of the vial. • Use a syringe with a volume of twice the required amount of drug or solution and place the needle. • Suck up as much air as the amount of solution needed to aspirate. • Insert needle into (top of) vial and turn upside-down. • Pump air into vial (creating pressure). • Aspirate the required amount of solution and 0.1 ml extra. Make sure the tip of the needle is below the fluid surface. • Pull the needle out of the vial. • Remove the possible air from the syringe. • Clean up; dispose of waste safely; wash your hands.
- 40. Thank you